Overview
When creating character animation, rigging is the process of adding a "skeleton" to your model so the mesh deforms according to bone movements. The skeleton is composed of "bones," and the relationship between bones and mesh is defined through "weight painting."
Rigging is one of the most important and time-consuming steps in character animation production. However, once you understand the basic concepts and procedures, even beginners can build functional and manageable rigs.
This article walks through the basic rigging workflow step by step, from bone placement to weight painting, using a simple character model as an example.
Basic Rigging Concepts
Rigging consists of three main steps:
- Bone Placement: Position bones (armature) corresponding to the character's skeleton.
- Skinning: Define the relationship between bones and mesh, determining how the mesh deforms with bone movements.
- Weight Adjustment: Use weight painting to fine-tune each bone's influence for more natural deformation.
Step 1: Creating and Placing the Armature (Bones)
Adding an Armature
- Press
Shift+Ato open the Add menu. - Select "Armature."
- A basic bone will be added to the scene.
Placing Bones
With the armature object selected, press Tab to enter "Edit Mode." Here, you'll place bones according to the character's skeleton.
| Operation | Description |
|---|---|
| Shift + Click | Adds a new bone from the tip of an existing bone. |
| E | Extrudes the selected bone to create a new one. |
| G | Moves the bone. |
| R | Rotates the bone. |
| S | Scales the bone. |
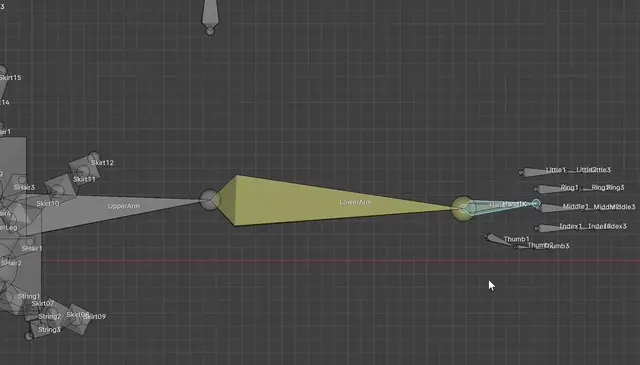
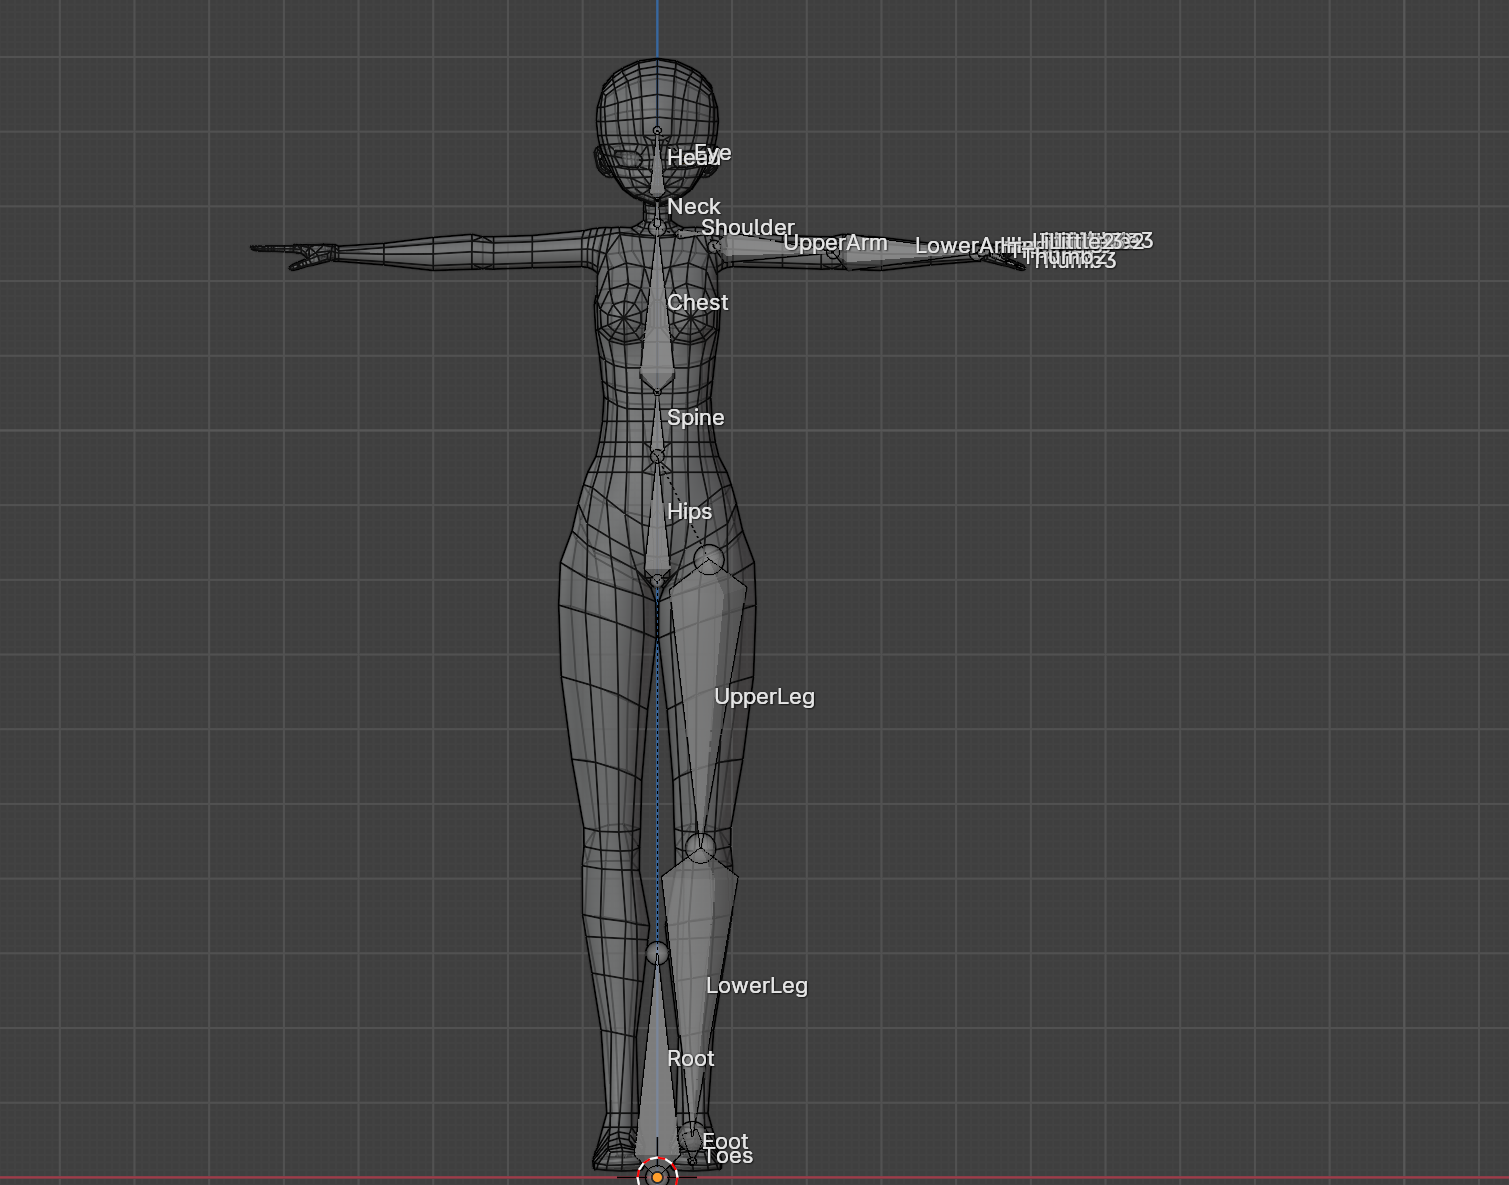
Basic Bone Structure Example:
- Root: The overall center
- Spine: Multiple bones extending upward from the root
- Arms: Shoulder, upper arm, forearm, and hand bones
- Legs: Hip, thigh, shin, and foot bones
Step 2: Skinning (Linking Bones to Mesh)
Once bone placement is complete, define the relationship between mesh and bones.
- Select the mesh object.
Ctrl+ click to add the armature to the selection (both should be selected).- Press
Ctrl+Pto open the parent menu and select "Armature Deform."
This makes the mesh a child of the armature, allowing it to deform according to bone movements.

Step 3: Weight Painting
After skinning, the mesh deforms with bone movements, but the deformation may look unnatural. "Weight painting" is used to adjust this.
Switching to Weight Paint Mode
- Select the mesh object.
- Choose "Weight Paint" from the mode menu, or use
Ctrl+Tabto access the pie menu.
Weight Painting Basics
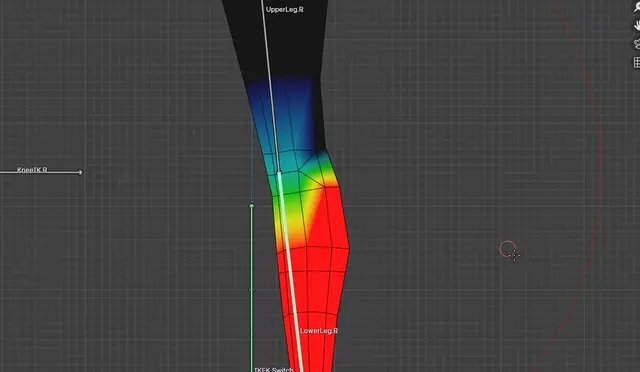
In Weight Paint mode, you define each bone's influence (weight) on each mesh vertex as a value from 0 to 1.
- Red: Weight value of 1 (fully influenced by that bone)
- Blue: Weight value of 0 (not influenced by that bone)
- Intermediate colors: Weight values between 0 and 1
Brush Types
| Brush Type | Purpose |
|---|---|
| Draw | Increases weight values. Areas turn red. |
| Erase | Decreases weight values. Areas turn blue. |
| Blur | Averages weight values with surrounding areas for smoothness. |
| Smooth | Softens abrupt weight value changes. |
Weight Adjustment Tips
- Adjust gradually: Don't aim for perfection at once; make incremental adjustments.
- Test animation: Move arms and legs to verify natural deformation while adjusting.
- Symmetry: For symmetrical parts of the character, setting symmetrical weights is important.
Step 4: Testing in Pose Mode
After weight adjustment, switch the armature to "Pose Mode" and test by actually moving the bones.
- Select the armature object.
- Choose "Pose Mode" from the mode menu, or use
Ctrl+Tabto access the pie menu. - Select bones and test by pressing
Gto move orRto rotate.
If mesh deformation looks unnatural, return to Weight Paint mode for further adjustments.
Summary
Character rigging may seem complex, but understanding the basic steps allows even beginners to build functional rigs.
- Bone Placement: Position bones according to the character's skeleton.
- Skinning: Define the relationship between mesh and bones.
- Weight Painting: Adjust each bone's influence for natural deformation.
- Testing: Move bones in Pose Mode and adjust as needed.
Start by learning rigging basics with simple characters (e.g., robots made of combined cubes), then gradually tackle more complex characters. Rigging skills are essential fundamentals for character animation production.