Overview
To apply textures (images) to a 3D model, you need to perform "UV mapping." UV mapping is the process of unfolding a 3D shape into 2D and defining which part of the texture corresponds to which part of the model. This article covers everything from UV mapping basics to practical techniques.
What is UV Mapping?

"UV" refers to coordinates on the texture image (U and V are used because X, Y, and Z are already used for 3D space coordinates).
Think of it like:
- 3D model = Gift box
- UV mapping = Blueprint for wrapping the box
- Texture = Wrapping paper design
Poor UV mapping causes textures to stretch, distort, or appear in unintended positions.
Opening the UV Editor
- Select the "UV Editing" workspace at the top
- Or in any area, "Editor Type" → "UV Editor"
The UV Editor appears on the left, 3D viewport on the right.
What Are Seams?
Seams are the "cut lines" for unfolding a 3D model into 2D.
Think of it like deciding where to cut when flattening a cardboard box.
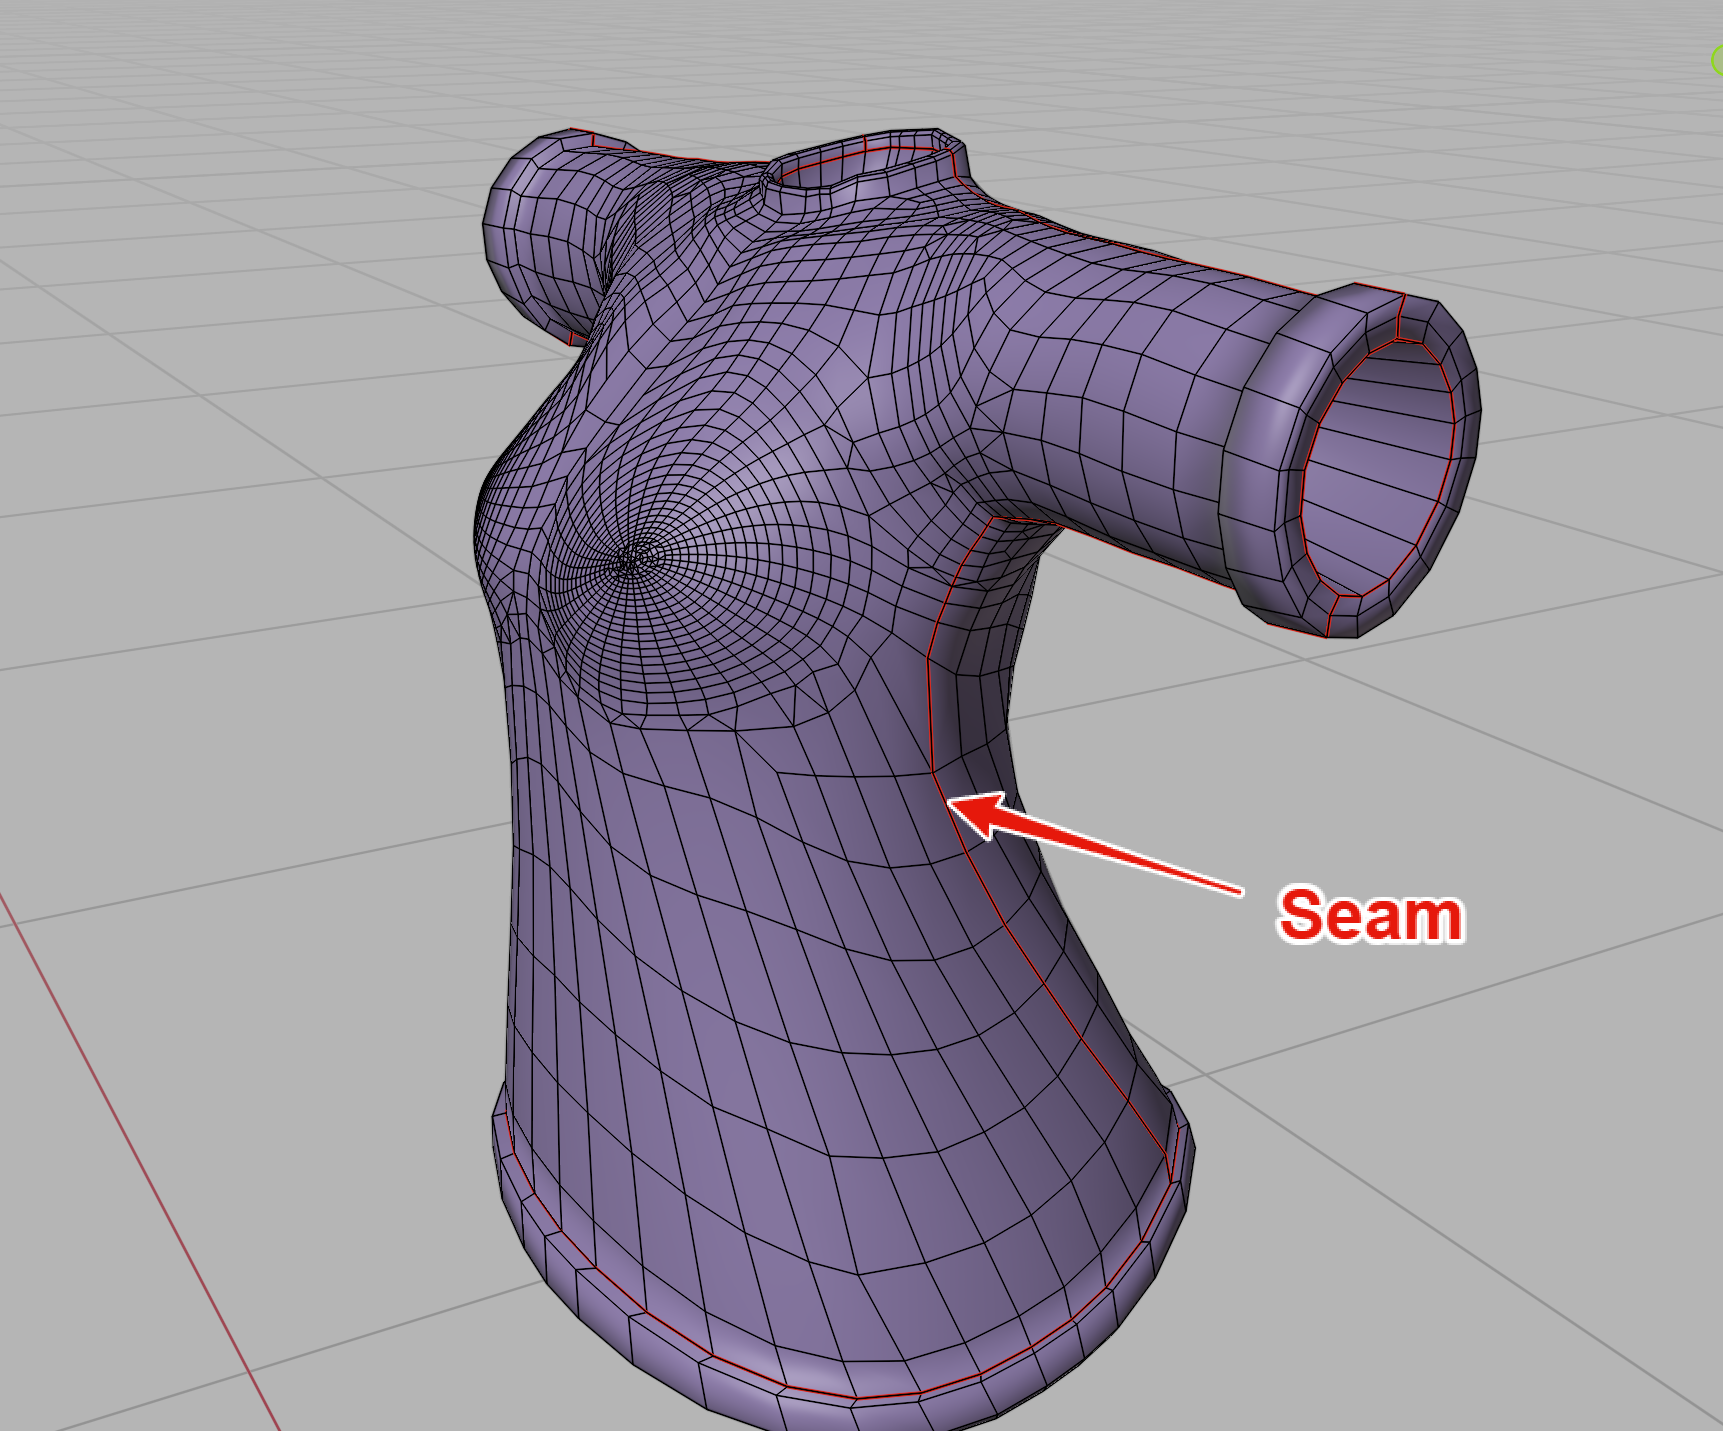
Creating Seams
- Enter Edit Mode (Tab)
- Switch to Edge Select mode (2)
- Select the edges to cut
Ctrl + E→ "Mark Seam"
Seam edges display in red.
UV Unwrap Methods
After setting seams, unwrap the UVs.
Basic Unwrap
- In Edit Mode, select all (A)
- Press
U→ "Unwrap" (In Blender 4.5: "Unwrap Angle Based")
The unwrapped UV map appears in the UV Editor.
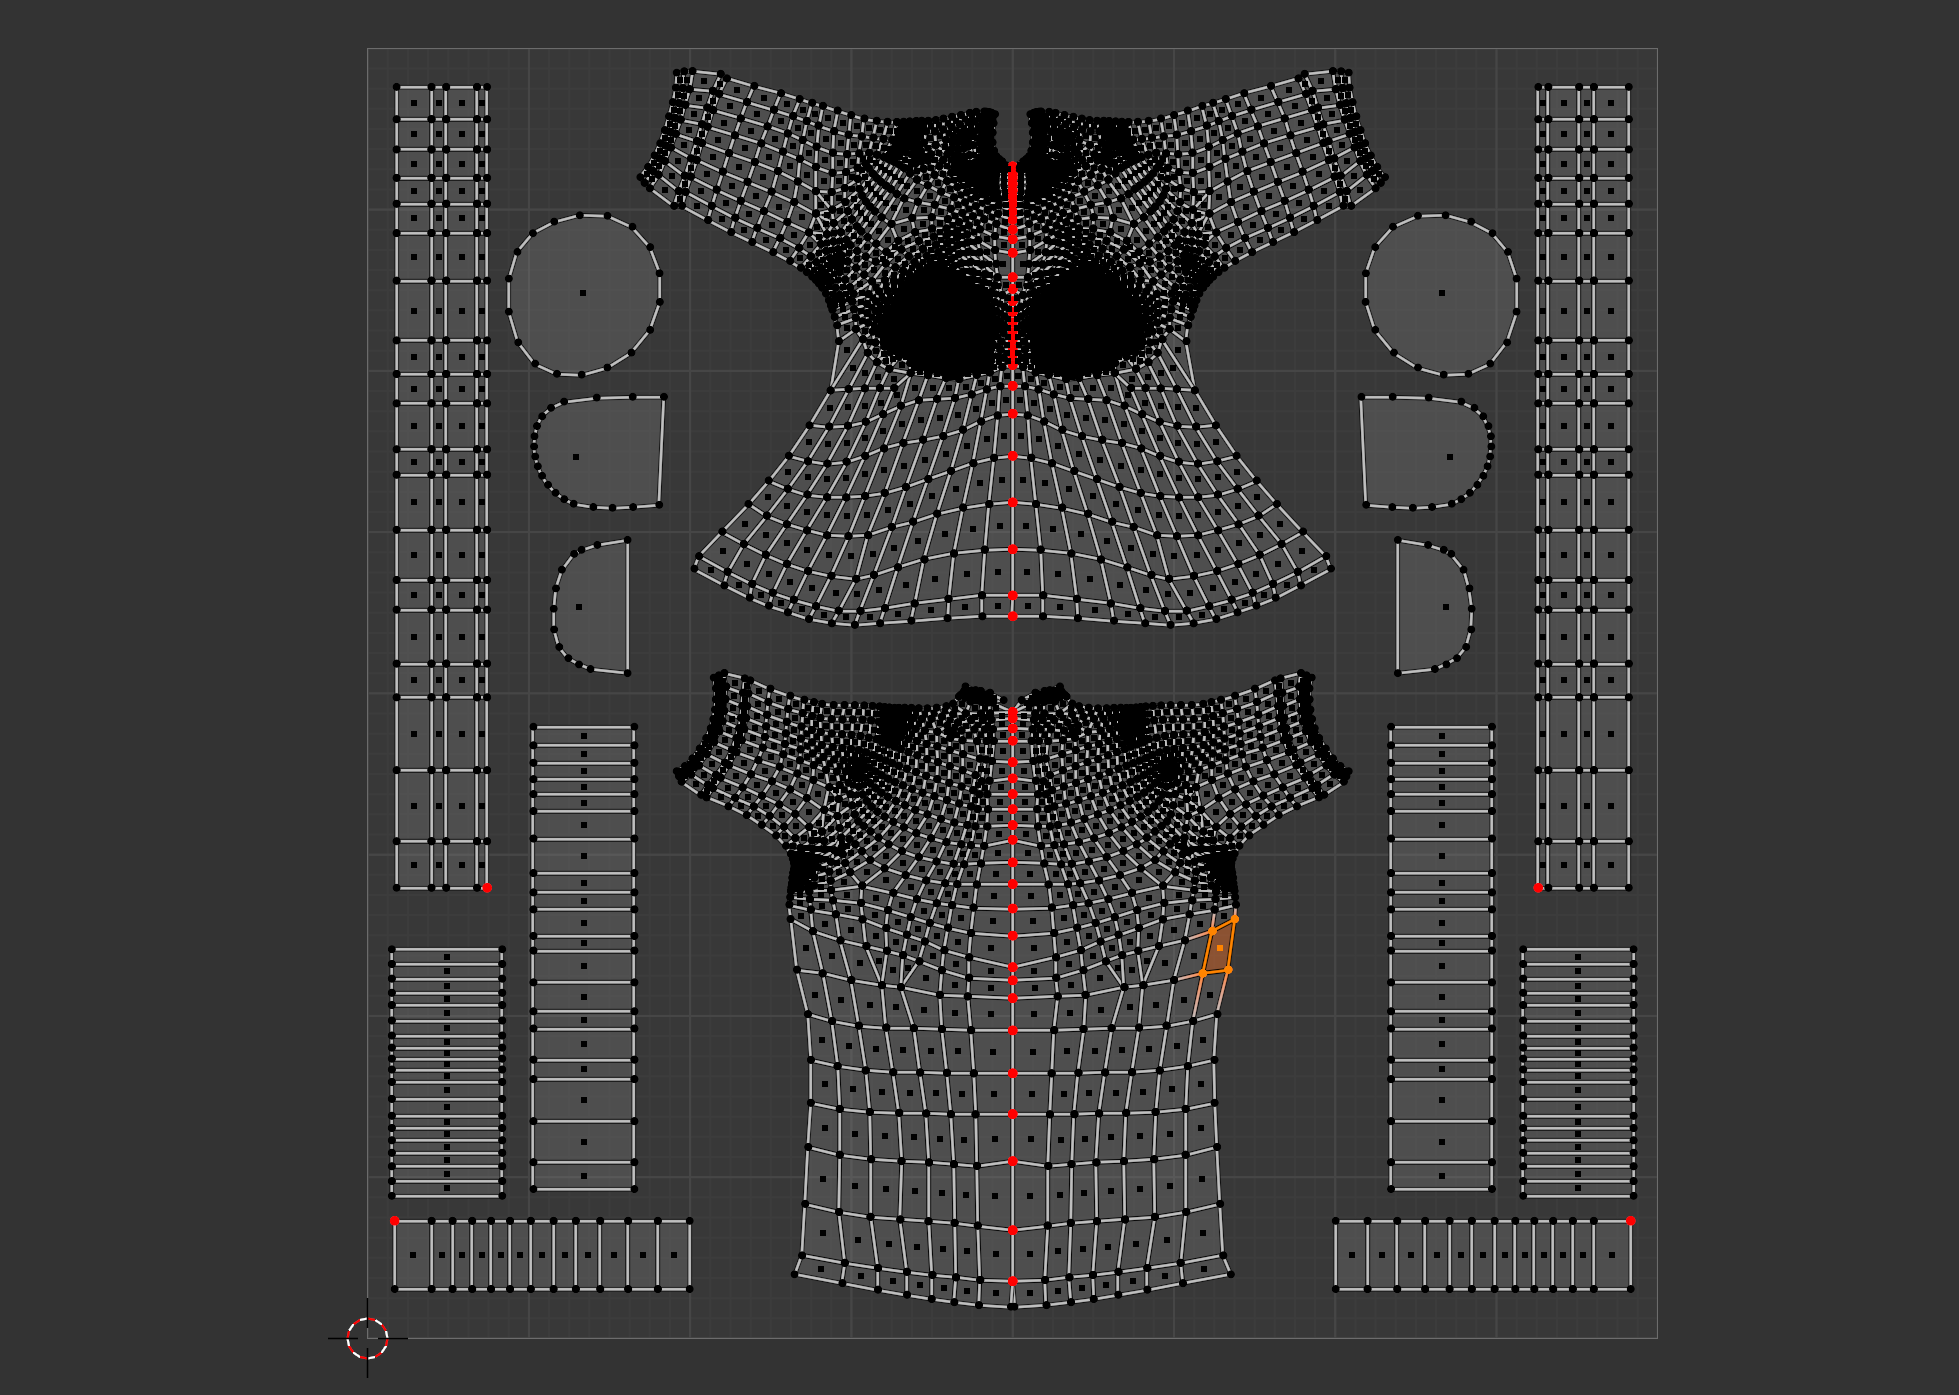
Editing UVs
You can edit UV islands (unwrapped parts) in the UV Editor.
Basic Operations
G: MoveR: RotateS: ScaleL: Select islandP: Pin (lock selected vertices in place)
Pinning
Pinning locks specific vertices in place during UV editing. Pinned vertices won't move when re-unwrapping.
- Pin: Select vertices and press
P - Unpin:
Alt + P
Pin the areas you want to keep fixed, then re-unwrap. Other vertices will unfold relative to the pinned positions.
Checking Textures
Methods to verify UV mapping is correct.
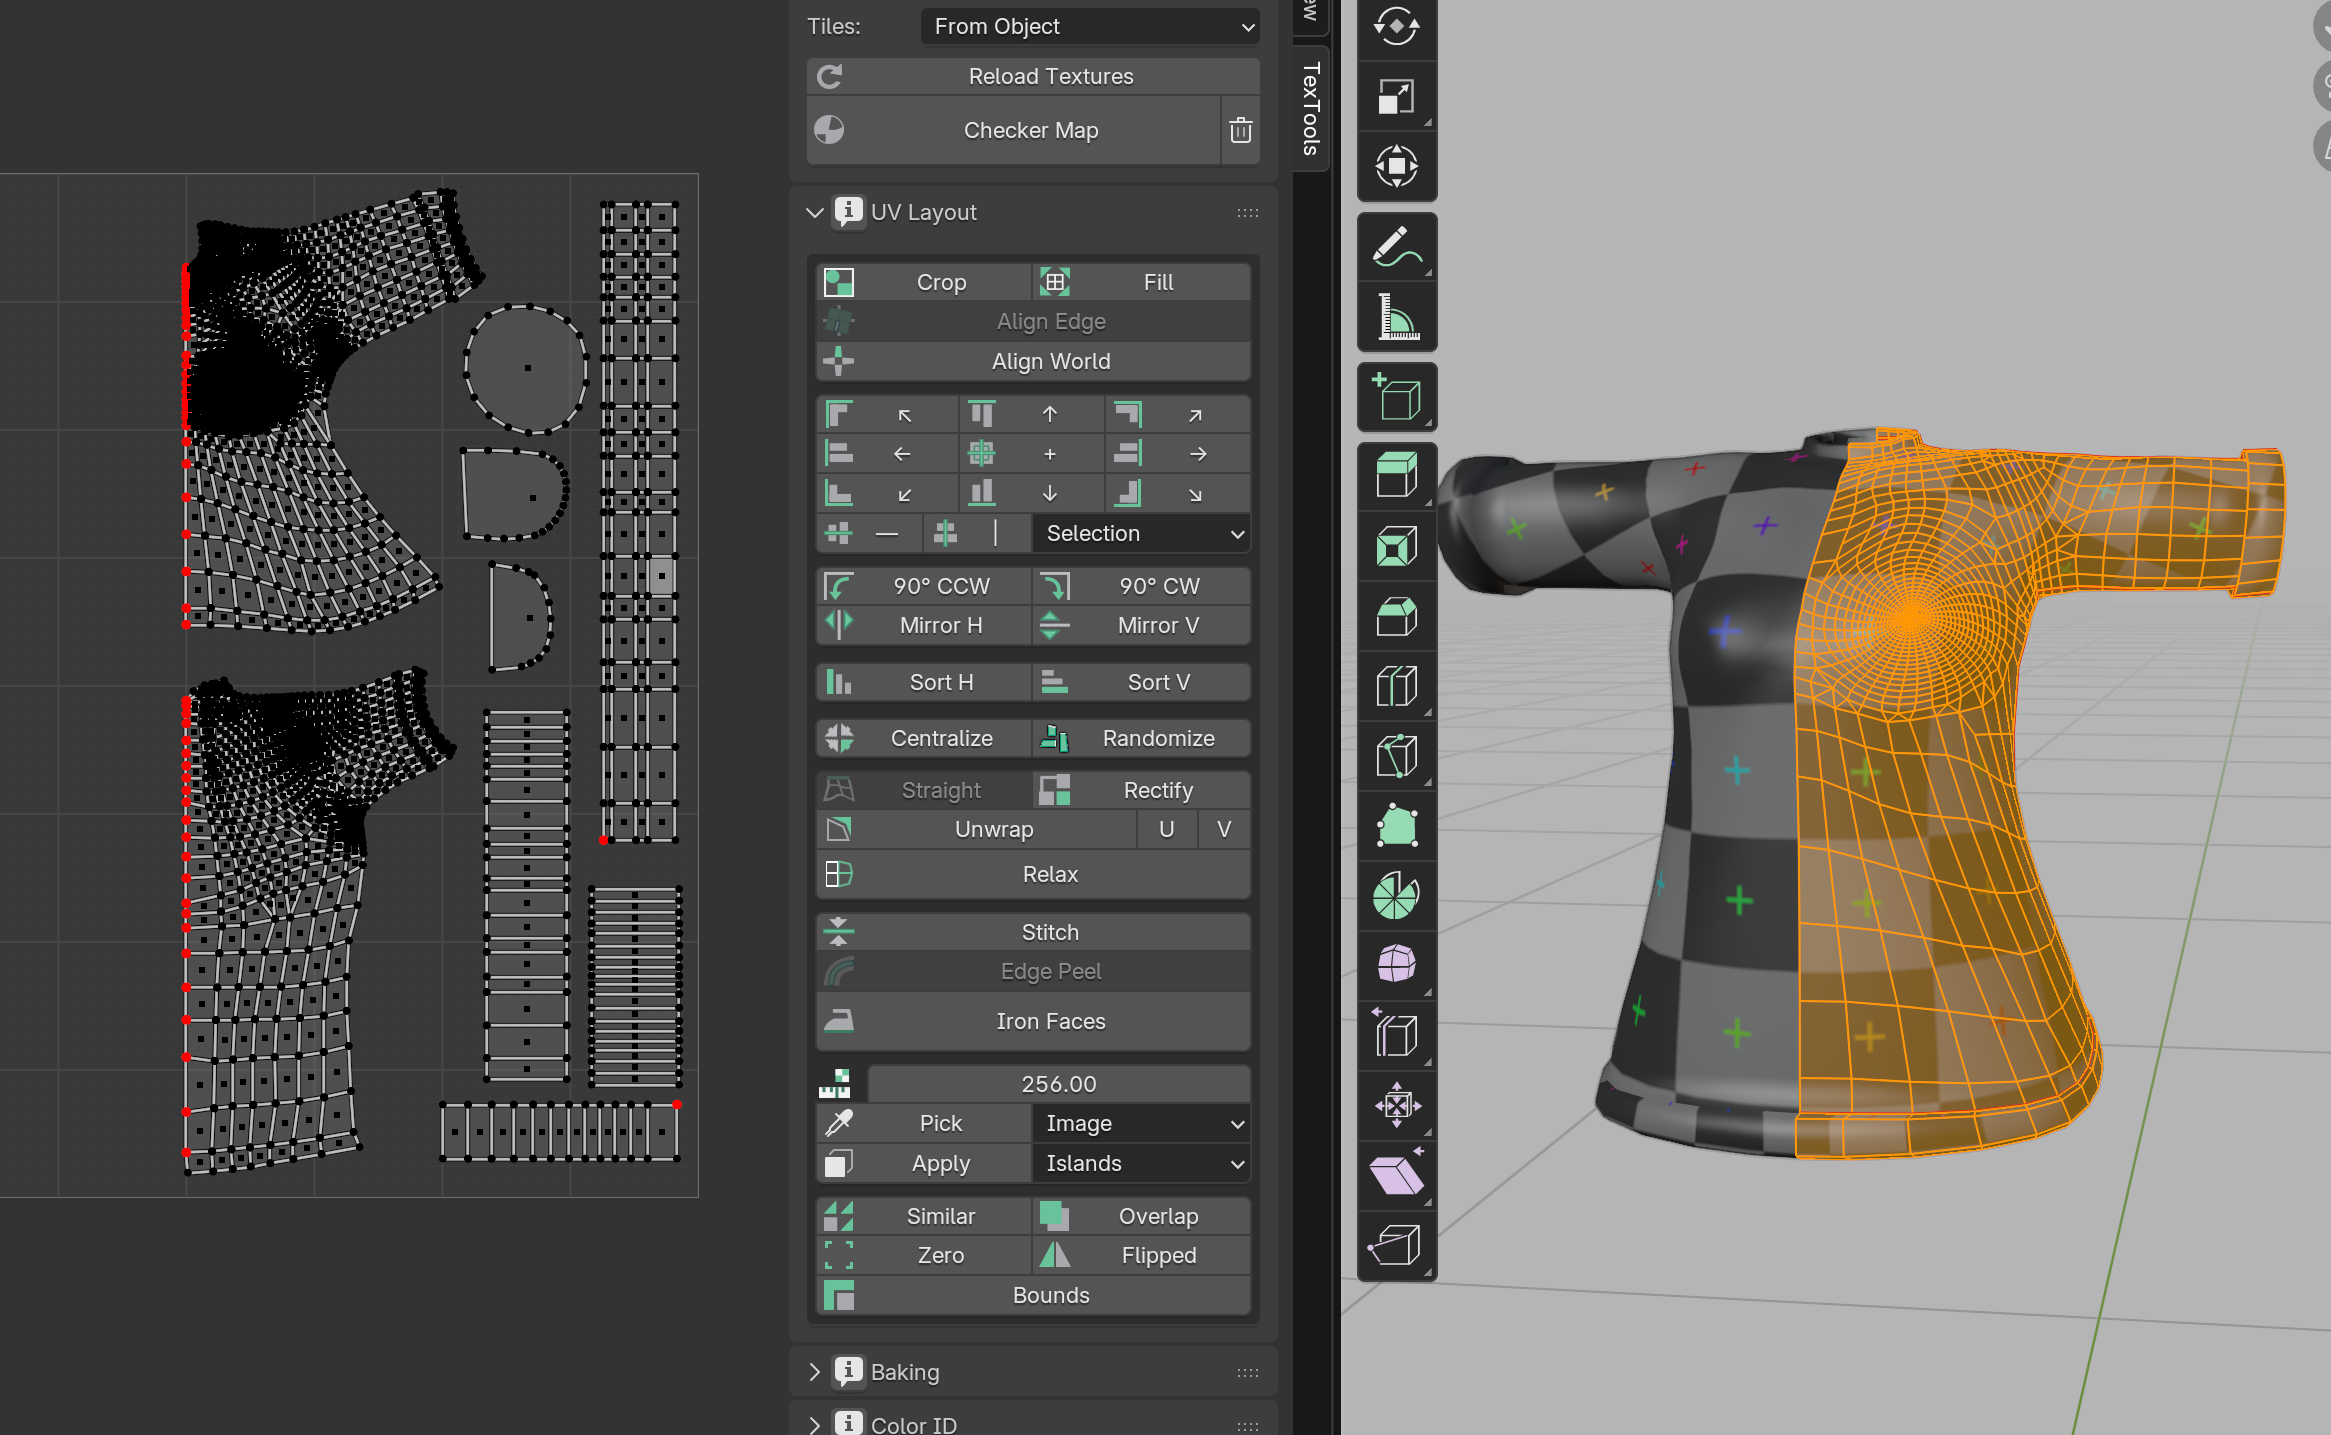
Using Checker Texture
Simply click the "Checker Map" button in the "TexTools" panel in the UV Editor sidebar to display a checker pattern.
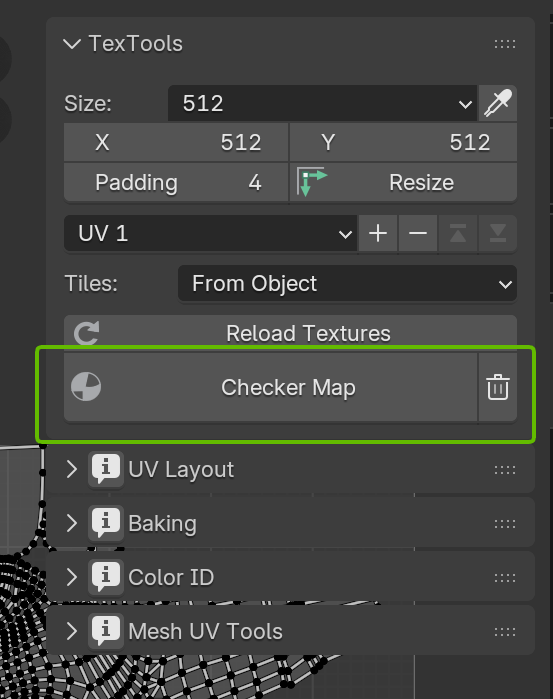
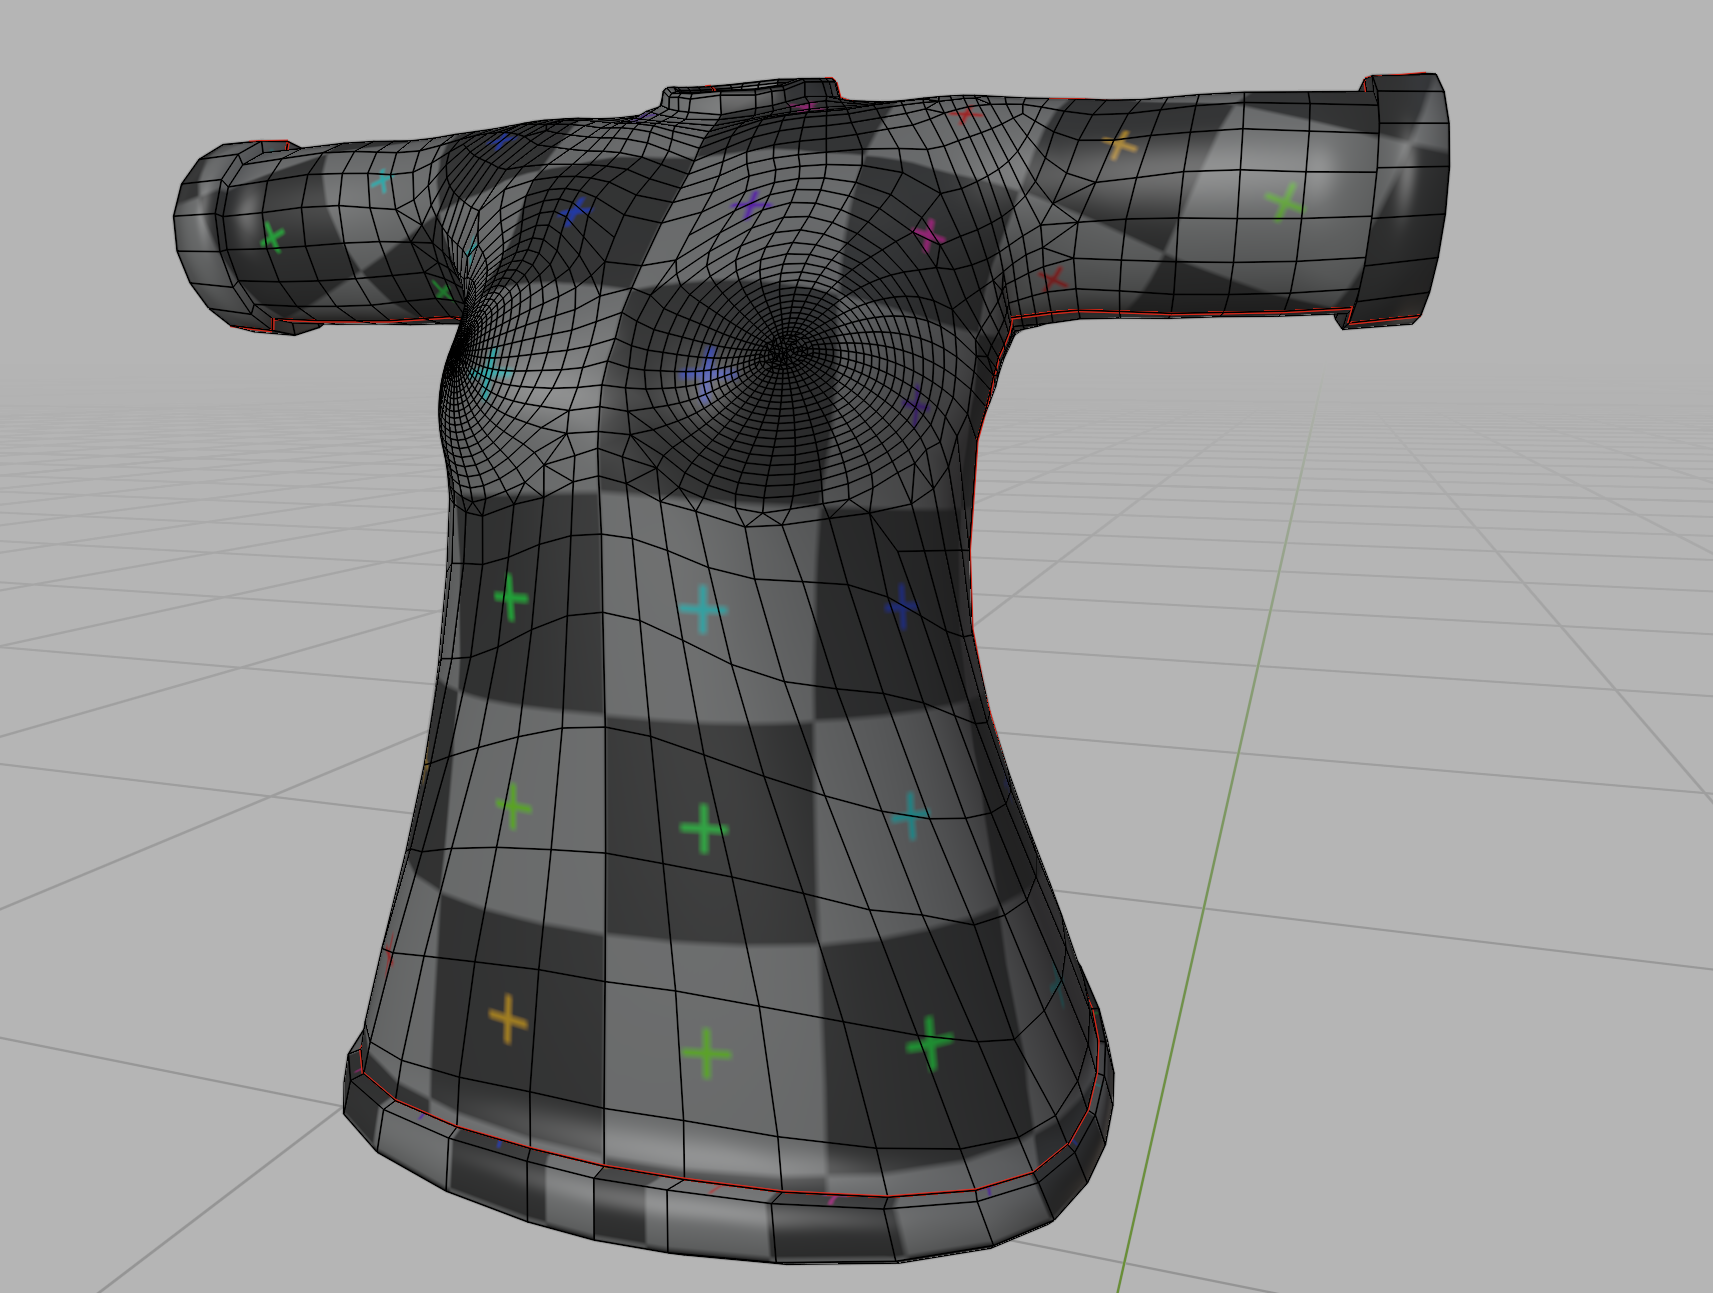
If the checker pattern isn't distorted, UV mapping succeeded. If you see distortion, reconsider seam placement or manually adjust the affected areas in the UV Editor.
Mirror Modifier Notes
When using a Mirror Modifier, you can also mirror the UVs symmetrically.
Preparation
- In the UV Editor, arrange UV islands to fit within half of the texture area (left or right half)
Mirror U Setting
- Open the "Data" section of the Mirror Modifier and enable "Mirror U"
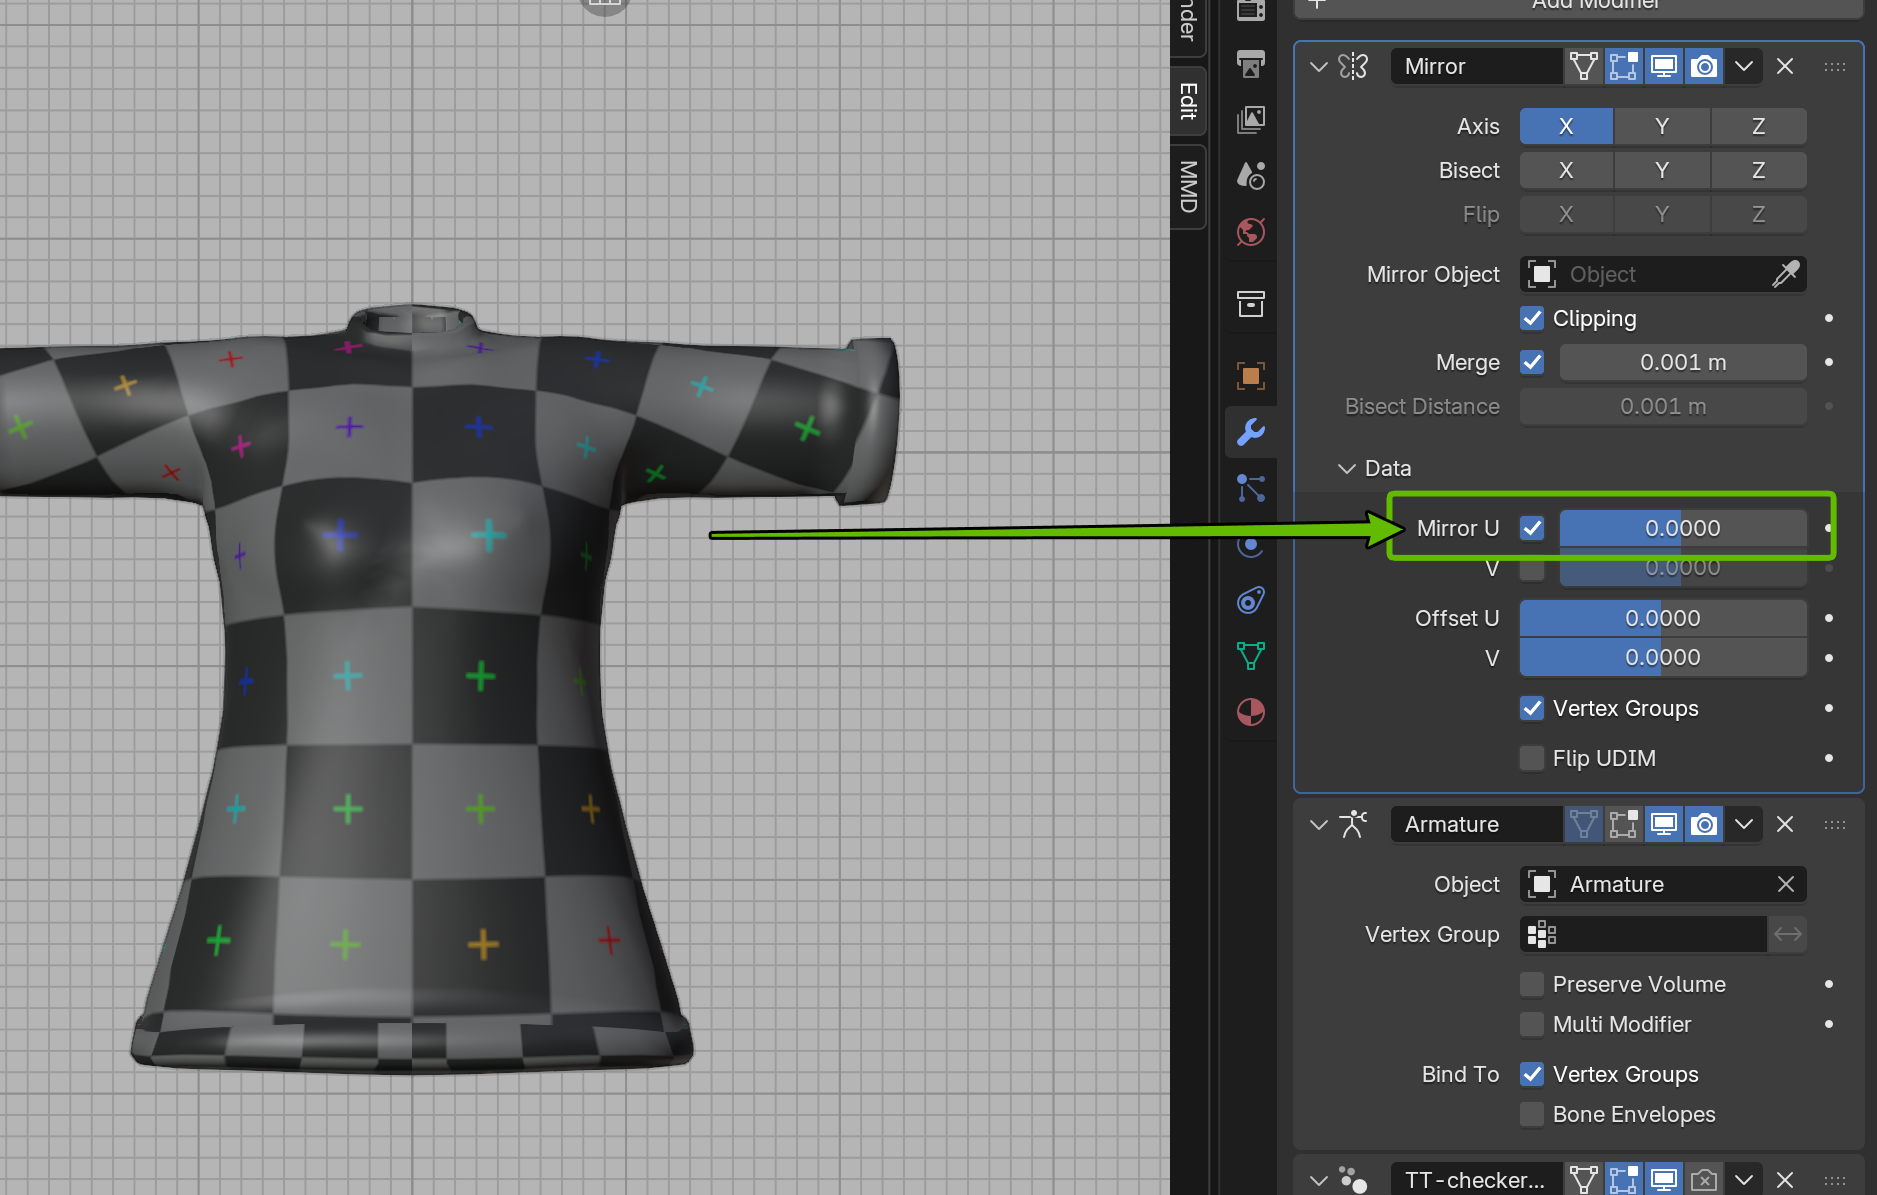
With this setting, UVs will automatically mirror when the modifier is applied. This allows efficient texture use for symmetrical models.
Preview with Modified Edges
- Enable "Modified Edges" in Viewport Overlays to preview the UV boundaries after the Mirror Modifier is applied in the 3D Viewport
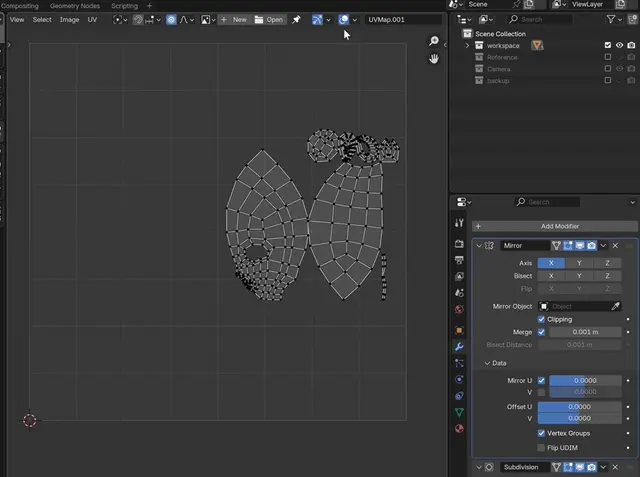
This displays the UV boundaries on the mirrored side, allowing you to verify the UV layout is correct before applying textures.
Common Issues and Solutions
Stretched Texture
- Cause: UV island proportions don't match the original mesh
- Solution: Adjust the affected area in UV Editor, or re-unwrap
Flipped Texture
- Cause: Face normals may be inverted
- Solution: Select faces in 3D view →
Alt + N→ "Flip"
Visible Seams
- Cause: Seam placement is in a noticeable location
- Solution: Move seams to less visible areas (back side, natural folds, etc.)
Overlapping UVs
- Cause: Multiple UV islands are in the same position
- Solution:
Ctrl + Pto pack UVs, or manually move islands
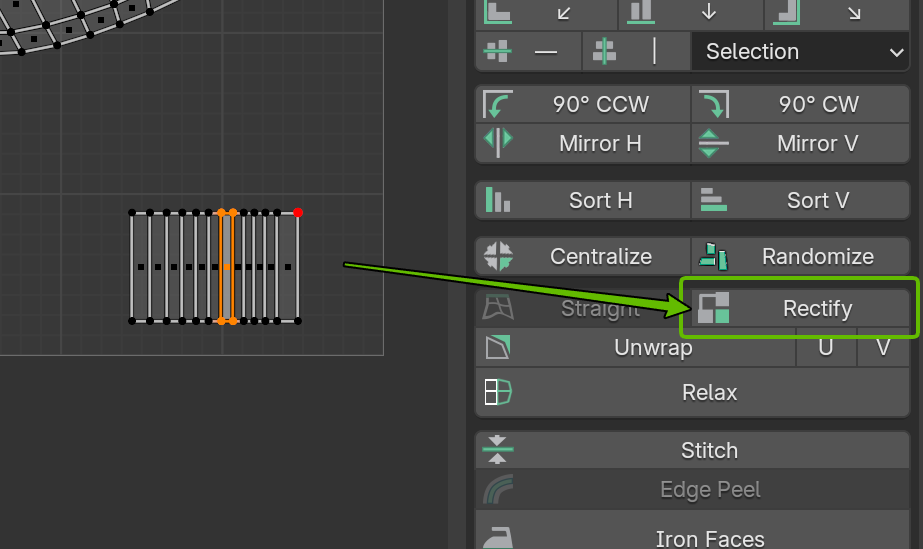
Rectify Grayed Out
- Cause: UV Sync Selection is enabled
- Solution: Click the "UV Sync Selection" button in the top-left of the UV Editor header to turn it OFF

When UV Sync Selection is ON, selections in the 3D Viewport and UV Editor are synchronized. In this state, some UV editing features like Rectify are restricted.
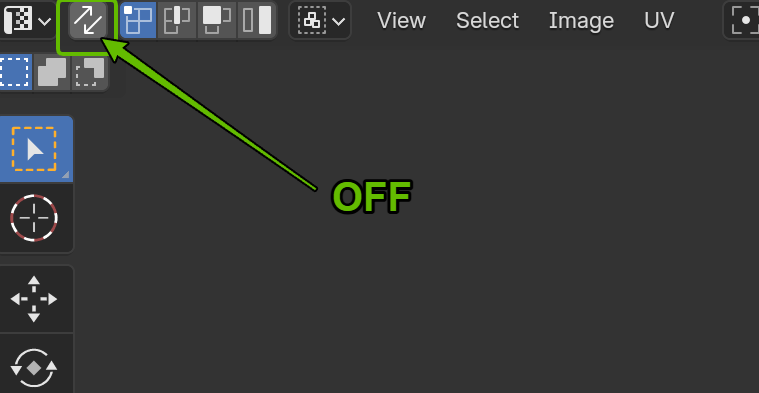
Click the icon with two overlapping squares in the top-left header to turn it OFF, and Rectify will become available.
Efficient UV Mapping Tips
- Minimize seams: Too many creates more visible seams
- Place seams in hidden areas: For characters, use armpits, clothing seams, etc.
- Consider texture resolution: Make important areas larger in UV space
- Ensure padding: Leave space between islands to prevent bleeding
Summary
- UV Mapping: Unfolds 3D models into 2D to define texture coordinates
- Seams: Specify where to cut for unfolding
- Unwrap: Generates UVs according to seams
- Smart UV Project: Creates UVs quickly and automatically
UV mapping may feel difficult at first, but the intuition develops with practice.