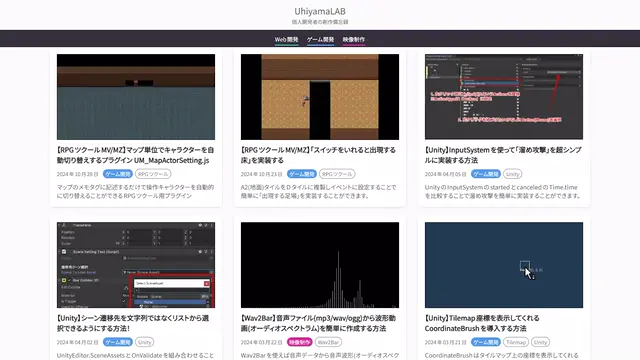
ブログトップページの記事リストのサムネイルを動かすためにGif画像を利用していました。
しかしGifは数秒の動画であってもファイルサイズが大きくなりがちです。数MBになることも珍しくありません。
「だったら画像で良いじゃん」という話ですが、やっぱり動いてたほうが見栄えが良い・・・。
他のサイトの構造を調べていると、動画はGif形式ではなくWebP形式で指定されてい�ることに気が付きました。
WebPの優位性
WebPは、GoogleによってWebコンテンツの最適化のために開発された画像フォーマットです。GIFと比較して以下のような利点があります:
- ファイルサイズ:同じ品質でGIFの約26%まで圧縮可能
- 色数制限なし:GIFの256色制限に対し、フルカラー対応
- アルファチャンネル対応:透過度の表現が可能
- より高度な圧縮アルゴリズム:VP8動画コーデックベースの効率的な圧縮
「よし、WebPに切り替えよう」
しかし「数秒の動画をWebP形式に変換する」方法がうまく見つかりませんでした。
アニメーションGifなどはAdobe Creative CloudのクイックアクションやMedia Encoderを使って簡単に作成できます。ですがWebPは現状対応していません。
オンライン上のWebP変換サービスは画像の劣化が激しかったり、ファイルサイズが逆に大きくなったりして不安定です。
今回達成したいのは「数秒の動画をWebPに簡単に変換すること」です。余計な機能はいりません。
「だったら自作しよう」
という流れで、動画やGIFをWebP形式に変換する簡単なツールを作成しました。
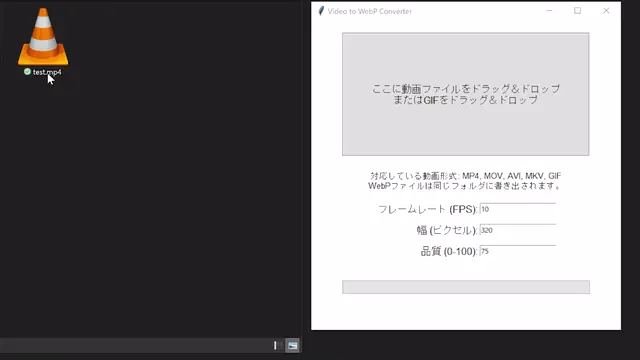
このツールを使えば、ドラッグ&ドロップするだけで動画をWebPに変換できます。
主な特徴:
- ドラッグ&ドロップで簡単変換
- MP4, MOV, AVI, MKV, GIFに対応
- フレームレート、画質、サイズを自由に設定可能
- プログレスバーで変換進捗を確認可能

導入方法
1. 必要なパッケージのインストール
このツールを使用するには以下のパッケージが必要です:
pip install tkinter
pip install tkinterdnd2
2. FFmpegのインストール
動画変換にはFFmpegが必要です。以下の手順でインストールしてください:
Windowsの場合:
- Download FFmpegから最新版をダウンロード
- ダウンロードしたzipファイルを解凍
- binフォルダを環境変数PATHに追加
Macの場合:
brew install ffmpeg
使い方

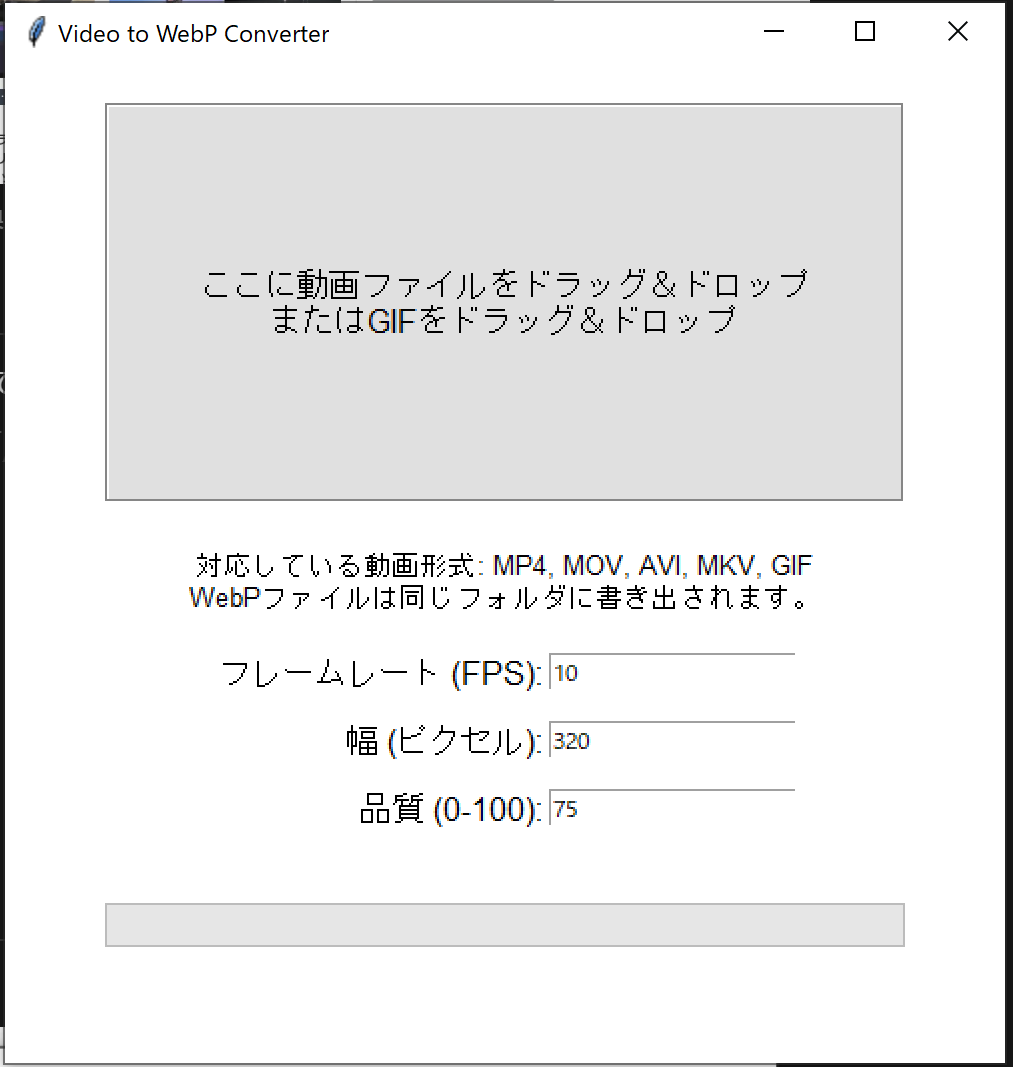
- アプリを起動すると、ドラッグ&ドロップ用の枠が表示されます
- 以下の設定を必要に応じて変更できます:
- フレームレート(FPS):動画の滑らかさを調整(デフォルト:10fps)
- 幅(ピクセル):出力サイズを調整(デフォルト:640px)
- 品質(0-100):圧縮率を調整(デフォルト:75)
- 変換したい動画ファイルをドラッグ&ドロップ
- 変��換が完了すると、同じフォルダにWebPファイルが生成されます

ソースコード全文
必要なパッケージとffmpegを導入したうえで下記のコードを実行してみてください。
import tkinter as tk
from tkinter import filedialog, ttk, messagebox
from tkinterdnd2 import DND_FILES, TkinterDnD
import subprocess
import threading
import os
import shlex

class VideoToWebPConverter(TkinterDnD.Tk):
    def __init__(self):
        super().__init__()
        self.title("Video to WebP Converter")
        self.geometry("500x500")
        self.configure(bg='white')

        self.create_widgets()

    def create_widgets(self):
        # ドラッグアンドドロップ領域のフレームを作成
        self.drop_frame = tk.Frame(self, width=400, height=200, bg='#e0e0e0', relief='groove', bd=2)
        self.drop_frame.pack(pady=20)
        self.drop_frame.pack_propagate(False)

        self.label = tk.Label(
            self.drop_frame,
            text="ここに動画ファイルをドラッグ&ドロップ\nまたはGIFをドラッグ&ドロップ",
            bg='#e0e0e0',
            font=('Arial', 12)
        )
        self.label.pack(expand=True)

        # 対応している画像形式についての注釈を追加
        self.note_label = tk.Label(
            self,
            text="対応している動画形式: MP4, MOV, AVI, MKV, GIF\nWebPファイルは同じフォルダに書き出されます。",
            bg='white',
            font=('Arial', 10)
        )
        self.note_label.pack()

        # ドラッグアンドドロップの設定
        self.drop_frame.drop_target_register(DND_FILES)
        self.drop_frame.dnd_bind('<>', self.drop)

        # 設定項目のフレーム
        settings_frame = tk.Frame(self, bg='white')
        settings_frame.pack(pady=10)

        # フレームレート設定
        tk.Label(settings_frame, text="フレームレート (FPS):", bg='white', font=('Arial', 12)).grid(row=0, column=0, sticky='e', pady=5)
        self.fps_entry = tk.Entry(settings_frame)
        self.fps_entry.insert(0, "10")
        self.fps_entry.grid(row=0, column=1, pady=5)

        # 幅設定
        tk.Label(settings_frame, text="幅 (ピクセル):", bg='white', font=('Arial', 12)).grid(row=1, column=0, sticky='e', pady=5)
        self.width_entry = tk.Entry(settings_frame)
        self.width_entry.insert(0, "640")
        self.width_entry.grid(row=1, column=1, pady=5)

        # 品質設定
        tk.Label(settings_frame, text="品質 (0-100):", bg='white', font=('Arial', 12)).grid(row=2, column=0, sticky='e', pady=5)
        self.quality_entry = tk.Entry(settings_frame)
        self.quality_entry.insert(0, "75")
        self.quality_entry.grid(row=2, column=1, pady=5)

        # プログレスバー
        self.progress = ttk.Progressbar(self, orient='horizontal', length=400, mode='determinate')
        self.progress.pack(pady=20)

    def drop(self, event):
        files = self.tk.splitlist(event.data)
        for file in files:
            if file.lower().endswith(('.mp4', '.mov', '.avi', '.mkv', '.gif')):
                threading.Thread(target=self.convert_video, args=(file,)).start()
            else:
                messagebox.showerror("エラー", "サポートされていないファイル形式です。")

    def get_unique_filename(self, filepath):
        base, ext = os.path.splitext(filepath)
        output_dir = os.path.dirname(filepath)
        base_name = os.path.basename(base)
        counter = 1
        output_path = os.path.join(output_dir, base_name + '.webp')
        while os.path.exists(output_path):
            output_path = os.path.join(output_dir, f"{base_name}_{counter}.webp")
            counter += 1
        return output_path

    def convert_video(self, filepath):
        # ユーザー設定を取得
        fps = self.fps_entry.get()
        width = self.width_entry.get()
        quality = self.quality_entry.get()

        # 入力値のバリデーション
        try:
            fps = int(fps)
            width = int(width)
            quality = int(quality)
            if not (0 <= quality <= 100):
                raise ValueError
        except ValueError:
            messagebox.showerror("入力エラー", "正しい数値を入力してください。")
            return

        output_path = self.get_unique_filename(filepath)

        # 入力ファイルがGIFかどうかをチェック
        is_gif = filepath.lower().endswith('.gif')

        # ffmpegコマンドを設定
        if is_gif:
            cmd = [
                'ffmpeg',
                '-i', filepath,
                '-vf', f'scale={width}:-1:flags=lanczos',  # 解像度を設定
                '-loop', '0',
                '-lossless', '0',
                '-q:v', str(quality),
                '-preset', 'default',
                output_path
            ]
        else:
            cmd = [
                'ffmpeg',
                '-i', filepath,
                '-vf', f'fps={fps},scale={width}:-1:flags=lanczos',  # フレームレートと解像度を設定
                '-vcodec', 'libwebp',
                '-lossless', '0',
                '-q:v', str(quality),  # 品質を設定
                '-loop', '0',
                '-an',
                '-preset', 'default',
                '-vsync', '0',
                output_path
            ]

        # コマンドを文字列にして表示(デバッグ用)
        cmd_str = ' '.join(shlex.quote(arg) for arg in cmd)
        print(f"実行コマンド: {cmd_str}")

        # プロセスの実行とエラー取得
        try:
            process = subprocess.Popen(
                cmd,
                stdout=subprocess.PIPE,
                stderr=subprocess.PIPE,
                text=True,
                encoding='cp932',  # Windowsのデフォルトエンコーディング
                errors='replace'
            )

            if is_gif:
                self.progress.config(mode='indeterminate')
                self.progress.start()
            else:
                total_duration = self.get_video_duration(filepath)
                self.progress['maximum'] = total_duration

            error_output = ""

            while True:
                line = process.stderr.readline()
                if not line:
                    break
                if not is_gif and 'time=' in line:
                    time_str = line.strip().split('time=')[1].split(' ')[0]
                    current_time = self.ffmpeg_time_to_seconds(time_str)
                    self.progress['value'] = current_time
                    self.update_idletasks()
                error_output += line

            process.wait()
            self.progress.stop()
            self.progress['value'] = 0
            self.progress.config(mode='determinate')

            if process.returncode == 0:
                messagebox.showinfo("完了", f"変換が完了しました。\n{output_path}")
            else:
                messagebox.showerror("エラー", f"変換中にエラーが発生しました。\n\n詳細:\n{error_output}")
        except Exception as e:
            messagebox.showerror("例外エラー", f"予期せぬエラーが発生しました。\n\n詳細:\n{str(e)}")

    def get_video_duration(self, filepath):
        cmd = [
            'ffprobe',
            '-v', 'error',
            '-show_entries',
            'format=duration',
            '-of',
            'default=noprint_wrappers=1:nokey=1',
            filepath
        ]
        result = subprocess.run(
            cmd,
            stdout=subprocess.PIPE,
            stderr=subprocess.STDOUT,
            text=True,
            encoding='cp932',  # Windowsのデフォルトエンコーディング
            errors='replace'
        )
        try:
            return float(result.stdout.strip())
        except ValueError:
            return 0

    def ffmpeg_time_to_seconds(self, time_str):
        try:
            h, m, s = time_str.split(':')
            s = float(s)
            return int(h) * 3600 + int(m) * 60 + s
        except ValueError:
            return 0

if __name__ == "__main__":
    app = VideoToWebPConverter()
    app.mainloop()
まとめ
このツールを使用することで、収録した動画の一部分をすぐにWebP変換してブログサムネイルに使用することができるようになりました。
システムがWebPが対応していることが大前提にはなりますが、最近の環境ではよっぽど問題ないと思います。
場合によって代替画像を表示する仕組みと組み合わせるのが良いでしょう。
ソースコードは以下のGitHubリポジトリで公開しています:
GitHub - Video to WebP Converter
気になる点やご要望があれば、GitHubのIssuesにてお知らせください。