Do you ever wish your Adobe Premiere Pro video editing workflow could be faster and more efficient? With deadlines looming, finding ways to streamline the editing process is a common goal for video editors everywhere.
Fortunately, Premiere Pro comes packed with powerful features designed to dramatically speed up your editing workflow. On top of that, incorporating external tools and proper project management practices can boost efficiency even further.
This article covers a wide range of techniques, useful features, recommended tools, and often-overlooked project file management tips to help you speed up and streamline your video editing in Premiere Pro. Use these to save time in your daily editing work.
In This Article
- Premiere Pro Built-in Feature Techniques
- Text-Based Editing & Filler Word Removal
- Subtitle Generation
- Using Presets
- Recommended Plugins
- Premiere Composer
- Efficient Project File Management
- Leveraging CC Libraries
- Essential Graphics (Motion Graphics Templates)
- Duplicating Project Files (Templating)
- Using Project Manager (Archiving)
Premiere Pro Built-in Feature Techniques
Let's start with built-in Premiere Pro features that significantly boost editing efficiency. Knowing these alone can make a major difference in your workflow.
Text-Based Editing & Filler Word Removal
In newer versions of Premiere Pro (2023 and later), the Text-Based Editing feature is available. It automatically transcribes video/audio content, allowing you to edit (cut, etc.) directly from the generated text — a game-changing capability.
- Cut editing from text: Instead of repeatedly playing back video to find unnecessary parts, you can read the transcribed text, select unwanted sections (mistakes, silent gaps, etc.), and delete them — the corresponding video/audio clips are automatically cut. This is incredibly effective for interview, lecture, and gameplay commentary videos.
- Automatic filler word removal: As part of text-based editing, there's a feature that automatically detects and bulk-removes filler words like "um," "uh," "you know," etc. The accuracy is quite high, drastically reducing the manual effort of cutting these out one by one from audio waveforms.
[Note] While filler word removal is powerful, use caution depending on the video type. For example, it might remove intentional pauses or silent moments used for emotional expression. If you prioritize the overall atmosphere and pacing, don't rely on this feature entirely — make final adjustments manually.
Subtitle Generation
Text data from text-based editing can be directly used as subtitles (captions). After cutting and correcting unnecessary parts in the text-based editing view, simply click the "Create Captions" button to auto-generate a subtitle track on the timeline.
Japanese speech recognition accuracy is relatively high, significantly reducing the effort of creating subtitles from scratch. However, proper nouns like names and technical terms are often misrecognized, so always review and correct the generated subtitles.
Using Presets
In video editing, you frequently apply the same effects and settings to multiple clips. For example:
- Adjusting to a specific zoom level and position (picture-in-picture, etc.)
- Applying color correction or LUTs
- Applying chroma key compositing with Ultra Key for green screen footage
- Applying specific audio effects (noise reduction, etc.)
Manually configuring these settings each time is inefficient. That's where Presets come in.
Right-click on the adjusted settings in the Effect Controls panel (e.g., Motion scale and position, Ultra Key settings) and select "Save Preset" to save the configuration with a custom name.
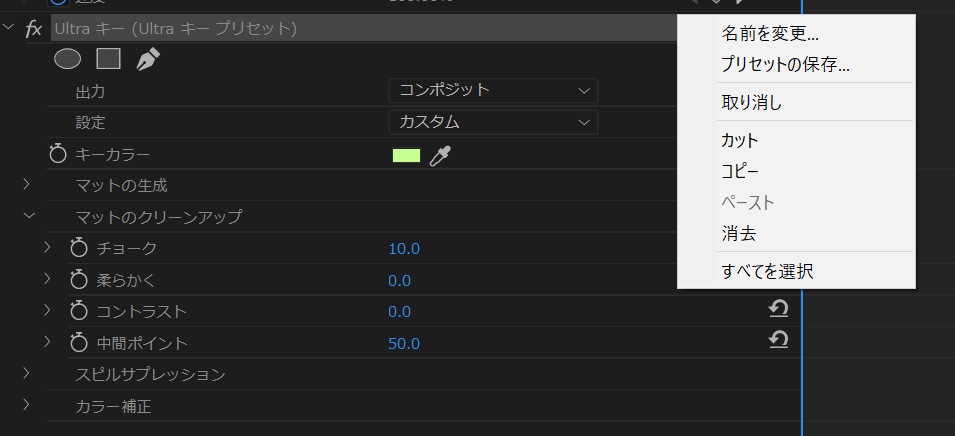
Saved presets are stored in the "Presets" folder within the Effects panel.
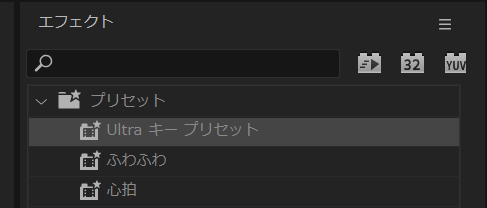
From then on, simply drag and drop the saved preset from the Effects panel onto a clip to instantly apply the same settings. Actively save repetitive configurations as presets to streamline your editing.
Recommended Plugins
While Premiere Pro is powerful on its own, plugins can further boost editing efficiency and expand your creative options. Here's one particularly recommended plugin.
Premiere Composer (Mr. Horse)
"Premiere Composer" is a highly popular plugin (free and paid versions available) that provides easy access to high-quality text animations, transitions, and sound effects directly within Premiere Pro.
Normally, creating elaborate text animations and motion graphics requires After Effects integration (Dynamic Link, etc.), but with Premiere Composer, you can select from a rich library of presets and simply drag and drop professional-looking effects right within Premiere Pro's editing interface.
It's especially useful for videos that heavily feature titles, captions, and social media-style popups, where it can dramatically reduce production time. The free version offers plenty of functionality, so give it a try.
(Note: Many other useful plugins exist, such as Excalibur and Motion Bro. Feel free to explore options that match your editing style.)
Efficient Project File Management
Editing efficiency depends not only on editing techniques but also on how you manage project files and assets. Here are some tips for efficient project management in Premiere Pro.
Leveraging CC Libraries
If you're an Adobe Creative Cloud subscriber, you can use CC Libraries. This feature lets you save images, videos, logos, color swatches, text styles, and more to the cloud, sharing them across multiple Adobe applications including Premiere Pro.
In Premiere Pro, open the CC Libraries panel and drag and drop saved assets directly onto the timeline or project panel.
[Use Cases]
- Frequently used logos and watermarks
- Opening/ending videos and background music
- Common sound effects (SFX)
- Brand colors and standard text styles
By organizing these in CC Libraries, you eliminate the hassle of searching through folders on your PC or copying from old projects every time you start a new one. Libraries can also be organized into folders by client or project type for even greater efficiency.
Essential Graphics (Motion Graphics Templates)
Repeatedly used captions, titles, and shape layouts in videos can be saved as templates using Essential Graphics (Motion Graphics Templates / .mogrt files).
For example, if you've created a caption layout with specific font, size, color, and background settings, right-click the clip (or nested clips) on the timeline and select "Export As Motion Graphics Template."
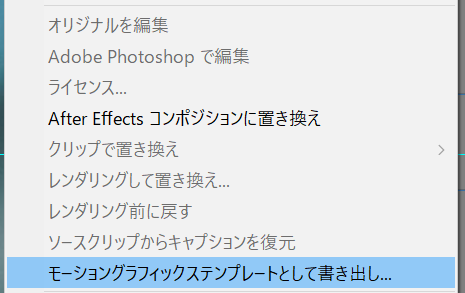
After naming and saving, the layout is added as a template in the "Browse" tab (local template folder) of the Essential Graphics panel. From then on, simply drag and drop the template from the panel onto the timeline to instantly create a caption with the same layout. Text content can be easily modified in the "Edit" tab of the Essential Graphics panel.
The more layouts you save as templates, the more efficient your editing becomes. Take advantage of this feature.
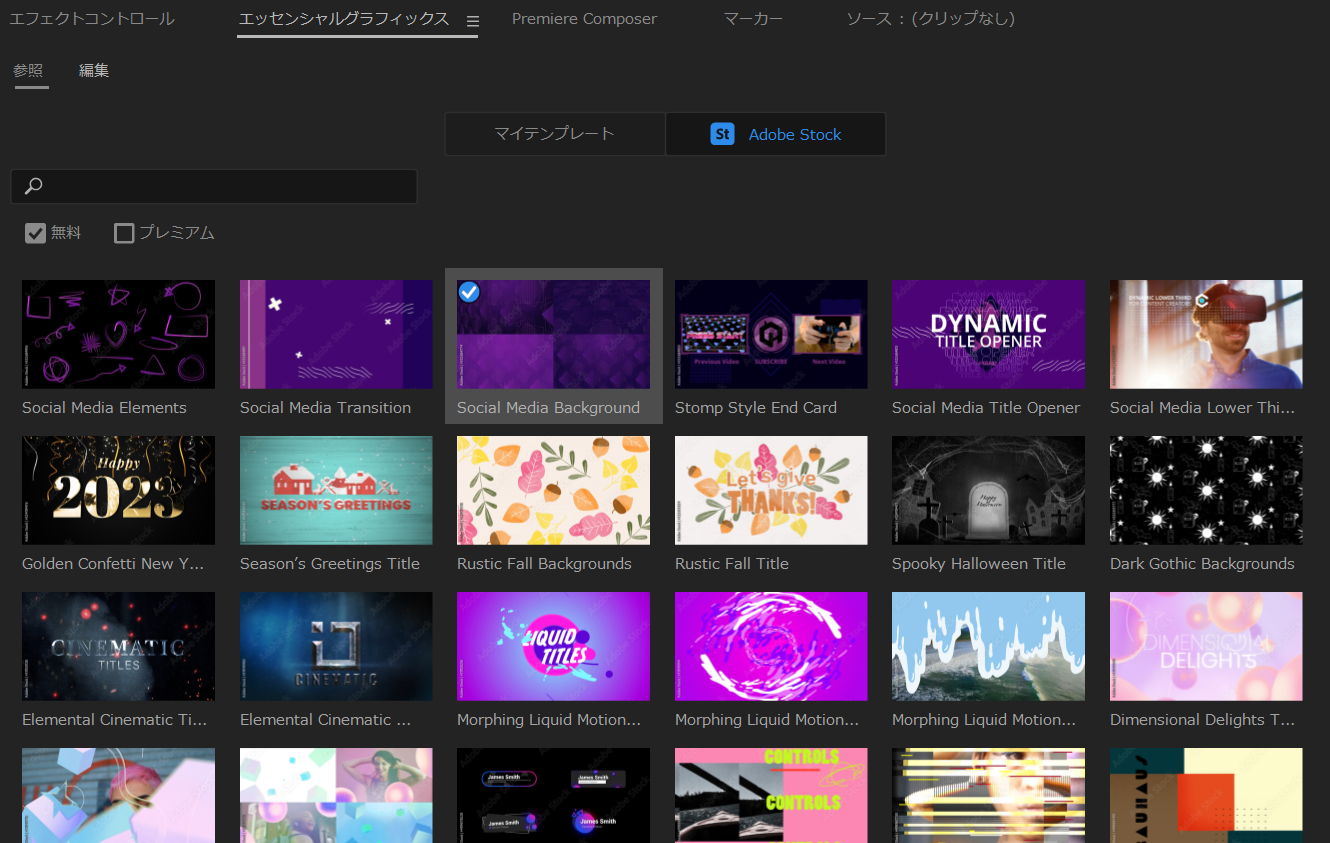
Additionally, you can search and download professional Motion Graphics Templates from Adobe Stock (free and paid) directly from the Essential Graphics panel. This is helpful when you need high-quality visual effects quickly or aren't confident in design.
Duplicating Project Files for Mass Production
When producing a video series like YouTube content where each video follows roughly the same structure, creating a template project file and duplicating it for each new video can be more efficient than importing individual elements from Essential Graphics.
[Workflow Example]
- Create a Premiere Pro project file with only the basic structure (opening, BGM tracks, standard caption placement, ending, etc.) and save it as a template (e.g.,
EditingTemplate.prproj). - When a new video (e.g., Video A) needs to be produced, open
EditingTemplate.prproj. - Immediately use "File" > "Save As" to save it with a new project name (e.g.,
VideoA.prproj). (Be careful not to edit the original template directly!) - Import required video assets into the new project file and start editing on top of the existing template structure.
- After editing is complete, it's recommended to use the "Project Manager" (described below) to organize and save the project with its used assets.
This approach eliminates even the step of dragging elements from Essential Graphics one by one, allowing you to start editing more quickly.
Using Project Manager (Archiving)
After completing and delivering a video edit, how do you manage the project files? For future revision requests or reuse in similar projects, proper archiving is important. That's where the Project Manager feature comes in.
With the completed project open, select "File" > "Project Manager."
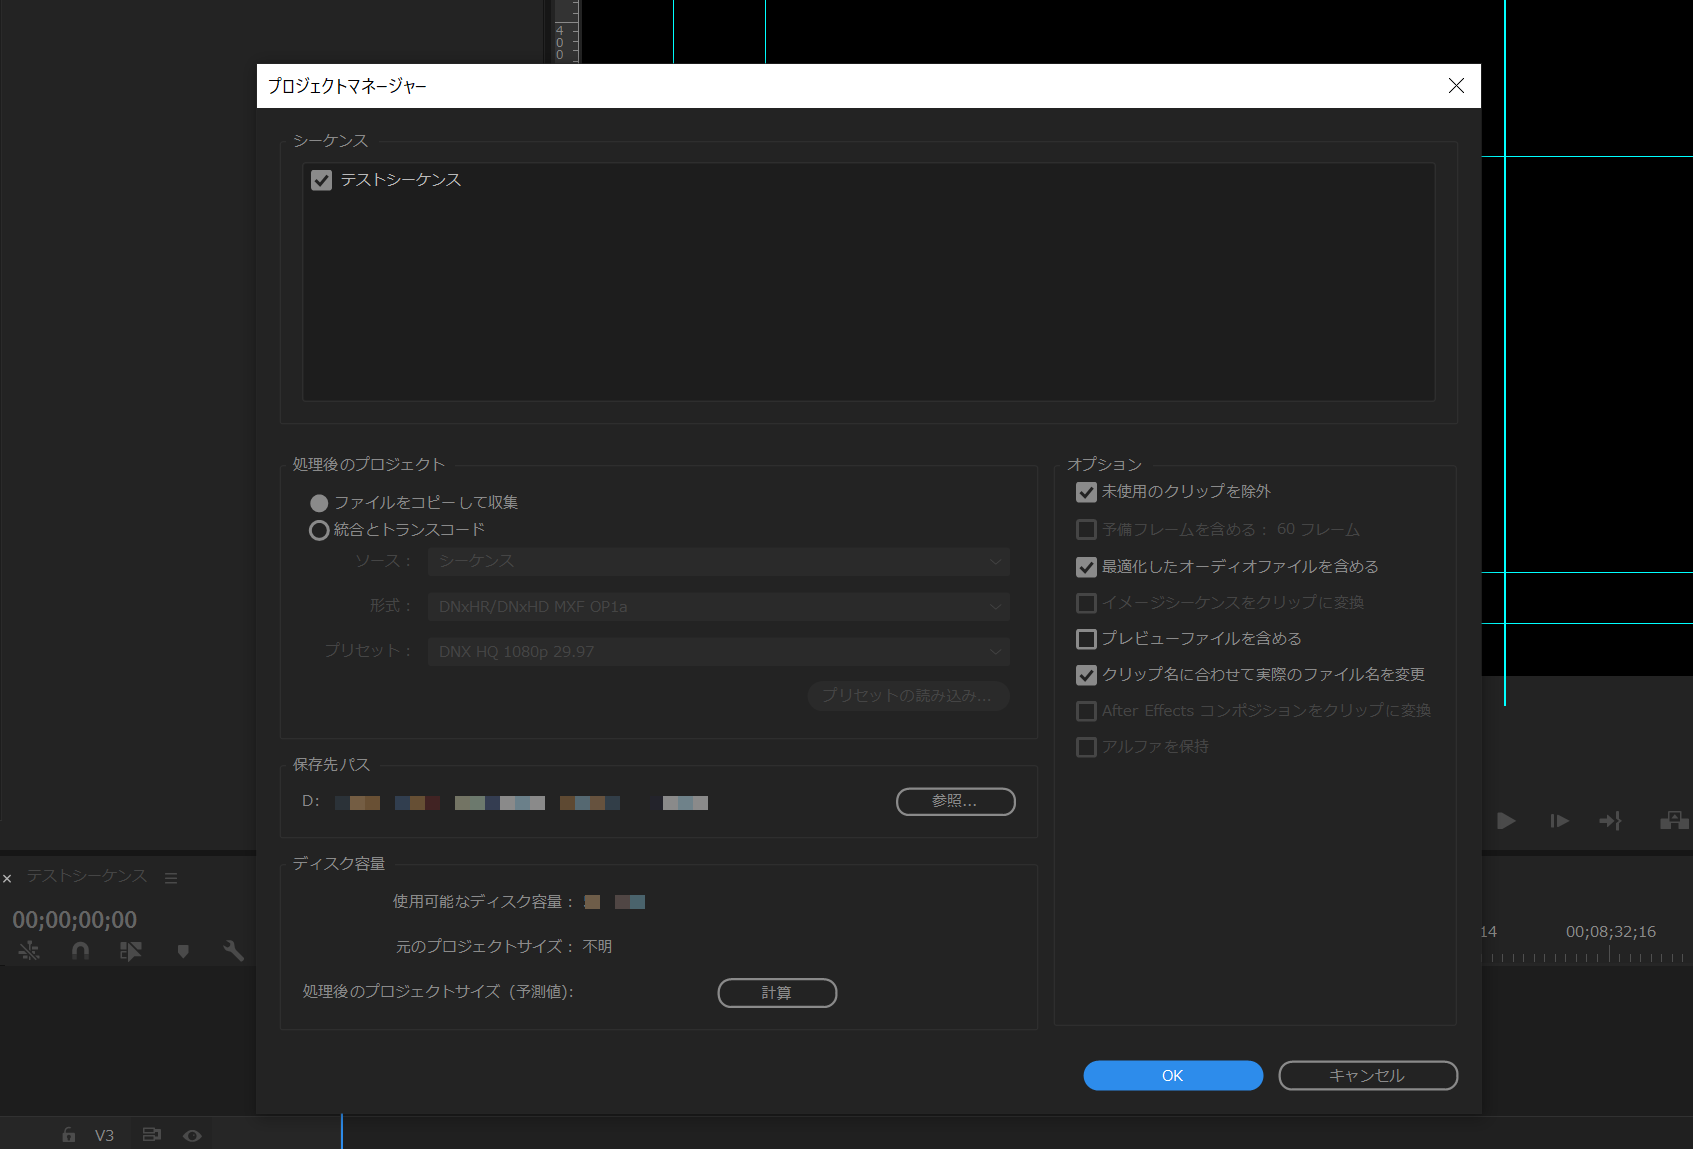
The Project Manager window offers the following settings:
- Sequences: Select the sequences to archive (typically the final version).
- Resulting Project:
- Collect Files: Copies all asset files (video, images, audio) used in the project to a specified location. [Recommended]
- Consolidate: Converts and consolidates assets into new files with a specified codec (rarely used).
- Options:
- Exclude Unused Clips: Excludes assets imported into the project panel but not used in the final timeline, saving archive space. [Recommended]
- Other options include audio conform, preview file copying, etc.
- Destination Path: Specify the folder for the archive. An external HDD is recommended.
After configuring and clicking "OK," a new folder is created at the specified location containing a new project file (.prproj) and only the asset files used in that project.
[Benefits of Using Project Manager]
- Prevent broken media links: Avoids "media offline" errors when reopening the project later, since all necessary assets are consolidated in one folder.
- Save storage space: Excluding unused clips reduces the disk space needed for the archive.
- Reliable backup and delivery: Useful for creating complete project backups or delivering the full project package to clients.
[Recommended Workflow]
- Complete the video edit and get client approval.
- Keep the original editing project files for a few weeks to a month as a precaution (in case of urgent revision requests).
- After that period, run "Project Manager" with "Collect Files" and "Exclude Unused Clips" to create an archive (preferably on an external HDD).
- After confirming the archive was created successfully, delete the project files and large asset files from your local drive (to free up storage).
- Set a retention policy for archive folders (e.g., keep for 6 months to 1 year, then delete).
Using Project Manager this way lets you manage past projects safely and efficiently, and respond smoothly to future revision requests.