After about 4 years of using my custom-built PC, I started noticing some concerning behaviors:
- Opening folders or displaying files in Explorer was taking unusually long.
- During file operations like renaming, the display would briefly reset (frustratingly committing the input mid-edit).
- Occasionally the entire PC would briefly freeze, with the Windows taskbar and other elements appearing to reload.
I tried memory diagnostics, GPU driver updates, and deleting unnecessary files, but nothing helped. I was starting to think "Maybe it's time for a new PC..." But before giving up, I decided to check the state of my C drive -- the heart of the PC.

Bright red! Less than 5% free space remaining -- a danger zone.
Generally, it's recommended to keep at least 10-15% free space on the C drive where Windows is installed. When free space is extremely low, it can interfere with Windows temporary file creation, paging file (virtual memory) allocation, and system updates, leading to system instability, performance degradation, slower read/write speeds (especially on SSDs), and various other issues.
So I decided to tackle this storage shortage by cloning the entire contents of my current C drive (a ~500GB M.2 SSD) to a new, larger SSD (a 2TB 2.5-inch SSD) and swapping them. While the capacity expansion ultimately succeeded, I ran into a nasty Windows boot issue along the way that gave me quite a headache.
This article documents the specific steps for the SSD clone and replacement, the tools I used, and how I dealt with the boot error "0xc000000e" -- as a reference for anyone facing similar C drive capacity issues or considering an SSD replacement.
Preparation
Here are the main items and software I used for this SSD clone replacement:
-
New SSD: Silicon Power 2TB SSD 3D NAND A58 (2.5-inch SATA)
-
The destination SSD. Choose any capacity, form factor (M.2 NVMe, 2.5-inch SATA, etc.), and brand you prefer. I chose this one because it was on sale. Switching from M.2 to 2.5-inch is fine as long as your motherboard has a free SATA port.
-
-
SSD Cloning Software: Macrium Reflect Free
-
Software for copying (cloning) the entire contents of the original SSD to the new one. There are many options, but I chose this one because it was free and highly rated.
-
-
USB Drive: 16GB or larger
-
Used for recovery if Windows fails to boot after the replacement. Needed to create Windows installation media. [Important] I strongly recommend creating this beforehand.
-
-
Partition Management Software: Paragon Hard Disk Manager 15 (or equivalent)
- Used after the replacement to adjust (expand) the partition size so the new SSD's full capacity is available for the C drive. Windows' built-in "Disk Management" can also do this, but dedicated software offers more flexible operations. I used software I already had, but free partition management tools are also available.
-
SATA-to-USB Adapter Cable/Enclosure (optional):
- Needed if you're doing the clone via USB before installing the new SSD internally. Not needed if you can connect it directly inside the PC.
You can use different SSDs and software than those listed above. Choose based on your setup and budget. However, I recommend creating Windows installation media in advance, just in case of boot issues.
*BCD (Boot Configuration Data) is a file that stores configuration information needed for Windows to boot (such as which disk to boot the OS from). If boot errors occur after an SSD replacement, one possible cause is that the BCD information no longer matches the new environment.
Step 1: Creating the SSD Clone
First, clone (copy) the entire contents of your current C drive to the new SSD.
-
Connect the new SSD to your PC. (Use a SATA-to-USB adapter or connect to a free internal port)
-
Launch the cloning software (Macrium Reflect Free in this case).
-
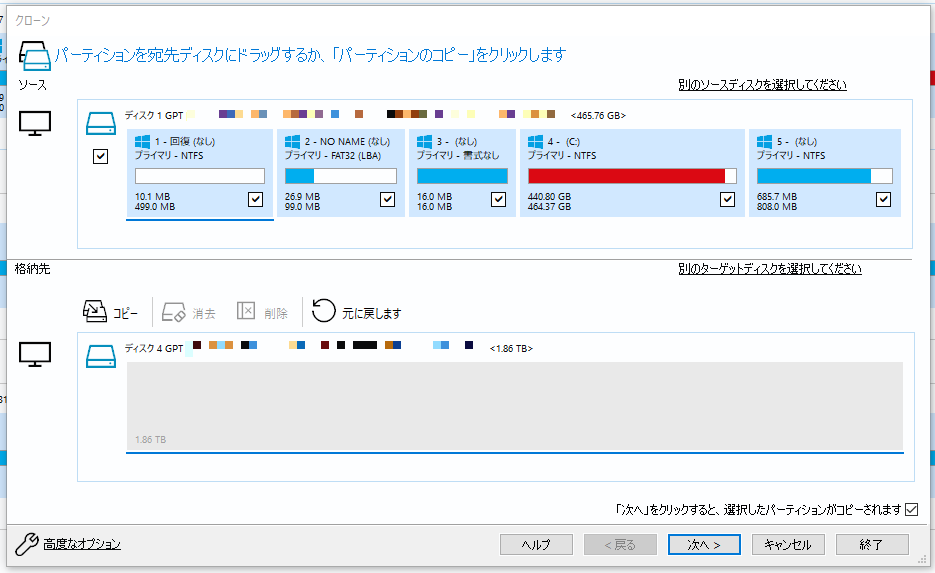
Follow the software's instructions to select the source drive (current C drive) and destination drive (new SSD), and start the clone process.
(For detailed steps, the reference article by combat-travor mentioned above is very helpful.)
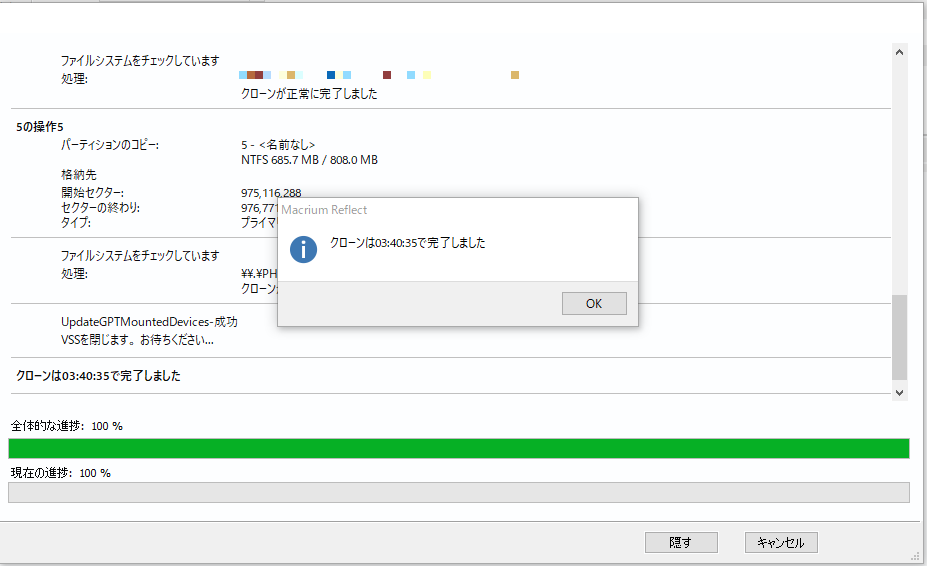
In my environment, cloning the C drive with about 450GB of data took approximately 3 hours and 40 minutes. The time varies significantly depending on your setup and data volume.
[Tip] Partition Size During Cloning
Some cloning software lets you specify the destination partition size. Generally, it's safest to clone at the same size as the source. Leave the remaining capacity on the new SSD as "unallocated" space at the time of cloning. This unallocated space will be merged with the C drive later in Step 4.
The recommended approach is to set the partition size to match the original drive during cloning. Leave the remaining space on the larger SSD as "unallocated" for now.
After cloning is complete, verify using Windows' "Disk Management" (diskmgmt.msc) or partition management software that the new SSD has the same partition structure as the original C drive, with the remainder as unallocated space.

(The original C drive contents have been copied, with the remainder shown as unallocated)
Step 2: Creating Installation Media
Ideally, Windows would boot right up after the SSD swap, but boot errors can occur depending on your environment. In my case, I got the following blue screen error:

Error code "0xc000000e" typically occurs when Windows cannot access the boot device (in this case, the new SSD) or when there's a problem with the Boot Configuration Data (BCD).
To repair this error, you need to launch Command Prompt from the Windows Recovery Environment. For this, create Windows installation media (USB drive) in advance.
-
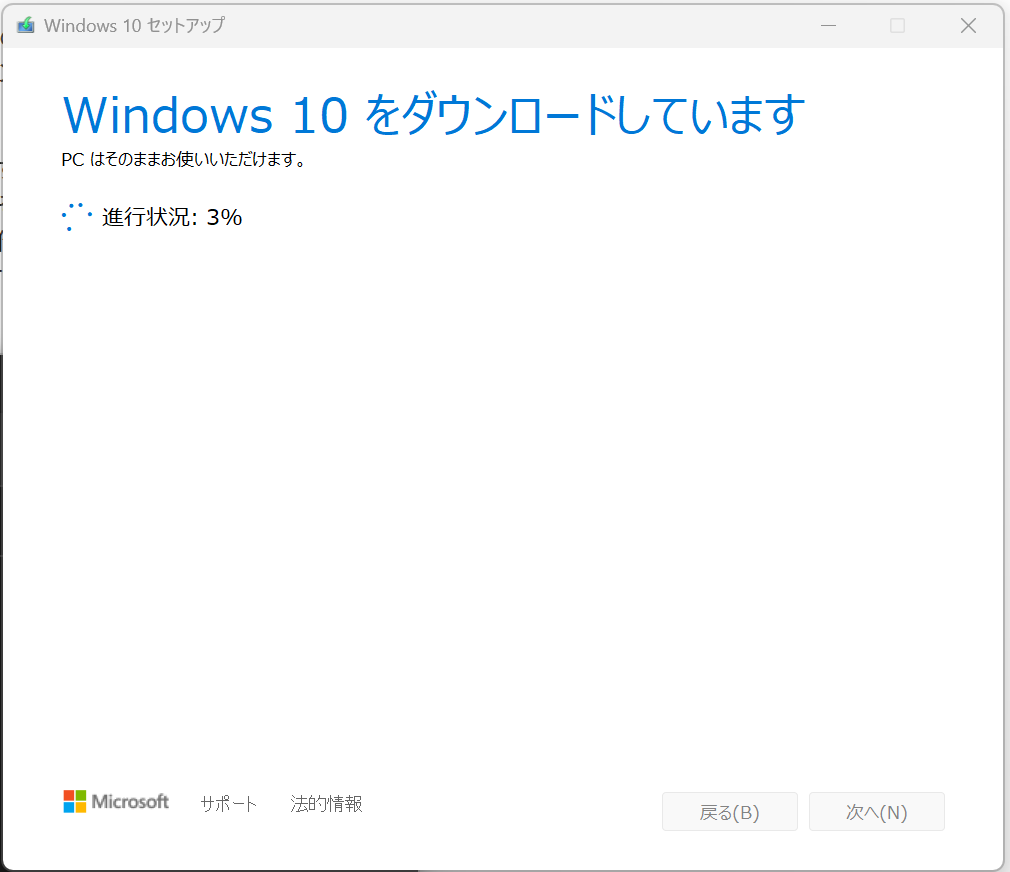
Download the "Media Creation Tool" from Microsoft's official website.
-
Connect a blank USB drive (16GB or larger) to your PC.
-
Run the downloaded Media Creation Tool and follow the on-screen instructions to select "Create installation media for another PC (USB flash drive, DVD, or ISO file)" and create the installation media on the USB drive.
With this USB drive, you can perform repair operations even if Windows won't boot.
Step 3: SSD Installation and Boot Error Resolution
Once the cloning and installation media creation are done, it's time for the actual SSD swap.
-
Completely power off the PC and unplug the power cable.
-
Open the PC case, remove the old SSD (original C drive), and install the new SSD (the cloned one). (Don't forget anti-static precautions!)
-
Close the PC case, connect the power cable, and turn on the PC.
-
Immediately after powering on (while the manufacturer logo is displayed), press the designated key (usually DEL or F2) to enter the BIOS (UEFI) settings screen.
-
In the BIOS settings, find the "Boot" menu and check the boot priority (Boot Options / Boot Priority). Verify that the newly installed SSD is recognized as "Windows Boot Manager" and is set as the first boot priority. (If it's not recognized or has a low priority, change the settings.)
-
Save the settings and exit BIOS to restart the PC.
[Trouble] BIOS recognizes the drive but 0xc000000e error prevents booting!
This was the biggest hurdle in my case. Despite the BIOS correctly recognizing the new SSD as the boot drive, attempting to boot Windows would produce the blue screen error "0xc000000e."
Initially, I suspected a failed clone and re-cloned using different software (Paragon), but the result was the same.
[Solution] Boot from Windows Installation Media and Rebuild the BCD
Ultimately, I resolved the issue by following these steps using the Windows installation media (USB drive) created in Step 2. This process repairs and rebuilds the Windows Boot Configuration Data (BCD).
-
With the PC powered off, connect the Windows installation media (USB drive).
-
Power on the PC and immediately enter the BIOS settings.
-
Change the boot priority to make the USB drive first, then save and restart.
-
When the Windows Setup screen boots from the USB drive, select "Repair your computer" > "Troubleshoot" > "Advanced options" > "Command Prompt."
-
In Command Prompt, execute the following commands in order. These repair the boot sector and rebuild the BCD. (See the reference articles below for detailed procedures.)
bootrec /fixmbrbootrec /fixboot(see note below)bootrec /scanosbootrec /rebuildbcd
(In some cases, you may also need to assign a drive letter to the EFI partition using the
diskpartcommand.)
[Note] "Access is denied" error with bootrec /fixboot
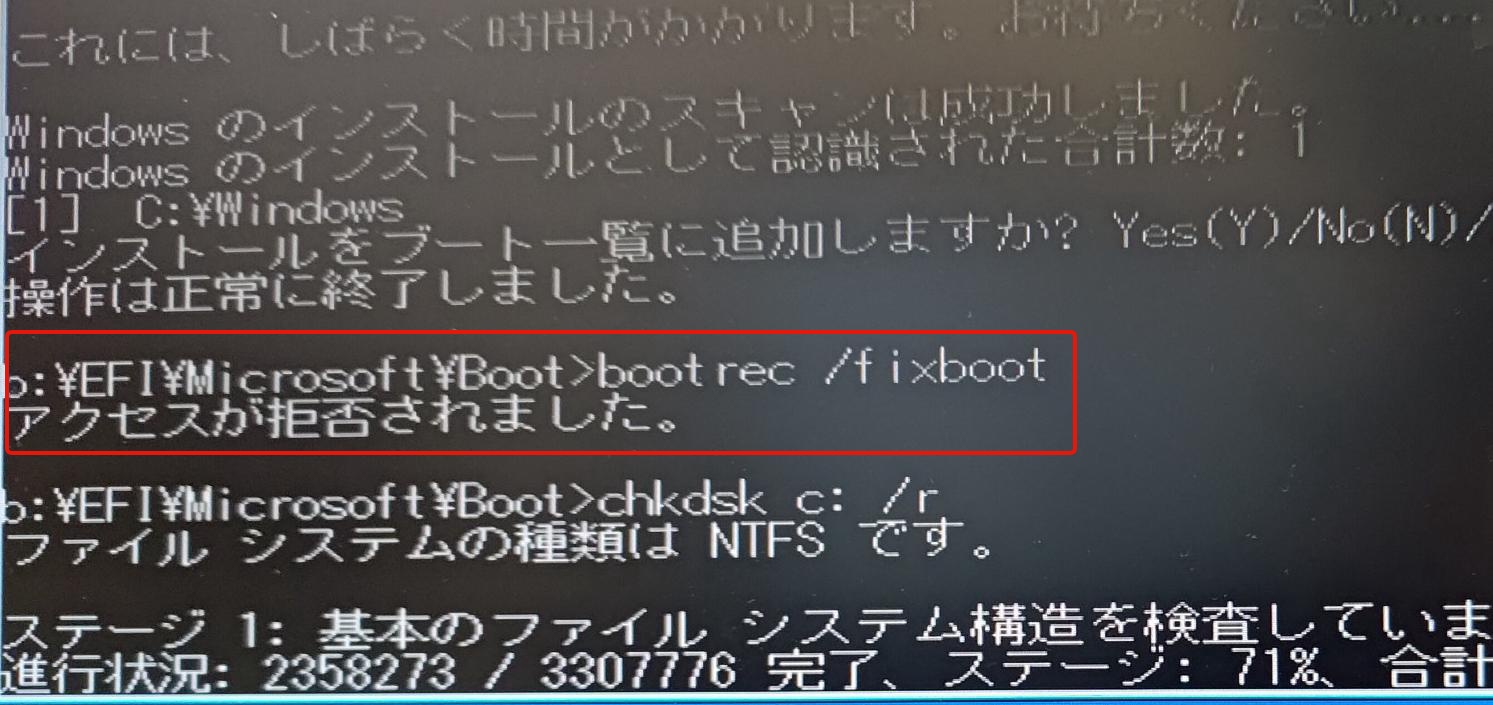
During the command execution, you may encounter an "Access is denied" error with bootrec /fixboot. This appears to be a common issue with recent Windows versions (especially when installed in UEFI mode).
In my case, I ignored this error and proceeded to execute bootrec /scanos and bootrec /rebuildbcd, which ultimately allowed Windows to boot successfully. The fixboot command is primarily used for repairing older MBR-format disks, and in UEFI environments, it may not be necessary or may require alternative steps (like EFI partition manipulation using diskpart).
If you encounter this error and Windows still won't boot after running rebuildbcd, you may need to try additional solutions described in the reference articles below.
Once the BCD rebuild succeeds, exit Command Prompt and restart the PC -- Windows should now boot from the new SSD!
Step 4: Partition Expansion
Once Windows boots successfully, it's time for the final step. Currently, the new SSD only has a partition the same size as the original C drive, with the remaining large capacity sitting as "unallocated" space. We need to merge this unallocated space with the C drive so the SSD's full capacity is usable.
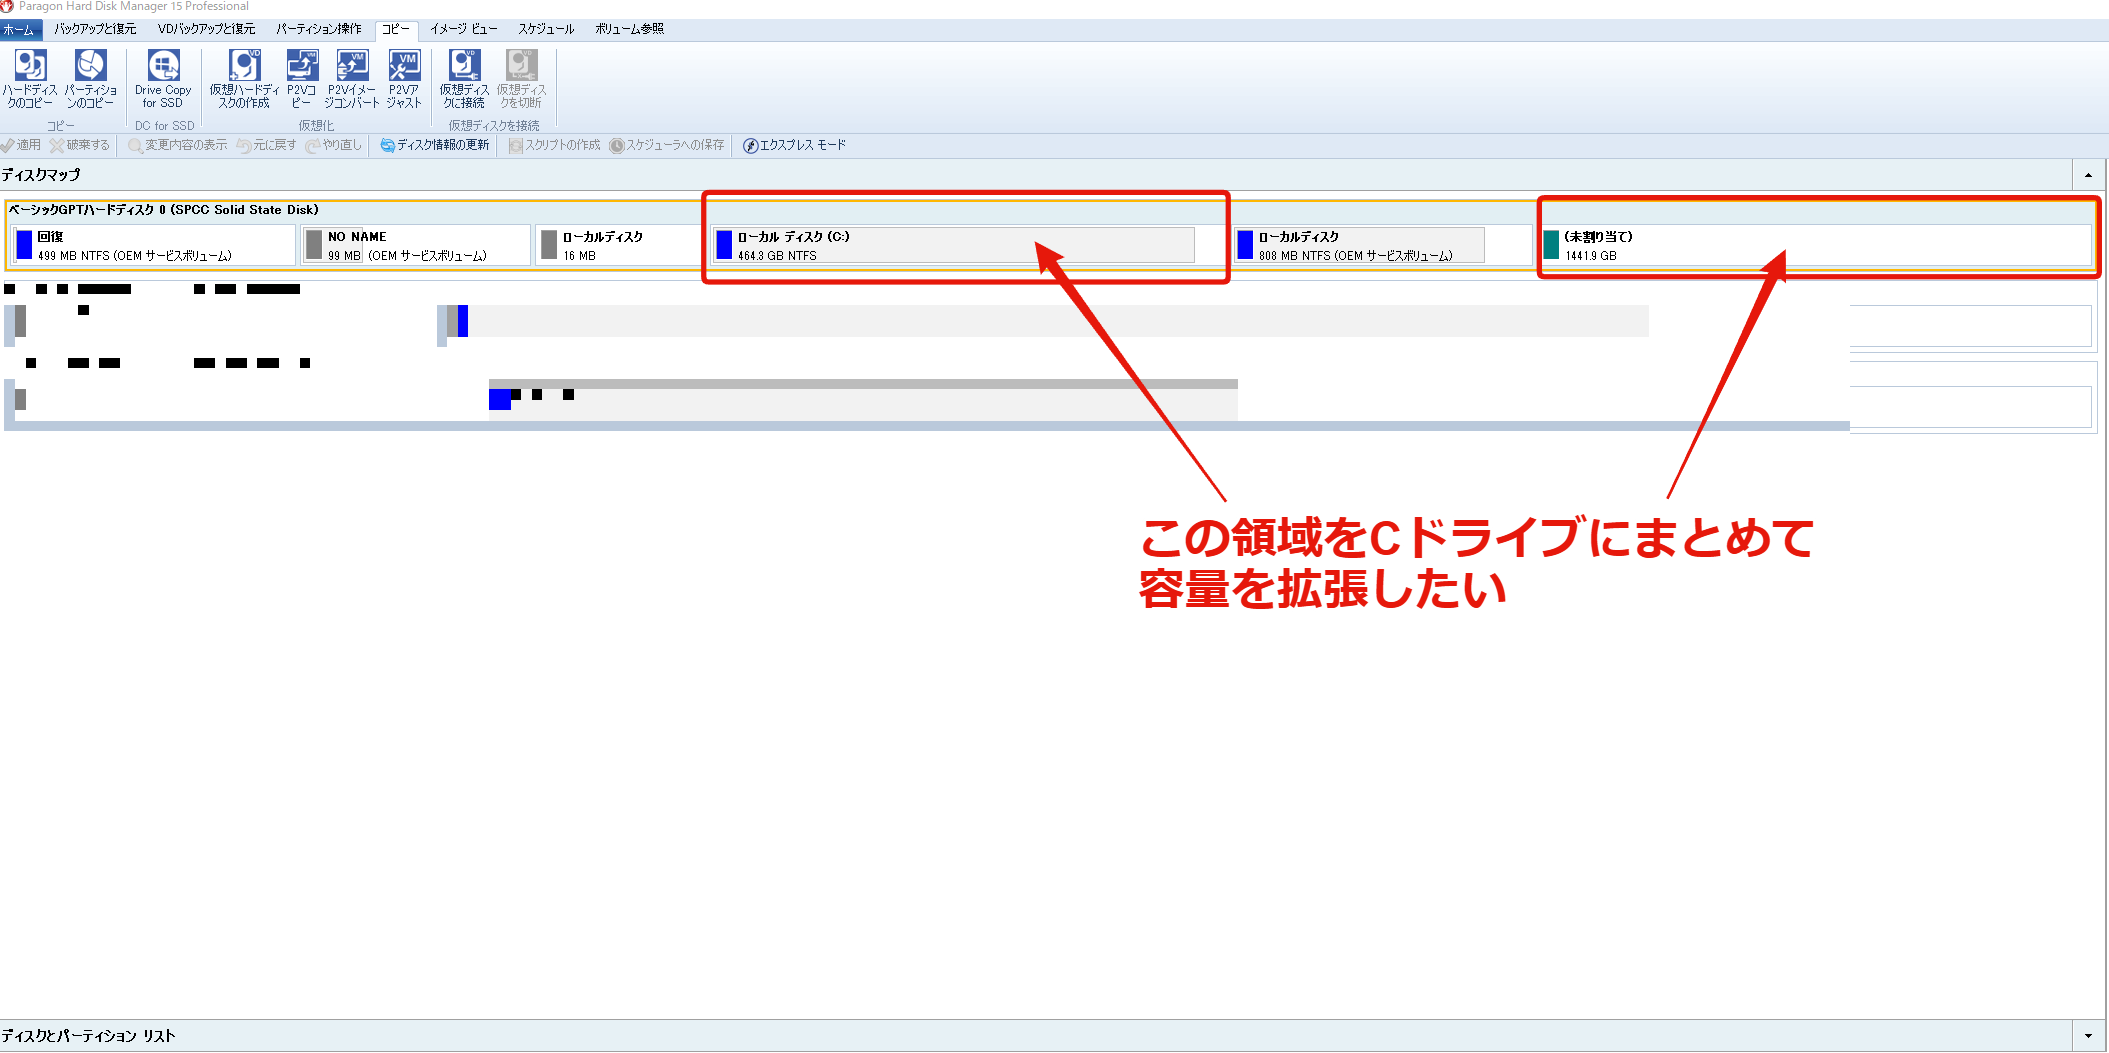
This can be done with Windows' built-in "Disk Management," but if a recovery partition or similar is sandwiched between them, expansion may not be possible. Using dedicated partition management software is more reliable.
I used "Paragon Hard Disk Manager 15," which I already had. Select a feature like "Resize/Move Partition," select the C drive partition, and expand it to absorb the unallocated space behind it, maximizing the size.
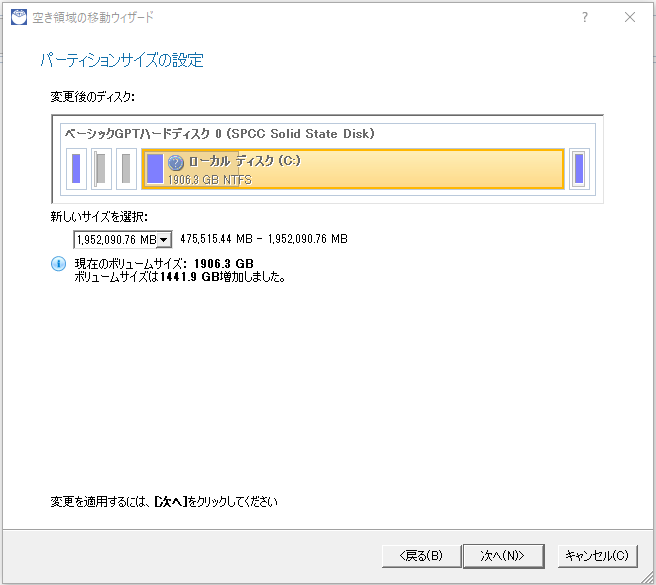
After applying the settings, the PC usually requires a restart, and the partition change is processed on a pre-Windows boot screen. Once the processing completes and Windows boots again, the C drive capacity should be expanded to the new SSD's maximum capacity (approximately 2TB in this case).
Replacement Complete and Results
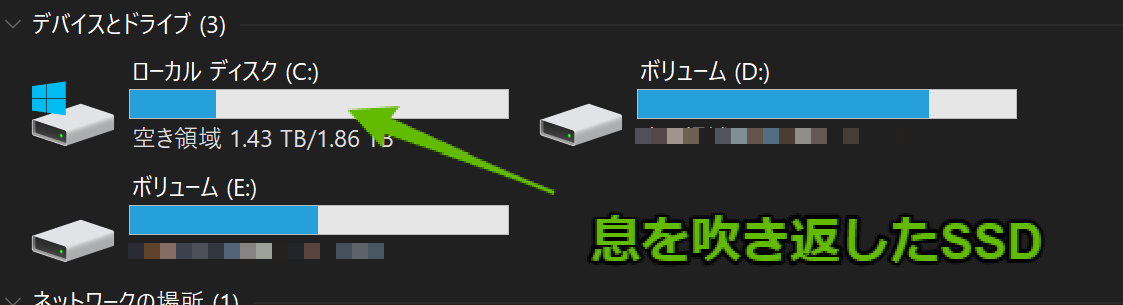
After going through all these steps, I successfully replaced the C drive SSD from 500GB to 2TB, dramatically expanding the capacity!
With sufficient free space on the C drive (over 15%), all the PC issues I'd been experiencing -- Explorer slowdowns, display redraws, brief freezes -- disappeared as if by magic. Indeed, insufficient C drive free space has a significant impact on system stability. Don't ignore a red drive indicator; address it early (whether by deleting unnecessary files or expanding capacity like I did).
SSD clone replacement isn't overly complicated in terms of procedure, but boot issues can arise depending on your environment. UEFI environments in particular seem prone to BCD-related problems. I hope the troubleshooting described in this article helps anyone facing the same issue. (Please note: all operations are at your own risk.)