Sometimes your VRChat avatar ends up with a "Very Poor" performance rank. Very Poor avatars may be hidden in certain worlds or cause performance issues for other users, so optimization is generally recommended where possible.
In this post, I used the Unity tools "Mantis LOD Editor" and "MeshDeleterWithTexture" to reduce my avatar's polygon count, successfully improving the performance rank from "Very Poor" to "Poor." Here's a record of the process and methods used.
Optimization Results: Before and After
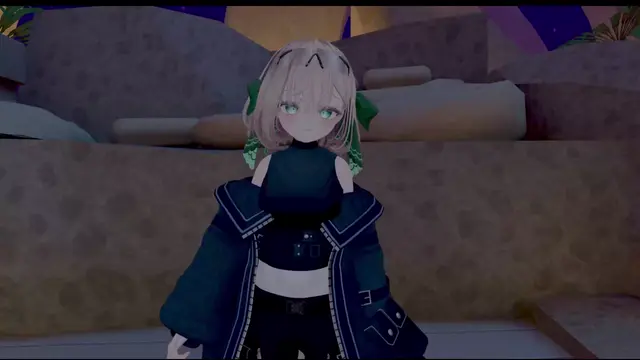
Before: 188,784 polygons / Performance Rank: Very Poor
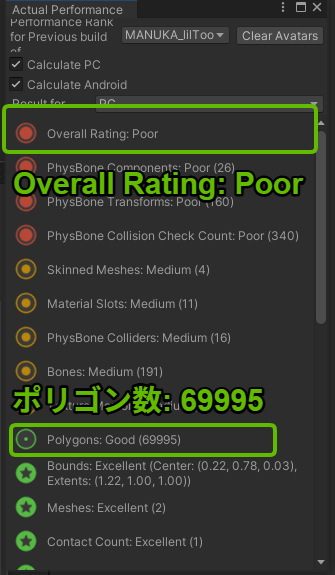
After: 69,995 polygons / Performance Rank: Poor
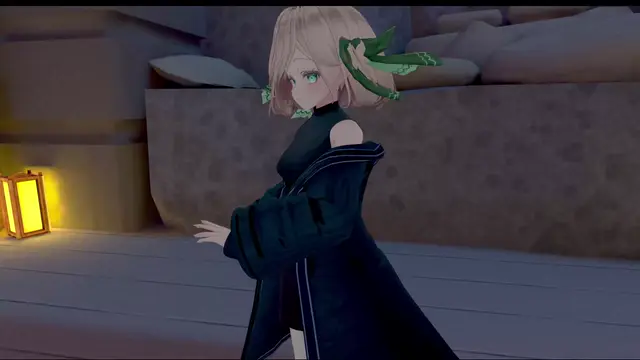
As shown, the polygon count was reduced by 63% while keeping visual impact to a minimum.
[Before you read: a note on expectations]
This article documents the process of forcibly reducing a ~190,000 polygon high-end model to under 70,000. Honestly, after going through the process, I questioned whether this level of reduction was really necessary.
In practice, keeping a separate lightweight avatar for performance-critical situations is more realistic. That said, this guide is useful as a reference for understanding polygon reduction techniques, or for more modest optimizations (e.g., 100K to 70K polygons). Read it as a learning experience!
Here are the specific methods I used to effectively reduce polygon count. These techniques are also valuable for avatar customization and original model creation:
- Removing hidden parts: Deleting body mesh that's invisible under clothing (e.g., elbows)
- Mantis LOD Editor reduction: Reducing polygon counts on individual parts (clothes, hair, accessories) to the limit before visual quality breaks down
- MeshDeleterWithTexture partial deletion: Removing unnecessary clothing decorations or hidden mesh by specifying texture regions
- (Advanced) Part separation with MeshDeleter: Splitting combined parts (e.g., inner + outer clothing as one object) to optimize them individually
This article walks through each step in order.
Required Tools and Setup
Here are the main tools used for this VRChat avatar optimization (polygon reduction):
-
Mantis LOD Editor - Professional Edition (Unity Asset Store / Paid: ~$55)
- A well-established Unity asset with high-quality polygon reduction (decimation) capabilities. Efficiently reduces polygon counts on individual avatar parts. After purchase, import it via Unity's PackageManager > My Assets.
-
Non-Destructive Polygon Reduction: NDMF Integration for Mantis LOD Editor (Booth: by Hitsubu / Free *Requires Mantis LOD Editor)
- A tool that lets you use Mantis LOD Editor within the "NDMF" framework, widely used for VRChat avatar modification, in a safer and simpler (non-destructive) way. Download from Booth and import the unitypackage. This is what you'll actually apply to your avatar.
-
MeshDeleterWithTexture beta (Booth: by Gatosyocora / Free)
- An incredibly useful Unity editor extension that lets you delete mesh regions by painting on a texture image. Ideal for removing fine clothing decorations or hidden mesh that Mantis can't easily handle. Download from Booth and import the unitypackage.
-
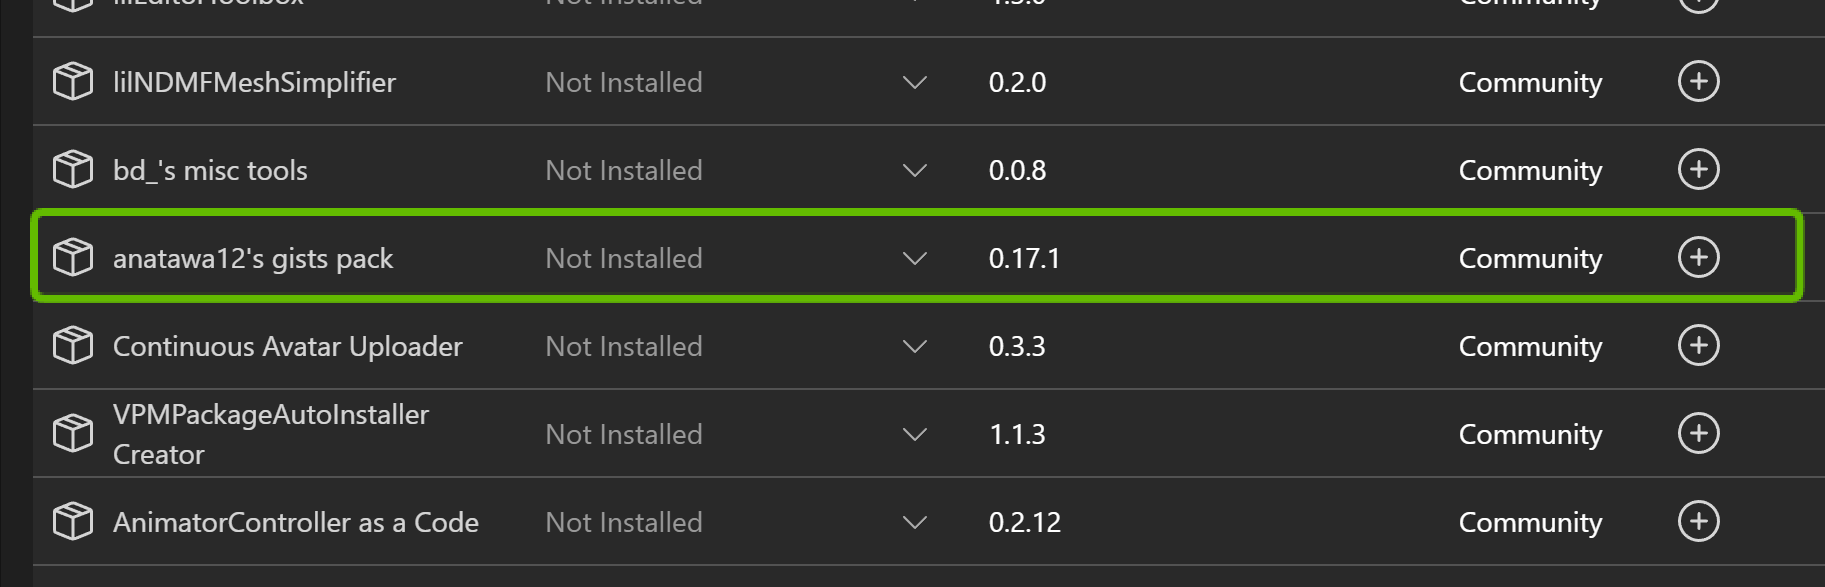
anatawa12's VRC Avatar Tools (formerly: gists pack) (Install via VCC)
- A toolkit that includes detailed avatar performance statistics. The "Actual Performance" tab is essential for monitoring current polygon counts and performance rank in real-time during optimization. Easily added via VCC (VRChat Creator Companion) under "Manage Project."
[Important] How to check with the Actual Performance tab:
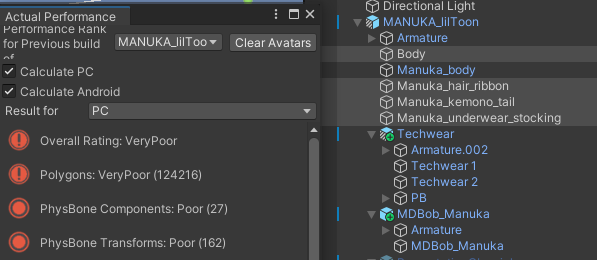
After installing anatawa12's VRC Avatar Tools, a new "Avatars" tab appears in the VRChat SDK Control Panel with an "Actual Performance" section. After applying Mantis or MeshDeleter optimizations, enter Play Mode in Unity to update these stats and confirm your current polygon count and performance rank. The goal is to get the "Polygons" value below 70,000 (the Poor rank threshold).
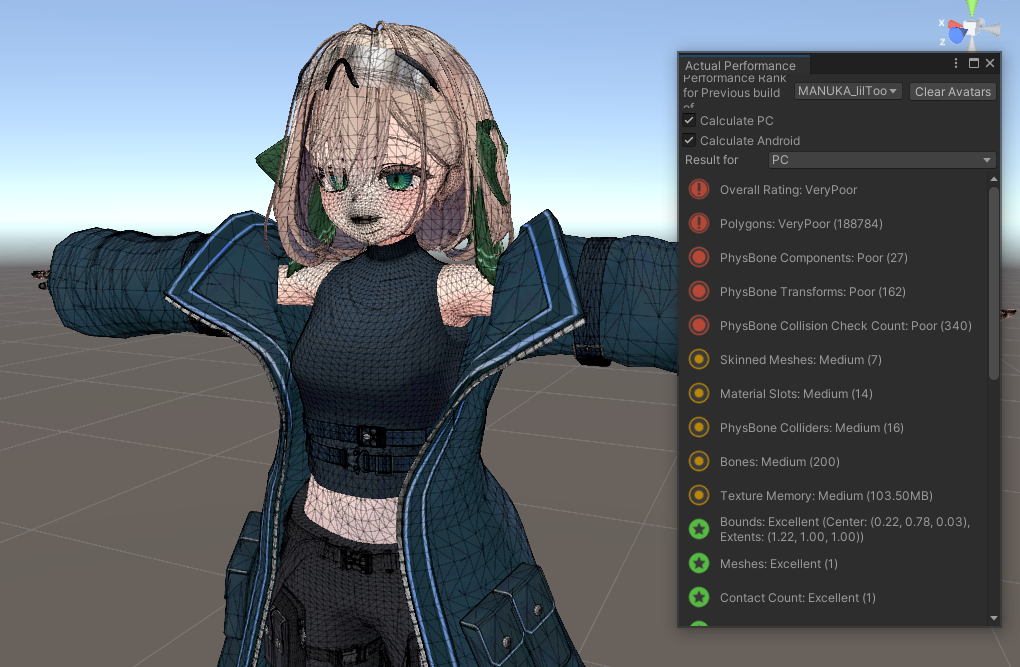
(In this example: 188,784 polygons = Very Poor. Target: under 70,000!)
Useful Terminology
Here are some terms that will help you understand the optimization process:
-
Non-Destructive An editing approach that doesn't modify the original data directly. The NDMF version of Mantis and MeshDeleter both operate non-destructively, preserving the original mesh data. This means that if you make a mistake or don't like the results, you can simply remove the tool's component or revert the settings to easily restore the original state. This is a huge advantage that makes it safe for beginners to experiment.
-
NDMF (Non-Destructive Modular Framework) A framework for VRChat avatar modification. It manages various avatar settings and modifications as "components" that are automatically applied at build time. It pairs well with non-destructive workflows, and many useful tools support NDMF. The "NDMF Integration for Mantis LOD Editor" used in this guide is one of them.
Polygon Reduction with Mantis
Start by identifying which parts of your avatar are the biggest polygon offenders.
-
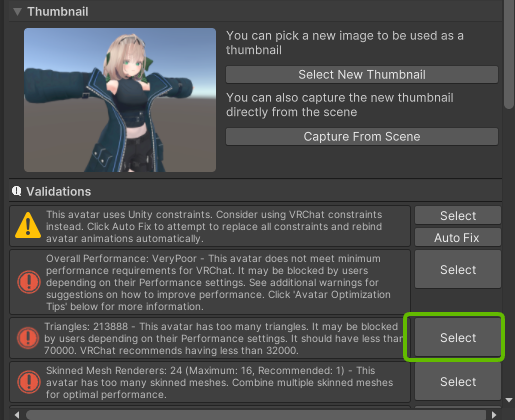
Open the VRChat SDK Control Panel in Unity and select the "Builder" tab.
-
With your avatar selected, attempt to build -- performance warnings (Validation Results) will appear. Click the "Select" button next to the "Polygons" warning message to highlight the meshes (clothing parts, etc.) with the highest polygon counts in the Hierarchy window.
-
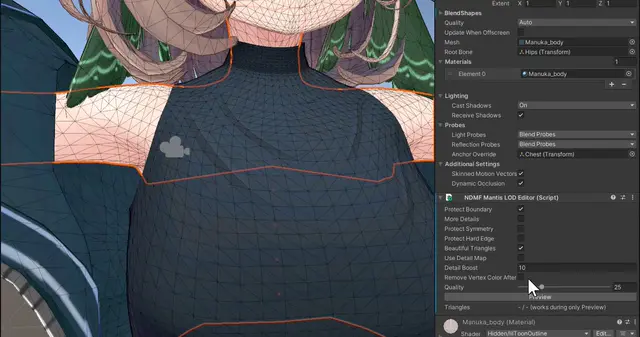
Add the "NDMF Mantis LOD Editor" component to the highlighted objects (clothing parts, etc.). In the Inspector window, click "Add Component" and search for "Mantis."
-
Adjust the "Quality" slider on the added component. Lowering this value reduces the polygon count, but going too far will cause the mesh shape to degrade.
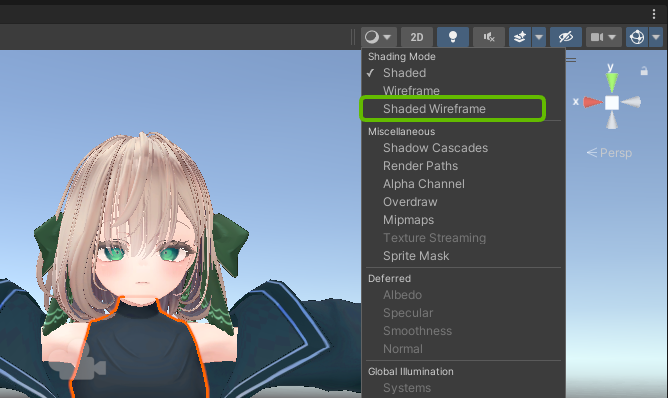
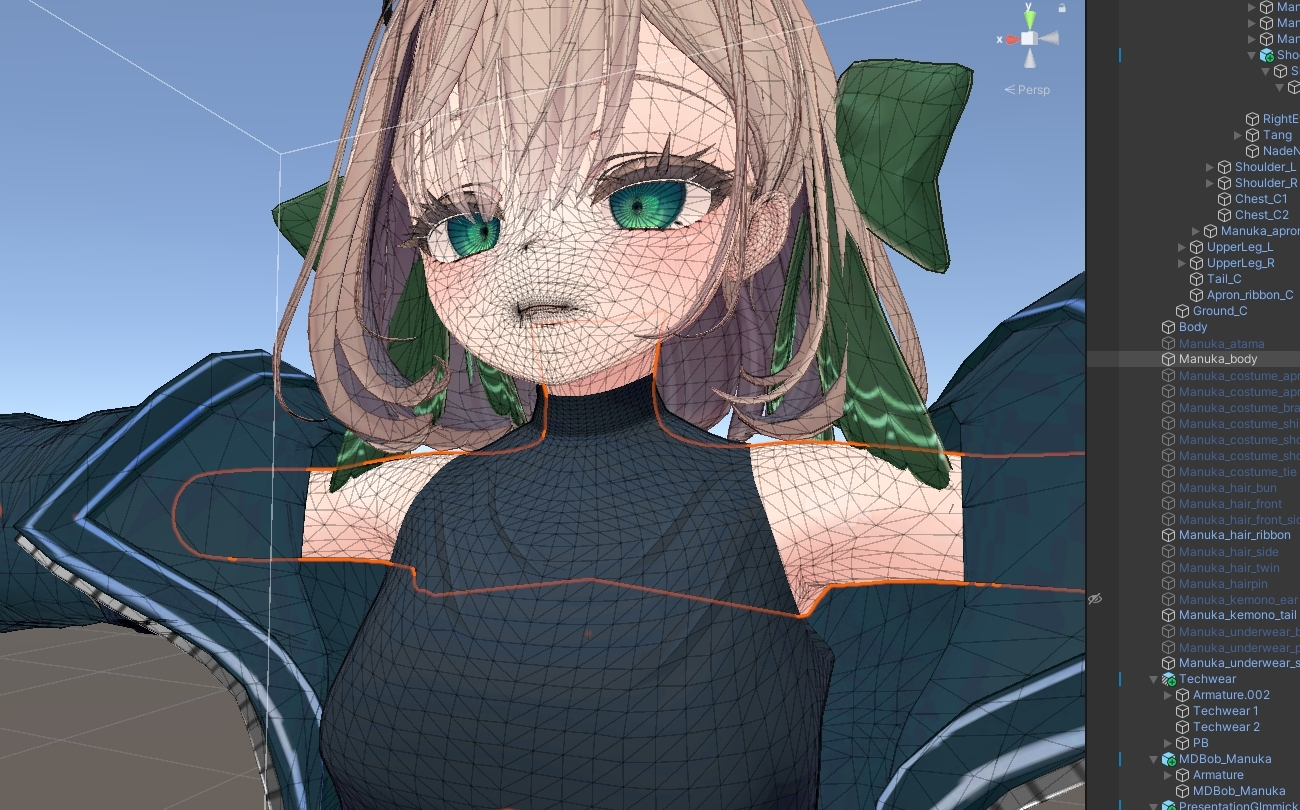
[Tip] Use Shaded Wireframe view
When adjusting the Quality slider, switch Unity's Scene view to "Shaded Wireframe" mode. This makes it easier to visually assess how much the polygons are being reduced and whether the mesh is degrading. Toggle between "Shaded" and "Shaded Wireframe" views to find the sweet spot that preserves visual quality.
The basic workflow is: identify high-polygon parts, add the component, and adjust Quality -- repeating this for each major part.
[Important] Delete Unused Parts Completely
When customizing avatars, it's tempting to keep old outfits or hairstyles "just in case" by simply hiding them in the Hierarchy. However, hidden meshes may still count toward the polygon total!
In my case, I had the original Manuka avatar's apron parts hidden but still present. Completely deleting them from the Hierarchy saved approximately 16,000 polygons.
Don't hesitate to delete parts you're not using. If you need them later, you can always reimport from the original avatar or outfit unitypackage.
(Reference: How to escape VeryPoor with just Unity | Kohada)
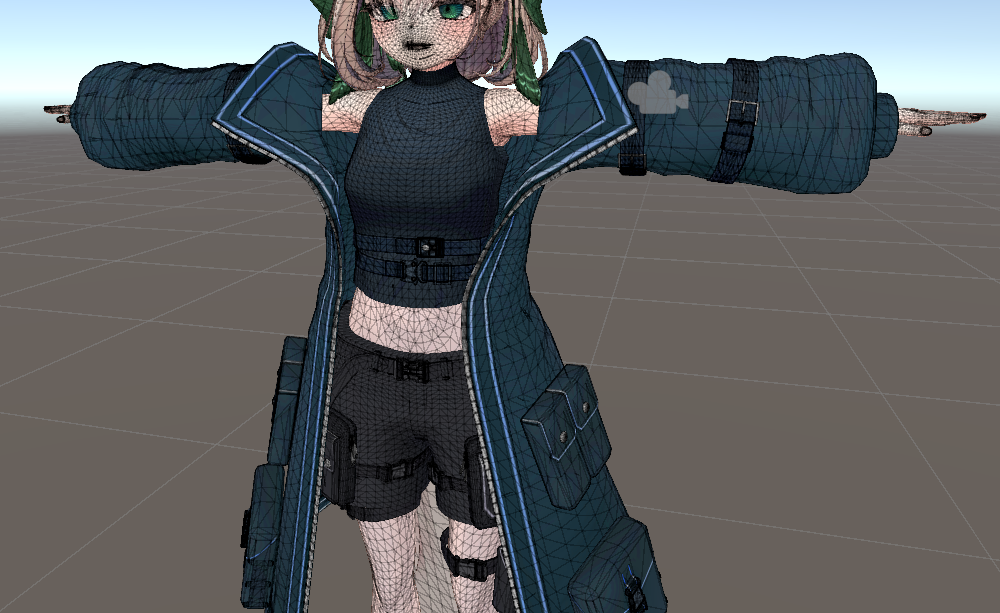
[Caution] Be Very Careful with Face and Body Polygon Reduction!
While Mantis is effective for polygon reduction, it's generally best to leave the "face" and "body" meshes untouched.
The face area in particular is composed of extremely fine polygons to support rich facial expressions. The mouth area needs various polygon configurations for lip sync shapes, and the eye area needs them for blinking and emotion expressions.
Carelessly reducing these areas with Mantis has a high risk of causing the mouth to break during speech or facial expressions to collapse entirely. Similarly, reducing body joint areas can result in unnatural appearances during poses.
Focus polygon reduction on clothing, hair, and accessories, keeping the face and body as close to their original state as possible.
[Decision] Sometimes Design Compromises Are Necessary
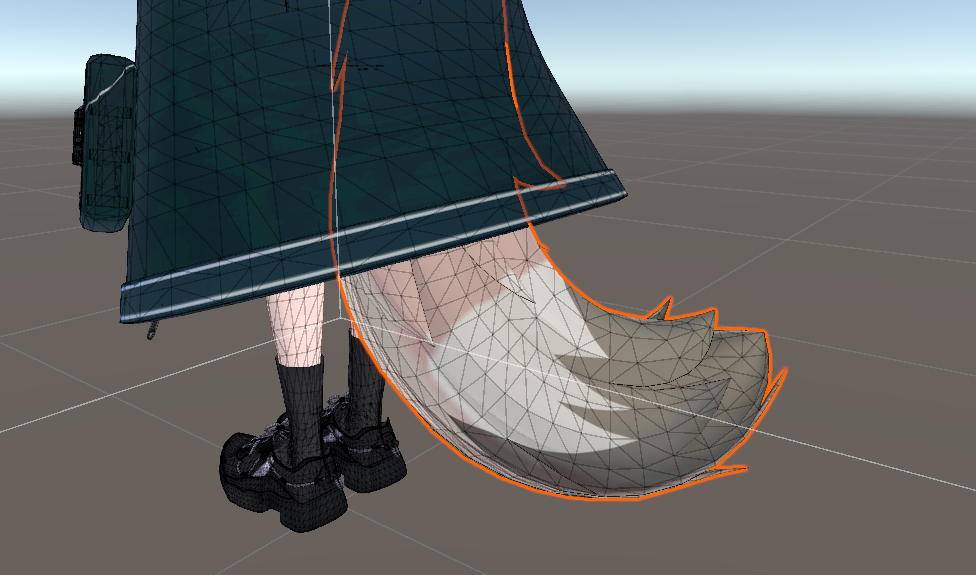
When you simply can't reach your target polygon count (70,000 for Poor rank), you may need to make the tough call of sacrificing part of the design.
For my avatar, I reduced the tail part's polygon count with Mantis to some degree, but it still wasn't enough to hit the target. Ultimately, I decided to remove the tail part entirely. It was disappointing, but sometimes these trade-offs are necessary for performance rank improvement.
Cases Where Mantis Alone Isn't Enough
Mantis LOD Editor is an excellent tool, but during the optimization process, several situations arose where Mantis alone wasn't sufficient or efficient:
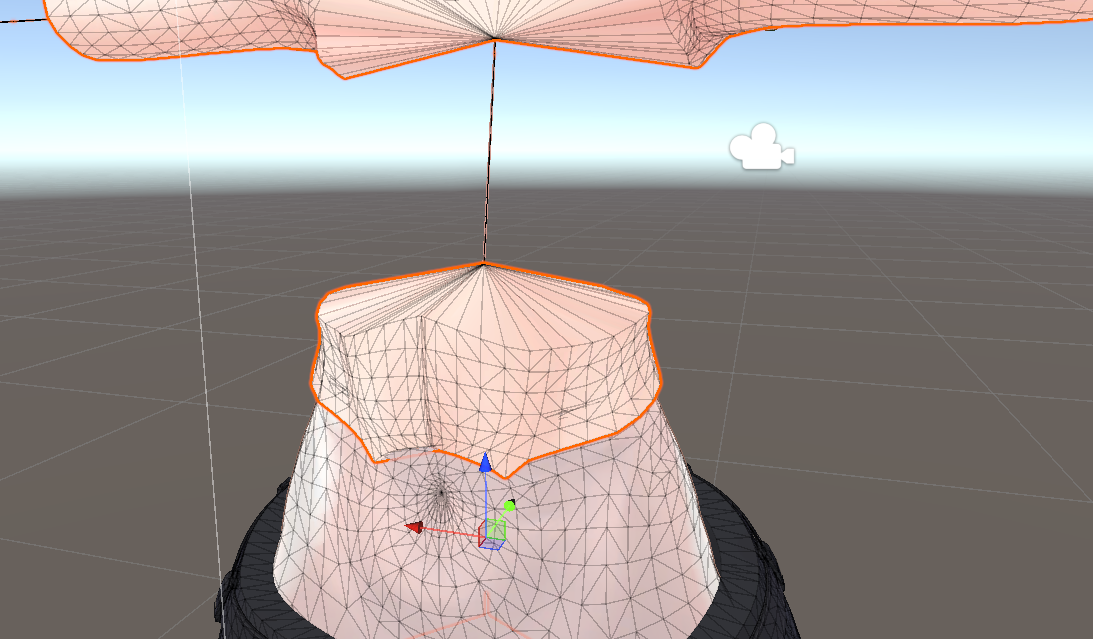
- Reduction limits on combined parts: When a single object contains multiple elements (e.g., inner and outer clothing fused together), reducing with Mantis causes the lower-polygon section (e.g., the inner layer) to degrade first, preventing adequate reduction of the higher-polygon section (e.g., the outer coat). Ideally, you'd separate the parts and reduce each individually.
- Remaining hidden mesh: Body mesh hidden under clothing (e.g., the stomach area) still counts toward polygon totals even when hidden. You want to delete just those concealed areas.
- Removing specific decorations: You want to remove just certain clothing details (pockets, belts, frills, etc.) to save polygons, but Mantis only offers global reduction.
This is where "MeshDeleterWithTexture beta" becomes invaluable.
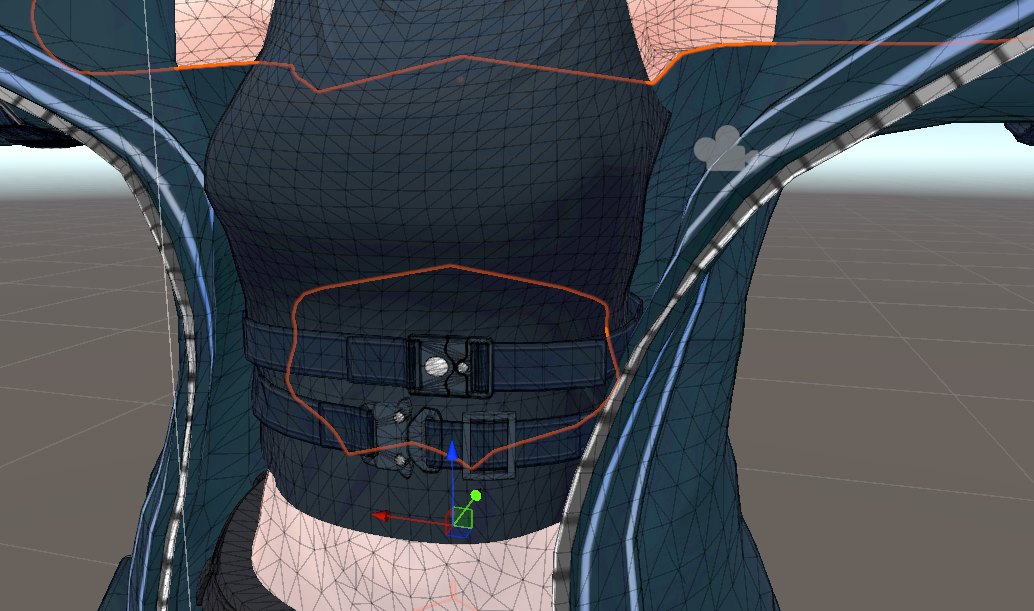
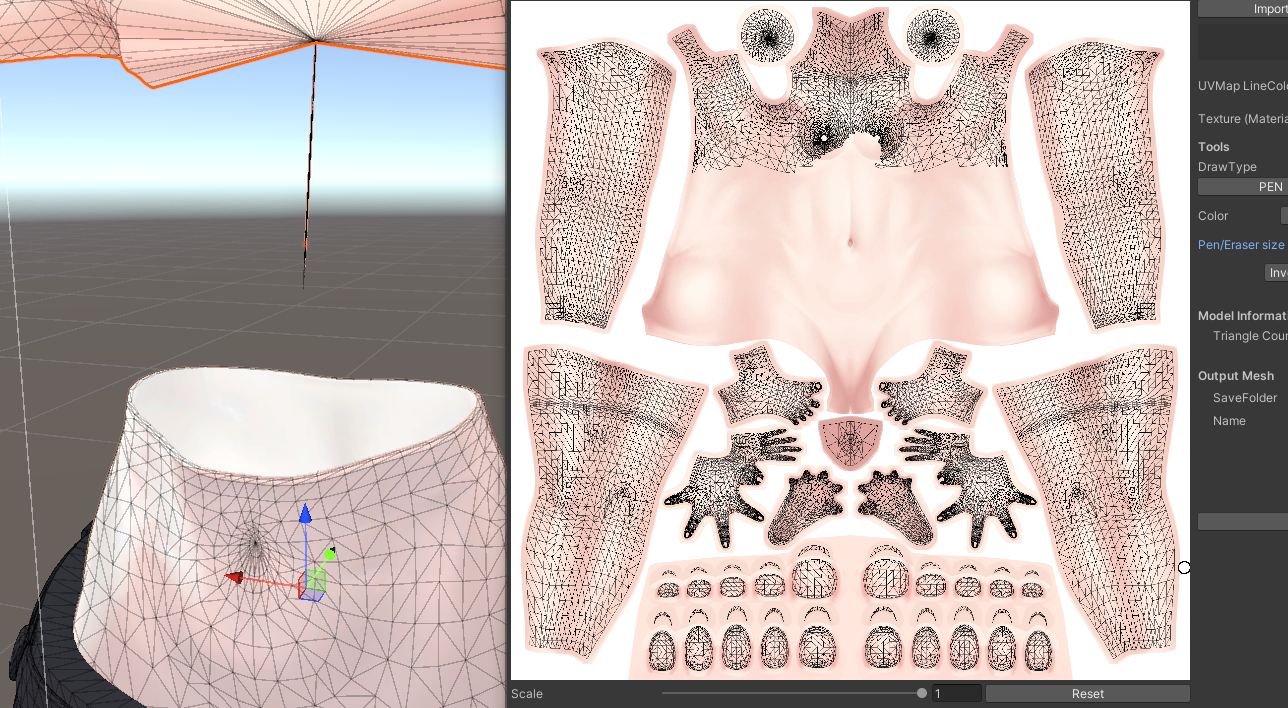
(For example, we want to delete this stomach mesh that's hidden under clothing.)
Partial Deletion with MeshDeleter
"MeshDeleterWithTexture beta" is a revolutionary tool that deletes mesh regions corresponding to areas you paint on a texture image (technically, it generates a new mesh with those areas removed).
The workflow is highly intuitive:
-
Download the unitypackage from Gatosyocora's Booth page and import it into your project.
-
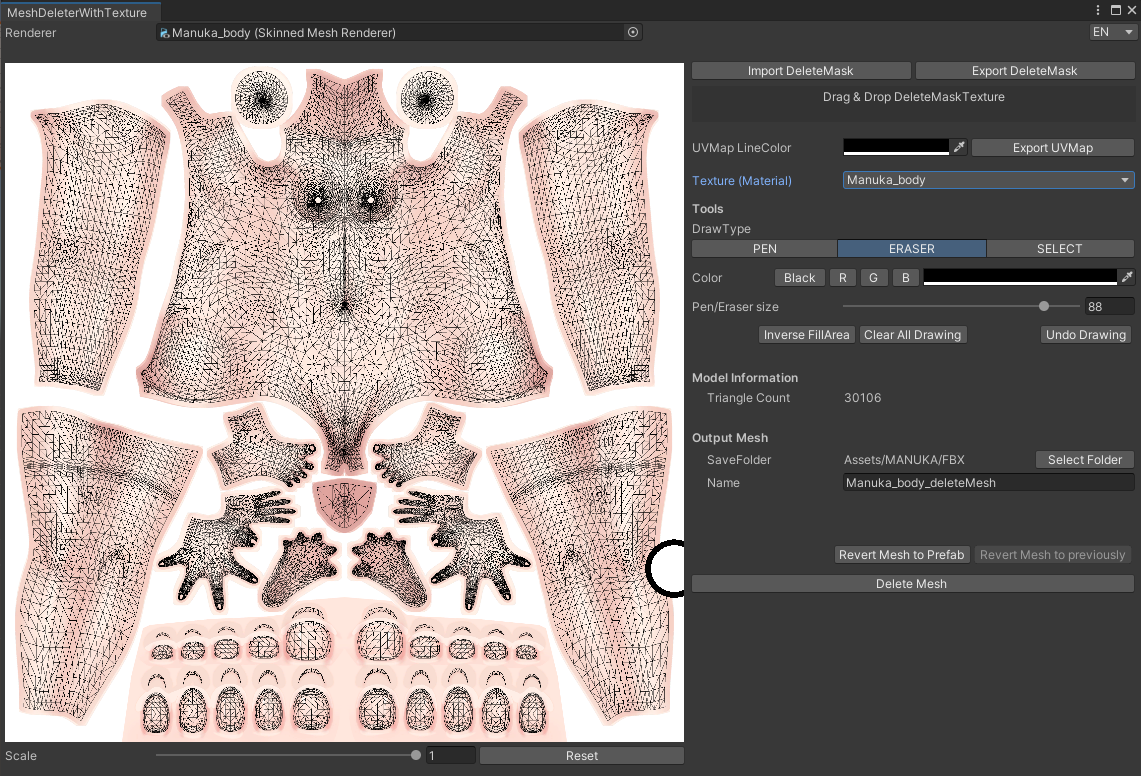
A "GotoTools" item appears in Unity's menu bar. Select "MeshDeleter with Texture" to open the tool window.
-
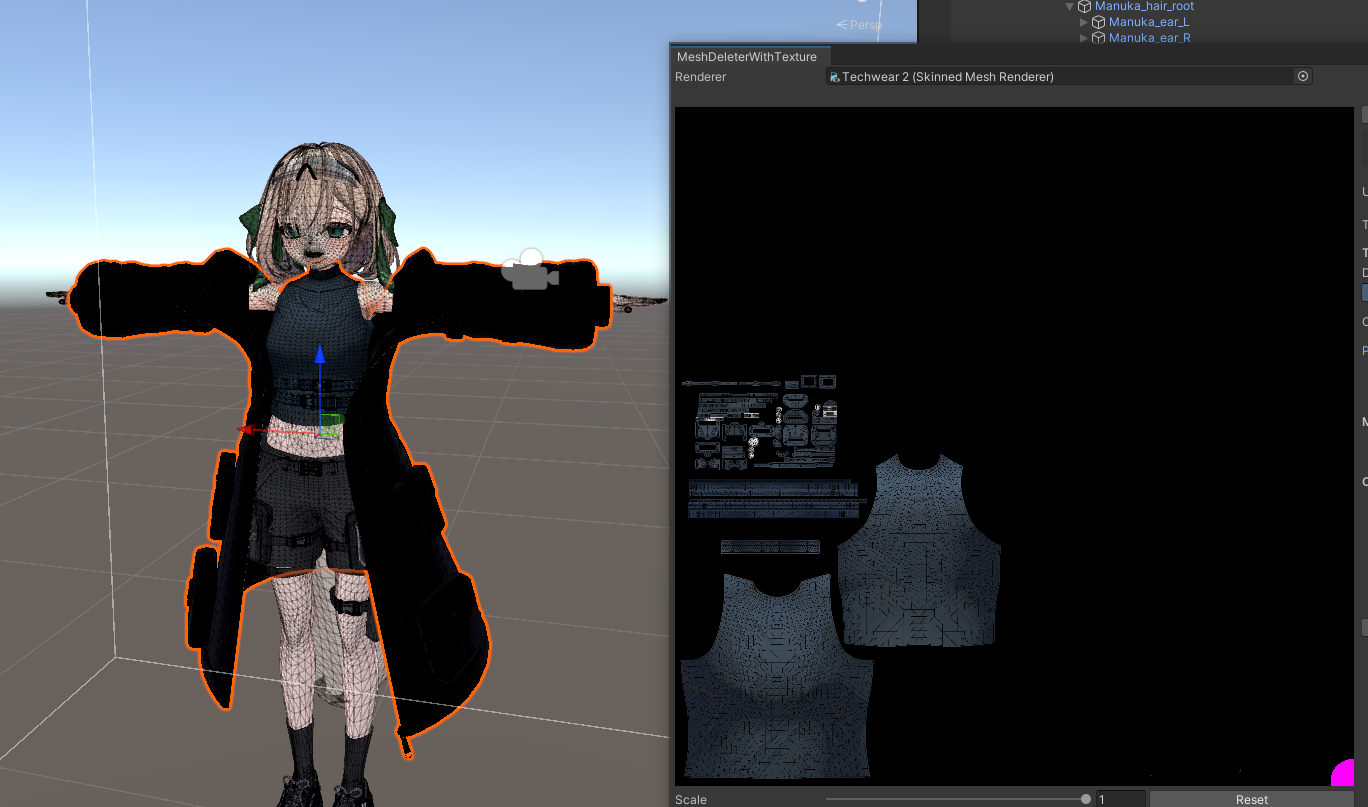
Drag and drop the object whose mesh you want to delete (e.g., the body mesh object) from the Hierarchy window into the "Renderer" field at the top of the window.
-
The texture image assigned to the object appears in the window.
-
Select "PEN" or another draw type from the right side, then paint the areas you want to delete (e.g., the stomach area hidden by clothing) in black on the texture. The painted areas are reflected in real-time on the model in the Scene view, letting you preview what will be removed.
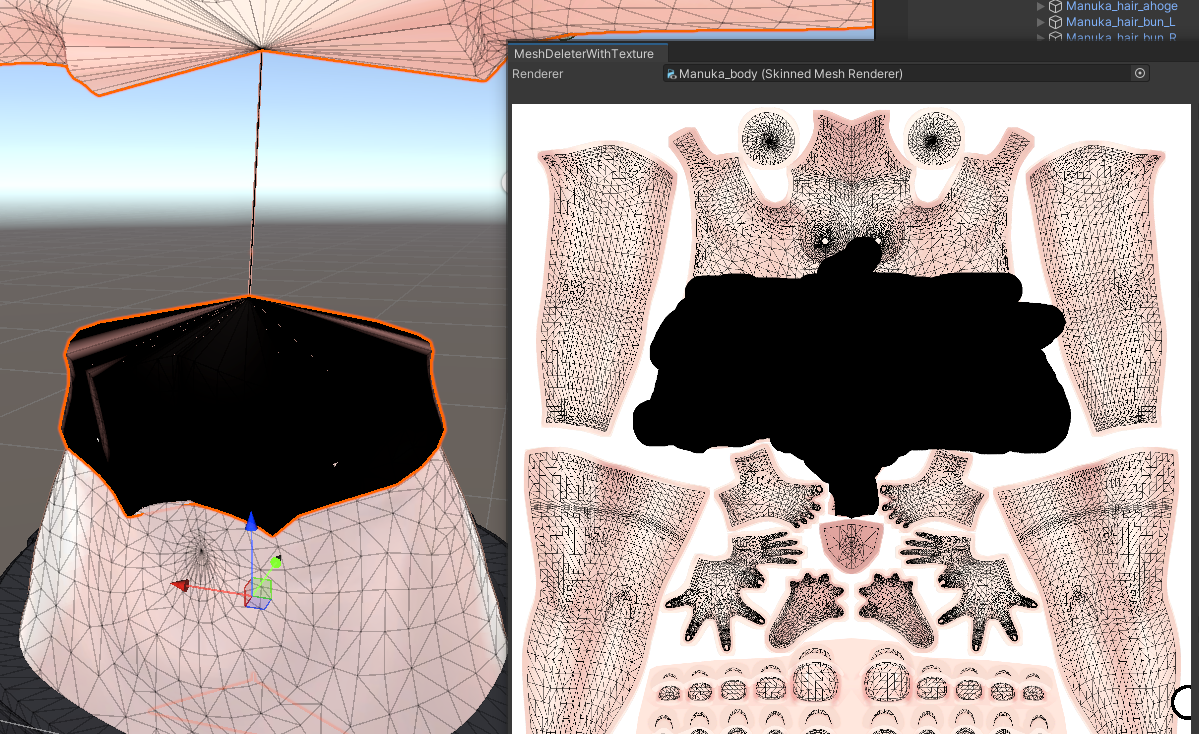
- After confirming the deletion area, click the "DeleteMesh" button. A new mesh with the specified areas removed is generated and automatically applied to the object.
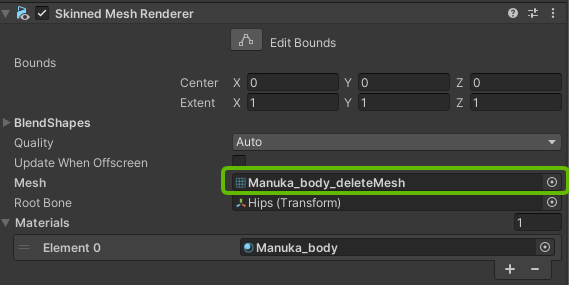
[Note] MeshDeleter is also non-destructive!
This tool is also non-destructive -- the original mesh data remains in your project. If you made a mistake or want to revert, simply change the Mesh reference in the object's Mesh Renderer (or Skinned Mesh Renderer) component back to the original file.
Using this method to remove the stomach mesh hidden under clothing saved approximately 1,000 polygons. You can then apply Mantis LOD Editor to the remaining areas for even more efficient polygon reduction.
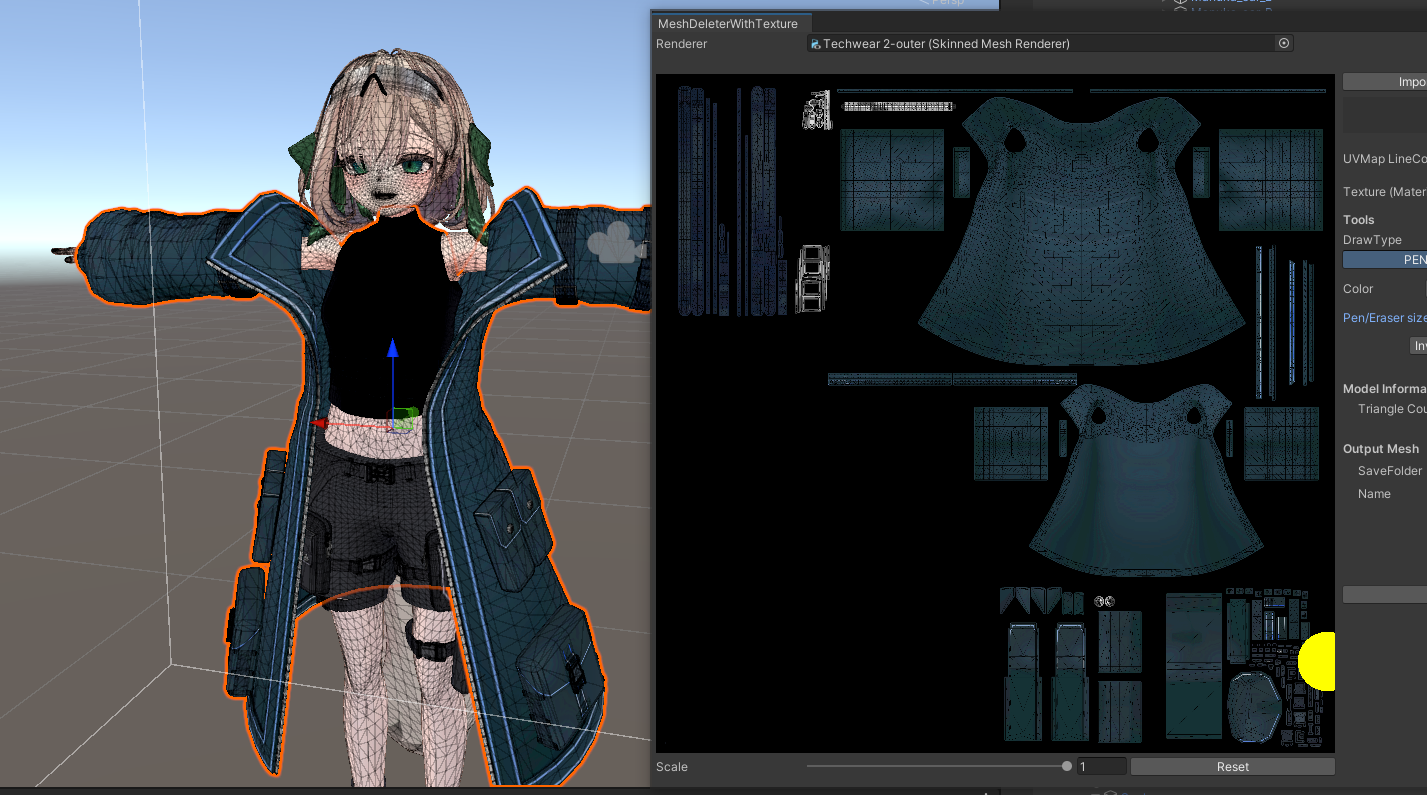
Advanced: Separating Clothing Parts
MeshDeleter's "delete mesh by painting on a texture" functionality can also be used to separate fused clothing parts.
The techware outfit I was working with (~60,000 polygons) had the coat (outer layer) and upper-body inner layer built as a single object (mesh). With Mantis, trying to reduce this combined mesh would degrade the lower-polygon inner layer first, preventing sufficient reduction of the higher-polygon coat section.
So I used MeshDeleter to create separate "inner-only" and "outer-only" meshes.
[Part Separation Steps]
-
Duplicate the original techware object in the Hierarchy (Ctrl+D or Cmd+D) and rename each copy descriptively (e.g., "Inner" and "Outer").
-
Select the "Inner" object and open the MeshDeleter window.
-
On the texture, paint all areas corresponding to the outer coat in black and execute "DeleteMesh." This produces a mesh containing only the inner layer.

- Similarly, select the "Outer" object, and in the MeshDeleter window paint all areas corresponding to the inner layer in black, then execute "DeleteMesh." This produces a mesh containing only the outer coat.
This separates what was originally a single piece of clothing into two distinct meshes: "Inner" and "Outer." The fact that you can separate parts entirely within Unity without needing external modeling software like Blender is incredibly convenient.
After separation, you can apply NDMF Mantis LOD Editor individually to each part (inner, outer) for much more effective polygon reduction.
Optimization Results and Key Takeaways
Using the methods described above, the avatar that started at 180,000 polygons with a VeryPoor rank was successfully reduced to 69,995 polygons with a Poor rank.
To reach the target of under 70,000 polygons, I also made design adjustments like removing clothing decorations and reducing coat polygons. The process of reducing polygon count while preserving visual quality requires trial and error, but it was an excellent learning experience.
Both "Mantis LOD Editor (NDMF version)" and "MeshDeleterWithTexture beta" are non-destructive tools, making them relatively safe for beginners to try. The reassurance that "you can always revert" is a significant psychological benefit when undertaking optimization work.
By combining Mantis's powerful polygon reduction capabilities with MeshDeleter's flexible partial editing and creative applications, even VeryPoor-ranked avatars have a strong chance of being effectively optimized.
If you're struggling with polygon counts on your VRChat avatar, I encourage you to try the tools and methods introduced in this article. (Note that performance rank is also affected by factors like material count, so consider those as well if aiming for comprehensive optimization.)
References
The following articles and videos were invaluable references during this avatar optimization (polygon reduction) work. Thank you for the excellent information!
- Episode 5: lil NDMF Mesh Simplifier VS Mantis LOD Editor - Polygon Reduction Comparison & Guide (VeryPoor to Medium) - INST Channel YouTube (The original link pointed to a YouTube search -- this is a placeholder. Please search for the actual video.)
- Non-Destructive Polygon Reduction! Introducing the NDMF Integration Tool for Mantis LOD Editor | Metacul Frontier
- November 2024 Update: Must-Have VCC Tools for Avatar Modification | Metacul Frontier
- Getting Your Avatar Under 20K Polygons with Mantis LOD Editor (VRChat) | Suzuha
- How to Escape VeryPoor with Just Unity | Kohada
Addendum: Considerations for High-End Models
While this article covers improving a Very Poor avatar to Poor rank, it's worth noting that the same approach isn't always the best option for every case. Optimizing so-called "high-end models" with very high initial polygon counts requires particular caution.
These models are appealing precisely because of their intricate decorations, complex outfits, and numerous gimmicks -- but this comes with enormous polygon counts (commonly exceeding 100,000 by a large margin). Applying polygon reduction tools like Mantis LOD Editor to these models can strip away visual detail even at modest reduction levels, significantly diminishing the model's original appeal.
For avatars that are only slightly above the Poor rank threshold (e.g., 70K-100K polygons) or models with inherently simpler designs, the methods in this article work well. However, for high-end models that exceed twice the threshold -- 150K, 200K+ polygons -- trying to forcibly reduce them to Poor rank while maintaining visual quality is often impractical and not recommended.
So what should you do instead? Rather than extreme optimization of a single model, consider a usage-based approach:
- Regular use: Keep your main avatar at its original quality without optimization
- Performance-critical situations: For large gatherings or worlds where performance matters, prepare a separate lightweight version (Quest-compatible versions may already be available) or use an entirely different lightweight avatar
Personal Experience and Reflection
To be honest, after using the Manuka modification I optimized to Poor rank (69,995 polygons) for a while, my perspective changed somewhat. While the polygon reduction was technically successful, I found myself thinking "Was it really worth removing those clothing details for this?" about some of the design compromises I'd made.
Also, given that my VRChat play style doesn't frequently involve performance-critical worlds, the honest truth is that "keeping this particular model at Very Poor probably wouldn't have caused any real problems."
Avatar optimization is an important aspect of enjoying VRChat comfortably, but it's not always a necessity. I believe it's important to carefully consider your play style, the communities you participate in, and how much visual change you're willing to accept before deciding whether and how far to optimize.