
When you want to add dramatic cutscenes (event scenes) to your RPG Maker game, you'll be pleasantly surprised -- compared to other game engines like Unity or Unreal Engine, RPG Maker makes it remarkably easy to create basic cutscenes.
This article covers everything from creating basic cutscenes using RPG Maker's built-in features to enhancing them with camera control for more expressive storytelling. For camera effects, we'll use the popular plugin "Galv_CamControl.js."
With these techniques, you can make your game's story more engaging and memorable for players.
In this article
- Creating basic cutscenes (RPG Maker built-in features)
- Adding camera effects (Galv_CamControl plugin)
- Completing a polished cutscene
Creating Basic Cutscenes (RPG Maker Built-in Features)
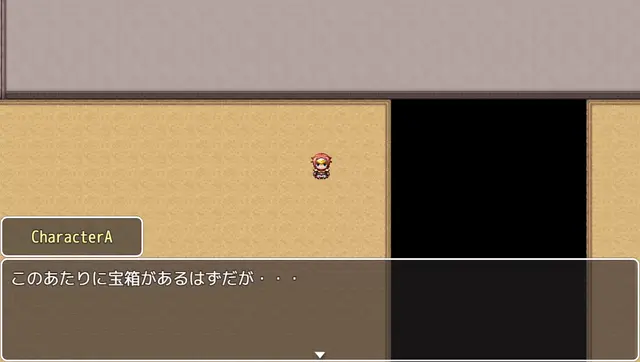
Let's start with creating cutscenes using only RPG Maker's standard features -- no plugins required.
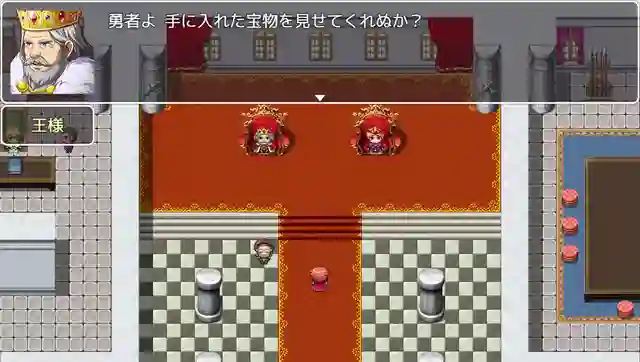
(You can create scenes like this using just the built-in features.)
By combining the following basic event commands, you can easily create cutscenes with character conversations and movement:
- Show Text: Displays character dialogue or narration. Combine with face graphics to clearly show who's speaking.
- Show Balloon Icon: Displays icons like "!" or "?" above characters' heads to visually express emotions or states.
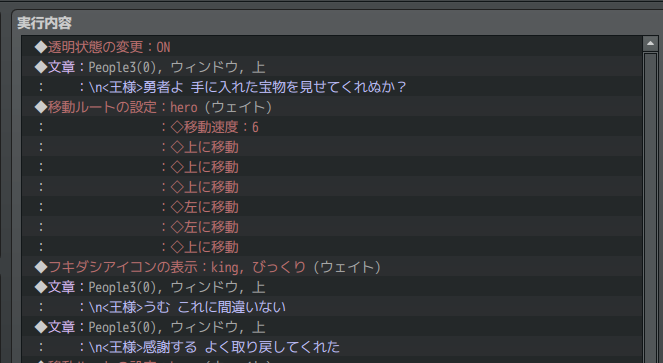
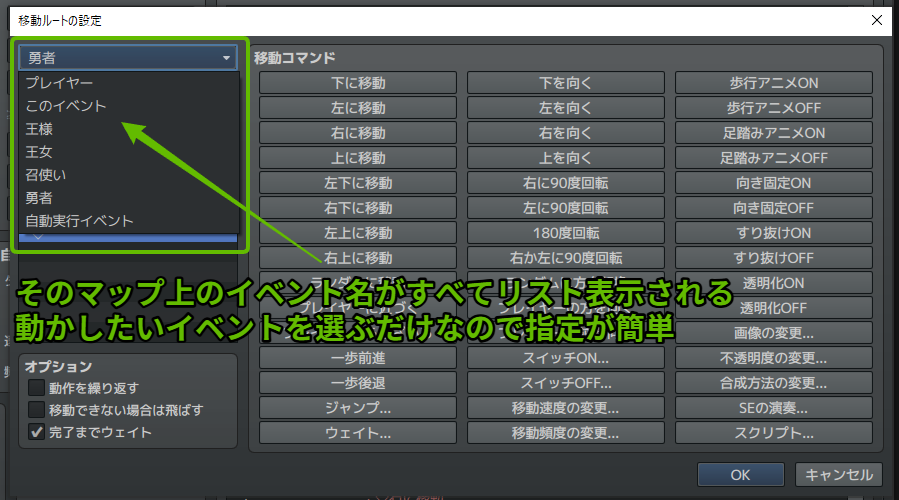
- Set Movement Route: Moves event characters or the player along a specified path. You can also include direction changes, waits, and switch operations. Being able to specify target characters by "This Event" or by name is incredibly intuitive.
- Change Transparency: Temporarily hides the player character from the screen. Useful for transitions into and out of event scenes.
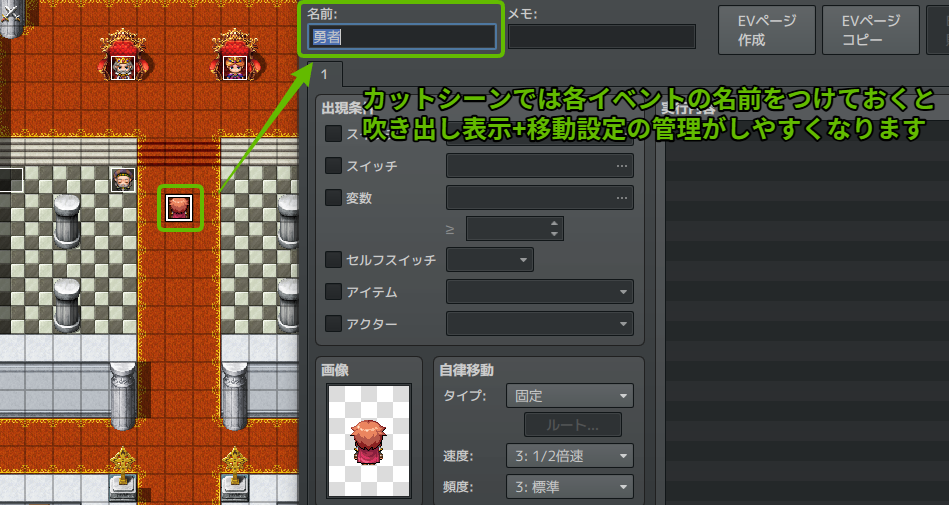
[Tip] Give Your Events Descriptive Names!
For those with experience in other game engines, RPG Maker's event creation features -- particularly the character targeting (e.g., "Player," "This Event," "Event ID: 1") and movement route setup -- are surprisingly polished and streamlined.
One important practice: always give descriptive names to events placed on the map (e.g., "VillagerA," "Chest_Cave"). Since you can select events by name when setting up event commands, it makes management much easier. Even for solo development, this saves you from the "which event was that again?" confusion during later debugging and modifications, helping your future self. As game development progresses and data grows more complex, these small habits make a big difference.
Now, while built-in features alone can create cutscenes, they may start to feel a bit monotonous with the same fixed camera angle throughout. Let's add some camera work to spice things up.
Adding Camera Effects (Galv_CamControl Plugin)
Adding camera control to your basic cutscenes can greatly enhance immersion, guide the player's attention, and create more impressive visual storytelling. In RPG Maker MV/MZ, the standard approach for camera control is to use a plugin.
We'll be using "Galv_CamControl.js," a well-established camera control plugin used by many RPG Maker developers.
Plugin source: Galv's Scripts - MV Cam Control (For MZ, you may need a community-modified version. Please search and verify separately.)
[Installing the Plugin]
- Download the plugin file (
Galv_CamControl.js) from the above site (or find a compatible version). - Copy the downloaded file into the
js/pluginsfolder of your RPG Maker project. - Open the RPG Maker editor and go to "Tools" > "Plugin Manager."
- In the Plugin Manager window, double-click an empty row, select "Galv_CamControl" from the "Name" dropdown, and click "OK."
- Make sure the status is set to "ON" and click "OK" to close the Plugin Manager.
The plugin is now active, and you can execute camera control commands through the "Plugin Command" event command.

Basic Usage of Galv_CamControl (Plugin Commands)
You can control the camera by executing the following commands via the "Plugin Command" event command. (These are MV-based syntax examples. The format may differ slightly for MZ or specific modified versions -- check the plugin's help documentation.)
- Focus the camera on a specific event (follow it):
Example:
CAM EVENT 1(focuses camera on Event ID 1) Example:CAM EVENT 2(focuses camera on Event ID 2) - Return the camera to the player (follow the player):
CAM PLAYER - Move the camera to specified map coordinates:
CAM MAP X Y(Example:CAM MAP 10 15moves the camera to coordinates (10, 15)) - Unlock camera tracking (fix at current position):
CAM TARGET 0
[Note: Camera Scroll Duration]
You can add a number (frame count) after a space following any of the above commands to make the camera scroll smoothly over that duration. For example, CAM EVENT 1 60 will smoothly scroll the camera to Event 1 over 60 frames (1 second). If no duration is specified, the camera moves instantly.
Combining these commands with event commands like "Show Text," "Set Movement Route," and "Wait" lets you focus the camera on whoever is speaking, highlight important items or locations, and more.
[Advanced Application: "Show, Don't Tell" Game Design]
Good game design goes beyond telling players "go here" or "pick up that." By briefly showing the destination or target object with the camera, you guide players to understand intuitively what to do next.
Camera control plugins like Galv_CamControl are excellent not just for cutscene effects but also for implementing this "show, don't tell" design approach. For example, when an NPC gives a quest, you can briefly pan the camera to the objective or relevant object. This makes it clearer for players what to do next, improving the overall gameplay experience.
Advanced Technique: Standoff Scenes For tense scenes where characters face each other, you can place a transparent empty event between the two characters and lock the camera on that event (e.g., CAM EVENT [empty event ID] [duration] followed by CAM TARGET 0). This positions the characters at opposite edges of the screen with empty space in the center, creating a cinematic composition.
Completing a Polished Cutscene
By combining basic event commands (dialogue, movement, balloon icons, etc.) with camera control via Galv_CamControl, you can see how the initially simple cutscene becomes much more dynamic and visually engaging.
In 2D-based games like those made with RPG Maker, event scenes can easily feel monotonous without visual movement. By effectively moving the camera, you can guide the player's viewpoint, emphasize the importance of a scene, deliver emotional impact, and keep players engaged throughout.
Combining RPG Maker's accessible event creation features with plugin-based camera control is a straightforward way to make your game's storytelling significantly more compelling.