Have you ever wanted to create a game in RPG Maker MV or RPG Maker MZ where multiple protagonists appear, or where a specific character is controlled on specific maps?
Normally, to switch the player character per map, you need to place a "Change Party Leader" command inside each map transfer or location move event. However, as the number of target maps grows, this method has several issues:
- It's time-consuming to set up and copy events for each map.
- It's prone to bugs from missed settings or incorrect character assignments.
- It becomes difficult to review and manage which character leads on which map.
To solve these issues, I created the plugin "UM_MapActorSetting.js" -- simply add a tag to a map's note field, and the player character automatically switches to the specified actor when entering that map.
This article covers the plugin's features, installation method, configuration steps, and specific usage examples. It's recommended for anyone who wants a simpler way to implement character switching without event commands.
In this article
- Plugin Overview and Benefits
- Plugin Installation
- Basic Setup (Parameters and Map Notes)
- Usage Example (Switching Between Hero and Princess)
- Usage Notes
- Plugin Code (UM_MapActorSetting.js)
Plugin Overview and Benefits
As mentioned above, the standard way to switch player characters per map in RPG Maker MV/MZ is through the "Change Party Leader" event command. However, this method becomes cumbersome and hard to manage as the number of maps increases.
The UM_MapActorSetting.js plugin was developed to solve this problem.
Key features and benefits:
- Specify in the map's note field: Which character to control on which map is specified with a simple tag (e.g.,
<Player:hero>) in each map's "Note" field. - Automatic switching: When the player enters a map with a note tag set, the plugin automatically swaps the party leader (player character) to the specified actor.
- No events needed: You no longer need to create and place switching events on each map.
- Simple configuration: Just link an "identifier" to an "Actor ID" in the plugin parameters and write the identifier in the map notes. It's easy to set up, review, and modify later.
This makes developing games with multiple switchable characters much smoother.
Plugin Installation
Installing the plugin is straightforward.
- Copy the plugin code at the bottom of this article, paste it into a text editor (such as Notepad), and save the file as
UM_MapActorSetting.js. - Place the created
UM_MapActorSetting.jsfile in thejs/pluginsfolder within your RPG Maker project directory. - Open the RPG Maker Editor and go to "Tools" menu > "Plugin Manager."
- Double-click an empty row in the plugin list, select
UM_MapActorSettingfrom the "Name" dropdown, set "Status" to "ON," and click "OK."
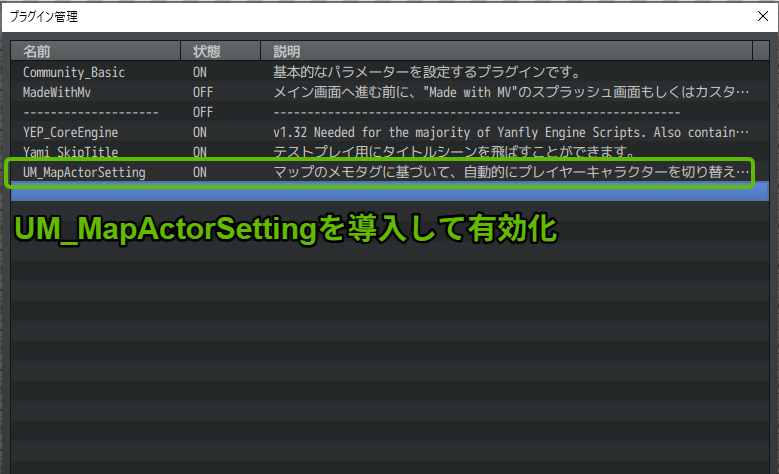
The plugin is now active.
Basic Setup (Parameters and Map Notes)
Next, configure the plugin to work correctly.
Plugin Parameter Settings
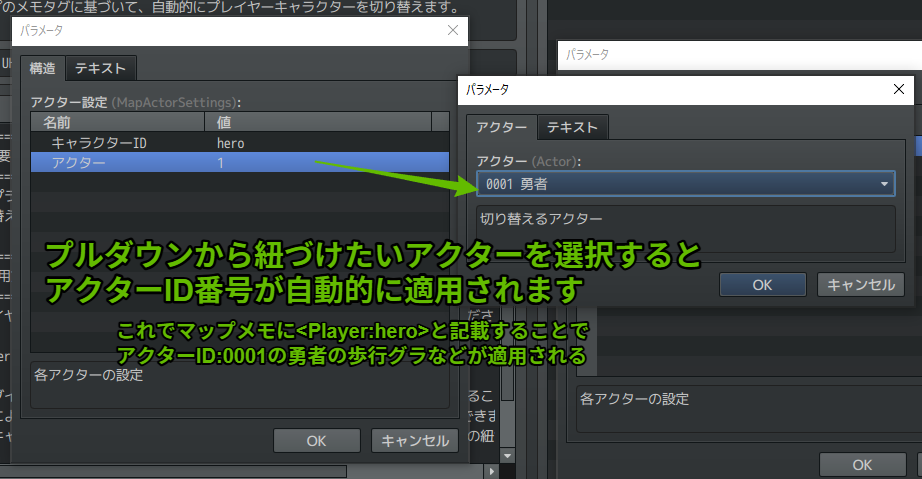
First, link the "identifiers (arbitrary strings)" used in map note fields with the actual "Actors (characters)" to switch to.
- Double-click (or select and press Enter)
UM_MapActorSettingin the Plugin Manager to open the "Parameters" section on the right. - Double-click the "ActorSettings" (Actor Settings List) item.
- Double-click an empty row (or use the "+" button) to add a new entry.
- In the new entry, configure these two items:
- Character ID: Enter an arbitrary identifier to use in map note tags (alphanumeric characters recommended, e.g.,
hero,princess,actor1, etc.). - Actor: Select the actor you want to associate with this identifier from the database using the dropdown menu on the right.
- Character ID: Enter an arbitrary identifier to use in map note tags (alphanumeric characters recommended, e.g.,
- Add entries for as many characters as you want to switch between.
- Click "OK" when done.

Map Note Settings
Next, configure the maps where you want the player character to automatically switch.
- In the RPG Maker Editor, open the map where you want automatic character switching.
- Right-click the map name (or select the map in edit mode) and open "Map Settings" (or "Map Properties").
- In the "Note" field at the bottom right, enter a tag in the following format:
<Player:identifier>
Replace identifier with the exact "Character ID" you set in the plugin parameters. (e.g., <Player:hero>)
- Click "OK" when done.
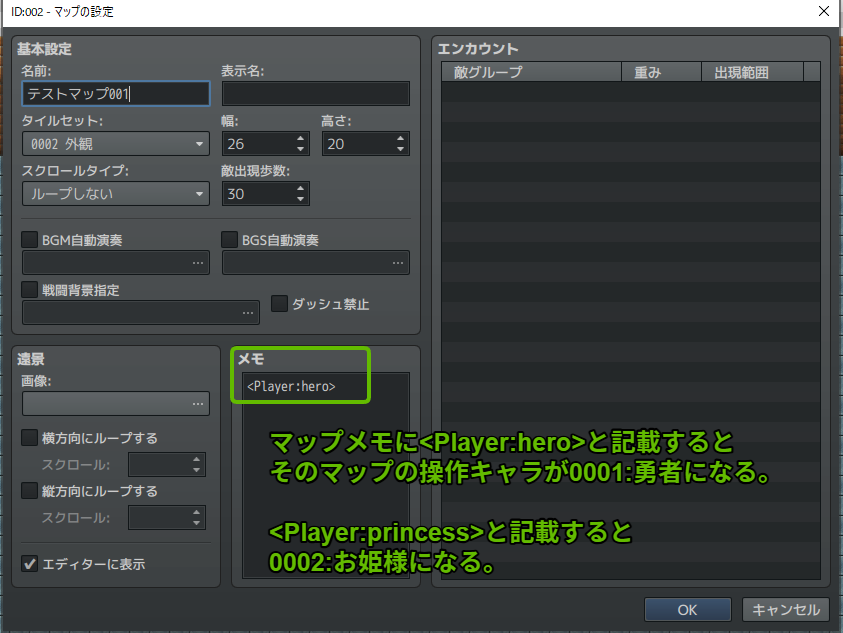
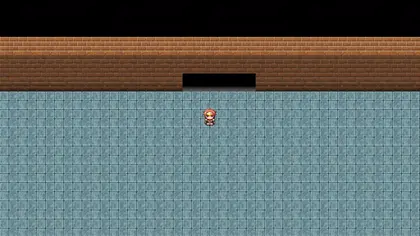
Now, when the player moves to this map, the actor corresponding to the identifier specified in the <Player:identifier> tag will automatically become the party leader (player character).
Usage Example (Switching Between Hero and Princess)
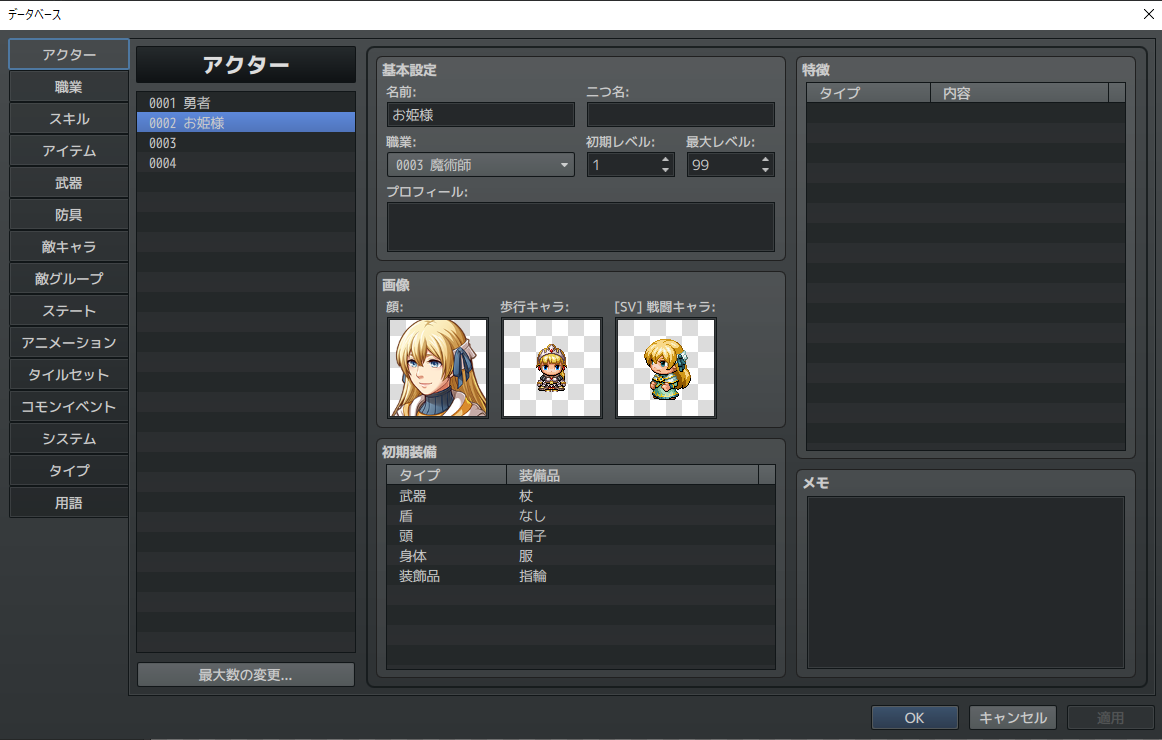
As an example, let's say "Actor ID: 1" is "Hero" and "Actor ID: 2" is "Princess" in the database.
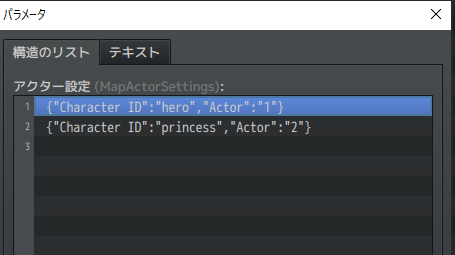
1. Plugin Parameter Settings:
Configure the following in the Plugin Manager:
- Entry 1:
- Character ID:
hero - Actor:
0001: Hero(Actor ID 1 in the database)
- Character ID:
- Entry 2:
- Character ID:
princess - Actor:
0002: Princess(Actor ID 2 in the database)
- Character ID:
2. Map Note Settings:
For example, set up notes for two maps as follows:
- Map 1 (Hero's Town) Note field:
<Player:hero>
- Map 2 (Castle) Note field:
<Player:princess>
Result:
- When the player enters the "Hero's Town" map, the player character automatically switches to "Hero."
- When the player enters the "Castle" map, the player character automatically switches to "Princess."
This way, you can achieve per-map player character switching without using any event commands.
Usage Notes
- Character switching occurs automatically during map transitions (after a Transfer Player command, etc.) and when loading a save file.
- The identifier in the map note tag
<Player:identifier>must exactly match the "Character ID" set in the plugin parameters. It is case-sensitive. If the identifier is incorrect, the switch won't work. - The plugin performs a simple operation: it swaps the specified actor to the front of the party (moving them to the front if already in the party, or adding them and placing them at the front if not). It does not control the entire party composition or order. If you specify an actor not currently in the party, that actor will be added and become the leader. (The previous leader will be removed from the party.)
- If you add or modify actors in the database, or change the "Character ID" in the plugin parameters, be sure to update the plugin parameter settings accordingly.
- There is a possibility of conflicts with other plugins that modify party members. Please be cautious when using them together.
Plugin Code (UM_MapActorSetting.js)
Feel free to use this plugin code. Modifications are also welcome.
//=============================================================================
// UM_MapActorSetting
//=============================================================================

/*:
 * @plugindesc Automatically switches the player character based on map note tags.
 * @author UHIMA
 *
 * @param MapActorSettings
 * @text Actor Settings
 * @type struct<ActorConfig>[]
 * @desc Settings for each actor
 *
 * @help
 * ============================================================================
 * Overview
 * ============================================================================
 * This plugin enables automatic player character switching based on
 * map note tags.
 *
 * ============================================================================
 * Usage
 * ============================================================================
 * Add the following note tag to maps where you want to switch the player character:
 *
 * <Player:characterId>
 *
 * You can link database Actor IDs with character names in the plugin parameters.
 * This allows simple notation like <Player:harold> to switch actors.
 * When adding new characters or changing Actor IDs, update this plugin's
 * mappings accordingly.
 *
 * Example:
 * <Player:harold>
 */

/*~struct~ActorConfig:
 * @param Character ID
 * @text Character ID
 * @type string
 * @desc Identifier used in map note tags (e.g., harold)
 *
 * @param Actor
 * @text Actor
 * @type actor
 * @desc The actor to switch to
 */

(function () {
  var parameters = PluginManager.parameters("UM_MapActorSetting");
  var MapActorSettings = JSON.parse(parameters["MapActorSettings"] || "[]").map(
    (setting) => JSON.parse(setting)
  );

  var _Game_Player_performTransfer = Game_Player.prototype.performTransfer;
  Game_Player.prototype.performTransfer = function () {
    _Game_Player_performTransfer.call(this);
    switchActorByMap();
  };

  function switchActorByMap() {
    if ($dataMap && $dataMap.meta.Player) {
      var characterId = $dataMap.meta.Player;
      var actorConfig = MapActorSettings.find(
        (config) => config["Character ID"] === characterId
      );

      if (actorConfig) {
        var newActorId = Number(actorConfig.Actor);
        var currentLeader = $gameParty.leader();
        var currentLeaderId = currentLeader ? currentLeader.actorId() : null;

        if (currentLeaderId !== newActorId) {
          if (currentLeaderId) {
            $gameParty.removeActor(currentLeaderId);
          }
          $gameParty.addActor(newActorId);
          $gamePlayer.refresh();
        }
      }
    }
  }

  var _Scene_Map_start = Scene_Map.prototype.start;
  Scene_Map.prototype.start = function () {
    _Scene_Map_start.call(this);
    switchActorByMap();
  };
})();