This article is a complete step-by-step guide for beginners on how to deploy a website built with the popular framework Next.js to the feature-rich hosting service Cloudflare Pages, and then set up your own custom domain (e.g., your-domain.com).
While Vercel (the creators of Next.js) is well-known as a deployment target, Cloudflare Pages is also an excellent option. It offers a fast CDN, powerful security features, and generous free-tier limits, making it a great choice for everything from personal projects to small and mid-sized websites. In this guide, I'll walk you through the deployment process I frequently use with Cloudflare Pages.
Note: This guide assumes your Next.js project code is already pushed to a GitHub (or GitLab) repository (private repositories are fine).
Steps covered in this article
- Add a Next.js project to Cloudflare Pages
- Grant access to a private GitHub repository
- Build configuration and tips (Node.js version, compatibility flags)
- Set up a custom domain on Cloudflare Pages (nameserver changes)
- Summary: Next.js + Cloudflare Pages + Custom Domain Setup Flow
Add a Next.js Project to Cloudflare Pages
The first step is to create a new Pages project in the Cloudflare dashboard and link it to the GitHub repository containing your Next.js project.
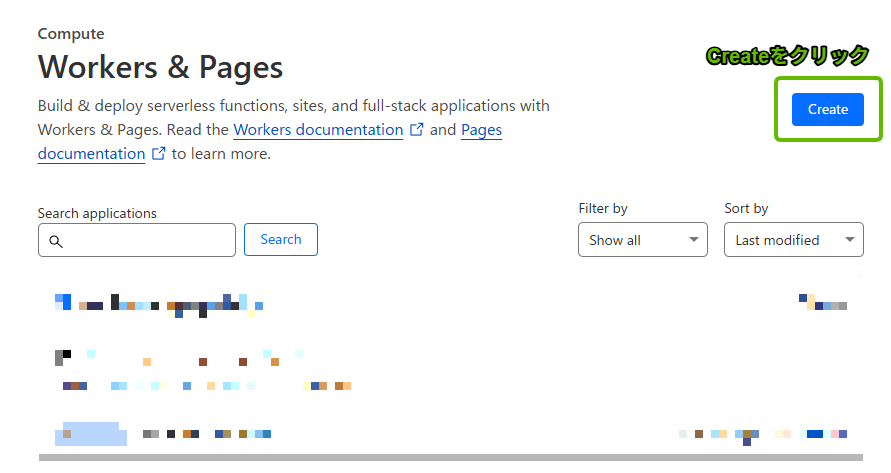
- Log in to the Cloudflare dashboard and select Workers & Pages from the left menu. (Note: Cloudflare's UI is frequently updated, so menu names may vary slightly. Look for similar items.)

- On the overview screen, find and click the Create application button.
- On the "Create an application" screen, make sure the Pages tab is selected and click the Connect to Git button. Cloudflare Pages primarily uses Git repository integration for automatic deployments.

-
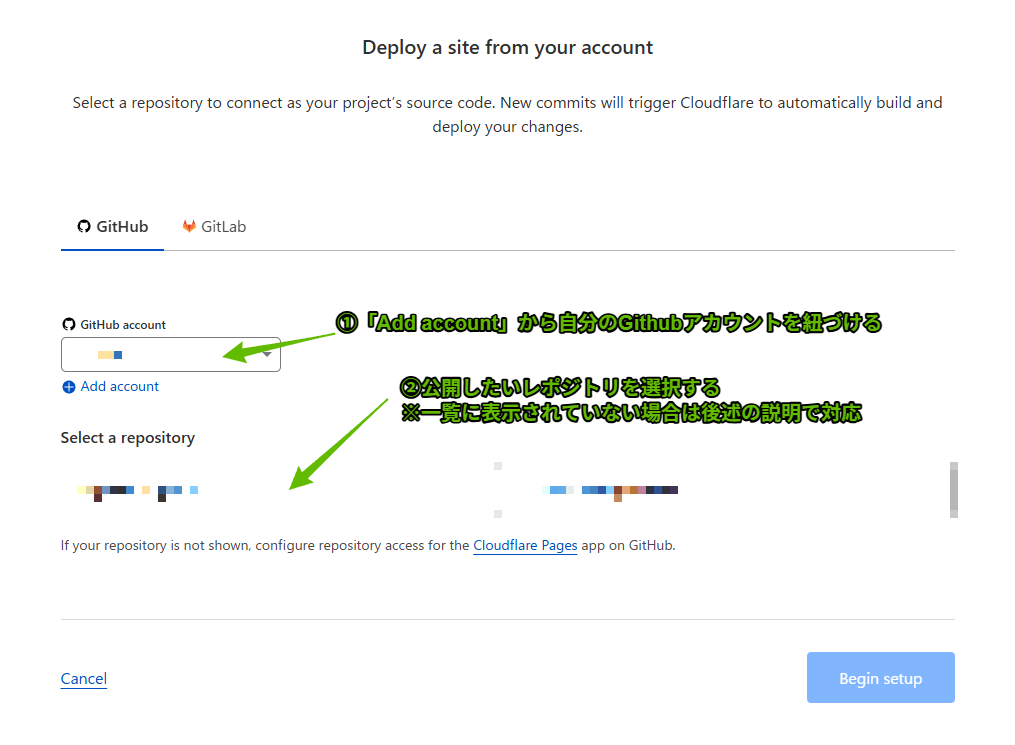
You'll be taken to the GitHub or GitLab account connection screen. If this is your first time connecting, click "Add account" and follow the prompts to authenticate your GitHub account and authorize Cloudflare access.
-
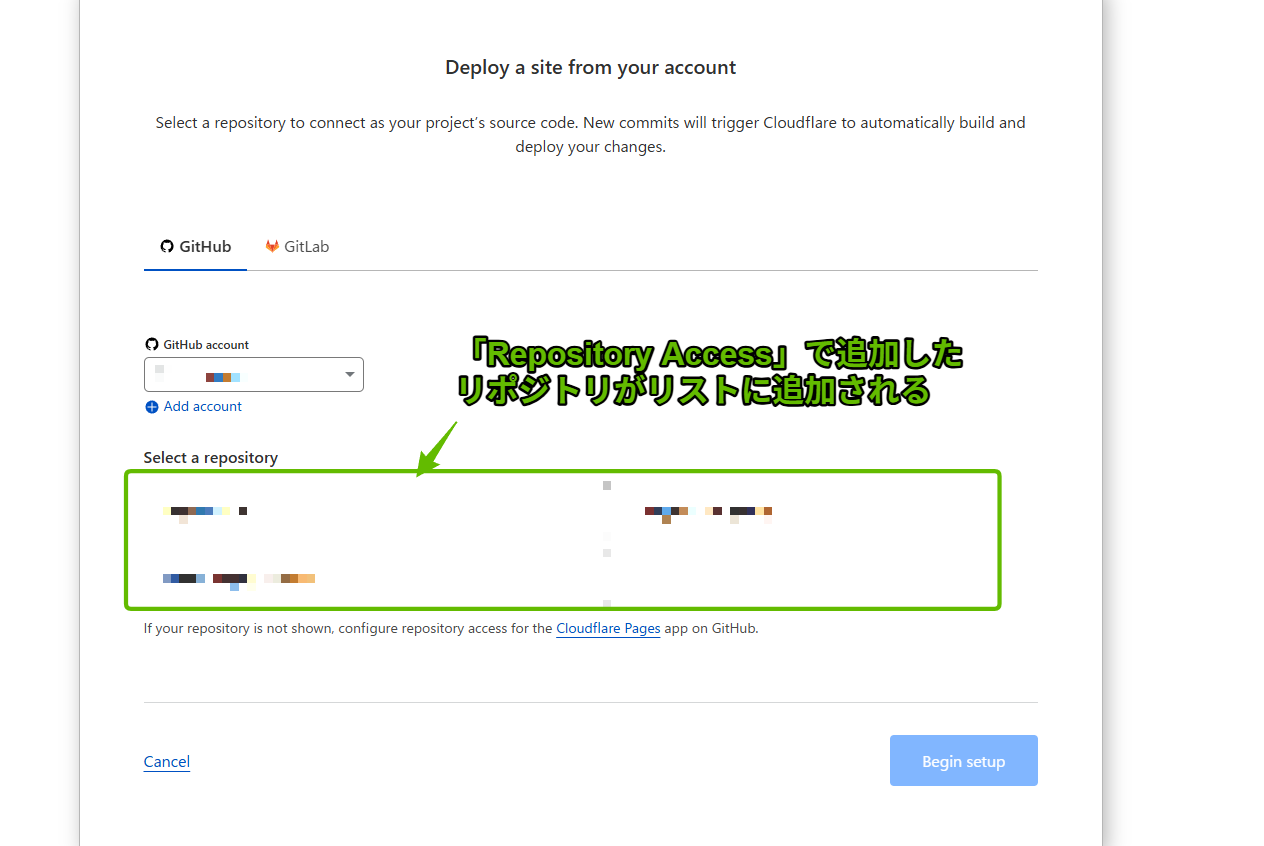
Once the account is connected, the "Select a repository" section will display a list of Git repositories from your linked account. Select the repository containing the Next.js project you want to deploy.
Grant Access to a Private GitHub Repository
[Tip] If the repository you want to deploy is set to private, it may not appear in the repository list above. This happens because the Cloudflare Pages application doesn't have permission to access that private repository. In that case, you'll need to grant access on the GitHub side using the following steps.
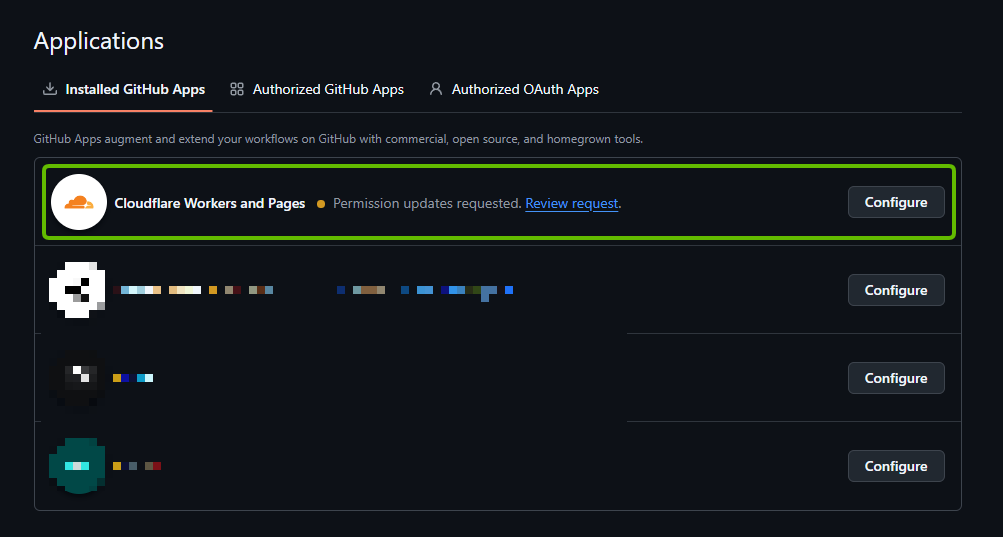
- Log in to GitHub, click your profile icon in the top right, open Settings, and select Applications from the left menu.

- Select the Installed GitHub Apps tab and find and click Cloudflare Pages (or a similar name) in the list.
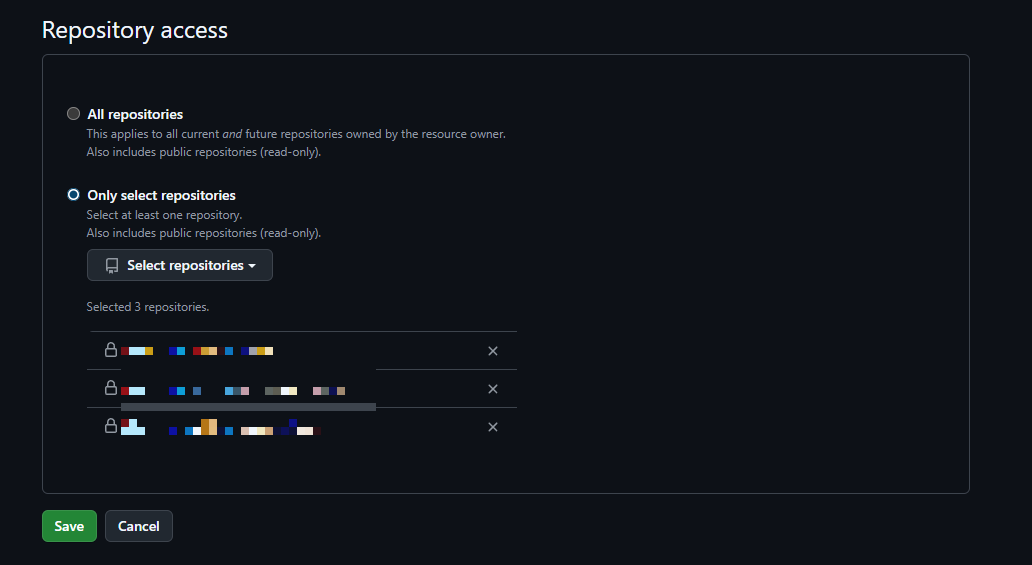
- Scroll to the Repository access section. Select the Only select repositories option, then check the repository for the Next.js project you want to deploy to Cloudflare Pages. Click Save to save your changes.
[Security Recommendation] Even if "All repositories" is currently selected, it's recommended to switch to "Only select repositories" and limit access to only the repositories you need, for better security.
- After completing the GitHub settings, return to the Cloudflare Pages screen and refresh the repository list (or reload the page). The private repository you just granted access to should now appear. Select it and click Begin setup to proceed.
Build Configuration and Tips (Node.js Version, Compatibility Flags)
After selecting a repository, you'll see the build and deployment settings screen. This is where you configure how Cloudflare Pages fetches code from the GitHub repository, builds it, and deploys it.
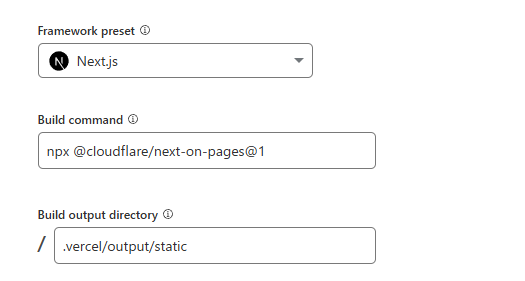
- In the "Build settings" section, open the Framework preset dropdown menu and select Next.js. Cloudflare Pages supports many frameworks, and selecting a preset automatically fills in the optimal build commands and settings for that framework.
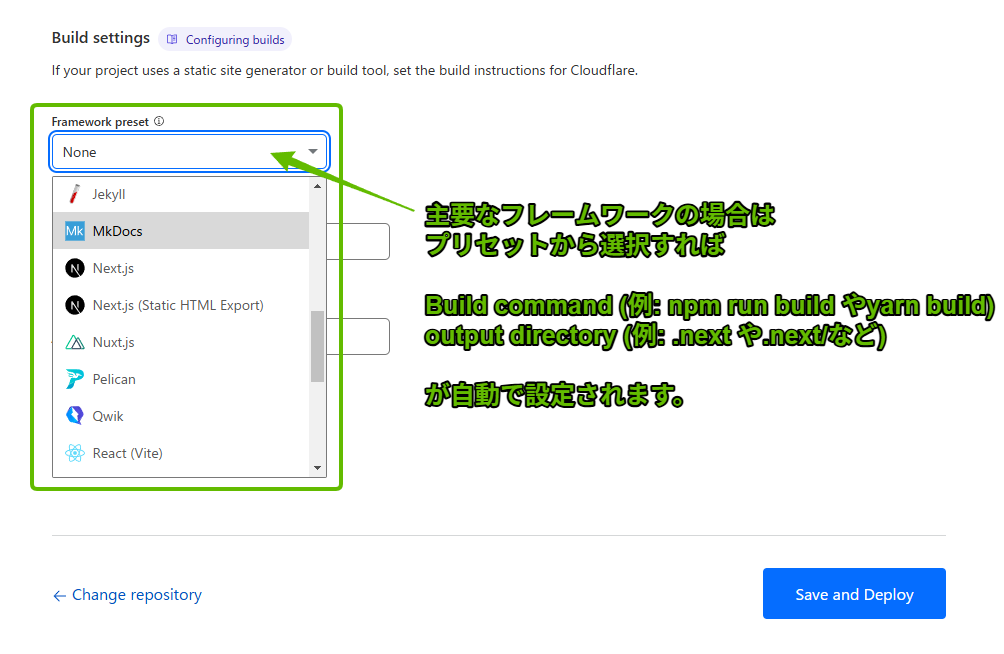
- After selecting the preset, the "Build command" (e.g.,
npm run buildornext build) and "Build output directory" (e.g.,.nextor.vercel/output/static, which may vary depending on your Next.js version and configuration) will be automatically populated. Usually, you can leave these as-is.
[Note 1] When you need to specify the Node.js version
The basic setup is complete at this point, but clicking "Save and Deploy" may result in build errors. A common cause is when the Node.js version used in Cloudflare Pages' build environment is older than what your Next.js project requires.
Check the build logs. If you see error messages like the following, you need to specify the Node.js version:
Initializing build environment. Failed: error finding node version '>=18.0.0'
You are using Node.js 18.17.1.
For Next.js, Node.js version "^18.18.0 || ^19.8.0 || >= 20.0.0" is required.
(The version numbers in the error message may differ.)
To fix this, explicitly specify the Node.js version in your Cloudflare Pages project settings.
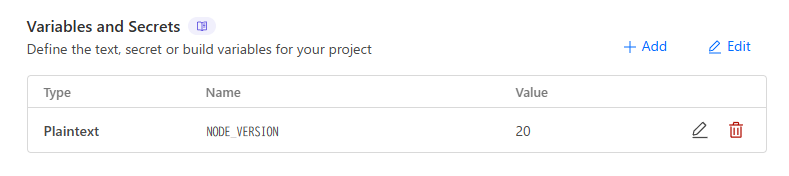
Go to your project's Settings > Environment variables, and in the "Build environment variables" section (or both "Production" and "Preview" environment variables), click Add variable and configure it as follows:
- Variable name:
NODE_VERSION - Value: The Node.js version required by your Next.js project (e.g.,
18.18.0or20.0.0. Match it to the error message, Next.js documentation, or your local development environment). If you have it specified in theenginesfield of yourpackage.json, use that value.
After setting the environment variable, re-deploy (e.g., click "Retry deployment" from the build log screen). The specified Node.js version will be used and the build should complete successfully.
[Note 2] When you need to set the Node.js compatibility flag
If the build succeeds but you see the following error screen when visiting the deployed site (xxx.pages.dev):
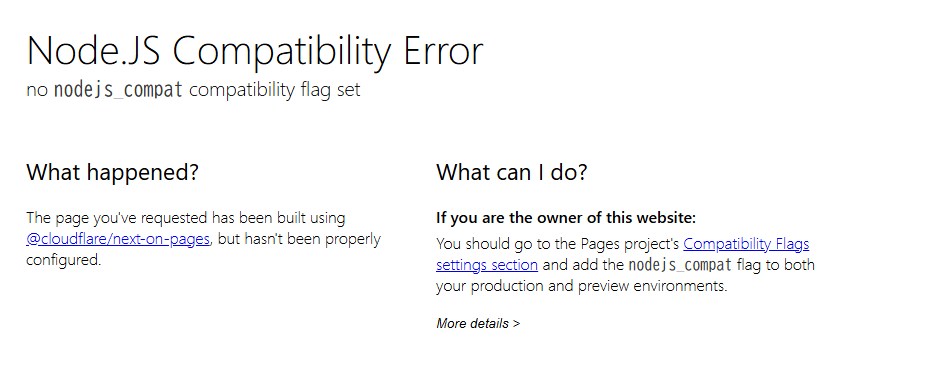
This is called a Node.JS Compatibility Error. It means you need to enable Node.js API compatibility mode for the Cloudflare Pages runtime environment (Cloudflare Workers) to correctly run your Next.js application (especially server-side features and API routes).
To fix this, configure the following setting:
Go to your project's Settings > Functions > Compatibility flags section (or a similar item). Click Configure (or "Add"), add the nodejs_compat flag, and save. (Typically, set this for both production and preview environments.)
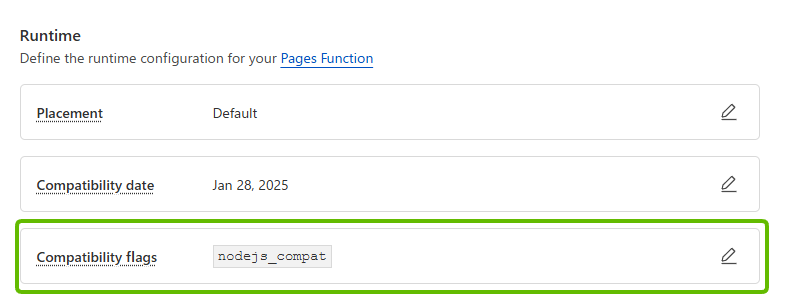
After setting this flag and redeploying, your Next.js application should display correctly when you visit the site.
Set Up a Custom Domain on Cloudflare Pages (Nameserver Changes)
Once your build and deployment succeed and the site is accessible at a URL like project-name.pages.dev, the final step is to assign your own custom domain (e.g., your-cool-site.com) to this Cloudflare Pages project.
Here's the general flow for setting up a custom domain:
- Cloudflare Pages configuration: Add the custom domain name you want to use in the project settings.
- Note the nameserver information: Cloudflare will provide the nameserver addresses to configure for your domain.
- Domain registrar configuration: In the management panel of the service where you registered your domain (e.g., Namecheap, Google Domains, Route 53, etc.), change the domain's nameserver settings to the ones provided by Cloudflare.
- Wait for DNS propagation: Wait for the nameserver change information to propagate across the internet. This usually takes a few minutes to a few hours, but can take up to about 48 hours.
- Activate on Cloudflare Pages: Once Cloudflare confirms the nameserver change, the domain status becomes "Active," and your Pages project is connected to your custom domain.
Below is a step-by-step example. (The basic flow is the same regardless of your registrar.)
Step 1: Add a Custom Domain to Cloudflare Pages
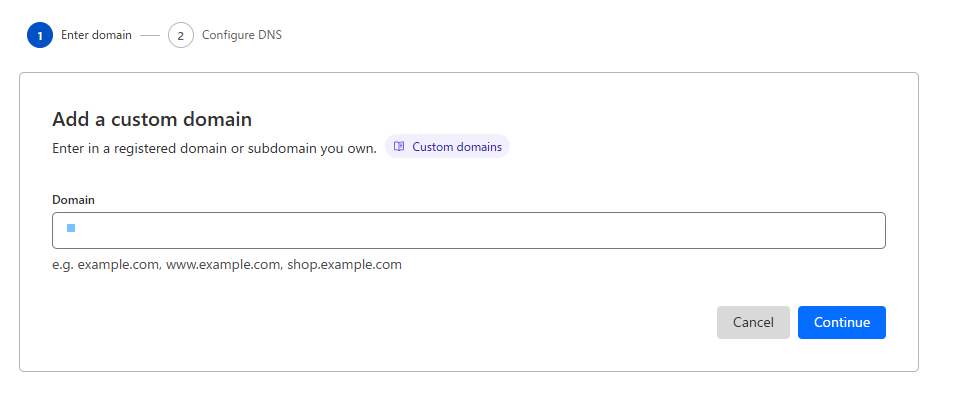
- Go to your Cloudflare Pages project, select the Custom domains tab, and click the Set up a custom domain button.

- Enter your custom domain name (e.g.,
your-cool-site.com) in the text box and click "Continue."
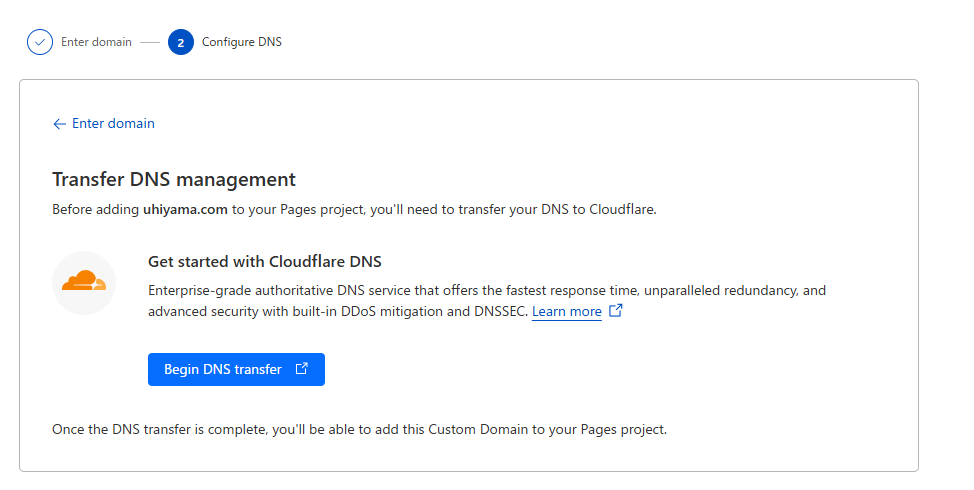
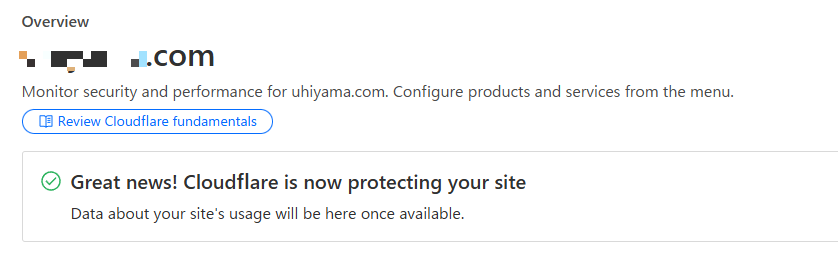
- If the domain isn't yet managed by Cloudflare, the process of transferring (or partially delegating) DNS management to Cloudflare will begin. Follow the on-screen instructions and click buttons like Begin DNS transfer or "Add site." (Note: This doesn't transfer the domain itself to Cloudflare -- it only points DNS management to Cloudflare.)
- Enter the domain name and proceed to the step where Cloudflare scans existing DNS records. Click "Continue."

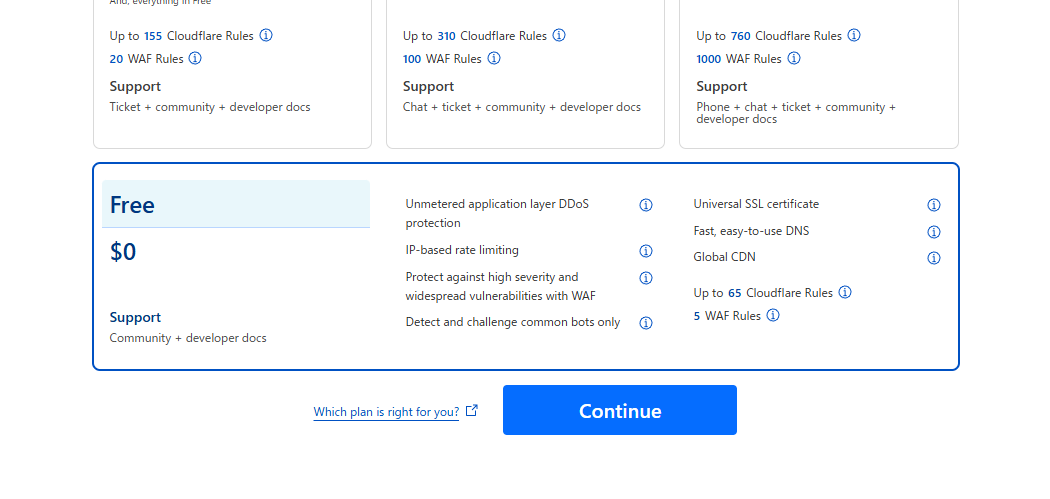
- A Cloudflare plan selection screen will appear. For basic custom domain usage, the Free plan at the bottom of the screen is typically sufficient. Select it and click "Continue."
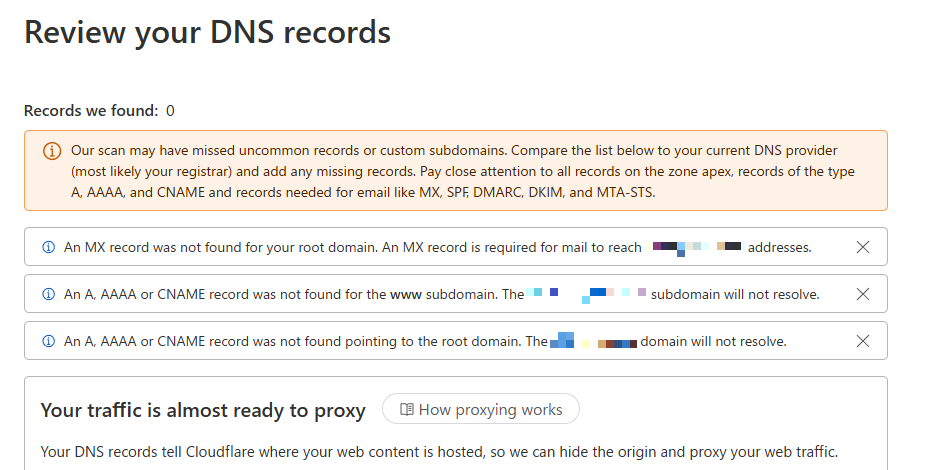
- Cloudflare will display any existing DNS records it found during the scan. Review the contents (it's fine to leave them as-is if you're unsure) and click "Continue."
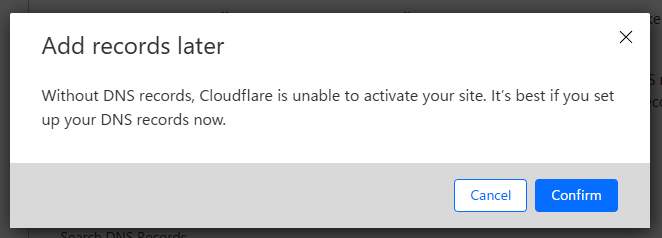
- If a confirmation popup appears, click "Confirm."
- [Important] This screen will display the Cloudflare nameserver addresses (usually two) that you need to set for your domain. Copy or note these addresses accurately (e.g.,
ada.ns.cloudflare.com,ben.ns.cloudflare.com). You'll need them in the next step.

Step 2: Change Nameservers at Your Domain Registrar
Next, log in to the management panel of the service where you registered your domain (domain registrar) and change the nameserver settings.
-
Go to your domain registrar's website and log in.
-
In the domain management menu, find the "Nameserver settings" or "DNS settings" option for your target domain and open the editing screen.
-
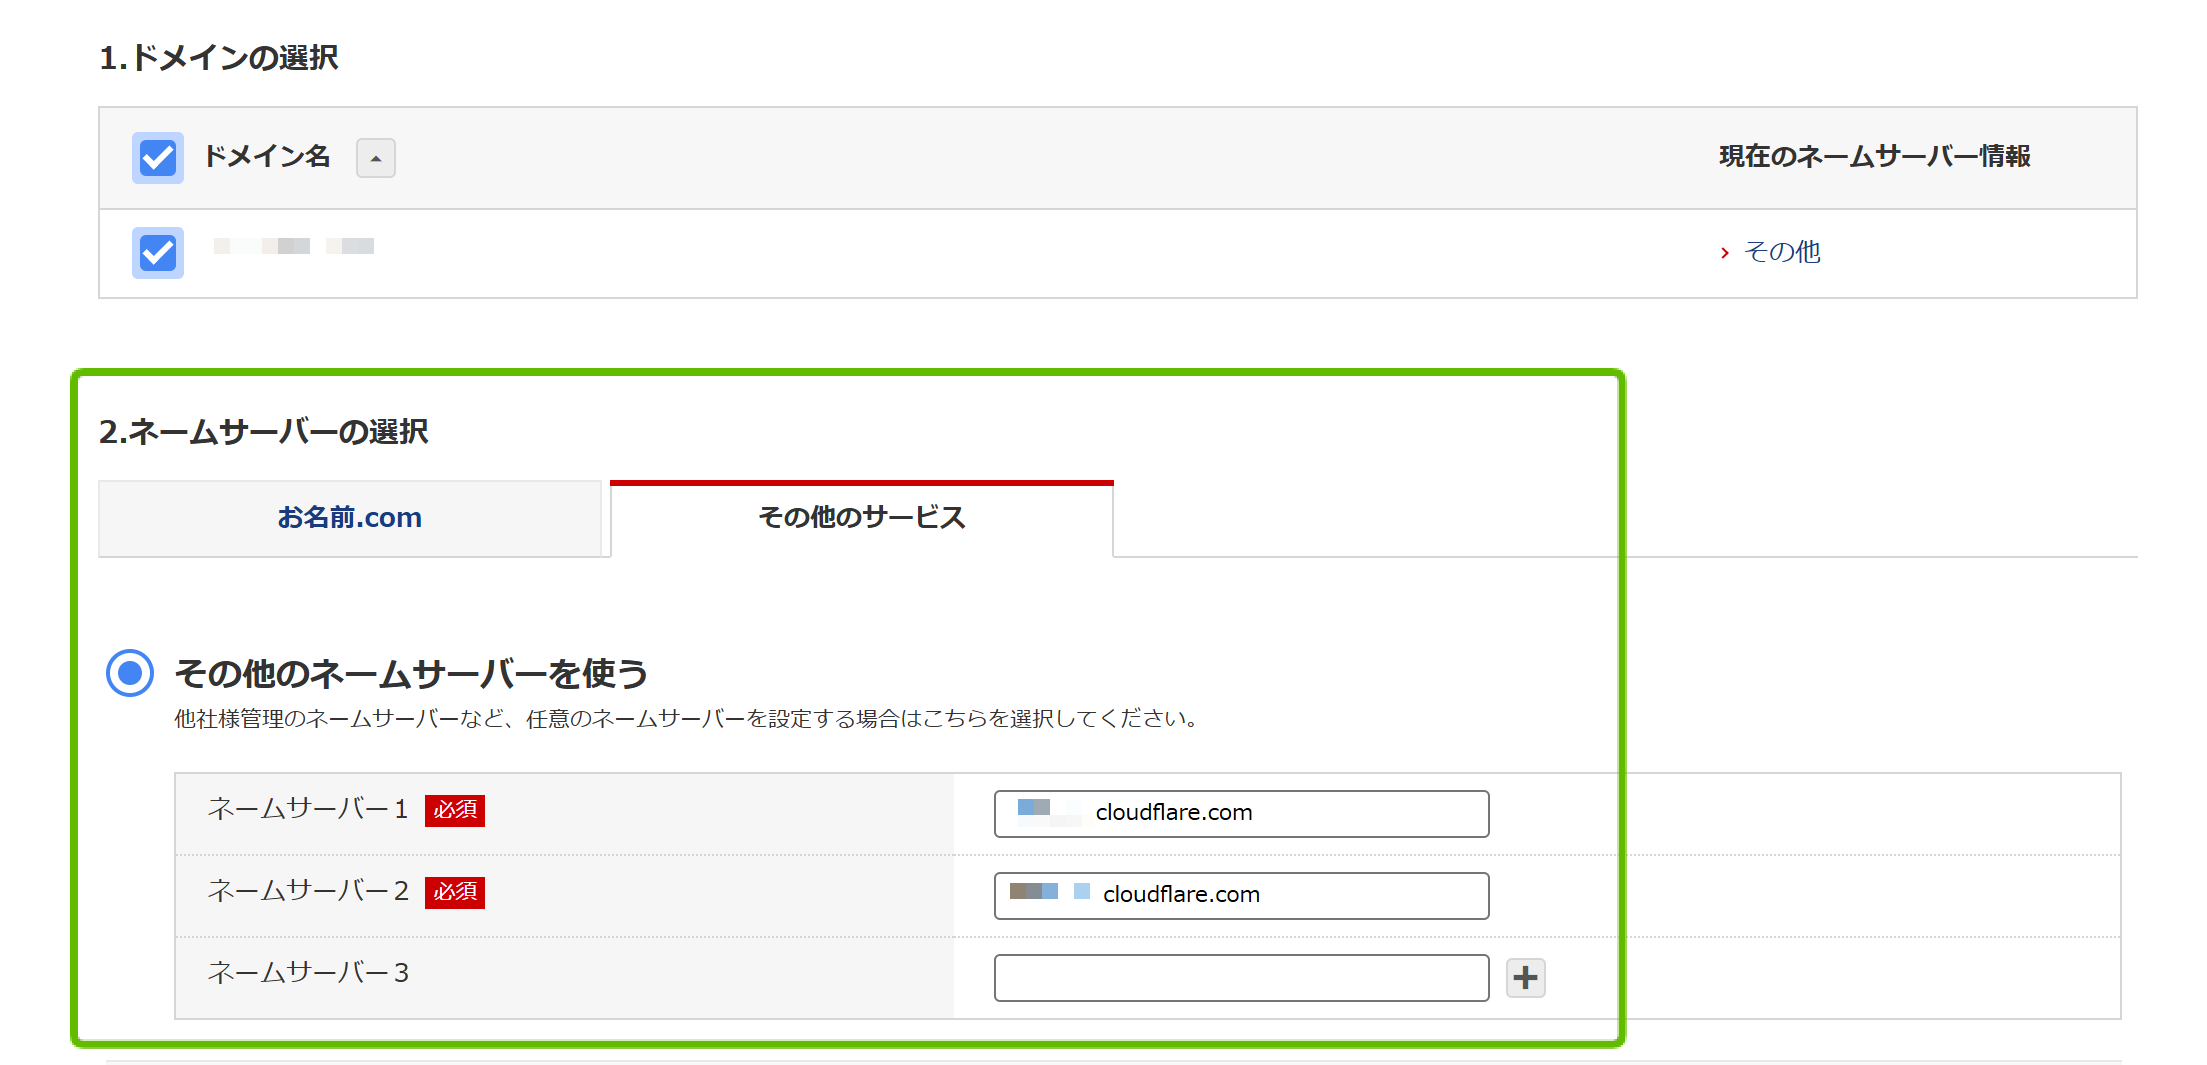
Remove or change the current nameserver settings (usually set to the registrar's own nameservers) and enter the two nameserver addresses provided by Cloudflare. Save the changes.
[Note] DNS propagation takes time!
It takes time for nameserver changes to propagate across the internet. While it can sometimes take effect within minutes, it usually takes several hours and can take up to about 48 hours in some cases. During this time, your custom domain may not be accessible or may show outdated information. Be patient and wait. Check the status periodically on the Cloudflare dashboard or wait for the confirmation email from Cloudflare.

Step 3: Activate the Domain on Cloudflare Pages
Once Cloudflare recognizes the nameserver change, the domain status on the Cloudflare dashboard will change from "Pending" to Active. (In my case, this was relatively quick and took about 5 minutes.)
Once the domain is active, it's time to formally connect your Cloudflare Pages project to your custom domain.
-
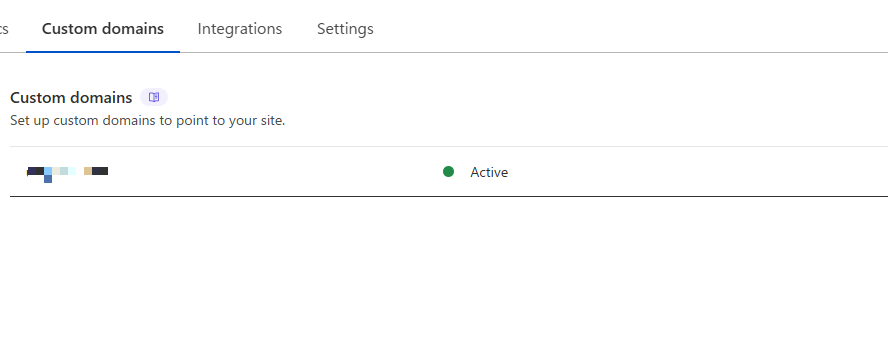
Go back to the Cloudflare Pages project settings and open the Custom domains tab.
-
Click the "Set up a custom domain" button, re-enter your custom domain name, and click "Continue."
-
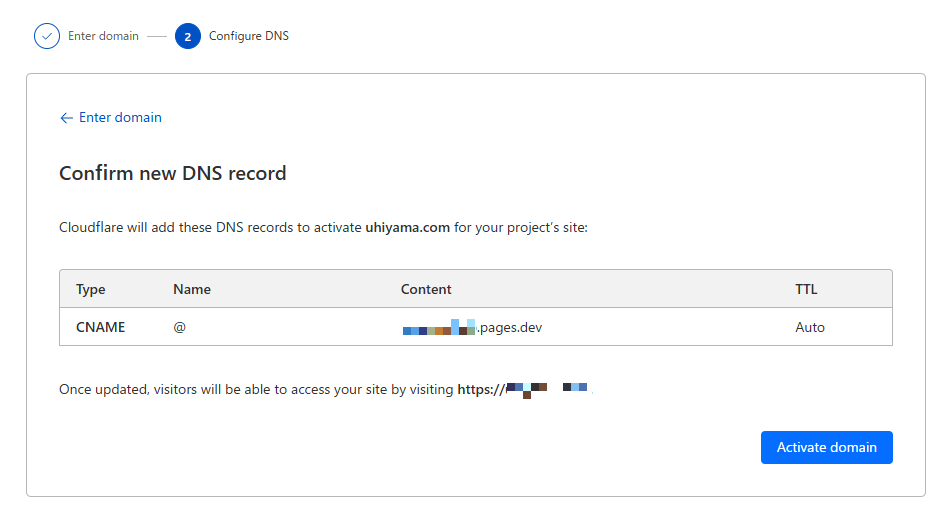
This time, since Cloudflare recognizes the domain, you should see a screen like "Activate domain" or "Verify DNS records." Cloudflare Pages will automatically set (or suggest) the required DNS records (usually a CNAME record). Review the details and click the Activate domain button.
- The status will show "Initializing" or "Verifying," and after a short wait, it will change to Active. The setup is now complete!
Once the setup is done, visiting your custom domain (e.g., https://your-cool-site.com) will display the Next.js site deployed on Cloudflare Pages. (SSL certificates are automatically issued and managed by Cloudflare.)
Summary: Next.js + Cloudflare Pages + Custom Domain Setup Flow
That covers the complete process of deploying a Next.js site to Cloudflare Pages and setting up a custom domain. Let's recap the overall flow:
- GitHub preparation: Push your Next.js project to a GitHub repository.
- Cloudflare Pages integration: Create a project on Cloudflare Pages and link it to the GitHub repository. (For private repositories, configure access permissions on the GitHub side.)
- Build settings and troubleshooting:
- Select "Next.js" in the framework preset.
- If needed, set the
NODE_VERSIONenvironment variable to specify the Node.js version. - If needed, set the
nodejs_compatcompatibility flag.
- Custom domain setup:
- Add a custom domain to Cloudflare Pages and note the Cloudflare nameservers provided.
- In your domain registrar's management panel, change the nameservers to Cloudflare's.
- Wait for DNS propagation, and once the domain is active on Cloudflare, activate the domain in the Pages project.
While there are a few things to watch out for -- like Node.js-related build errors and DNS propagation wait times -- the process itself is fairly straightforward. Cloudflare Pages offers fast delivery, strong security, and generous free-tier limits, making it an excellent hosting choice for Next.js applications. Give it a try!
(This article covers the basic deployment steps. Depending on your application's requirements, you may need additional configuration such as environment variables, custom build commands, redirect rules, and more. Refer to the official Cloudflare Pages documentation for further details.)