
In my previous article, I covered the basics of learning Godot. This time, I completed the Udemy course "Godot4: Build a 2D Action-Adventure Game" and tackled building a practical 2D action-adventure game.
The course systematically covers everything from basic player controls to NPC dialogue, puzzles, and combat systems. This article distills the key Godot features and concepts I learned along the way.
- Course Overview
- Key Godot Features & Concepts
- Process Mode: Pause Control
- CharacterBody2D Motion Mode
- InputMap: Key Binding Management
- Input Processing Methods
- move_and_slide vs move_toward
- Groups: Flexible Object Identification
- Collision Layers/Masks
- Terrains: Auto-Tiling
- Marker2D: The Go-To Manager Node
- Editable Children & Scene Inheritance
- Autoload: Cross-Scene Data Management
- White Flash with modulate
- AnimatedSprite2D vs AnimationPlayer
- Conclusion
Course Overview
"Godot4: Build a 2D Action-Adventure Game" builds a 2D action-adventure game from scratch. As you work through it, questions like these get answered naturally:
- How do you implement area transitions?
- How do you handle pushable objects?
- How do you persist opened treasure chest states?
- How do you manage NPC dialogue?
- How do you implement a door that requires multiple switches?
- How do you create a damage flash effect?
The curriculum covers 8-directional player movement, Terrains-based auto-tiling, Y-Sort for draw order, RigidBody2D physics puzzles, dialogue systems, Autoload for data persistence, and enemy AI with knockback combat.
It's a step up in difficulty from the beginner course I covered previously, but packed with knowledge you actually need for real game development. Udemy runs sales frequently — add it to your wishlist and grab it on sale.
Key Godot Features & Concepts
Here's a deep dive into the features I found most important during the course.
Process Mode: Pause Control
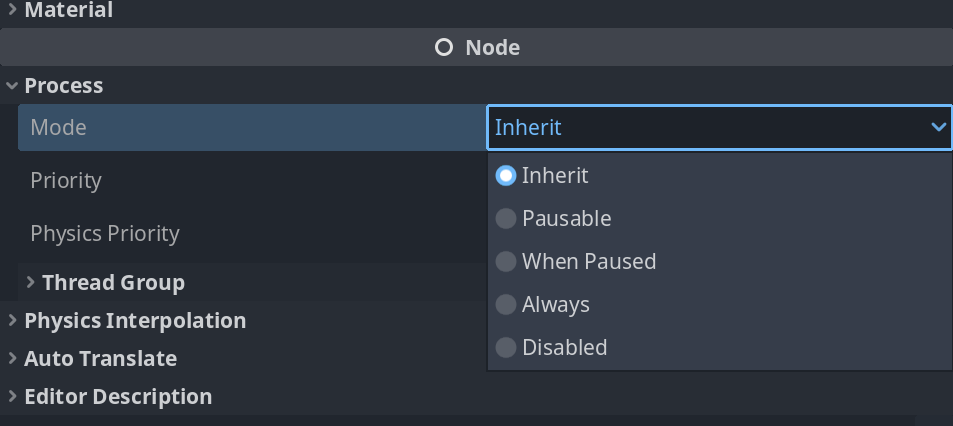
"Freeze enemies and the player during NPC dialogue, but keep the dialogue window interactive" — a common game development requirement. Godot handles this with per-node Process Mode settings.
- Pausable (default): Stops when
get_tree().paused = true. For game world objects like players and enemies. - Always: Ignores pause state. For active NPCs, UI, and background music.
- When Paused: Only runs during pause. For pause menu UI.
In Unity, you'd set Time.timeScale = 0 and manually use Time.unscaledDeltaTime in individual scripts. Godot's approach of setting Process Mode per node is far more elegant.
Implementation: pausing the game during dialogue
The scene pauses during conversation and resumes when dialogue ends
# NPC.gd
# Set this NPC's Process Mode to "Always" in the inspector

func _process(delta):
    if Input.is_action_just_pressed("interact") and can_talk:
        if is_dialog_active():
            close_dialog()
            get_tree().paused = false
        else:
            open_dialog()
            get_tree().paused = true
The NPC keeps running while the rest of the game pauses, allowing safe dialogue open/close handling.
CharacterBody2D Motion Mode
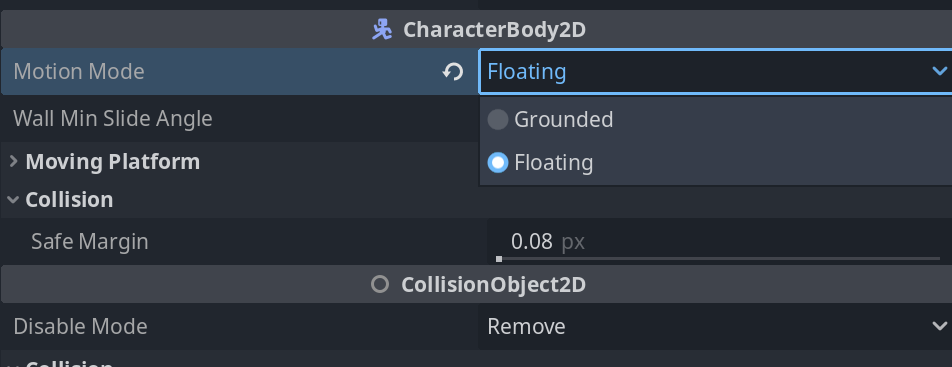
CharacterBody2D has a Motion Mode setting that switches physics behavior based on your game's genre. Always check this at project start.
- Grounded (default): Gravity applies,
is_on_floor()works. For platformers and side-scrollers. - Floating: No gravity, no floor concept. For top-down action games and shooters.
# Player.gd (Motion Mode set to "Floating")
extends CharacterBody2D

@export var speed: float = 200.0

func _physics_process(delta):
    var direction = Input.get_vector("move_left", "move_right", "move_up", "move_down")
    velocity = direction * speed
    move_and_slide()
Wrong settings cause unexpected gravity or broken floor detection — an easy mistake to make.
InputMap: Key Binding Management
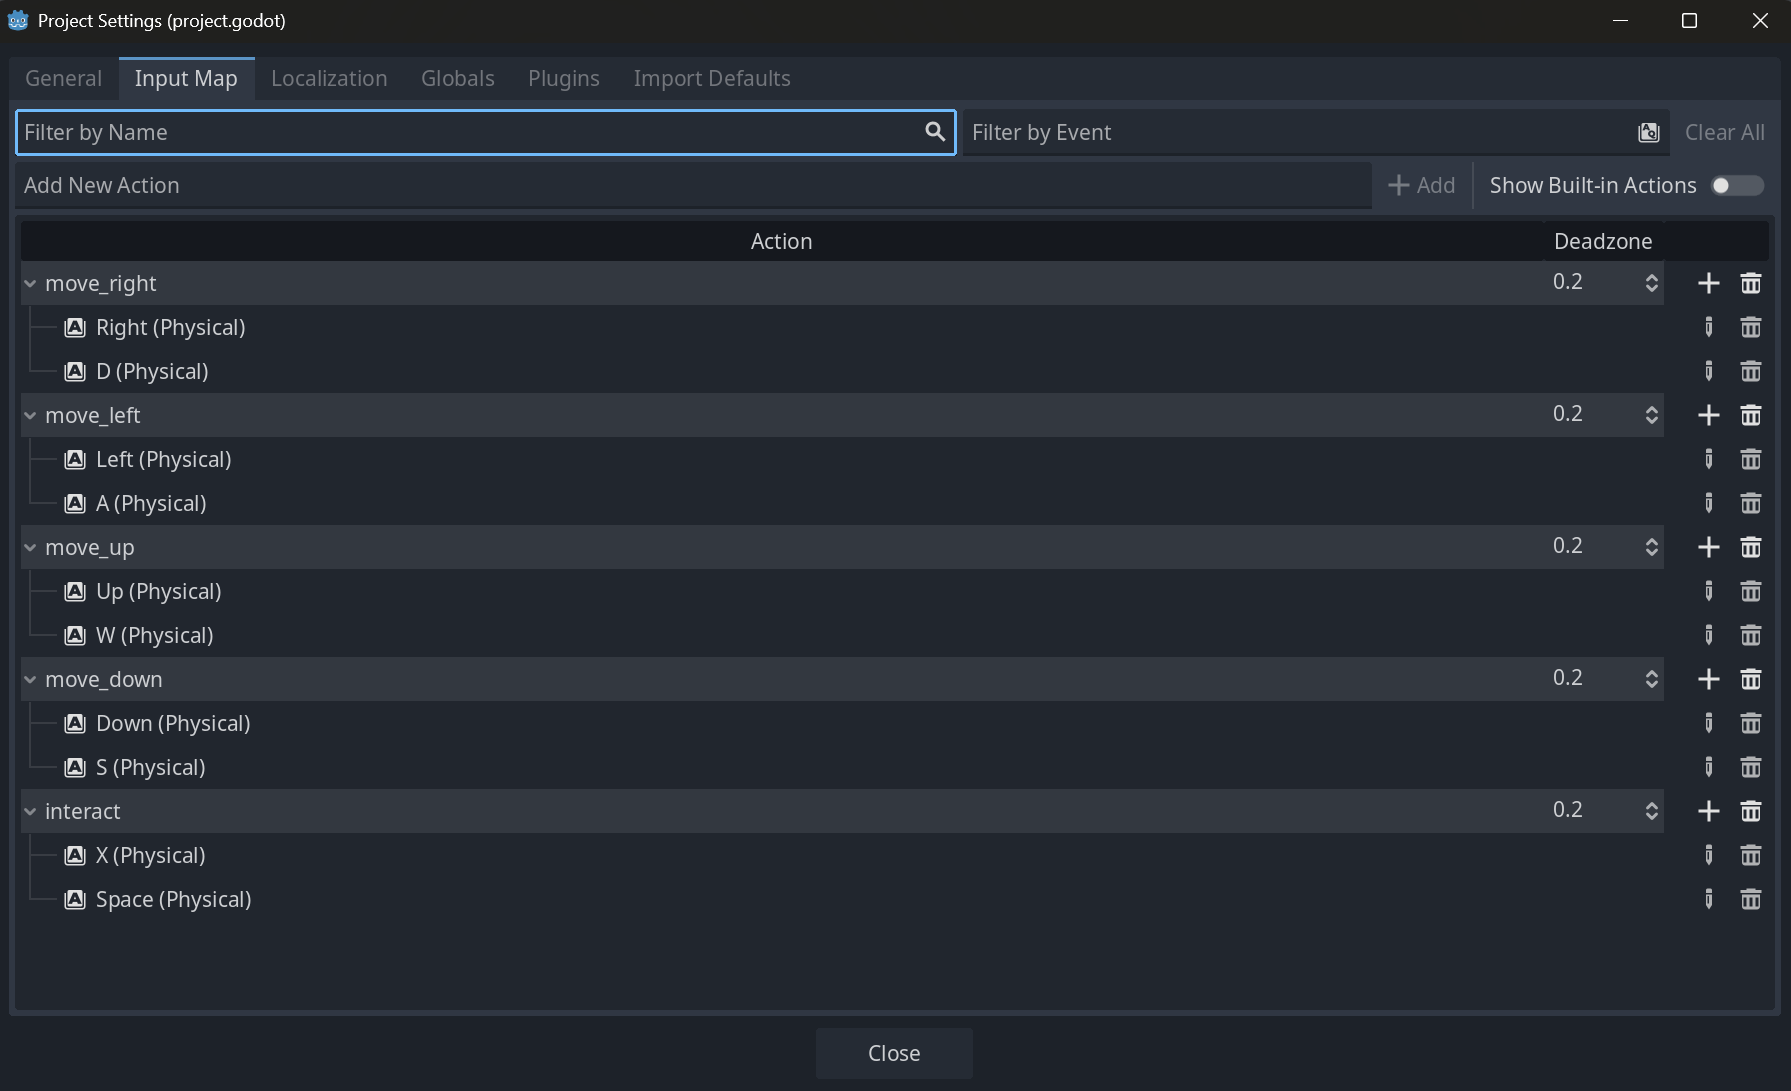
In Unity, it's tempting to write Input.GetKey(KeyCode.A) directly. Godot's Input Map (Project Settings → Input Map) takes a better approach: define action names and bind keys to them. Your code uses abstract names like "move_left", making it more readable and easy to add key remapping.
func _process(delta):
    # One-shot input (moment of press)
    if Input.is_action_just_pressed("interact"):
        open_chest()

    # Continuous input (while held)
    if Input.is_action_pressed("dash"):
        speed = DASH_SPEED
    else:
        speed = NORMAL_SPEED

    # Get 4-directional input as a normalized Vector2 (very handy)
    var direction = Input.get_vector("move_left", "move_right", "move_up", "move_down")
    velocity = direction * speed
    move_and_slide()
Input.get_vector() returns a normalized Vector2 from four actions, letting you write top-down movement in a single line.
Input Processing Methods
Once you've defined actions in InputMap, choose the right method based on input state.
| Use Case | Method | Examples |
|---|---|---|
| One-shot on press | is_action_just_pressed() | Jump, attack, menu toggle |
| While held | is_action_pressed() | Movement, dash, charge |
| On release | is_action_just_released() | Fire charged attack |
| Analog (0.0–1.0) | get_action_strength() | Gamepad trigger |
func _process(delta):
    # One-shot actions
    if Input.is_action_just_pressed("jump"):
        if is_on_floor():
            velocity.y = JUMP_VELOCITY

    if Input.is_action_just_pressed("attack"):
        perform_attack()

    # Continuous actions
    if Input.is_action_pressed("dash"):
        current_speed = dash_speed
    else:
        current_speed = normal_speed

    # Charge: hold to build, release to fire
    if Input.is_action_pressed("charge"):
        charge_power += charge_rate * delta
        charge_power = min(charge_power, max_charge)

    if Input.is_action_just_released("charge"):
        fire_charged_shot(charge_power)
        charge_power = 0.0
A common mistake: using is_action_pressed() for shooting fires a bullet every frame. Always use is_action_just_pressed() for one-shot actions.
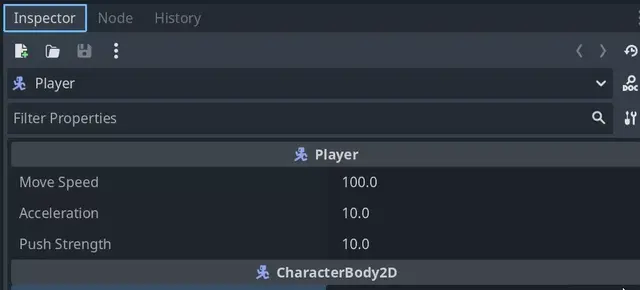
move_and_slide vs move_toward
Two essential movement functions in Godot:
move_and_slide(): The workhorse ofCharacterBody2D. Moves based on currentvelocityand automatically handles wall/floor collisions.move_toward(target, delta): Gradually shifts a value toward a target. Used for smooth acceleration and deceleration.
The distinction becomes critical when implementing knockback. Here's a real problem I hit during the course:
Directly assigning velocity means the moment a player inputs movement during knockback, the knockback effect vanishes instantly. Using move_toward for gradual velocity changes lets knockback decay naturally into normal movement.
# Direct assignment — knockback disappears instantly
func move_player():
    var move_vector = Input.get_vector("move_left", "move_right", "move_up", "move_down")
    velocity = move_vector * move_speed  # Overwrites knockback velocity

# move_toward — knockback decays smoothly
@export var acceleration: float = 500.0

func move_player():
    var move_vector = Input.get_vector("move_left", "move_right", "move_up", "move_down")
    var target_velocity = move_vector * move_speed
    velocity = velocity.move_toward(target_velocity, acceleration * delta)

# Knockback
func apply_knockback(direction: Vector2, strength: float):
    velocity += direction * strength
The second argument of move_toward specifies how much to approach the target per frame. Using acceleration * delta ensures frame-rate-independent smooth transitions.
Groups: Flexible Object Identification
"Did the attack hit an enemy or a pushable object?" — Godot uses groups to answer this.
Similar to Unity's Tag system, but with a crucial difference: Unity allows only one Tag per GameObject. Godot groups support multiple assignments, so an object can be both "enemies" and "damageable" simultaneously.
Setup is simple: select a node → Inspector → Node tab → Groups → add a group name. In code, use is_in_group() to check.
# Connected to player's sword Area2D
func _on_sword_area_body_entered(body: Node2D):
    if body.is_in_group("enemies"):
        body.take_damage(attack_power)
    elif body.is_in_group("pushable"):
        pass  # Handle pushable object
Collision Layers/Masks
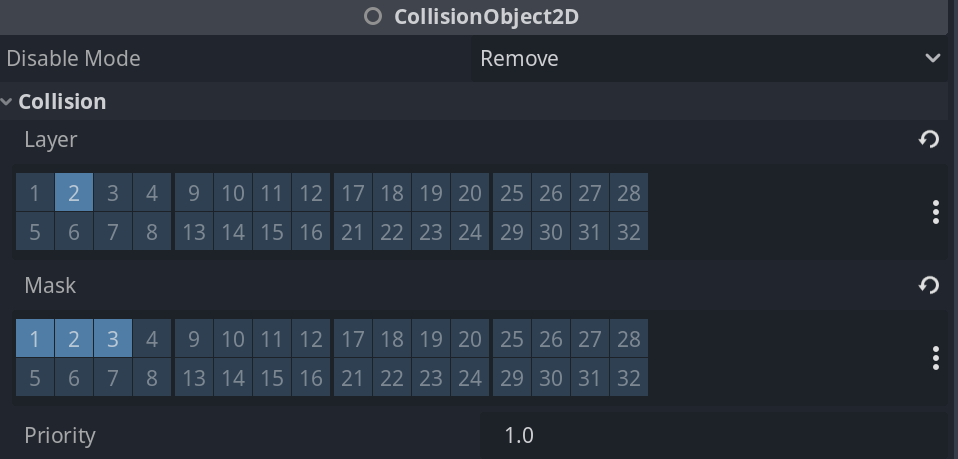
Without proper collision organization, you'll get "the player's sword hits allies" or "enemies get stuck on each other." Godot's Collision Layers/Masks prevent this.
- Layer: Which collision layer this object exists on
- Mask: Which layers this object checks for collisions
For example, with Player (Layer 1), Enemies (Layer 2), and Weapons (Layer 3):
| Object | Layer | Mask | Reason |
|---|---|---|---|
| Player | 1 | 2 | Takes damage from enemies |
| Enemy | 2 | 1 | Only contacts player (enemies pass through each other) |
| Player's weapon | 3 | 2 | Only hits enemies (doesn't collide with player) |
# Weapon's Mask only detects enemies, so only enemies trigger this
func _on_weapon_area_body_entered(body):
    if body.is_in_group("enemies"):
        body.take_damage(attack_power)
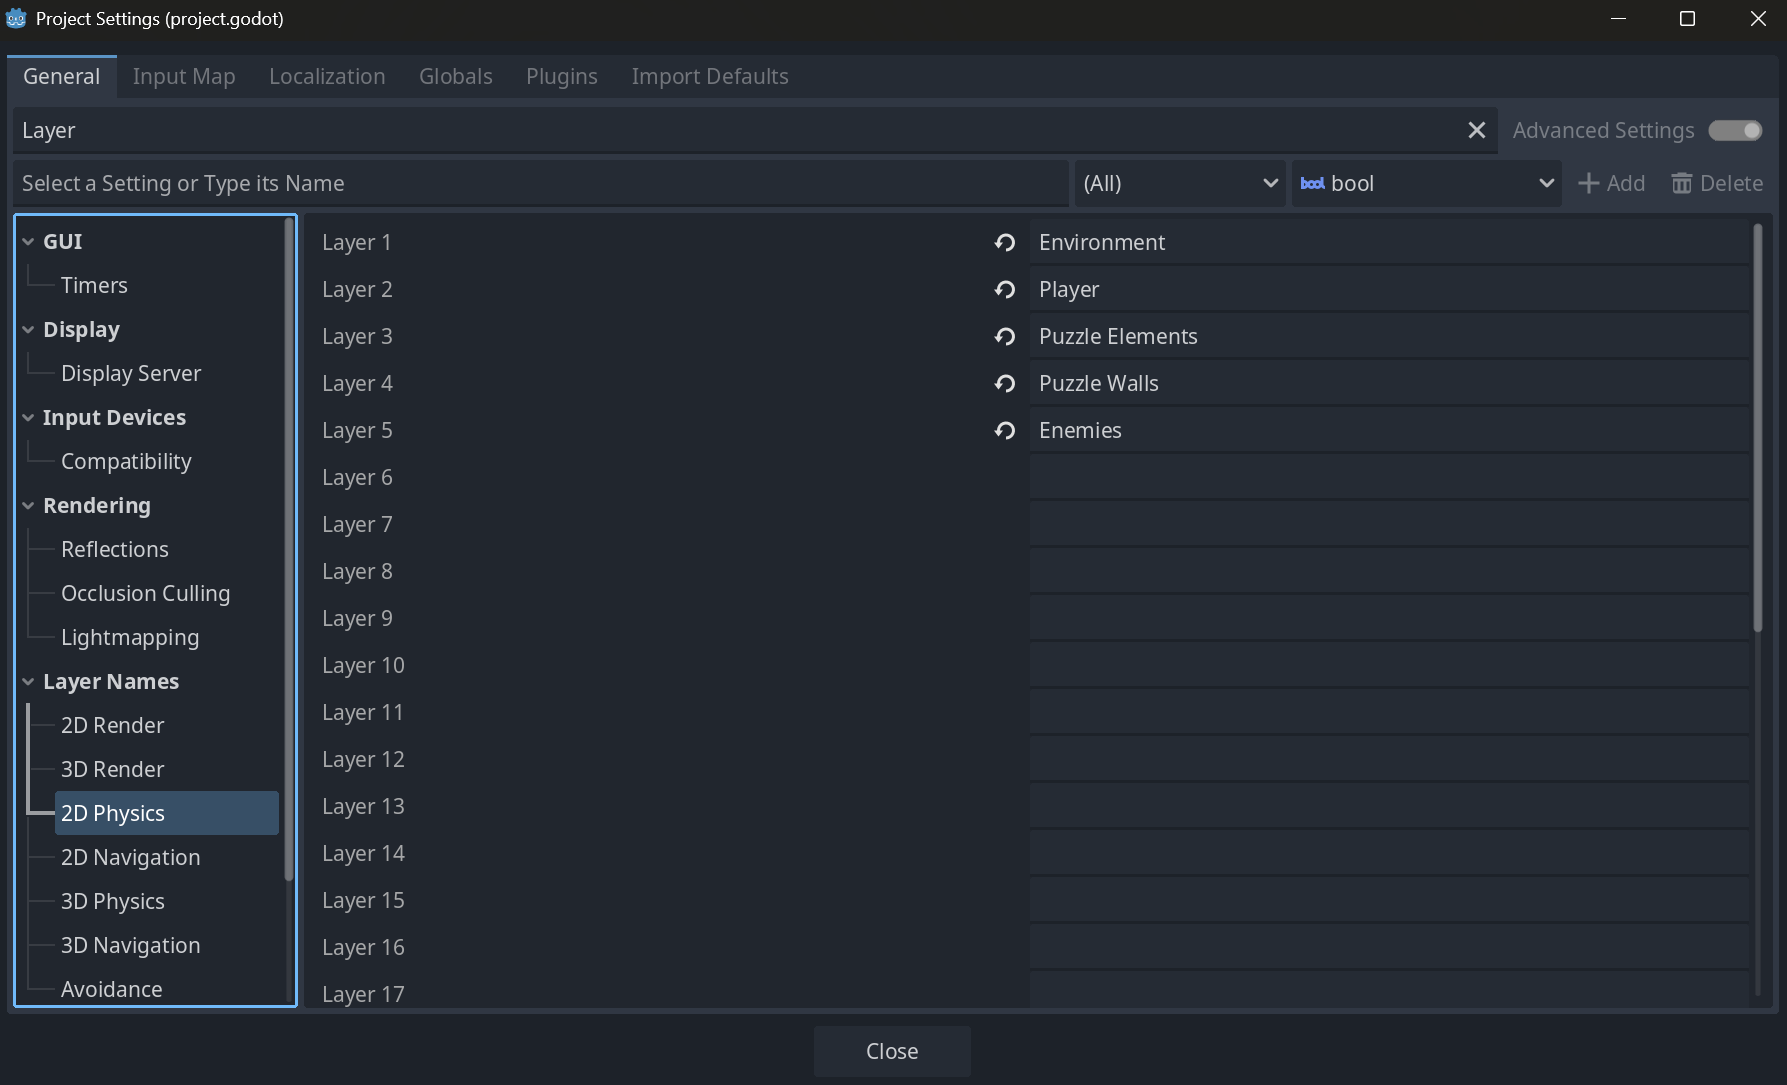
Name your layers in Project Settings → Layer Names to make inspector setup much clearer.
Terrains: Auto-Tiling
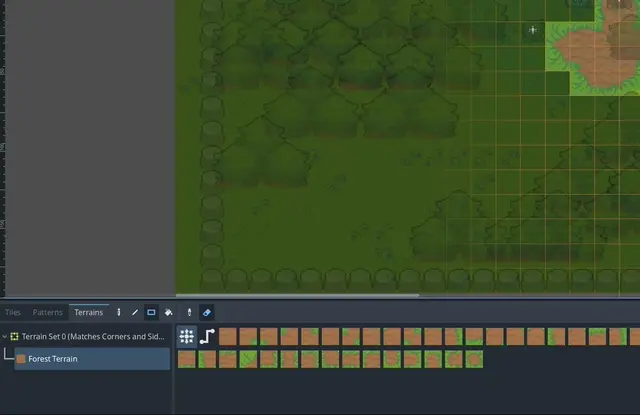
Godot's Terrains feature makes auto-tiling surprisingly easy. If you've used Rule Tiles in Unity, you'll appreciate how intuitive this is.
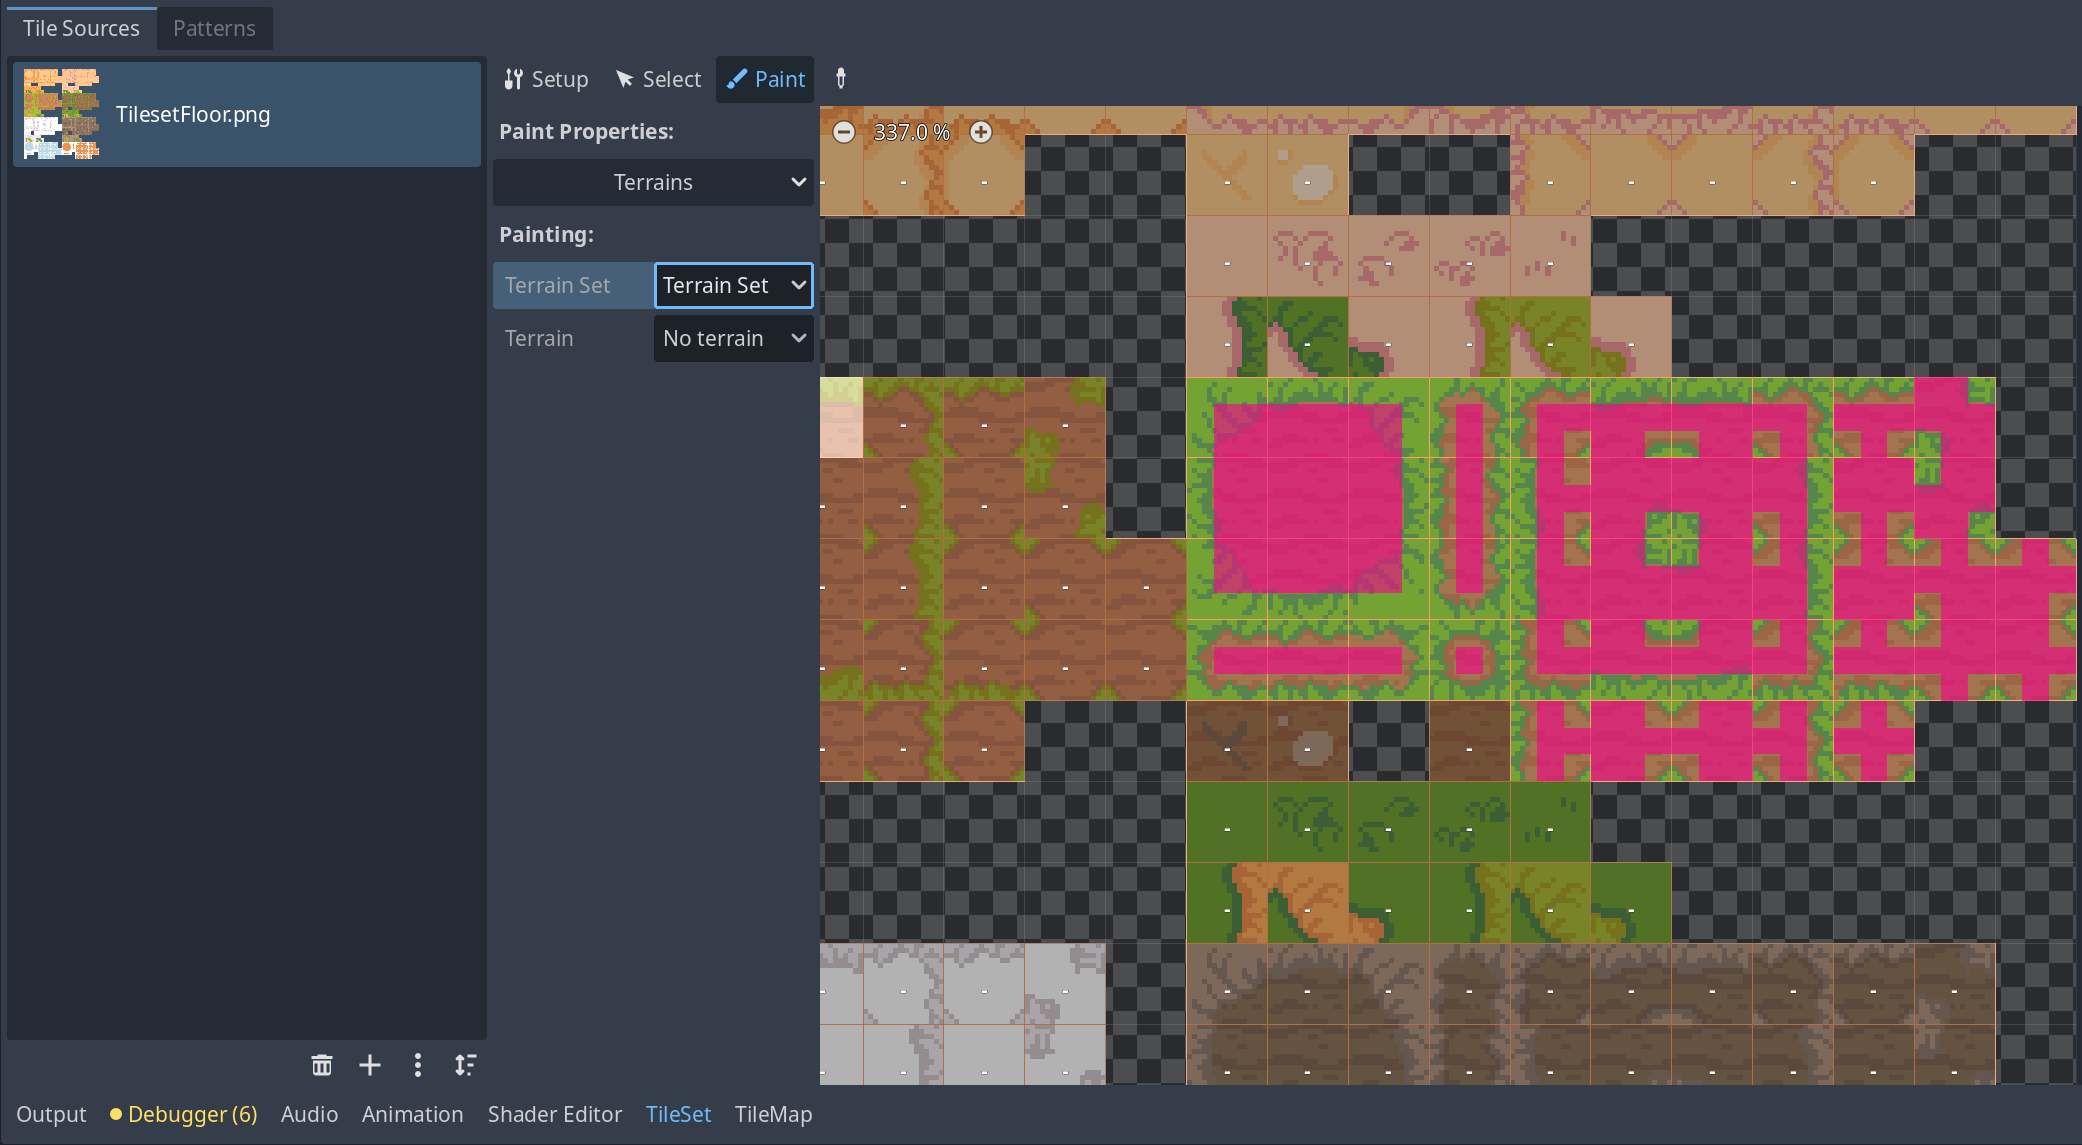
In the TileSet resource's Terrains tab, you visually paint which edges of each tile connect to which terrain type. Then the TileMap editor's brush tool automatically selects the right tile based on boundaries.
Handy features include: random brush (dice icon) for selecting from multiple tiles, probability control for tile frequency, and "F" key for batch-applying collision to all tiles.
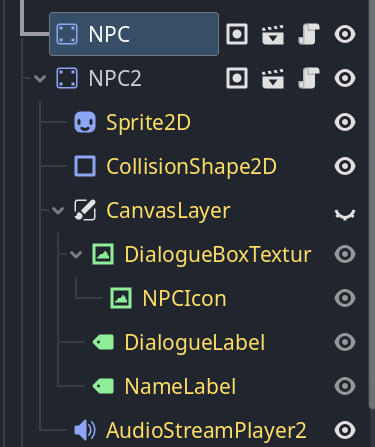
Marker2D: The Go-To Manager Node
In Unity, the standard practice was attaching scripts to empty GameObjects to create "managers." In Godot, Marker2D fills this role.
Marker2D holds only position data (Transform) — the lightest 2D node available. No rendering, no physics overhead, making it perfect for scene management scripts like GameManager or PuzzleManager. Unlike Unity's empty GameObjects, it shows a crosshair marker in the editor for easy visibility.
Editable Children & Scene Inheritance
Two approaches for creating variations from a base scene, each suited to different use cases:
- Editable Children: Right-click an instance → "Editable Children" to directly modify its internals (sprites, colliders, etc.). Changes only apply to that specific placement. Great for mass-producing NPCs that differ only in appearance or dialogue.
- Scene Inheritance: Create a new scene (Shopkeeper.tscn) that inherits from a base (BaseNPC.tscn). Add unique nodes and scripts while keeping parent functionality. Best for functionally different variants like a merchant NPC that can "talk" and "trade."
| Aspect | Editable Children | Scene Inheritance |
|---|---|---|
| Best for | Villager A, B, etc. (visual/dialogue differences) | Merchant, Blacksmith (unique functionality) |
| Reusability | Low (local to that scene) | High (inherited scene usable everywhere) |
| Management | Simple (base scene only) | Structured (functionality split across files) |
Autoload: Cross-Scene Data Management
"Open a treasure chest, leave the area, come back — and it's closed again." The classic scene-switching data loss problem is solved in Godot with Autoload — equivalent to Unity's DontDestroyOnLoad + singleton pattern.
Register a script as Autoload in Project Settings, and it loads automatically at game start, accessible globally from any scene.
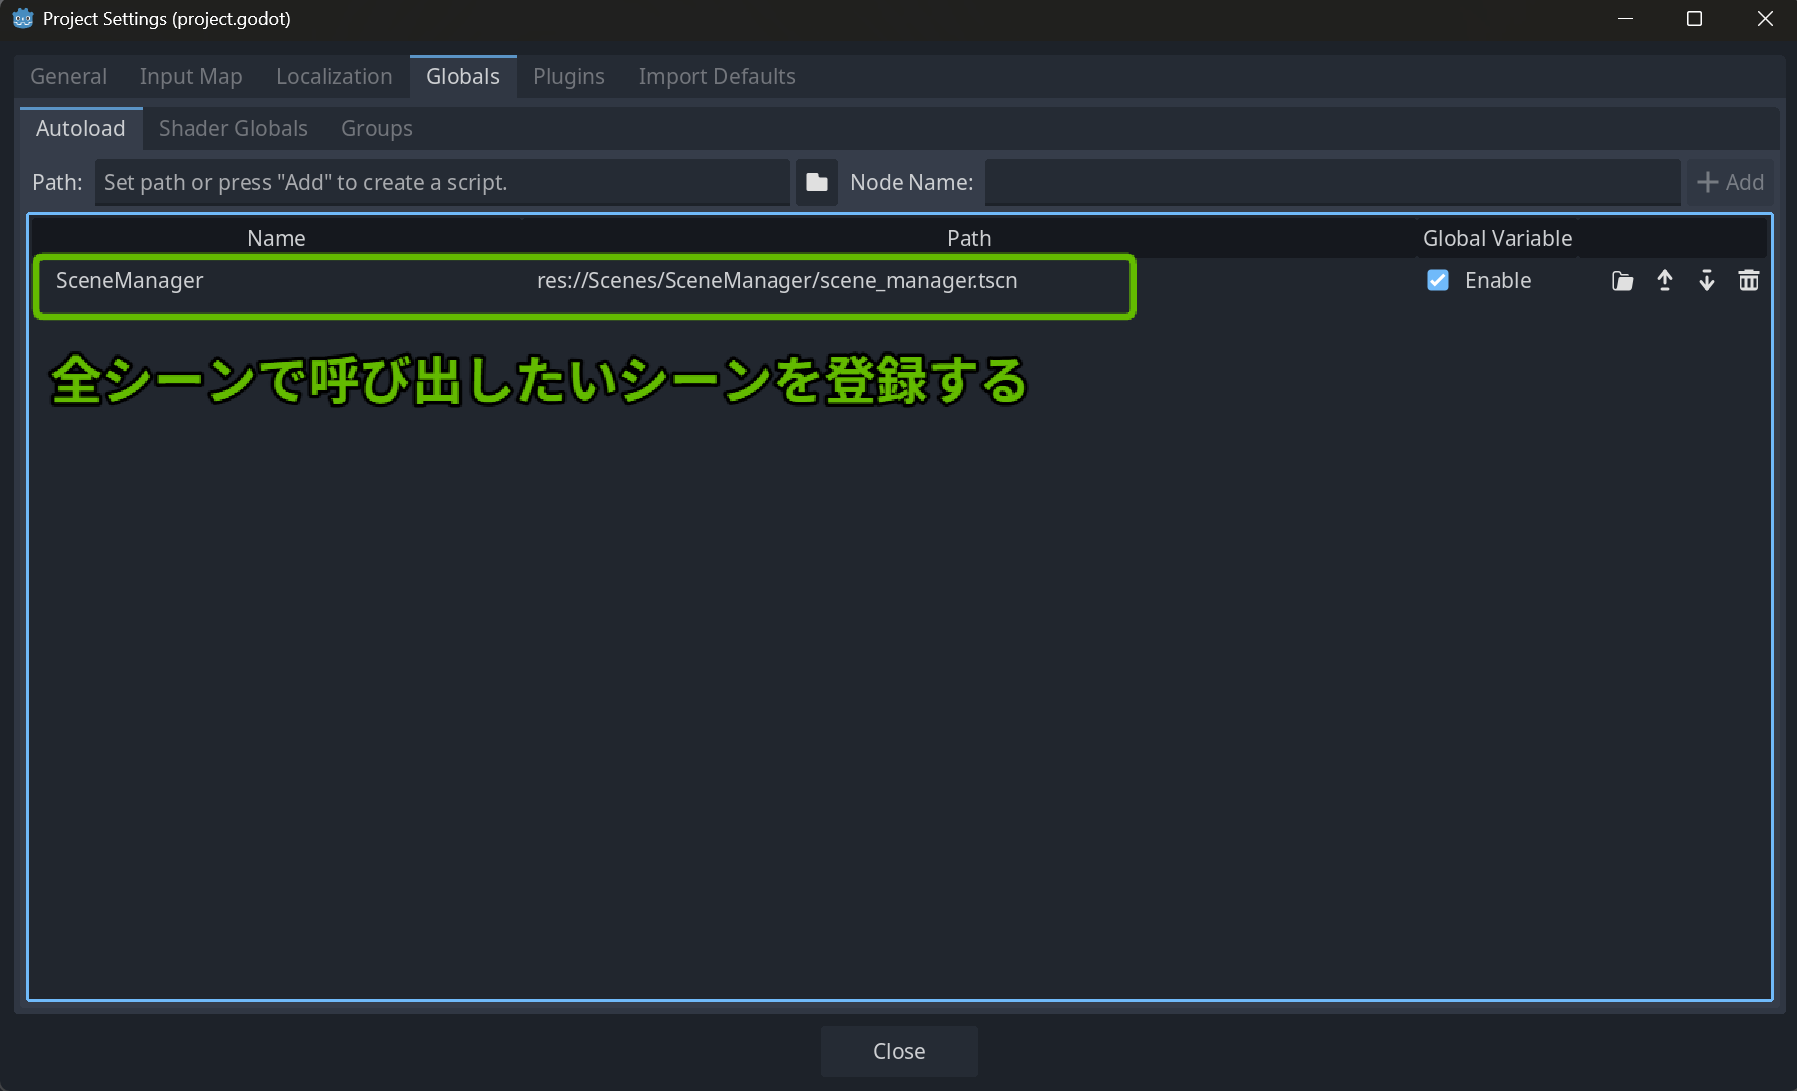
# GameManager.gd (registered as AutoLoad)
extends Node

var opened_chests: Array[String] = []
var player_hp: int = 3
var player_spawn_position: Vector2
# TreasureChest.gd
extends StaticBody2D

@export var chest_id: String  # Set a unique ID like "forest_chest_01"

func _ready():
    if GameManager.opened_chests.has(chest_id):
        play_open_animation(false)

func open_chest():
    GameManager.opened_chests.append(chest_id)
    play_open_animation(true)
Player HP, scores, inventory, quest progress — any data that needs to survive scene changes goes through Autoload.
White Flash with modulate
A brief white flash on damage is incredibly effective player feedback. In Godot, it's trivial to implement using the modulate property.
modulate is a color value multiplied against a node and all its descendants. Default is white (1, 1, 1). Higher values = brighter, lower = darker. Changing CharacterBody2D's modulate automatically affects its child AnimatedSprite2D — no individual sprite manipulation needed.
# Player.gd
func take_damage(amount):
    # ...damage calculation...
    flash_effect()

func flash_effect():
    modulate = Color(2, 2, 2)  # Flash white
    await get_tree().create_timer(0.1).timeout  # Wait 0.1 seconds
    modulate = Color(1, 1, 1)  # Restore original
await get_tree().create_timer(0.1).timeout is a one-liner for temporary delays without adding timer nodes.
AnimatedSprite2D vs AnimationPlayer
Godot has two main 2D animation systems, each suited to different needs.
AnimatedSprite2D
Dedicated to sprite frame animation. Best for walk cycles, attacks, idles — anything that's just swapping sprite sheet frames.
if velocity.x > 0:
    $AnimatedSprite2D.play("move_right")
elif velocity.x < 0:
    $AnimatedSprite2D.play("move_left")
else:
    $AnimatedSprite2D.stop()
AnimationPlayer
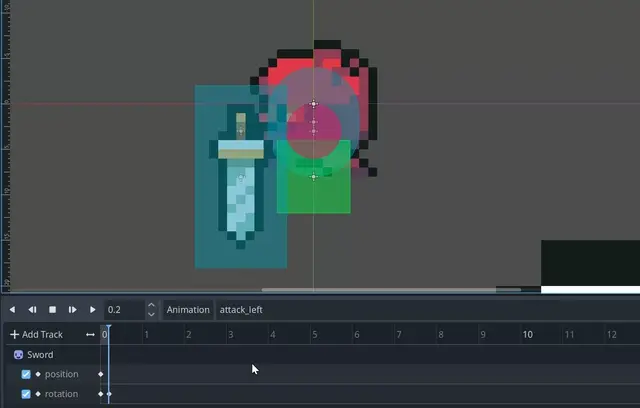
A general-purpose animation system controlling position, rotation, scale, and any property simultaneously. Similar to Unity's Animator — used for sword swings, UI animations, and camera work.
func attack():
    var player_animation: String = $AnimatedSprite2D.animation
    if player_animation == "move_right":
        $AnimatedSprite2D.play("attack_right")
        $AnimationPlayer.play("attack_right")  # Controls sword position & angle
Selection Guide
| Animation Content | Recommended System |
|---|---|
| Sprite frame switching only | AnimatedSprite2D |
| Position/rotation/scale changes | AnimationPlayer |
| Multi-object synchronization | AnimationPlayer |
| Complex state transitions | AnimationTree |
In practice, you'll typically combine AnimatedSprite2D for basic character animation with AnimationPlayer for weapon and effect animations.
Conclusion
This course reinforced how consistently Godot's design philosophy holds together. Process Mode, Motion Mode, Collision Layers — concepts are unified and solutions to common problems are straightforward.
What stands out most is how many "I wish Unity had this built-in" features come standard: Terrains, Y-Sort, move_and_slide(), and more. For Unity developers, Godot offers a compelling combination of low learning curve and development comfort.