Overview
To create scripts with UdonSharp, you first need to set up a proper development environment. Currently, using the official tool VRChat Creator Companion (VCC) is the standard approach for VRChat world development.
This article explains the complete process from creating a new Unity project for UdonSharp development using VCC, writing your first script, and verifying its operation in the Unity Editor.
Step 1: Installing VRChat Creator Companion (VCC)
VCC is an official tool that centrally manages the Unity version, VRChat SDK, UdonSharp, and other packages needed for VRChat content creation. Using this tool significantly reduces the complexity of environment setup.
- Download VCC: Visit the VRChat official download page and download "Creator Companion."
- Install: Run the downloaded installer and follow the on-screen instructions to complete the installation.
Going forward, it's recommended to create and manage all VRChat-related projects through this VCC.
Step 2: Creating a Unity Project for UdonSharp
Launch VCC and create a new project from the world development template.
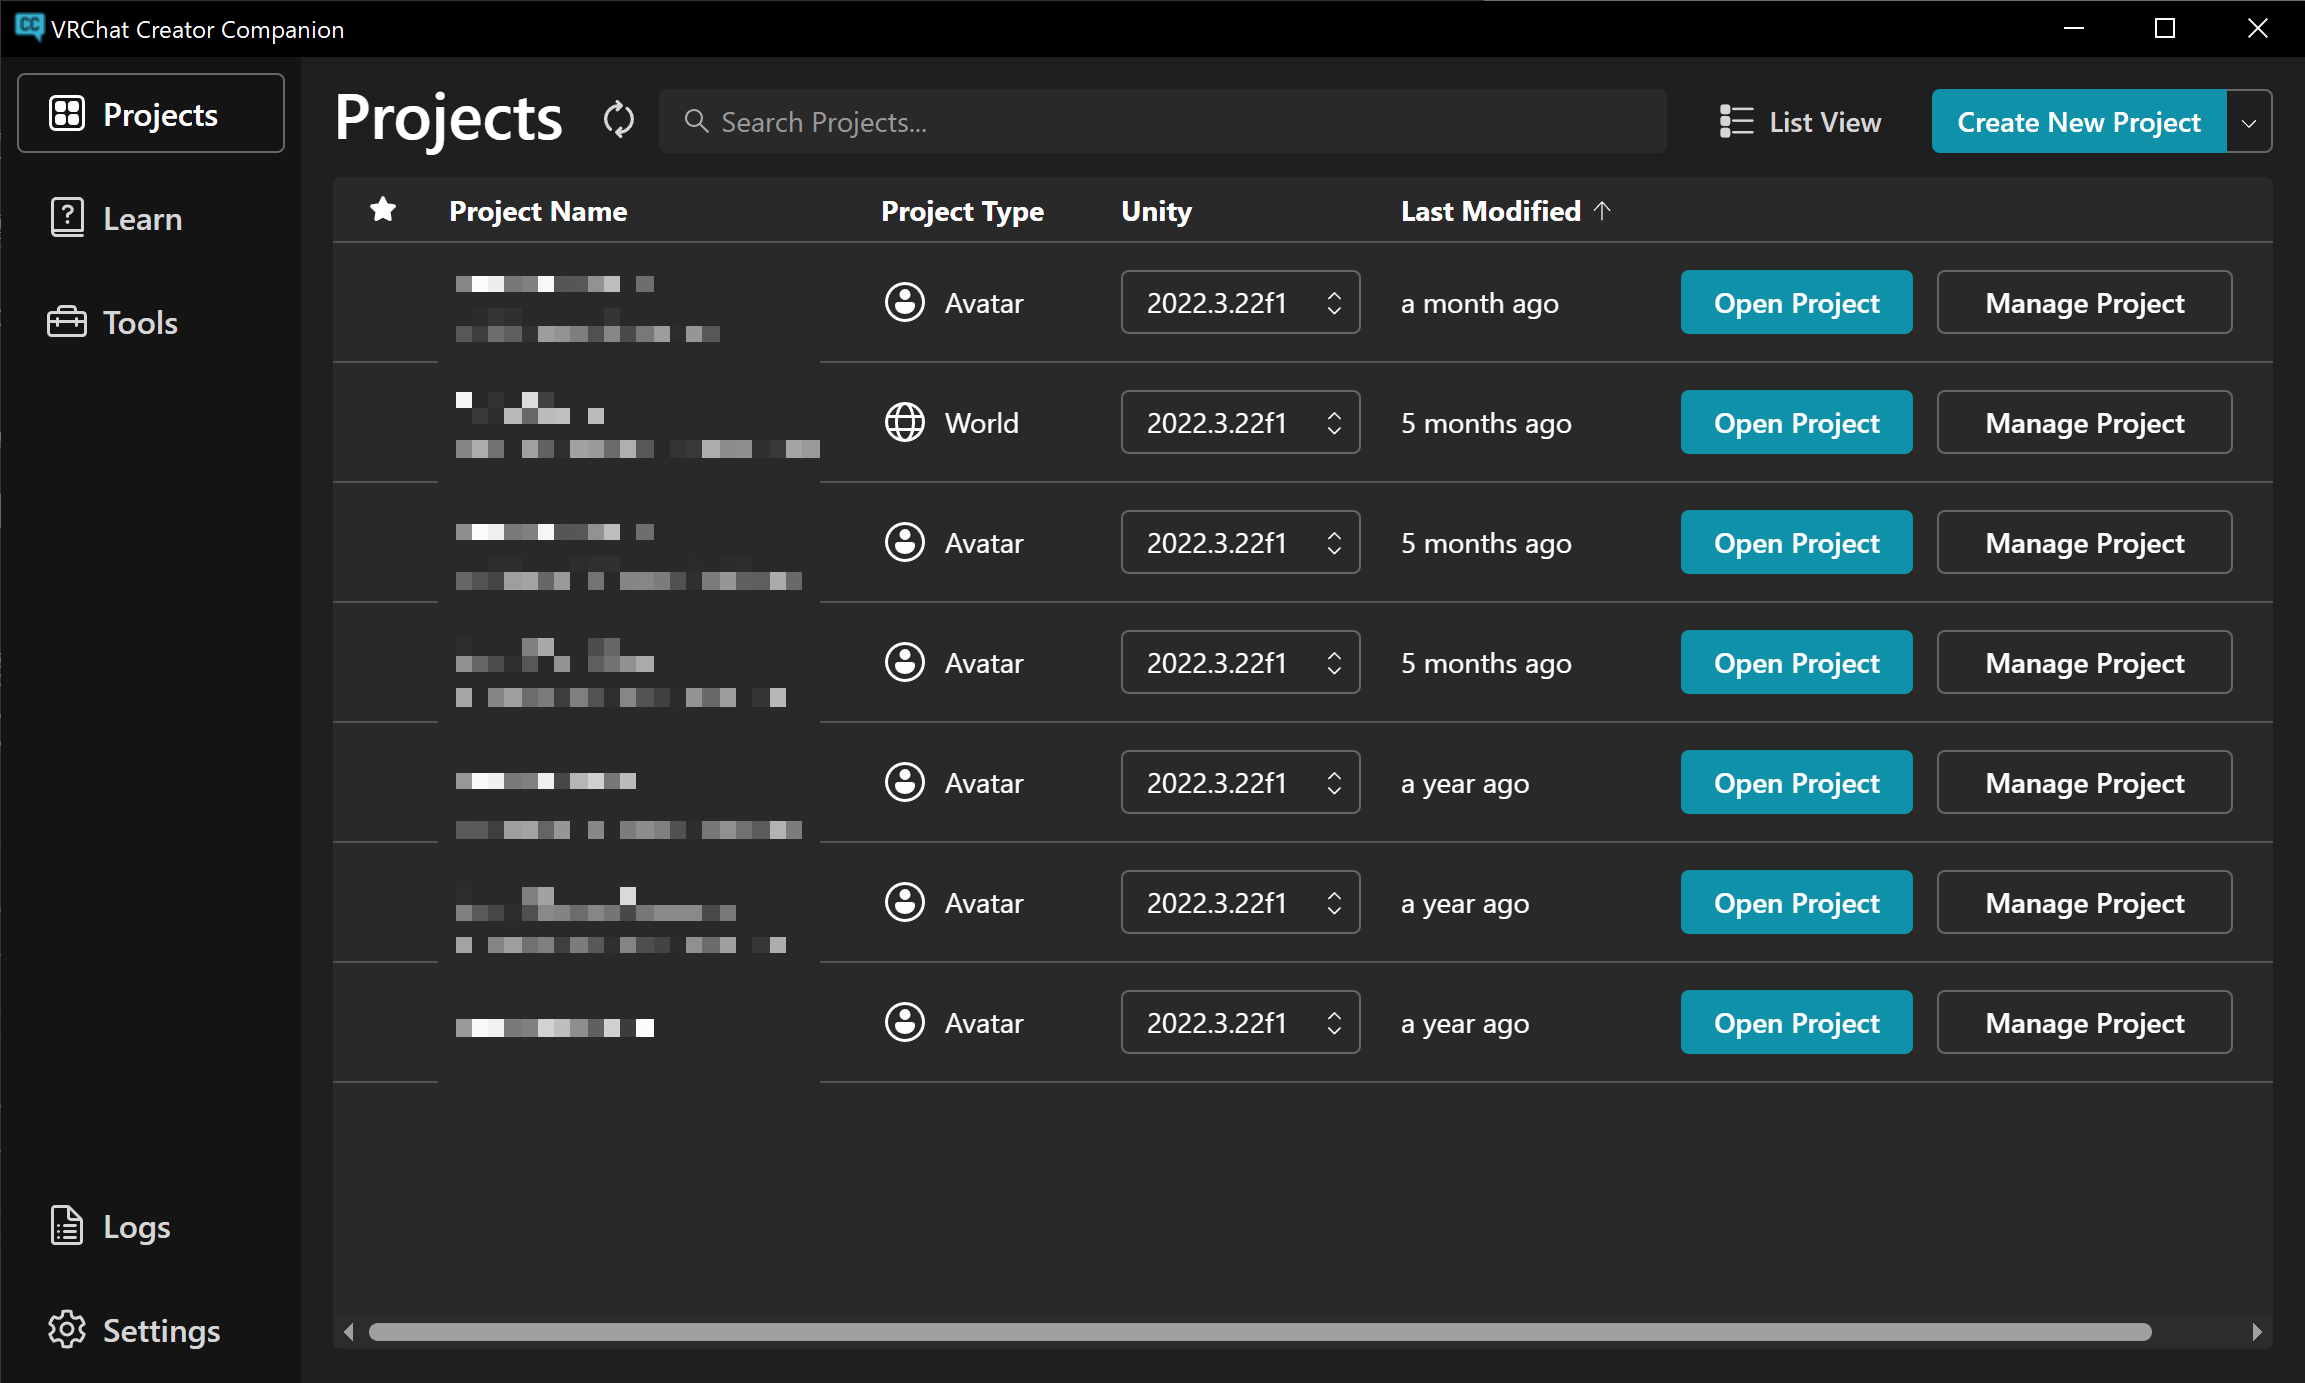
- Launch VCC and select the "Projects" tab from the left menu.
- Click the "Create New Project" button in the upper right.
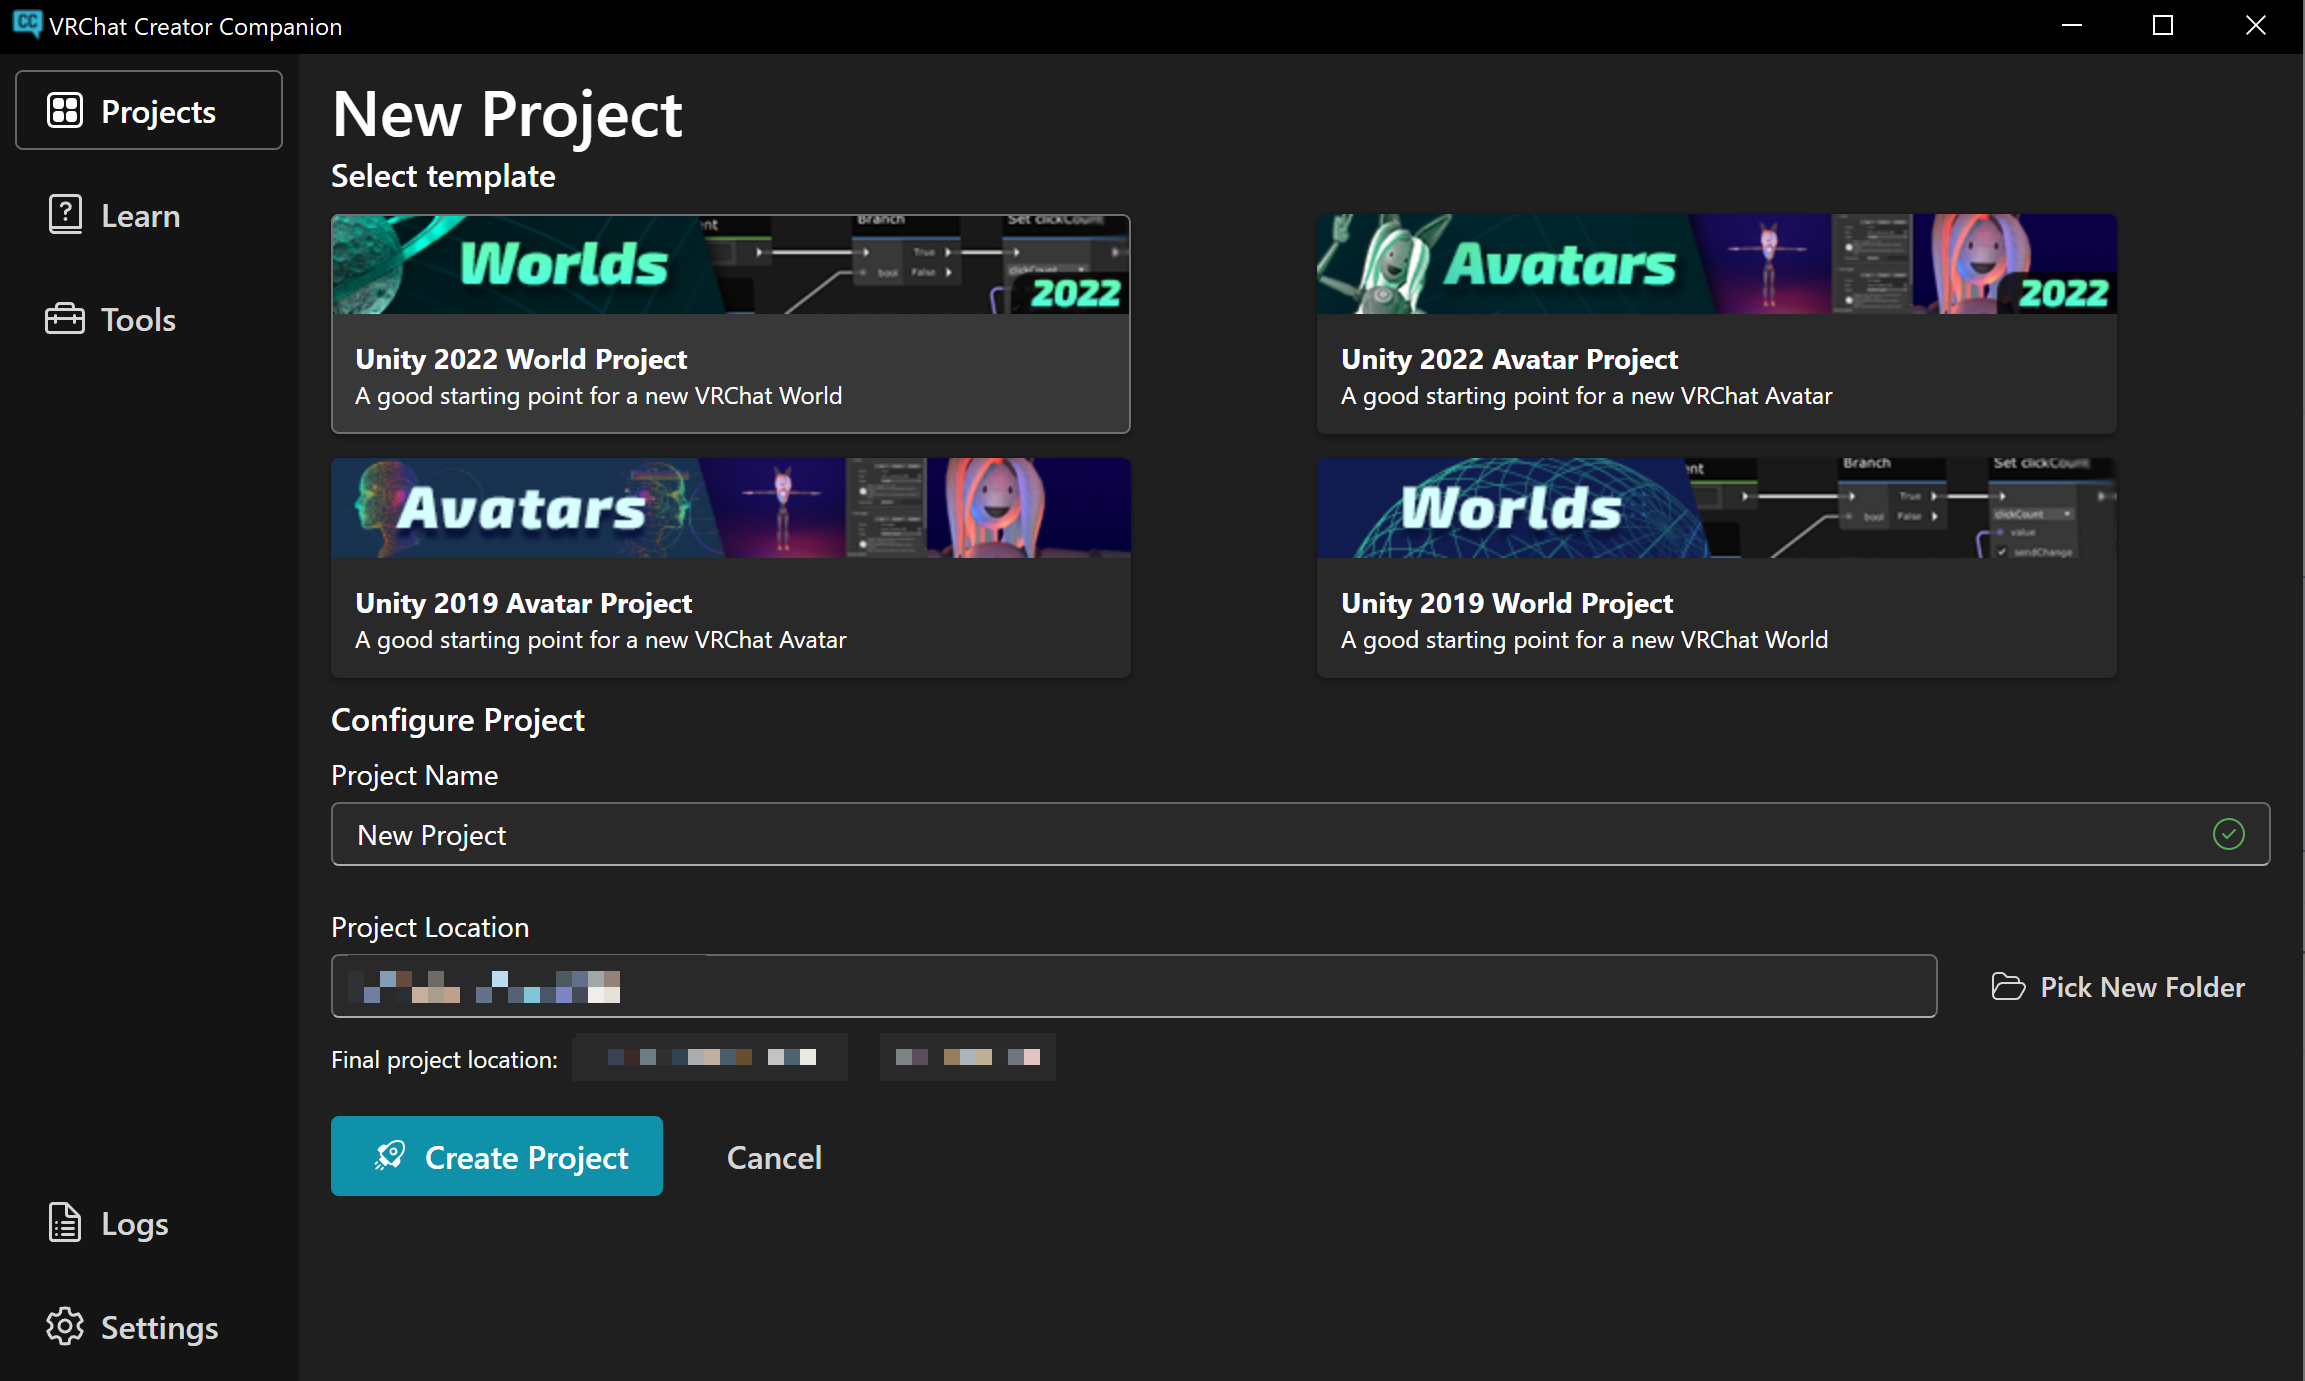
- Select "Unity 2022 World Project" from the list of project templates. This template includes all packages needed for world development, including VRChat Worlds SDK, Udon, UdonSharp, and ClientSim.
- Specify a Project Name (e.g.,
MyFirstUdonWorld) and the Project Location where you want to save the project. - Click the "Create Project" button.
VCC will automatically install the corresponding Unity version and generate a project with the necessary packages. Once processing is complete, click the "Open Project" button to launch the Unity Editor.
Step 3: Basic Unity Editor Layout
After launching the Unity Editor, familiarize yourself with the roles of the four main windows used during development.
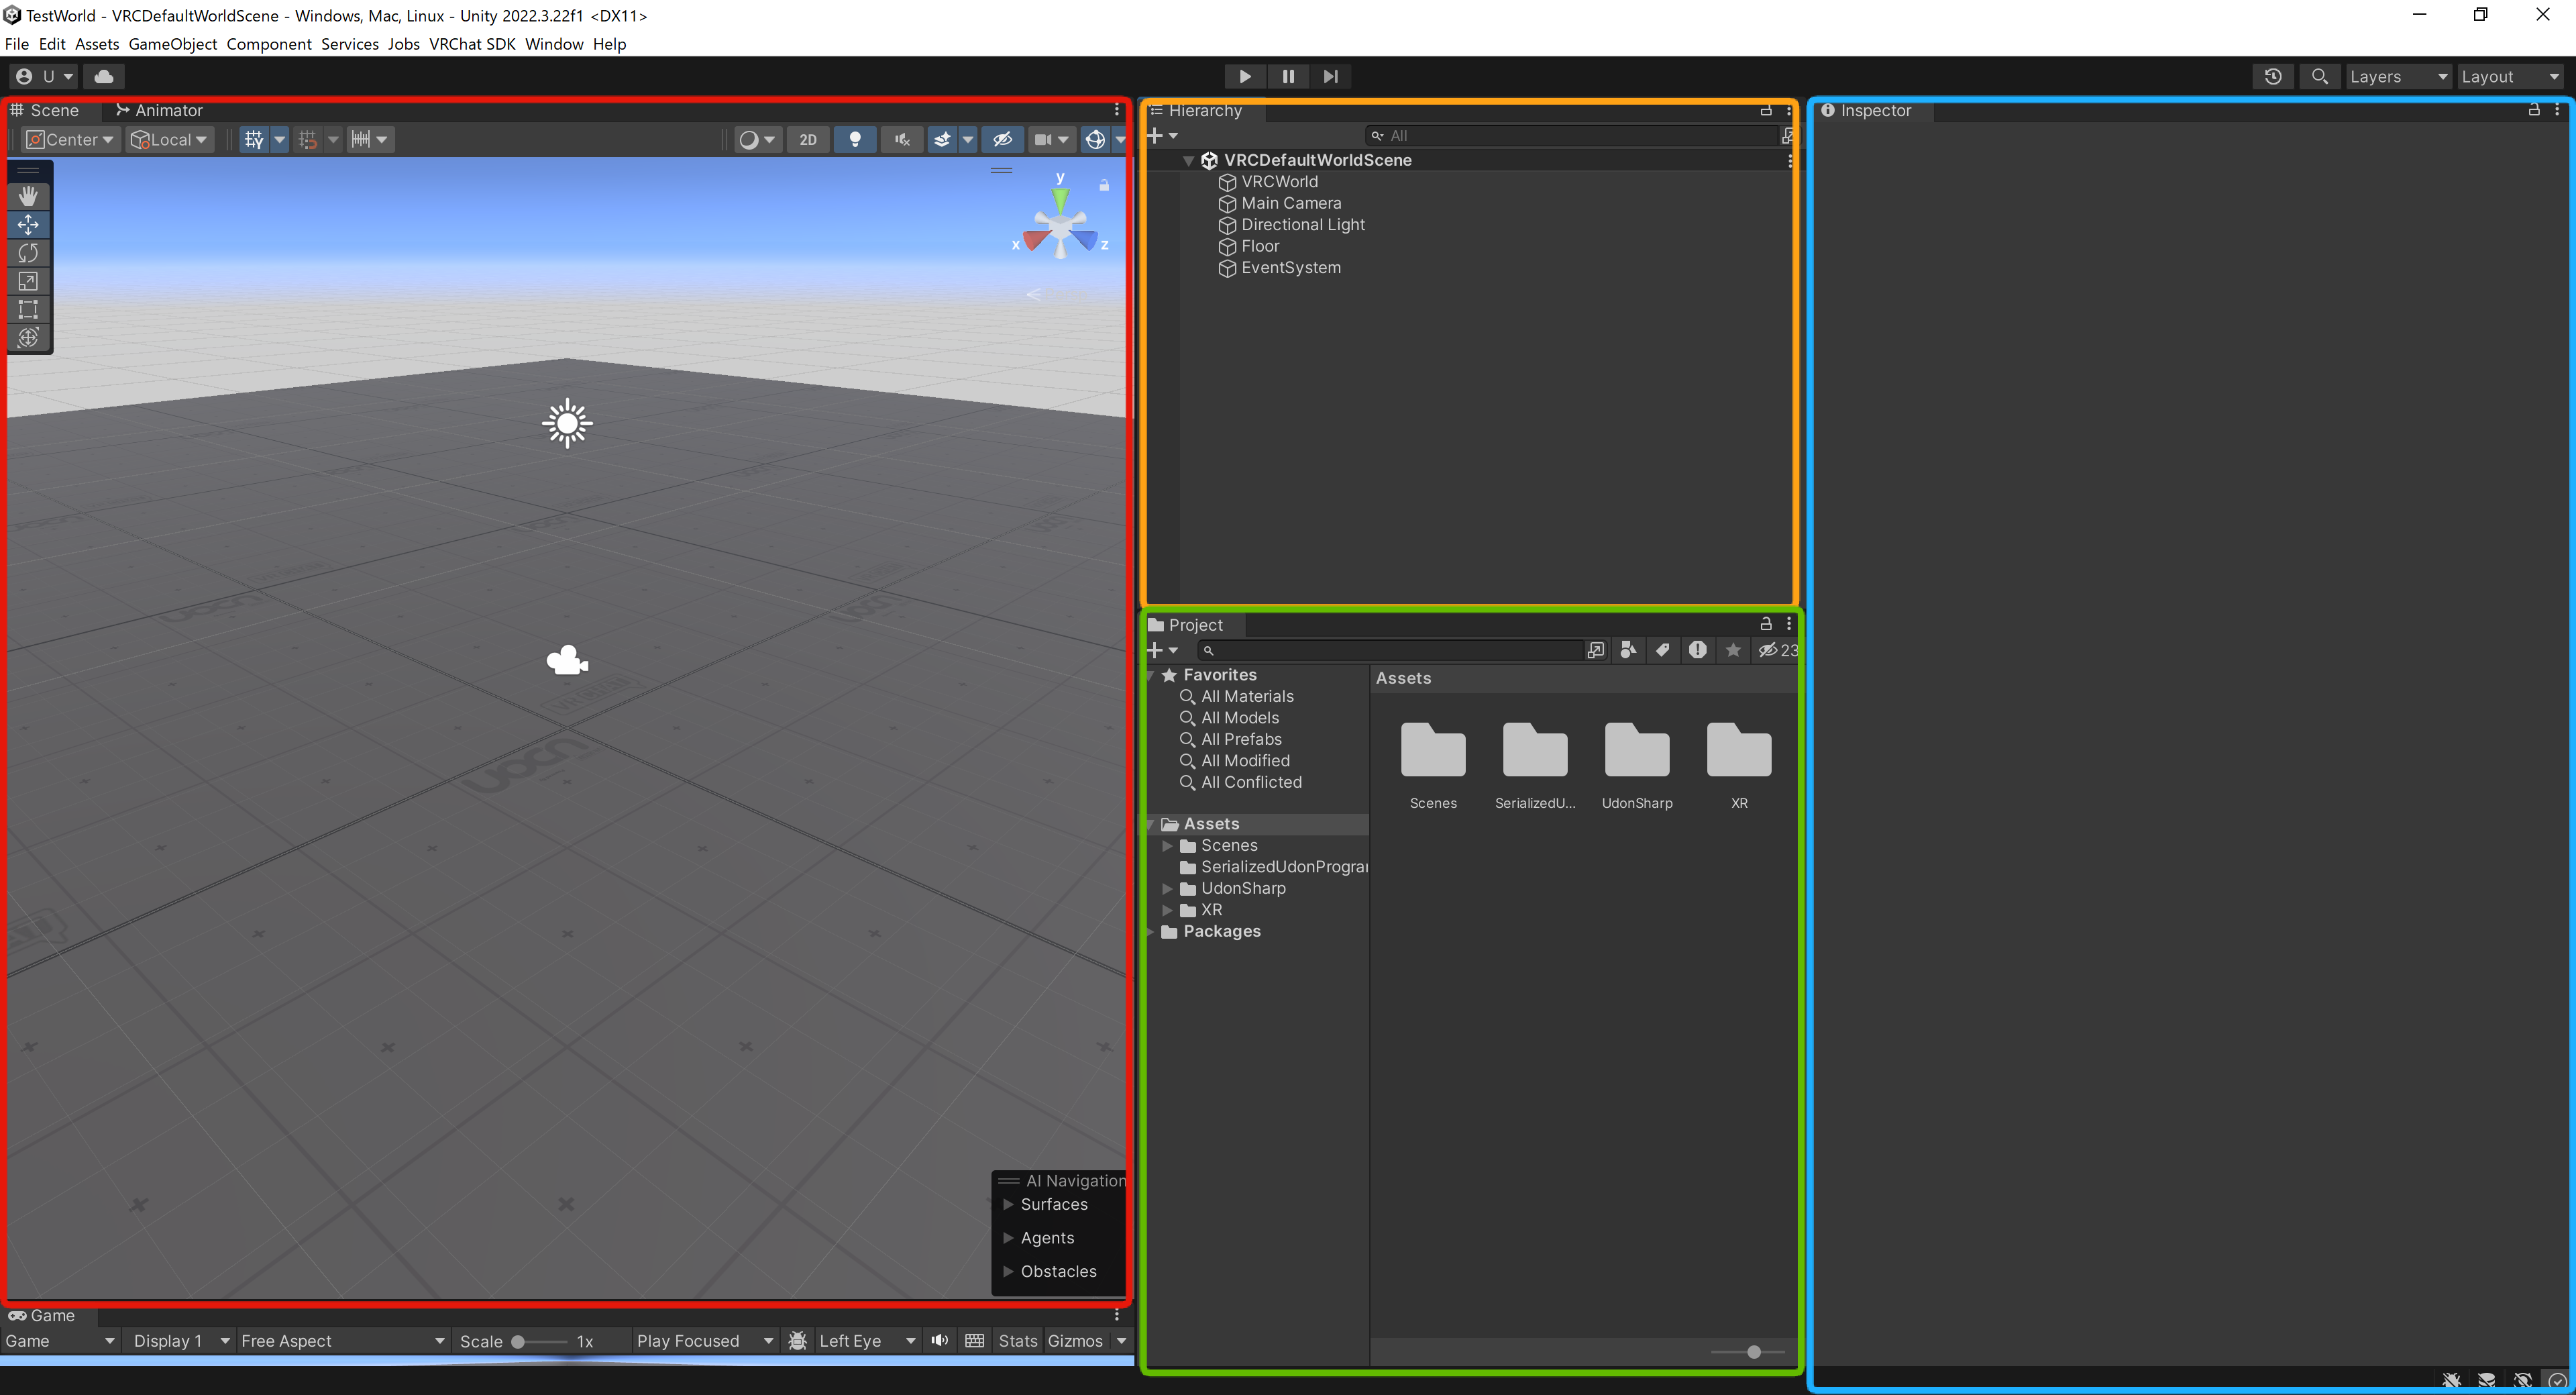
- Scene Window (red frame): The main window for visually editing the world's 3D space.
- Hierarchy Window (orange frame): A window that lists all objects (GameObjects) existing in the scene.
- Project Window (green frame): A file explorer-like window for managing all files (assets) included in the project.
- Inspector Window (blue frame): A window that displays detailed information about the currently selected object or asset in Hierarchy or Project, allowing you to edit settings.
Step 4: Creating Your First UdonSharp Script
Here we'll explain the procedure for creating a script and applying it to an object. As an example, we'll create a "cube that changes to a random color when clicked."
1. Creating the Script File
- In the Project window, create a new folder named
Scriptsinside theAssetsfolder to organize your assets. - Right-click inside the created
Scriptsfolder and select [Create] > [U# Script] from the context menu. - Rename the file to "
ColorChanger."
2. Editing the Script
- Double-clicking the created
ColorChangerfile will launch the associated code editor (usually Visual Studio). - Write or copy and paste the following code:
using UdonSharp;
using UnityEngine;
using VRC.SDKBase;
using VRC.Udon;

public class ColorChanger : UdonSharpBehaviour
{
    private MeshRenderer objectRenderer;

    void Start()
    {
        // Get the MeshRenderer component from the GameObject this script is attached to
        objectRenderer = GetComponent<MeshRenderer>();
    }

    public override void Interact()
    {
        // Called when the player clicks on the object
        // Generate a random color
        Color randomColor = Random.ColorHSV();

        // Update the material color of the MeshRenderer
        objectRenderer.material.color = randomColor;
    }
}
- After editing the code, save the file (shortcut:
Ctrl + S).
3. Compiling the Script
- When you save the file and return to the Unity Editor, UdonSharp will automatically compile the C# code (convert it to Udon Assembly).
- If there are no errors, selecting the
ColorChangerscript in the Project window will display the compilation results in the Inspector window. - If an error occurs, a red error message will appear in the Console window at the bottom of the Unity Editor. Read the message and fix any typos or syntax errors in your code.
Step 5: Applying the Script to an Object
Apply the created script to a specific object in the scene.
- Place an Object: Right-click in the Hierarchy window and select [3D Object] > [Cube] to place a cube in the scene.
- Add Udon Behaviour Component: Select the placed cube in Hierarchy and click the "Add Component" button at the bottom of the Inspector window. Type "Udon Behaviour" in the search field and add the component.
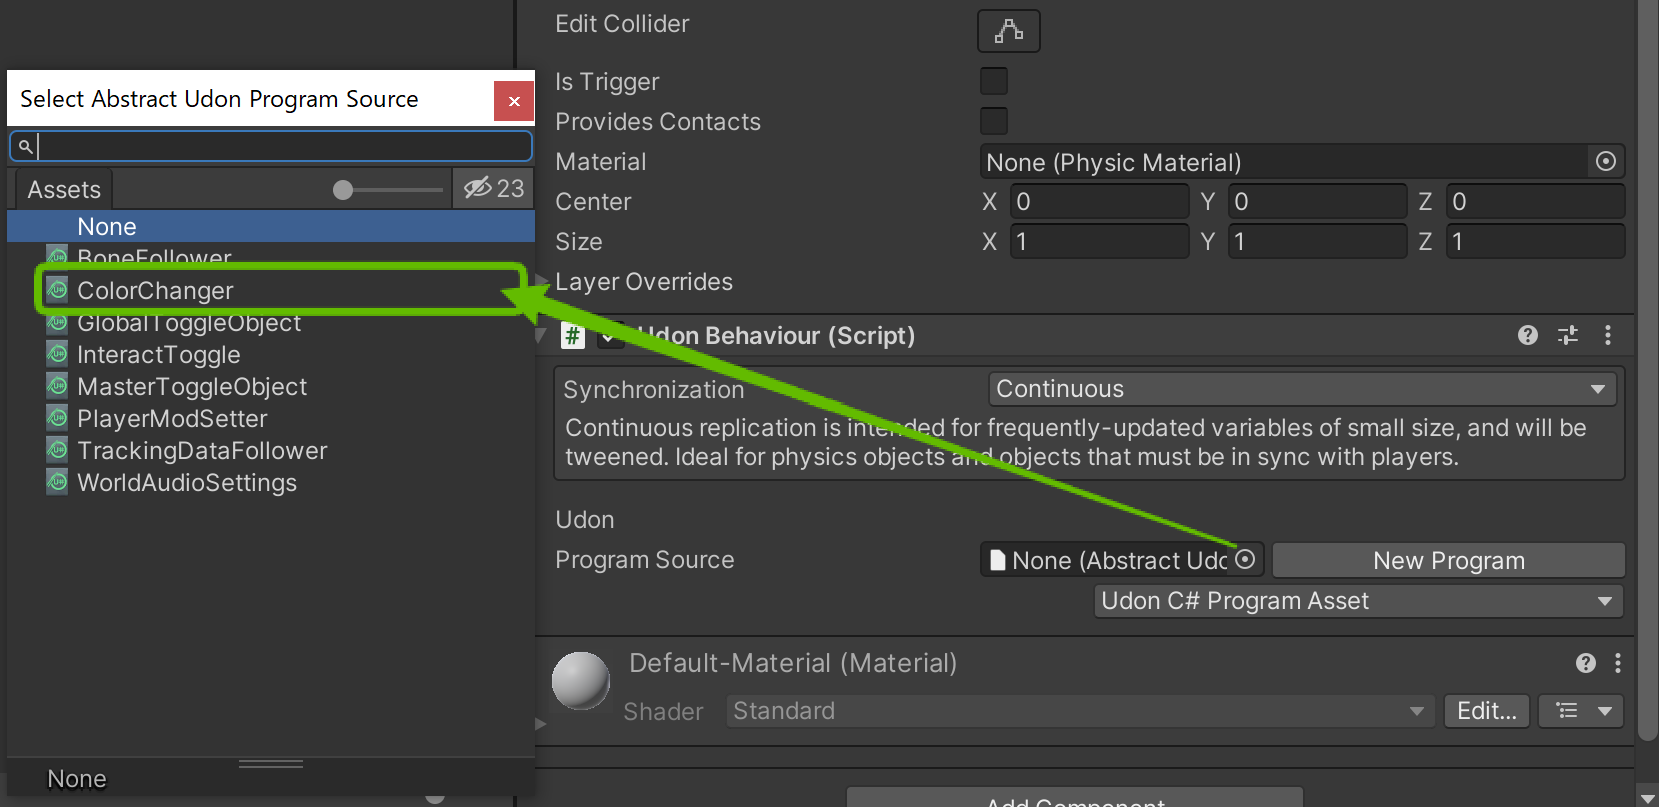
- Assign the Script: The added
Udon Behaviourcomponent has a "Program Source" field. Drag and drop theColorChangerscript file from the Project window into this field.
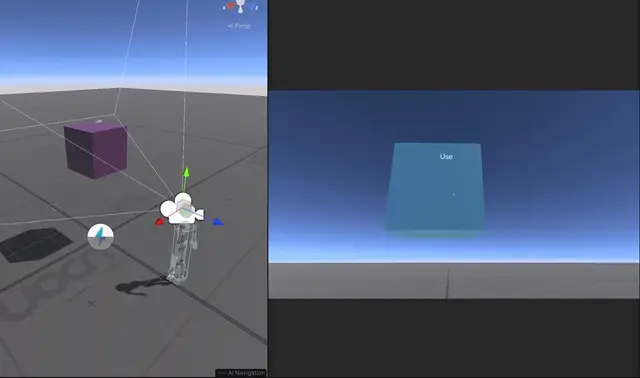
Step 6: Testing in Unity Editor
You can test basic functionality in the Unity Editor without launching the VRChat client.
- Click the Play button (▶) at the top center of the Unity Editor. The editor will switch to play mode.
- Click on the cube displayed in the Game window (or Scene window) with your mouse.
If the cube's color changes with each click, your setup was successful.
About ClientSim: When testing scripts that include VRChat-specific features (such as retrieving player information using
VRCPlayerApior network synchronization), using the ClientSim package (available through VCC) enables more accurate simulation in the Unity Editor. ClientSim is an official tool that simulates player behavior and interactions within VRChat.
Summary
This article explained the complete process from setting up the development environment for UdonSharp to creating and testing your first script.
- Use VRChat Creator Companion (VCC) for setting up the development environment.
- UdonSharp scripts are assigned to the Udon Behaviour component added to GameObjects.
- Use the Unity Editor's play mode to quickly test basic functionality.