Overview
In Godot Engine game development, object interactions—especially collision detection—are unavoidable. "The player shouldn't pass through walls," "Enemy attacks should only hit the player, not other enemies," "Only players with a specific key can open certain doors"... If you tried managing these complex rules with nested if statements alone, the code would quickly become unmaintainable.
Godot provides an elegant solution: the powerful Collision Layers and Collision Masks system.
This article explains these two concepts—which confuse many developers at first—with concrete scenarios and code examples.
Why Are Collision Layers/Masks Necessary?
In small prototypes, with few object types, simple collision detection may suffice. However, as projects grow, these needs emerge:
- Performance Optimization: Having every object check collision with every other object wastes CPU. A player needs to collide with coins, but coins don't need to collide with walls. Narrowing detection targets improves overall game performance.
- Declarative Design: Declaring "what" collides "with what" in the inspector rather than code makes logic easier to follow.
- Complex Interaction Implementation: Interactions that only occur under specific conditions (e.g., defeating enemies only while powered up) can be achieved without complicating code.
Basic Concepts: Layer and Mask Roles
In the inspector for CollisionObject2D/3D (Area2D, CharacterBody2D, RigidBody2D, etc.), you'll find Layer and Mask items in the Collision section. Understanding these two roles precisely is the first step.
- Layer: A name tag saying "I am here." Indicates which physics group the object belongs to.
- Mask: A list of what you're looking for, saying "I want to interact with these." Indicates which layers' objects this object wants to detect.
For collision to occur between PhysicsBody objects, one-sided interest is sufficient. For object A to collide with object B, either of these conditions works:
- Object A's Mask has Object B's Layer checked.
- Object B's Mask has Object A's Layer checked.
This "collision occurs if either side is watching the other" is the key point. It doesn't need to be bidirectional.
Note: Bidirectional Mask setup is only needed when "both want to detect each other." For example, if both player and enemy want to detect each other's presence, set Masks on both. However, physical collision (blocking movement) occurs if just one side's Mask sees the other's Layer.
First Step: Naming Your Layers
Layers and Masks are internally bit flags (numbers), but humans remembering "layer 3 is enemies" is inefficient and error-prone. Always name each layer clearly in project settings.
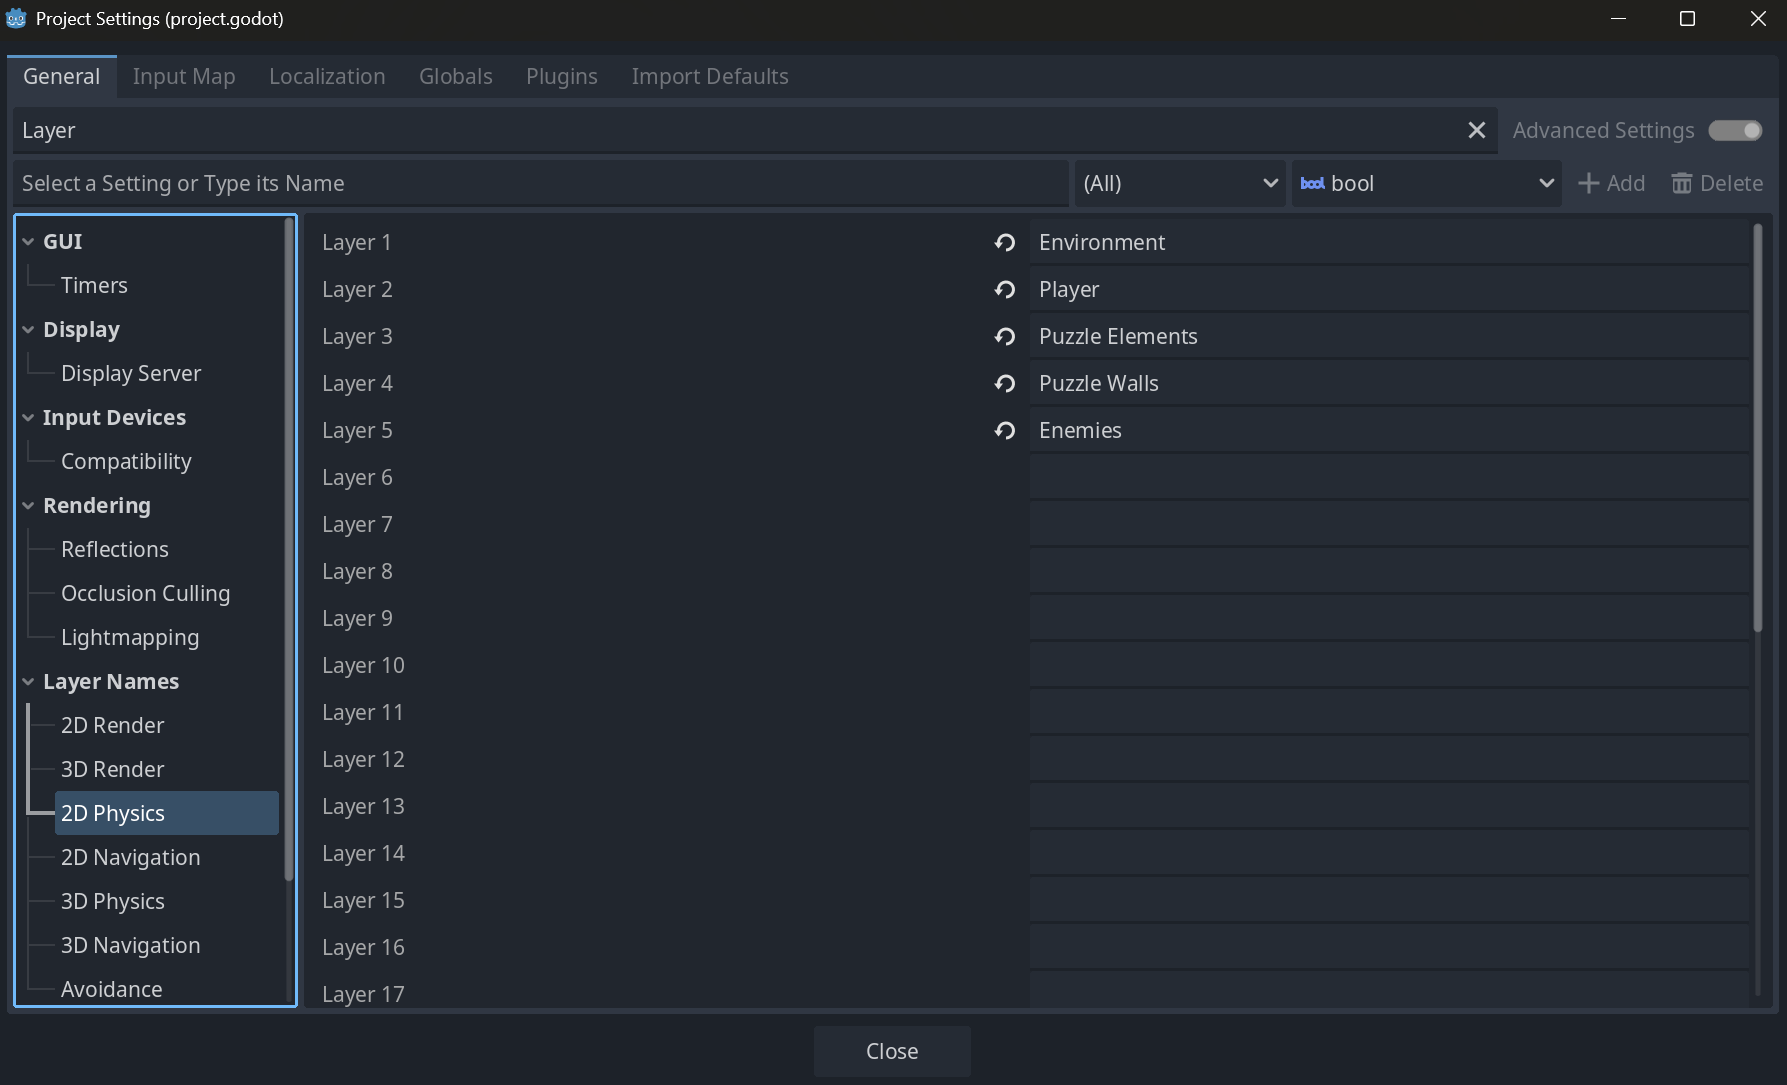
- Open "Project" → "Project Settings" from the menu.
- Select "Layer Names" → "2D Physics" or "3D Physics" from the left tree.
- Give each layer specific names like "player," "enemy_body," "enemy_attack," "world," "item."
This small effort greatly improves later development efficiency.
Practical Examples: Specific Setup Scenarios
Let's look at specific settings using a typical action game as an example.
| Object | Layer (I am here) | Mask (I want to collide/detect these) | Notes |
|---|---|---|---|
| Player (CharacterBody2D) | player | world, enemy_body, item, enemy_attack | Interacts with all major objects |
| Enemy (CharacterBody2D) | enemy_body | world, player | Enemies don't collide with each other, ignore items |
| Enemy Attack (Area2D) | enemy_attack | player | Only detects for dealing damage to player |
| World (StaticBody2D) | world | player, enemy_body | Blocks player and enemy bodies |
| Coin (Area2D) | item | player | Only collected by player |
This setup achieves:
- Player: Blocked by walls, touches enemies, picks up items, receives enemy attacks.
- Enemy: Moves along walls, chases player, but doesn't interfere with other enemies, items, or its own attack detection.
- Enemy Attack Area: Only detects player entry, emits signals. Unaffected by walls or other objects.
Dynamic Control via Code
The true value of Layer/Mask shines when changed dynamically from scripts. Let's see an implementation where a player who picks up a "ghost" item can pass through enemies for a limited time.
# player.gd

func _ready():
    # Initially collides with enemy (enemy_body)
    set_collision_mask_value(3, true) # Assuming layer 3 is 'enemy_body'

func _on_ghost_item_picked_up():
    # Disable collision with enemies
    set_collision_mask_value(3, false)
    print("Ghost mode activated! Passing through enemies.")

    # Timer to restore after 5 seconds
    $GhostTimer.start(5.0)

func _on_GhostTimer_timeout():
    # Re-enable collision with enemies
    set_collision_mask_value(3, true)
    print("Ghost mode ended.")
Using set_collision_mask_value(layer_number, enabled) like this allows flexible collision rule changes based on game state.
Common Mistakes and Best Practices
Here are common beginner mistakes and best practices to avoid them:
| Common Mistake | Best Practice |
|---|---|
| Not naming layers | Always name them. Essential for team development and long-term maintenance. |
Confusing Area2D and PhysicsBody detection conditions | PhysicsBody collision occurs if one Mask includes the other's Layer (OR condition). Area2D similarly emits signals like body_entered when its Mask detects the other's Layer. However, if both want detection, both need Mask settings. |
| Giving one object multiple roles | Separate detection. For example, split enemy "body" and "attack range" into different objects (CharacterBody2D and Area2D), each with appropriate Layer/Mask settings. |
Complex if filtering of move_and_slide() results | Exclude unnecessary collisions with Layer/Mask before move_and_slide() reports them. Keep code simple. |
| Using all 32 layers without planning | Assign main categories (player, enemy, world...) first, use later layers for auxiliary detection (minimap, camera_trigger...). Establish rough rules. |
Performance Considerations
Godot's physics engine is highly optimized, but in situations with thousands of objects, collision detection can become a bottleneck.
- Minimize Masks: More layers in an object's Mask means more detection targets and higher load. Enable only truly necessary interactions.
- Keep Physics Process Light: Heavy processing in
_physics_processaffects overall physics performance. - Disable Unnecessary Objects: For offscreen enemies or objects, disable
CollisionShape($CollisionShape2D.disabled = true) or remove from tree to completely exclude from physics calculations.
Next Steps
After mastering Collision Layer/Mask, learn these related topics to implement more advanced game mechanics:
Area2D/Area3D: Ideal for detecting object entry/exit without physical collision. Useful for detection ranges, damage zones, conversation event triggers.- Ray Casting: Using
RayCast2D/RayCast3Dnodes orPhysicsDirectSpaceState, cast rays in specific directions to detect the first object hit. - Physics Material: Setting
PhysicsMaterialonPhysicsBodyorAreaallows fine control of friction and bounce coefficients.
Summary
Collision Layers and Masks are an extremely powerful and scalable system forming the foundation of physics interactions in Godot. Remember that "Layer is a name tag, Mask is a list of what you're looking for," and the OR condition rule that "collision occurs if one Mask sees the other's Layer"—then it's all about practice.
Define relationships declaratively in the inspector, and control dynamically with scripts only when needed. Following this principle will make your project cleaner, more performant, and easier to manage. Start by naming your layers in project settings.