Conversations are the backbone of RPGs and adventure games. They carry the setting and pull the player into the story. But if you hardcode dialogue text into your scripts, fixing a single line means opening code, and every new choice tangles your if statements further.
In this article we build a data-driven dialogue system that keeps text and branching as data. Typewriter effect, branching through choices, and external management via JSON, all with nothing but stock Godot nodes and GDScript.
What You'll Learn
- A design that keeps conversations as data (separating logic from content)
- A lightweight typewriter effect using
visible_characters- The choice and branching flow wired together by
next_id- Loading JSON so that talking to an NPC starts the conversation
Separating Logic and Content with a Data-Driven Design
The key to a good dialogue system is separating "logic" (the processing) from "content" (what the characters say). Lines, speakers, and choices live as Dictionary or JSON data, apart from your GDScript code.
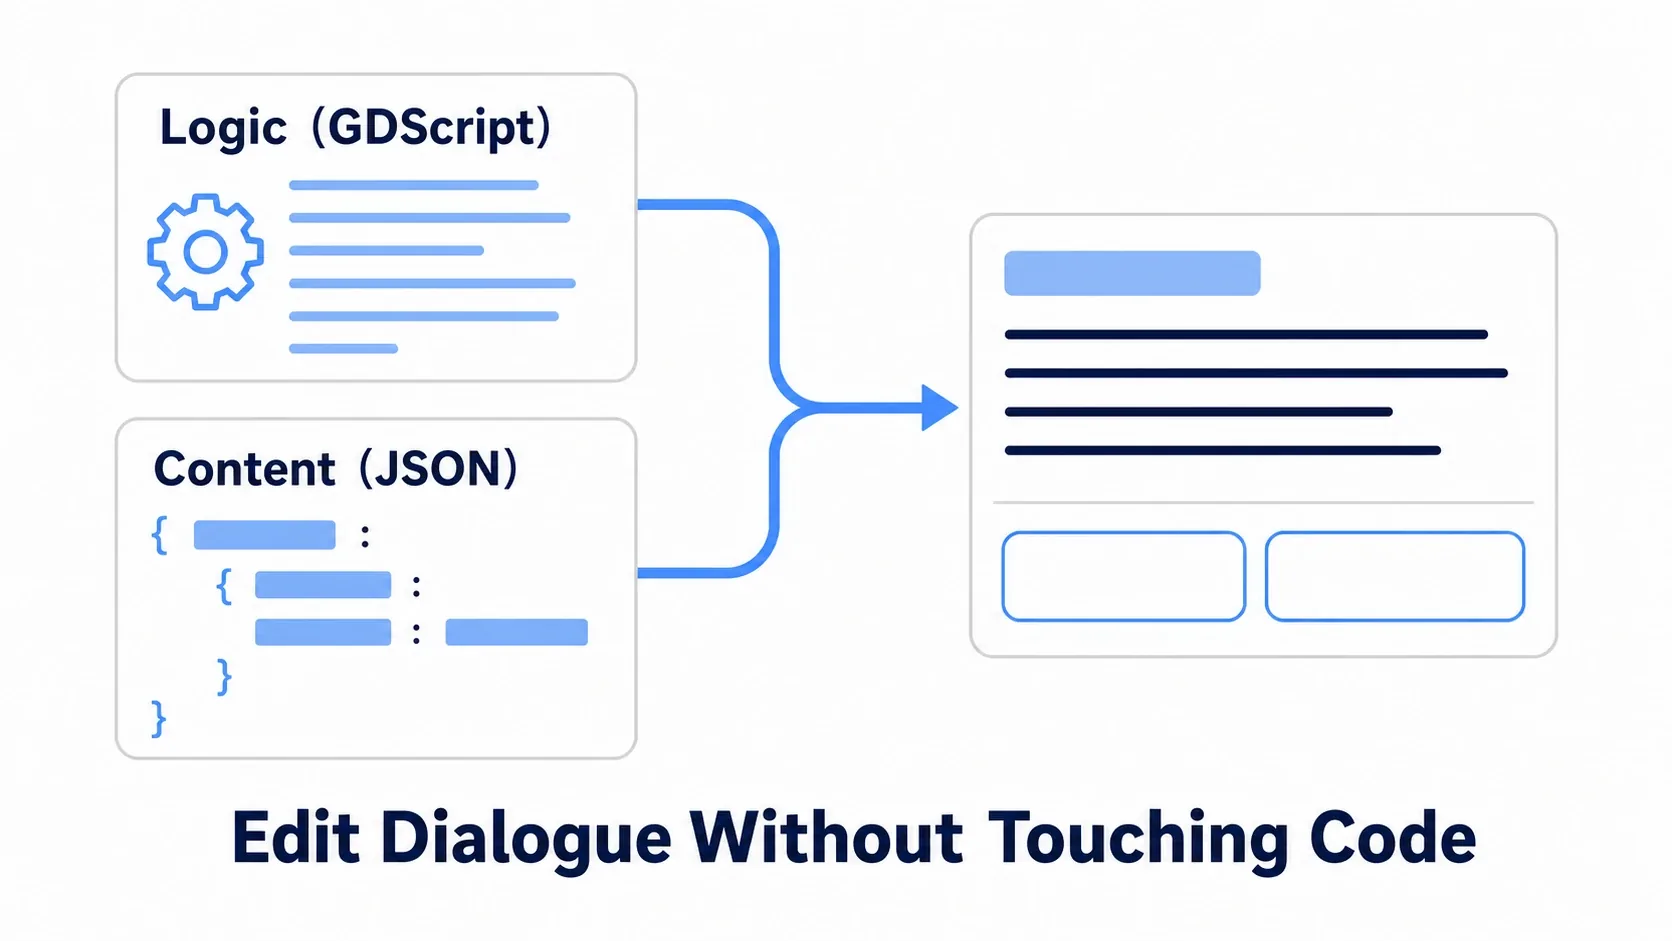
With that split, you add story by editing data and never touch the code. Want facial expressions or sound effects later? That's one more key in the data.
Let's start by defining the dialogue data as a Dictionary.
# Each line is keyed by a unique ID. next_id links to what comes next
const DIALOGUE_DATA := {
    "start": {
        "speaker": "Old Sage",
        "text": "Welcome, young traveler. Is there something you need of me?",
        "choices": [
            {"text": "Tell me about the history of this world.", "next_id": "history_1"},
            {"text": "Where is the legendary sword?", "next_id": "sword_location"},
            {"text": "No, nothing.", "next_id": "farewell"},
        ],
    },
    "history_1": {
        "speaker": "Old Sage",
        "text": "This world was shaped by the ancient war between dragons and giants...",
        "next_id": "history_2",   # no choices = advance automatically
    },
}
The important part is using a Dictionary keyed by ID rather than an array. next_id lets you rewire the conversation in any order, and branching falls out naturally.
Assembling the Dialogue UI
Now build the UI scene that displays the conversation. Use a Control as the root with the node structure below (let layout containers handle placement and a theme handle the look, and this gets much easier).
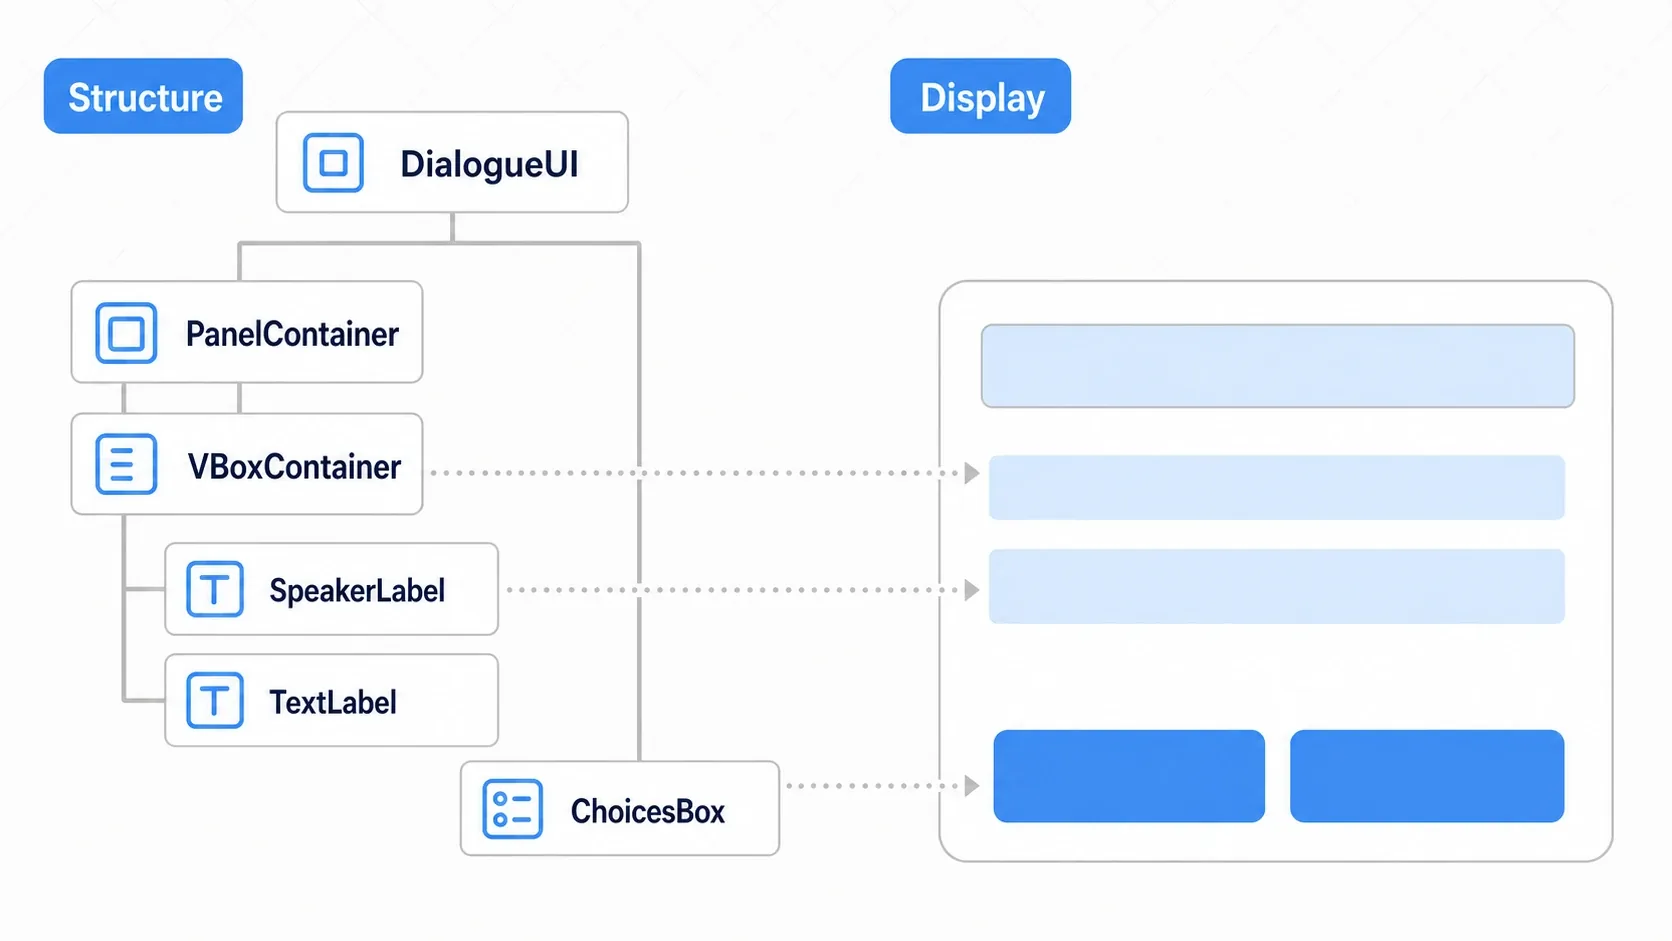
DialogueUI (Control)
├─ PanelContainer            … background panel
│  └─ VBoxContainer
│     ├─ SpeakerLabel         … speaker name
│     └─ TextLabel            … dialogue text
└─ ChoicesBox (VBoxContainer) … holds the choice buttons
Attach a script to DialogueUI. Start with the variables and the "display a line" logic.
extends Control

signal dialogue_finished   # notify the outside world when the conversation ends

@onready var speaker_label: Label = $PanelContainer/VBoxContainer/SpeakerLabel
@onready var text_label: Label = $PanelContainer/VBoxContainer/TextLabel
@onready var choices_box: VBoxContainer = $ChoicesBox

var _data: Dictionary = {}
var _current_id: String = ""
var _typing := Timer.new()

func _ready() -> void:
    _typing.timeout.connect(_on_typing_tick)
    add_child(_typing)
    hide()

# The entry point called from outside: pass in the data and the starting ID
func start(data: Dictionary, start_id: String) -> void:
    _data = data
    show()
    _show(start_id)

func _show(id: String) -> void:
    if not _data.has(id):
        _end()          # no such ID, so we're done
        return
    _current_id = id
    var entry: Dictionary = _data[id]
    speaker_label.text = entry.get("speaker", "")
    text_label.text = entry.get("text", "…")
    text_label.visible_characters = 0   # nothing revealed yet
    _typing.start(0.05)
    for c in choices_box.get_children():
        c.queue_free()   # clear out the previous choices
Typewriter Effect and Choices
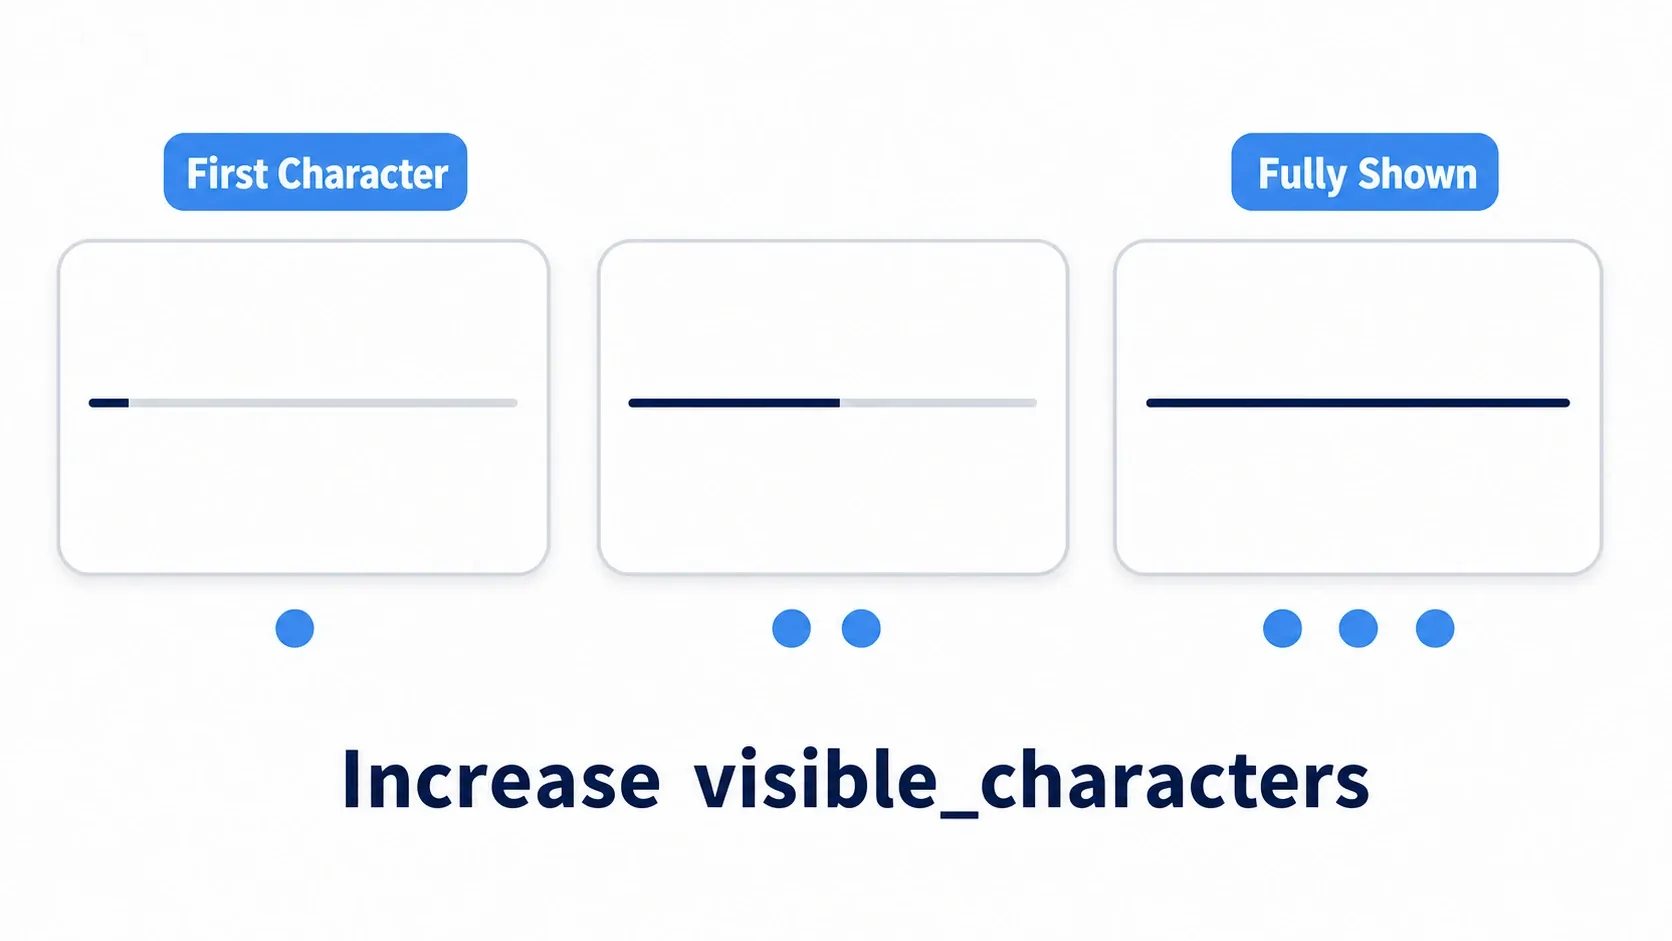
The typewriter effect is nothing more than increasing a Label's visible_characters one character at a time. It's far lighter than rebuilding text every frame.
func _on_typing_tick() -> void:
    if text_label.visible_characters < text_label.get_total_character_count():
        text_label.visible_characters += 1   # reveal one more character
        return
    # Done typing, so stop and move to the choices or the next line
    _typing.stop()
    var entry: Dictionary = _data[_current_id]
    if entry.has("choices"):
        _show_choices(entry["choices"])
    elif entry.has("next_id"):
        _show(entry["next_id"])   # no choices, so advance automatically

func _show_choices(choices: Array) -> void:
    for choice in choices:
        var button := Button.new()
        button.text = choice["text"]
        # When pressed, jump to that choice's next_id
        button.pressed.connect(func() -> void: _show(choice["next_id"]))
        choices_box.add_child(button)
It's worth wiring a click or confirm key so that it reveals the whole line instantly if text is still typing (skip) and advances if typing has finished.
func _unhandled_input(event: InputEvent) -> void:
    if not visible or not event.is_action_pressed("ui_accept"):
        return
    if _typing.is_stopped():
        var entry: Dictionary = _data[_current_id]
        if not entry.has("choices") and not entry.has("next_id"):
            _end()   # end of the line, so close
    else:
        # Still typing -> skip to the full text
        text_label.visible_characters = text_label.get_total_character_count()
        _typing.stop()
        _on_typing_tick()
    get_viewport().set_input_as_handled()

func _end() -> void:
    hide()
    dialogue_finished.emit()
Branching Conversations with next_id
With next_id, a conversation can be a straight line or a branching tree, whichever you want. Give each choice its own next_id and the conversation jumps to wherever the player chose.
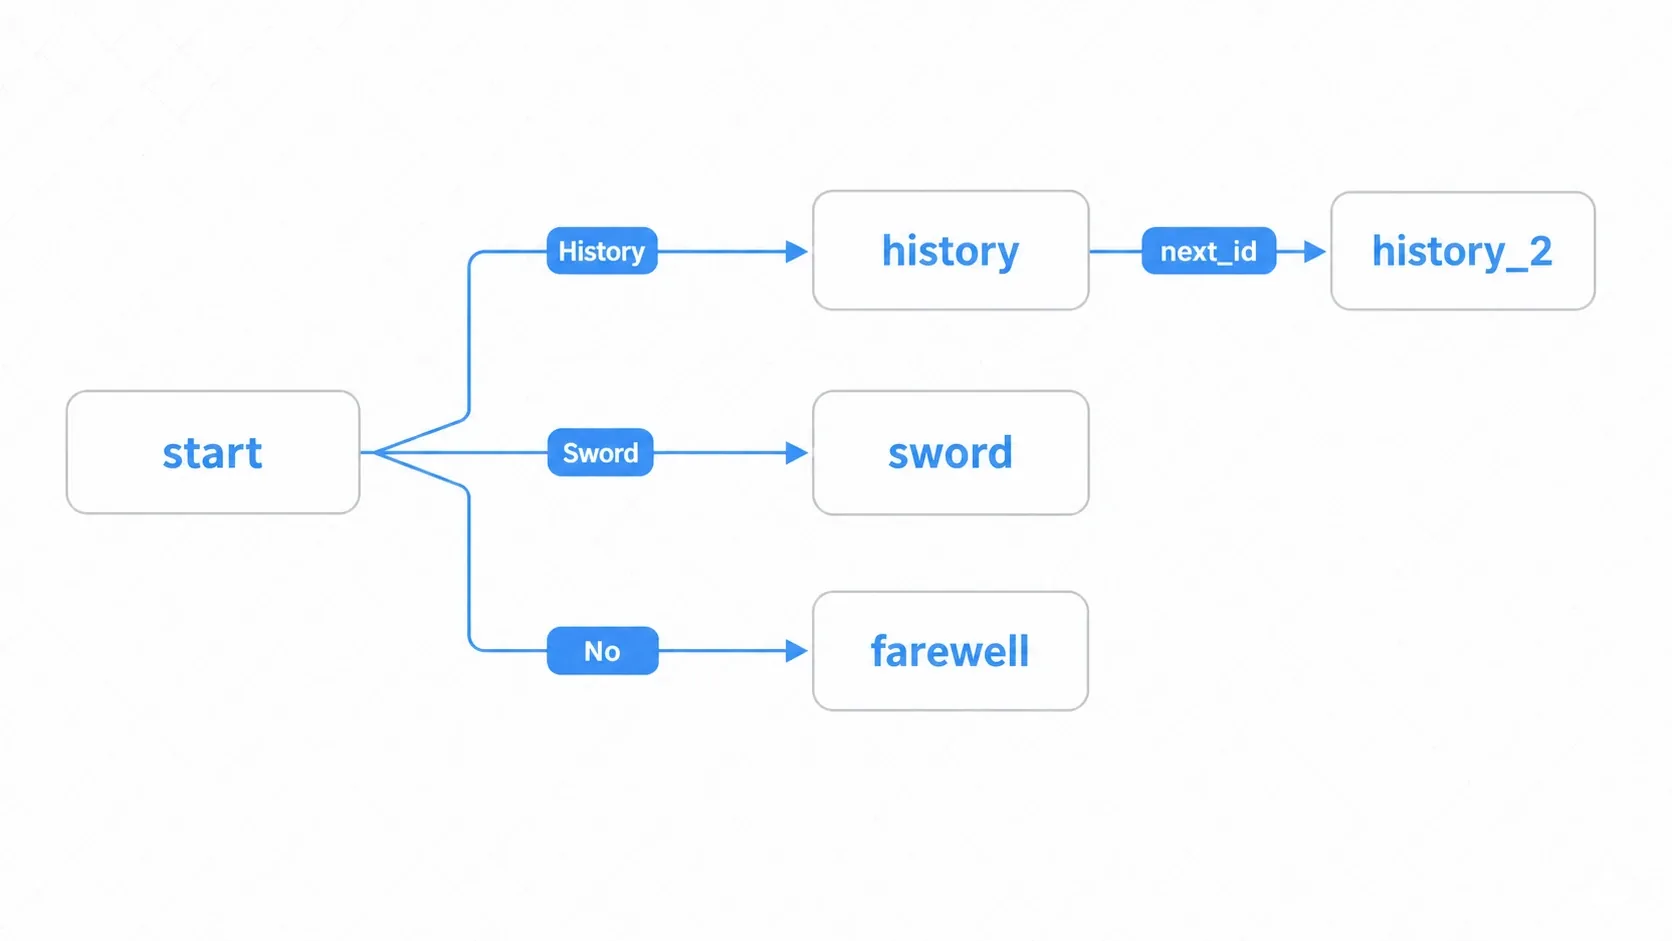
Because the data is linked by ID, the flow itself becomes a conversation graph. To add a branch, add an entry with a new ID and point some next_id at it. The code never changes. That is where data-driven design earns its keep.
Hands-On: Starting a Conversation by Talking to an NPC
Finally, let's move the dialogue data into JSON and get to the point where walking up to an NPC starts the conversation, and control returns when it ends. Villagers in an RPG or event triggers in a visual novel work exactly the same way.
First, put the conversation in dialogue_data.json (the same structure as the Dictionary).
{
  "start": {
    "speaker": "Old Sage",
    "text": "Welcome, young traveler. Is there something you need of me?",
    "choices": [
      {"text": "Tell me about the history of this world.", "next_id": "history_1"},
      {"text": "No, nothing.", "next_id": "farewell"}
    ]
  },
  "farewell": { "speaker": "Old Sage", "text": "I see. Come back any time." }
}
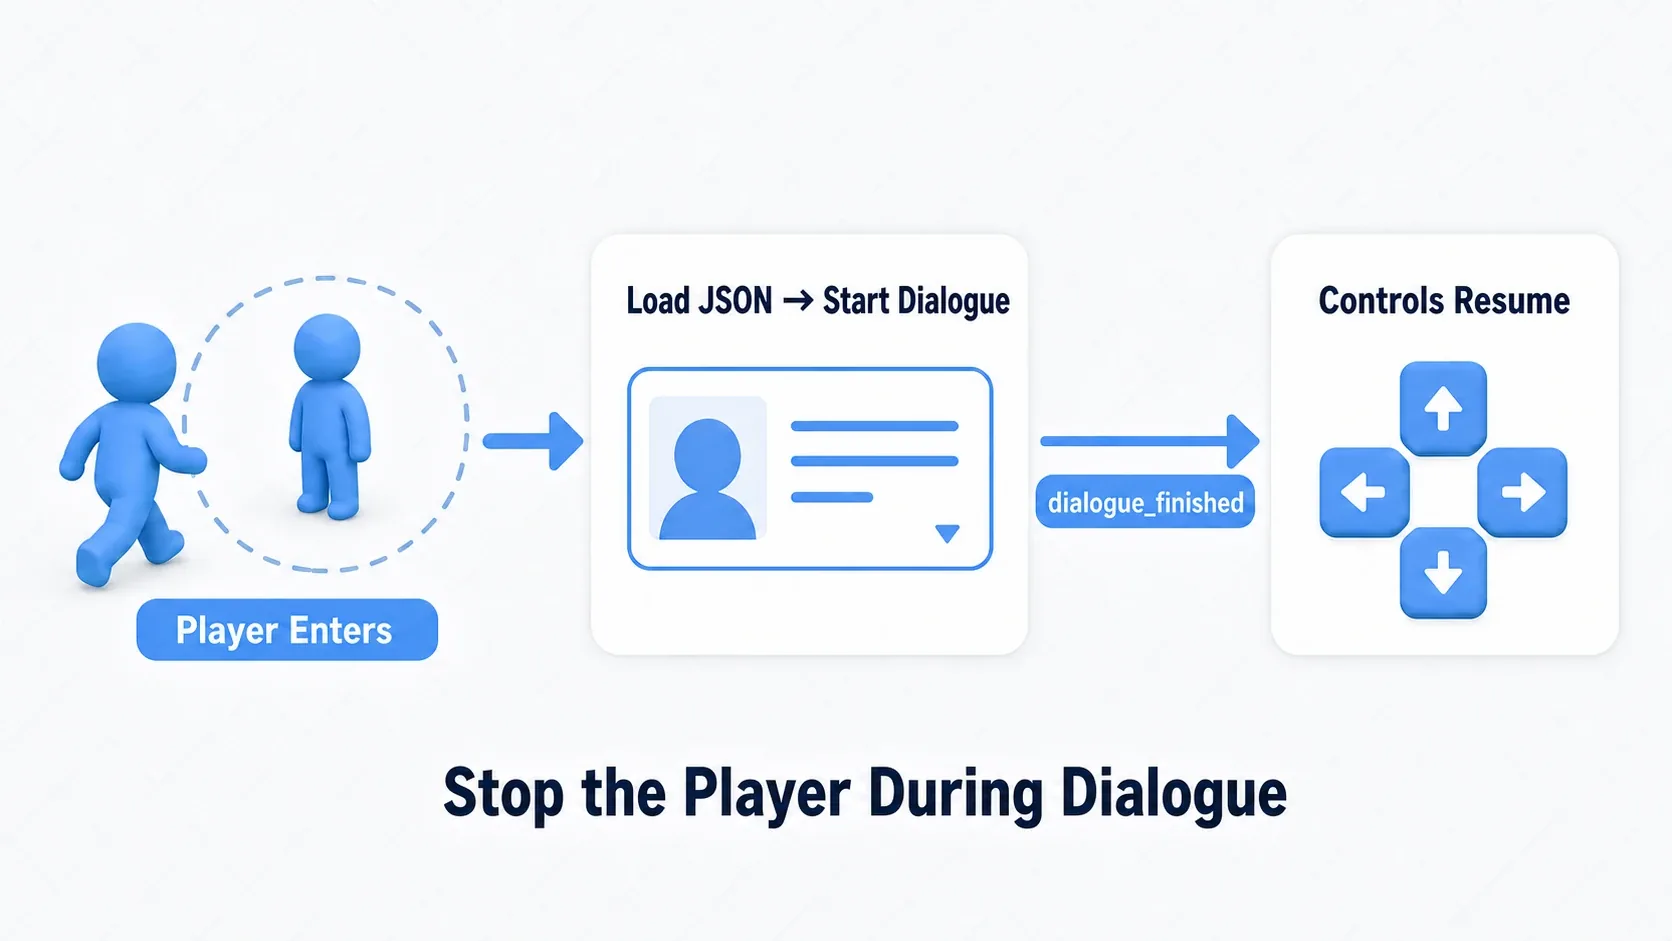
Make the NPC an Area2D that loads the JSON and starts the conversation when the player enters. When the conversation ends, catch the signal and hand control back to the player.
# npc.gd
extends Area2D

@onready var dialogue_ui: Control = $DialogueUI
var _data: Dictionary = {}

func _ready() -> void:
    var file := FileAccess.open("res://dialogue_data.json", FileAccess.READ)
    if file:
        _data = JSON.parse_string(file.get_as_text())   # JSON -> Dictionary
    body_entered.connect(_on_body_entered)
    dialogue_ui.dialogue_finished.connect(_on_finished)

func _on_body_entered(body: Node2D) -> void:
    if body.is_in_group("player"):
        body.set_process_unhandled_input(false)   # freeze player input during the conversation
        dialogue_ui.start(_data, "start")

func _on_finished() -> void:
    var player := get_tree().get_first_node_in_group("player")
    if player:
        player.set_process_unhandled_input(true)   # hand control back
There are two points to take away.
- Conversations are data, progression is signals:
DialogueUIonly displays the data it's handed and emitsdialogue_finishedwhen it's done. The NPC only starts it and cleans up afterward. The roles stay cleanly separated. - Freeze the player during conversations: Stopping input with
set_process_unhandled_input(false)and restoring it on the finished signal prevents the classic bug of the player wandering off mid-conversation.
Conditional branching (changing lines based on flags) and additions like expressions or sound effects extend the same way: add a key to the data and pick it up in _show().
Common Mistakes and Best Practices
| Common mistake | Best practice |
|---|---|
| Hardcoding dialogue data in scripts | Externalize it to JSON or a Resource so you can edit the story without changing code |
Building tight coupling with get_node() | Use signals (like dialogue_finished) to stay loosely coupled and hook up post-conversation logic |
| Skipping input handling | Provide skip and advance in _unhandled_input, which directly affects how good it feels to play |
| Managing it all with a complex state machine | Control the flow with simple data such as _current_id |
| Not designing for growth | Start with a Dictionary base so expressions and sound effects are just extra keys |
Bonus: Rolling Your Own vs. the Dialogic Addon
- Dialogic is worth considering at scale: The
Dialogicaddon in the Asset Library lets you build conversations in a visual editor. For non-programmers writing story or for cranking out volume quickly, it can beat rolling your own. Build it yourself when you want fully custom UI and behavior, or when you want to learn how it works. - Data can live in Resources too: Storing conversations in a custom resource instead of JSON gives you type safety and editor-based editing.
- Localization: Turn the text into keys and swap it via
tr()and a translation CSV to support multiple languages. - Style it with a theme: Designing the dialogue frame and buttons through a theme keeps everything consistent.
Summary
- Data-driven: Keep conversations out of code, stored in a
Dictionaryor JSON keyed by ID - Typewriter: Just increment
visible_charactersone character at a time. Lightweight, and easy to skip - Branching: Build any conversation graph you want through each choice's
next_id. Additions are pure data - Integration:
DialogueUIsticks to display, while start and end connect to the NPC through thedialogue_finishedsignal
Start by displaying a single Dictionary conversation, then grow it step by step: choices, then external JSON, then NPC triggers. Combine it with a theme for the dialogue frame and layout containers for placement and it starts to feel like a real game.