Logic for picking up, using, and dropping items gets scattered across the player script, and every new equipment type or non-stackable item means edits in several places. An inventory built ad hoc turns into spaghetti fast.
In this article we build an inventory design that splits data (item definitions), logic (management), and UI (display) into three layers. Combining Resources, a singleton, and signals, the goal is a core that keeps working unchanged no matter how many item types you add or how much you redesign the UI.
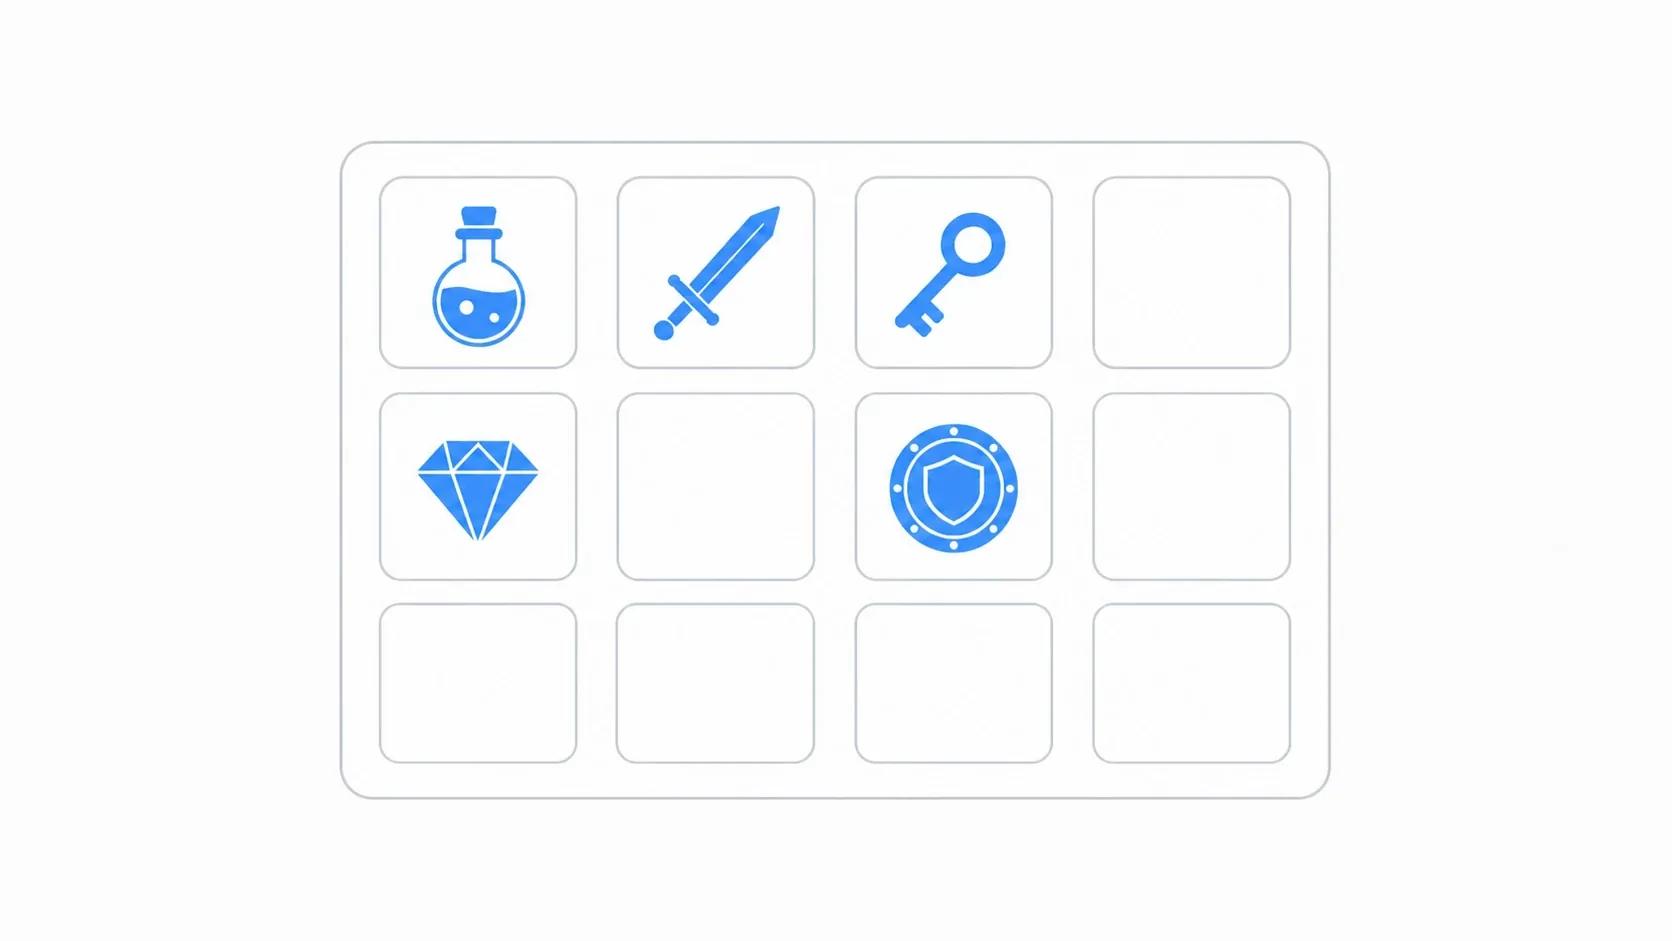
What You'll Learn
- The three-layer architecture that separates data, logic, and UI
- How to define items as .tres files with
Resource(data-driven)- How a singleton
InventoryManagerkeeps state in one place- How the
inventory_changedsignal updates the UI automatically
Designing in Three Layers
The key to a robust system is separation of concerns. We'll split the inventory into the following three layers.
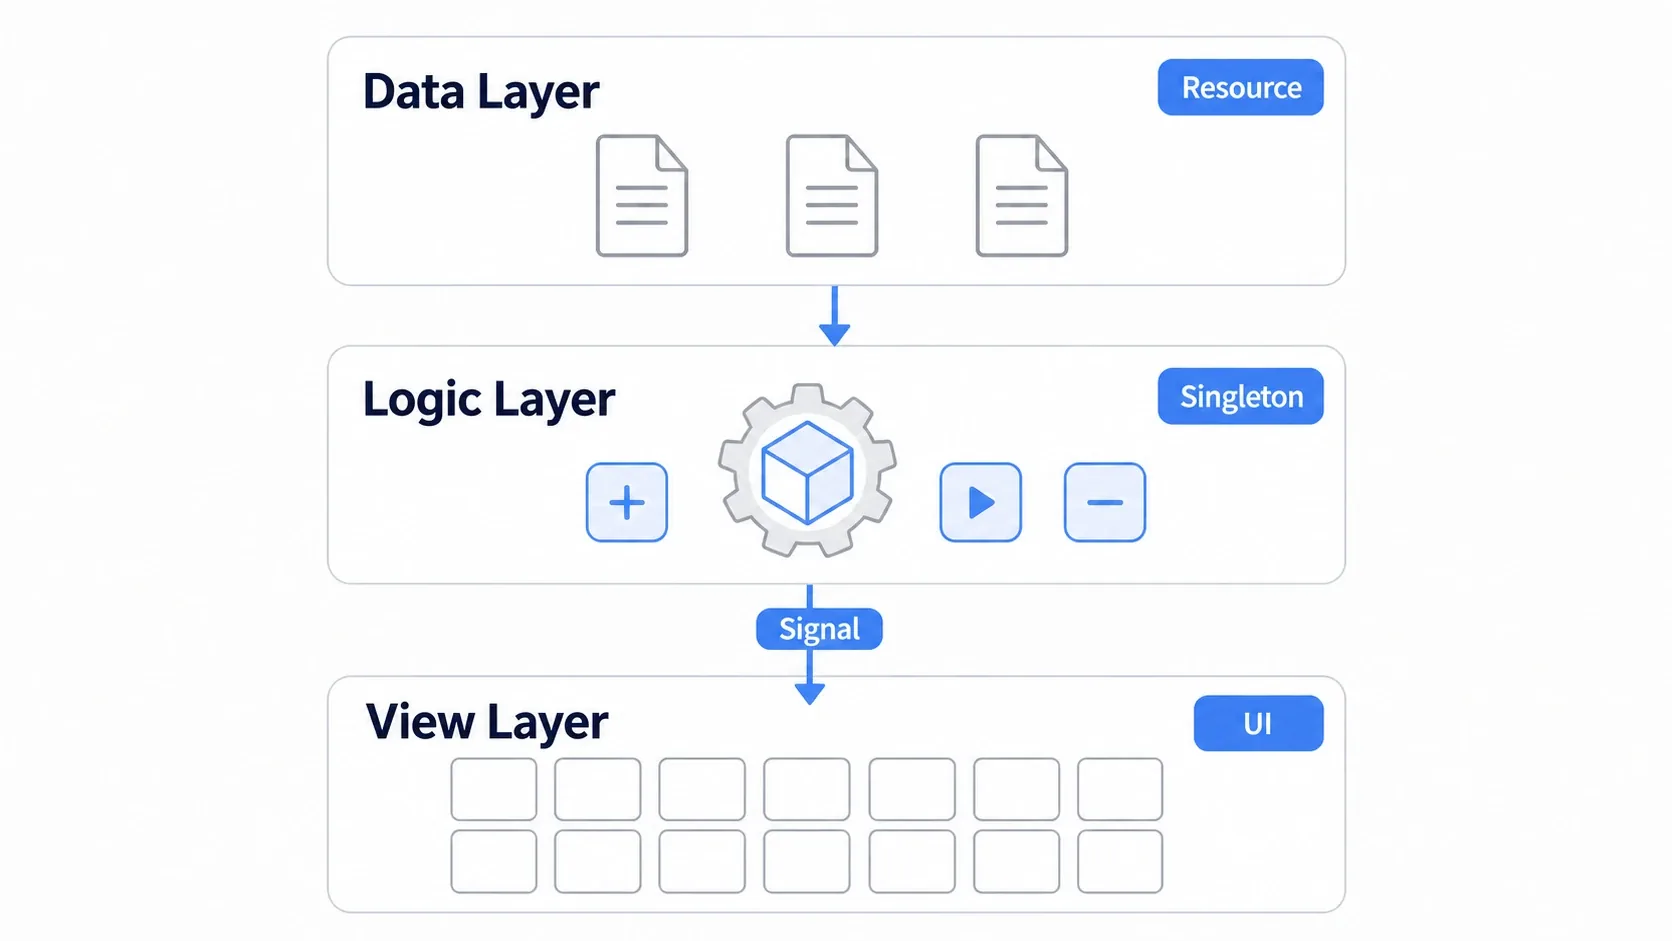
| Layer | Role | Implementation in Godot |
|---|---|---|
| Data layer | Defines what an item is | Resource (.tres files) |
| Logic layer | Manages state: adding, removing, using | A singleton Node (Autoload) |
| View layer (UI) | Shows the state to the player | Control nodes |
Split this way, each layer can focus on its own job without knowing the internals of the others. Rebuild the UI and the logic is untouched; add more items and you never open the UI code.
Data Layer: Defining Items with Resources
Create the blueprint for an item with a Resource. Because Resources can be edited and saved right in the editor, you can churn out swords and potions as .tres files, and non-programmers can add them too. The data-driven mindset is covered in more depth in Creating and Using Custom Resources.
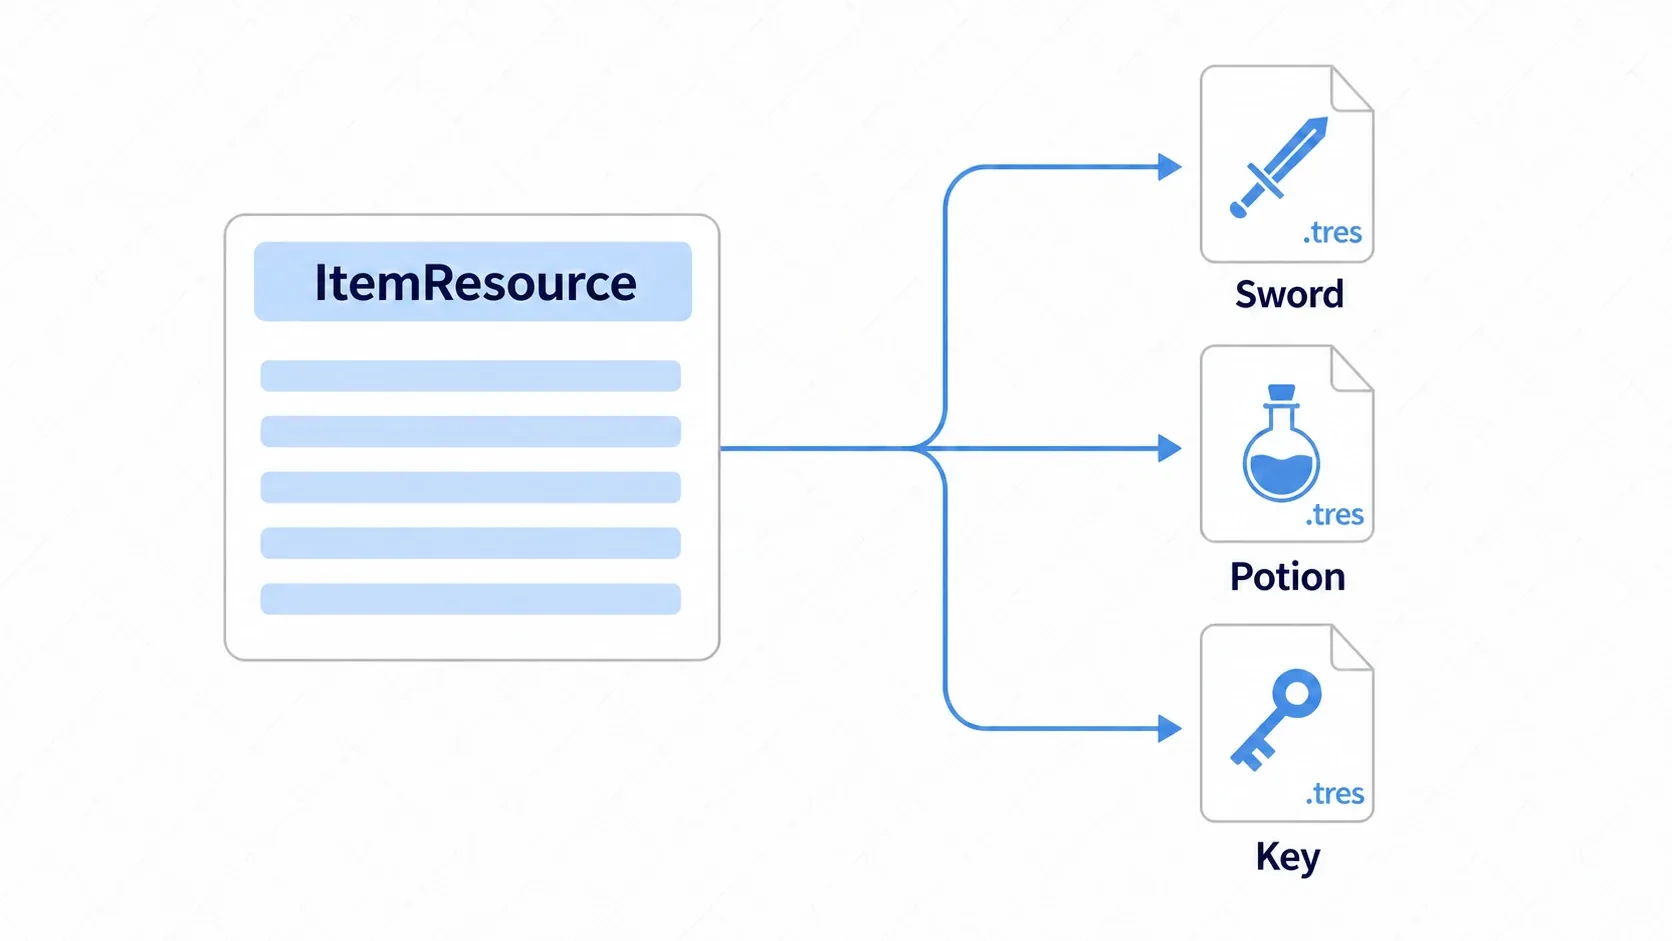
# item_resource.gd
class_name ItemResource
extends Resource

enum ItemType { CONSUMABLE, EQUIPMENT, KEY_ITEM, MATERIAL }

@export_group("Basic Info")
@export var item_name: String = "New Item"
@export_multiline var description: String = ""
@export var texture: Texture2D          # icon

@export_group("Inventory Settings")
@export var type: ItemType = ItemType.CONSUMABLE
@export var stackable: bool = true
@export var max_stack_size: int = 99

@export_group("Gameplay")
@export var can_be_used: bool = true
@export var heal_amount: int = 10

# Unique ID. Use the file path if saved, otherwise fall back to the instance ID
func get_id() -> String:
    return resource_path if not resource_path.is_empty() else str(get_instance_id())
Since the .tres path is itself a unique ID, you don't need to maintain a separate table of string IDs.
Logic Layer: Managing State in a Singleton
Inventory state lives in exactly one place: an Autoload singleton called InventoryManager. The player, chests, and enemies all move items in and out through it (a single source of truth).
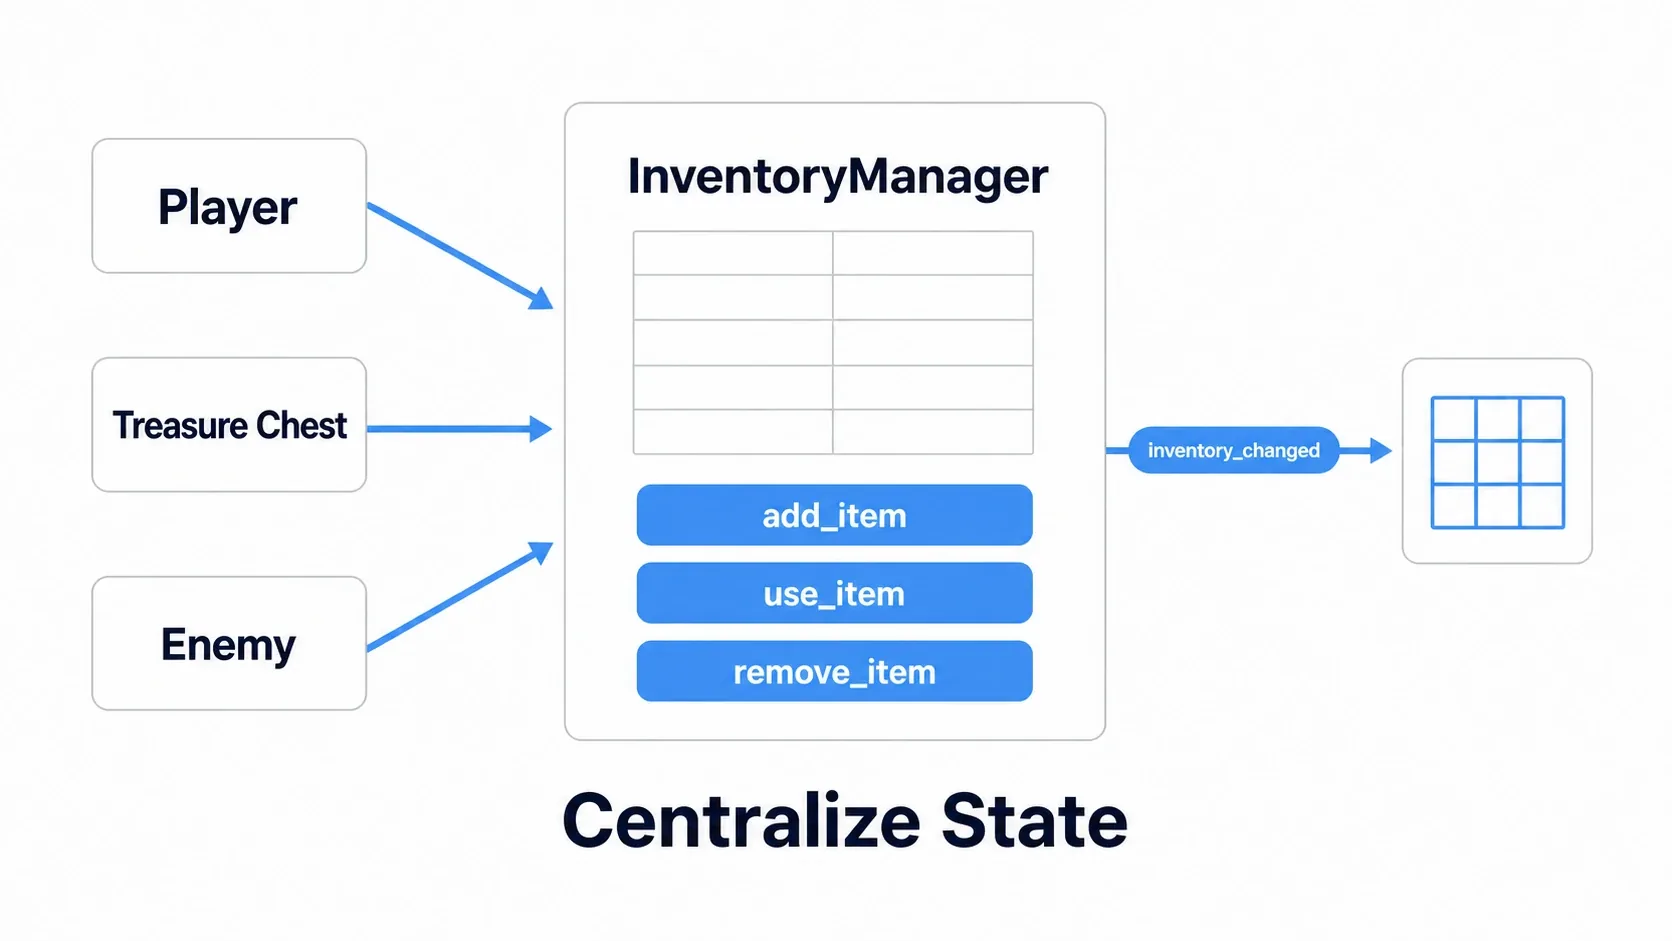
# inventory_manager.gd (registered as an Autoload)
extends Node

signal inventory_changed                     # fired when the contents change
signal item_used(item: ItemResource)         # fired on use (for sound effects, etc.)

# Key: item ID, Value: { "resource": ItemResource, "count": int }
var _items: Dictionary = {}
const MAX_SLOTS := 30

func add_item(item: ItemResource, count := 1) -> bool:
    if item == null:
        return false
    var id := item.get_id()
    if item.stackable and _items.has(id):
        _items[id].count += count
        inventory_changed.emit()
        return true
    if _items.size() < MAX_SLOTS:
        _items[id] = {"resource": item, "count": count}
        inventory_changed.emit()
        return true
    return false   # inventory full

func use_item(id: String) -> void:
    if not _items.has(id):
        return
    var item: ItemResource = _items[id].resource
    if not item.can_be_used:
        return
    item_used.emit(item)
    if item.type == ItemResource.ItemType.CONSUMABLE:
        remove_item(id, 1)   # consumables get used up

func remove_item(id: String, count := 1) -> void:
    if not _items.has(id):
        return
    _items[id].count -= count
    if _items[id].count <= 0:
        _items.erase(id)
    inventory_changed.emit()

func get_inventory_data() -> Dictionary:
    return _items.duplicate(true)
Every operation that changes state (add / use / remove) ends by calling inventory_changed.emit(). That's the cue for the UI update below.
View Layer: Updating the UI Automatically with Signals
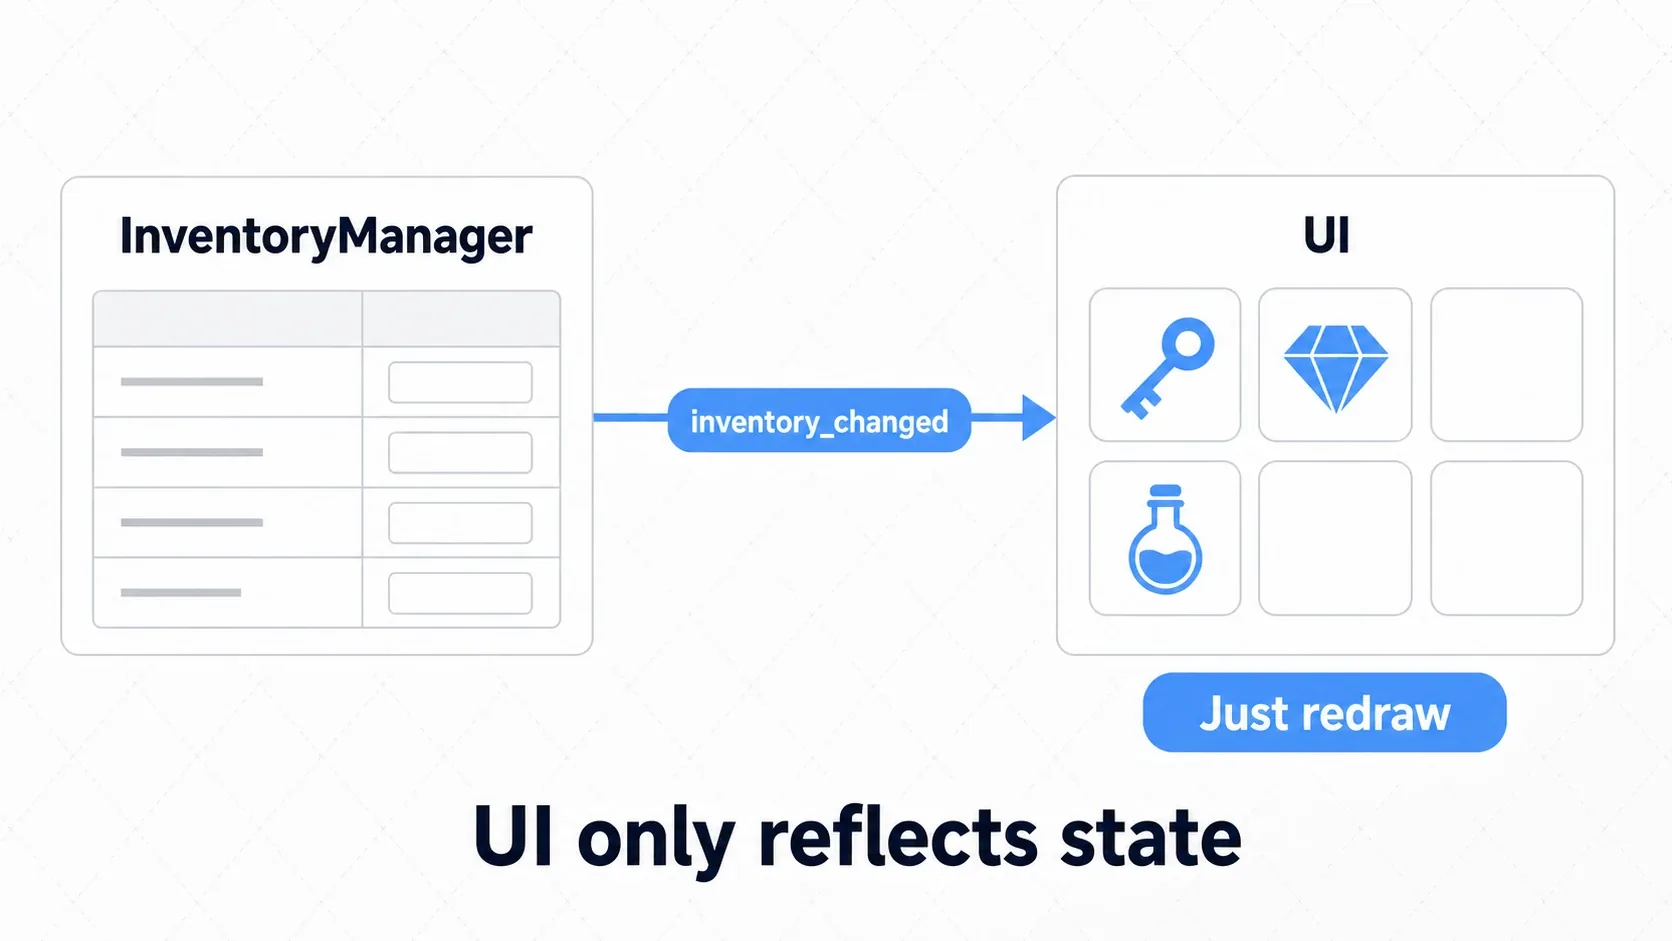
Make the UI something that only reflects state. When it receives inventory_changed, it redraws. That's all. A GridContainer is handy for the layout.
# inventory_ui.gd
extends GridContainer

const SLOT := preload("res://ui/inventory_slot.tscn")

func _ready() -> void:
    InventoryManager.inventory_changed.connect(_redraw)   # subscribe to changes
    _redraw()

func _redraw() -> void:
    for c in get_children():
        c.queue_free()                       # clear everything first
    var data := InventoryManager.get_inventory_data()
    for id in data:
        var slot := SLOT.instantiate()
        slot.update_display(data[id].resource, data[id].count)
        # On click, simply ask the logic layer to use the item
        slot.gui_input.connect(func(e: InputEvent) -> void:
            if e is InputEventMouseButton and e.button_index == MOUSE_BUTTON_LEFT and e.pressed:
                InventoryManager.use_item(id))
        add_child(slot)
All the UI does is ask with InventoryManager.use_item(id). Whether the count actually goes down, or healing happens, is entirely up to the logic layer. That's why redesigning the UI doesn't change a single line of logic.
Hands-On: Picking Up and Using a Potion
With all three layers in place, let's run the full loop: pick up a potion lying on the ground, then use it from the inventory to heal. RPG, roguelike, or survival game, this round trip has the same shape.
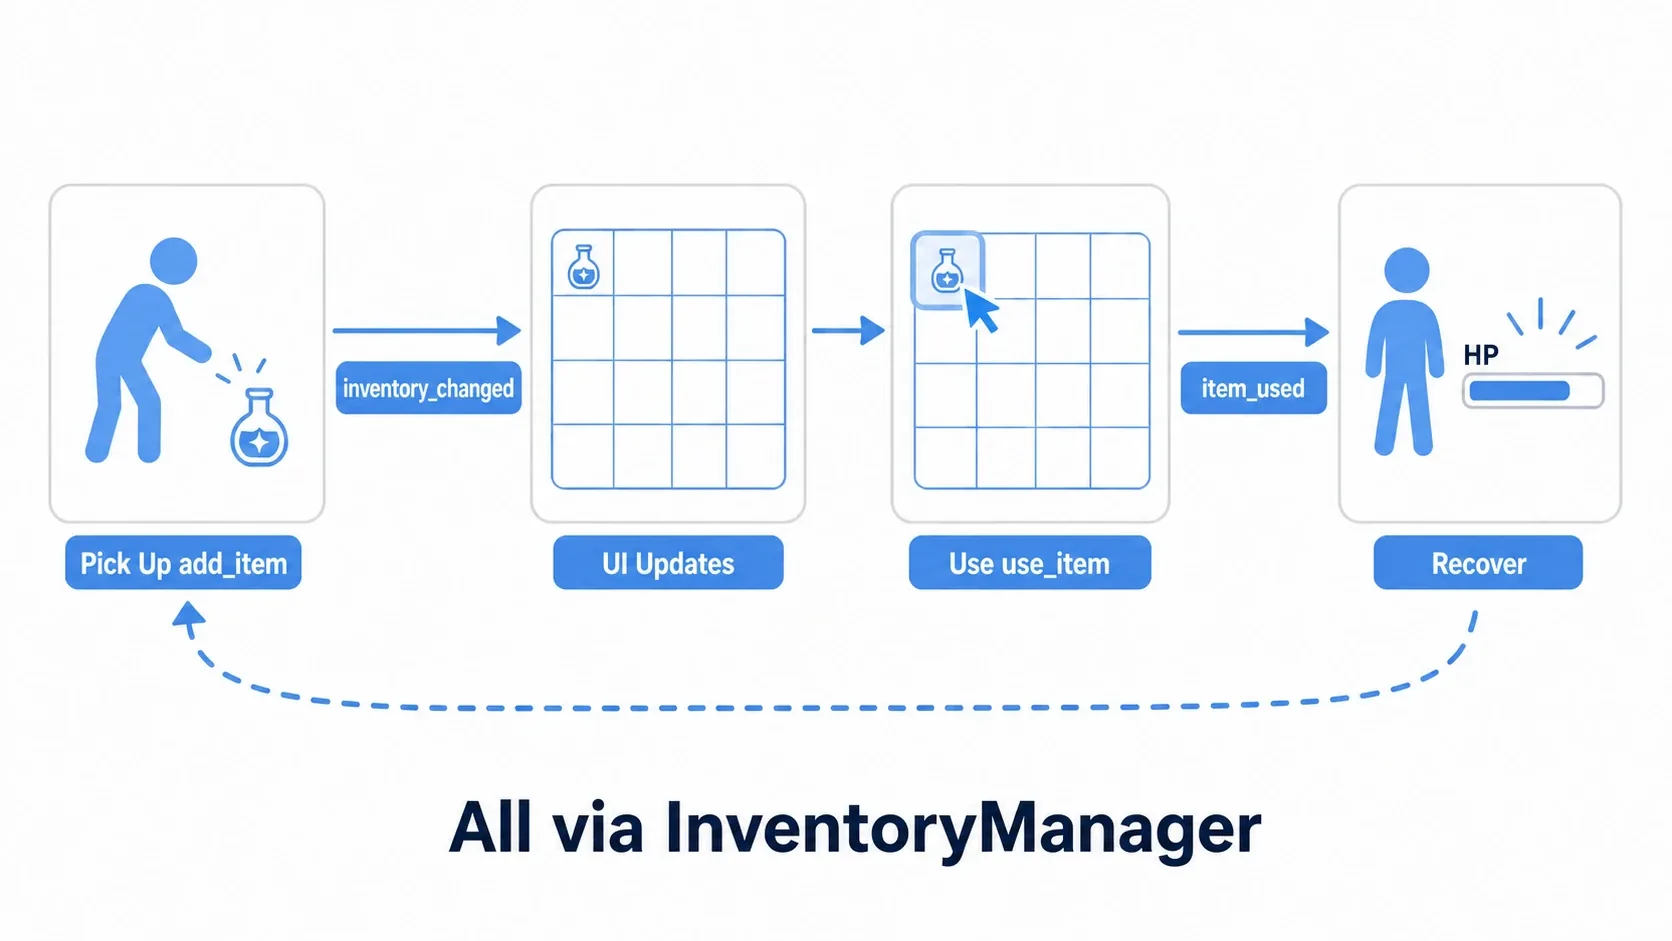
The pickup item (an Area2D) only adds itself to the InventoryManager on contact and then disappears.
# item_pickup.gd
extends Area2D

@export var item: ItemResource   # assign a .tres in the editor

func _ready() -> void:
    body_entered.connect(_on_body_entered)

func _on_body_entered(body: Node2D) -> void:
    if body.is_in_group("player"):
        if InventoryManager.add_item(item):   # hand it to the logic layer
            queue_free()                       # disappear once picked up
That's all it takes. The rest connects automatically.
- Pick up →
add_item()adds to_itemsand emitsinventory_changed - The UI receives it and redraws the grid (the potion appears)
- Click the slot →
use_item()emitsitem_usedand decrements the count - The healing itself is handled by a separate system listening to
item_used(the player's HP)
There are two points to take away.
- Nobody reaches into anyone else's internals: The pickup only says "add this," and the UI only says "use this." Everything goes through
InventoryManager, so there is always exactly one place to fix. - Growing the system means adding data and subscribers: Want a sound effect or healing? Add one more node that listens to
item_used. You don't touch existing code.
Common Mistakes and Best Practices
| Common mistake | Best practice |
|---|---|
Tightly coupling logic and UI with things like get_node("../Player").add_item() | Stay loosely coupled with signals and a singleton: the UI gets notified, and the logic is callable from anywhere |
| Writing item data directly into scripts | Move it into .tres Resources and go data-driven |
| Rebuilding the UI every frame | Update only when inventory_changed fires (and pool slots at scale) |
| Letting the player and UI each hold their own inventory data | Single source of truth: only InventoryManager holds state, everyone else reads it |
Bonus: Good to Know for Later
- Save and load: Flatten
_itemsinto aDictionaryof item IDs and counts, save it withJSONorConfigFile, and rebuild on load. - Reuse UI slots instead of rebuilding: Clearing and regenerating every slot each time gets heavy when there are many. Reusing slots (object pooling) keeps it light.
- Style it with a theme: Pulling the look of slots and item frames into a theme keeps everything consistent.
- Put item effects in the data: Store heal amounts and effects on
ItemResourceand let whoever listens toitem_usedapply them, so adding an item is purely a data task.
Summary
- Three layers: Separate data (
Resource), logic (singleton), and UI (Control) - Data layer: Define items as
.tres. Adding one is just creating a file - Logic layer:
InventoryManagerowns the only copy of state and emitsinventory_changedon every change - View layer: Listens to the signal and redraws. Using an item is just asking with
use_item()
Follow these three principles and your core logic keeps working no matter how many item types you add or how much the UI design changes. Start by creating one ItemResource and running the round trip: add_item → UI display → use_item. Build the UI on top of layout containers and a theme and it starts to look like the real thing.