You've finished slicing the sprite sheet. The walk frames are sitting in your Project window. So—how do you turn them into "walk animation while walking, idle animation while standing"?
Unity's 2D animation works as a division of labor between three tools with distinct roles. This article walks the full pipeline: create clips → build switching rules → drive them from a script.

What You'll Learn
- The three tools and their jobs—Clip (film), Animator (projector), Controller (switchboard)
- Creating clips from sprites in the Animation window
- Auto-switching "walk ⇔ idle" with the Animator Controller
- Reporting state from scripts with
SetFloat/SetBool(Unity 6'slinearVelocity)- Flipping direction with
Flip X—no left-facing animations needed
Tested with: Unity 6 (6000.x)
Three Tools, Three Jobs
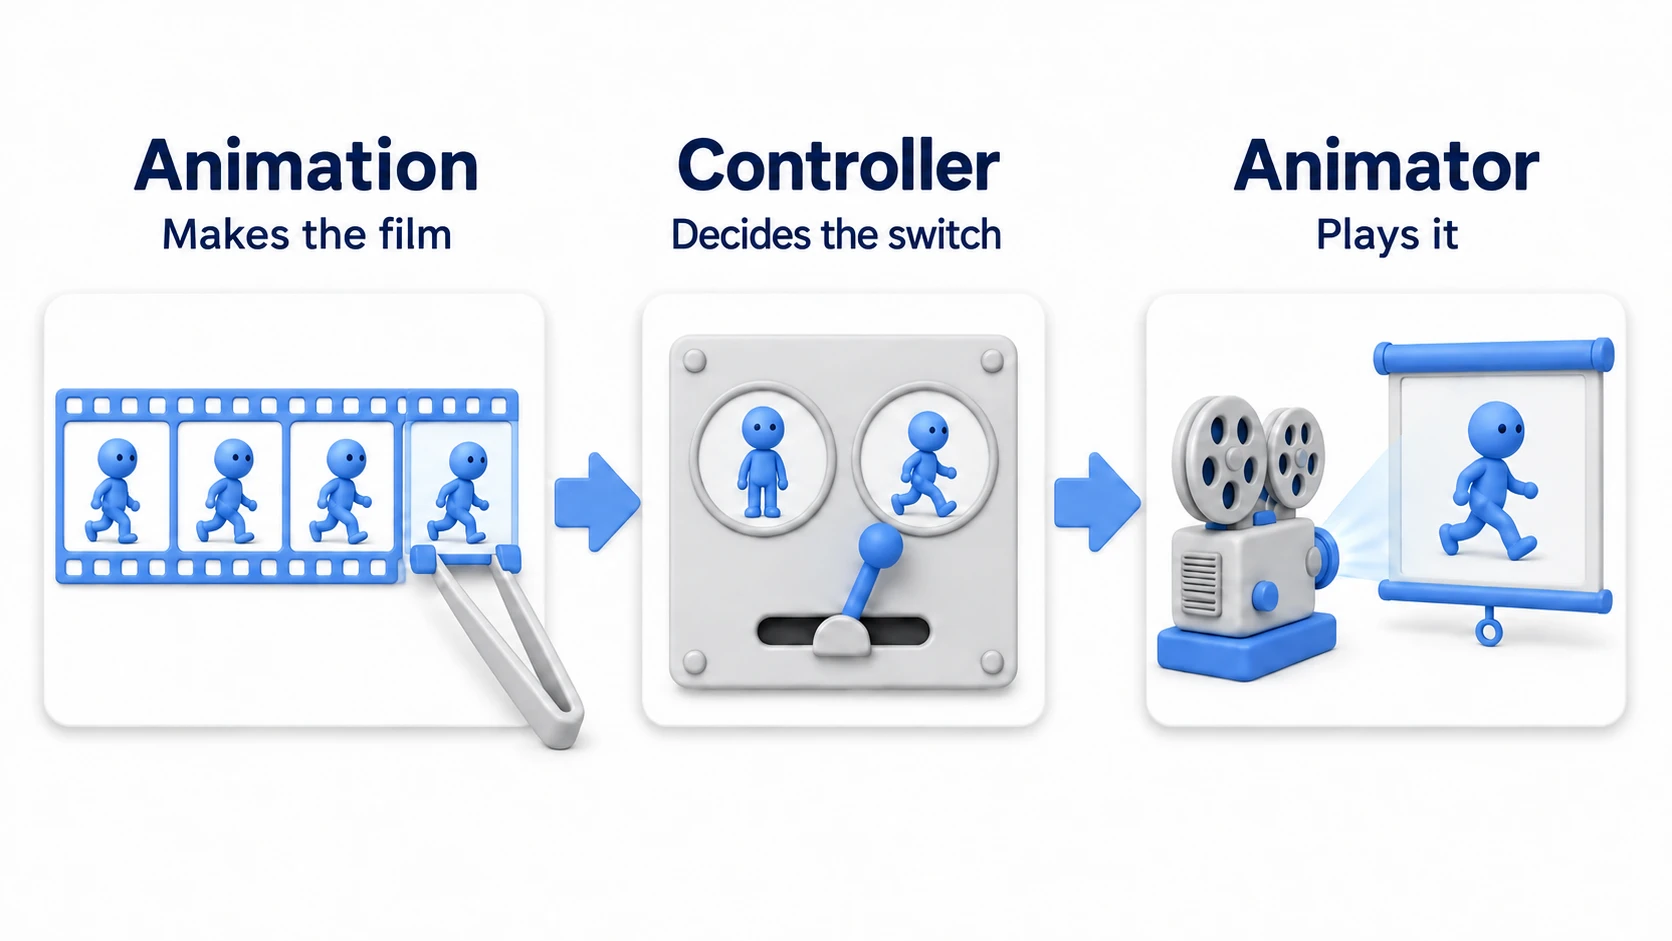
- Animation window (the editing desk): Where you lay sprites on a timeline to create animation clips (
.anim)—your "stop-motion film." - Animator component (the projector): Attached to the GameObject; the device that actually plays the animation.
- Animator Controller (the switchboard): A state machine (
.controller) defining the rules for "under which conditions, switch to which film."
"Create clips → build switching rules → report state from scripts"—the Steps below follow exactly this order.
Step 1: Creating Animation Clips
First, create a clip for each action: idle, walk, jump, and so on.
- Prepare: Place a GameObject with a
Sprite Rendererin the scene (sprites already sliced). - Open the Animation window: With the object selected, go to
Window > Animation > Animation. - Create the first clip: Pressing
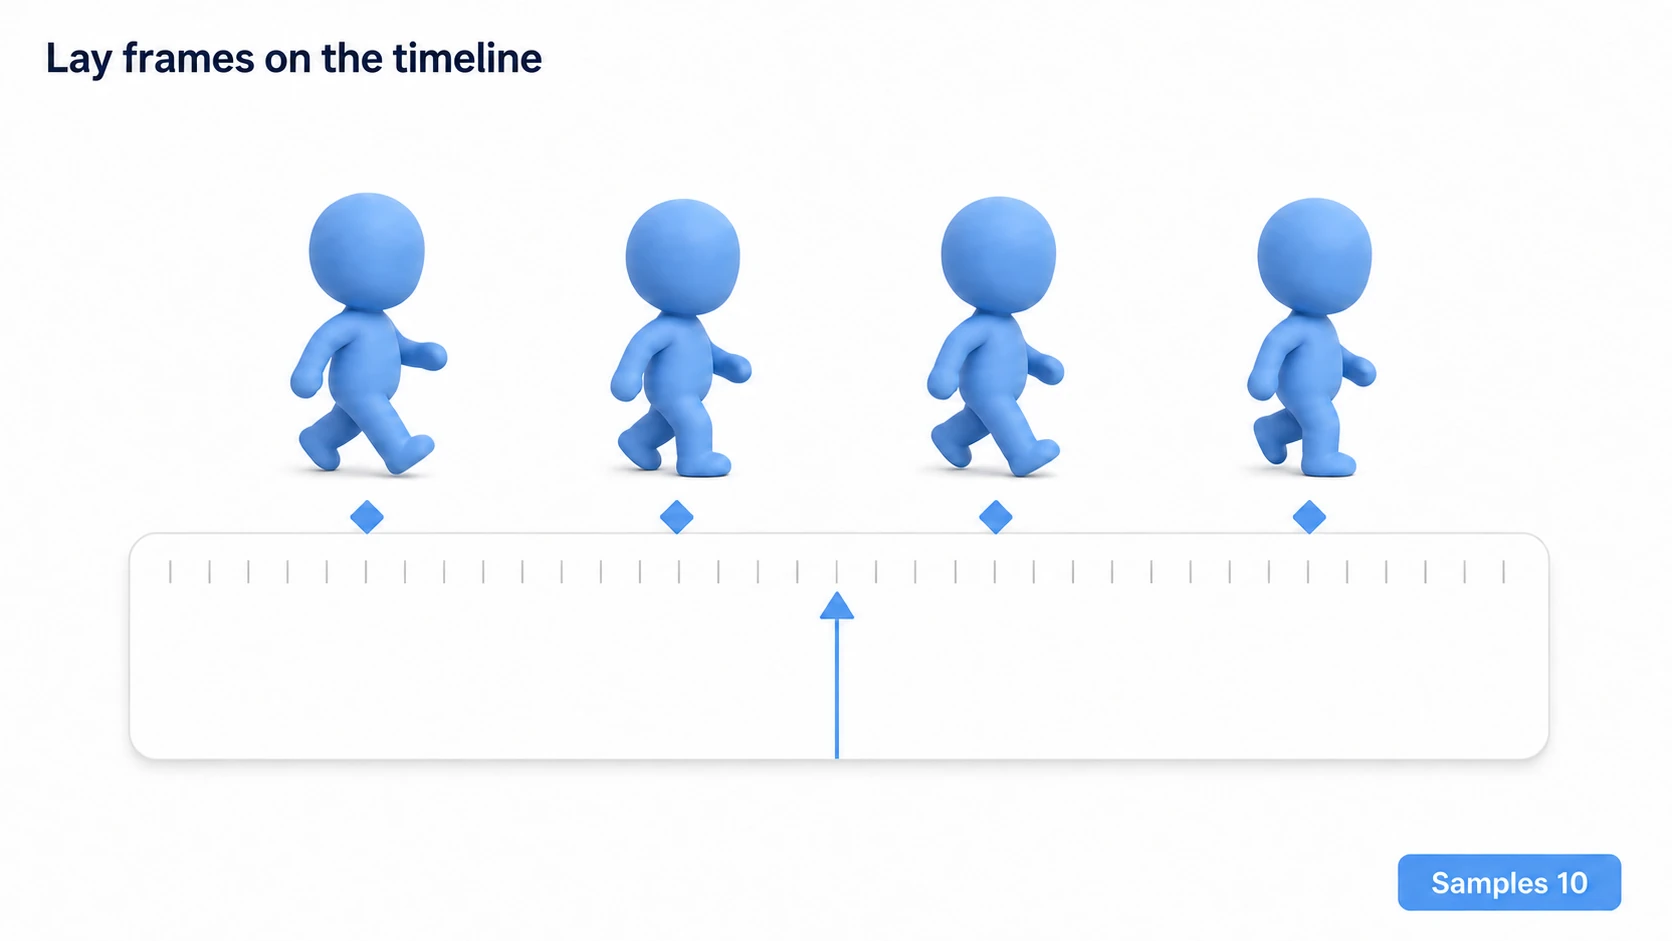
Createauto-creates an Animator Controller and the first clip, and attaches anAnimatorcomponent to the object. Name the clip something like "Idle." - Register the sprites: Select all the sliced sprites you need and drag & drop them onto the timeline. Keyframes are placed automatically.
- Adjust the speed: Check with the play button; if it's too fast, lower
Samples(frames per second) or widen the keyframe spacing (theSamplesfield is hidden at first; show it with Show Sample Rate from the ⋮ menu at the top right of the Animation window). 8–12 fps is the standard range for pixel art.
- Create the other clips: Click the clip name →
Create New Clip...to make "Walk" and "Jump" the same way.
tips: Select a clip and check
Loop Timein the Inspector. Repeating animations like walk and idle should have it on; one-shot animations like attacks and jumps should have it off. "My attack animation loops forever" is almost always this.
Step 2: Managing States with the Animator Controller
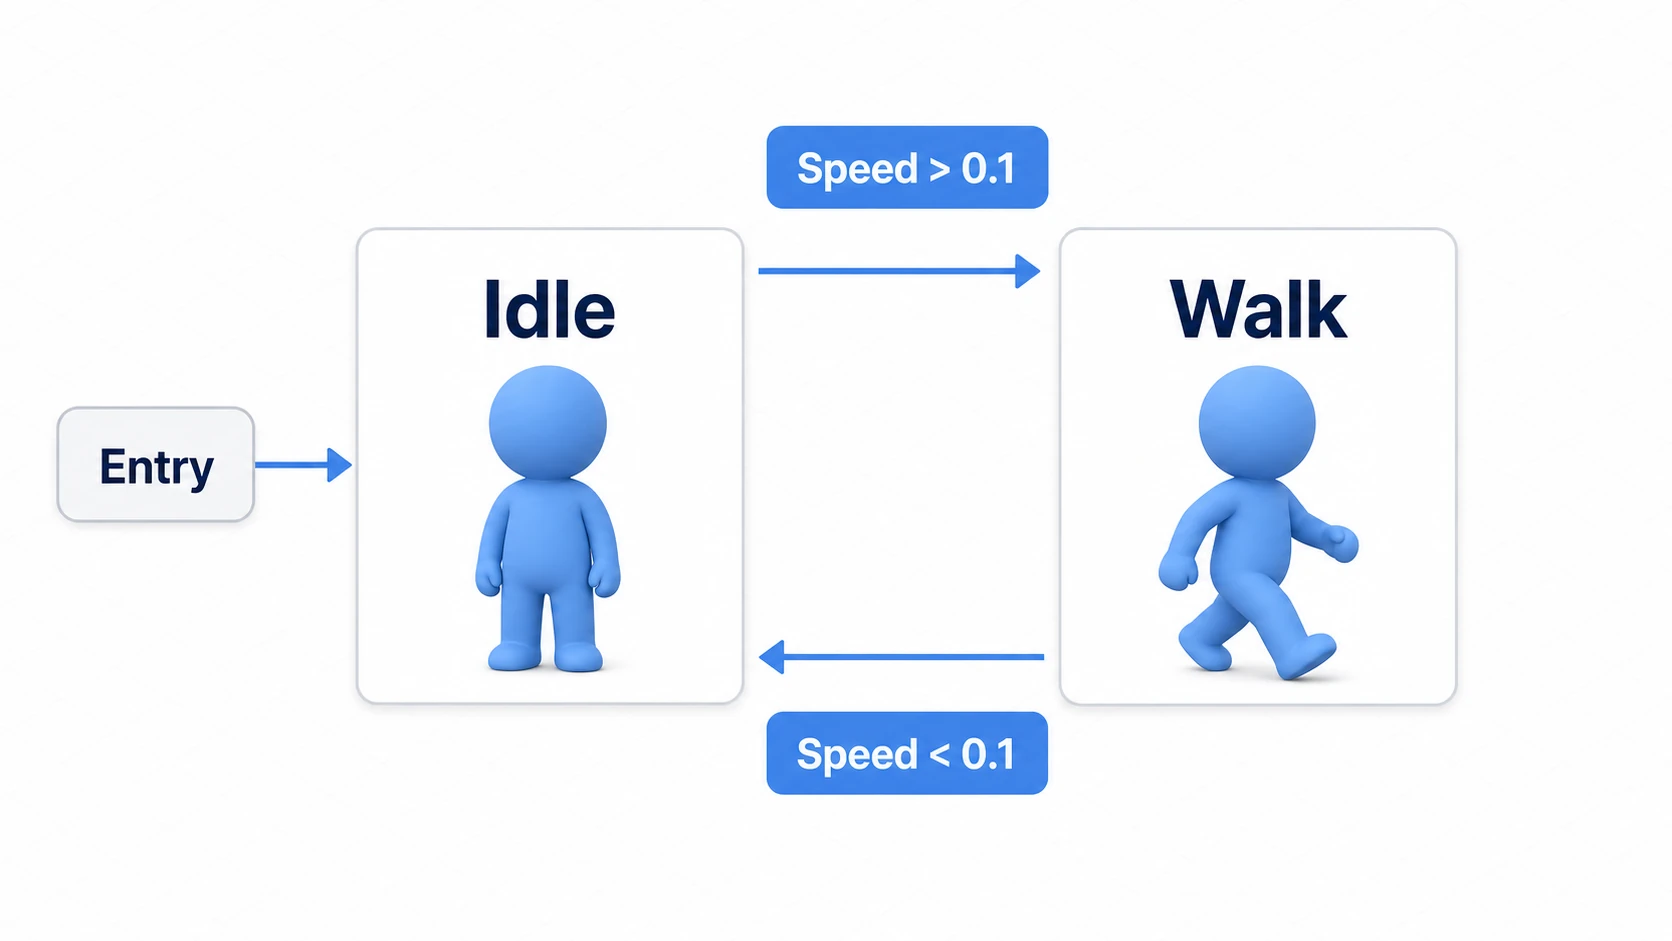
With the clips ready, build the switching rules. Double-click the controller asset to open the Animator window—you'll see states (boxes) corresponding to your clips. The box with an arrow from Entry is the default (usually Idle).
- Create parameters: From the
+in theParameterstab, create the variables your script will use to communicate. Here, make aFloatnamedSpeedand aBoolnamedIsJumping. - Create transitions: Right-click "Idle" →
Make Transition→ click "Walk" to draw the Idle→Walk arrow. Make the reverse Walk→Idle as well. - Set the conditions: Select each arrow and set its
Conditionsin the Inspector:- Idle→Walk:
SpeedGreater0.1 - Walk→Idle:
SpeedLess0.1
- Idle→Walk:
- Turn off Has Exit Time: For movement transitions, uncheck
Has Exit Time. When on, the switch waits for "the animation to finish playing," making controls feel a beat late. Also set Transition Duration under Settings to 0. Sprite animations don't blend two images, so transition time is just delay.
The state machine concepts themselves (Entry, Any State, Blend Trees) are covered in depth in the Animator Controller intro. The mechanism is identical in 2D and 3D.
Step 3: Controlling the Animator from a Script
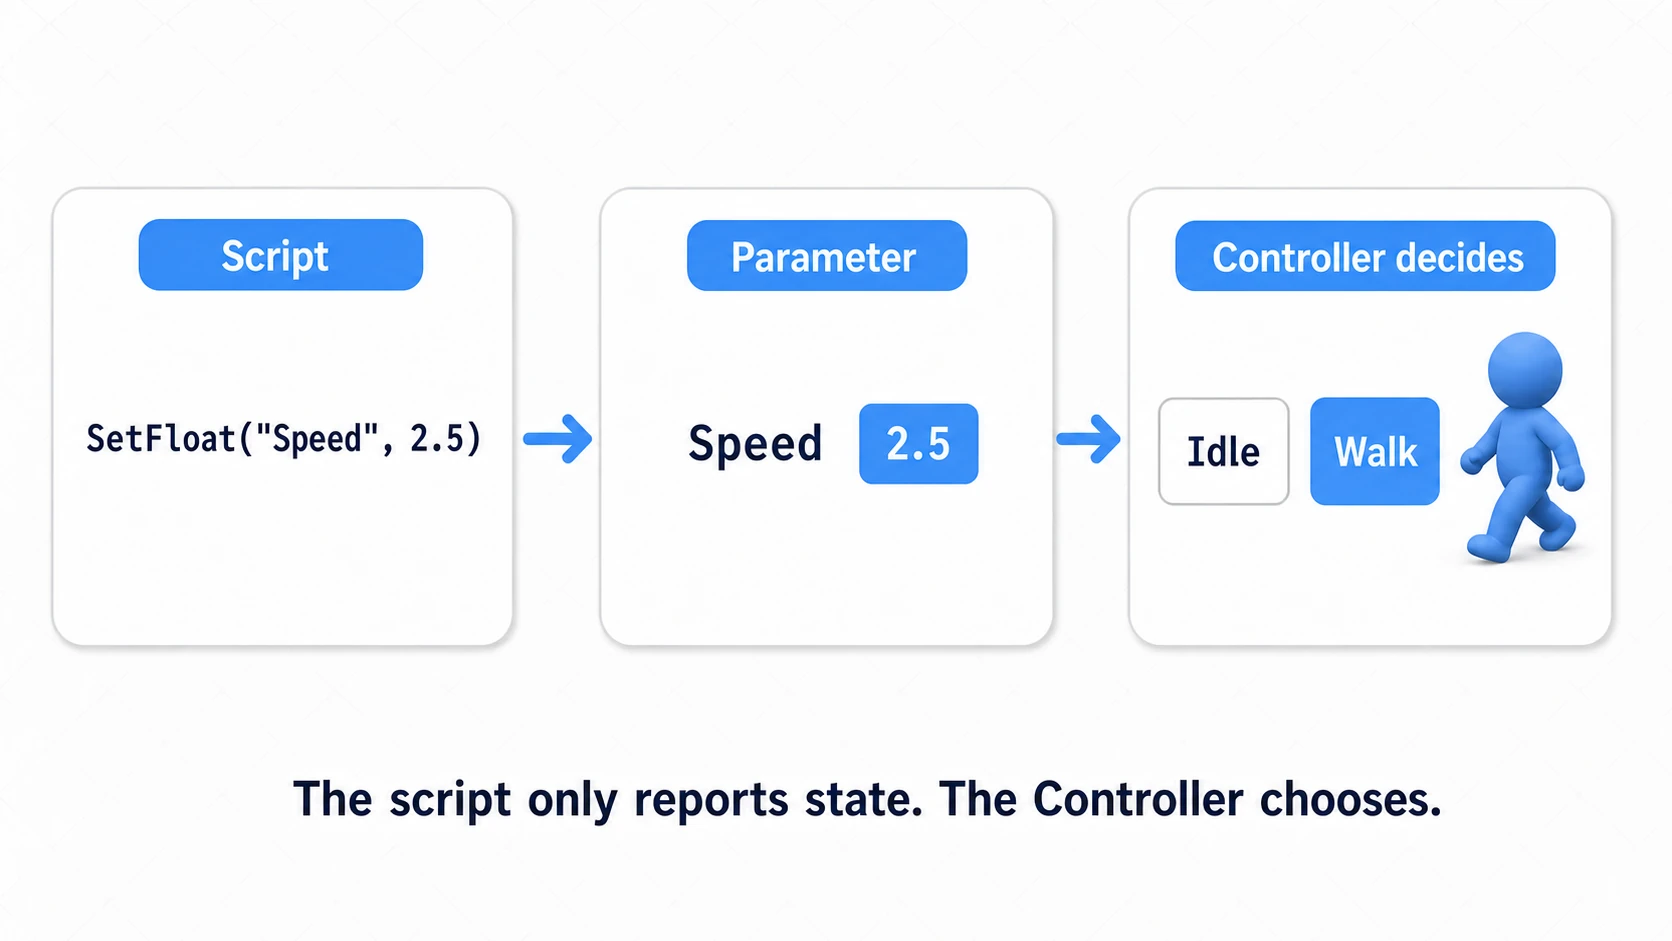
Finally, report the character's state to the Animator through parameters. The script only reports "the current state"—deciding which animation to play is the Controller's job.
using UnityEngine;

[RequireComponent(typeof(Animator), typeof(Rigidbody2D), typeof(SpriteRenderer))]
public class PlayerAnimationController : MonoBehaviour
{
    private Animator animator;
    private Rigidbody2D rb;
    private SpriteRenderer spriteRenderer;

    void Start()
    {
        animator = GetComponent<Animator>();
        rb = GetComponent<Rigidbody2D>();
        spriteRenderer = GetComponent<SpriteRenderer>();
    }

    void Update()
    {
        // Feed the absolute horizontal speed to the Speed parameter (drives walk ⇔ idle)
        float speedX = rb.linearVelocity.x;
        animator.SetFloat("Speed", Mathf.Abs(speedX));

        // IsJumping is true only while airborne (tied to the ground check)
        animator.SetBool("IsJumping", !IsGrounded());

        // Flip the facing direction with Flip X; no left-facing animations needed
        if (speedX > 0.01f) spriteRenderer.flipX = false;
        else if (speedX < -0.01f) spriteRenderer.flipX = true;
    }

    private bool IsGrounded()
    {
        // The classic ground check: a short ray at the feet (hits only the Ground layer)
        // Assumes the sprite's Pivot is at the feet (Bottom); if it's centered, add the distance to the feet
        return Physics2D.Raycast(transform.position, Vector2.down, 0.1f,
                                 LayerMask.GetMask("Ground"));
    }
}
Three points matter here.
- Use
linearVelocity: In Unity 6,velocitywas replaced bylinearVelocity; the oldvelocitygives an obsolete warning (see the API migration guide). - Don't forget to reset Bools: Leave
IsJumpingstuck at true and the character stays in the jump animation even after landing. The safe pattern is to tie it directly to the state, as in "true only while not grounded." - Facing is
flipX: Make only right-facing animations, and flip with theSprite Renderer'sFlip Xwhen moving left. That's half the animation work gone.
Hands-On: Interrupting with an Attack Motion
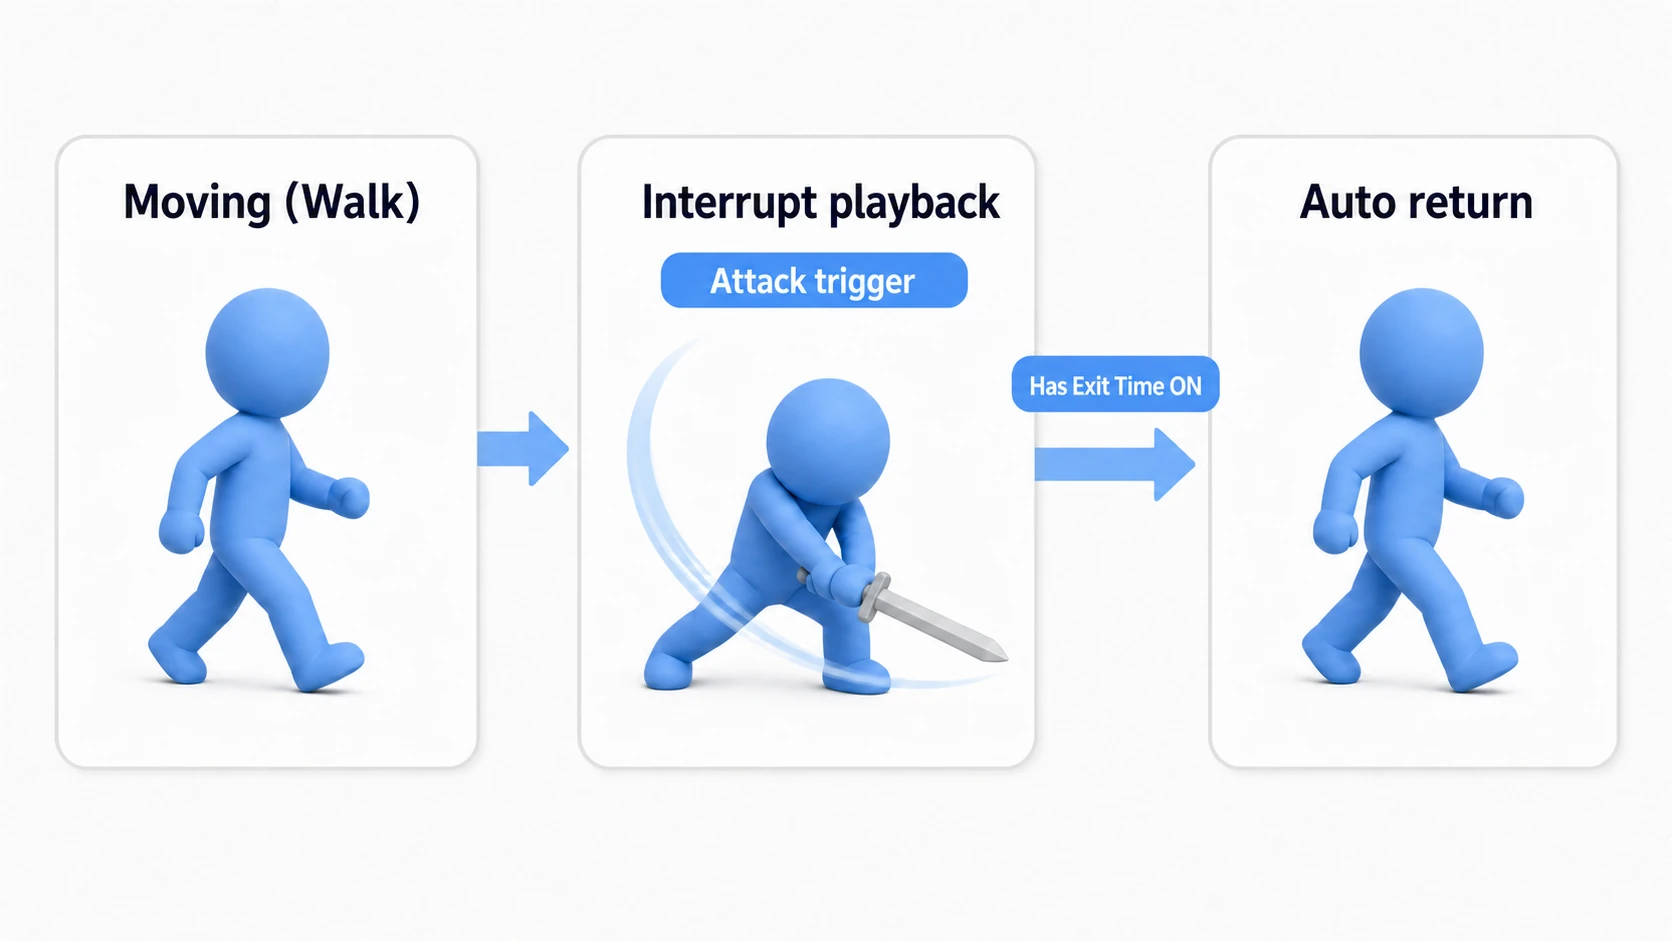
A beat 'em up punch, a slash in a sword-fighting action game, cutting grass in an RPG field—animations that "play exactly once the moment a button is pressed, then return to whatever was playing" are wired a bit differently from Idle ⇔ Walk. All you need to add to what you know is one tool: the Trigger. Let's build it.
- Create the Attack clip: Make a clip from the attack frames using the Step 1 procedure, and turn off
Loop Timein the Inspector (it's a one-shot). - Create a Trigger parameter: In the
Parameterstab, add aTriggernamedAttack. A Trigger is a button-style parameter—"true only at the moment it's fired, automatically reset once consumed"—so there's no forgetting to reset it like withSetBool. - Draw the interrupt arrow: Right-click "Any State" →
Make Transition→ "Attack." Set the condition toAttack(Trigger) and turnHas Exit Timeoff (you want the interrupt at the instant of the press). Coming fromAny Statemeans one arrow interrupts from Idle and Walk alike. - Draw the return arrow: Create an "Attack" → "Idle" transition, leave its
Conditionsempty, turnHas Exit Timeon, and setExit Timeto 1. "No conditions + Has Exit Time on + Exit Time 1" means return unconditionally after playing to the end (Exit Timeisn't seconds but a fraction of the clip's length, where 1 is the end).
The script side is one line:
void Update()
{
    // Fires exactly once at the moment of the press (unlike a Bool, nothing to reset)
    if (Input.GetButtonDown("Fire1"))
    {
        animator.SetTrigger("Attack");
    }
}
Input.GetButtonDown belongs to the old Input Manager. If it throws in a new Unity 6 project, set Active Input Handling under Project Settings > Player to Both (this restarts the editor).
Two points matter most here.
Has Exit Timeis opposite on the way in and the way out: the interrupting arrow has it off (react instantly), the returning arrow has it on (play to the end, then restore). Step 2 taught "off for movement," but the precise rule is "off for animations you may cut short, on for animations you want seen through to the end."- The attack's effects go in Animation Events: "spawn the hitbox on frame 3 of the swing" or "play the hit sound" is wired with Animation Events (see Bonus), which call a function at a specific frame of the clip. Visuals and hit detection stay perfectly in sync.
If you want combo chains or "no moving during attacks," the next step is organizing state management itself—see the State pattern article.
Bonus: Good to Know for Later
- When to use Any State: Interrupts like "damage motion from any state" are built as transitions from
Any State(see the Animator Controller intro). - Animation Events: Call a function at a specific frame of a clip. Use them for frame-level syncing—"play the footstep sound on the frame the foot lands," "spawn the hitbox on frame 3 of the attack."
- Bone animation: Besides frame-by-frame animation, there's the 2D Animation package (skeletal animation), which deforms a single illustration with bones. Its strengths are smooth motion and low memory use, approaching Live2D-style expression.
- Working with physics: The speed you feed into
Speedshould come from the Rigidbody2D. Drive movement and animation from the same value and the visuals never drift from the behavior.
Summary
- Three jobs: Animation window (making film) → Animator Controller (switchboard) → Animator component (projector).
- Clip creation is drag & drop. Speed via
Samples, repetition viaLoop Time. - Switching is parameters + transition conditions. Movement transitions:
Has Exit Timeoff. - Scripts only report state. Communicate with
SetFloat/SetBool, and mind unreset Bools. - One-shot interrupts use
SetTrigger. Return via "no conditions + Has Exit Time on + Exit Time 1." - Don't make left-facing animations. Flip with
Flip X.
Once you can build the "Idle ⇔ Walk" round trip, everything else is just adding states and parameters. Start with two states.