Talking to a villager in an RPG, a character's monologue in a visual novel, tutorial explanations — "showing text" comes up surprisingly often in games. Yet when you try to build a conversation window in Unity, text display, advancing, effects, and branching all tangle together and your hands stall. The truth is, thinking of it as separating data from UI makes a dialogue system very clean to build.
This article assembles a minimal dialogue engine. Define lines with a ScriptableObject, a typewriter effect that reveals text character by character with TextMeshPro, clicking to advance, and branching with choices. A visual novel's conversation, an RPG's event scene, a novel game's body text — all built from this foundation.
What you'll learn
- Defining lines with a ScriptableObject (separating data from UI)
- A typewriter effect with TextMeshPro (one character at a time)
- Clicking to advance (mid-effect: show full text → next line)
- Branching with choices (generate buttons → next conversation)
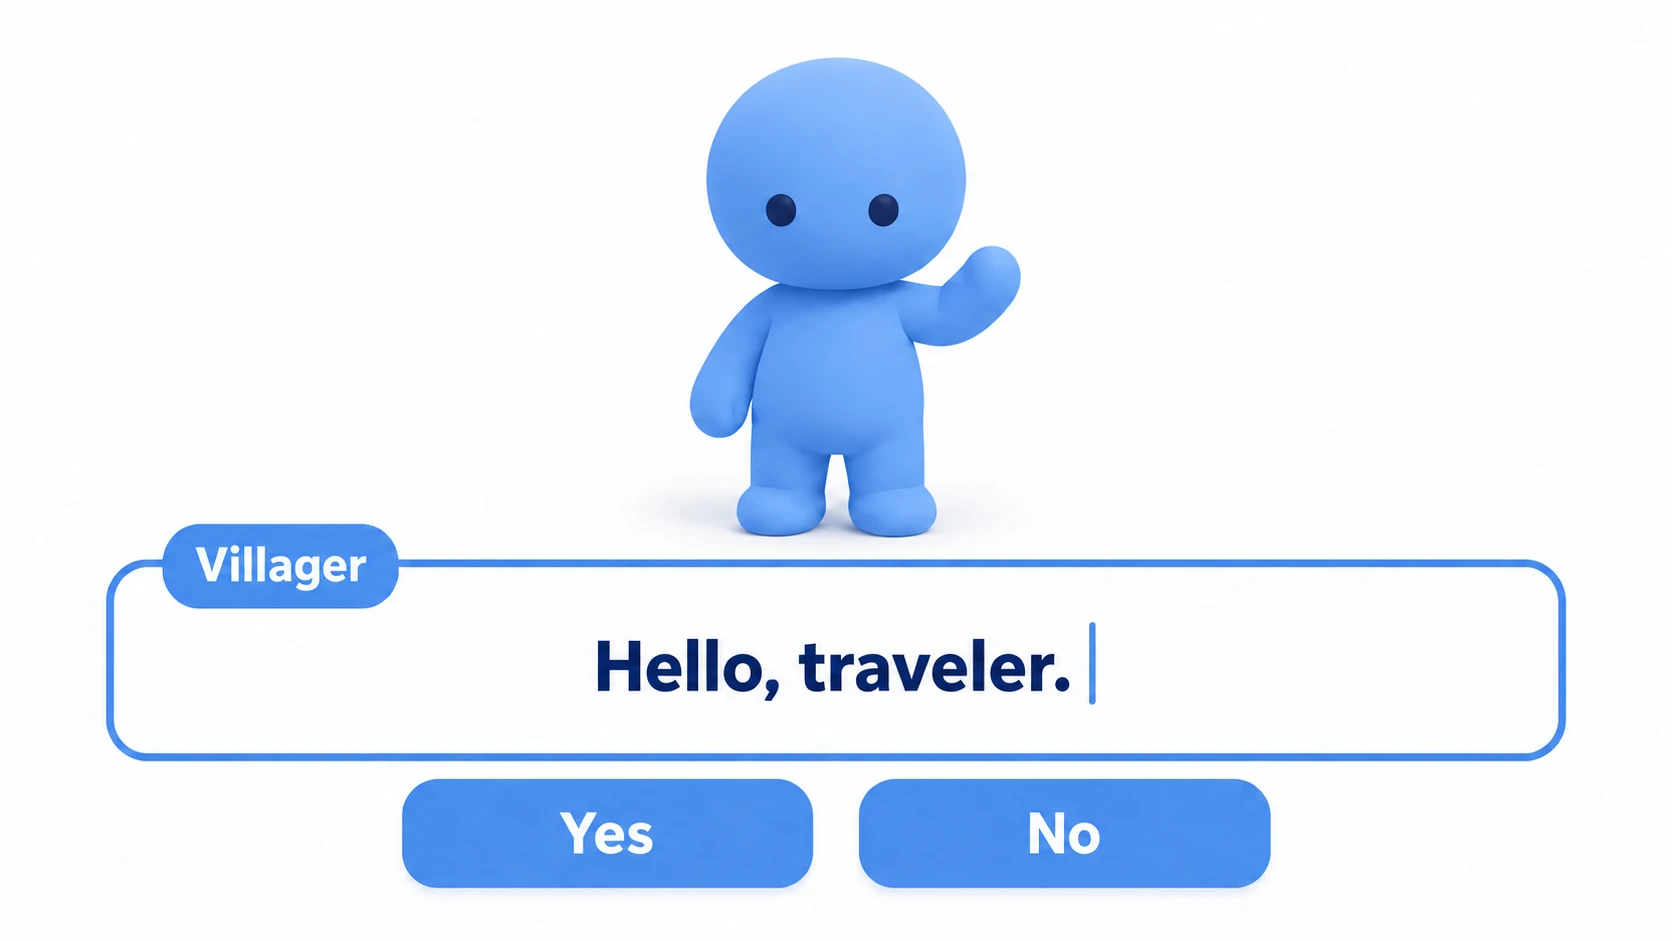
- Practice: a villager conversation whose reaction changes with choices
Tested on: Unity 6 (6000.x)
Separate data from UI
The most important idea in a dialogue system is to separate "what to say (data)" from "how to show it (UI)." Mix these up and you end up editing code every time you fix a single line.
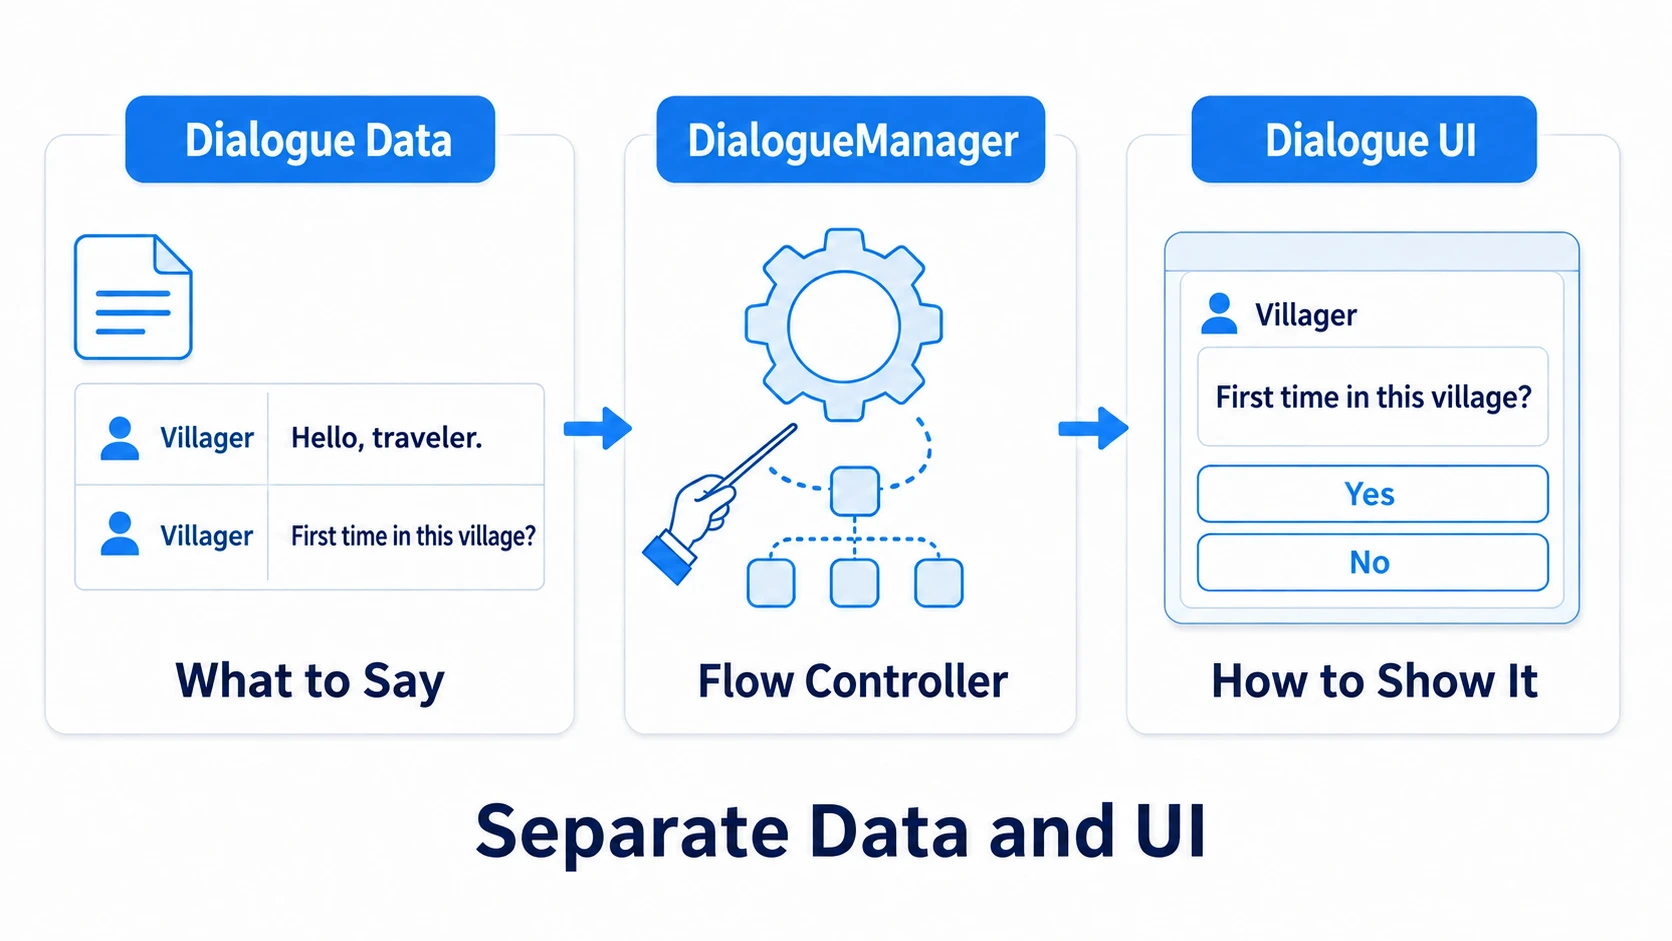
The structure splits into three parts.
| Part | Role |
|---|---|
| Dialogue data (ScriptableObject) | A list of speaker names and lines. Holds only "what to say" |
| Dialogue UI (Canvas) | Window, speaker name, body, choice buttons. Holds only "how to show it" |
| DialogueManager (script) | The "conductor" that reads data and feeds it into the UI line by line |
Split this way, whoever writes the scenario just edits lines in the ScriptableObject Inspector with no need to touch code. When you want to change the UI look, the data stays the same. This separation pays off later when you add more conversations.
Define lines with a ScriptableObject
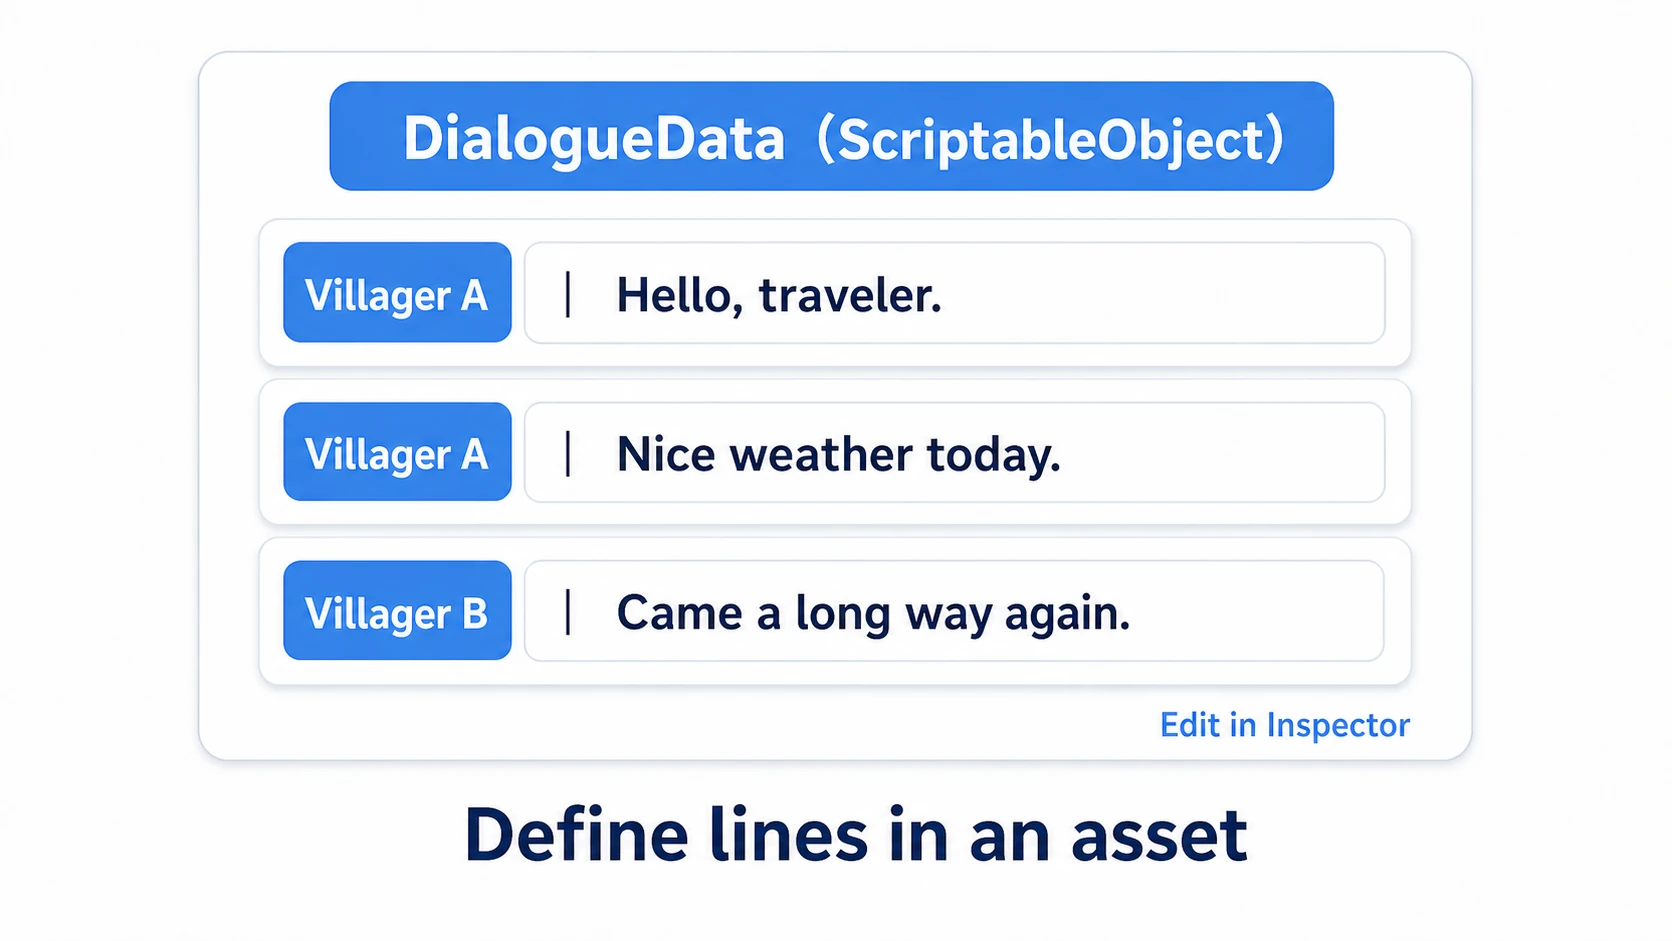
First, define "what to say" with a ScriptableObject. Think of one conversation (a series of exchanges) as one asset.
using UnityEngine;

// One line
[System.Serializable]
public class DialogueLine
{
    public string speaker;           // Speaker name
    [TextArea] public string text;   // Line body
    public DialogueChoice[] choices; // Choices (leave empty if none; used in branching below)
}

// One conversation's data (creatable via Create > Dialogue)
[CreateAssetMenu(fileName = "NewDialogue", menuName = "Dialogue/Dialogue Data")]
public class DialogueData : ScriptableObject
{
    public DialogueLine[] lines;   // Lines in order
}
Adding [CreateAssetMenu] lets you create conversation assets from Create > Dialogue > Dialogue Data in the Project view. Then just add lines to lines in the Inspector. You arrange content like "Villager A" / "Hello, traveler." without touching code. To add more conversations, just duplicate the asset.
Typewriter effect and click-to-advance
Rather than dumping a whole line at once, revealing it character by character with a "clack-clack" feels much more like a game. This is done with TextMeshPro's maxVisibleCharacters.
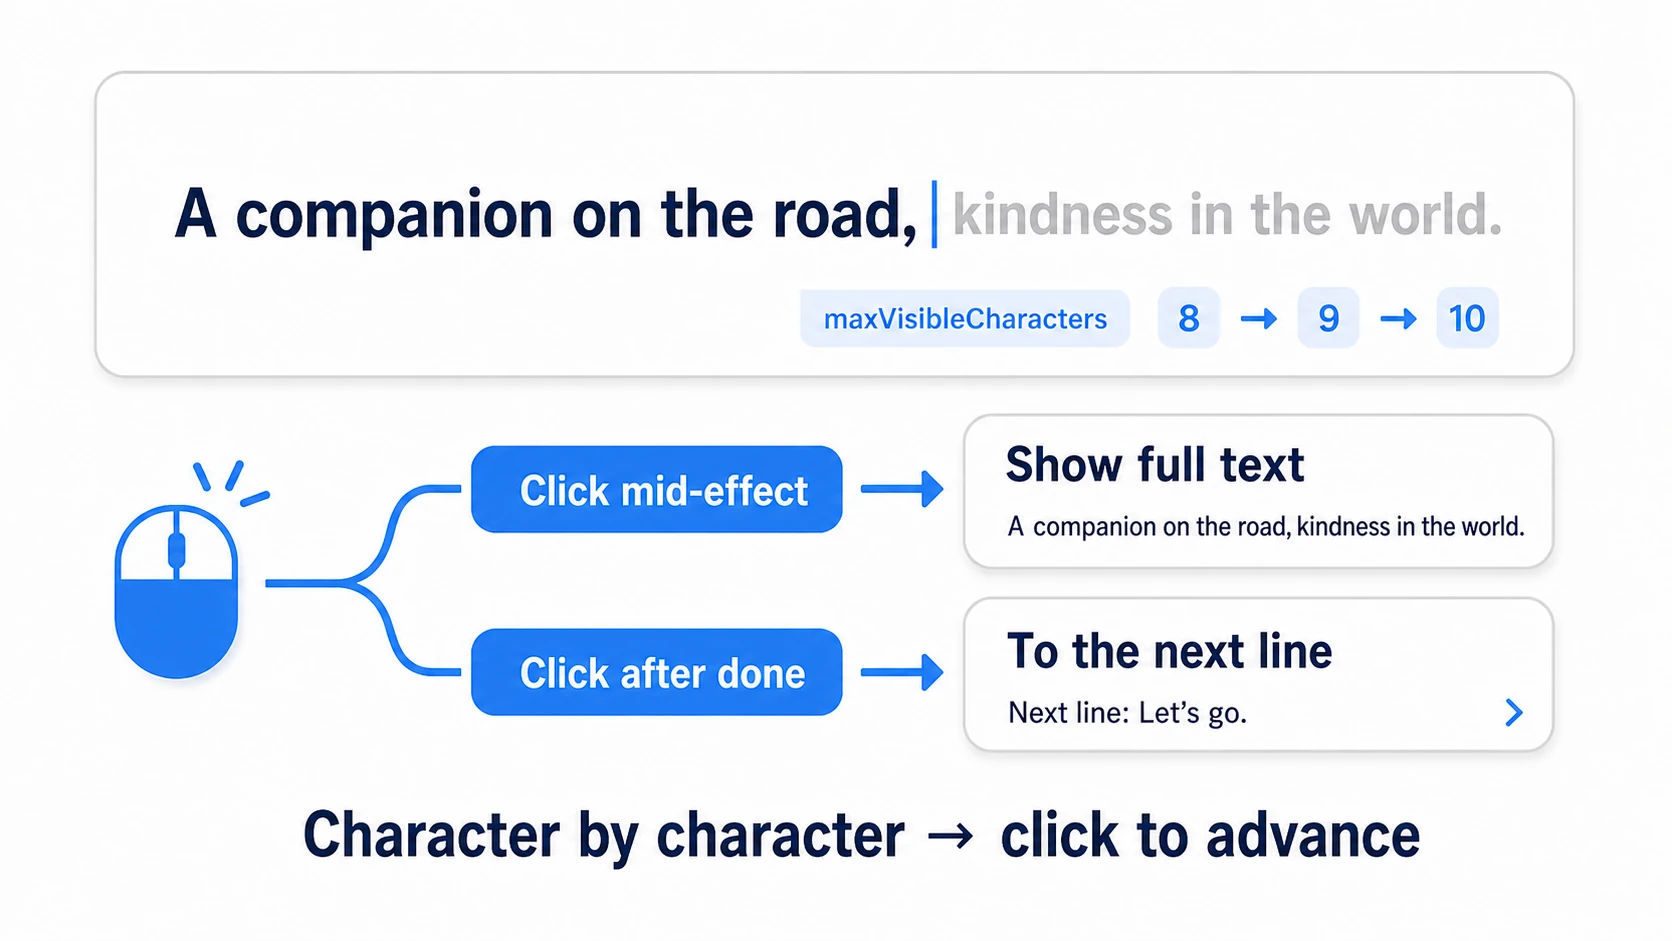
Here's how it works. Put the whole body into text and increase maxVisibleCharacters from 0 little by little, so only the visible character count grows, giving a typewriter effect.
using System.Collections;
using TMPro;
using UnityEngine;

public class TypewriterText : MonoBehaviour
{
    [SerializeField] private TMP_Text bodyText;
    [SerializeField] private float charsPerSecond = 30f;

    private Coroutine typeRoutine; // Remember the coroutine we started
    private bool isTyping;

    // Call this from outside. Starting and stopping both live inside this component
    public void Play(string line)
    {
        if (typeRoutine != null) StopCoroutine(typeRoutine); // Stop a leftover effect
        typeRoutine = StartCoroutine(TypeLine(line));
    }

    private IEnumerator TypeLine(string line)
    {
        bodyText.text = line;                 // Set the full text (not visible yet)
        bodyText.maxVisibleCharacters = 0;
        isTyping = true;

        bodyText.ForceMeshUpdate();                    // Count the visible characters (tags like <color> aren't counted)
        int total = bodyText.textInfo.characterCount;
        for (int i = 1; i <= total; i++)
        {
            yield return new WaitForSeconds(1f / charsPerSecond);
            bodyText.maxVisibleCharacters = i; // Increase visible count by 1
        }
        isTyping = false;
    }

    // On click: if mid-effect, show full text; if done, signal ready to advance
    public bool SkipOrAdvance()
    {
        if (isTyping)
        {
            StopCoroutine(typeRoutine); // We started it ourselves, so we can reliably stop it
            bodyText.maxVisibleCharacters = bodyText.text.Length; // Show full text instantly
            isTyping = false;
            return false;  // Don't advance yet
        }
        return true;       // OK to advance to the next line
    }
}
Warning (a classic trap):
StopCoroutine/StopAllCoroutinesonly affect coroutines that the same component started withStartCoroutine. If the conductorDialogueManagerstarts the coroutine (say, by makingTypeLinepublic and callingStartCoroutine(typewriter.TypeLine(...))), the coroutine runs on the DialogueManager—the Typewriter can't stop it, and you get the bug where the text keeps advancing even after skipping. As in the code above, keep both starting (Play) and stopping inside the same component.
The key is the two-step click. If clicked mid-effect, first show the full text instantly (consideration for impatient players). If clicked after the reveal finishes, advance to the next line. This two-step removes the "being made to wait" stress and dramatically improves conversation tempo.
Branching with choices
The heart of conversation is choices — that "yes/no changes the story" mechanism.
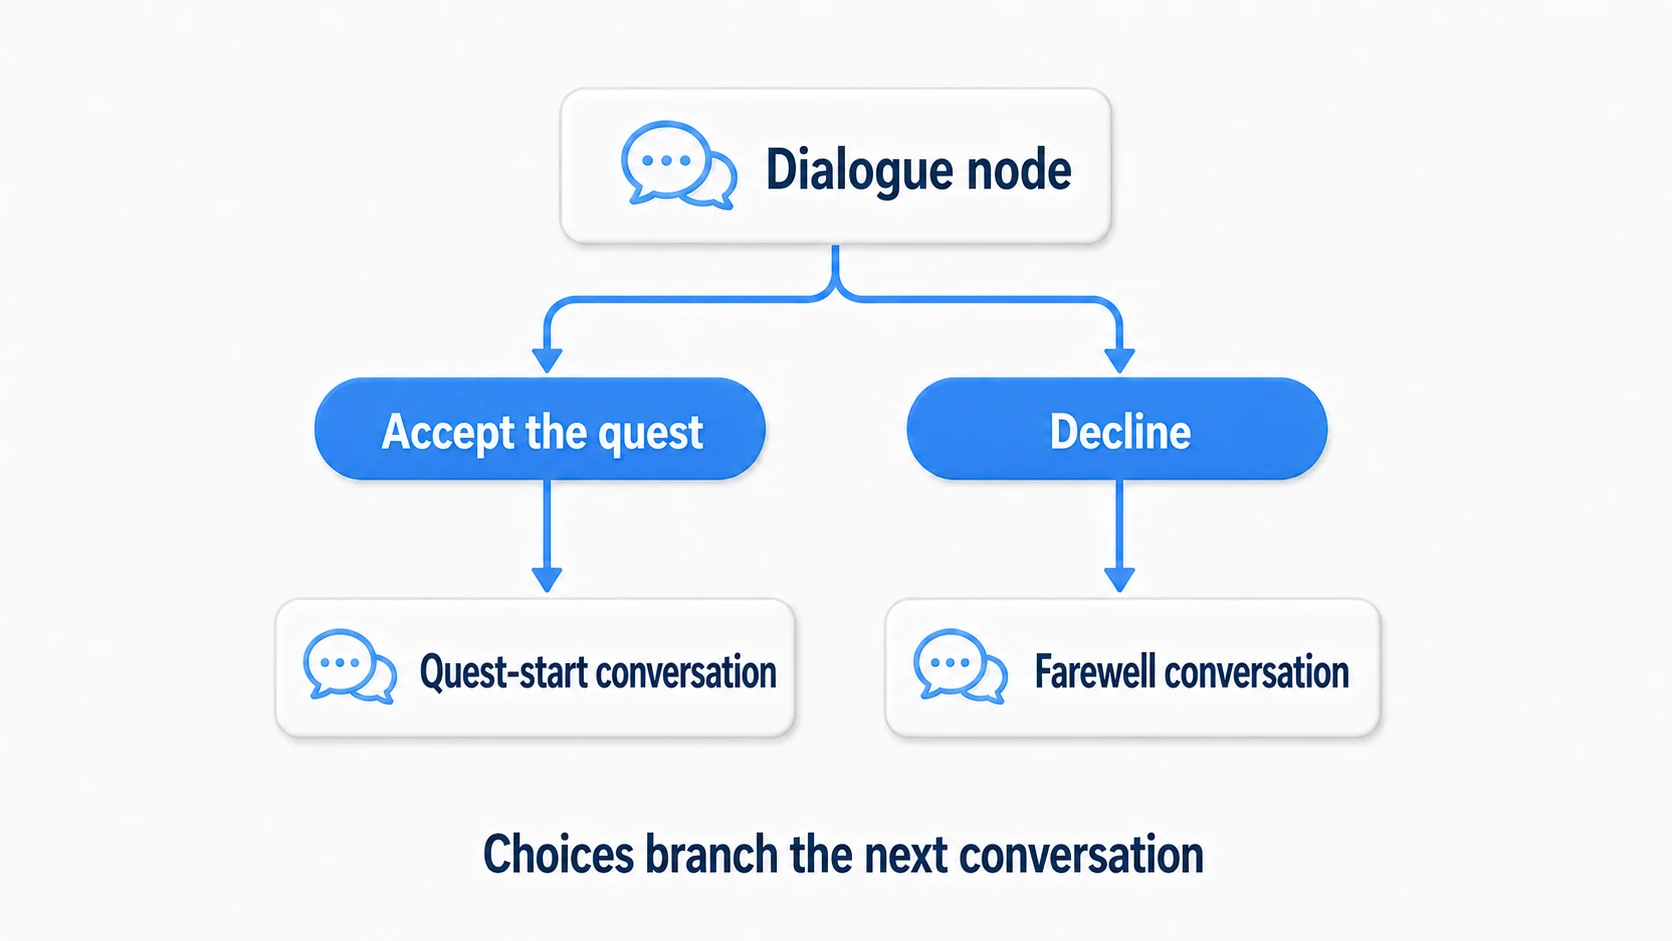
The idea is simple. Give the line data "choices" and "the conversation each choice leads to." When a choice appears, generate buttons and switch to the next conversation for the pressed button.
[System.Serializable]
public class DialogueChoice
{
    public string choiceText;         // "Accept the quest," etc.
    public DialogueData nextDialogue; // The conversation to go to if chosen
}
Give DialogueLine a DialogueChoice[] choices, and when you reach a line with choices, generate uGUI buttons for each choice. The button generation and branching part works with just this much code:
using TMPro;
using UnityEngine;
using UnityEngine.UI;

public class ChoicePanel : MonoBehaviour
{
    [SerializeField] private DialogueManager manager;
    [SerializeField] private Transform buttonParent; // Parent with a Vertical Layout Group
    [SerializeField] private Button buttonPrefab;    // Button prefab with a TMP text

    public void Show(DialogueChoice[] choices)
    {
        // Clear the previous choice buttons
        foreach (Transform child in buttonParent) Destroy(child.gameObject);

        foreach (var choice in choices)
        {
            Button button = Instantiate(buttonPrefab, buttonParent);
            button.GetComponentInChildren<TMP_Text>().text = choice.choiceText;
            button.onClick.AddListener(() =>
            {
                gameObject.SetActive(false);
                manager.StartDialogue(choice.nextDialogue); // Switch to the chosen conversation
            });
        }
        gameObject.SetActive(true);
    }
}
The pressed button "starts the corresponding nextDialogue" — think of it as linking conversation data by reference. Even complex branching is expressed by this "conversation → choice → next conversation" chain.
When branching gets complex: once conversations grow to dozens and branching gets intricate, consider a dedicated dialogue tool (Yarn Spinner, Ink, Dialogue System, etc.). Build it yourself first to understand the mechanism, and move to a tool as scale grows — that's the royal road.
Practice: a villager whose reaction changes
Combining the above, let's build a villager who talks and reacts based on choices. An RPG quest-giver NPC, a visual novel love interest, a novel game branch — all the same mechanism.
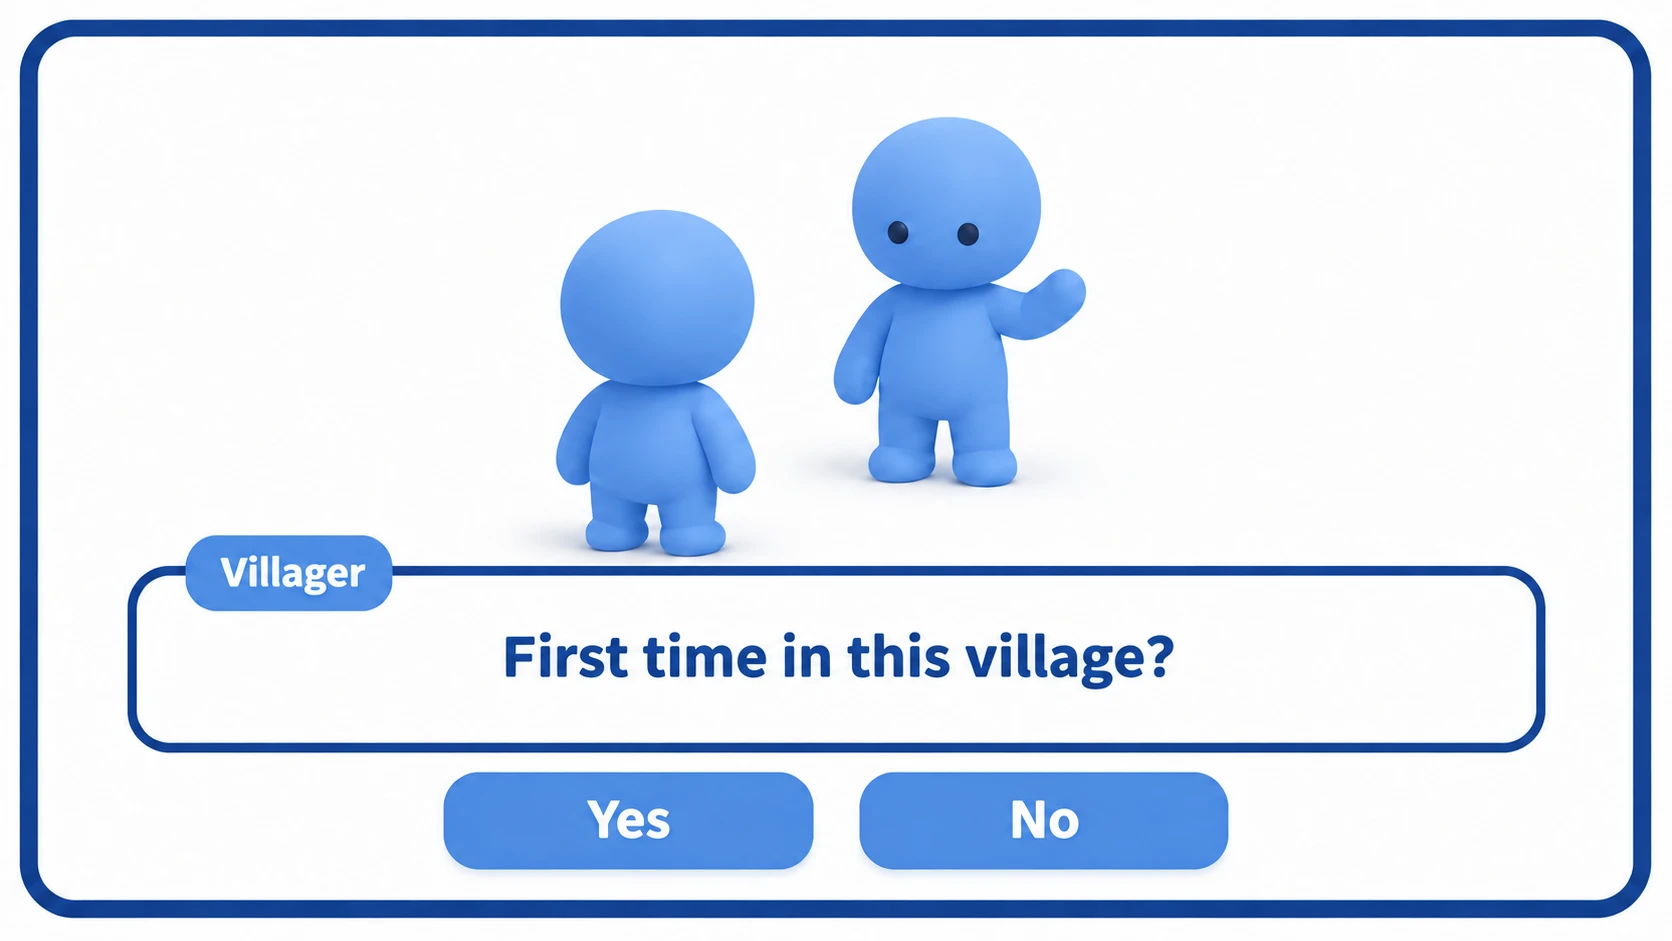
The conductor DialogueManager controls the whole thing. The flow:
- The player approaches the villager and presses confirm → call
DialogueManager.StartDialogue(villagerDialogue) - Open the conversation window and display
linesfrom the top, one at a time, setting the speaker name and revealing via typewriter - Advance on click, and generate buttons when reaching a line with choices
- Switch to the chosen button's
nextDialogueand continue - Close the window when the last line is reached
using TMPro;
using UnityEngine;

public class DialogueManager : MonoBehaviour
{
    [SerializeField] private GameObject window;
    [SerializeField] private TMP_Text speakerText;
    [SerializeField] private TypewriterText typewriter;
    [SerializeField] private ChoicePanel choicePanel;

    private DialogueData current;
    private int index;

    public void StartDialogue(DialogueData data)
    {
        current = data;
        index = 0;
        window.SetActive(true);
        ShowLine();
    }

    void ShowLine()
    {
        var line = current.lines[index];
        speakerText.text = line.speaker; // Speaker name
        typewriter.Play(line.text);      // The Typewriter starts and manages the effect itself
    }

    // Called on click
    public void OnClick()
    {
        if (!typewriter.SkipOrAdvance()) return;  // Mid-effect: only show full text

        // If the fully shown line has choices, branch instead of advancing
        var line = current.lines[index];
        if (line.choices != null && line.choices.Length > 0)
        {
            choicePanel.Show(line.choices);
            return;
        }

        index++;
        if (index < current.lines.Length) ShowLine();
        else window.SetActive(false);             // End conversation
    }
}
Two points: "manage progress with an index" (hold which line you're on in index and advance on click; this simplicity is the secret to stability) and "decouple effect and data" (typewriter in TypewriterText, data in DialogueData, progress in DialogueManager — don't cram it into one class). Lowering the BGM a bit during conversation improves audibility — combining it with the ducking in dynamic BGM with AudioMixer gives a pro-looking effect.
Good to know first
- Always use TextMeshPro for text: the regular Text component is weak with Japanese and decoration. Conversations have a lot of text, so TextMeshPro is the only choice. Don't forget to create the font asset.
- Boost expression with rich text: TextMeshPro supports tags like
<color>,<b>,<size>. Effects like "change color for just the important word" work by embedding tags in the line body. - Sync with voice and SFX: playing a small "beep" SFX per character gives a classic visual-novel feel. Just play the SFX inside the typewriter loop.
- Compatibility with autosave: recording how far the conversation progressed with save & load lets you implement things like "skip conversations already heard."
Summary
- A dialogue system splits into three layers: data (ScriptableObject), UI (Canvas), and the conductor (DialogueManager)
- Define lines with a ScriptableObject. The scenario is editable in the Inspector, no code needed
- The typewriter effect increases
maxVisibleCharactersin a coroutine. The click is a two-step "show full text → next" - Choice branching gives lines "choices → next conversation" and links them with buttons
- Manage progress with an index. Decoupling effect, data, and progress is the key to stability
Start by creating one short 3–4 line conversation as a ScriptableObject and displaying it. The moment characters flow via typewriter and you can advance with a click, you already have a proper dialogue engine. What will your game's characters say to the player?
Further reading
- Data-Driven Design with ScriptableObject — the foundation of dialogue data
- High-Quality Text with TextMeshPro — displaying lines and rich text
- uGUI Button Event Handling — implementing choice buttons
- Dynamic BGM with AudioMixer — ducking during conversation
- Quest and Objective System — remembering choices and progress outside the dialogue system
- Unity Manual: ScriptableObject — the primary source on data assets