Tracking the score, playing BGM, managing game state—sooner or later, every game project needs "a single manager that can be reached from anywhere." Hunting it down with Find-style calls every time is slow and tedious, and manual Inspector references don't survive scene changes. The classic answer is the Singleton pattern.
But once Unity's lifecycle gets involved, Singletons come with their own set of traps, breeding bugs like "it's null sometimes" or "I switched scenes and now there are two of them." This article walks through a safe implementation using a reusable MonoSingleton<T> base class, the three big pitfalls, and the criteria for knowing when not to use a Singleton.

What You'll Learn
- The problem Singletons solve and where they belong in game development
- A reusable
MonoSingleton<T>base class implementation (copy-paste ready)- Three pitfalls (duplicate instances, execution order, stale references) and how to fix them
- Guidelines for avoiding overuse, and alternatives to Singletons
Where Do Singletons Belong?
Let's start with a picture of where Singletons fit. They are a good match for roles that are "exactly one per game" and "called from all over the place."
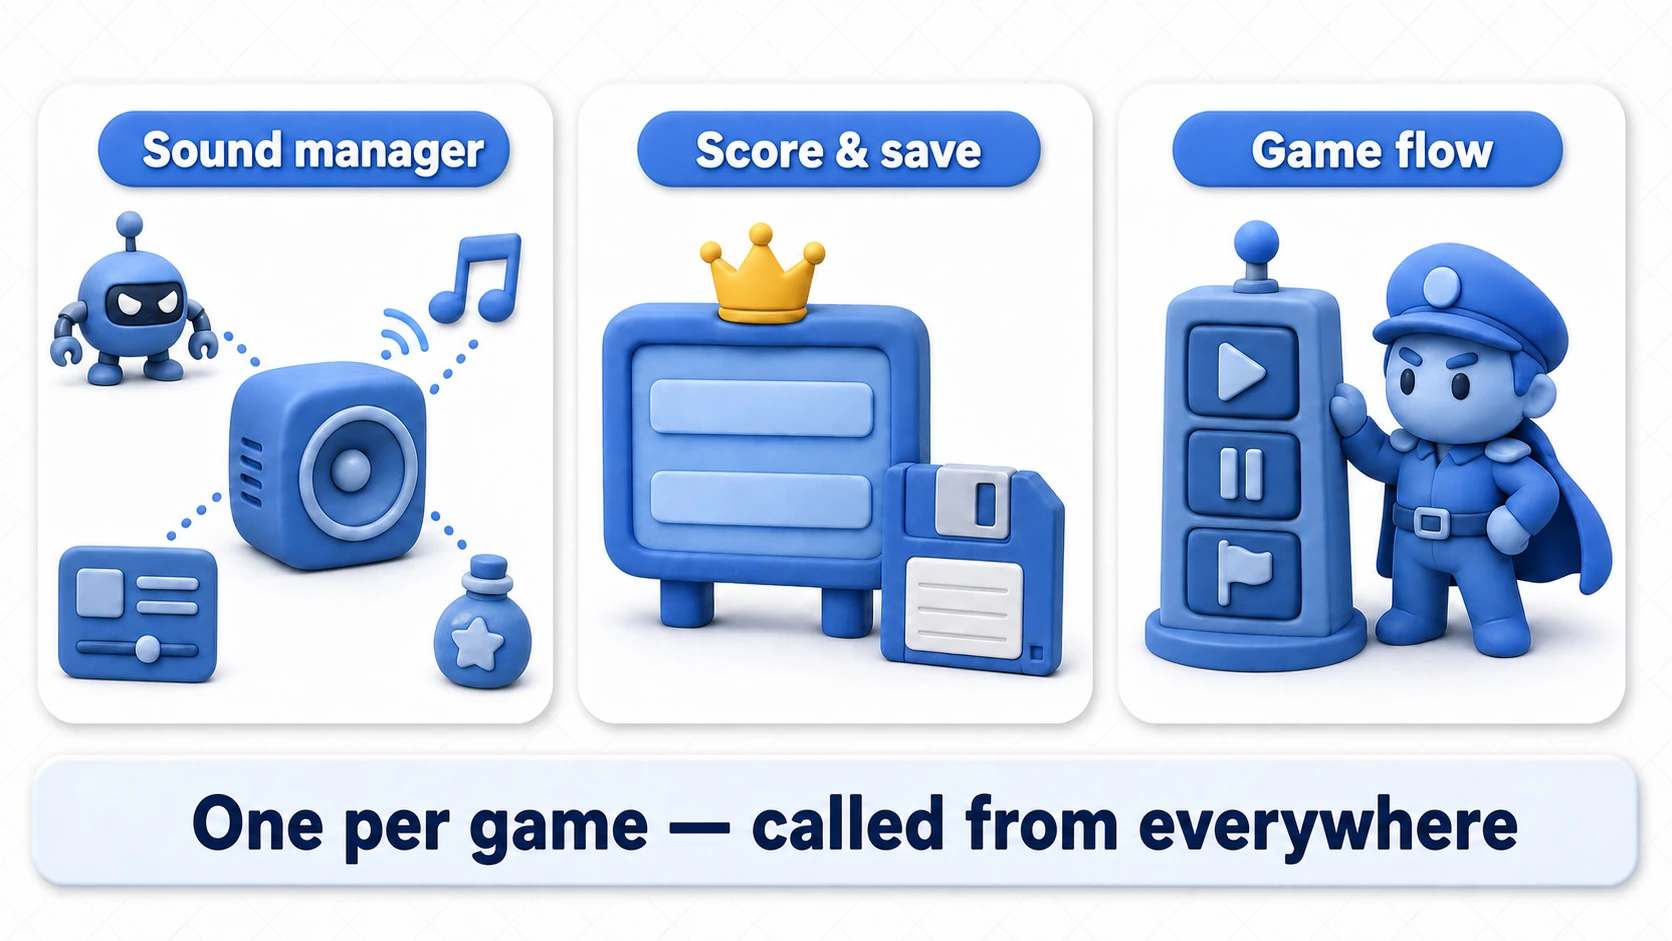
- Sound manager: The single entry point for SFX and BGM playback. Enemies, UI, items—everyone asks it to play sounds
- Score / save data management: A home for values that need to survive across scenes
- Game flow management: The command center that owns states like title, playing, and paused (covered in depth in the GameManager pattern article)
Conversely, things that exist in multiples—enemies, bullets—or that only appear in a specific scene should never be Singletons. We'll look at what goes wrong when that line gets blurred later in the article.
The Basic Concept of the Singleton Pattern
The Singleton pattern guarantees that a class has exactly one instance across the entire application, and provides a global access point to that instance.
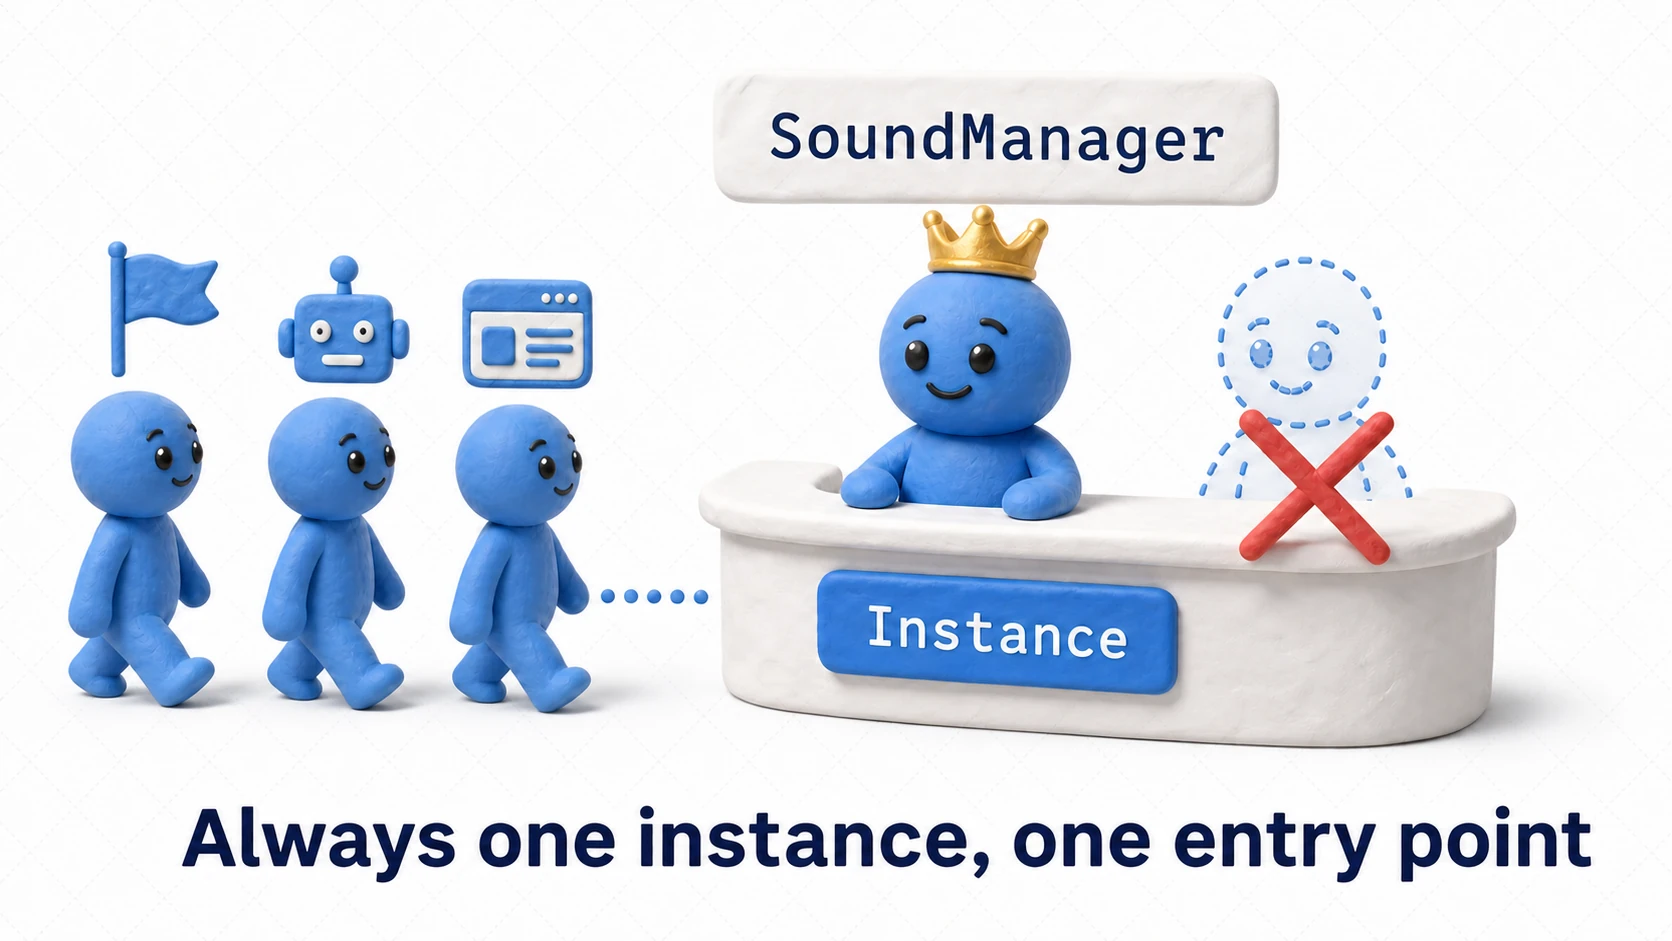
In a plain C# class, achieving this requires three main ingredients:
- A static instance variable: A
staticfield that holds the class instance itself. - A private constructor: Prevents external code from creating instances via
new. - A static access property: A
staticproperty that returns the unique instance.
Implementing a MonoBehaviour Singleton in Unity
When you implement the Singleton pattern in Unity, most manager classes need to inherit from MonoBehaviour—that's what gives you Unity's lifecycle methods like Awake and Update, plus Inspector configuration.
Here we'll build a reusable base class using generics that can turn any class into a Singleton. This approach is widely considered one of the best practices for Singleton implementation in Unity.
A Reusable MonoSingleton<T> Class
Save the following code as MonoSingleton.cs.
using UnityEngine;

// Constraint: T must be a class that inherits from MonoBehaviour
public abstract class MonoSingleton<T> : MonoBehaviour where T : MonoSingleton<T>
{
    // Static variable holding the unique instance
    private static T instance;

    // Static property for external access
    public static T Instance
    {
        get
        {
            // If the instance doesn't exist yet
            if (instance == null)
            {
                // Search the scene for an object of type T
                instance = FindFirstObjectByType<T>();

                // If still not found, create a new GameObject and attach the component
                if (instance == null)
                {
                    GameObject singletonObject = new GameObject();
                    instance = singletonObject.AddComponent<T>();
                    singletonObject.name = typeof(T).ToString() + " (Singleton)";
                }
            }
            return instance;
        }
    }

    // Called right after the instance is created
    protected virtual void Awake()
    {
        // If an instance already exists (duplicate prevention)
        if (instance != null && instance != this)
        {
            // Destroy self to prevent duplicates
            Debug.LogWarning($"[Singleton] An instance already exists; destroying {typeof(T).Name}.");
            Destroy(gameObject);
            return;
        }

        // Register self as the unique instance
        instance = (T)this;

        // Persist the object across scene loads
        // Note: only applied at runtime, due to editor behavior caveats
        if (Application.isPlaying)
        {
            DontDestroyOnLoad(gameObject);
        }

        // Hand off initialization to the subclass
        OnInitialize();
    }

    // Clear the static reference on destruction
    protected virtual void OnDestroy()
    {
        if (instance == this)
        {
            instance = null;
        }
    }

    // Method for subclasses to override with their initialization logic
    protected virtual void OnInitialize() { }
}
Note: The scene search uses
FindFirstObjectByType<T>(). TheFindObjectOfTypeyou'll see in older tutorials is a legacy API that was deprecated in Unity 6 (2023.1 and later). See the old-to-new API migration guide for the full mapping.
Usage (Example: Sound Manager)
Next, create an actual manager class by inheriting from this base class.
using UnityEngine;

// Inherit from MonoSingleton<SoundManager>
public class SoundManager : MonoSingleton<SoundManager>
{
    // Public methods for external access
    public void PlayBGM(AudioClip clip)
    {
        Debug.Log($"Playing BGM: {clip.name}");
        // Actual BGM playback logic...
    }

    public void PlaySE(AudioClip clip)
    {
        Debug.Log($"Playing sound effect: {clip.name}");
        // Actual SFX playback logic...
    }

    // Override the initialization hook
    protected override void OnInitialize()
    {
        // One-time setup such as loading sound settings goes here
        Debug.Log("SoundManager initialization complete.");
    }
}
Accessing the Singleton
Now you can reach it from anywhere in the game, without worrying about which scene you're in.
// From some other script
public class PlayerController : MonoBehaviour
{
    public AudioClip jumpSound;

    void Jump()
    {
        // Access the unique instance and call its method
        SoundManager.Instance.PlaySE(jumpSound);
    }
}
Key point: If no instance exists, the Instance property of MonoSingleton<T> automatically searches the scene, and if nothing is found, creates a new GameObject and attaches the component. Even if you forget to place the manager in a scene manually, nothing breaks—which makes this design considerably safer.
Three Common Pitfalls for Beginners and How to Fix Them
Singletons are convenient, but Unity's lifecycle introduces a few problems that beginners run into again and again.
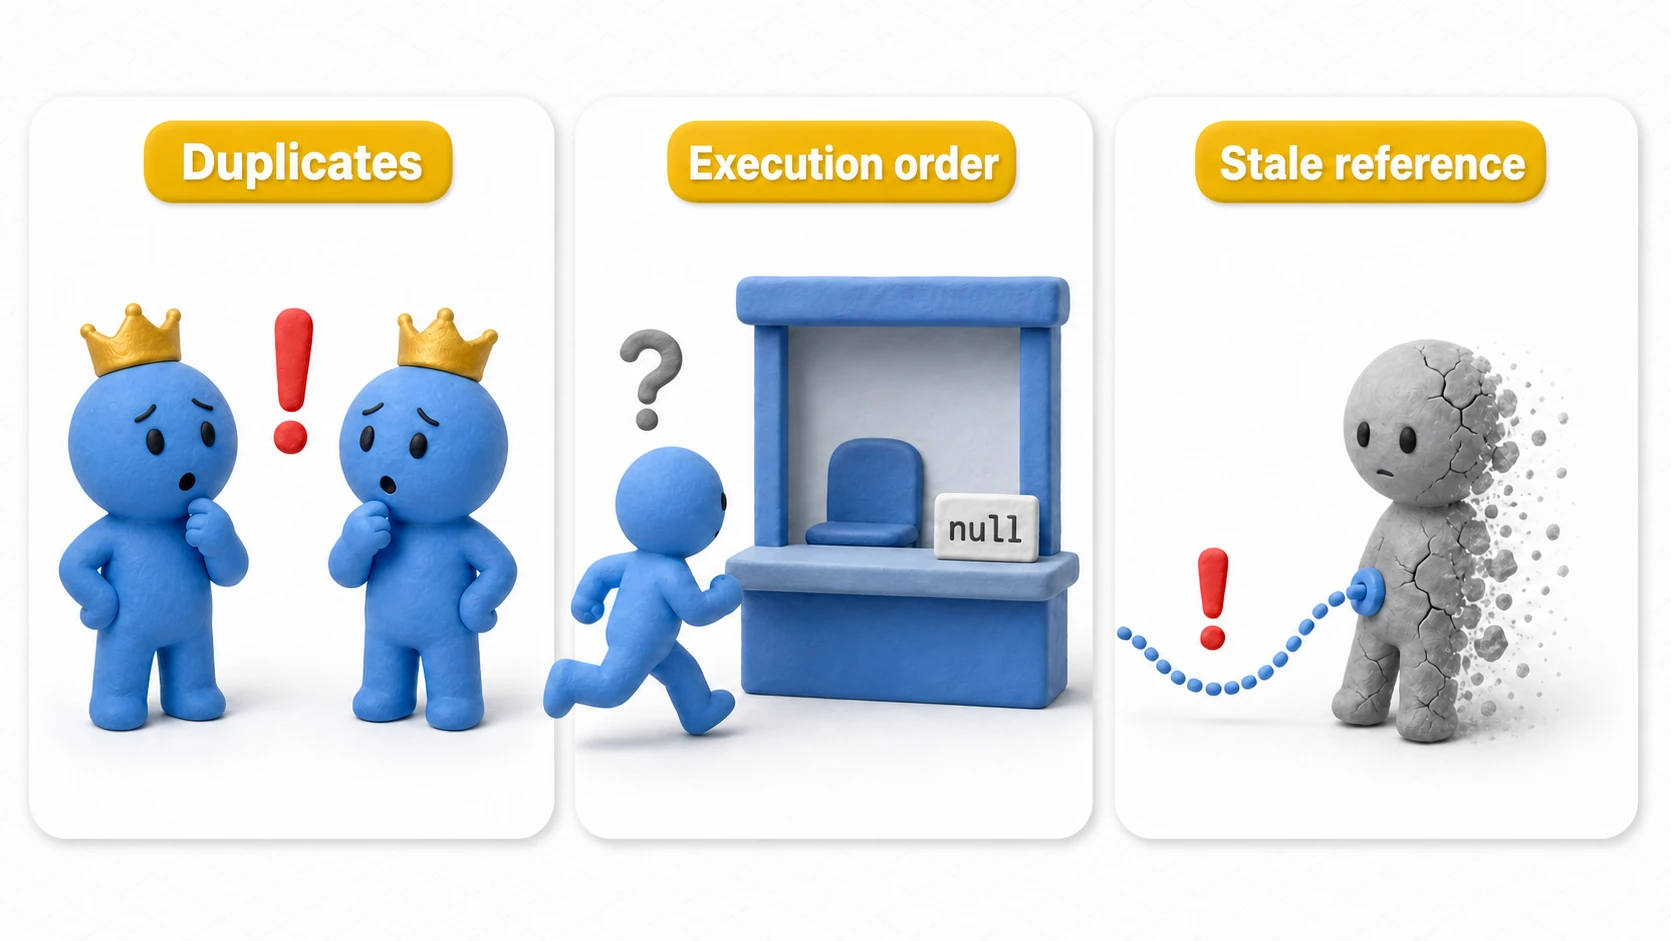
1. Duplicate Instances on Scene Transitions
The most common problem: a Singleton class using DontDestroyOnLoad gets duplicated when you move between scenes.
- How it goes wrong:
SoundManageris created in Scene A and persisted withDontDestroyOnLoad. When Scene B loads, if Scene B also contains aSoundManagerprefab, a second instance is created. - The fix: As in the
MonoSingleton<T>implementation above, check whetherinstancealready exists insideAwake, and if it does, immediately destroy the newcomer withDestroy(gameObject);. This "gatekeeper check" mechanism is illustrated in detail in the DontDestroyOnLoad article.
2. Reference Order Problems (Script Execution Order)
In Unity, the order in which scripts run (when Awake and Start are called) is essentially undefined. If another script's Awake tries to access the Singleton's Instance, the Singleton's own Awake may not have run yet, leaving instance as null. That flaky "it worked yesterday, today it throws a null error" bug is almost always this.
- The fixes:
- Use the create-on-demand logic inside the
Instanceproperty (as in the code above), which guarantees the instance exists whenever it's accessed. - Use Script Execution Order settings (
Edit->Project Settings->Script Execution Order) to make your Singleton classes run earlier than other scripts. This guarantees initialization finishes before anyone else touches them.
- Use the create-on-demand logic inside the
3. Forgetting to Clear the Static Reference in OnDestroy
Singleton objects can get destroyed during scene transitions or when the game shuts down. If you forget to clear the static instance variable at that point, a reference to an already-destroyed object lingers, potentially triggering unexpected errors (MissingReferenceException, etc.) on the next access.
- The fix: Implement
OnDestroyin theMonoSingleton<T>class and clear the static reference withinstance = null;when the object is destroyed.
    // Clear the static reference on destruction
    protected virtual void OnDestroy()
    {
        if (instance == this)
        {
            instance = null;
        }
    }
Caution: Overuse Breeds Tight Coupling
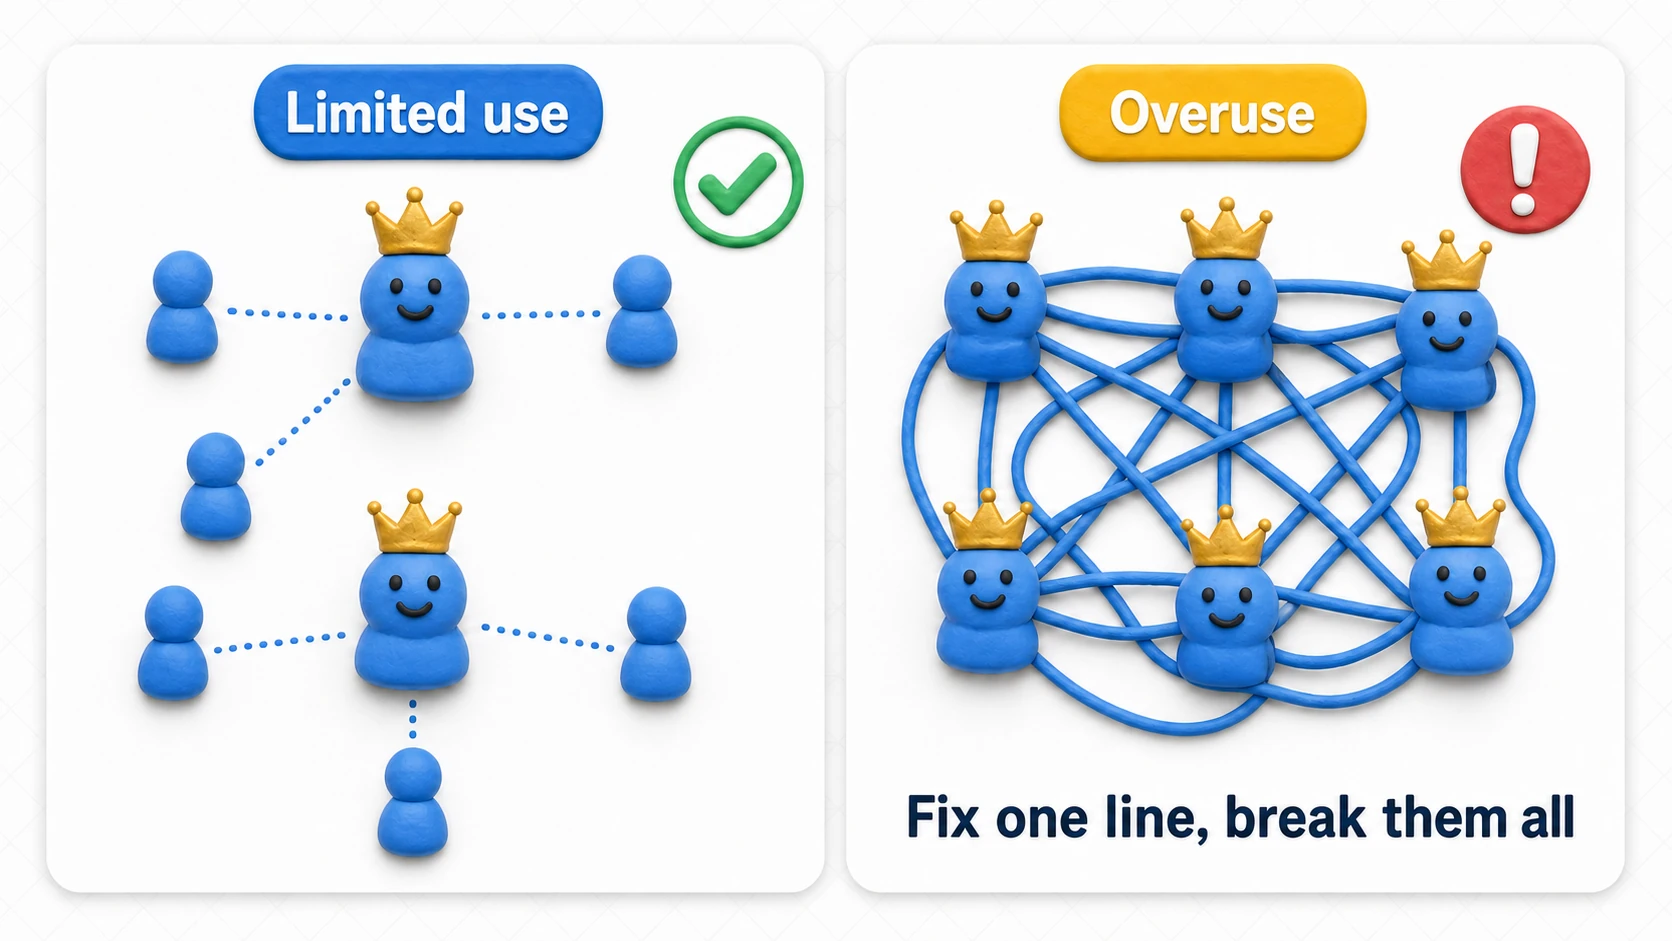
The Singleton pattern is powerful, but its greatest strength—"accessible from anywhere"—is also its greatest weakness.
-
Tight coupling (strong dependencies): Because a Singleton provides a global access point, any class can reach it with zero effort. As a result, more and more classes come to depend on that specific Singleton, driving up coupling across your codebase. Tight coupling raises the risk that changing one piece of code breaks something in a completely unexpected place.
-
Hard to test: In unit testing, a Singleton carries global state, so state leaks between tests and keeping tests independent becomes difficult. Singletons are also hard to swap out for mocks (fake objects), which limits testing flexibility.
Note (how large teams differ): In large-scale development, a technique called DI (Dependency Injection) is often adopted as a Singleton alternative precisely to avoid these downsides. For solo developers and small teams, though, the simplicity and convenience of Singletons often win out—so the key is to keep their scope limited. A good rule of thumb: only roles that truly exist once per game, such as sound, game flow, and save management.
Hands-On: Sharing One BGM Service Across Scenes
To finish, let's put these pieces into "one whole game." Three scenes — Title → Game → Results — with exactly one SoundManager as the gateway for BGM and sound effects. Even with ten enemies on screen, the enemies themselves are never Singletons. The goal here is to experience the boundary itself, not just the pattern.
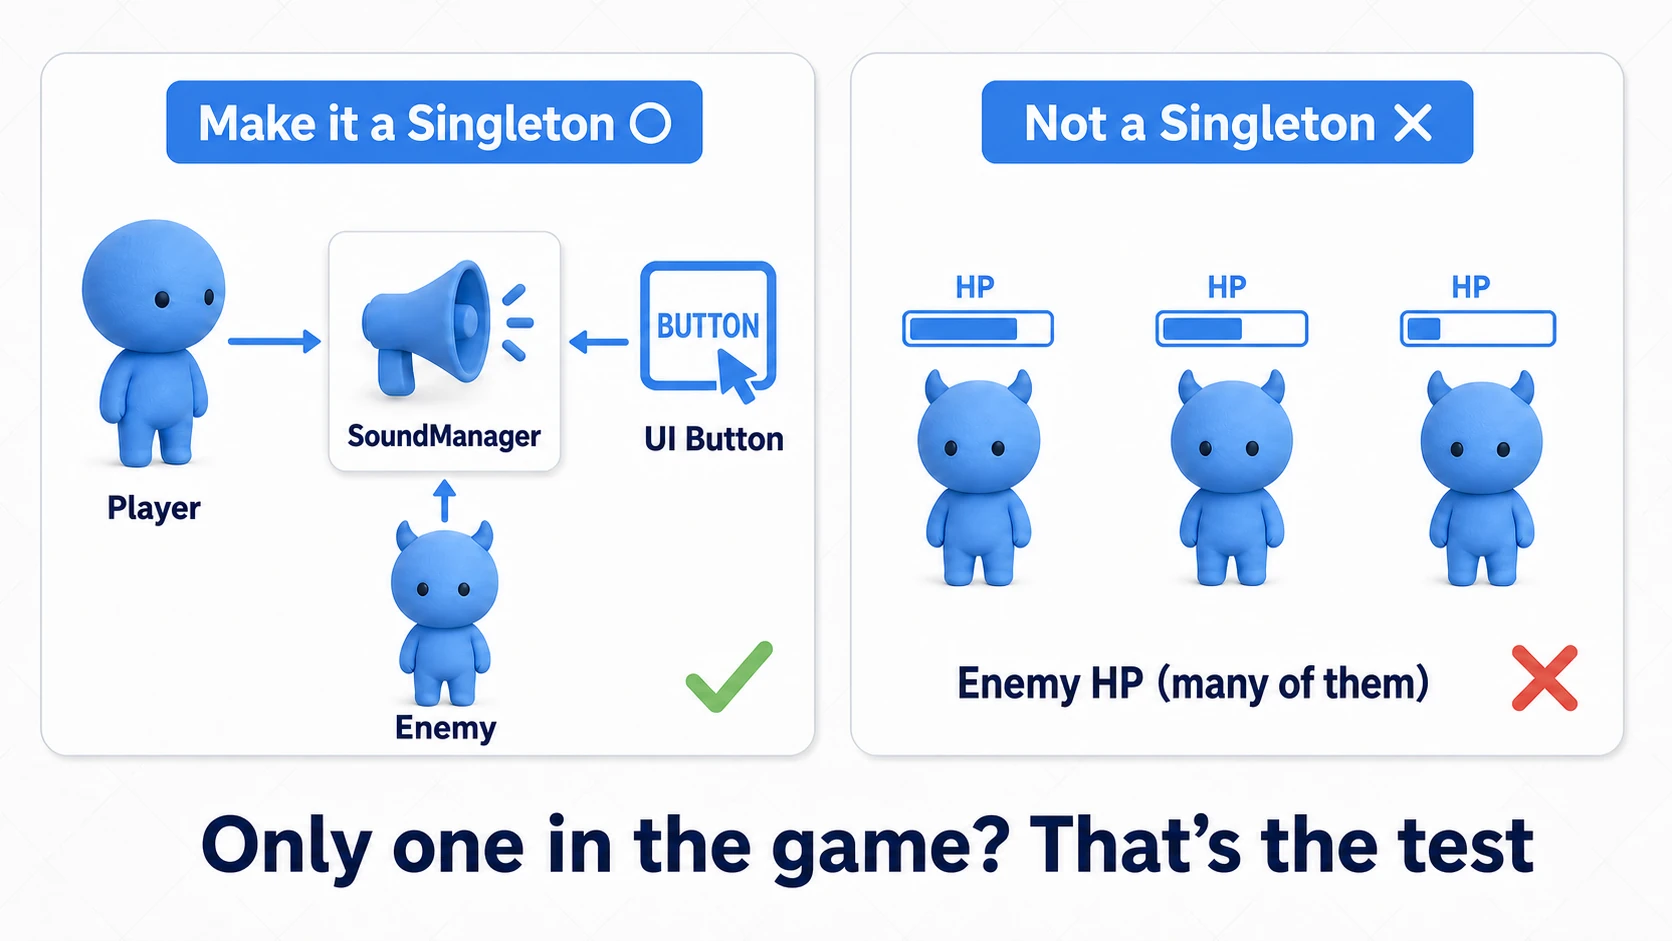
Setup steps:
- Place
SoundManagerin the title scene. Auto-creation insideInstancemeans it works even if you forget, but a manager that carries Inspector settings like AudioClips should have its "real" copy placed in the startup scene - The player's jump, the UI's confirm sound, and enemy hit sounds all play through
SoundManager.Instance.PlaySE(...)from anywhere - Cycle the scenes three times and confirm the "DontDestroyOnLoad" section of the Hierarchy holds exactly one
SoundManager
Then draw the line within the same game — which roles get to be Singletons and which don't:
| Role | Singleton? | Why |
|---|---|---|
SoundManager | Yes | One per game, spans scenes, called by everyone |
Enemy Health / overhead HP bars | No | Many exist. "Per-object news" belongs to instance events |
| Pause menu UI | No | Lives in one scene. A plain Inspector reference is enough |
The "Where Did That Sound Come From?" Symptom
When callers everywhere read SoundManager.Instance.PlaySE(...), the pain of tight coupling shows up as a concrete symptom. "The same sound effect plays twice for some reason" — so, who triggered it? Instance is a public button anyone can press, so the caller is anonymous, and your investigation devolves into a project-wide text search.
Two practical countermeasures during development: put a single Debug.Log(clip.name) inside PlaySE, and clicking the log in the Console shows the caller in the stack trace. The other is to stop multiplying the places that trigger sounds — concentrate firing points, like "the hit sound is played by exactly one subscriber of the enemy's Health event," and your dependencies stay within traceable range.
Break It on Purpose, Then Fix It
- Duplicate it by placing one per scene: Put a
SoundManagerin the game scene too and cycle scenes — the gatekeeper inAwakedestroys the second copy and logs a warning (working as intended). Comment out the gatekeeper'sDestroyand the two coexist, and the BGM starts playing doubled - Access it before initialization: Try calling
PlayBGMfrom another script'sAwake. Thanks to create-on-demand inInstanceyou won't get null, but a playback request can still arrive beforeOnInitialize(settings loading) has run. Lock the order down with "place it in the startup scene + put the Singleton first in Script Execution Order" - Recreate it during shutdown (the zombie Singleton): At the moment you stop Play mode, touching
Instancefrom another object'sOnDestroycan make the getter spawn a brand-new GameObject even though the real one is already destroyed. The telltale sign: "I stopped Play mode, but aSoundManager (Singleton)appeared in the Hierarchy"
Note (the quit flag): The standard fix for #3 is a quit flag: set
isQuitting = trueinOnApplicationQuit, and bail out withif (isQuitting) return null;at the top of theInstancegetter. We've kept it out of the main code to keep things simple — add this pair the moment you see the symptom.
What deserves a final look isn't the game — it's your code. Search the project for Instance: if everything that comes up is a "one per game" role like SoundManager, your boundary is holding. If it has crept into enemy or HP-bar code, hand that job back to events or Inspector references.
Bonus: Good to Know for Later
Once you're comfortable with Singletons, these topics are the natural next steps.
- If you only need notifications, you may not need a Singleton at all: When the goal is just "I want to call a method on the manager," the connection can often be replaced with events and delegates or event channels, sidestepping tight coupling. Get in the habit of asking whether you need to access something or merely notify it.
- The persistence mechanism itself: How
DontDestroyOnLoadworks and how duplicates arise is covered independently in the DontDestroyOnLoad article. It's the perfect background for understanding theMonoSingleton<T>in this article. - The flagship use case for Singletons: The GameManager, which owns game-wide state, is the most classic application of the Singleton pattern. The GameManager pattern article gives you the big-picture design.
Summary
We've covered how to implement the Singleton pattern correctly in Unity and what to watch out for. Used appropriately, this pattern keeps your game's management structure simple.
- The Singleton pattern is a design pattern that guarantees a single instance and provides global access to it. Reserve it for managers that are "one per game, called from everywhere."
- In Unity, the best practice is a generic base class (
MonoSingleton<T>) that inherits fromMonoBehaviour, giving you a safe, reusable Singleton implementation. - Performing a duplicate-instance check and destroy inside
Awakeprevents bugs on scene transitions. - Nulls caused by execution order are handled by create-on-demand in the
Instanceproperty plus Script Execution Order; stale references after destruction are handled by clearing inOnDestroy. - Singleton overuse leads to tight coupling. Replace "I just want to notify" connections with events, and limit Singletons to global manager roles.
Put this knowledge to work and make your Unity projects more efficient and more robust.