3D action, TPS, first-person exploration — for any 3D game, the first step is making a character feel good to walk. But the moment you try, you hit a wall: with Rigidbody it slides like it's on ice, snags on slopes, and floats when jumping. The truth is, for snappy platformer-style control, a dedicated system called CharacterController is the standard.
This article builds the standard 3D movement of walking, jumping, and climbing slopes with CharacterController. We cover when to use it vs Rigidbody, moving with Move(), ground checks with isGrounded, hand-rolling gravity and jumping, camera-relative movement, and slopes and steps with Slope Limit and Step Offset.

What you'll learn
- When to use Rigidbody vs CharacterController (physics push / move yourself)
- Movement and ground checks with
Move()andisGrounded- Hand-rolling gravity and jumping (handling
velocity.y)- Moving forward/back/left/right relative to the camera direction
- Climbing slopes and steps with Slope Limit / Step Offset
- Practice: a 3D character that walks camera-relative, jumps, and climbs slopes
Tested on: Unity 6 (6000.x)
Two schools: Rigidbody vs CharacterController
There are broadly two schools for moving a 3D character in Unity. Which you pick completely changes both the implementation and the feel.
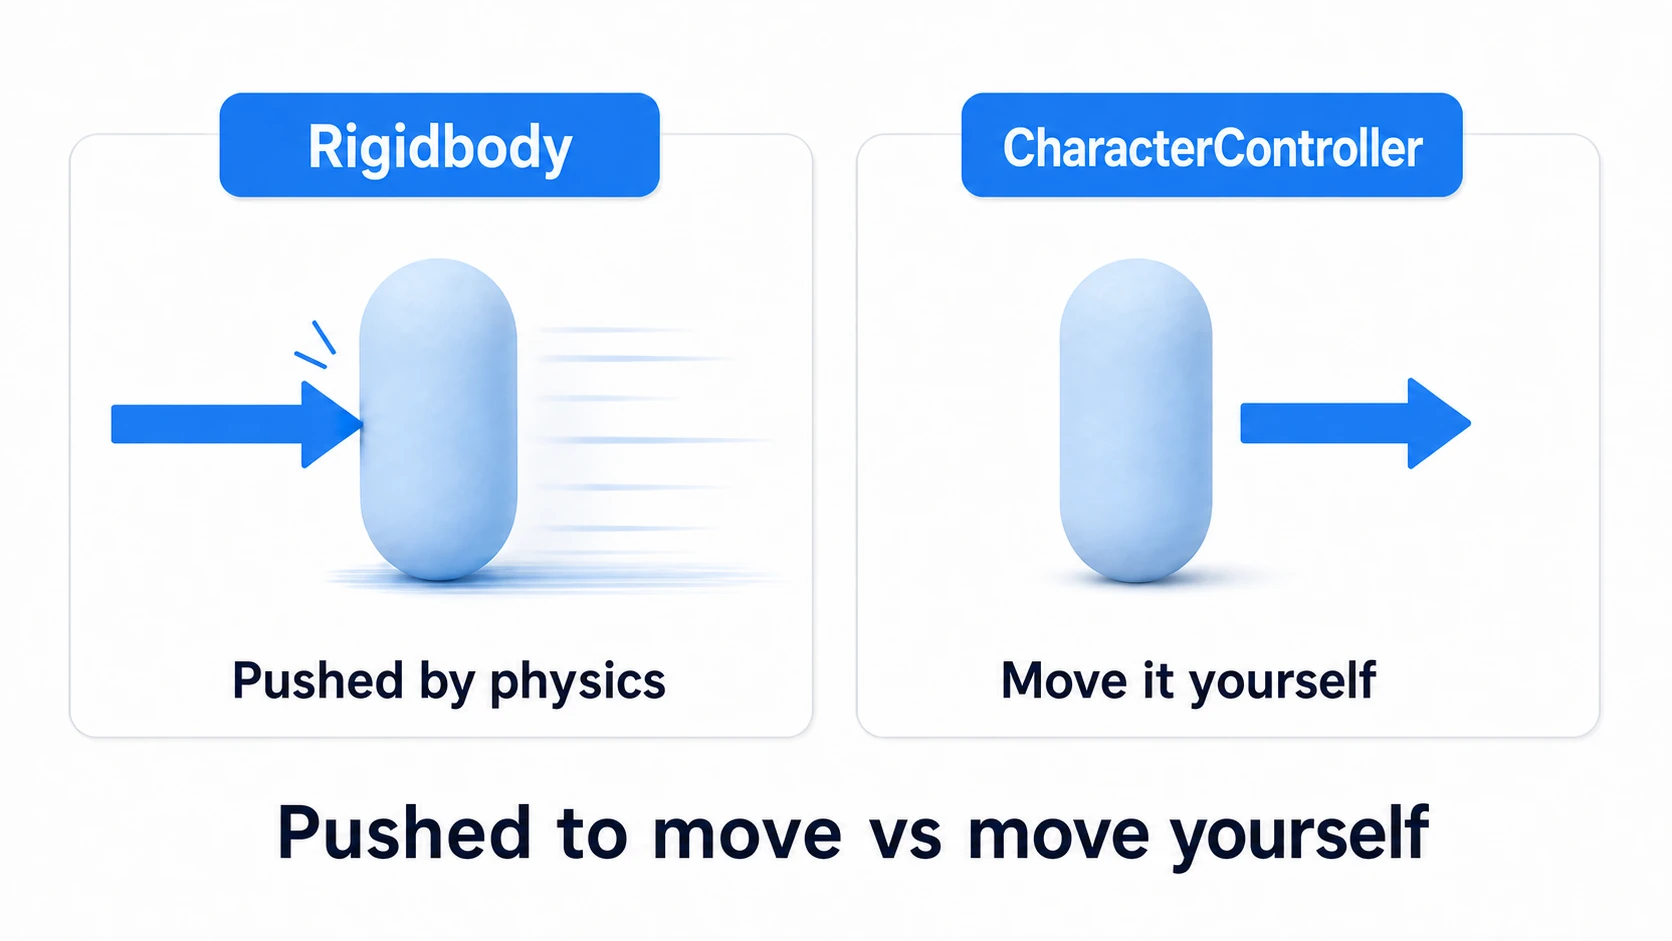
| Rigidbody approach | CharacterController approach | |
|---|---|---|
| How it moves | Apply force with AddForce, etc. | Move it yourself with Move() |
| Feel | Slides/bounces with inertia (physical) | No inertia, snappy (platformer-like) |
| Slopes/steps | Up to physics (snags easily) | Climbs automatically via Slope Limit / Step Offset |
| Other objects | Can push / be pushed | Doesn't push automatically |
| Good for | Rolling balls, realistic physics, vehicles | Player characters, TPS, first-person exploration |
If you want to control the character snappily and exactly, CharacterController is the standard. Leaving it to the physics engine makes it hard to finely control bounce-off on wall hits or sliding on slopes, and beginners especially struggle with "it doesn't move like I wanted." CharacterController moves exactly as you specify with Move() — being straightforward and easy to handle is its biggest advantage.
First, add a CharacterController component to the character GameObject. It gets a capsule collider and can be moved with Move() (don't add a Rigidbody — with both, two systems try to set the position, so pick one way of moving).
Ground checks, gravity, and jumping
CharacterController has no automatic gravity. You need to "add gravity yourself and drop it with Move()." This is the first stumbling block.
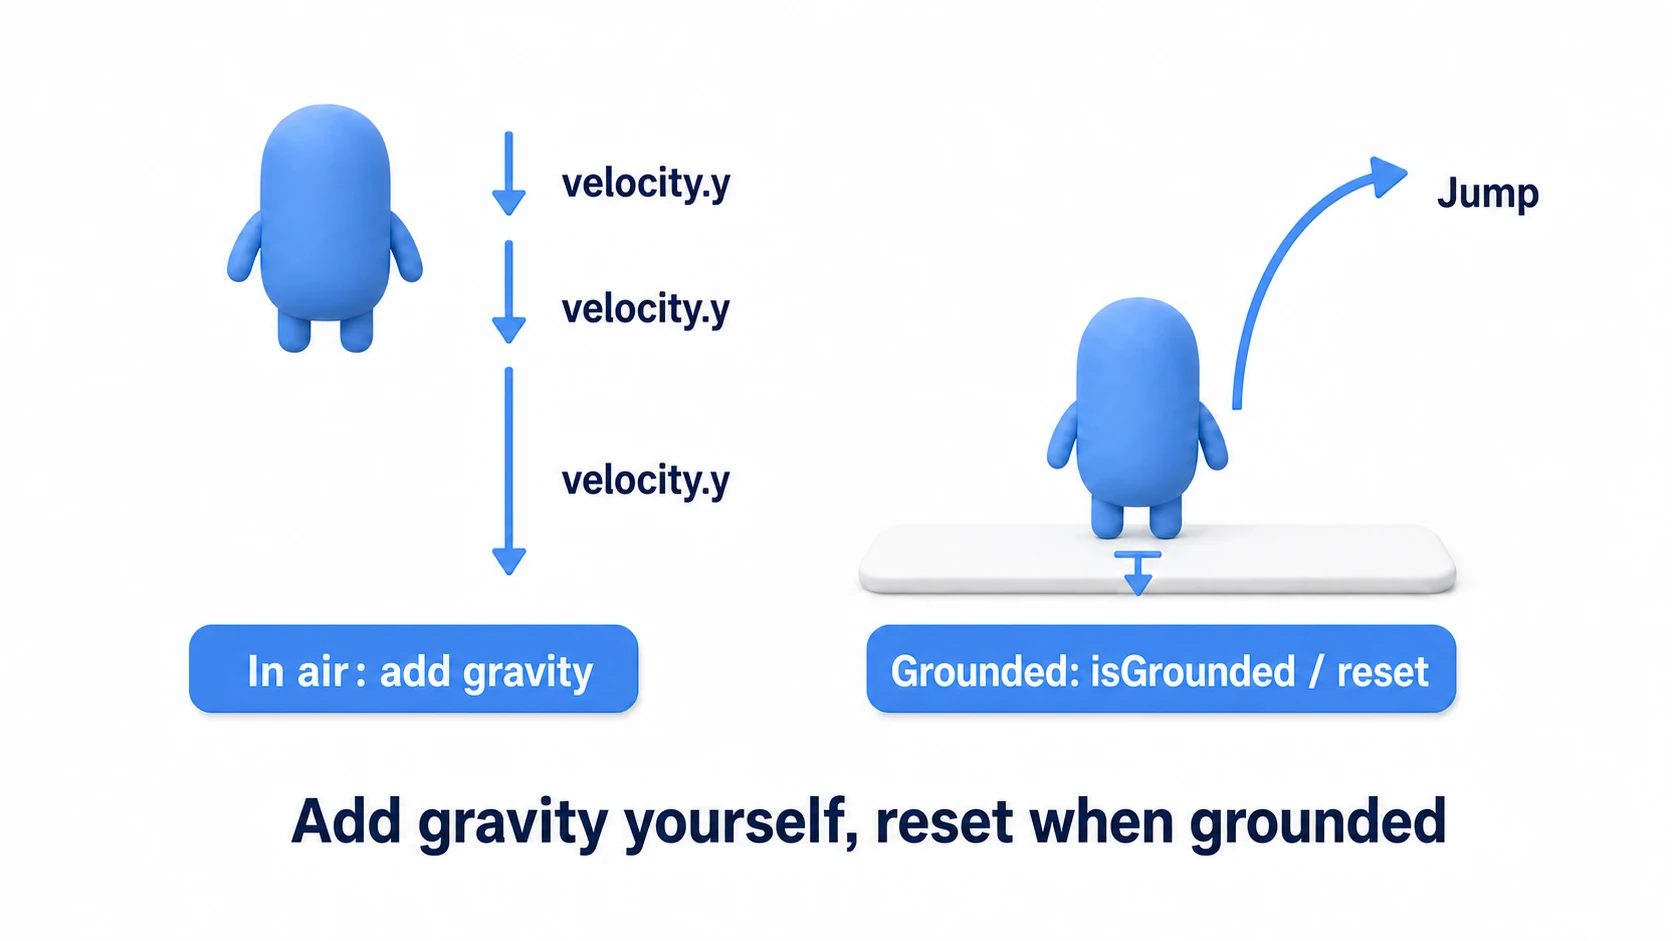
Here's how it works. Prepare a velocity.y for fall speed, add gravity every frame to accelerate downward, and apply it with Move(). When it lands (isGrounded), reset the speed.
- Ground check:
CharacterController.isGroundedtells you whether the lastMove()hit something below (whether the character was touching the ground).truemeans on the ground,falsemeans in the air - Adding gravity: run
velocity.y += gravity * Time.deltaTime(withgravitya negative value like-9.81f) every frame, drivingvelocity.ysteadily negative - Reset on landing: when
isGroundedandvelocity.y < 0, resetvelocity.yto a small negative value (like-2f). The trick is a slight downward push instead of 0, which keeps it firmly stuck to the ground - Jumping: only when
isGrounded, givevelocity.yan upward initial speed. Gravity then automatically decelerates and drops it
Why
-2fand not 0?: Keeping a little downward velocity while grounded makes the grounded state more stable on slopes and steps. Settingvelocity.y = 0can make the character float slightly on slopes and steps, making the ground check jittery.-2fis a commonly used starting point—adjust it to your character's size and gravity.
Moving relative to the camera
When you "press W to go forward," which way is "forward"? In most 3D games, "forward" is the direction the camera faces. Without this, controls feel off when you rotate the camera.
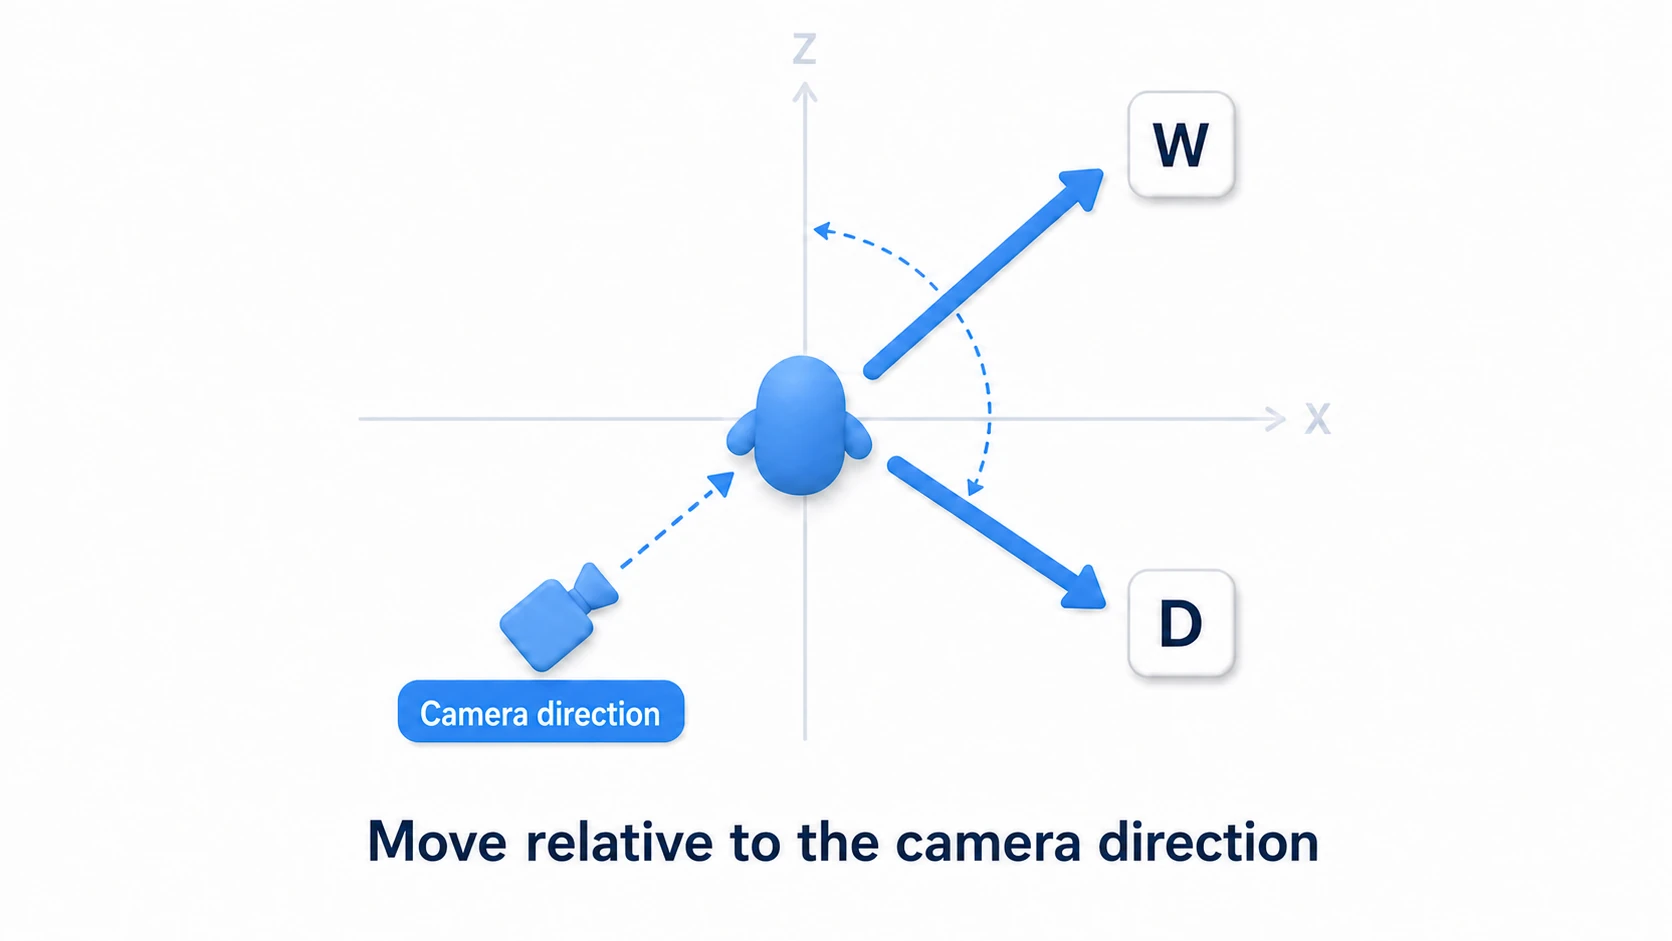
The approach is simple. Combine the input (forward/back/left/right) based on the camera's forward and right. But since the camera often tilts downward, the key is to zero the vertical (y) component and normalize horizontally.
// Input (-1 to 1)
float h = Input.GetAxis("Horizontal");
float v = Input.GetAxis("Vertical");

// Camera forward / right (projected onto the horizontal plane)
Vector3 camForward = cameraTransform.forward;
Vector3 camRight = cameraTransform.right;
camForward.y = 0f; camRight.y = 0f;
camForward.Normalize(); camRight.Normalize();

// Camera-relative move direction (clamp the length so diagonal input isn't faster)
Vector3 moveDir = Vector3.ClampMagnitude(camForward * v + camRight * h, 1f);
That final Vector3.ClampMagnitude is an easy-to-forget classic. Simply adding forward and right gives a vector about 1.4 long on diagonal input, creating the bug where diagonal movement is 1.4× faster. Clamp the length to 1 and every direction moves at the same speed.
Note: This article reads input through the legacy Input Manager (
Input.GetAxis/Input.GetButtonDown). If your project uses the New Input System, swap out the input-reading parts accordingly (see the New Input System article).
Now no matter which way the camera faces, it moves intuitively: "W goes into the screen, D goes right on screen." To face the character in its travel direction, use moveDir to rotate smoothly with Lerp and Slerp or Quaternion.
Slopes and steps: Slope Limit and Step Offset
A nice thing about CharacterController is that it climbs slopes and steps with no special code. This is determined by two component settings.
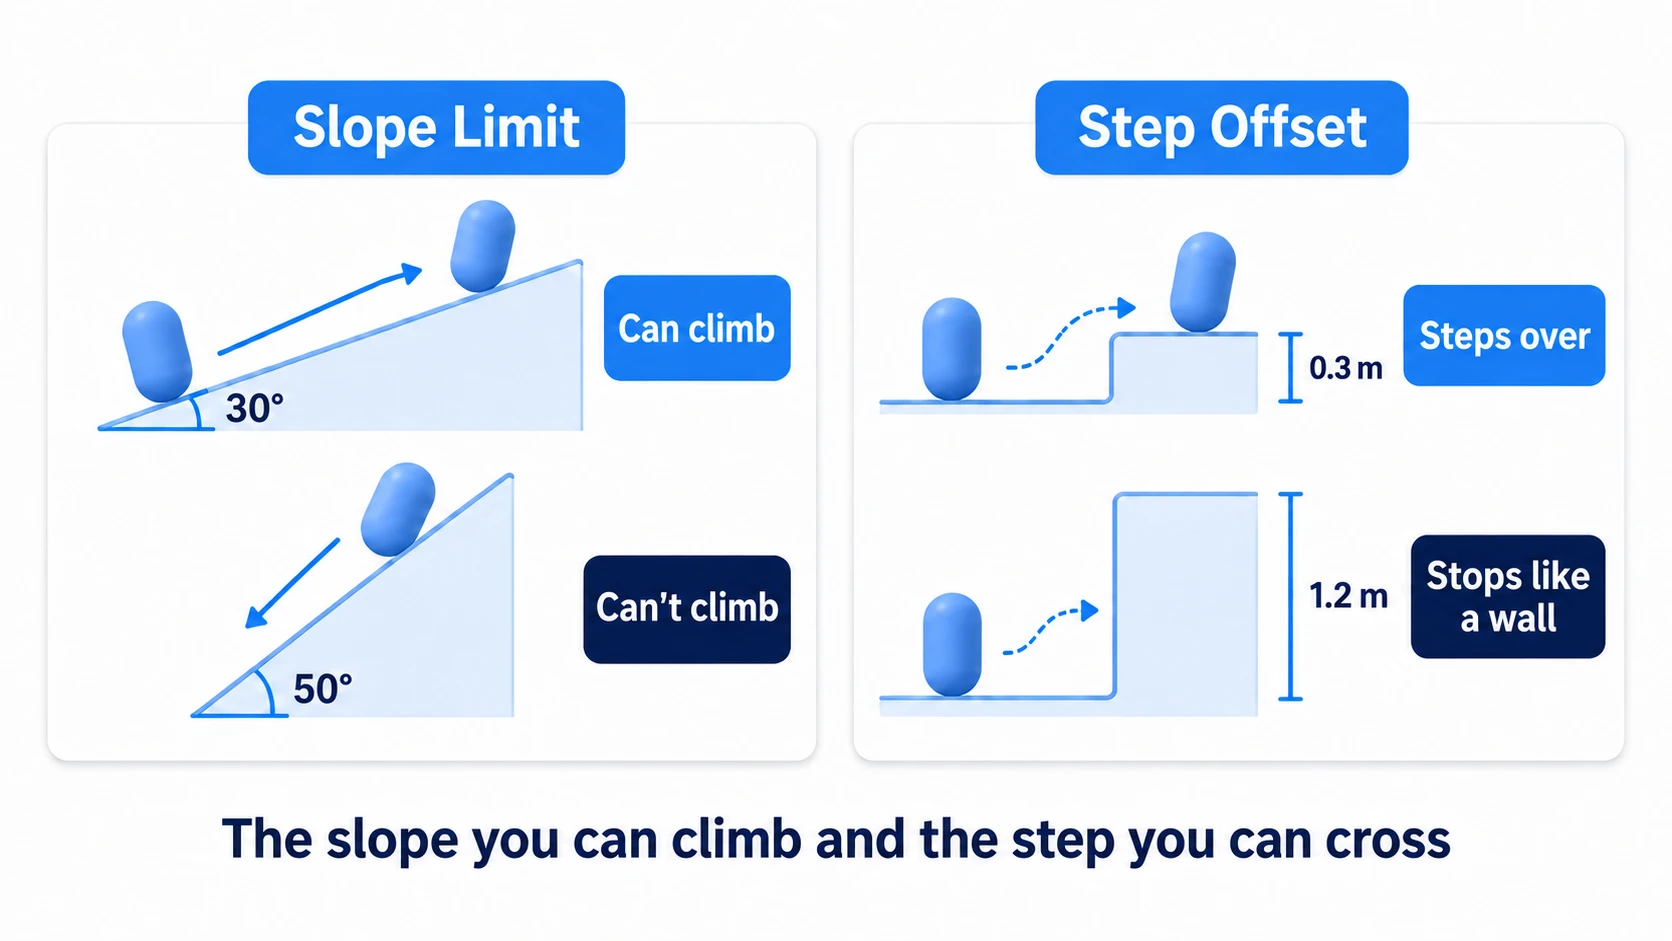
- Slope Limit (max slope angle): slopes at or below this angle are climbed automatically. Default is 45 degrees. Steeper slopes simply can't be climbed. Useful for terrain design like "this cliff can't be climbed"
- Step Offset (step height): steps at or below this height are stepped over automatically without jumping. You can walk up stairs and small curbs without jumping each time. Taller ones are treated as "walls" and stop it
Just tuning these two gets you natural behavior like "gentle slopes are walkable but steep cliffs aren't" and "stairs go up smoothly." No code needed.
Don't make Step Offset larger than the height: making Step Offset larger than the CharacterController's Height breaks the behavior (it also warns you). Keep the step height a sensible value smaller than the character's stature.
Practice: a walk + jump + slope character
Let's combine everything into one and complete a 3D character that walks camera-relative, can jump, and climbs slopes. A third-person action protagonist, a first-person exploration player, a TPS shooter's character — all start from this foundation.
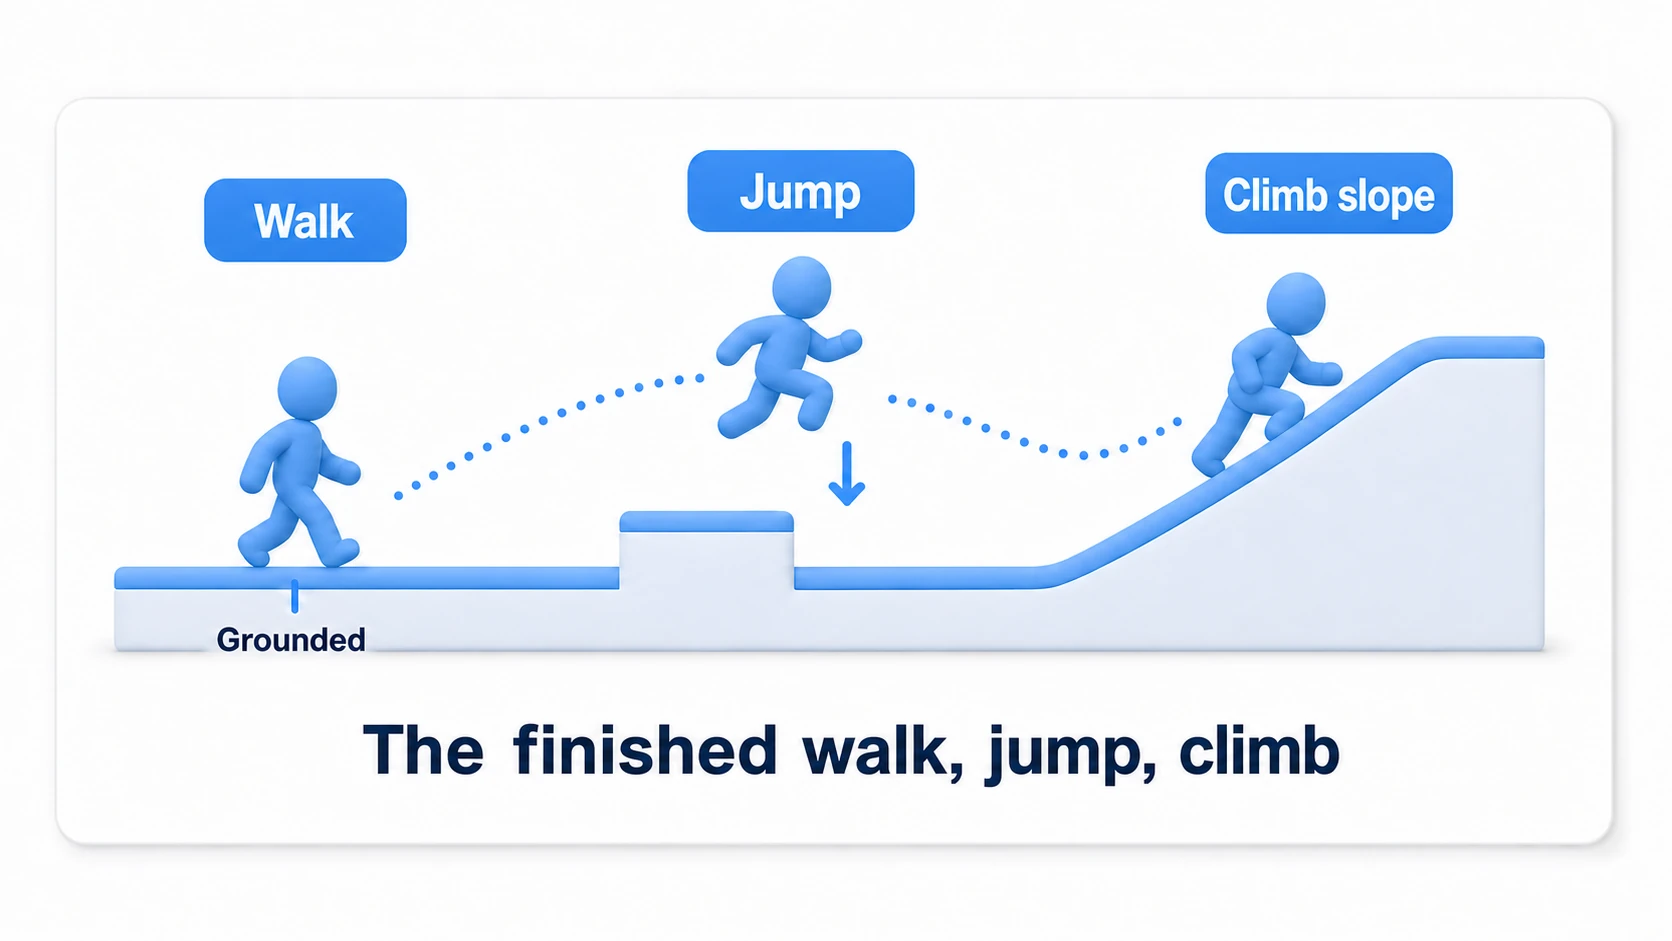
We integrate the earlier "camera-relative movement," "gravity/grounding," and "jumping" into one script.
using UnityEngine;

[RequireComponent(typeof(CharacterController))]
public class PlayerMovement : MonoBehaviour
{
    [SerializeField] private Transform cameraTransform;
    [SerializeField] private float moveSpeed = 5f;
    [SerializeField] private float jumpHeight = 1.5f;
    [SerializeField] private float gravity = -20f;

    private CharacterController controller;
    private Vector3 velocity;  // the y component is used for falling / jumping

    void Awake() => controller = GetComponent<CharacterController>();

    void Update()
    {
        // --- Read the grounded state once, at the top of the frame ---
        bool isGrounded = controller.isGrounded;

        if (isGrounded && velocity.y < 0f)
            velocity.y = -2f;  // stick to the ground

        // --- Camera-relative horizontal movement ---
        float h = Input.GetAxis("Horizontal");
        float v = Input.GetAxis("Vertical");
        Vector3 camForward = cameraTransform.forward;
        Vector3 camRight = cameraTransform.right;
        camForward.y = 0f; camRight.y = 0f;
        camForward.Normalize(); camRight.Normalize();
        Vector3 moveDir = Vector3.ClampMagnitude(
            camForward * v + camRight * h, 1f);  // Prevent 1.4x diagonal speed

        // --- Jump (only while grounded) ---
        if (isGrounded && Input.GetButtonDown("Jump"))
            velocity.y = Mathf.Sqrt(jumpHeight * -2f * gravity);  // back-solve initial speed from target height

        // --- Add gravity ---
        velocity.y += gravity * Time.deltaTime;

        // --- Combine horizontal and vertical, calling Move() just once ---
        Vector3 movement = moveDir * moveSpeed + Vector3.up * velocity.y;
        controller.Move(movement * Time.deltaTime);
    }
}
Two points to remember. "Save the grounded state at the top of the frame, and call Move() just once at the end" (calling Move() can update isGrounded, so re-reading it mid-frame makes the jump check flicker; save it into bool isGrounded once and reuse it, computing horizontal and vertical separately and combining them into one movement at the end), and "back-solve the jump's initial speed from the target height" (Mathf.Sqrt(jumpHeight * -2f * gravity) gives "the initial speed to jump to jumpHeight" (the per-frame calculation lands slightly lower in practice); more convenient than eyeballing numbers, letting you specify the height directly). Slopes and steps are handled by CharacterController's Slope Limit / Step Offset, so the code focuses on movement, gravity, and jumping.
Good to know first
- CharacterController doesn't push objects automatically: in its standard state, interactions like pushing a Rigidbody box with the character don't happen. To push, add your own logic that applies force to the hit object in
OnControllerColliderHit. - When isGrounded is unstable:
isGroundedcan jitter at slope peaks or during fast movement. For more stability, you can cast a Raycast at the feet to determine grounding yourself. - Always multiply movement by
Time.deltaTime: to keep the amount passed toMove()independent of frame rate, always multiply byTime.deltaTime. Forget it and speed changes with the PC's performance. - Leave the camera to Cinemachine: for a camera following the player, Cinemachine easily adds following, collision avoidance, and shake. Just assign Cinemachine's follow camera to this article's
cameraTransform.
Summary
- For snappy character control, CharacterController is the standard. It moves exactly as intended with
Move()and doesn't push other objects automatically - Gravity is not automatic. Add gravity to
velocity.yevery frame and drop withMove() - Ground check is
isGrounded. On landing, resetvelocity.yto-2fto stick, and allow jumping only while grounded - Move based on the camera's
forward/right(zero the y component to flatten it) - Slopes/steps are handled automatically by Slope Limit / Step Offset. No code needed
Start by walking a capsule with a CharacterController camera-relative. Add jumping and gravity and you already have a proper "controllable character." How will your 3D game's protagonist roam its world?
Further reading
- Rigidbody Basics — the difference from the physics approach, when you want rolling/bouncing
- The Complete Guide to Raycast — an alternative ground check, detecting ground and walls
- Smooth Movement with Lerp and Slerp — smoothly facing the travel direction
- Cinemachine Follow Camera in Practice — a camera that follows the player
- Unity ScriptReference: CharacterController — the primary source on Move, isGrounded, and each setting