"My bullets keep hitting the background grass," "I want to find every enemy in the scene but don't know how"—once your objects grow into the hundreds or thousands, you inevitably run into this problem of classification and management.
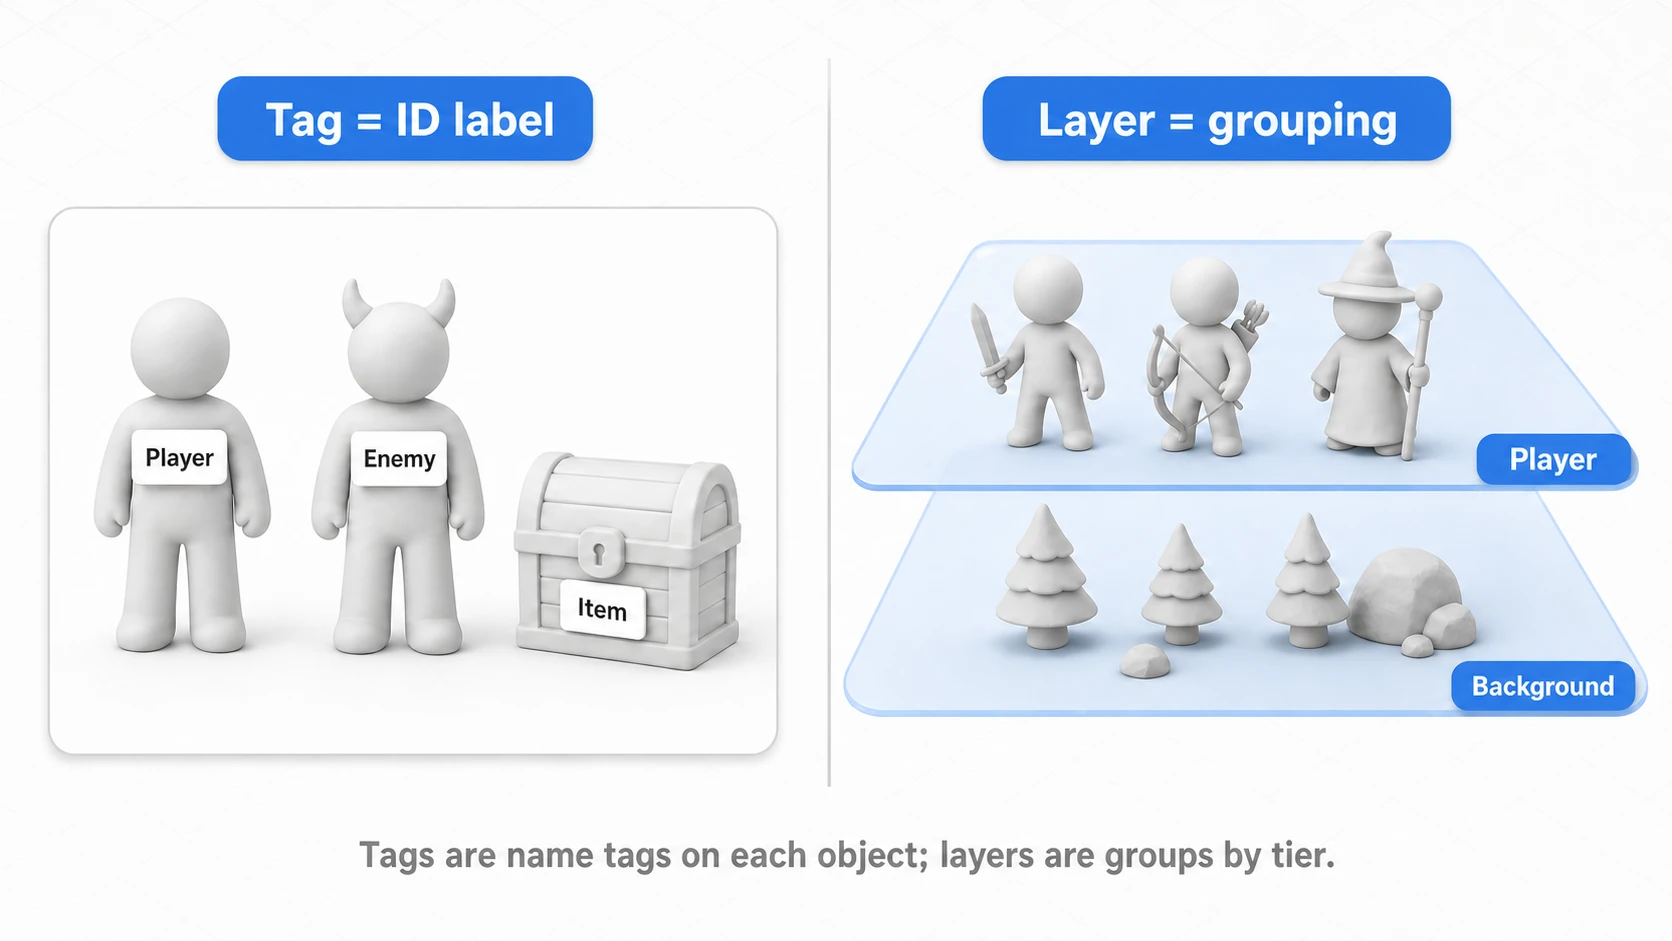
Unity provides two classification features to solve it: Tags and Layers. They look similar but play completely different roles: Tags are "ID labels," Layers are "functional grouping." Once you understand this distinction, everything from collision optimization to object searching becomes dramatically easier to manage.

What You'll Learn
- The difference between Tags and Layers, and when to use which
- Finding objects and identifying collision partners with Tags
- Optimizing collision detection with the Layer Collision Matrix
- Filtering Raycasts with LayerMask
Tags: Use as Object "Identifiers"
A Tag is an identification label you can attach to a GameObject. It is most commonly used to easily find specific types of objects from scripts.
Basic Tag Usage
To set a tag, select an existing tag from the dropdown at the top of the Inspector, or create a new one via "Add Tag...". One caveat: a GameObject can carry only one tag. If you need multiple attributes like "an enemy that is also a boss," express it with your own marker component or an enum, not by stacking tags.
The biggest advantage of tags is that you can search for objects very intuitively from scripts.
using UnityEngine;

public class TagSearchExample : MonoBehaviour
{
    void Start()
    {
        // Find one object tagged "Player" in the scene
        GameObject player = GameObject.FindWithTag("Player");
        if (player != null)
        {
            Debug.Log("Found the player object: " + player.name);
        }

        // Find all objects tagged "Enemy" in the scene
        GameObject[] enemies = GameObject.FindGameObjectsWithTag("Enemy");
        Debug.Log("Total enemies: " + enemies.Length);
    }

    // Example of identifying the other object by tag on collision
    private void OnTriggerEnter(Collider other)
    {
        // If the collided object's tag is "DamageZone"
        if (other.gameObject.CompareTag("DamageZone"))
        {
            Debug.Log("Entered a damage zone!");
            // Reduce the player's HP here, etc.
        }
    }
}
GameObject.FindWithTag() searches the entire scene, so calling it frequently can hurt performance. Moreover, FindGameObjectsWithTag() allocates a fresh array for its results on every call, so calling it every frame also feeds the GC. Search once in Start() or Awake() and cache the result in a variable; avoid calling it in Update() every frame.
More fundamentally, re-searching by tag every time for a list that grows and shrinks—like "the enemies currently alive"—is the long way around. A registry pattern, where each enemy registers/unregisters itself in a list as it spawns and dies, is faster and more reliable (the RegisterEnemy/UnregisterEnemy in the arrays and List article is exactly this shape). Keep tag searches for "finding the one-of-a-kind object once at startup."
Note: When comparing tags, use
CompareTag()as in the code example rather than a string comparison likeother.gameObject.tag == "DamageZone". They behave almost identically, butCompareTag()throws an error if you pass a tag name that doesn't exist, so typos get caught immediately (a==comparison silently returnsfalseand becomes a breeding ground for bugs).
Layers: Use for Functional "Grouping"
Layers, unlike tags, are primarily used for functional control. The two most important uses are:
- Physics (collision detection) control: You can make specific layers ignore collisions with each other.
- Camera rendering control: You can make a camera render only objects on specific layers, or exclude them from rendering.
Optimizing Collision Detection with Layers
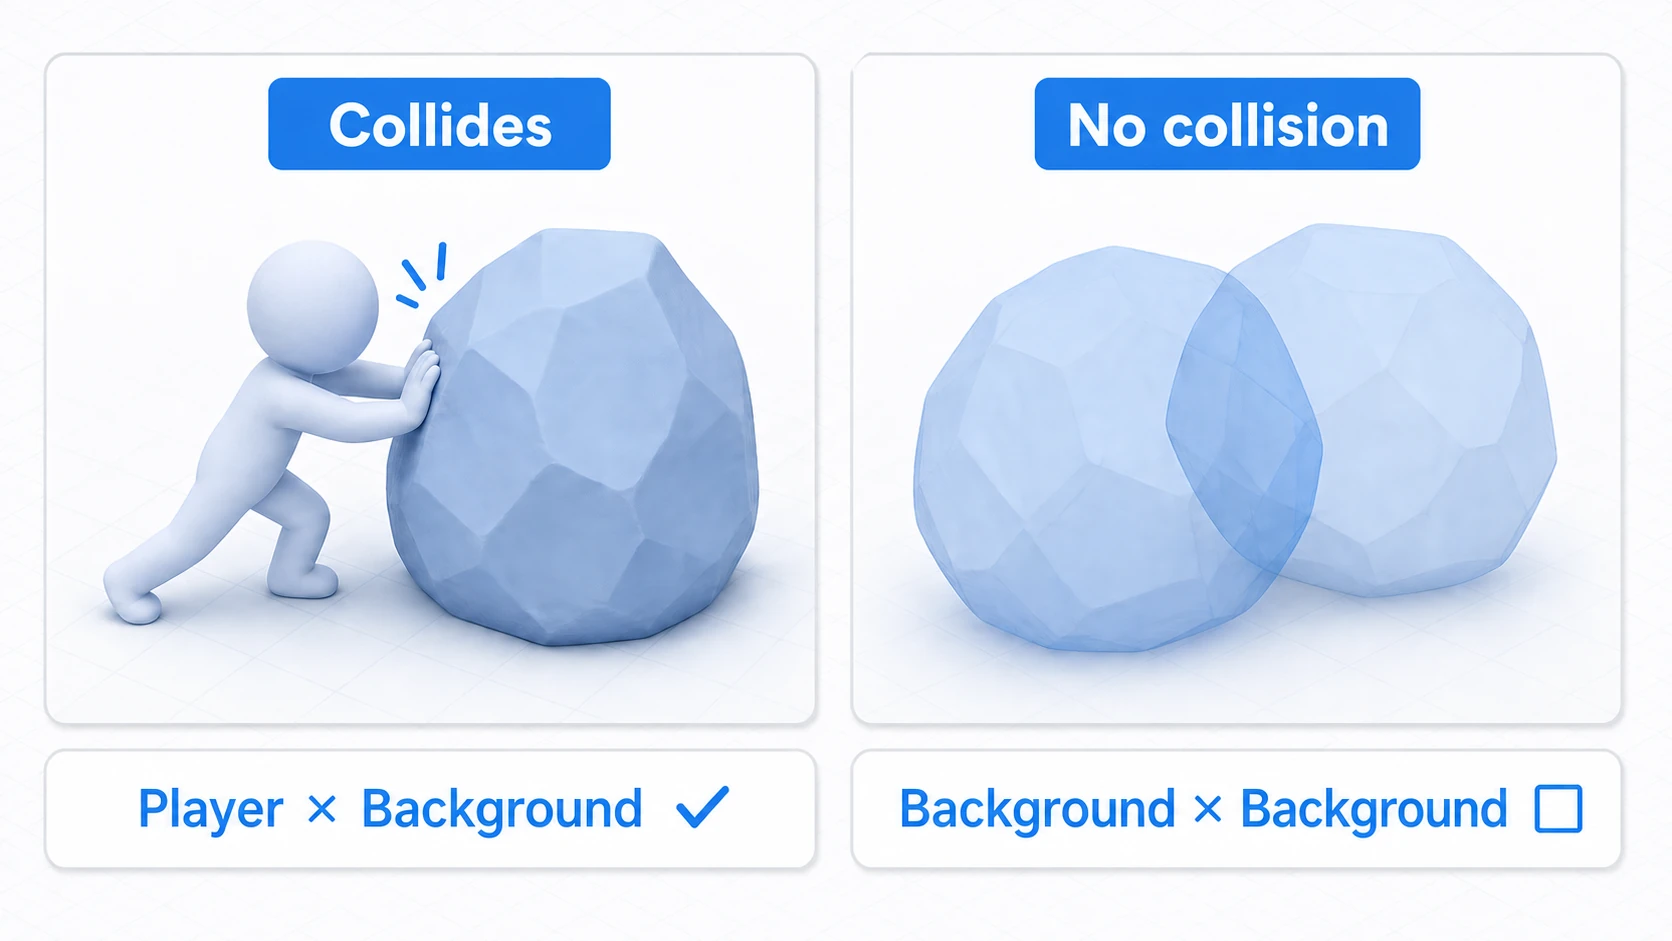
The most powerful use of layers is collision control. For example, if collisions between background objects are unnecessary, you can significantly reduce the physics load by putting them on the same layer and disabling collision between them.
- Create a layer: Create a new layer (e.g.,
Background) inEdit->Project Settings->Tags and Layers. - Apply it to objects: Apply the
Backgroundlayer to your background objects. - Disable the collision: Open
Edit->Project Settings->Physics(orPhysics 2D) and uncheck the checkbox whereBackgroundintersectsBackgroundin the Layer Collision Matrix.
| Layer | Default | Player | Enemy | Background |
|---|---|---|---|---|
| Default | ✔ | ✔ | ✔ | ✔ |
| Player | ✔ | ✔ | ✔ | ✔ |
| Enemy | ✔ | ✔ | ✔ | ✔ |
| Background | ✔ | ✔ | ✔ | (Uncheck) |
With this setting, objects on the Background layer no longer perform physical collision detection against each other, even when they touch.
Optimizing Raycast with LayerMask
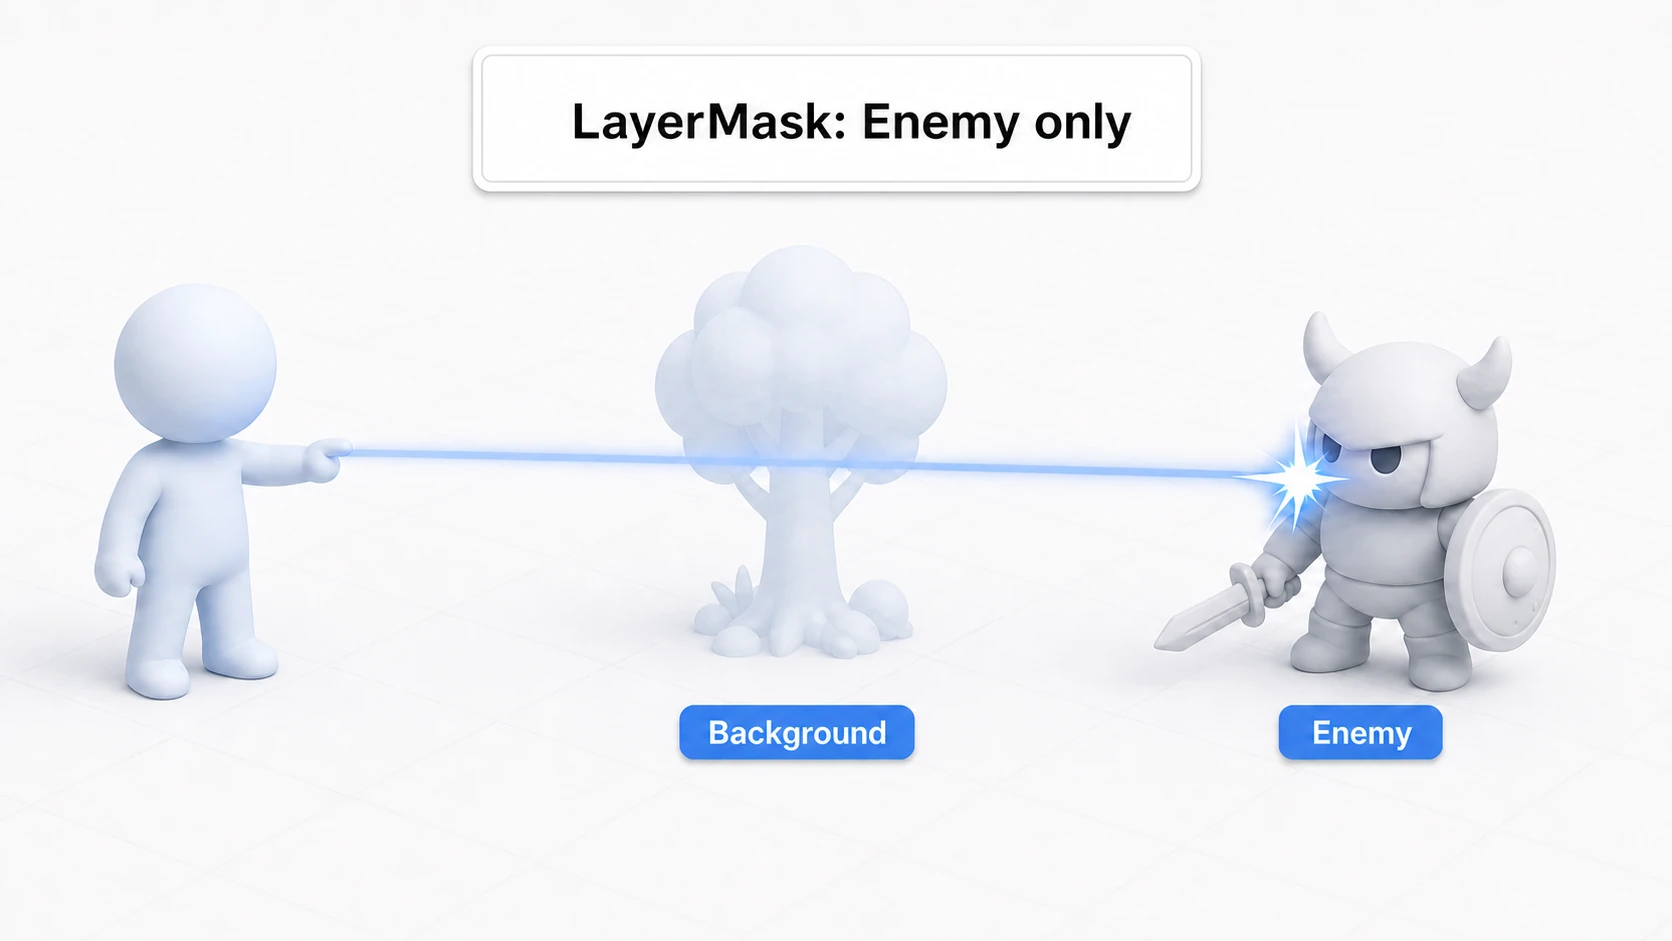
Layers are also crucial when performing a Raycast (casting a ray to detect hits). Using a LayerMask lets you run the Raycast against only objects on specific layers, skipping unnecessary checks and speeding up processing.
using UnityEngine;

public class RaycastExample : MonoBehaviour
{
    // Declared public so it can be set from the Inspector
    public LayerMask targetLayer;

    void Update()
    {
        // Cast a ray forward
        Ray ray = new Ray(transform.position, transform.forward);
        RaycastHit hit;

        // Run the Raycast, passing the LayerMask as an argument
        // Only objects on layers set in targetLayer will be detected
        if (Physics.Raycast(ray, out hit, 10f, targetLayer))
        {
            Debug.Log("Hit an object within the LayerMask: " + hit.collider.name);
        }
    }
}
A LayerMask variable appears as a dropdown menu in the Inspector, letting you pick target layers with simple checkboxes. This is easier to manage and less error-prone than using magic numbers in code.
Common Pitfalls for Beginners
Confusing Tags and Layers
The most common mistake is mixing up what tags and layers are for.
- Tags: Used for identification—"this is an enemy," "this is an item."
- Layers: Used for functional control—"this object skips collision detection," "this object isn't rendered."
Keep the split clear—use layers when you need functional control (especially physics), and tags when you just need identification or searching—and both your code and your settings stay organized.
"Sorting Layer" Is Something Else
The Sorting Layer you see everywhere in 2D games has a similar name but is a completely different mechanism from this article's Layer (the physics/rendering-control kind). Sorting Layers decide the draw order of sprites (which appears in front) and have nothing to do with collision detection. If you're confused that "I put them on different Sorting Layers but they still collide / still don't collide," check whether you've mixed these two up.
Bit Operations for LayerMask
When working with layer masks in scripts, you need to use bit operations (1 << layerNumber) instead of using layer numbers (0-31) directly.
For example, to target only layer number 10, write:
// Create a LayerMask for layer number 10
int layerNumber = 10;
int layerMask = 1 << layerNumber;

// Run the Raycast
Physics.Raycast(ray, out hit, 10f, layerMask);
This is because Unity's layer mask is stored as a 32-bit integer, where each bit represents whether the corresponding layer is enabled. Once you understand this bit-operation mechanism, you can also combine multiple layers (e.g., layerMask = (1 << 8) | (1 << 9);).
Bonus: Good to Know for Later
Once you're comfortable with tags and layers, this is the knowledge that pays off next.
- Going deeper with Raycast: There are many variations on casting rays, such as the sphere-shaped SphereCast and RaycastAll for collecting every hit. You can master them in the Physics.Raycast deep-dive article.
- Receiving collision events: After using layers to control whether things collide, you write what happens on collision with
OnCollisionEnter/OnTriggerEnter. The OnTrigger and OnCollision article is a good reference. - Verifying the gains with numbers: The effect of layer optimization is hard to feel by intuition alone. Once you can measure physics load with the Unity Profiler article, optimization becomes genuinely fun.
Summary
By effectively using Unity's Tags and Layers, object management in your scenes improves dramatically. The key points from this article:
- Tags specialize in identifying objects, used for searches like
GameObject.FindWithTag()and for determining what you collided with. - Layers specialize in functional control, essential for optimizing physics (collision detection) and camera rendering.
- Collision control with layers is configured in the Layer Collision Matrix under
Project Settings->Physics, cutting unnecessary calculations to improve performance. - For operations like Raycast, a LayerMask lets you target only objects on specific layers, making processing more efficient.
- When handling layer numbers in scripts, the standard approach is to build a LayerMask with bit operations (
1 << layerNumber).
Master these fundamentals to make your Unity projects more organized and high-performing.