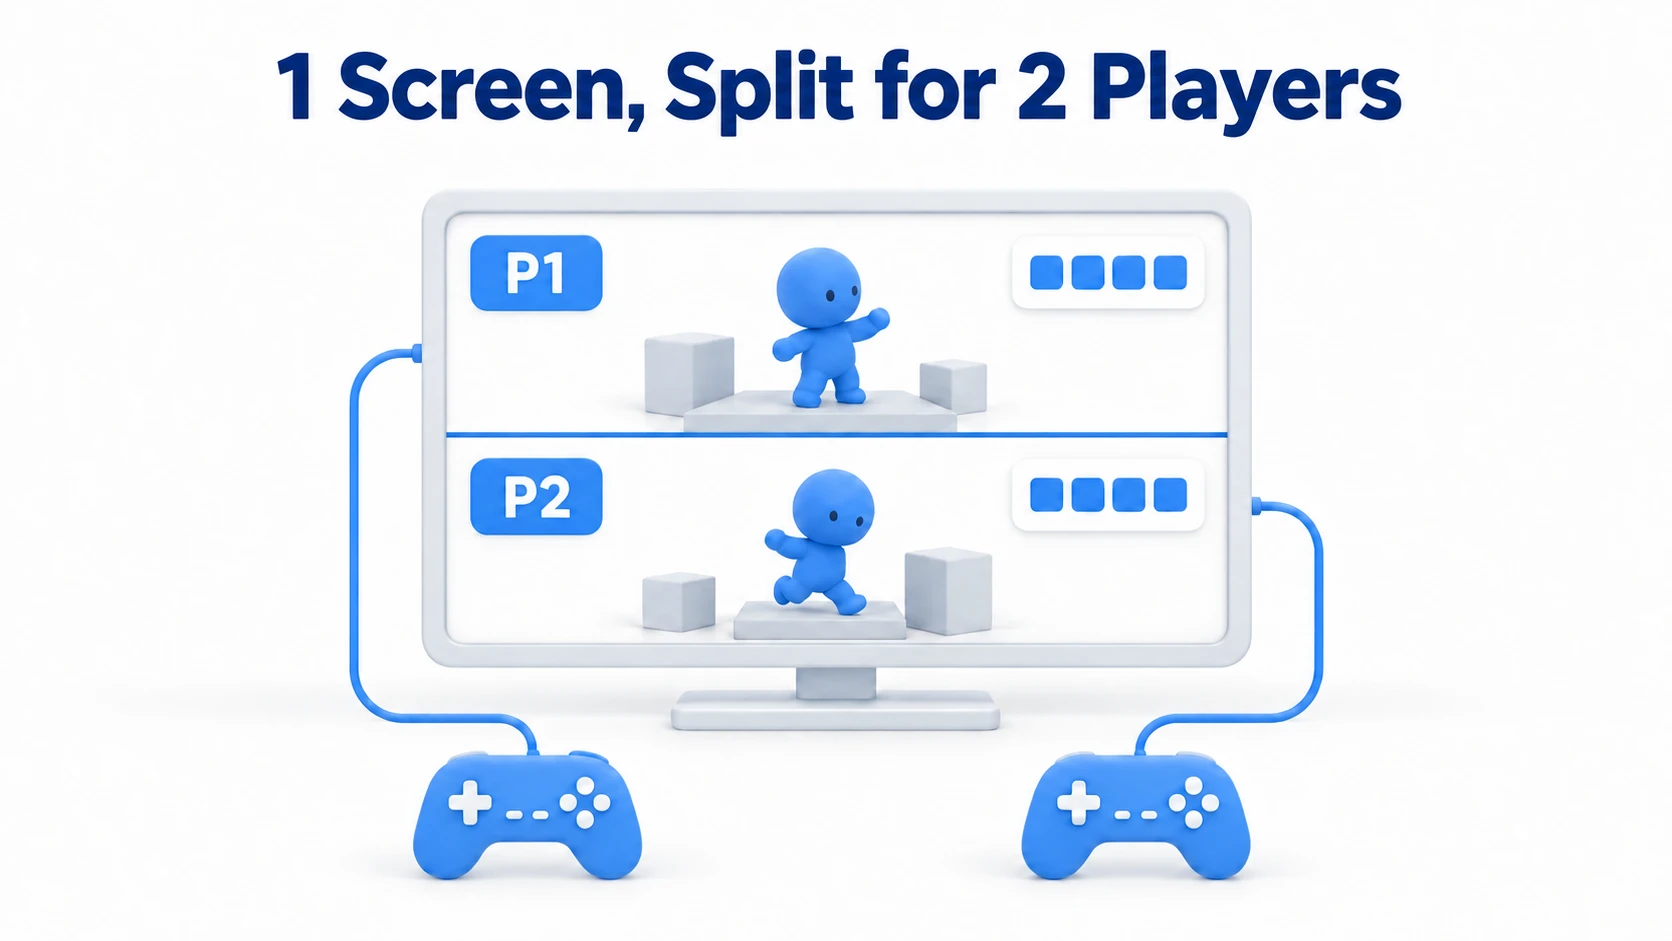
Sharing one PC or console with friends, splitting the screen and playing together — the fun of local multiplayer is special. Two-player racing, co-op action, four-player party games. This split-screen is actually built in Unity by combining just two mechanisms: divide the screen with multiple cameras' Viewport Rect, and control each with per-player input assignment. Those two pillars.
This article assembles the foundation of split-screen local multiplayer. From split-screen with Viewport Rect, to per-player input with the New Input System's PlayerInputManager, to each player's own UI. The first step of local versus and co-op games.
What you'll learn
- Splitting the screen with Viewport Rect (top/bottom, left/right)
- Assigning per-player input with PlayerInputManager
- Separating each player's UI
- Practice: split-screen where two play with separate controllers
Tested on: Unity 6 (6000.x) / URP / Input System 1.x
Split-screen is built from two mechanisms
Split-screen sounds hard, but broken down it's just "divide the screen" and "divide the input." Nail these two pillars and the rest is just adding more players.
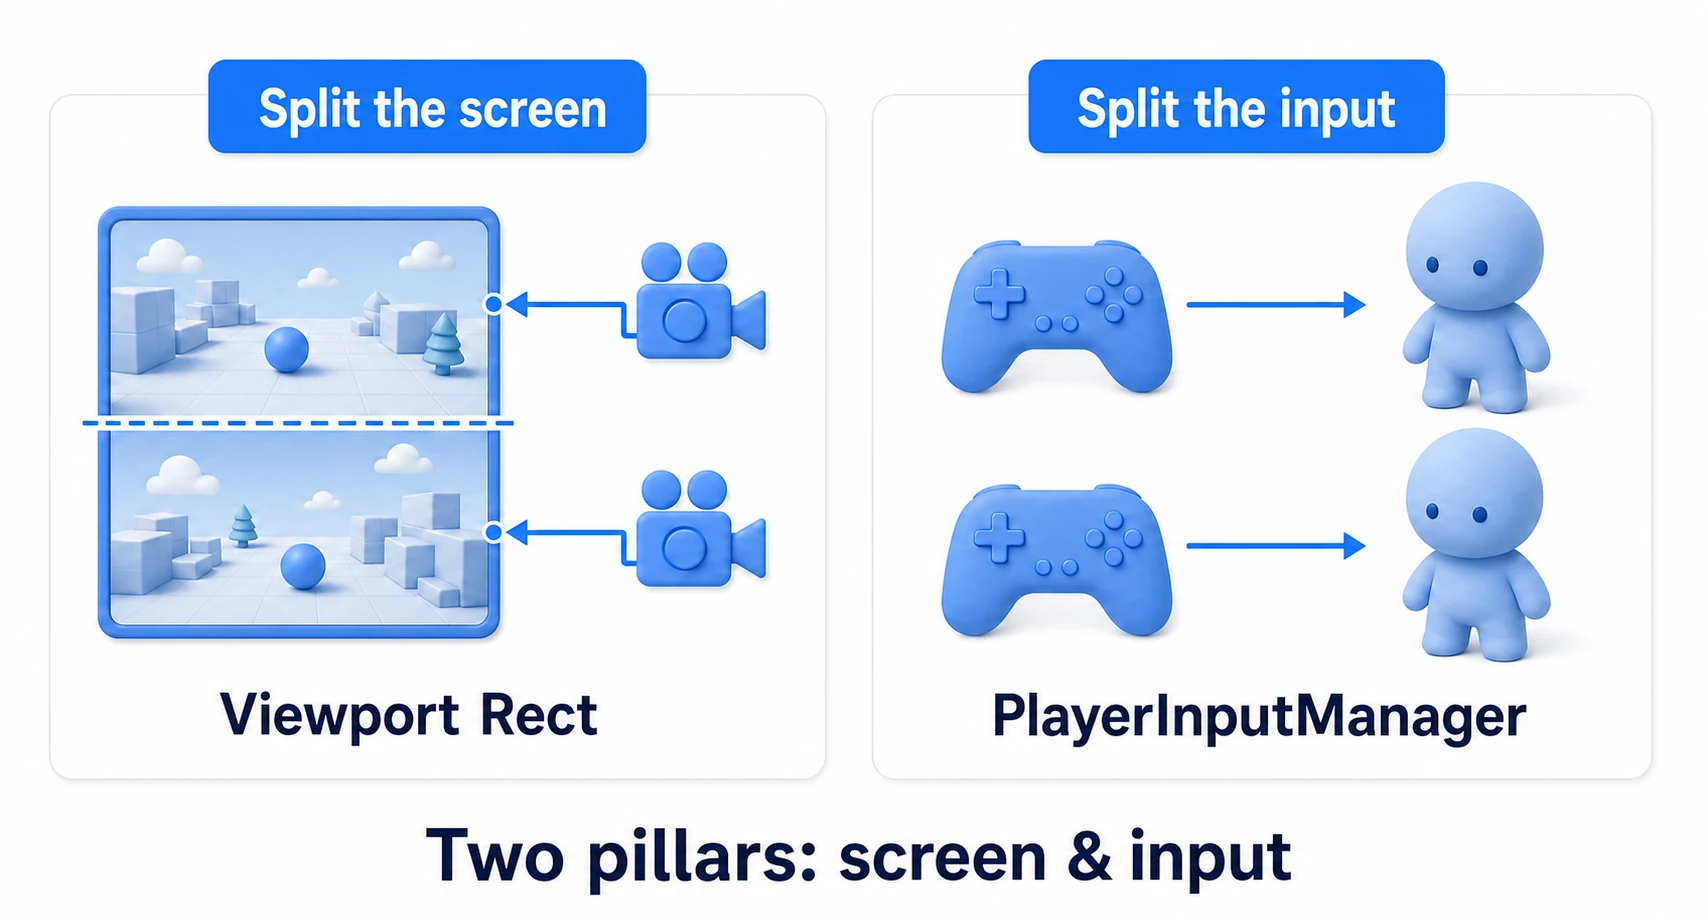
| Mechanism | Role |
|---|---|
| Divide the screen (Viewport Rect) | Prepare a camera per player and assign each camera's display area to part of the screen |
| Divide the input (PlayerInputManager) | Link each controller (device) to each player so they don't cross |
These two are independent. "How to split the screen" is the camera's job, "who controls which character" is the input's job. Each is set separately, and combined they complete local multiplayer where "on your screen, with your controller, you move your character." Let's start with split-screen.
Divide the screen with Viewport Rect
The crux of split-screen is the camera's Viewport Rect. This is a setting that specifies "which area of the screen a camera renders to" as a 0–1 ratio.
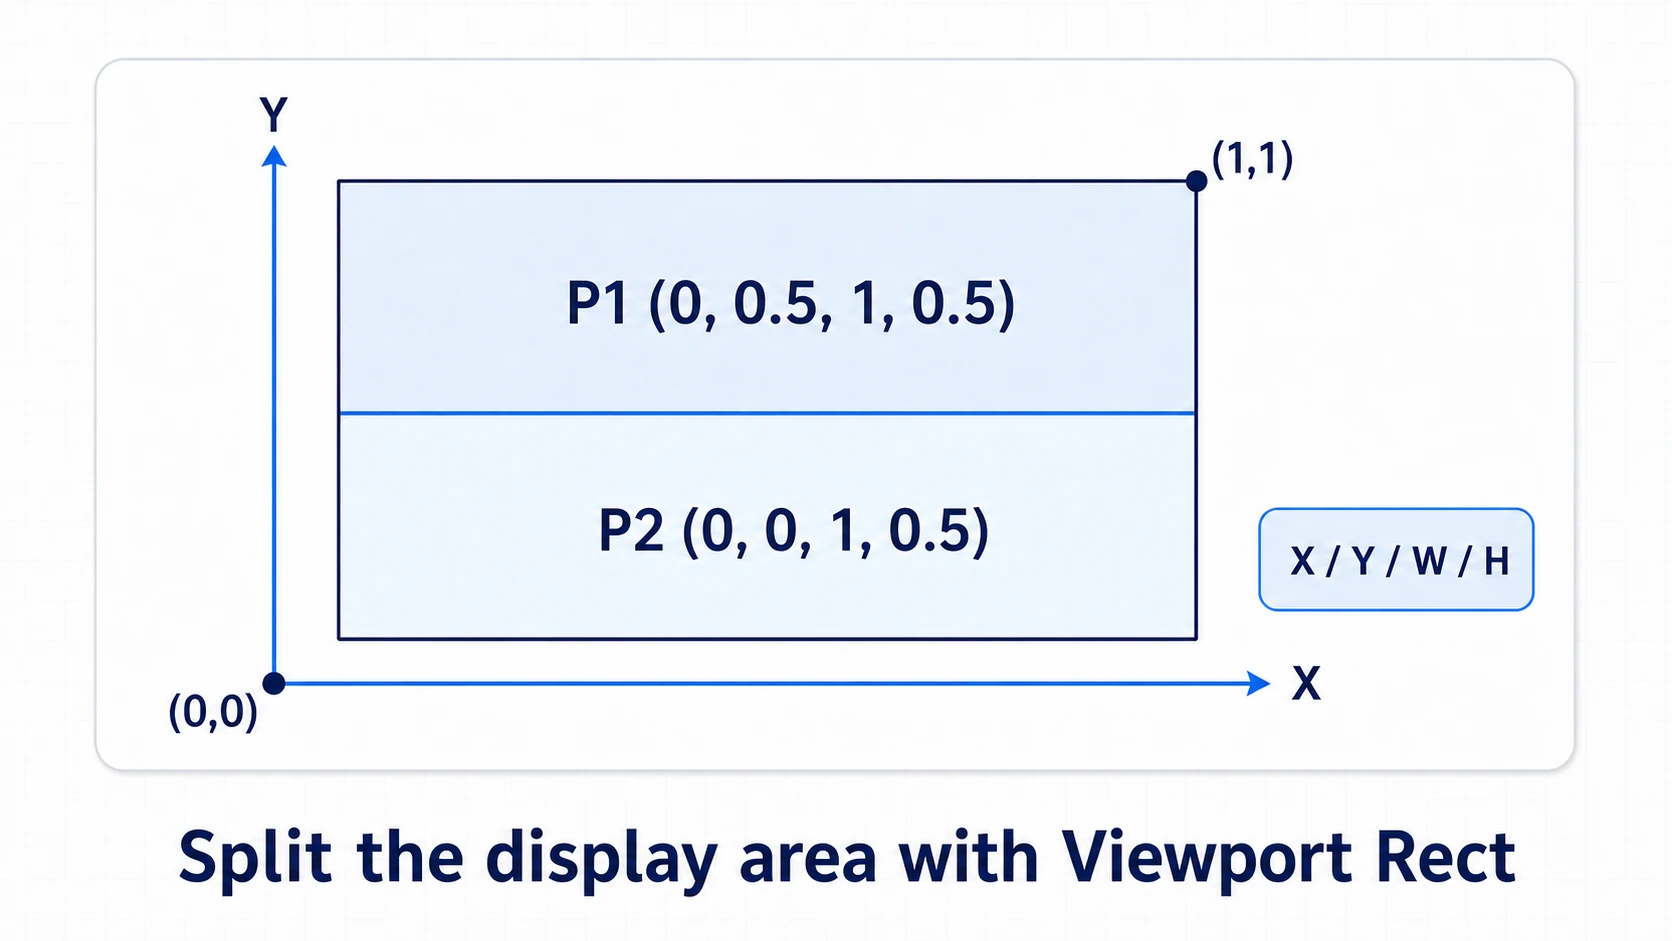
Viewport Rect specifies a ratio with the four values X, Y, W, H, with the bottom-left of the screen as origin (0, 0) and top-right (1, 1).
- Full screen:
(X=0, Y=0, W=1, H=1)— a normal camera - Top/bottom split (2P): player 1's camera at
(0, 0.5, 1, 0.5)(top half), player 2's at(0, 0, 1, 0.5)(bottom half) - Left/right split (2P): player 1 at
(0, 0, 0.5, 1)(left half), player 2 at(0.5, 0, 0.5, 1)(right half) - 4-way split: four cameras at
(0,0.5,0.5,0.5),(0.5,0.5,0.5,0.5),(0,0,0.5,0.5),(0.5,0,0.5,0.5)
Prepare a camera per player and just set each Viewport Rect, and the screen splits cleanly. Make each camera follow its player and each viewpoint shows separately. The simplest way is to parent the camera to the character (if you follow with Cinemachine, give each player their own Output Channel on the Cinemachine Camera and Channel Mask on the CinemachineBrain, so the two cameras don't grab the same shot). No special shader or rendering technique needed — it's achieved with a single camera setting.
Camera render order: when using multiple cameras, the render order is set by each camera's
Priority(in the Rendering section of a URP camera;Depthin Built-in), and higher numbers draw later. In a split display the cameras don't overlap, so you usually don't need to think about it.
Assign input with PlayerInputManager
Even with the screen split, it's meaningless if both characters move on the same input. Assigning each player "their own controller" is the New Input System's PlayerInputManager.
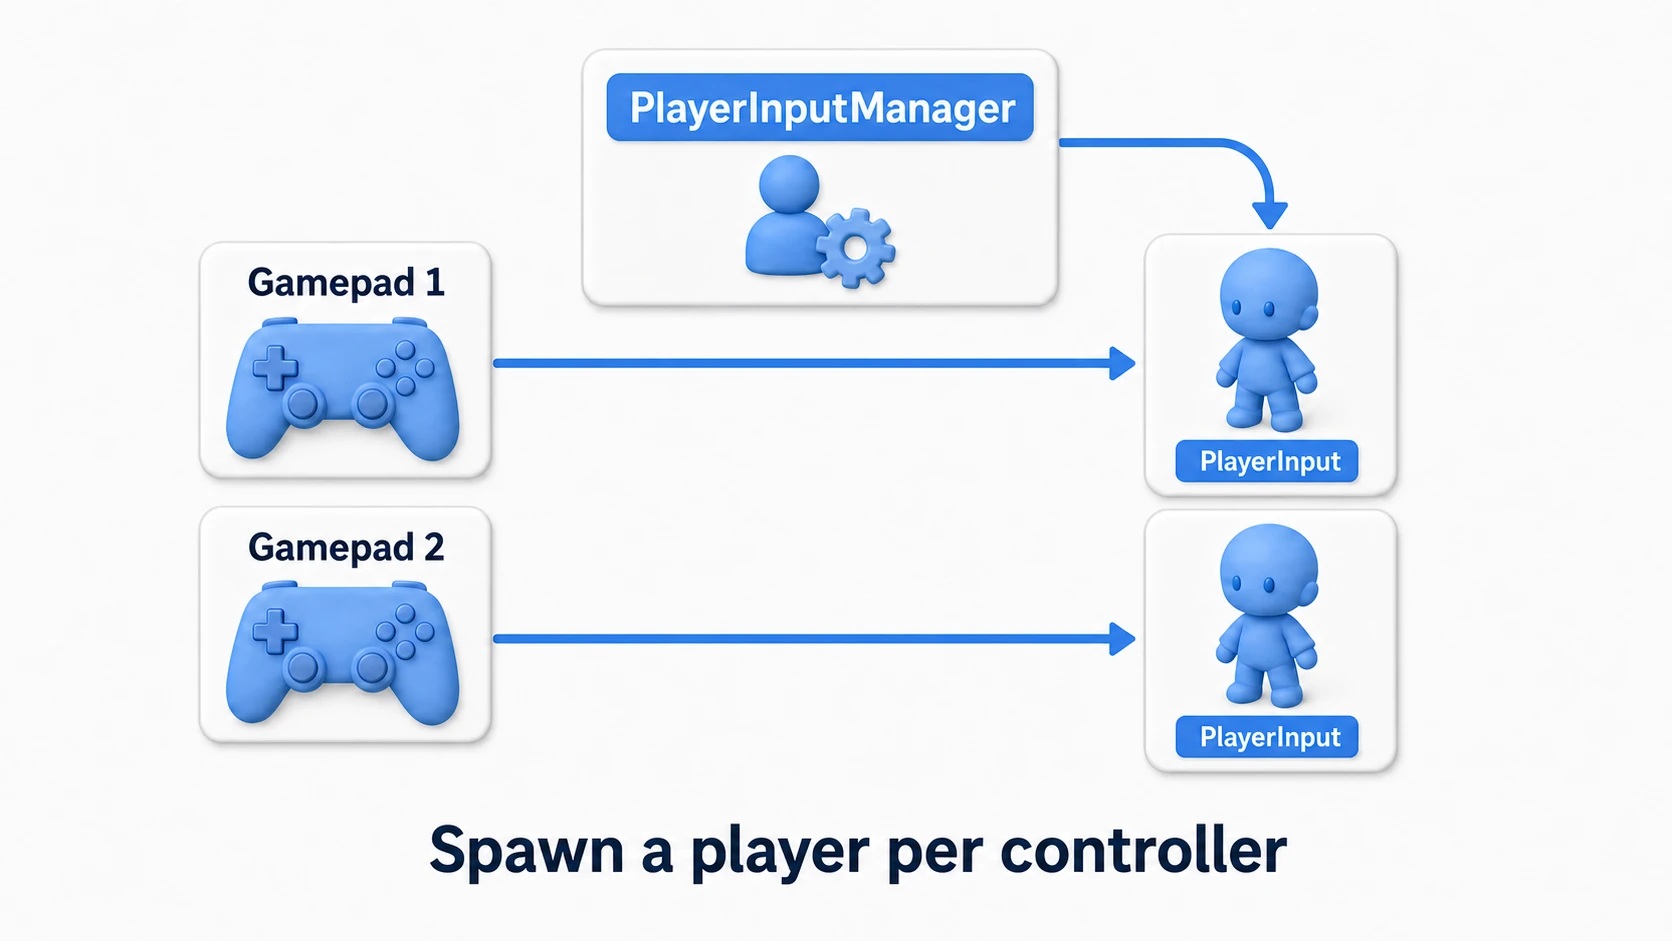
PlayerInputManager is a mechanism that auto-generates a player when a controller joins and delivers only that device's input.
- Prepare a Player Prefab: make a Prefab of the player character with a
PlayerInputcomponent (define input actions in an Input Actions asset) - Place a PlayerInputManager: place a
PlayerInputManagerin the scene and assign step 1 toPlayer Prefab - Set the join method: choose a Join scheme like "join by pressing a button." Pressing a gamepad button generates a player dedicated to that device
Now the player who joined with gamepad 1 receives only pad 1's input, and the pad 2 player only pad 2's. The biggest benefit is no input crossing. You can also split one keyboard into "P1 on WASD" and "P2 on arrow keys." But with join-by-button-press, a second player can't join from the keyboard player one is already using. Make two Control Schemes and create both players with PlayerInput.Instantiate, specifying the scheme and the keyboard. Assign the previous section's Viewport Rect to each generated player's camera, and screen and input connect.
PlayerInputManager also has built-in split-screen, Enable Split-Screen (two players split left/right). This article splits top/bottom and returns to fullscreen when one player remains, so it leaves that off and lays out the screens itself.
Separate each player's UI
Health bars and scores also want to show on each player's own screen. Place each UI in its divided area.
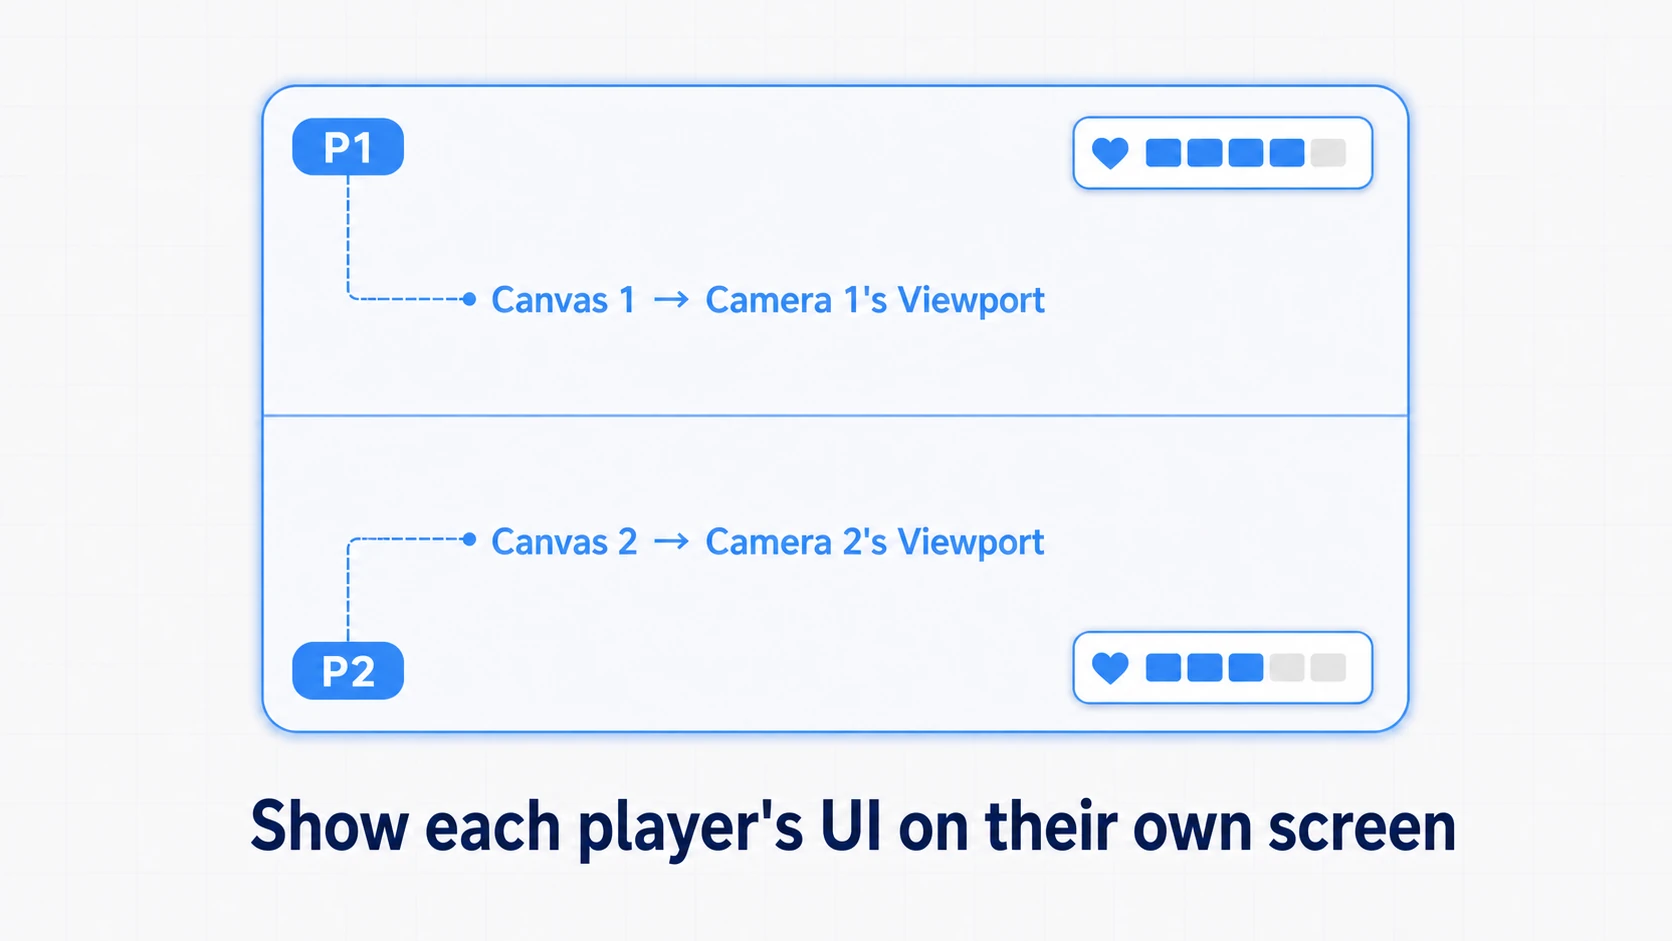
To separate each player's UI, prepare a Canvas per player. A Canvas's default, Screen Space - Overlay, draws over the whole screen regardless of cameras, so it straddles the split. There are mainly two ways to place it.
- Link via Screen Space - Camera: set each player's Canvas to
Screen Space - Cameraand setRender Camerato that player's camera. The UI fits within the camera's Viewport area - Follow the character in World Space: place a health bar above the character's head with a
World SpaceCanvas. The other player's camera sees it too, so it suits info everyone should see, like names over heads
However, a Screen Space - Camera Canvas is a board placed in front of its camera. When both players face the same way, the other camera sees that board too, and the other player's health bar overlaps your screen. Put each HUD on a per-player layer (HUD_P1, HUD_P2) and remove the other player's layer from each camera's Culling Mask (the layers that camera renders), and P1's health bar shows only in P1's area and P2's only in P2's. Knowing the basics of Canvas and RectTransform makes positioning within the split areas smooth. Player-specific info like scores and lives can all show on each screen this way.
Practice: two-player split-screen
Combining the above, let's complete local multiplayer where two play a top/bottom split screen with separate controllers. Co-op action, versus racing, party games — all start from this foundation.
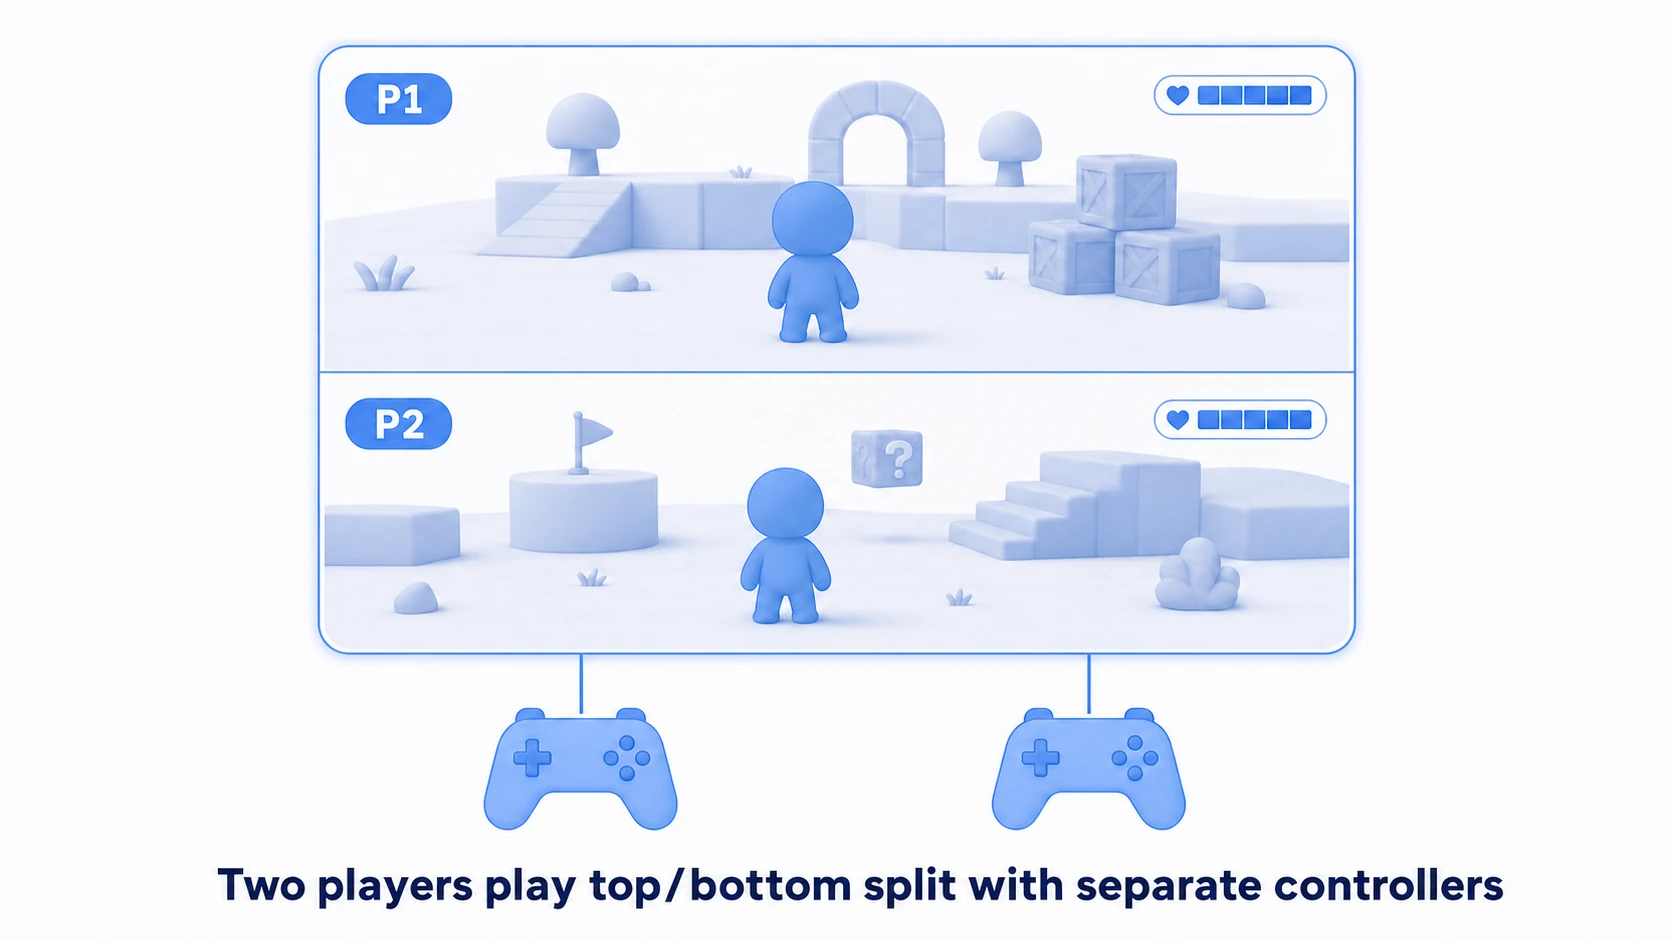
For this build we commit to a maximum of two players (turn on Limit Number of Players on the PlayerInputManager and set Max Player Count to 2 — mash the Join button all you like, a third player will never spawn). The overall assembly:
- Make a Player Prefab (
PlayerInput+ character + follow camera + own Canvas). Set the Canvas toScreen Space - Camerawith the prefab's own camera asRender Camera. Remove the follow camera'sAudioListener(one pair of ears is enough: the scene's Main Camera) - Place a PlayerInputManager in the scene, assign the Player Prefab and the player cap. Add the
SplitScreenManagerbelow to the same GameObject - In Project Settings > Tags and Layers, create the HUD layers
HUD_P1andHUD_P2 - Every time someone joins or leaves, redistribute the screens by player count (one player gets fullscreen, two get top/bottom)
- Join with each controller → each character, screen, and input connect
using UnityEngine;
using UnityEngine.InputSystem;

// Redistribute every player's Viewport Rect whenever someone joins or leaves
// Put this on the same GameObject as the PlayerInputManager
// (with the default Send Messages notification behavior, the two methods below are called on every join and leave)
public class SplitScreenManager : MonoBehaviour
{
    public void OnPlayerJoined(PlayerInput input)
    {
        // Move the HUD to this player's layer (create HUD_P1 and HUD_P2 in Tags and Layers first)
        int hudLayer = LayerMask.NameToLayer(input.playerIndex == 0 ? "HUD_P1" : "HUD_P2");
        foreach (var t in input.GetComponentInChildren<Canvas>().GetComponentsInChildren<Transform>(true))
            t.gameObject.layer = hudLayer;

        Relayout();
    }

    public void OnPlayerLeft(PlayerInput input) => Relayout();

    private void Relayout()
    {
        var players = PlayerInput.all;  // All currently joined players (whoever left is already gone at this point)
        int hudP1 = LayerMask.GetMask("HUD_P1");
        int hudP2 = LayerMask.GetMask("HUD_P2");

        for (int i = 0; i < players.Count; i++)
        {
            var cam = players[i].GetComponentInChildren<Camera>();
            if (cam == null) continue;

            cam.rect = players.Count <= 1
                ? new Rect(0f, 0f, 1f, 1f)                     // One player -> back to fullscreen
                : new Rect(0f, i == 0 ? 0.5f : 0f, 1f, 0.5f);  // Two players -> top/bottom split

            // Render your own HUD, not the other player's
            bool isP1 = players[i].playerIndex == 0;
            cam.cullingMask = (cam.cullingMask | (isP1 ? hudP1 : hudP2)) & ~(isP1 ? hudP2 : hudP1);
        }
    }
}
The first half of OnPlayerJoined stops the other player's HUD from showing on your screen, as described in the previous section. Two HUDs made from the same prefab start on the same layer, so they're sorted out on join.
Two points: "camera and input are a set per player" (one player has "their camera + their PlayerInput + their UI" as one set; bundling them in the Player Prefab makes generation easy) and "re-lay out on every change, not just on join" (handle only OnPlayerJoined, and when player two drops out, player one is left stranded in half a screen. Call the same Relayout from both Join and Left, and the moment you're back to one player, the screen glides back to fullscreen — that touch of care is what makes local multiplayer feel finished).
With this foundation, racing, fighting, or co-op action — just layer on the game logic.
Good to know first
- Requires the Input System package:
PlayerInputManageris a New Input System feature. InstallInput Systemin the Package Manager and nail the basics of New Input System (Input Actions) first. - Audio is shared: the screen splits, but there's one speaker. BGM and SFX are usually treated as one for the whole game, not split per player. Note that 3D audio is heard from the one spot where the ears (the AudioListener) are.
- A divider makes it readable: drawing a single thin line (a divider UI) at the split boundary makes the screen far more readable. An easy way is to place one full-screen
Screen Space - OverlayCanvas that draws only the divider. - Different from online: this article is local multiplayer that "splits one screen." Online multiplayer over a network needs a separate mechanism like Netcode for GameObjects and a completely different design.
- UI watches the character inside its own prefab: if a health bar looks up the character from the scene with
FindFirstObjectByTypeor similar, both bars show the same character, and P2 taking a hit drains P1's bar too. Assign the character inside the same prefab to the bar in the Inspector. - The pause belongs to whoever opened it: one fullscreen pause menu leaves unclear whose gamepad drives it. Switch only the pausing player's PlayerInput to the UI Action Map and stop everyone else's input.
Summary
- Split-screen is the two pillars of "divide the screen" + "divide the input"
- Split-screen is each camera's
Viewport Rect(X/Y/W/H ratio). Top/bottom is(0,0.5,1,0.5)and(0,0,1,0.5) - Input is
PlayerInputManager. It generates a player per controller and prevents crossing - UI prepares a Canvas per player, matched to the corresponding camera's area
- Practice: bundle each player as one prefab (camera + input + UI), and redistribute Viewport Rects on every join and leave (back to fullscreen when one remains)
Start by placing two cameras and splitting them top/bottom with Viewport Rect. The moment one screen splits into two, the door to local multiplayer opens. What game will you split the screen for with friends?
Further reading
- New Input System Guide — the basics of PlayerInput and PlayerInputManager
- Cinemachine Follow Camera in Practice — each player's follow camera
- Canvas, RectTransform, and Anchors — placing UI within split areas
- Render Texture Basics — another way to show camera footage (an adjacent theme)
- NGO + Relay + Lobby — playing on separate devices over the internet
- Unity Manual: PlayerInputManager — the primary source on local multiplayer input