You know that button in the options menu — "Jump: Space [Change]". Key rebinding is a feature modern PC gamers simply expect. And letting players remap their controls is one of the biggest reasons to choose the New Input System in the first place. But when you actually sit down to build it, questions pile up fast: "How do I wait for the next key press?" "How do I save the changes?"
This article walks through rebinding with the New Input System's PerformInteractiveRebinding(), in order: how it works (binding overrides), the basic implementation, UI integration, and saving/restoring.

What You'll Learn
- Rebinding is really just an override placed on top of a Binding
- How to "wait for the next input and swap it in" with
PerformInteractiveRebinding()- UI integration: showing the current key and a "waiting for input" state
- Saving with
SaveBindingOverridesAsJsonand restoring on startup
Tested with: Unity 6 (6000.x) / Input System
How It Works: Rebinding = Binding Overrides
In the New Input System, the "Jump" action and the "Space key" Binding are kept separate. Rebinding means rewriting that Binding — or more precisely, leaving the original definition intact and layering an override on top of it.
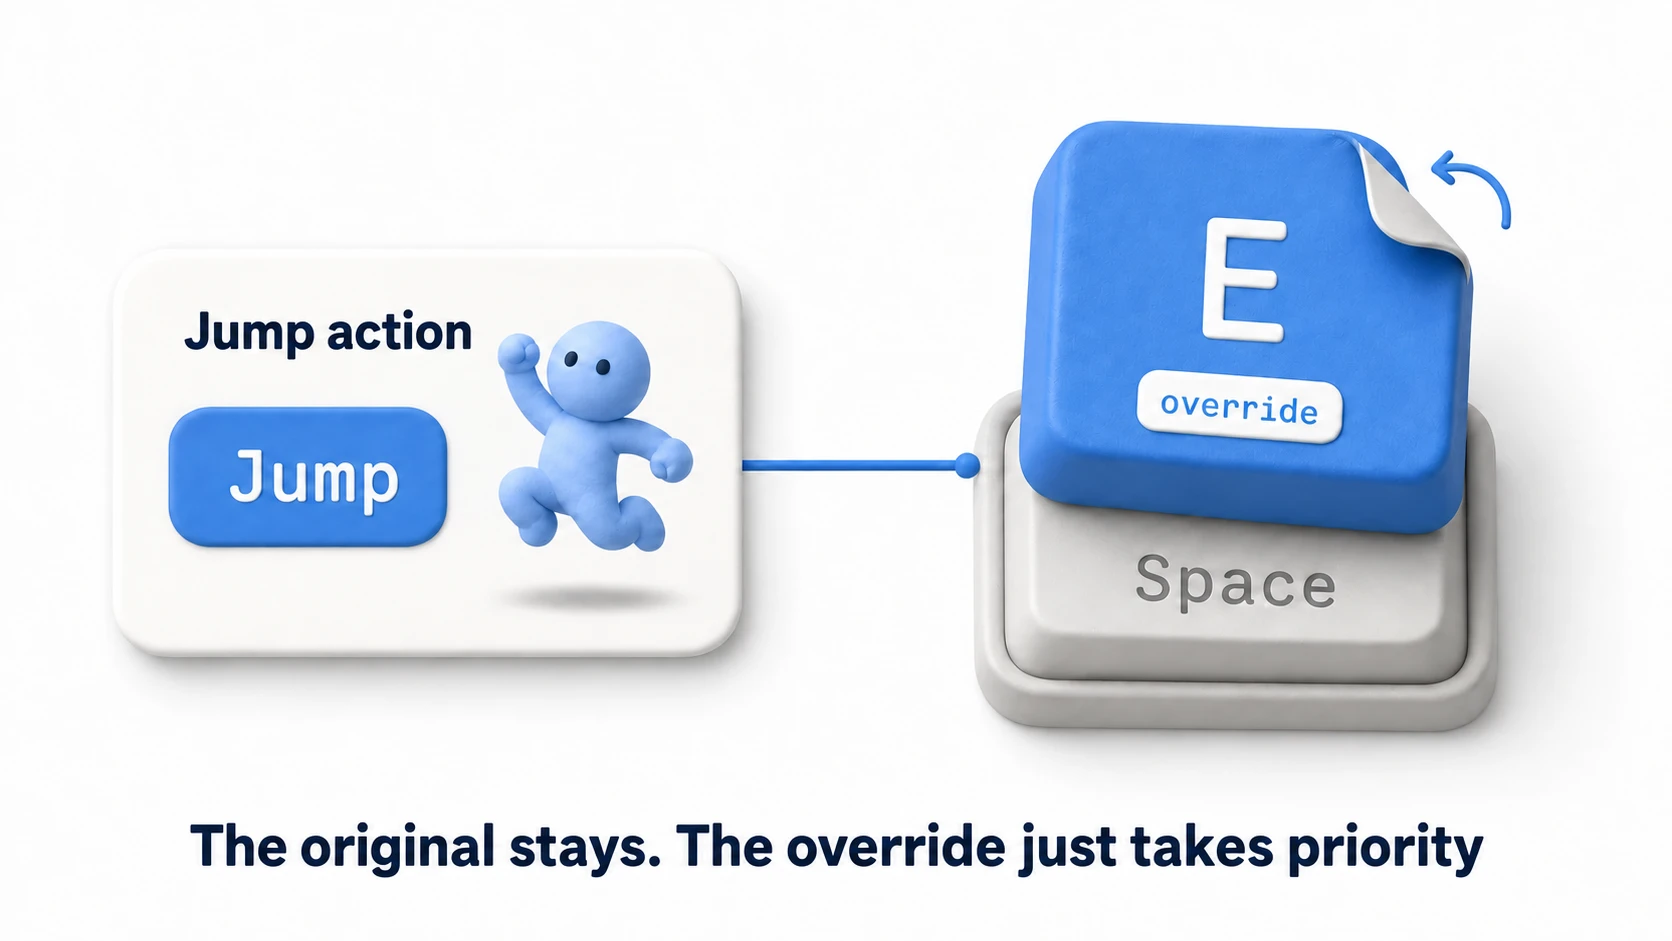
The original definition (the Space key stored in your Input Action Asset) never goes away. The overridePath simply takes priority, like a sticker placed over the original — peel off the sticker and you're back to the defaults at any time. This structure is exactly what makes the "reset to default" feature and easy saving possible, as we'll see below.
Basic Implementation: PerformInteractiveRebinding
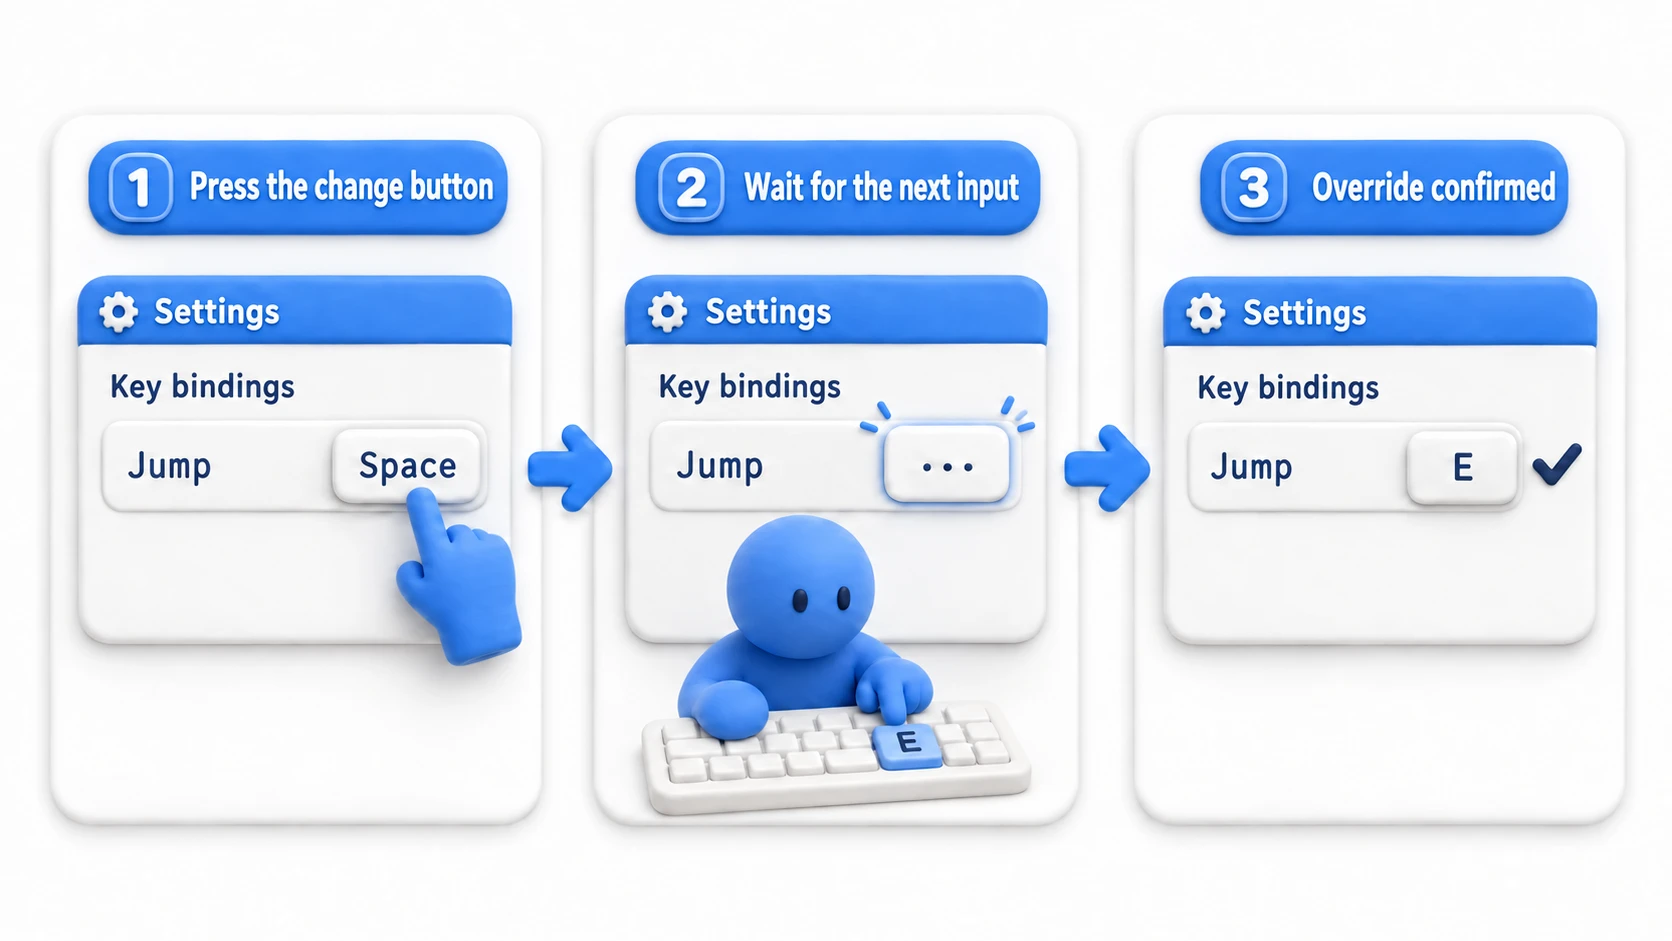
The whole flow — "press the change button, wait for the next key press, override with that key" — is handled for you by PerformInteractiveRebinding().
using UnityEngine;
using UnityEngine.InputSystem;

public class RebindController : MonoBehaviour
{
    [SerializeField] private InputActionReference jumpAction; // The jump action

    private InputActionRebindingExtensions.RebindingOperation rebindOperation;

    public void StartRebind()
    {
        // 1. A rebind can't start on an enabled action, so disable it first
        jumpAction.action.Disable();

        // 2. Start an operation that waits for the next input and overrides with it
        rebindOperation = jumpAction.action.PerformInteractiveRebinding()
            .WithControlsExcluding("<Mouse>")          // Exclude mouse input from candidates
            .WithCancelingThrough("<Keyboard>/escape") // Cancel with Escape
            .OnComplete(operation => FinishRebind())  // On confirm
            .OnCancel(operation => FinishRebind())    // On cancel
            .Start();
    }

    private void FinishRebind()
    {
        // 3. Clean up (forgetting Dispose causes memory leaks)
        rebindOperation.Dispose();
        jumpAction.action.Enable();
    }
}
There are three points to keep in mind.
- Call
Disable()before starting: if the action stays enabled, the rebind fails right away withInvalidOperationException. The rebind operation, not the action, watches for the next key, so the key still gets captured while the action is disabled WithCancelingThrough: always provide a cancel key for when the player changes their mind- Call
Dispose()on both complete and cancel: a rebinding operation is a single-use object. Bundle the cleanup and re-enable into one shared handler so nothing slips through
Warning: If the action has multiple bindings (say, Jump bound to both "Space" and "Gamepad South Button"), a bare
PerformInteractiveRebinding()overwrites the action's bindings all at once. In real projects, always specify which binding to change, as inPerformInteractiveRebinding(bindingIndex). For composite bindings like WASD it's mandatory (see the Bonus section).
Integrating with the UI
A real settings screen needs two things: showing the current key and showing a "waiting for input" state. For the current binding, GetBindingDisplayString() gives you a human-readable label like "Space" or "Left Button".
using UnityEngine;
using UnityEngine.InputSystem;
using TMPro;

public class RebindButtonUI : MonoBehaviour
{
    [SerializeField] private InputActionReference jumpAction;
    [SerializeField] private TextMeshProUGUI keyLabel; // Key name shown on the button

    private bool isRebinding; // Guard against double-starting

    private void Start()
    {
        RefreshLabel();
    }

    public void RefreshLabel()
    {
        // Get the current binding as a display string like "Space"
        keyLabel.text = jumpAction.action.GetBindingDisplayString();
    }

    public void OnClickRebind()
    {
        // Don't start two rebinds at once from rapid clicks
        if (isRebinding) return;
        isRebinding = true;

        keyLabel.text = "..."; // Show the waiting-for-input state

        jumpAction.action.Disable();
        jumpAction.action.PerformInteractiveRebinding()
            .WithControlsExcluding("<Mouse>")
            .WithCancelingThrough("<Keyboard>/escape")
            .OnComplete(op => { op.Dispose(); jumpAction.action.Enable(); isRebinding = false; RefreshLabel(); })
            .OnCancel(op => { op.Dispose(); jumpAction.action.Enable(); isRebinding = false; RefreshLabel(); })
            .Start();
    }
}
For the Jump Action field, expand the Input Actions asset in the Project window with the triangle on its left and drag the Jump action inside it (not the whole asset). Hook OnClickRebind up to the button's OnClick and you get the classic behavior: click, the label changes to ..., press a key, and the new key name appears.
Saving and Restoring
Overrides only live in memory while the game is running, so they're gone when the game exits. To save them, use SaveBindingOverridesAsJson(). It serializes just the override data into a JSON string, which drops straight into PlayerPrefs.
using UnityEngine;
using UnityEngine.InputSystem;

public class RebindSaveLoad : MonoBehaviour
{
    [SerializeField] private InputActionAsset actions; // The whole Input Action Asset

    private const string SaveKey = "rebinds";

    // Call this when closing the settings screen, etc.
    public void SaveRebinds()
    {
        string json = actions.SaveBindingOverridesAsJson();
        PlayerPrefs.SetString(SaveKey, json);
    }

    // Called on game startup
    private void Awake()
    {
        string json = PlayerPrefs.GetString(SaveKey, string.Empty);
        if (!string.IsNullOrEmpty(json))
        {
            actions.LoadBindingOverridesFromJson(json);
        }
    }

    // For a "Reset to Defaults" button
    public void ResetRebinds()
    {
        actions.RemoveAllBindingOverrides();
        PlayerPrefs.DeleteKey(SaveKey);
    }
}
Because the design saves only the overrides, saving, restoring, and resetting each take just a few lines — exactly the "sticker over the original" picture from earlier.
One more thing: saved data is tied to each binding's ID, so it survives reordering. But if an update deletes a binding and recreates it, the ID changes, and that override isn't restored; the binding goes back to its default. Rather than building an elaborate migration system, keeping a "Reset to Defaults" button on the settings screen is the simplest, most reliable safety net.
Troubleshooting
| Symptom | Cause | Fix |
|---|---|---|
InvalidOperationException the moment you press the change button | The rebind started without Disable() on the action | Disable() before starting, and Enable() again when it ends |
| You changed the key, but the character still moves with the old one | The character runs on a different Input Actions asset (such as InputSystem_Actions, which Unity 6 templates include from the start) | Make the asset you rebind the same one the character reads input from |
| The new binding became "Left Button" | A mouse click after the rebind started was captured | Remove the mouse from candidates with WithControlsExcluding("<Mouse>") |
Bonus: Good to Know for Later
Once basic rebinding works, these are the challenges you'll likely run into next.
- Rebinding WASD (composites): four-directional bindings like WASD movement are "composite Bindings", and you rebind each directional part binding individually. You'll need to specify the target index, as in
PerformInteractiveRebinding(bindingIndex). - Checking for duplicate assignments: whether "E for both jump and attack" is allowed is up to your game. If it isn't, compare the result against other actions' Bindings in
OnCompleteand revert the override when there's a conflict. - Coexisting with gamepads: keyboard and gamepad Bindings exist separately. To narrow down rebind candidates, use
WithControlsExcludingor target a specific control scheme. If you want a refresher on the New Input System basics, see the introductory article.
Summary
With the New Input System, key rebinding is mostly a matter of riding the built-in machinery.
- Rebinding is really a Binding override. The original definition stays put, so you can revert to defaults at any time.
PerformInteractiveRebinding()handles the whole "wait for the next input and swap it in" flow. Don't forget the three essentials:Disable()before starting, a cancel key, andDispose().- Show the current key with
GetBindingDisplayString(). The waiting state is just a label swap. - Save with
SaveBindingOverridesAsJson+ PlayerPrefs, restore on startup withLoadBindingOverridesFromJson, and reset withRemoveAllBindingOverrides.
In an era where remappable controls are table stakes, this implementation can become your game's settings screen as-is. Give it a try.