You've learned Canvas and anchors, lined things up with Layout Groups, and you can build uGUI screens. Then the whisper arrives: "the future is UI Toolkit." So is your uGUI knowledge wasted? Rebuild everything? — Relax. The answer is coexistence, not replacement.
This article covers UI Toolkit's parts (UIDocument, UXML, USS), driving a UI Builder screen from C#, and its signature strength — list virtualization — all through building a quest log screen. At the end, we're explicit about where uGUI stays.
What you'll learn
- The decision criteria between uGUI and UI Toolkit
- The UIDocument / UXML / USS division of labor (structure, looks, behavior)
- Grabbing UI Builder elements from C# with
Q<T>()- Switching visual states by toggling USS classes
- ListView virtualization (lists that stay light at 1,000 entries)
- Hands-on: building a quest log screen
- Where uGUI remains right (world space, effects, existing assets)
Tested with: Unity 6 (6000.x)
uGUI and UI Toolkit are not rivals
The two UI systems have different origins and different strengths.
- uGUI is GameObject-based. Every UI element is a GameObject, moves with a Transform, and mixes freely with particles and 3D effects. It excels at UI that lives inside the game world
- UI Toolkit is web-like. Structure (UXML) and appearance (USS) live in files; elements are lightweight objects, not GameObjects. It excels at screens that arrange lots of data cleanly — and it's what editor extension UIs are built with
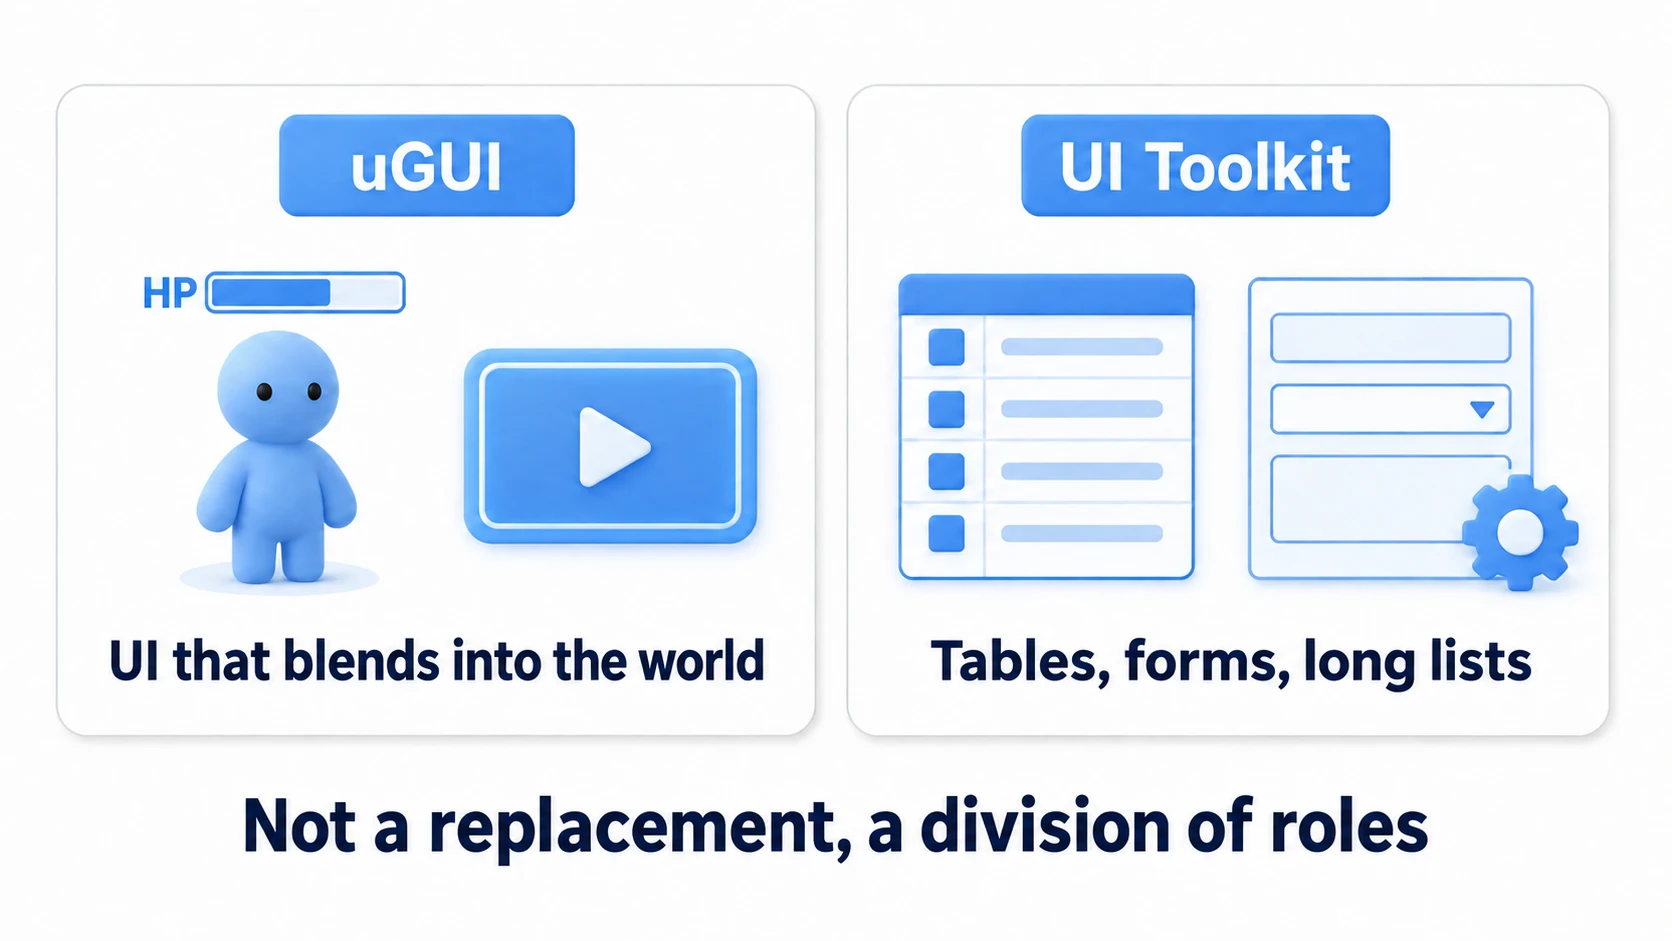
The rule of thumb: HP bars above heads, signs in 3D space, effect-coupled presentation UI → uGUI. Tables like inventories, rankings, and quest logs; forms like settings screens; editor extensions → UI Toolkit. Using both in one game is completely normal.
The parts: UIDocument, UXML, USS
A UI Toolkit screen consists of three file types plus one component. If you've done web work, it's exactly HTML / CSS / JavaScript.
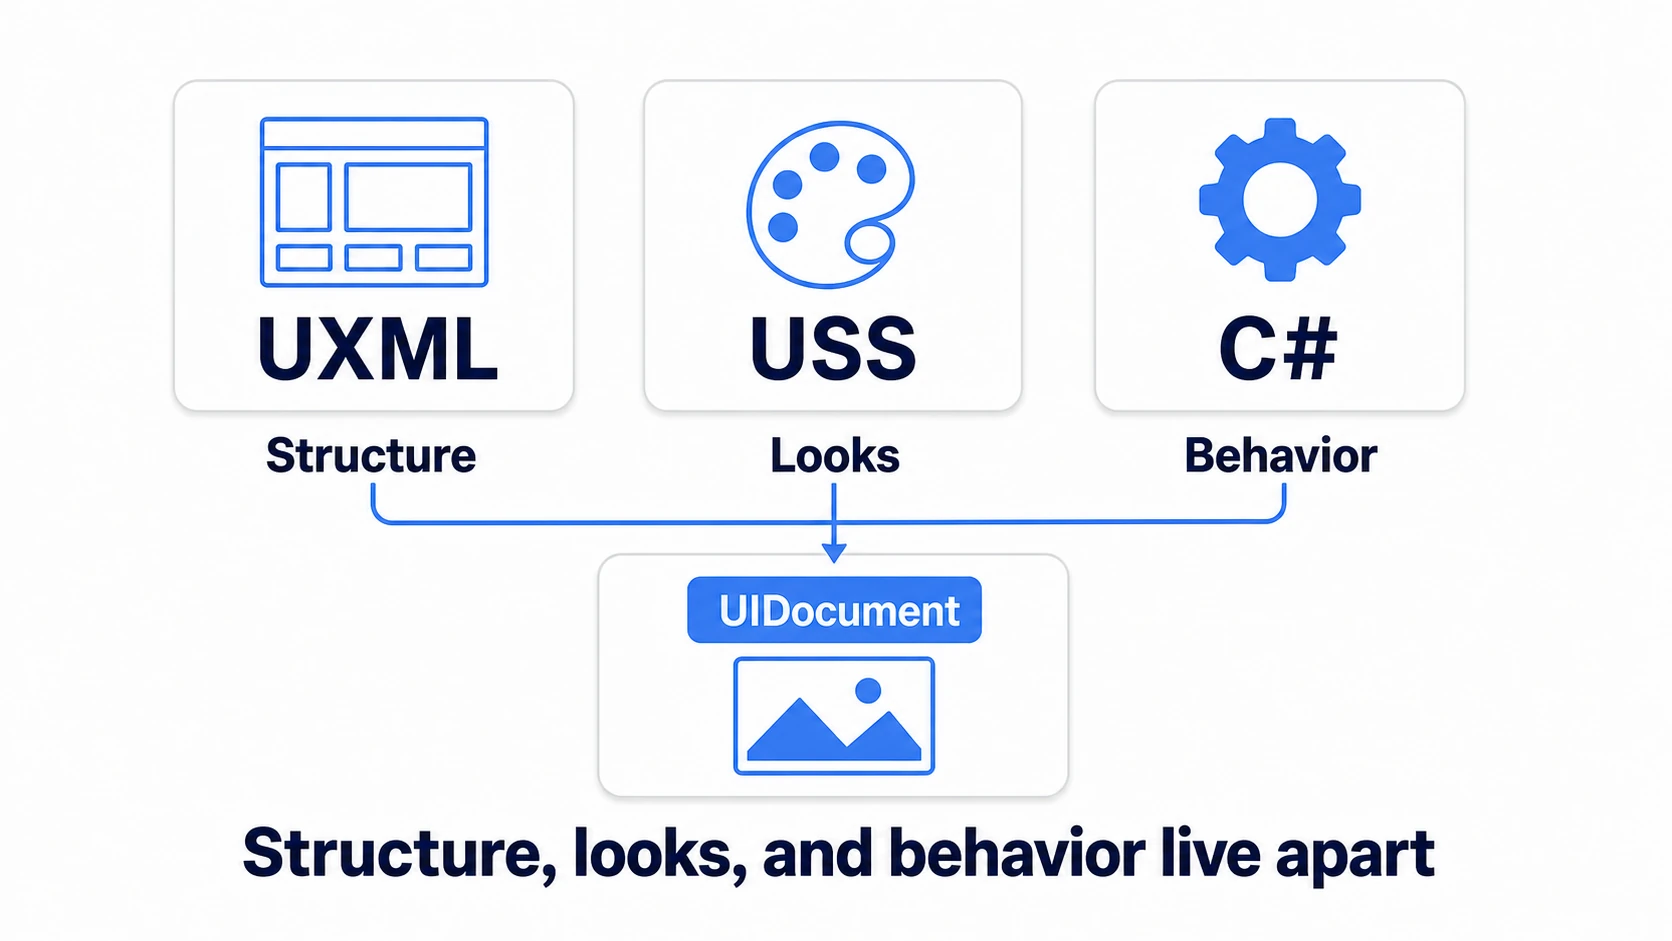
| Part | Role | Web analog |
|---|---|---|
| UXML (.uxml) | Structure: what appears, in what order | HTML |
| USS (.uss) | Appearance: colors, spacing, fonts | CSS |
| C# | Behavior: what happens on click | JavaScript |
| UIDocument | The component connecting them to the scene | — |
Scene setup is minimal: an empty GameObject with a UIDocument component, assigned your UXML (Source Asset) and a Panel Settings asset. No Canvas hierarchy — the screen's structure lives in the UXML file.
Build in UI Builder, grab from C#
You don't hand-write UXML. UI Builder (Window > UI Toolkit > UI Builder) is the visual editor — the Scene-view equivalent for this world. Drag Labels and Buttons from the Library, name and style them in the Inspector.
The magic word for grabbing elements from C# is Q<T>() (Query).
using UnityEngine;
using UnityEngine.UIElements;

public class TitleScreen : MonoBehaviour
{
    [SerializeField] private UIDocument document;

    void OnEnable()
    {
        // Search by name from the UI root (rootVisualElement)
        VisualElement root = document.rootVisualElement;

        Button startButton = root.Q<Button>("start-button");
        Label versionLabel = root.Q<Label>("version-label");

        versionLabel.text = "v" + Application.version;
        startButton.clicked += OnStartClicked;
    }

    void OnStartClicked()
    {
        Debug.Log("Game start!");
    }
}
Notice the decisive difference from uGUI: the Inspector drag-and-drop wiring is gone, replaced by lookup by name. Restructure the UI all you like — as long as names survive, the C# usually needs no changes.
Switch states with USS classes
USS is a rulebook for appearance. You tag elements with classes (name tags like .quest-item) and attach rules to them.
/* QuestLog.uss */
.quest-item {
    padding: 6px 12px;
    color: rgb(230, 230, 230);
}

/* Completed quests: adding one class switches the look */
.quest-item--done {
    color: rgb(120, 200, 120);
    -unity-font-style: italic;
}

/* On hover (pseudo-class) */
.quest-item:hover {
    background-color: rgba(255, 255, 255, 0.08);
}
The C# side knows nothing about visual details — it just toggles classes.
// Toggle the class based on completion (second argument true = add)
questLabel.EnableInClassList("quest-item--done", quest.isDone);
Where uGUI had you writing "change the color" and "change the font" code in C#, here you just pin a state name on the element. Visual tweaks happen entirely in the USS file, and design changes stop touching C# — this is the center of UI Toolkit's design philosophy.
Events, and ListView virtualization
Events come in two flavors: clicked (the Button shortcut) and RegisterCallback (general-purpose). Either way, what you register, you unregister — same etiquette as C# events.
And then there's UI Toolkit's signature move: ListView virtualization.
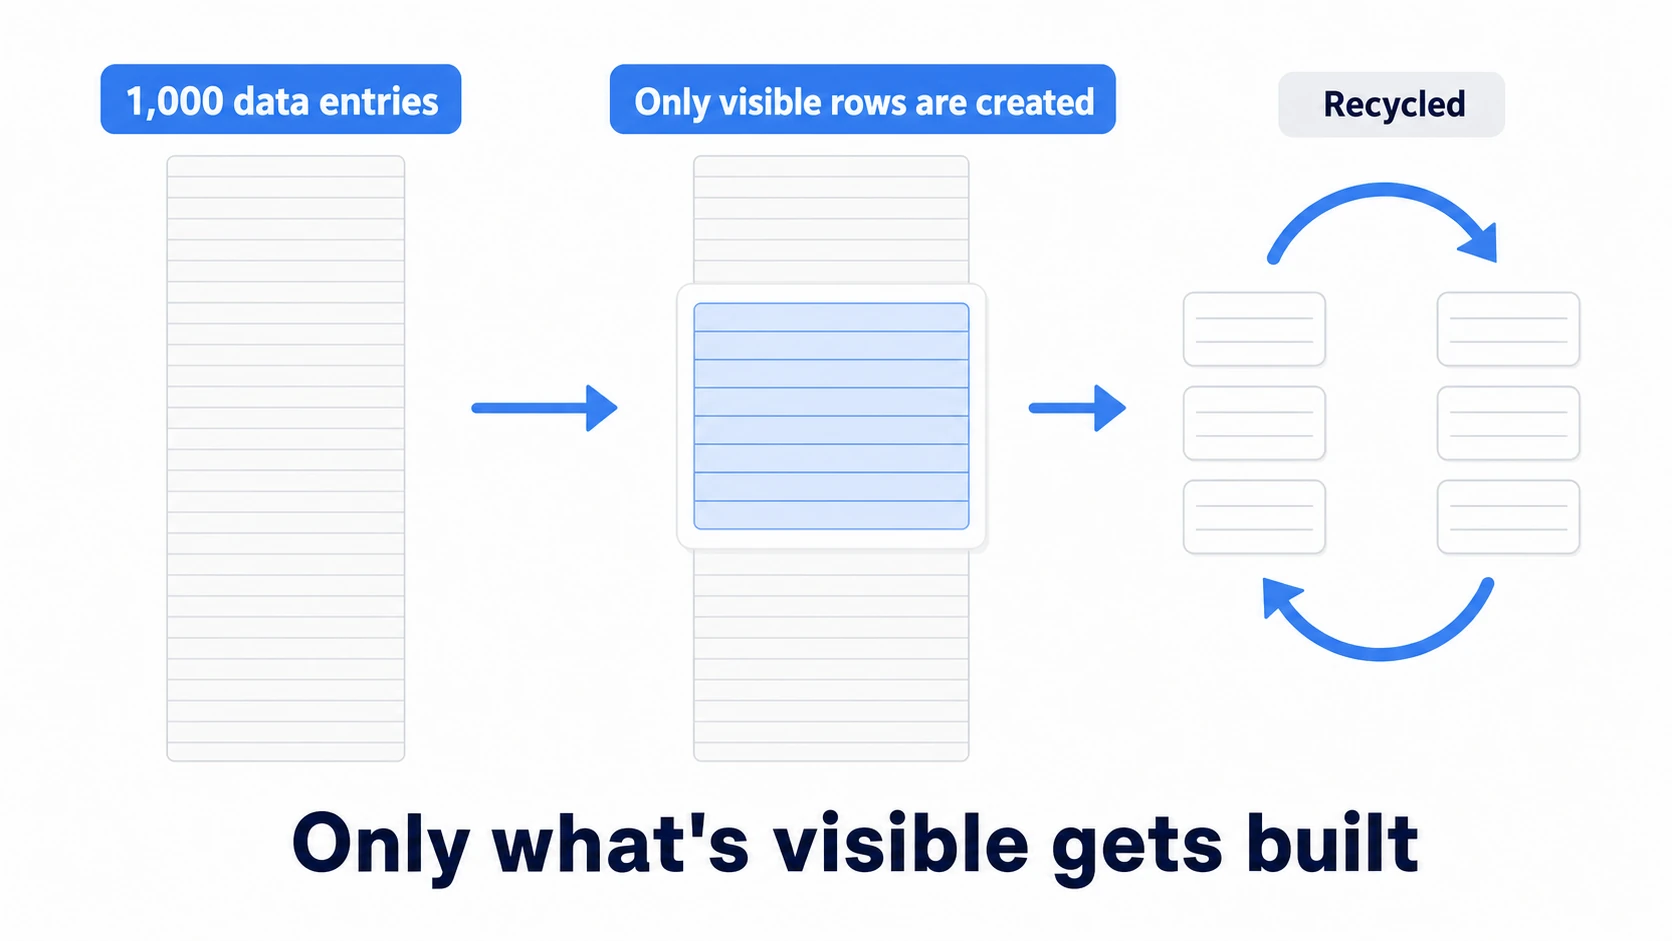
Build a 1,000-item list naively in uGUI and you birth 1,000 GameObjects, babysitting off-screen ones every frame. ListView inverts the idea: it creates only the visible rows (plus a few spares) and swaps their contents as you scroll. A thousand entries or ten thousand — only the visible rows ever exist.
Usage is a three-piece set:
listView.makeItem = () => new Label();        // how to build one row container
listView.bindItem = (element, index) =>       // how to pour item i into a container
{
    ((Label)element).text = quests[index].title;
};
listView.itemsSource = quests;                // the data itself
Teach it "how to build a container" and "how to fill one," and ListView handles creation counts and recycling for you.
Hands-on: build a quest log screen
An RPG quest log, a mission list, an achievements screen — "list on the left, details on selection" is a staple layout of game UI, and the perfect ListView training ground.
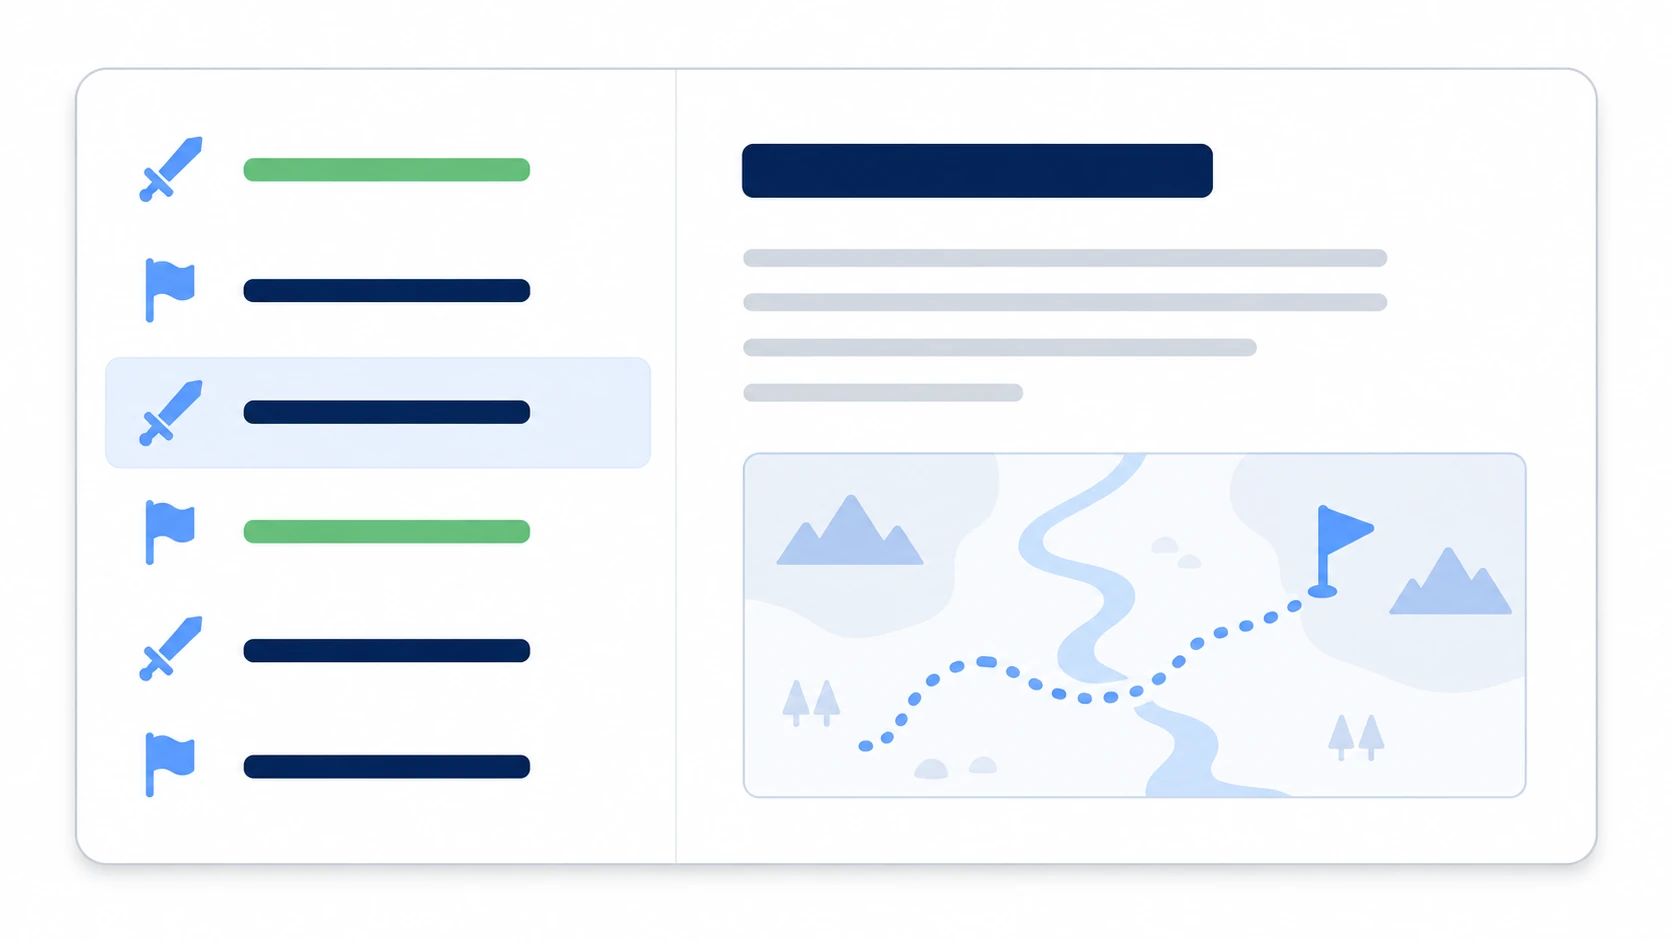
UXML (built in UI Builder — list on the left, detail on the right):
<ui:UXML xmlns:ui="UnityEngine.UIElements">
    <ui:VisualElement name="quest-log" class="quest-log">
        <ui:ListView name="quest-list" class="quest-list" />
        <ui:Label name="quest-detail" class="quest-detail" text="Select a quest" />
    </ui:VisualElement>
</ui:UXML>
C# (pour in the data, react to selection):
using System;
using System.Collections.Generic;
using System.Linq;
using UnityEngine;
using UnityEngine.UIElements;

[Serializable]
public class Quest
{
    public string title;
    public string detail;
    public bool isDone;
}

public class QuestLogScreen : MonoBehaviour
{
    [SerializeField] private UIDocument document;
    [SerializeField] private List<Quest> quests = new List<Quest>();

    private ListView questList;
    private Label questDetail;

    void OnEnable()
    {
        VisualElement root = document.rootVisualElement;
        questList = root.Q<ListView>("quest-list");
        questDetail = root.Q<Label>("quest-detail");

        // The three-piece set: container builder, filler, data
        questList.makeItem = () => new Label();
        questList.bindItem = (element, index) =>
        {
            var label = (Label)element;
            label.text = quests[index].title;
            label.AddToClassList("quest-item");
            // Completed? Pin the state class (USS owns the looks)
            label.EnableInClassList("quest-item--done", quests[index].isDone);
        };
        questList.fixedItemHeight = 32;
        questList.itemsSource = quests;

        // Show details when a row is selected
        questList.selectionChanged += OnQuestSelected;
    }

    void OnDisable()
    {
        // The usual unsubscribe etiquette
        questList.selectionChanged -= OnQuestSelected;
    }

    void OnQuestSelected(IEnumerable<object> selection)
    {
        if (selection.FirstOrDefault() is Quest quest)
        {
            questDetail.text = quest.title + "\n\n" + quest.detail;
        }
    }
}
Register twenty quests in the Inspector and press Play: the list renders, clicking swaps the detail pane, and completed quests turn green italic. Now — bump it to 1,000 quests. Scrolling stays silky. Open the UI Toolkit Debugger (Window > UI Toolkit > Debugger) and look inside the ListView: there are only as many row elements as fit on screen, plus a few spares, not 1,000. That's virtualization.
If the list shows up empty, look in two places: is Q<ListView> returning null before you set itemsSource (does the name in UXML match your C# string exactly?), and does the ListView itself have any height? USS flex-grow starts at 0, so if you wrote the UXML by hand, give the parent (.quest-log) and the ListView (.quest-list) flex-grow: 1, or the rows may not show for lack of height (elements placed in UI Builder sometimes get it automatically).
Two takeaways. C# handles data and state classes only; USS owns the looks. Big lists ride the ListView three-piece set (makeItem, bindItem, itemsSource) and virtualization comes free.
Where uGUI stays
However pleasant UI Toolkit is, you don't migrate everything.
- World Space UI: HP bars above characters, signs placed in 3D, VR interfaces. Runtime UI Toolkit is screen-space-first; world space remains uGUI's World Space Canvas territory (UI Toolkit's world-space support starts in Unity 6.2)
- Effect-coupled UI: particles layered on UI, panels flung around by Animators, 3D models mixed in — cases where being a GameObject is the advantage
- Existing assets: there's rarely a reason to rewrite working uGUI screens. The realistic migration is to start with the next new "table or form" you build
Bonus: things worth knowing early
- Resolution handling lives in Panel Settings: the equivalent of uGUI's Canvas Scaler (Scale With Screen Size) is on the Panel Settings asset. Set a reference resolution, combine with percentage-based USS sizing, and resizing behaves
- Gamepad support is focus design: movement between buttons runs on the focus system. Bolting pad support onto a mouse-first screen hurts — if pads are a target, verify focus traversal as you build
- It's continuous with editor extensions: the UXML, USS, and
Q<T>()you learned here transfer directly to editor extension UI. Practicing runtime UI doubles as practicing tool-building
Summary
- uGUI and UI Toolkit split the work: world-dwelling UI stays uGUI; tables, forms, and big lists go UI Toolkit
- The division: UXML = structure, USS = looks, C# = behavior, connected by UIDocument
- Grab elements with
Q<T>("name")— Inspector wiring becomes name lookup - Switch state visuals by toggling USS classes (
EnableInClassList) - Big lists ride the ListView three-piece set — 1,000 entries, zero extra GameObjects
The next time an inventory or ranking "table" lands on your plate — before you start assembling it in uGUI, remember this quest log. That's UI Toolkit's cue.