"Press Start to jump into the stage," "hit game over and move to the results screen"—your game's flow is built from moving between scenes. And when you try to implement it, you tend to run into walls like "I get a scene-not-found error" or "the screen freezes while loading."
In Unity, moving between scenes is managed by the SceneManager class. This article covers the essential knowledge for scene transitions, from basic loading to asynchronous loading that prevents freezes and lets you show a loading screen.

What You'll Learn
- Why and how to register scenes in Build Settings
- Loading scenes by name or build index with
LoadScene()- Implementing a loading screen (progress bar) with
LoadSceneAsync()- What's really going on when "progress stops at 0.9"
Tested with: Unity 6 (6000.x) / Input System
Adding Scenes to Build Settings
Before you can load scenes from a script, every scene you plan to use must be registered in Build Settings. Skip this step and your scenes may work fine in the editor but throw errors in the actual build because they can't be found.
- Select
File > Build Profilesto open the build settings window. - You'll see a list called
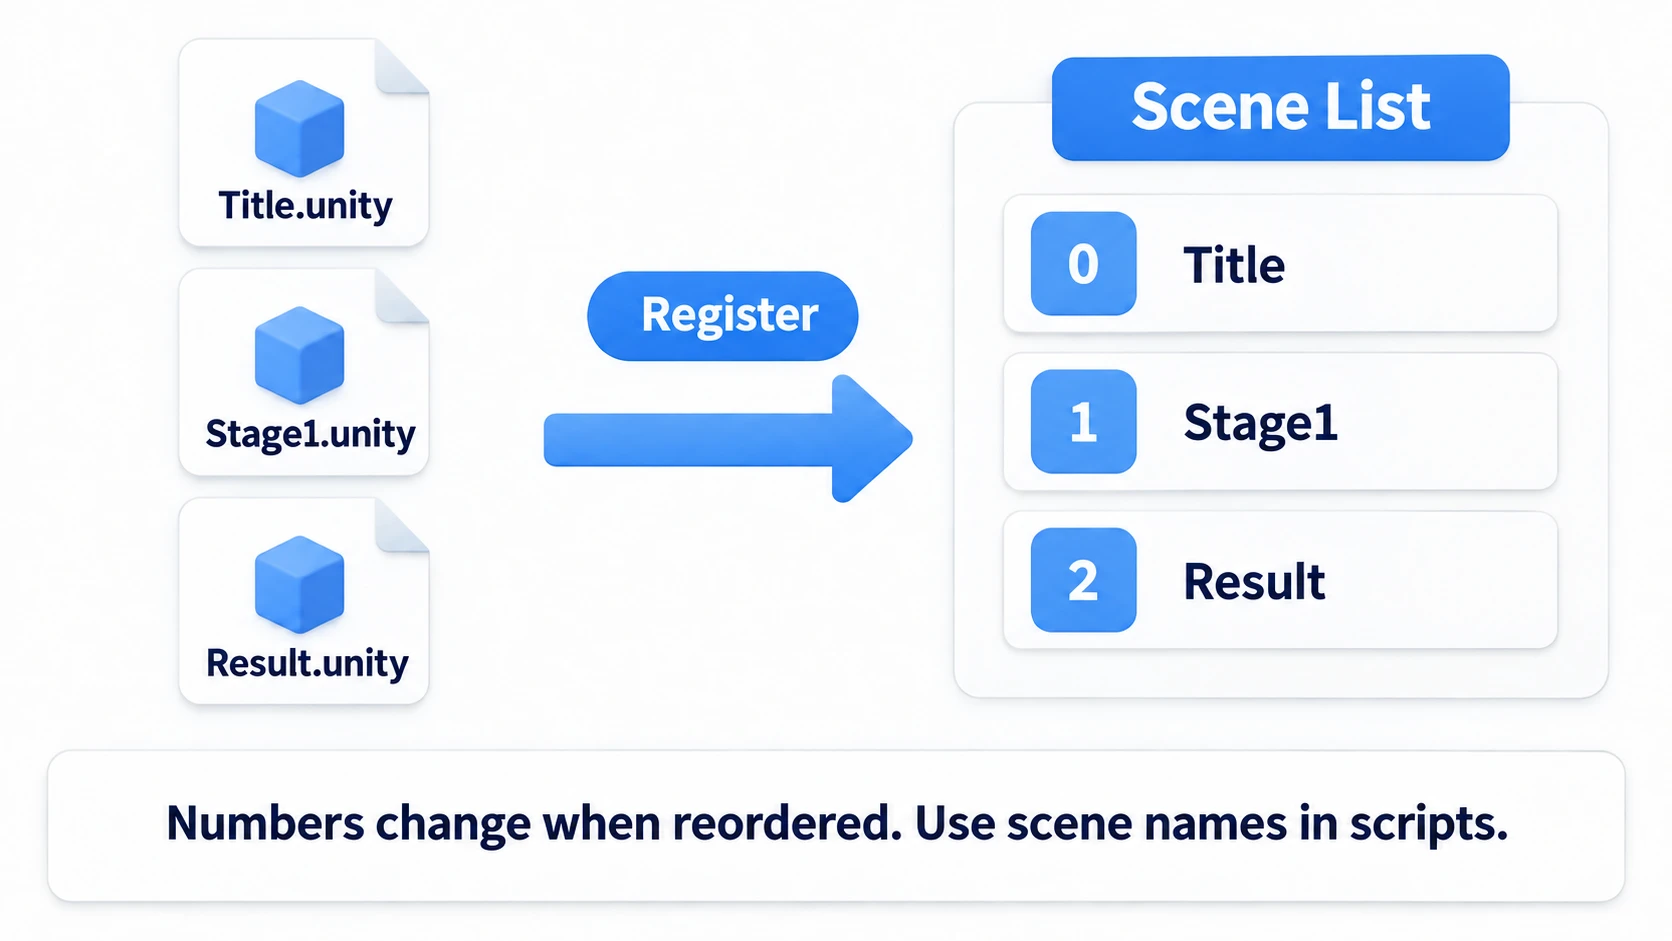
Scene List. - Drag and drop every scene file (
.unity) your game uses from the Project window into this list.
Each scene added to the list is assigned a build index: 0, 1, 2, and so on. You can load a scene from a script using either this index number or the scene file name (without the extension).
Tip: By convention, build index 0 is set to the scene that loads first when the game starts (the title screen or a splash screen).
Note: In Unity 2022 and earlier, this window is
File > Build Settings...and the list is calledScenes In Build. Translate accordingly when following older tutorials; the registration requirement itself is unchanged. Reordering the list changes the numbers, so loading by scene name is safer in scripts.
Basic Scene Loading: LoadScene()
The simplest way to load a scene is the SceneManager.LoadScene() method. To use it, don't forget to add using UnityEngine.SceneManagement; at the top of your script.
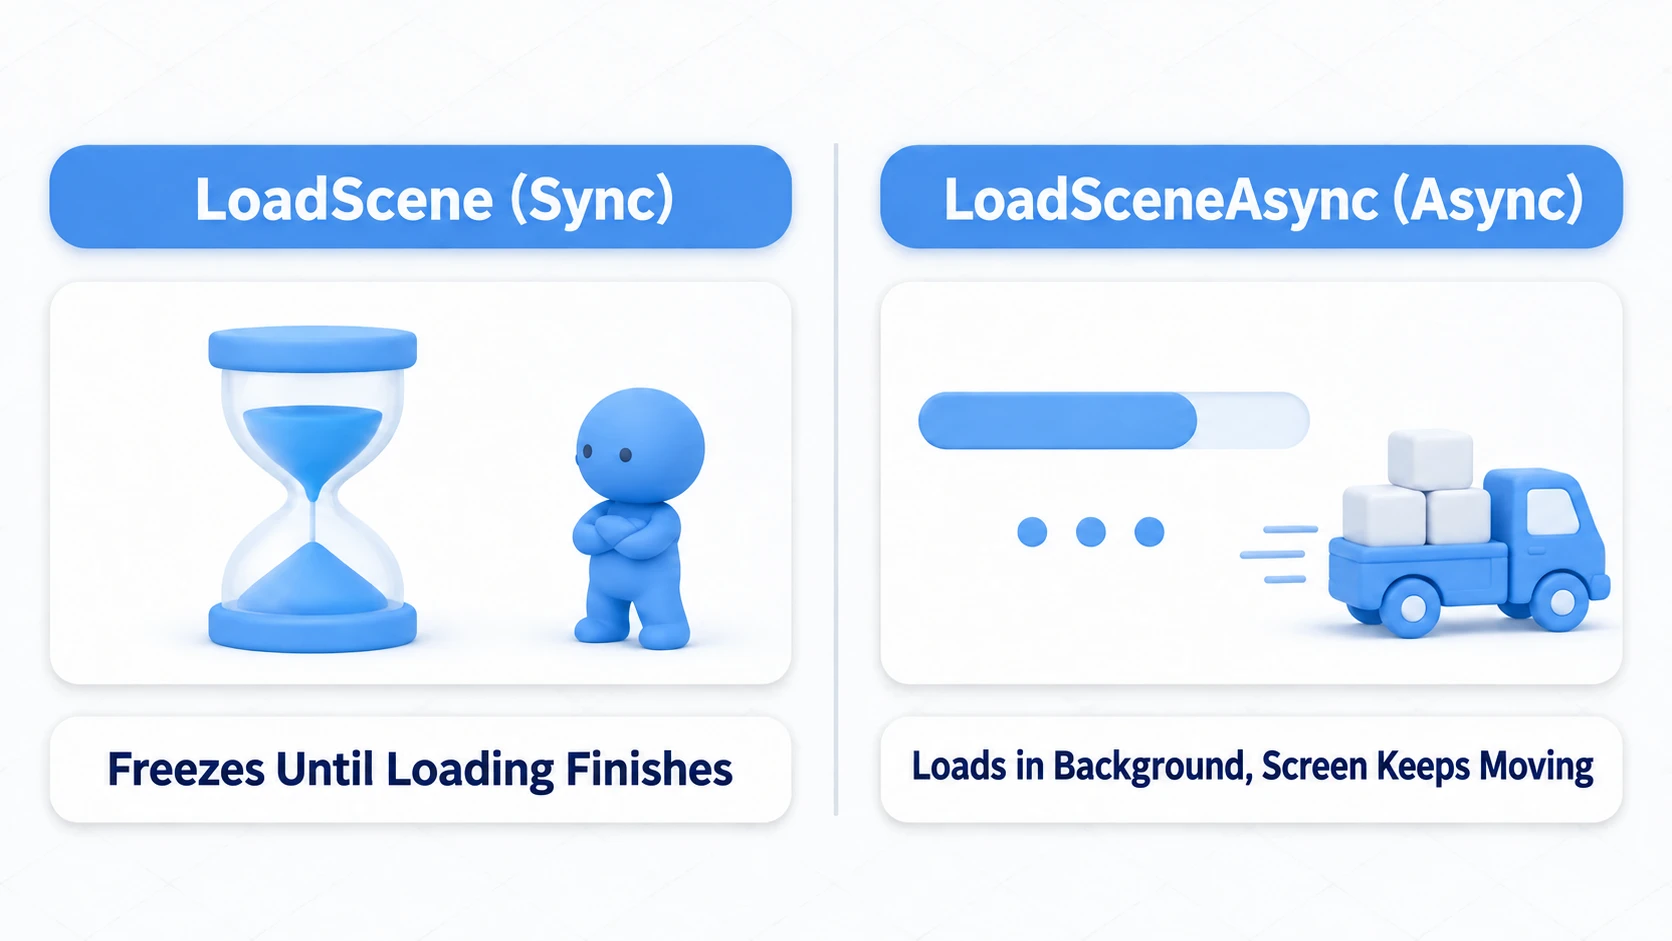
LoadScene() runs synchronously. When you call it, the new scene starts loading on the next frame, and the screen stays frozen until it finishes (the lines right after the call still run in the old scene). For heavy scenes that take a while to load, the game can appear to freeze for a moment.
Loading by Scene Name
using UnityEngine;
using UnityEngine.SceneManagement; // This is required!

public class TitleScreen : MonoBehaviour
{
    public void OnStartButtonClick()
    {
        // Pass the file name of a scene registered in Build Settings as a string
        SceneManager.LoadScene("GameStage1");
    }
}
Loading by Build Index
using UnityEngine;
using UnityEngine.SceneManagement;

public class GameController : MonoBehaviour
{
    public void GoToTitle()
    {
        // Load the scene at build index 0 (the title screen)
        SceneManager.LoadScene(0);
    }
}
Async Loading and Loading Screens: LoadSceneAsync()
To avoid freezing the game and to show players a "loading screen" that tells them something is happening, you need asynchronous scene loading. The SceneManager.LoadSceneAsync() method loads the scene data mostly in the background, letting you keep updating the screen and running effects while it works.
Note: This doesn't mean the game "never stops at all." The final activation step—creating the new scene's objects and running their
Awakecalls—happens on the main thread, so a hitch at the moment of the switch can remain. Async loading isn't magically free; think of it as "a mechanism that keeps your loading screen alive during the heavy wait."
LoadSceneAsync() returns an AsyncOperation object that tracks the loading process. By inspecting this object's properties, you can read the loading progress and detect when loading has finished.
Here's a simple loading screen implementation:
using System.Collections;
using TMPro; // For TextMeshPro
using UnityEngine;
using UnityEngine.SceneManagement;
using UnityEngine.UI; // Required for the Slider

public class LoadingScreen : MonoBehaviour
{
    public Slider progressBar;       // UI slider showing load progress
    public TMP_Text progressText;    // UI text showing the percentage

    private bool isLoading; // Guard against double-loading from button mashing

    public void LoadScene(string sceneName)
    {
        if (isLoading) return; // Ignore repeat presses
        isLoading = true;

        // Start a coroutine to load asynchronously
        StartCoroutine(LoadAsynchronously(sceneName));
    }

    IEnumerator LoadAsynchronously(string sceneName)
    {
        // Start loading the scene asynchronously with LoadSceneAsync
        AsyncOperation operation = SceneManager.LoadSceneAsync(sceneName);

        // Loop until isDone becomes true
        while (!operation.isDone)
        {
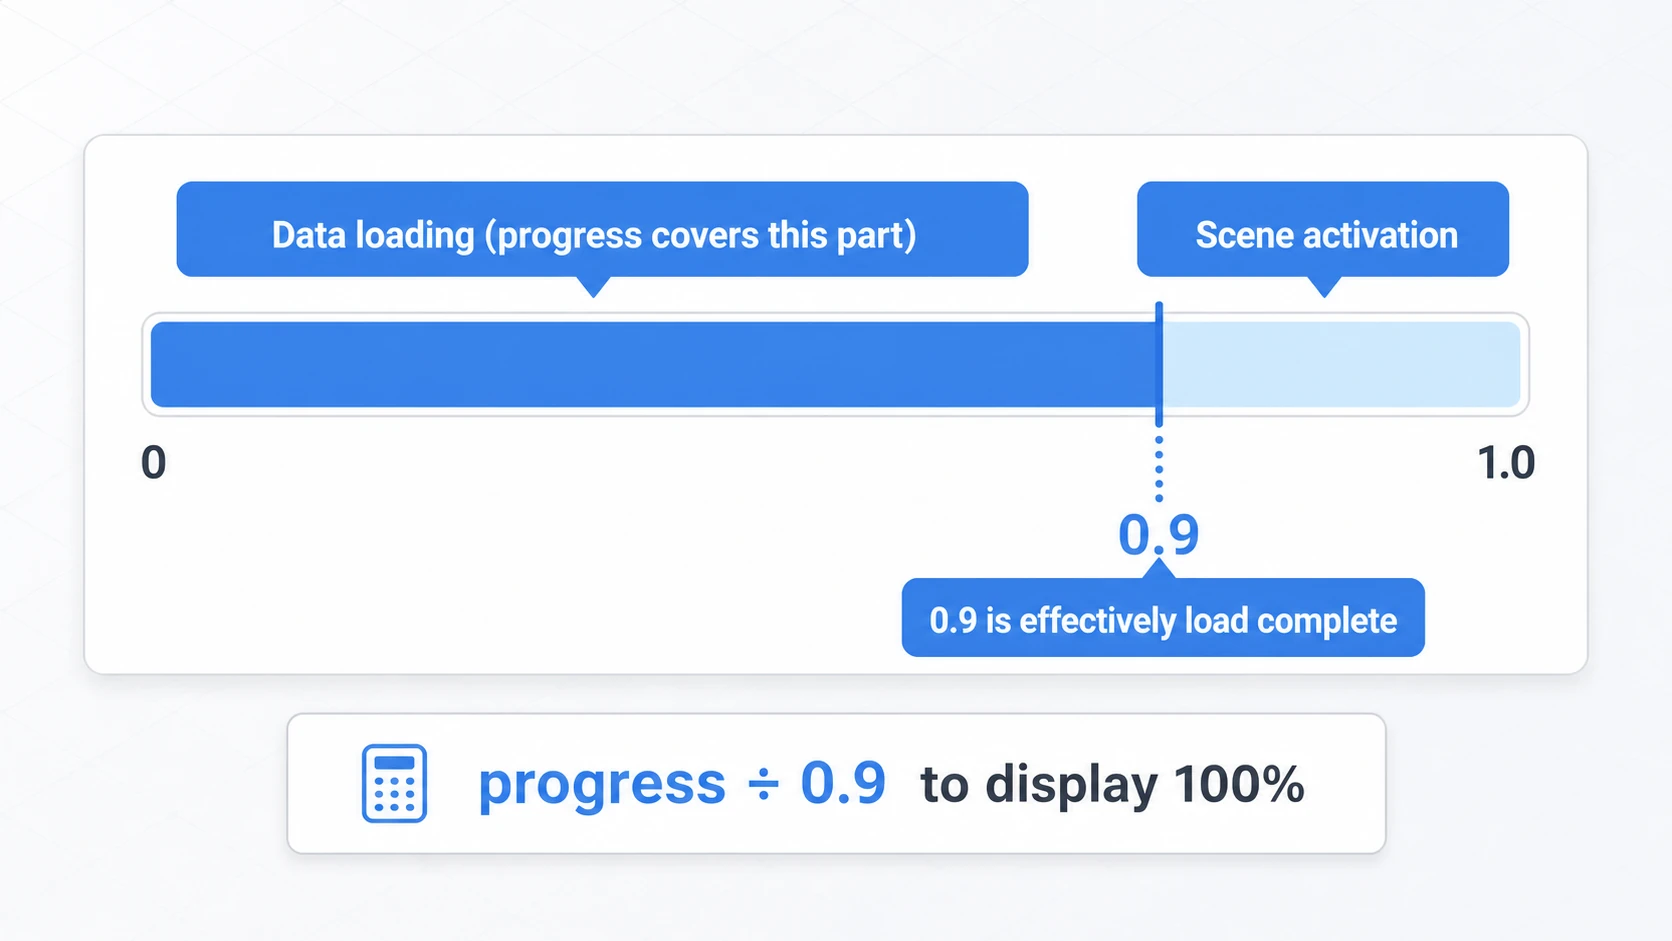
            // progress climbs to 0.9 while loading; the last 0.1 is the switchover (0.9 = loading done)
            float progress = Mathf.Clamp01(operation.progress / 0.9f);

            // Update the progress bar and text
            progressBar.value = progress;
            progressText.text = (progress * 100f).ToString("F0") + "%";

            // Wait one frame
            yield return null;
        }
    }
}
operation.progress returns 0.9 once loading is 90% complete. The actual scene activation (switching what's displayed) happens in the final 10%, so it's common to calculate progress / 0.9f to display 100%.
Holding the Switch Until You're Ready: allowSceneActivation
The place you actually see "progress stuck at 0.9" is when you use allowSceneActivation. Set it to false and the scene won't switch automatically even after the data finishes loading—progress waits at 0.9 (and isDone never becomes true). This is exactly how the classic "loading complete → PRESS ANY KEY to start" flow is built.
IEnumerator LoadWhenReady(string sceneName)
{
    AsyncOperation operation = SceneManager.LoadSceneAsync(sceneName);
    operation.allowSceneActivation = false; // Don't switch automatically

    // Once the data is loaded, progress stops at 0.9
    while (operation.progress < 0.9f)
    {
        yield return null;
    }

    // Show "Ready!" and wait for the player's input
    pressAnyKeyText.SetActive(true);
    // Keys are read with the Input System (add using UnityEngine.InputSystem; at the top of the file)
    while (Keyboard.current == null || !Keyboard.current.anyKey.wasPressedThisFrame)
    {
        yield return null;
    }

    operation.allowSceneActivation = true; // Only now does the scene switch
}
The moment you set allowSceneActivation = true, activation begins, isDone becomes true, and the new scene appears.
Bonus: Good to Know for Later
Once you can implement scene transitions, these are the challenges you'll run into next.
- Carrying data across scenes: Scores and background music normally disappear when you switch scenes. The classic solution is keeping specific objects alive with
DontDestroyOnLoad—covered in the DontDestroyOnLoad article. - Additive mode for "stacking" scenes: With
LoadScene(name, LoadSceneMode.Additive), you can add another scene without destroying the current one. It's an essential technique for keeping a UI scene resident or streaming a huge map in chunks. - More flexible load management: As your project grows, Addressables —a system for centrally managing scene and asset loading—comes into view. The Addressables introduction article gives you an overview.
Summary
Scene transitions are an essential feature for defining your game's structure.
- Use the
SceneManagerclass to move between scenes. - Always add any scene you want to load to Build Settings first.
LoadScene(): Simple synchronous loading. The game stops while loading.LoadSceneAsync(): Advanced asynchronous loading. Essential for loading screens.
While players wait, showing a progress bar or gameplay tips helps reduce the stress of waiting. Get comfortable with LoadSceneAsync to level up your game's user experience.