One of the first things that trips up Unity newcomers is its peculiar worldview: characters, cameras, lights—apparently they're all the same thing, a "GameObject." This is actually the very core of Unity's design philosophy, and once it clicks, the entire editor starts to make sense.
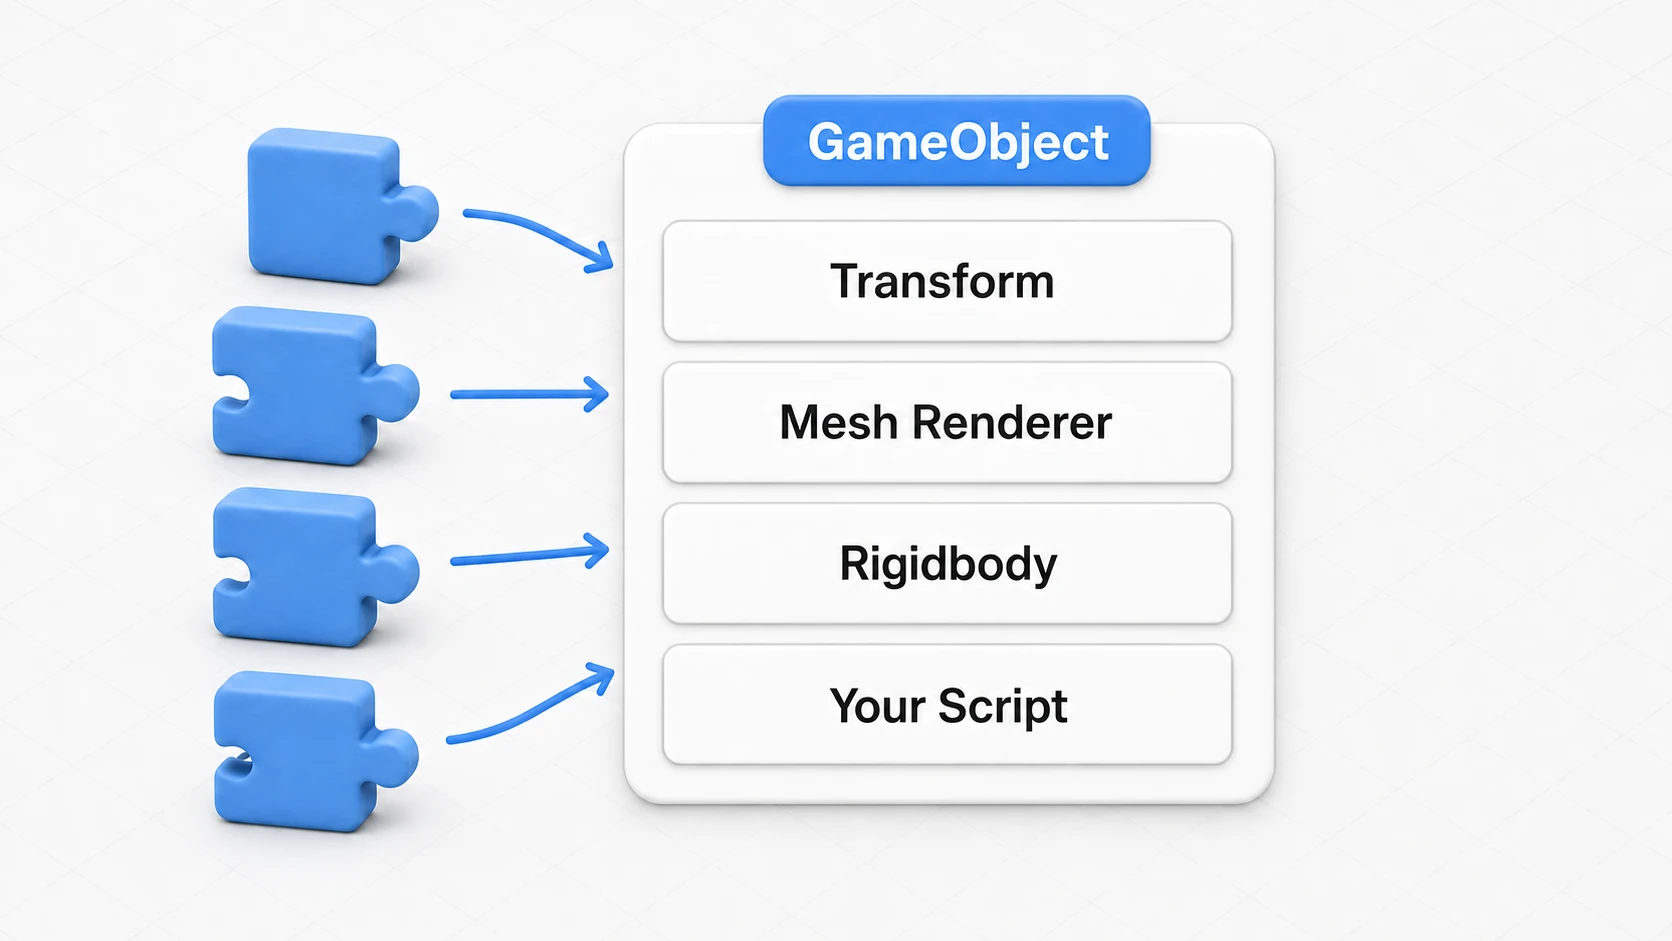
In Unity's world, everything that exists in a scene is called a GameObject, and what gives it movement, functionality, and appearance are Components. Think of a GameObject as an "empty container" or a "model kit body," and Components as the "engine" and "decorative parts" you attach to it. Depending on how you combine the parts, a single object can take on all kinds of roles.

What You'll Learn
- The relationship between GameObjects and components ("container" and "parts")
- What standard objects like Cube really are
- How to run your own scripts as components
- The idea behind component-oriented design
Tested with: Unity 6 (6000.x)
Core Concepts
GameObject
A GameObject is the fundamental building block of Unity scenes. Player characters, enemies, trees, walls, lights, cameras—visible or invisible, everything listed in the Hierarchy window is a GameObject.
However, a freshly created "empty" GameObject can do almost nothing on its own. The only thing it has is the Transform component, the most basic component that manages the object's "Position," "Rotation," and "Scale."
Think of a GameObject as the "foundation" or "container" to which you'll add various functionality.
Component
A Component is a "part" that adds specific functionality to a GameObject. Unity provides numerous built-in components:
- Mesh Renderer: Draws the object's shape (mesh) on screen.
- Rigidbody: Gives the object physical behavior (gravity, collisions).
- Collider: Defines the object's collision detection shape.
- Audio Source: Plays sound from the object.
- Light: Makes the object a light source.
- Camera: Makes the object a camera that renders the game world.
Most importantly, custom C# scripts are also treated as components. You implement unique logic and behavior by creating script components and adding them to GameObjects.
The GameObject is the "container," and you slot component "parts" into it to assemble functionality—here's what that relationship looks like as a diagram.
Implementation
Let's work with GameObjects and Components in the Unity Editor.
1. Creating GameObjects
Right-click in the Hierarchy window and select Create Empty to create an empty GameObject with only a Transform component. This is the purest "container."
Alternatively, selecting 3D Object > Cube creates a cube GameObject. Checking this Cube in the Inspector window reveals these components automatically added beyond Transform:
- Mesh Filter: Specifies the display shape (mesh) as "Cube."
- Mesh Renderer: Draws the shape specified by Mesh Filter.
- Box Collider: Cube-shaped collision detection.
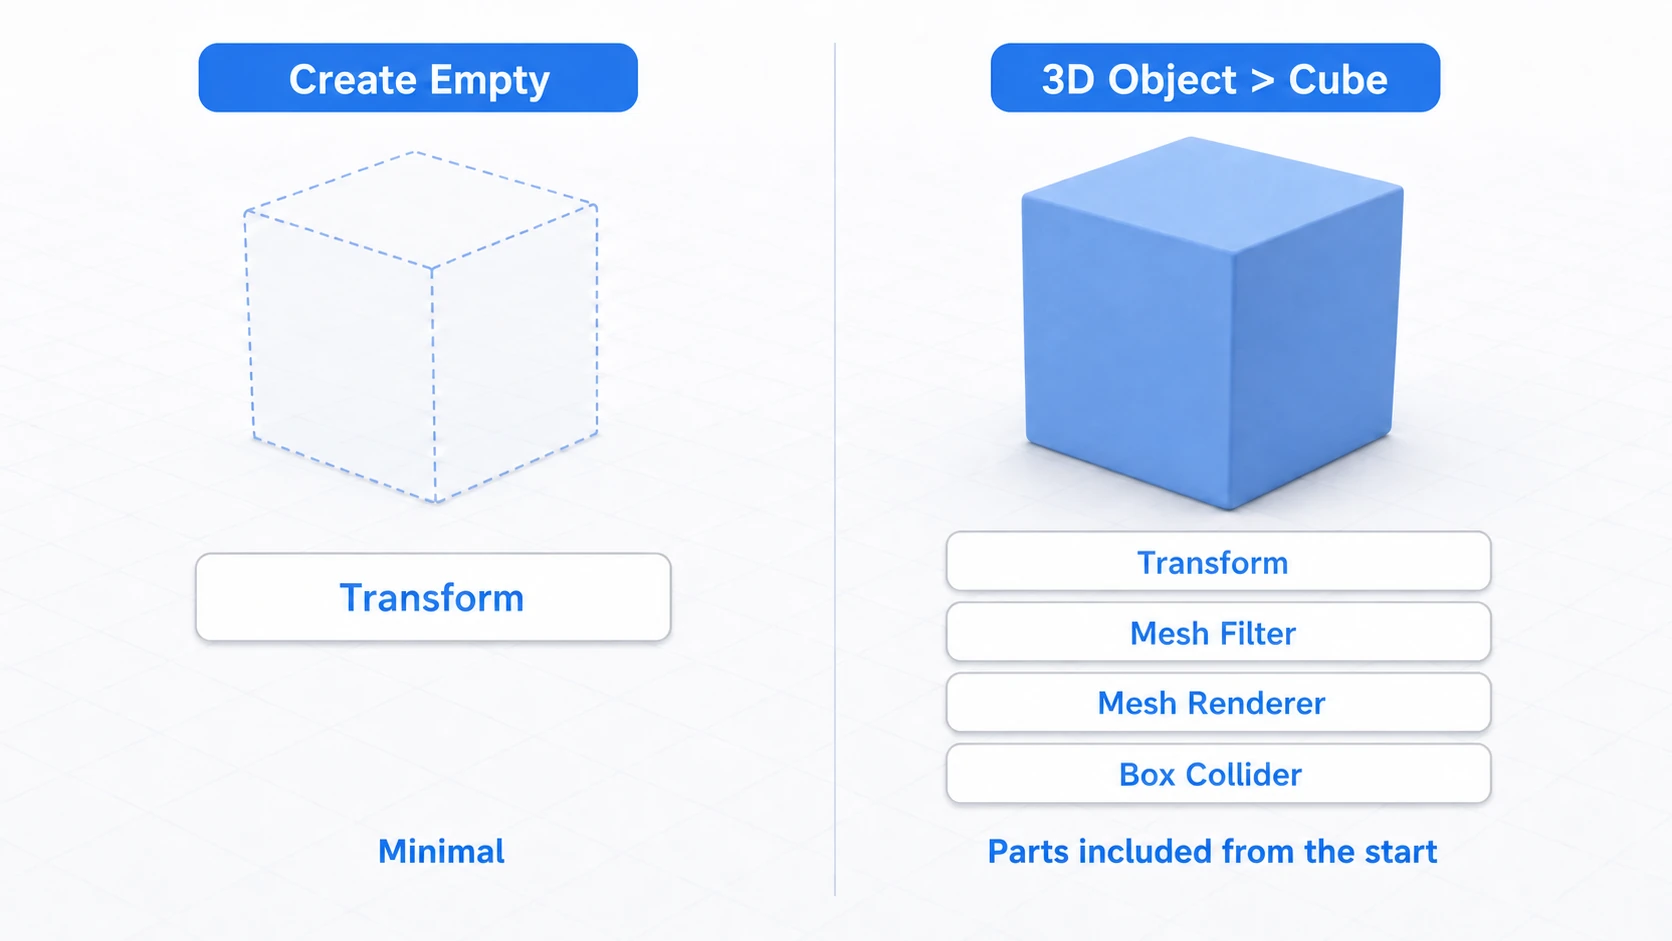
In other words, a "Cube" is nothing special—it's just an empty GameObject with "rendering" and "collision" parts attached from the start. Every object in Unity's creation menus is really a preset bundle of commonly used parts, and thinking of them that way makes everything much clearer.
2. Adding Components
Components can be freely added to give GameObjects new functionality. Let's add physics to our Cube:
- Select the Cube in Hierarchy.
- Click the
Add Componentbutton at the bottom of the Inspector. - Type "Rigidbody" in the search box and select
Rigidbody.
That's it—the Rigidbody component is now attached to the Cube. Play the game and the Cube will fall due to gravity. This is the moment functionality is added through a component. Turning a part off removes just that function. Uncheck Mesh Renderer and the Cube disappears from view, but its Box Collider stays, so it becomes an invisible wall that still blocks things.
3. Adding Script Components
Now let's create a C# script to add custom movement:
- Right-click in the Project window and select
Create > Scripting > MonoBehaviour Script. Type the name "SimpleMover" right away, while the new file is still selected for naming. The class inside is created with the name you type at this moment. - Double-click the script to open it and write:
using UnityEngine;

// Inheriting MonoBehaviour makes this class behave as a Component
public class SimpleMover : MonoBehaviour
{
    public float speed = 5f;

    // Update is called every frame
    void Update()
    {
        // Manipulate the Transform of the GameObject this script is attached to
        // Move right at 'speed' units per second
        transform.Translate(Vector3.right * speed * Time.deltaTime);
    }
}
- Save the code. With Play stopped, remove the
Rigidbodyyou added to the Cube earlier: open the "⋮" menu at the top right of the component and chooseRemove Component. Mixing a physics-driven part with a script that moves the position directly makes the object sink into the floor or jitter. - Drag the
SimpleMoverscript from Project onto the Cube in Hierarchy.
The SimpleMover component is now attached to the Cube. Play the game and the Cube moves to the right. Custom scripts work as components that control GameObject behavior.
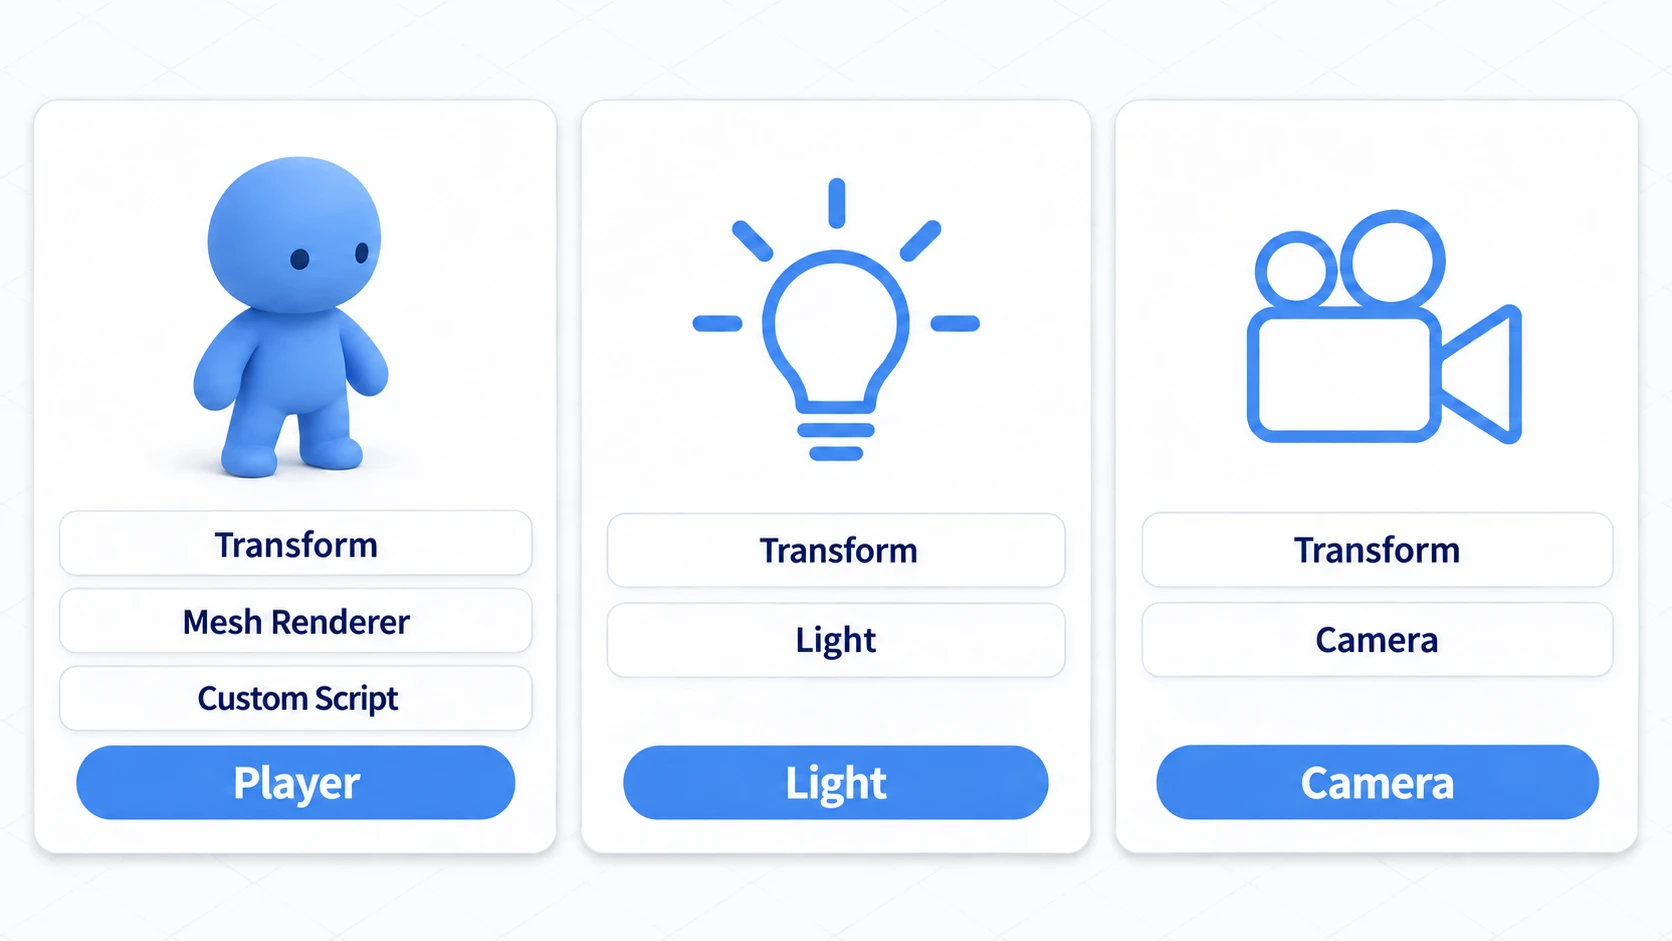
This idea—"the parts you attach decide the role"—applies to every object in an actual game. A player, a light, a camera: the container is the same GameObject in every case. Only the parts inside are different.
Best Practices
- Many Components Can Be Temporarily Disabled: For components that show a checkbox to the left of their name in the Inspector (scripts, Renderers, Colliders, Lights, etc.), unchecking it disables just that component. This is handy for debugging—"is this script causing the problem?" or "I want to turn off collision for a moment." Note that some component types, like Transform and Rigidbody, have no checkbox and can't be disabled. Components you no longer need can be removed via the "⋮" menu in the component's top-right corner and "Remove Component."
- Component-Oriented Design: Unity follows "component-oriented" thinking. Rather than one massive class managing everything, create small, focused components—"movement feature," "attack feature," "HP management"—and combine them to build GameObjects.
- Don't Overload Single GameObjects: If a "Player" GameObject handles movement, attacks, inventory, and UI display, complexity grows quickly. Use child objects to distribute roles—"empty object for holding weapons," "empty object for spawning effects"—making management easier.
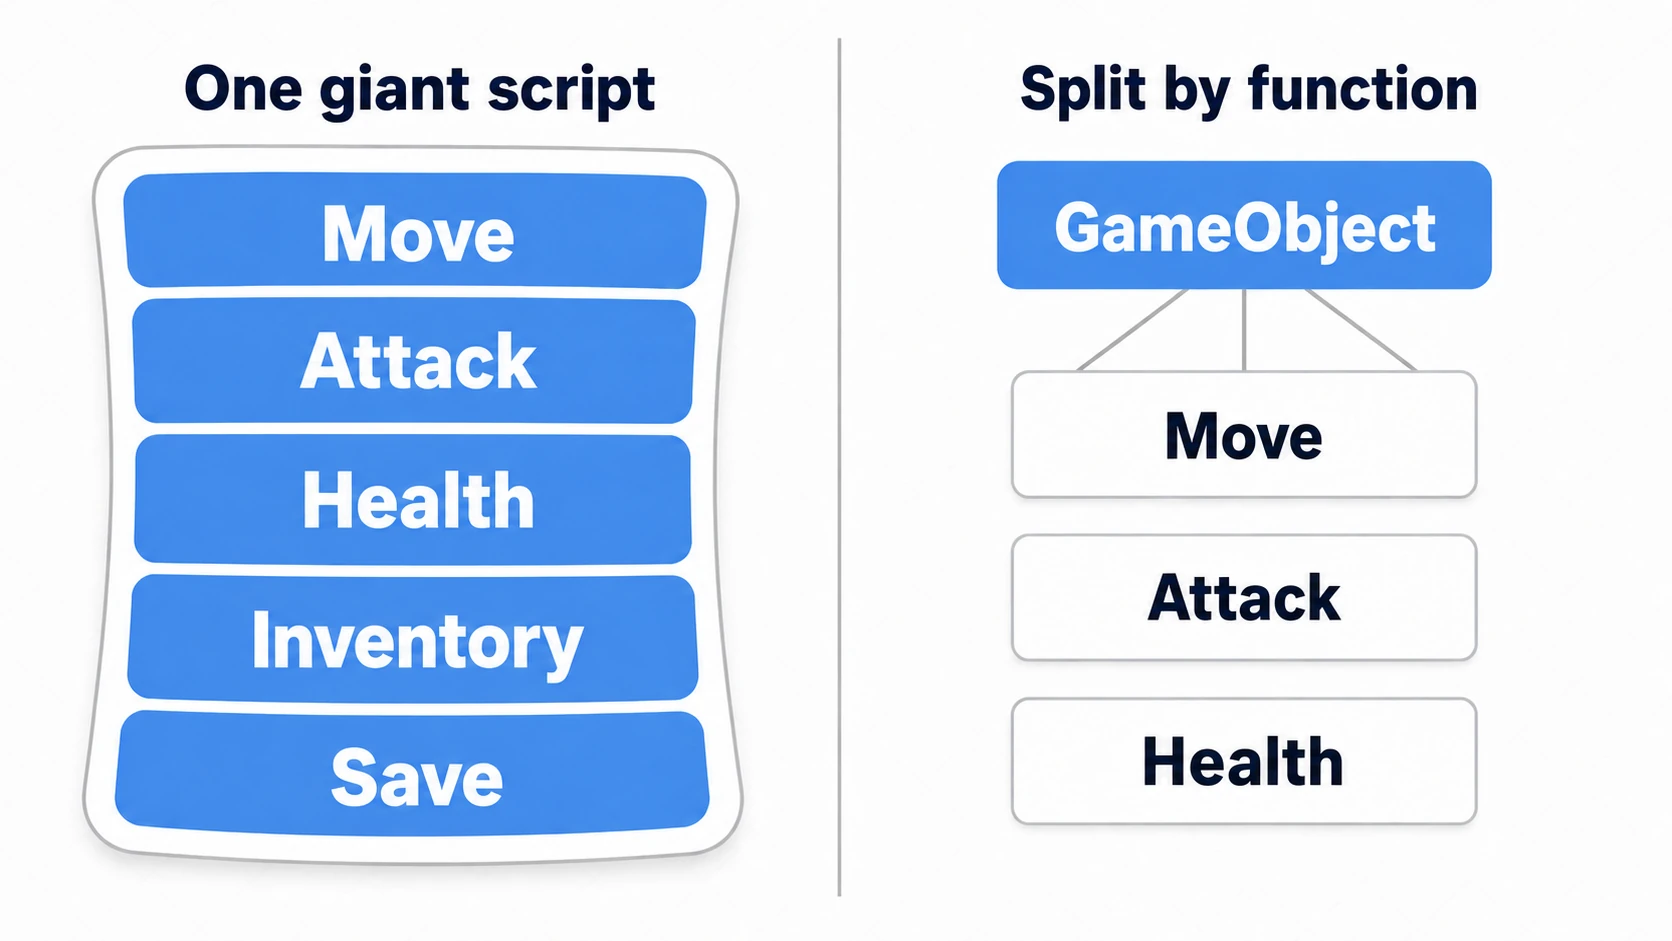
Hands-On: Remix the Same Parts into Three Objects
Let's experience "the combination of parts decides the role" hands-on. A spinning coin in an RPG, a blinking emergency light in a horror game, a rotating illuminated sign in a racing game—different genres, but all three are built by remixing just two tiny parts.
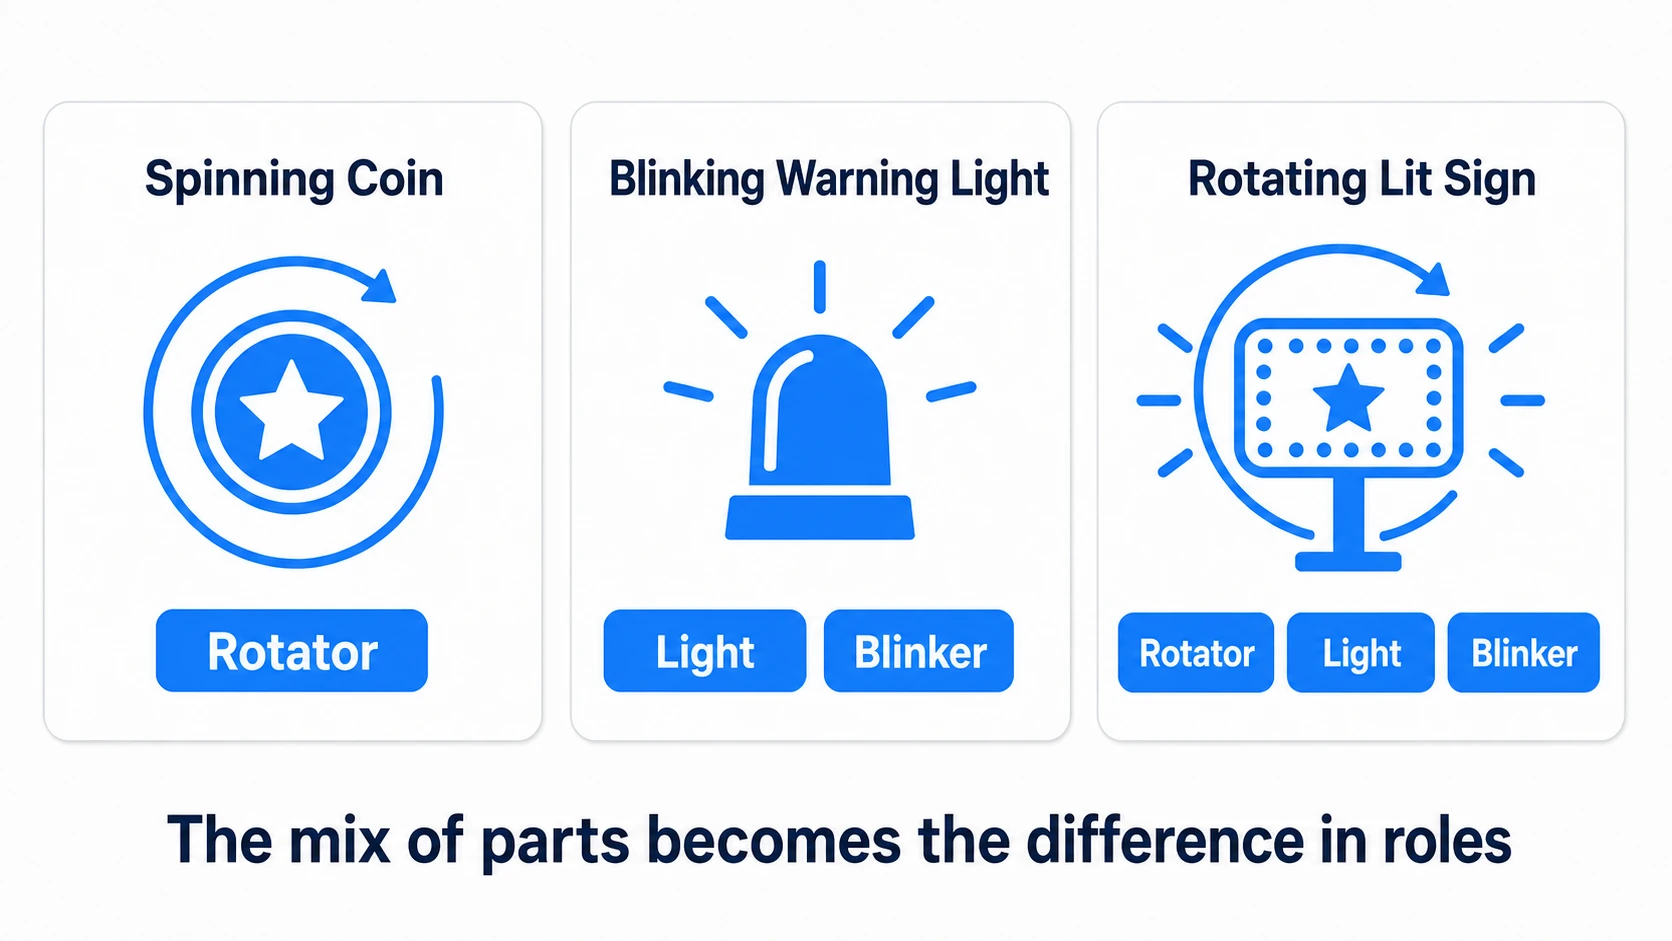
You only need two parts (scripts). The first one "spins":
using UnityEngine;

// A part that rotates the object every frame
public class Rotator : MonoBehaviour
{
    public float speed = 90f; // Degrees of rotation per second

    void Update()
    {
        // Spin around the world's up axis (so a coin standing on its edge spins too)
        transform.Rotate(0f, speed * Time.deltaTime, 0f, Space.World);
    }
}
The second one "blinks." It toggles the Light component on the same object on and off at a fixed interval.
using UnityEngine;

// A part that blinks the Light on the same object at a fixed interval
public class Blinker : MonoBehaviour
{
    public float interval = 0.5f; // Blink interval in seconds

    private Light targetLight;
    private float timer;

    void Awake()
    {
        // Use GetComponent to grab another part on the same object (covered in a later article)
        targetLight = GetComponent<Light>();
    }

    void Update()
    {
        timer += Time.deltaTime;
        if (timer >= interval)
        {
            timer = 0f;
            targetLight.enabled = !targetLight.enabled; // Toggle enabled/disabled
        }
    }
}
Now just remix the parts on the container (GameObject) side. Put down a 3D Object > Plane as a floor first, so you can see the lights blinking on it.
- Spinning coin: flatten a
3D Object > Cylinderwith Scale (1, 0.05, 1), stand it up with Rotation X = 90, and place it at Position (-3, 1, 0). AddRotator→ a spinning coin, done - Blinking emergency light: place a
Create Emptyat Position (0, 1, 0) and add aLight(Type Point, Intensity 3) andBlinker→ a warning lamp that flickers at a fixed interval, done - Rotating illuminated sign: shape a
3D Object > Cubeinto a sign with Scale (2, 1, 0.1), place it at Position (3, 1, 0), and add all three—Rotator,Light(same settings as the emergency light), andBlinker→ a sign that spins while blinking, done
The coin makes a full turn every 4 seconds and looks like a thin line for a moment when it faces sideways. A light brightens its surroundings, so it's the floor that blinks, not the face of the sign. Intensity is set to 3 because at the default of 1 the blinking gets lost in the scene's Directional Light.
Try two things while still in Play mode (everything goes back when you stop Play). Uncheck the box to the left of the sign's Rotator name: only the spinning stops, and the blinking continues. Check it again and add a second Rotator to the sign: the two Rotators add rotation around the same axis, so it turns 180 degrees per second and makes a full turn in 2 seconds. You haven't changed a single line of code.
Two takeaways: "make one part per function" (because "spin" and "blink" aren't crammed into a single script, you can combine them freely), and "the difference in roles is decided by the combination on the container side" (no need to write separate scripts for the coin and the sign—the same Rotator works in both). That satisfying click is the essence of component-oriented design.
Troubleshooting
| Symptom | Cause | Fix |
|---|---|---|
| Your script doesn't show up in Add Component, or won't attach when dragged | A red compile error remains in the Console (even one in an unrelated file) | Fix every error in the Console, then attach it |
You changed speed = 5f in code, but the Inspector still shows the old number | A component that's already attached uses the value saved in the Inspector | Choose Reset from the "⋮" menu at the top right of the component to get the code's default back |
| Values you changed in the Inspector during Play go back when you stop | Changes made during Play are undone when you stop | Stop Play first, then change them |
MissingComponentException after adding Blinker | There's no Light on the same GameObject | Add a Light to the same object |
Bonus: Good to Know for Later
Once the "container and parts" mindset has clicked, these are the natural next steps. None of them are must-know material right now, but knowing the names will keep you from getting lost later.
- Want to mass-produce an assembled object? Save a fully assembled GameObject as a Prefab and you can duplicate and reuse it as many times as you like. Anything that shares the same setup—enemies, bullets, and so on—should be a Prefab. See the Prefabs article.
- Want your parts to talk to each other? To access another part on the same object (like a Rigidbody or Collider) from a script, use
GetComponent. You'll use it constantly in component-oriented development. See the GetComponent article. - Too many objects to keep track of? When you need to handle "only the enemies" or collide "only with the ground," classify objects with tags and layers. The Layers and Tags article covers this.
- Want to put the parts together into one game? The Beginner Capstone builds a one-screen coin game from start to finish.
Summary
GameObjects and Components are the foundation of Unity development. Understanding their relationship is the first step to mastering Unity.
- GameObject: The "container" that serves as the foundation for everything in scenes.
- Component: The "parts" that give GameObjects functionality and behavior. Custom scripts are also components.
- Component-Oriented: Build complex objects by combining small, focused components.
Start by experimenting in the Editor—add various components to GameObjects and observe the changes.