Moving smoothly in every direction with WASD, sprinting with Shift, and attacking with just the upper body while running — the movement we take for granted in 3D action games is actually a combination of several techniques.
8-way movement comes from a 2D Blend Tree, per-body-part animation from Avatar Masks, and who drives movement from the Root Motion setting. This article covers this trio of 3D-specific techniques for developers who have moved past the Animator Controller basics.
What You'll Learn
- Reusing animations (retargeting) with Humanoid rigs and Avatars
- Building 8-way movement (forward/back + strafing) with a 2D Blend Tree
- Smoothing sudden input changes with the dampTime argument of
SetFloat- Creating "attack while running" with Layers and Avatar Masks
- Root Motion — deciding whether animation or script drives movement
- Bringing all three together in one character — strafing in 8 directions while shooting from the upper body
Tested with: Unity 6 (6000.x)
Prerequisites: The Animator Controller basics (States, Transitions, Parameters, 1D Blend Trees) are covered in Animator Controller Basics. If state machines are new to you, start there.
- Humanoid Rigs and Avatars: How Animation Reuse Works
- Building 8-Way Movement with a 2D Blend Tree
- Controlling It from Script with dampTime
- Moving Only the Upper Body with Layers and Avatar Masks
- Root Motion: Who Drives the Movement?
- Hands-On: Move in 8 Directions While Shooting from the Upper Body
- Bonus: Good to Know for Later
- Summary
Humanoid Rigs and Avatars: How Animation Reuse Works
The first thing to understand about animating 3D characters is that you don't have to make your own animations — you can reuse ones made by others. What makes that possible is the Humanoid rig and the Avatar system.
When you set Animation Type to Humanoid on the Rig tab of a model's import settings, Unity generates an Avatar asset that maps the model's skeleton onto a standardized humanoid bone structure. Through this shared "humanoid blueprint," you can reuse animations between characters with completely different body proportions (retargeting).
A "walk" bought from the Asset Store on your own character, a Mixamo "attack" on your teammate's — retargeting is the foundation that solves the sheer volume problem of 3D game development. For a deeper look at how it works, see the 3D model import article.
Building 8-Way Movement with a 2D Blend Tree
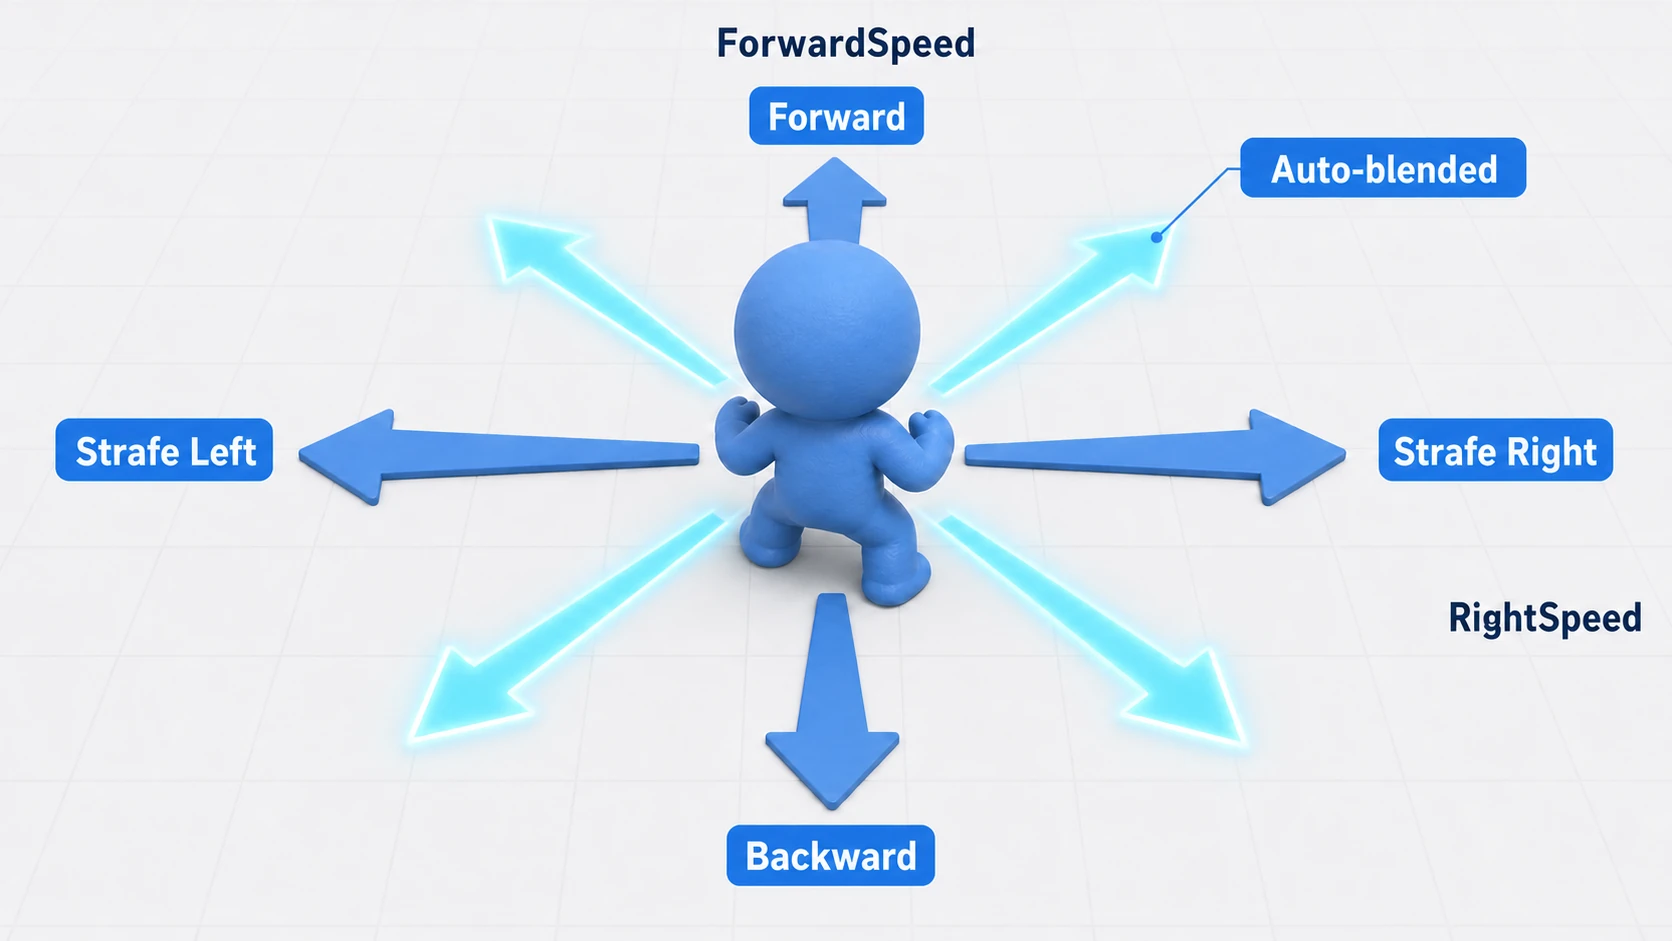
For a straight-line progression like "Idle → Walk → Run," a 1D Blend Tree with a single parameter is all you need (see the basics article). But the "move sideways or backward while facing forward" (strafing) common in TPS and RPG games needs two axes: forward/back and left/right. This is where the 2D Blend Tree comes in.
Setup Steps
- In the
Parameterstab, create twoFloatparameters:ForwardSpeed(forward/back) andRightSpeed(left/right). - Right-click an empty area in the Animator window →
Create State > From New Blend Tree. Double-click it to enter edit mode. - In the Inspector, change
Blend Typeto2D Freeform Cartesianand set theParametersto X =RightSpeed, Y =ForwardSpeed. - Use
Add Motion Fieldto place animations at their coordinates.
| Coordinates (X, Y) | Animation |
|---|---|
| (0, 0) | Idle |
| (0, 0.5) | Walk Forward |
| (0, 1) | Run Forward |
| (1, 0) | Strafe Right |
| (-1, 0) | Strafe Left |
| (0, -0.5) | Walk Backward |
Now the animations surrounding the "coordinate" indicated by the two parameter values are blended automatically. ForwardSpeed = 0.75 gives you a brisk walk mixing walk and run; (0.5, 0.5) becomes "moving diagonally forward-right." You don't need dedicated diagonal animations — the blend interpolates between the vertical and horizontal ones for you, and that's the real power of 2D Blend Trees.
Controlling It from Script with dampTime
The script's only job is to feed input into the two parameters. The key detail here is dampTime, the third argument of SetFloat (pass Time.deltaTime as the fourth). Attach the script to the same GameObject as the Animator. Also note that the code in this article uses the legacy Input Manager (the Input class). In a new Unity 6 project, set Edit > Project Settings > Player > Other Settings > Active Input Handling to Both and restart the editor, or it stops with an exception.
using UnityEngine;

[RequireComponent(typeof(Animator))]
public class CharacterAnimatorController : MonoBehaviour
{
    private Animator animator;

    // Hashing parameter names is faster and guards against typos
    private static readonly int ForwardSpeedHash = Animator.StringToHash("ForwardSpeed");
    private static readonly int RightSpeedHash = Animator.StringToHash("RightSpeed");

    void Start()
    {
        animator = GetComponent<Animator>();
    }

    void Update()
    {
        float right = Input.GetAxis("Horizontal");   // A/D keys: -1.0 to 1.0
        float forward = Input.GetAxis("Vertical");   // W/S keys: -1.0 to 1.0

        // With a dampTime of 0.1s, the value smoothly follows the target
        animator.SetFloat(ForwardSpeedHash, forward, 0.1f, Time.deltaTime);
        animator.SetFloat(RightSpeedHash, right, 0.1f, Time.deltaTime);
    }
}
The instant you release a key, the input snaps from 1.0 to 0.0 — but with dampTime set, the parameter decays smoothly over 0.1 seconds. The reason "run → sudden stop" reads as a natural deceleration instead of an abrupt pop is this one small extra step.
Moving Only the Upper Body with Layers and Avatar Masks
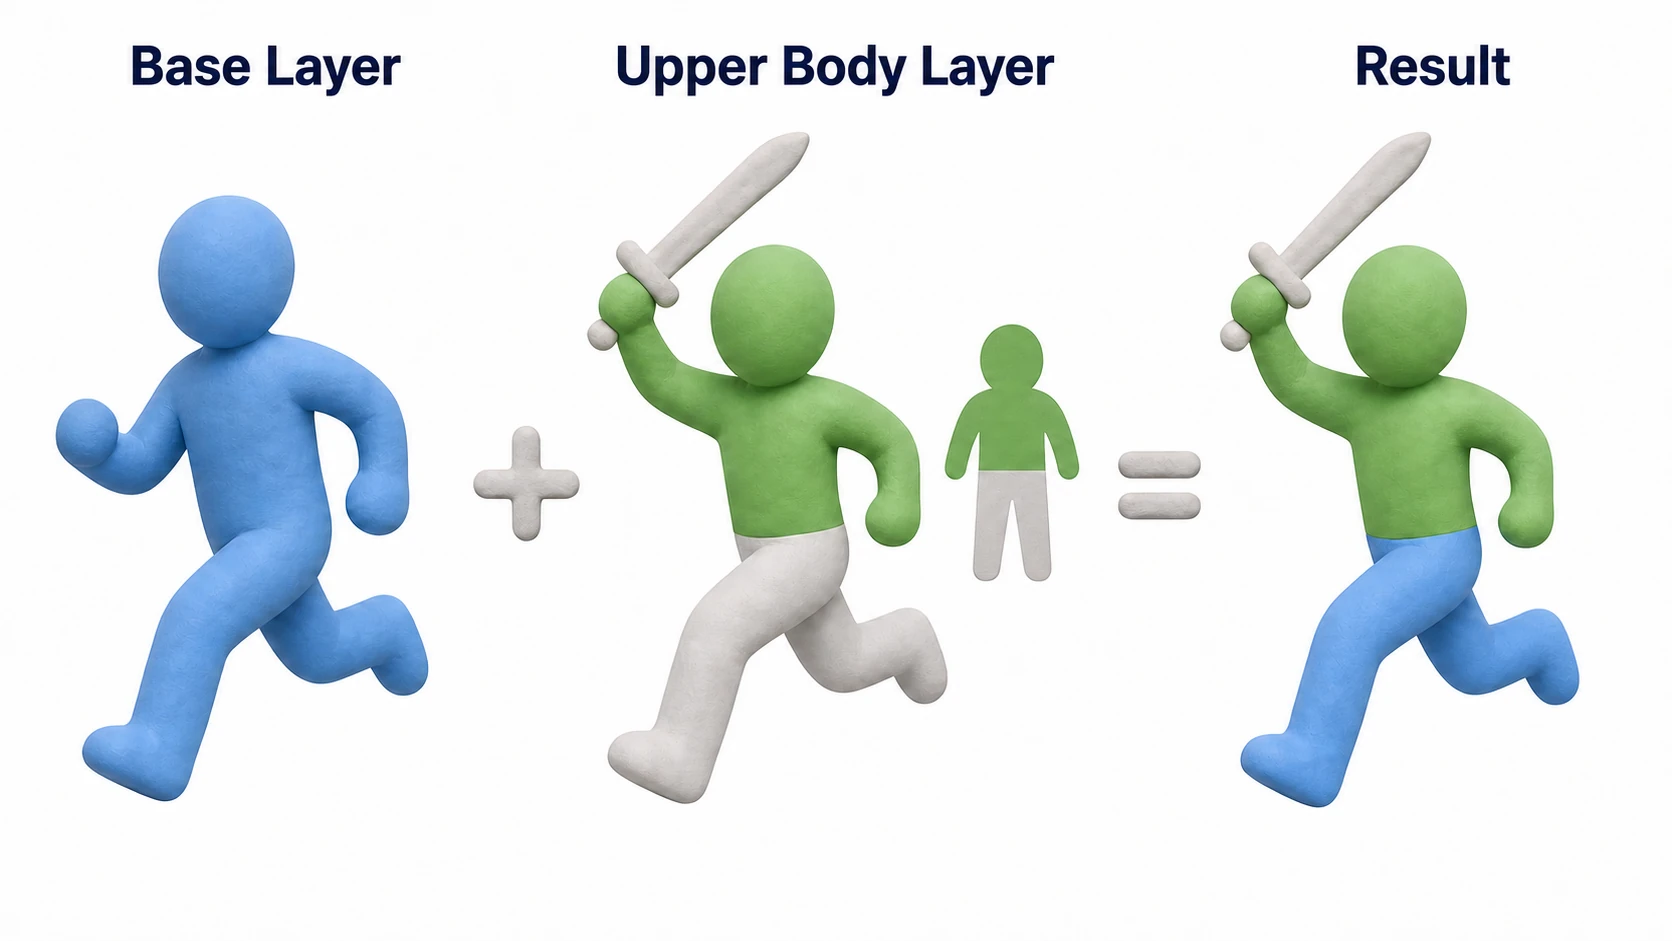
"Reload while running," "wave while walking" — when you want the lower body and upper body to play different animations at the same time, combine Layers with an Avatar Mask.
Steps
- Right-click in the
Projectwindow →Create > Avatar Mask. In the humanoid diagram, enable only the upper body (green). - In the Animator window's
Layerstab, click+to add a new layer (e.g.UpperBody). - Click the layer's gear icon, assign your Avatar Mask to
Mask, and setWeightto1. - Leave
BlendingonOverride(the layer's animation overwrites the base) — that's the standard choice.Additiveis a special-purpose mode that adds a delta on top of the existing motion.
Now the Base Layer handles the lower body's run while the UpperBody layer handles the upper body's attack, and the two animations are composited on a single character. In FPS, TPS, and action RPGs, this technique is practically mandatory.
Root Motion: Who Drives the Movement?
Apply Root Motion on the Animator component is the switch that decides who actually moves the character.
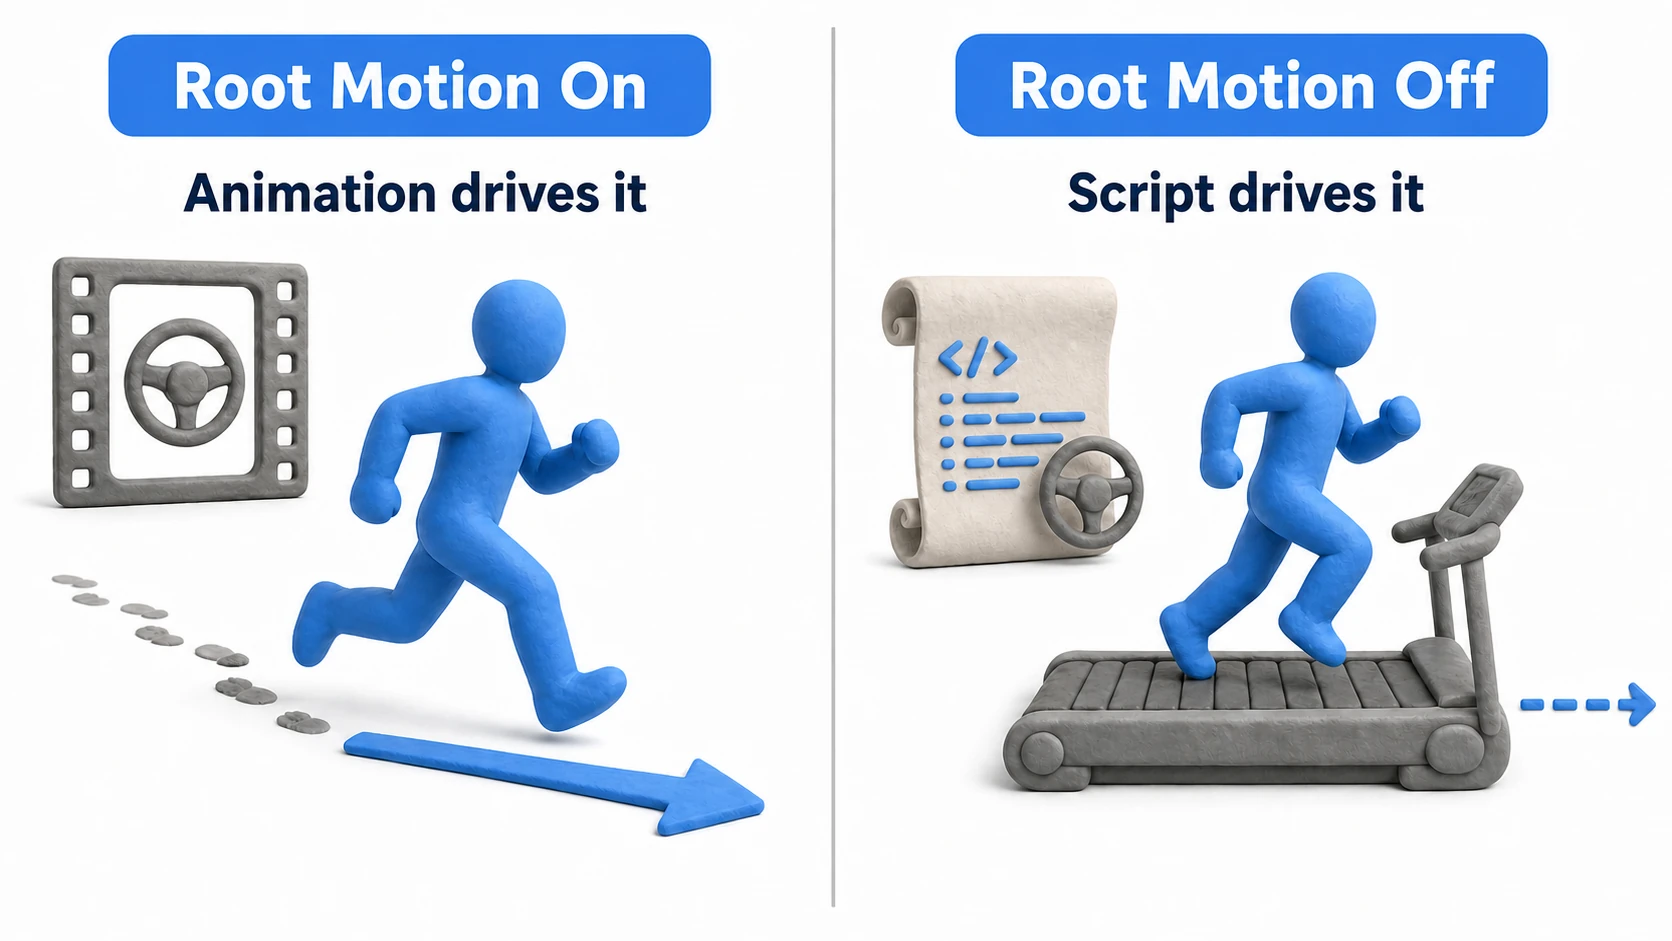
- On (Root Motion): The movement and rotation baked into the animation are applied directly to the character. Since the motion and the distance traveled match perfectly, it suits motion-driven actions like attack lunges and dodge rolls.
- Off (script-driven): The animation plays in place, and movement is handled by script via
CharacterControllerorRigidbody. Movement speed can be tuned freely on the game-design side, making it the right fit for games where you want fine control over game feel.
The decision comes down to one line: "Does the motion decide the movement distance, or does the game logic?" If both drive movement, it gets applied twice and the character slides or flies off — always hand control to exactly one side.
Hands-On: Move in 8 Directions While Shooting from the Upper Body
To wrap up, let's integrate this article's three techniques into one character. A TPS protagonist, a top-down ARPG gunner, a roguelite's ranged class — every "body that does two jobs at once" has this structure. First, settle the Root Motion question: for this build, we declare it off (script-driven) before we start.
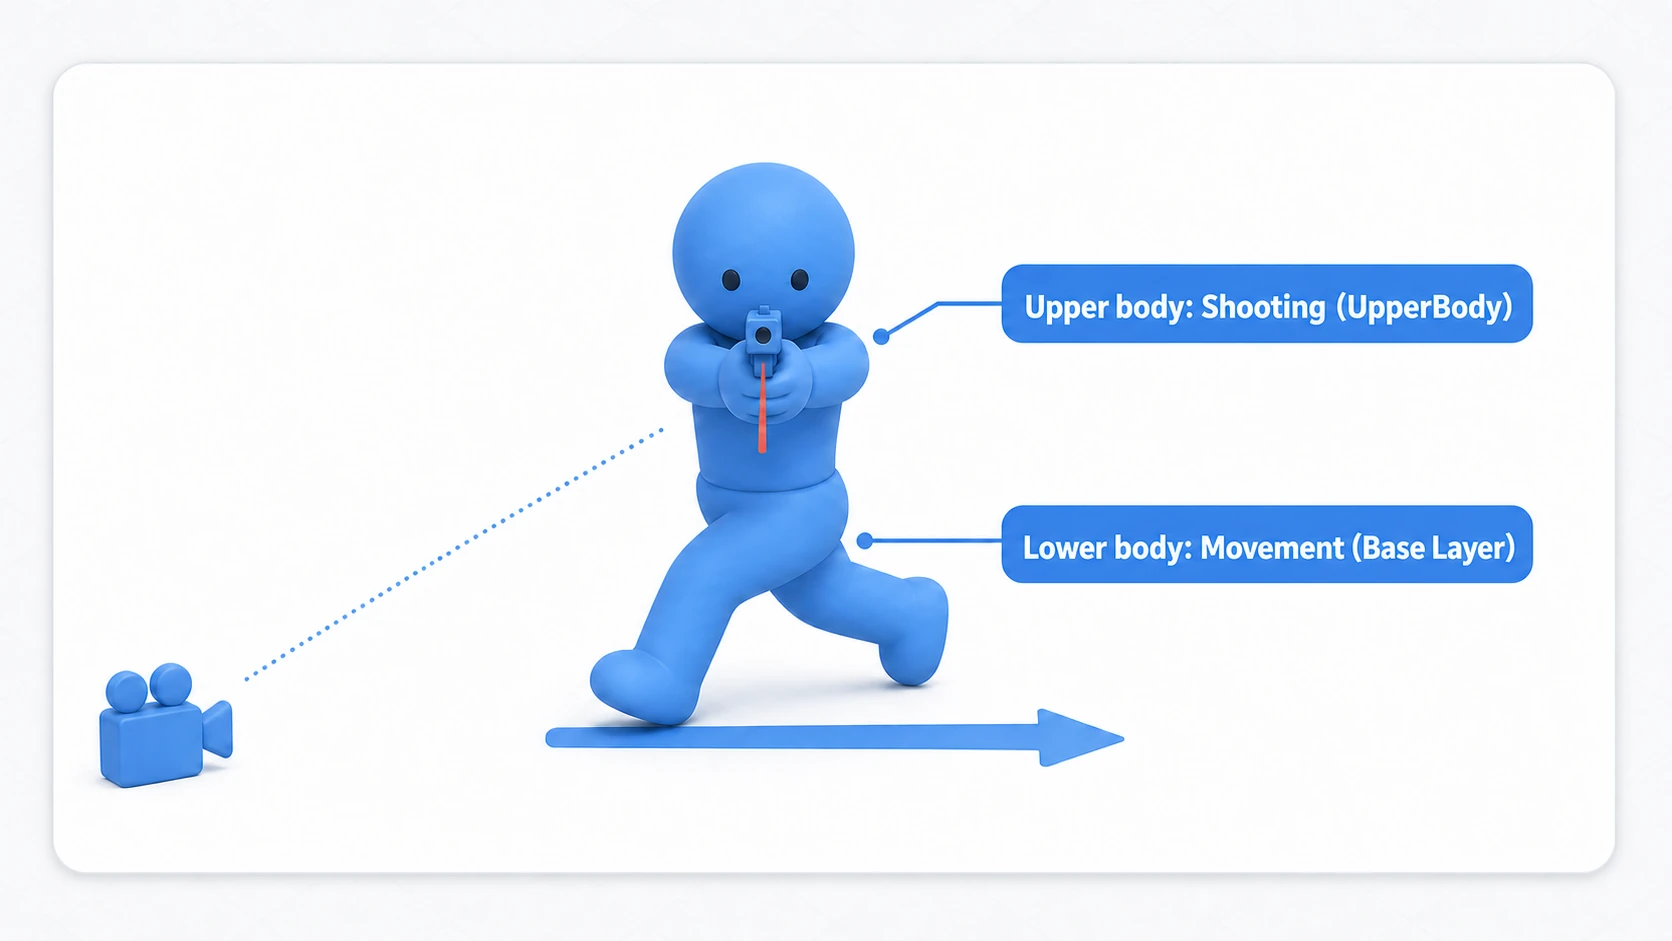
Assembly takes three steps.
- Base Layer: the 8-way movement 2D Blend Tree (exactly as configured earlier)
- UpperBody layer: upper-body-only Avatar Mask,
Weight 1. Add a shooting state, enter it with aShootTrigger, and let Has Exit Time (on) return it automatically - The script: this is where the biggest trap of the whole exercise hides
For a character that moves relative to the camera, what you feed the Blend Tree is not "the input" — it's "the movement direction as the character sees it." The way the character faces isn't always the same as the world axes (you placed it rotated, you added code that turns the body, and so on), so if you pass the world-space movement direction as-is, the footwork stops matching the direction of travel.
using UnityEngine;

[RequireComponent(typeof(Animator), typeof(CharacterController))]
public class StrafeShooter : MonoBehaviour
{
    [SerializeField] private Transform cameraTransform;
    [SerializeField] private float moveSpeed = 4.5f; // Running speed (m/s)

    private Animator animator;
    private static readonly int ForwardSpeedHash = Animator.StringToHash("ForwardSpeed");
    private static readonly int RightSpeedHash = Animator.StringToHash("RightSpeed");
    private static readonly int ShootHash = Animator.StringToHash("Shoot");

    private CharacterController controller;

    void Start()
    {
        animator = GetComponent<Animator>();
        controller = GetComponent<CharacterController>();
    }

    void Update()
    {
        // Build the camera-relative movement direction (world space)
        Vector3 camForward = cameraTransform.forward; camForward.y = 0f;
        Vector3 camRight = cameraTransform.right; camRight.y = 0f;
        Vector3 worldMove = camForward.normalized * Input.GetAxis("Vertical")
                          + camRight.normalized * Input.GetAxis("Horizontal");

        // The key line: translate world movement into "as the character sees it"
        Vector3 localMove = transform.InverseTransformDirection(worldMove);
        animator.SetFloat(ForwardSpeedHash, localMove.z, 0.1f, Time.deltaTime);
        animator.SetFloat(RightSpeedHash, localMove.x, 0.1f, Time.deltaTime);

        // The script moves the body (Root Motion is off). This assumes a flat floor, so gravity is left out
        controller.Move(Vector3.ClampMagnitude(worldMove, 1f) * moveSpeed * Time.deltaTime);

        // Shooting belongs to the UpperBody layer. The legs keep running
        if (Input.GetMouseButtonDown(0))
        {
            animator.SetTrigger(ShootHash);
        }
    }
}
Press Play, swing the camera around, and move in all 8 directions. The footwork matches the movement direction from any angle, the upper body aims and fires whether running or backpedaling, and everything settles into Idle when you stop — when this character moves, you're using the entire foundation of 3D character animation.
Bonus: Good to Know for Later
- A newly added layer starts at a Weight of 0: Right after you add a layer, its
Weightis 0, so the upper-body animation shows nothing. If shooting gets no reaction, check this first (forgetting to paint the arms in the Avatar Mask gives the same symptom). - Animation Events: A feature that calls a script function at a specific frame of an animation. "Spawn the hitbox the moment the sword swings down" and "play a footstep the moment the foot lands" are built with this.
- Foot IK: With Humanoid rigs, you can use IK (Inverse Kinematics) that automatically corrects foot placement so feet don't sink into stairs or slopes. Start by enabling
Foot IKin a state's Inspector. - Animator Override Controller: A mechanism that swaps out only the animation clips while keeping the state machine structure intact. Handy for mass-producing enemy variations (see the Override Controller section of the basics article).
- Working with the camera: TPS strafing movement is only complete when paired with "the character always faces the camera direction" logic. For camera work, see the Cinemachine article.
Summary
The movement we take for granted in 3D characters is built from this trio of techniques.
- Humanoid + Avatar lets you reuse animations. Not making your own is the basic 3D strategy.
- 8-way movement uses a 2D Blend Tree (
2D Freeform Cartesian+ forward/back and left/right parameters). The blend interpolates diagonals for you. - Give
SetFloata dampTime. It turns sudden input changes into smooth acceleration and deceleration. - Per-body-part animation uses Layers + Avatar Masks. Lower body for locomotion, upper body for actions.
- Root Motion is the ownership switch. Decide by asking "does the motion or the logic determine movement distance?"
Start with 8-way movement using a 2D Blend Tree. Once you've built one, you'll start seeing how the character movement in commercial games is actually put together.