"Where did I put that script…" — scrolling through the Assets folder from top to bottom hunting for a file is some of the most wasted time in development. It feels harmless while your project is small, but the more assets pile up, the bigger the price you pay for the mess.
This article covers the "Scene" concept fundamental to organizing Unity projects, plus best practices for "folder structures" that make asset management easier. Good organization not only boosts your personal development efficiency—it's also an essential skill for smooth team development.
What You'll Learn
- The role of scenes (the unit of a game "screen") and how to manage them
- The standard folder structure (by asset type) and why it works
- Feature-based folder structures for medium-to-large projects
- Organization tips you can use today (naming conventions, underscore tricks)
Tested with: Unity 6 (6000.x)
What Is a Scene?
A Scene in Unity is a unit that makes up a "screen" or "level" of your game. For example, each of these would be created as an individual scene:
- Title screen
- Game Stage 1
- Game Stage 2
- Game Over screen
- Settings screen
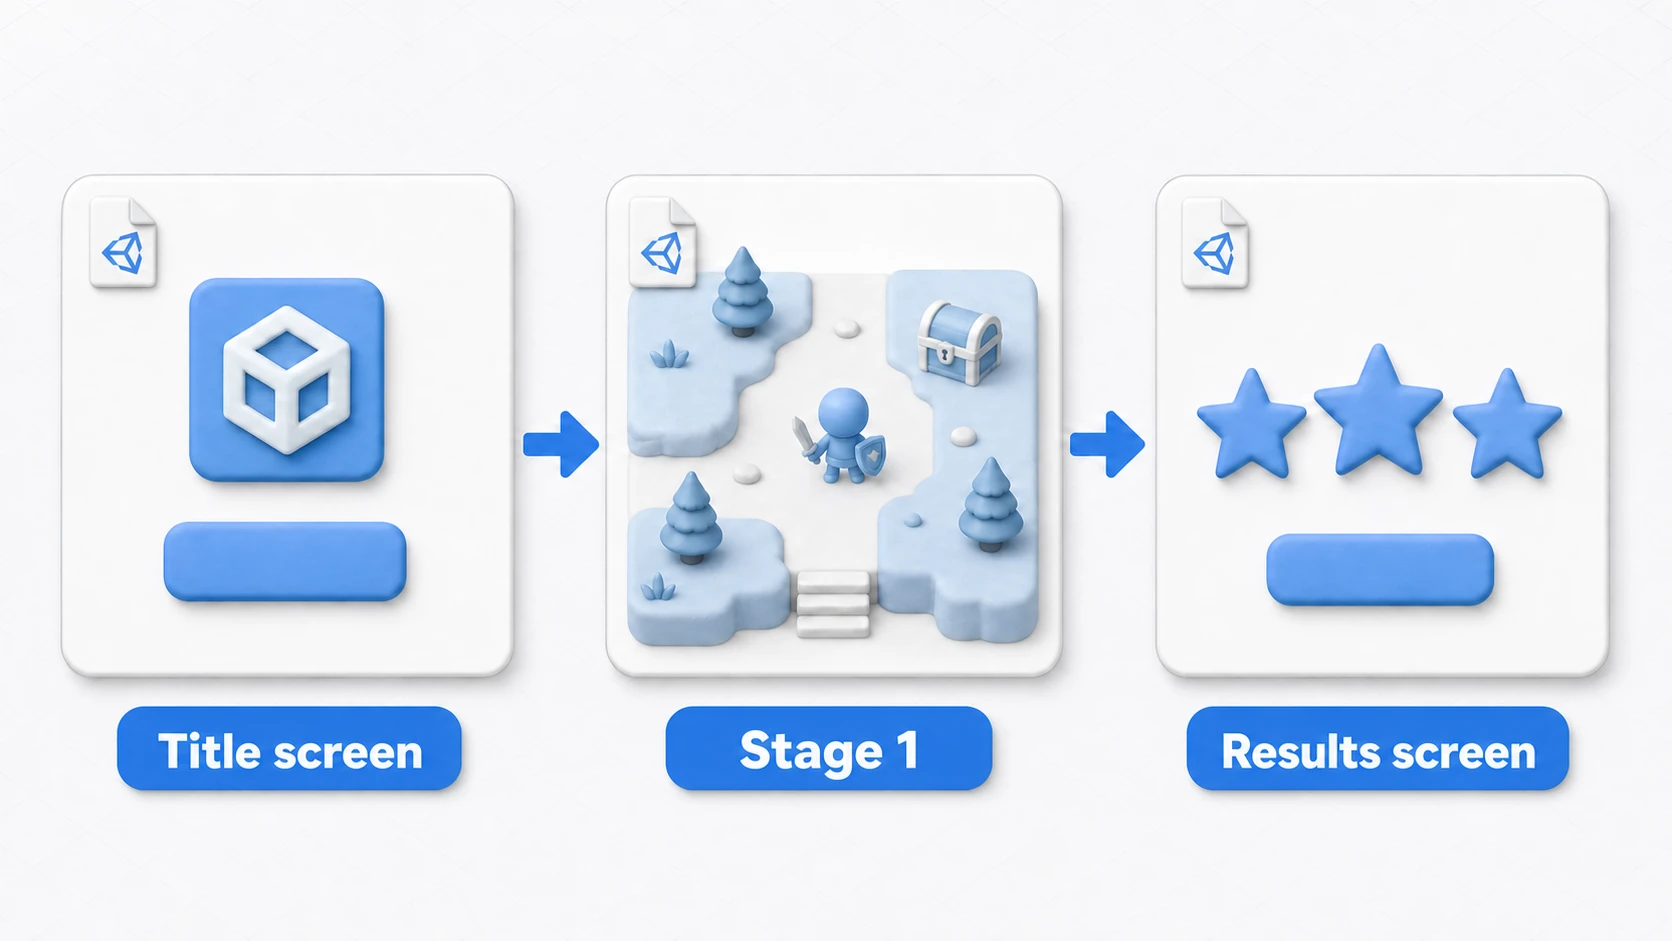
Each scene file (.unity extension) stores everything placed in that screen—the hierarchy of GameObjects, lights, cameras, and UI, along with every component's settings. The game progresses by implementing transitions such as switching from the current scene to the next stage's scene when the player clears a stage.
Creating and Managing Scenes
- Create: Right-click in the Project window and select
Create > Sceneto create a new scene. - Save: Save changes to the currently open scene with
File > SaveorCtrl + S. - Switch: Double-click a scene file in the Project window to switch which scene you're editing.
To switch scenes during gameplay, use the SceneManager class—covered in detail in the SceneManager article.
How to Split Scenes—and What to Put in Them
There's no single right way to split scenes, but two rules of thumb go a long way.
- Split at "screen changes": title → stage → results—the units where the player perceives a change of screen become your scene units. This alone is enough at first.
- Scenes hold "placement"; the contents become Prefabs: structured chunks like the player, enemies, and UI go into Prefabs, and the scene only records "where they're placed." Scene files stay light, the same parts get reused across scenes, and in team development you also reduce the classic "two people edited the same scene and collided" accident.
Project Folder Structure
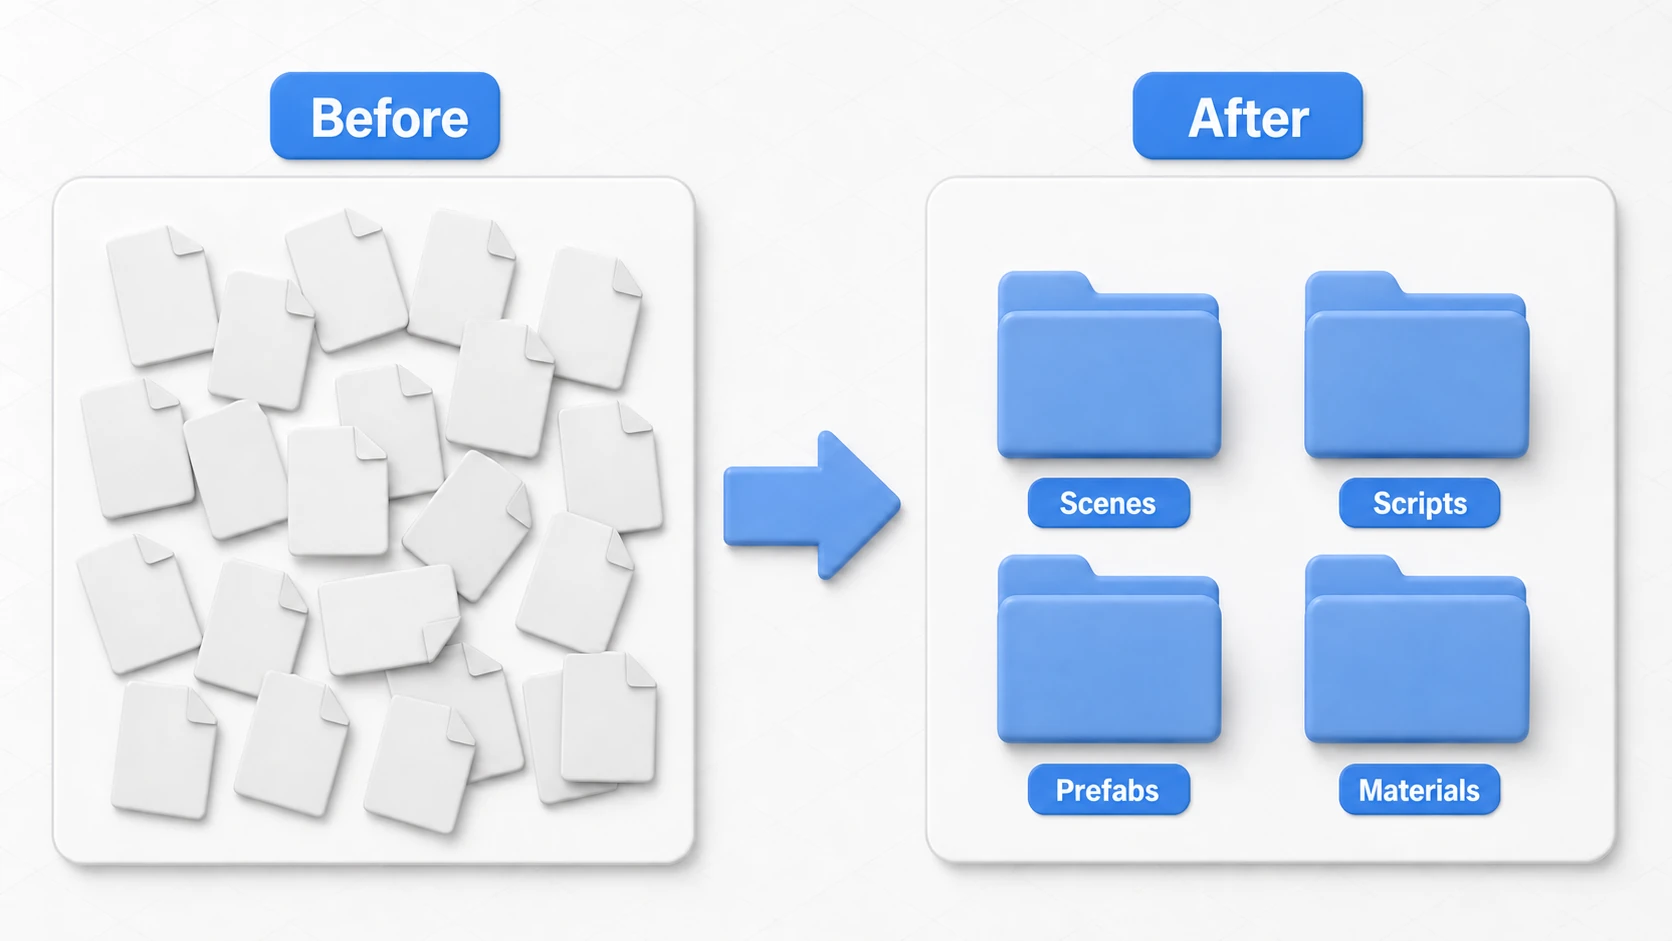
Dumping every asset into the project root (directly under the Assets folder) is the worst habit you can have. Organizing assets into folders by type lets you find the file you need quickly. This is a practice adopted by Unity developers worldwide—the de facto standard.
Basic Folder Structure Example
Here's a common, easy-to-understand basic folder structure:
Assets
├── Scenes          # Scene files (.unity)
├── Scripts         # C# scripts (.cs)
├── Materials       # Materials (.mat)
├── Prefabs         # Prefabs (.prefab)
├── Textures        # Texture images (PNG, JPG, etc.)
├── Models          # 3D models (FBX, OBJ, etc.)
├── Audio           # Audio files (WAV, MP3, etc.)
│   ├── BGM         # Background music
│   └── SFX         # Sound effects
└── Shaders         # Custom shaders (.shader)
Why This Structure Works
- Intuitive and clear: Folder names match asset types, so anyone can see where everything is at a glance.
- High searchability: Want to modify a script? Check the
Scriptsfolder. Change a material color? Check theMaterialsfolder. No more hunting. - Team-friendly: When all team members follow the same folder rules, finding files created by others becomes easy, enabling smooth collaboration.
Feature-Based Folder Structure (Medium-Large Projects)
As projects grow larger, organizing by asset type alone can become hard to manage. For example, hundreds of scripts sitting flat in the Scripts folder makes it painful to find related ones.
In that case, an effective approach is to create feature-based subfolders within the type-based folders:
Assets
└── Features
    ├── Player
    │   ├── Scripts
    │   ├── Prefabs
    │   └── Materials
    ├── Enemy
    │   ├── Scripts
    │   ├── Prefabs
    │   └── Models
    └── TitleScreen
        ├── Scripts
        ├── Scenes
        └── Textures
With this method, the rule becomes "everything related to the player goes in Features/Player." Related assets stay close together, making it very efficient to modify or extend a specific feature.
Which structure is better depends on project scale and team culture, but the rule of thumb fits in one line: "by type for solo/small projects; by feature once people and work start splitting along feature lines." Start with the basic asset-type structure first.
Keep Your Own Assets in a "_Project" Folder
Even with type-based folders, keep developing and one thing will almost certainly happen: "I imported an Asset Store package and now the root of Assets is a mess." Most imported assets create their own folder directly under Assets. Your own Scripts and Prefabs get buried among third-party folders, and you can no longer tell which files are yours.
The fix is surprisingly simple: put all of your own assets under a single folder named _Project.
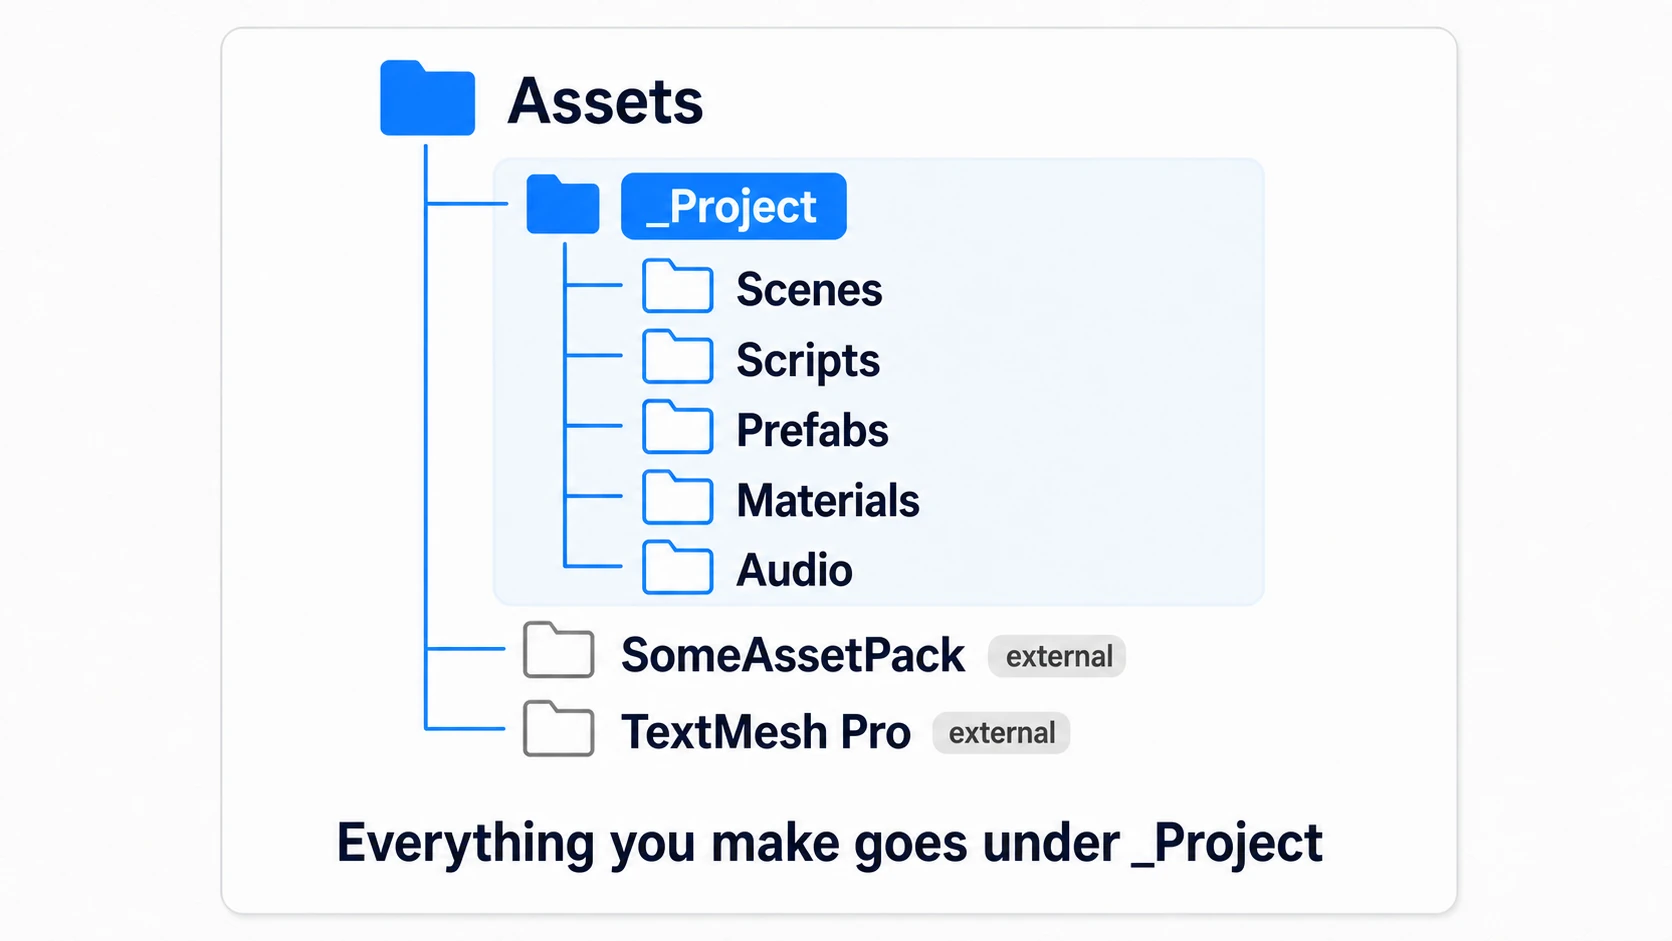
Assets
├── _Project            # Everything you make goes here (the _ keeps it pinned to the top)
│   ├── Scenes
│   ├── Scripts
│   ├── Prefabs
│   ├── Materials
│   └── Audio
├── SomeAssetPack       # An Asset Store import (unpacks itself here)
└── TextMesh Pro        # A folder created by a package
Three benefits:
- The boundary between yours and theirs is obvious: everything you wrote or made lives under
_Project. Updating or deleting an external asset can no longer sweep your files along with it - The leading
_pins it to the top: no matter how many external assets pile up, your workspace is one click away - Migration and backups get easy: "the actual game" fits in one folder, so carrying it around or cleaning up is painless
External assets unpacking directly under Assets is by design—don't force them into a _ThirdParty folder (some assets depend on their internal paths and break when moved). Just gathering your own work into one place achieves the separation.
Move and Rename Inside the Unity Editor (.meta and GUIDs)
The single most dangerous operation in folder cleanup is moving or renaming files in Windows Explorer or the macOS Finder. The accident where your scene suddenly fills with "Missing" references the moment you "organized things" starts right here.
Understand the mechanism and it stops being scary. Unity automatically creates a companion .meta file for every asset. Inside is a unique ID called a GUID, and Inspector assignments and Prefab references are wired up by this GUID, not by file name.
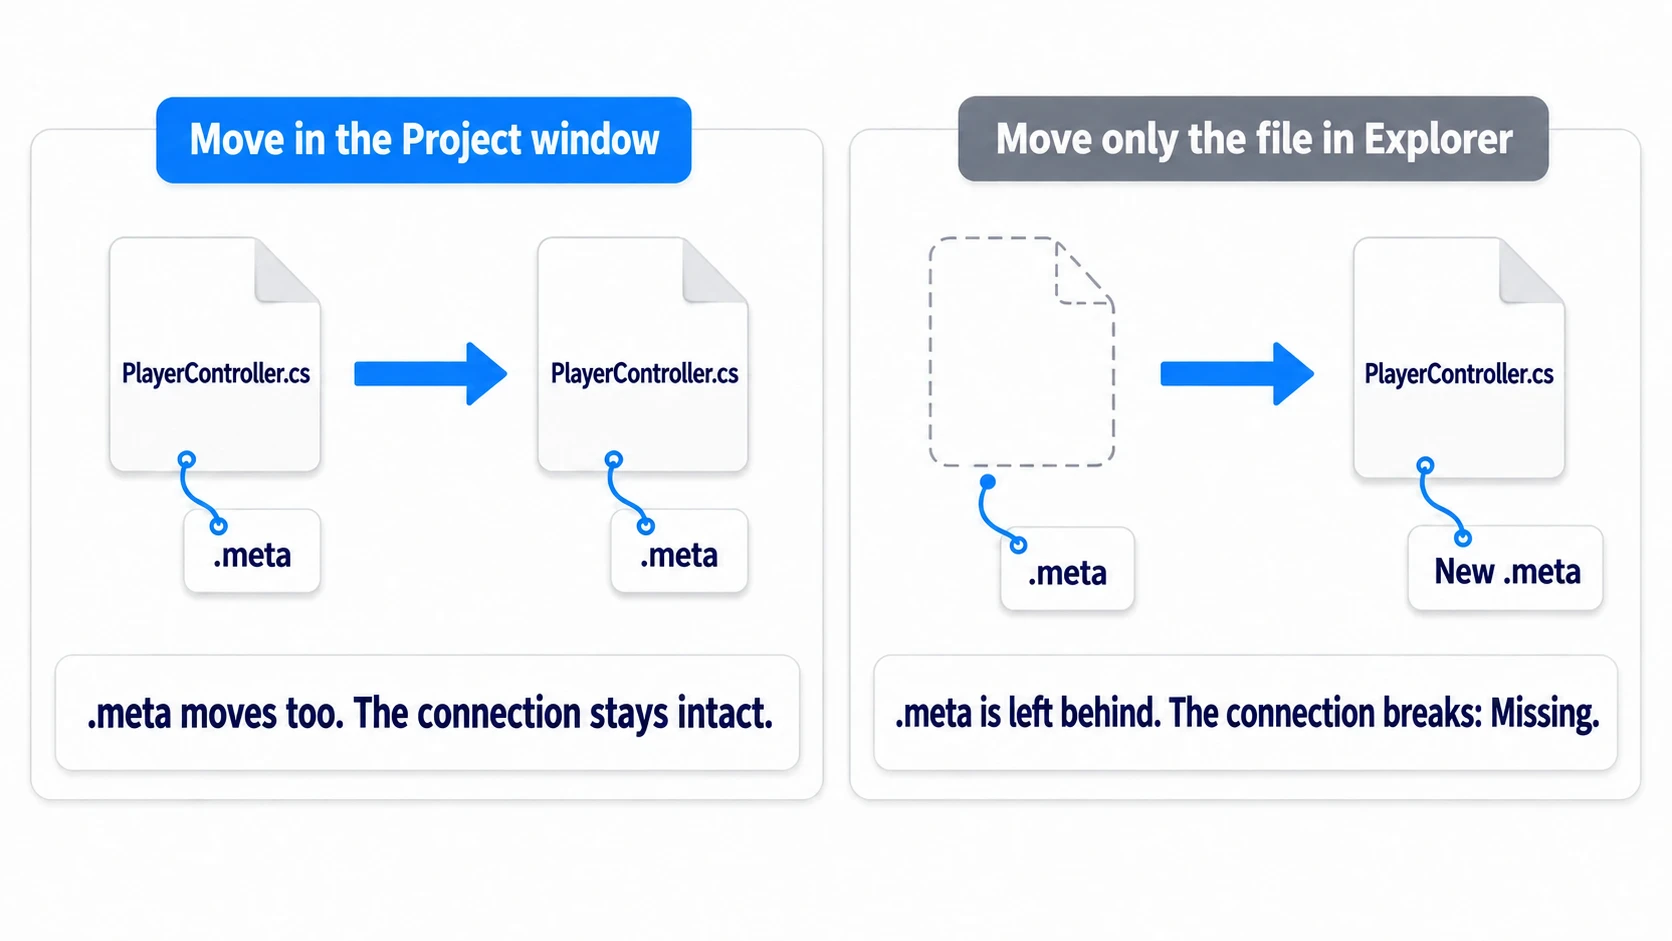
- Move/rename inside the Unity editor (Project window) → the
.metamoves along, the GUID is preserved, and references never break - Move just the file in Explorer → the
.metagets left behind, Unity decides "a new file arrived" and issues a new GUID. Every reference to the old GUID becomesMissing
One rule is all you need: "always move and rename assets inside Unity's Project window." If you absolutely must operate at the OS level, move the .meta file together as a set.
Best Practices and Tips
- Organize from the start: "I'll organize it later" is a trap. Make a habit of moving assets into the correct folder the moment you import or create them.
- Clear naming conventions: Folder and file names matter too. For player-related scripts, agreeing on shared prefixes like
PlayerControllerandPlayerHealthmakes everything even easier to navigate. - Using
_(underscore): Prefixing folder names with an underscore, like_ThirdPartyor_Sandbox, sorts them to the top alphabetically—handy for distinguishing externally imported assets or temporary experimental folders. - Don't use
Resourcesas a name for asset storage: A folder namedResourcesis special; everything in it goes into the build, used or not. Give asset folders ordinary names likeArtorAudio. - Don't delete the starter
Settingsfolder: TheSettingsfolder in a new project holds the rendering settings (the URP settings files). Delete it while tidying up and the rendering breaks (moving it within the Project window is fine).
Troubleshooting
| Symptom | Cause | Fix |
|---|---|---|
After reorganizing, fields in the Inspector show Missing | You moved only the file in Explorer or Finder, leaving its .meta behind (a new GUID was issued) | Restore the original .meta from Git or a backup if you have one. If not, reassign the asset to each Missing field |
| Adding a script fails with "Can't add script" | You renamed only the file, so it no longer matches the class name inside | Make the file name and the class name match |
Bonus: Good to Know for Later
Once your project is organized, these topics are worth learning next.
- Want to write scene-switching logic: Runtime scene transitions like "press Start to go to Stage 1" are implemented with the
SceneManagerclass. See the SceneManager article for details. - Want to organize objects inside a scene, not just files: Classifying objects in the Hierarchy with tags and layers makes them easier to find from scripts and simplifies collision control. The layers and tags article is a good reference.
- More serious asset management: As projects scale up, Addressables—a system for managing asset loading dynamically—comes into play. Get an overview in the Addressables introduction article.
- Keep a history: manage your organized project with Git and you can roll back when something breaks (Unity projects in Git)
Summary
Proper project management is the foundation of clean, efficient development. Scenes and folder structure are the first step.
- Scenes: The unit for managing game "screens" and "levels." Turn the structured contents into Prefabs and let scenes hold only "placement."
- Folder Structure: Gather your own assets under a single
_Projectfolder, organized by type inside (by feature once the project grows). - Always move and rename inside the Unity editor: references are wired by the
.metafile's GUID—moving files in Explorer breaks them. - Make It a Habit: Keeping things tidy from the earliest stage of a project helps your future self and your team.
A clean project makes bugs easier to find and speeds up adding new features. Start today and become an "organization master."