You placed a button on the Canvas. It looks right. You hit Play, press it, and — nothing happens. There isn't even an error in the console, so you have no idea what's wrong. It's the classic swamp everyone sinks into when they start touching UI.
This article organizes, in one pass, the Button component (the two ways to register onClick), how a click reaches the button, the three top causes of an unresponsive button, and how to build that "pressed" feel. For the Canvas and anchor foundations, start with Canvas Basics.
What You'll Learn
- The two ways to register onClick — Inspector registration and AddListener
- How a click arrives — EventSystem, Graphic Raycaster, Raycast Target
- The three top causes of an unresponsive button and how to fix them
- Building a "pressed" feel with Transition
- Making a hold button with IPointerDown/Up
- Hands-on: building a pause menu
Tested with: Unity 6 (6000.x)
Minimal Button Setup
Right-click in the Hierarchy and choose "UI > Button - TextMeshPro" ("UI (Canvas) > Button - TextMeshPro" in Unity 6.3 and later) to get everything you need in one go.
- Canvas: The UI foundation (auto-created if missing)
- Button: The main object, holding an
Image(the look) plus aButton(the click handling), with aTextMeshProlabel as a child - EventSystem: The command center that delivers input to UI (auto-created if missing)
At this point, if you hit Play and hover the cursor over the button, its color should darken slightly (Highlighted Color defaults to RGB 245,245,245). If that's hard to see, hold the button down (Pressed Color defaults to RGB 200,200,200). If the color changes, the cursor's input is already reaching the button. All that's left is to tell it "what to do when pressed."
Two Ways to Register onClick
The heart of a Button is onClick — "the list of actions to call the moment it's clicked." There are two ways to register.
Method 1: Register in the Inspector (for UI placed on screen)
- Prepare the method you want to call as
public.
using UnityEngine;

public class TitleMenu : MonoBehaviour
{
    public void StartGame()
    {
        Debug.Log("Game start!");
        // e.g. SceneManager.LoadScene("Main");
    }
}
- In the button's Inspector On Click() list, press "+", drag in the object that has
TitleMenu, and chooseTitleMenu.StartGamefrom the dropdown.
The advantage is that the wiring to your code is visible in the Inspector. For buttons placed in the scene from the start, like a title screen, this method is the easy choice.
Method 2: AddListener from a script (for dynamic UI)
using UnityEngine;
using UnityEngine.UI;

public class ShopItemSlot : MonoBehaviour
{
    [SerializeField] private Button buyButton;

    void Start()
    {
        // Register the click handler from code
        buyButton.onClick.AddListener(OnBuyClicked);
    }

    private void OnBuyClicked()
    {
        Debug.Log("Purchased!");
    }

    void OnDestroy()
    {
        // Remove it in case this script goes away while the button stays
        buyButton.onClick.RemoveListener(OnBuyClicked);
    }
}
For buttons created at runtime, like a shop's item list, you can't wire them up in advance in the Inspector, so AddListener is the only option. Remember it as "placed UI uses the Inspector, born UI uses AddListener."
How a Click Reaches the Button
To be able to fix trouble, let's learn the path a click takes to reach onClick. There are three players.
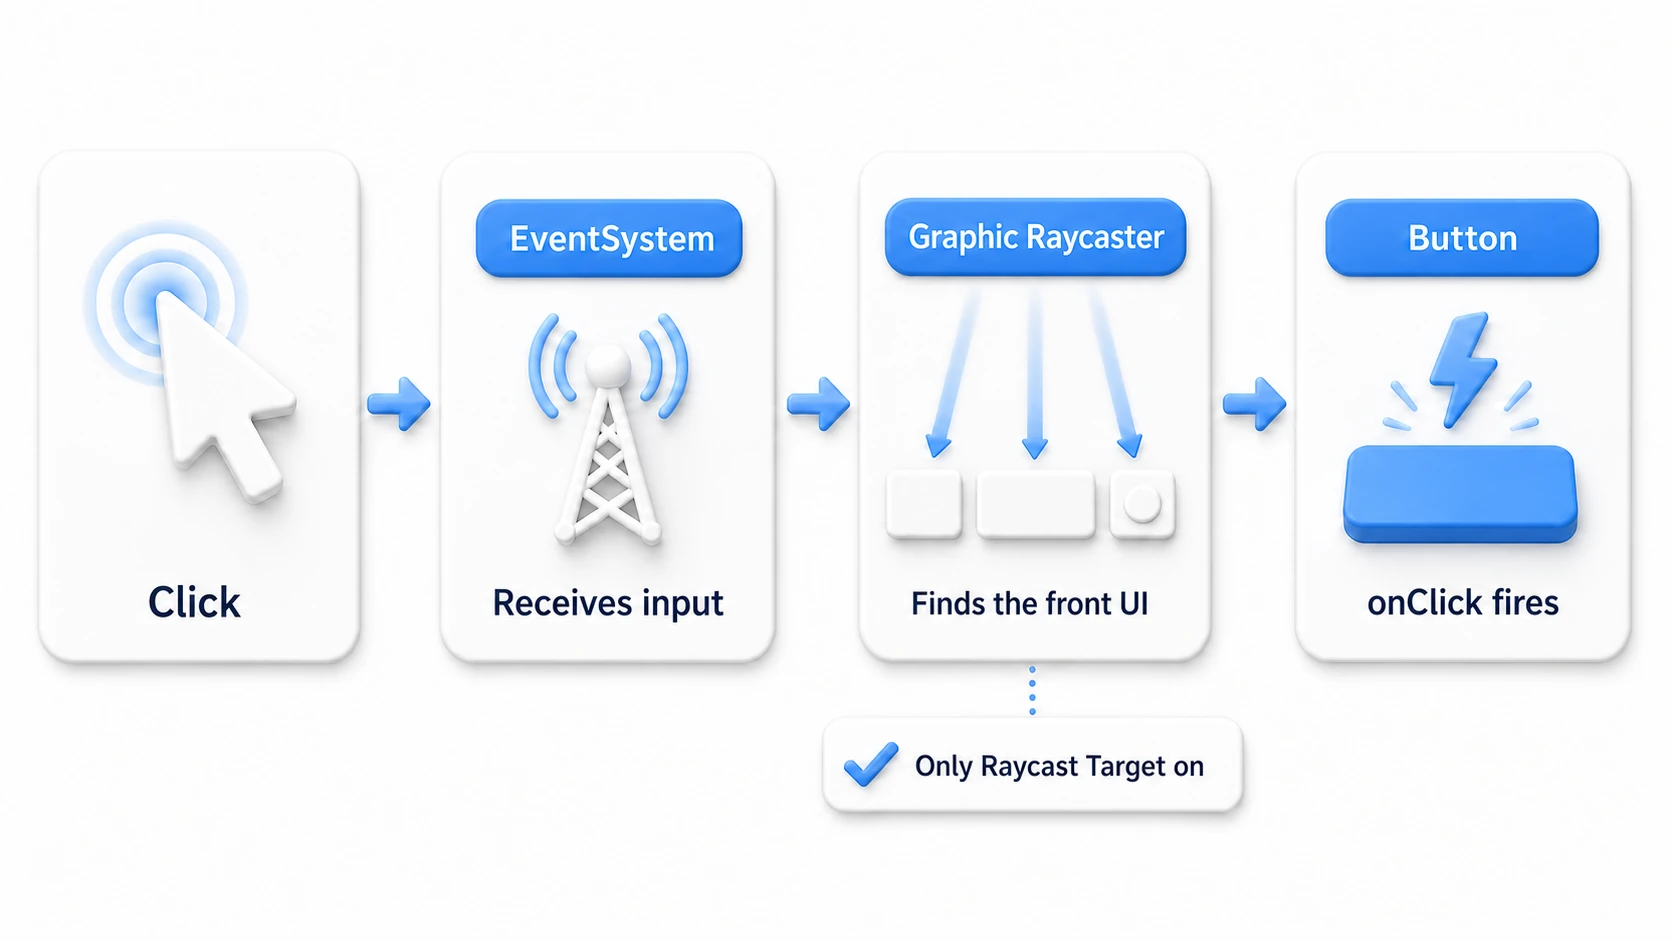
- EventSystem (the scene's command center): It watches mouse, touch, and other input every frame and manages "what got clicked where just now." You need one per scene.
- Graphic Raycaster (the Canvas's checkpoint): Attached to the Canvas, it fires a ray at the click position and finds the UI it hits.
- Raycast Target (each UI's "hitbox switch"): A checkbox on
ImageandTextMeshPro. Only UI with it on gets hit by the ray. Of the UI that's hit, only the single frontmost one receives the click.
If any part of this path is broken, the button falls silent. Which means —
The Three Top Causes of an Unresponsive Button
An "unresponsive" button is nasty precisely because there's no error — and it's almost always one of these three. Check them from the top.
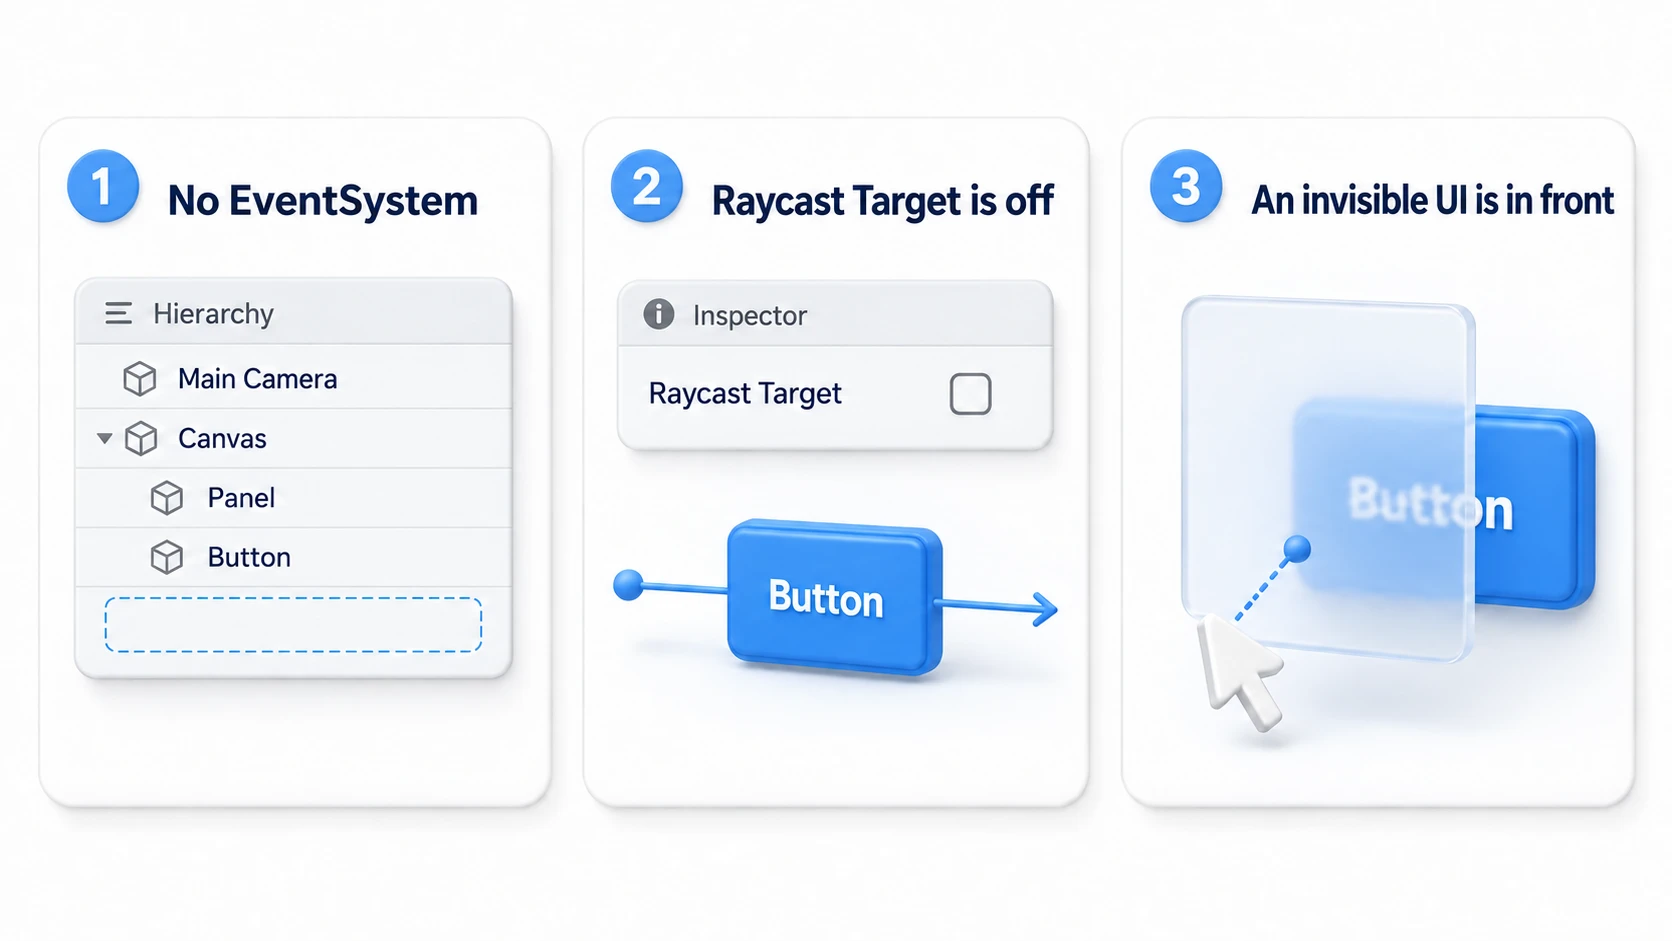
- No EventSystem in the scene: Accidentally deleting it while cleaning up is a classic. Search the Hierarchy, and if it's missing, recreate it with "UI > Event System." If all your UI is unresponsive at once, it's almost certainly this.
- Raycast Target is off: If the button's
Imagehas itsRaycast Targetunchecked, the ray passes right through. Conversely, turning it off for UI that shouldn't be clickable (decorative icons and labels) is the correct move, so manage on/off with intent. - A transparent UI is covering the front: A fullscreen transparent panel, or an oversized text rectangle, is stealing the click in front of the button. The trap is that you can't tell by looking. While playing in the editor, select
EventSystemin the Hierarchy and open the preview pane at the bottom of the Inspector to see which UI the ray is hitting under the cursor, so you can pin down the culprit.
tips The culprit in #3 is usually "a big transparent Image placed as decoration." If you're in the habit of turning off Raycast Target on decorative UI, this trouble drops sharply.
Building a "Pressed" Feel with Transition
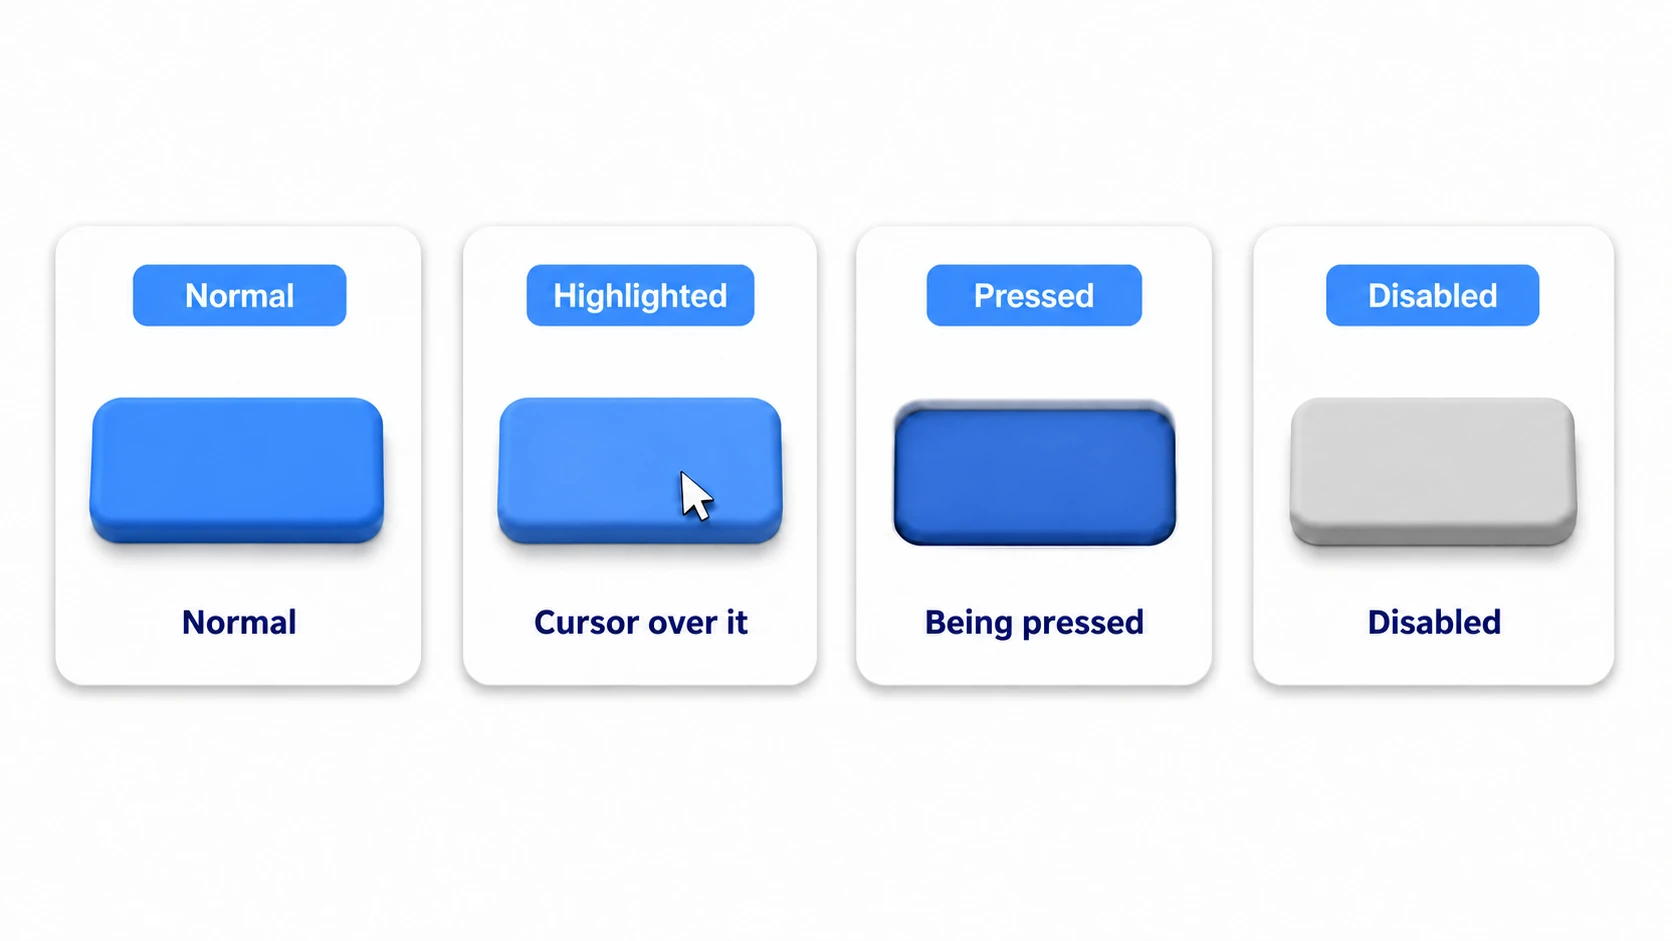
Once it works, next comes feedback. A Button's Transition switches its look per state (normal, hovered, pressed, disabled).
| Mode | Mechanism | Best for |
|---|---|---|
| Color Tint (default) | Multiplies the Image's color | This is enough to start |
| Sprite Swap | Swaps the image per state | When you can prepare a "pressed-in" graphic |
| Animation | Animates via the Animator | Fancy effects (bounce, glow, etc.) |
Even with the default Color Tint, the button sinks by the Pressed Color (RGB 200,200,200 by default) when pressed. To make it clearer, set the Pressed Color darker than the default (e.g. RGB 150,150,150). To add a game-like response, the standard move is to play the press SFX in the same place as onClick (see Audio Basics).
Making a Hold Button — IPointerDown/Up
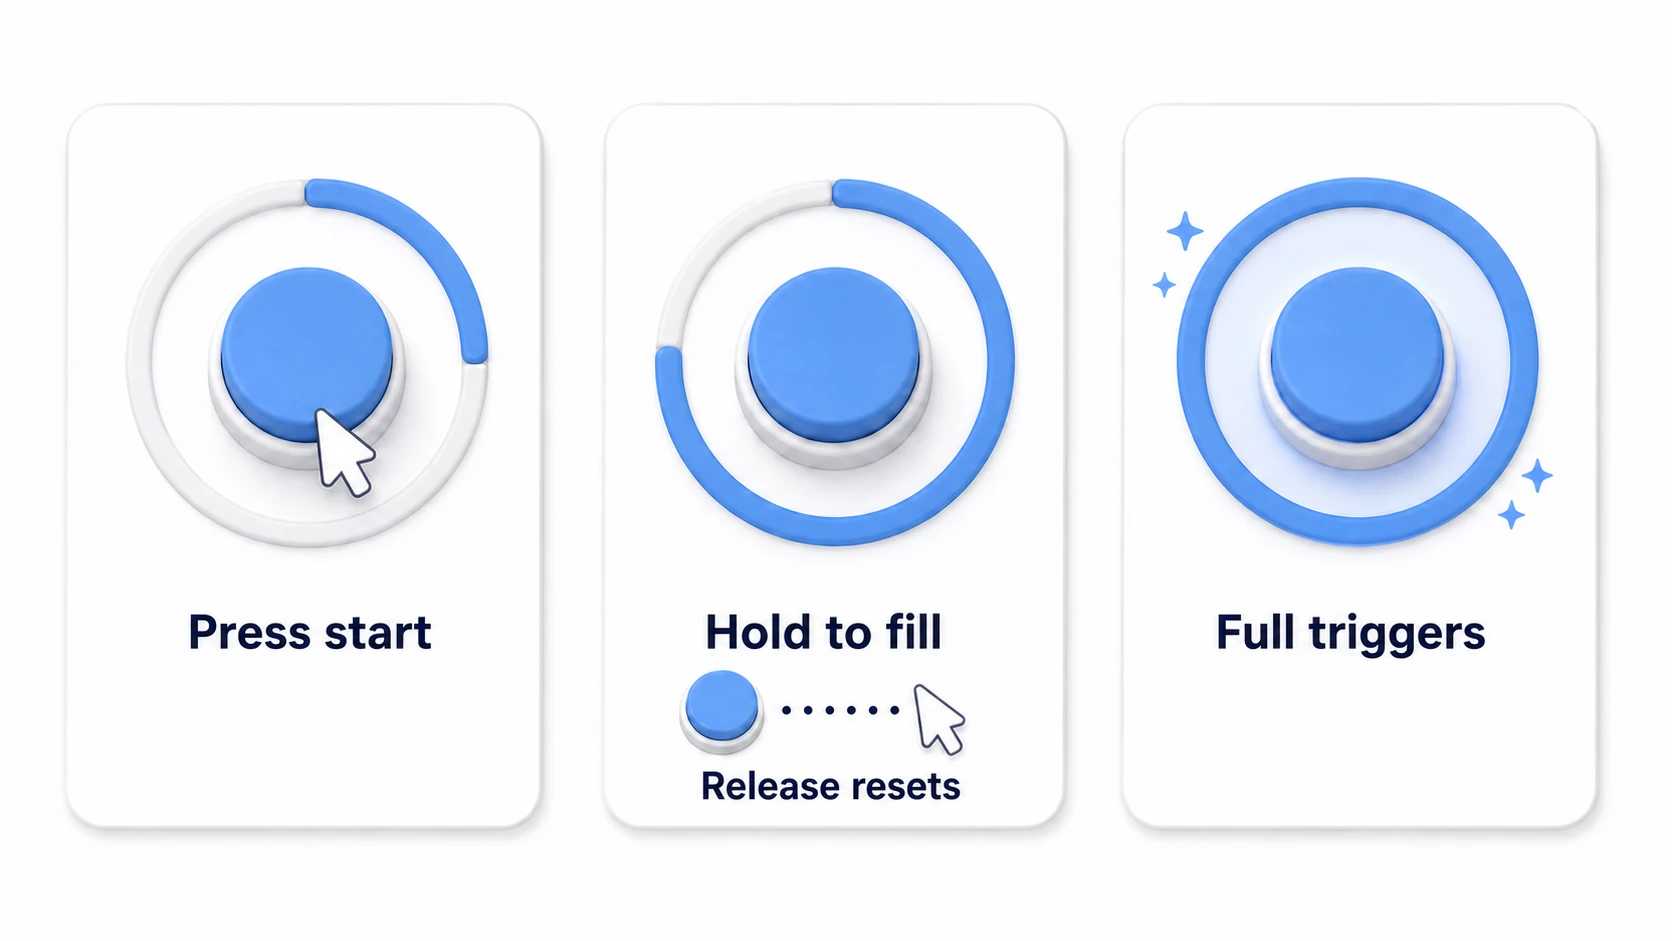
onClick fires the moment you press and release. Actions like "hold to delete an item" or "hold to charge" need to catch the press moment and the release moment separately. That's where the IPointerDownHandler/IPointerUpHandler interfaces come in.
using UnityEngine;
using UnityEngine.UI;
using UnityEngine.Events;
using UnityEngine.EventSystems;

public class HoldButton : MonoBehaviour, IPointerDownHandler, IPointerUpHandler
{
    [SerializeField] private float holdTime = 1.0f;   // Seconds until it triggers
    [SerializeField] private Image gaugeImage;        // The Image used as a Fill Amount gauge
    public UnityEvent onHoldComplete;                 // Called when the gauge fills

    private float timer;
    private bool holding;

    public void OnPointerDown(PointerEventData eventData) => holding = true;

    public void OnPointerUp(PointerEventData eventData)
    {
        holding = false;
        timer = 0f; // Reset if released partway
    }

    void Update()
    {
        if (!holding) return;

        timer += Time.deltaTime;
        gaugeImage.fillAmount = timer / holdTime; // Fill the gauge

        if (timer >= holdTime)
        {
            holding = false;
            timer = 0f;
            onHoldComplete.Invoke(); // Trigger!
        }
    }

    void LateUpdate()
    {
        if (!holding && gaugeImage.fillAmount > 0f)
        {
            gaugeImage.fillAmount = 0f;
        }
    }
}
Just attach this script to a button (or Image) and it works. Overlay a gauge Image set to Image Type: Filled, and you've got the classic UI where the gauge fills while you hold. There are also IPointerEnterHandler (cursor entered) and IPointerExitHandler (cursor left), useful for things like tooltips.
Hands-On: Building a Pause Menu
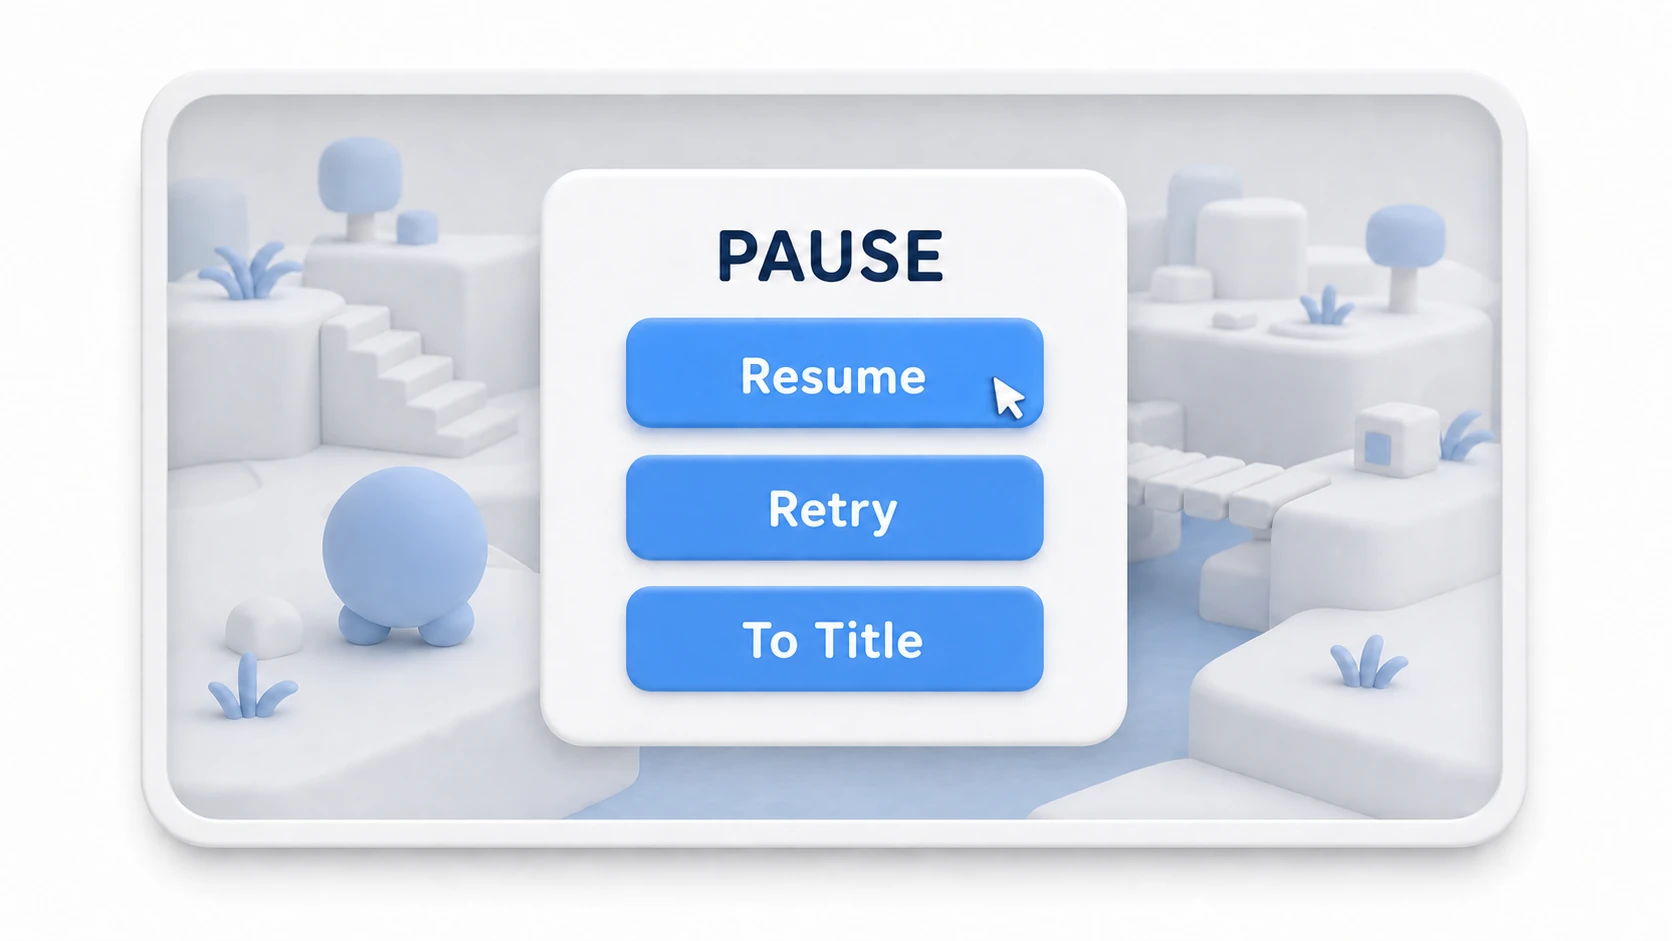
An RPG's menu screen, an action game's pause, a puzzle game's "restart?" confirmation — the "open → choose → close" menu is the gateway to button UI, and you can build it with just the parts in this article. Let's build a pause menu end to end.
Building the UI:
- Under the Canvas, create a
PausePanel(a fullscreen Image, semi-transparent black). It darkens the game screen behind it, and at the same time serves to block clicks from reaching UI behind it (Raycast Target on — this time you're deliberately using cause #3). - As its children, stack three buttons vertically — "Resume," "Retry," and "To Title."
- Leave
PausePanelinactive at first.
The script — the open/close and the destinations of the three buttons.
using UnityEngine;
using UnityEngine.SceneManagement;

public class PauseMenu : MonoBehaviour
{
    [SerializeField] private GameObject pausePanel;

    private bool isPaused;

    void Update()
    {
        if (Input.GetKeyDown(KeyCode.Escape))
        {
            if (isPaused) Resume();
            else Pause();
        }
    }

    public void Pause()
    {
        isPaused = true;
        pausePanel.SetActive(true);
        Time.timeScale = 0f; // Stop in-game time
    }

    // Register on the "Resume" button's On Click()
    public void Resume()
    {
        isPaused = false;
        pausePanel.SetActive(false);
        Time.timeScale = 1f;
    }

    // Register on the "Retry" button
    public void Retry()
    {
        Time.timeScale = 1f; // Forget to reset it and the next scene stays frozen!
        SceneManager.LoadScene(SceneManager.GetActiveScene().name);
    }

    // Register on the "To Title" button
    public void GoToTitle()
    {
        Time.timeScale = 1f;
        SceneManager.LoadScene("Title");
    }
}
Register the matching method on each button's On Click() in the Inspector, and you're done. Time.timeScale = 0 stops the game, but UI clicks still work as normal — that's why a pause menu works at all. Note that Input.GetKeyDown belongs to the old Input Manager. If it throws in a new Unity 6 project, set Active Input Handling under Project Settings > Player to Both (this restarts the editor).
Two points matter most. "Give the semi-transparent panel the job of blocking clicks too" (that one panel prevents the game UI behind it from misfiring during pause) and "always reset timeScale before leaving the scene" (forget to reset it and the world after a retry stays frozen; for the deeper pause pitfalls — audio, coroutines, unscaled time — the Pause Implementation Guide is the dedicated article).
Bonus: Good Things to Know in Advance
- Preventing double-clicks and spam: For an irreversible button like "Purchase," the standard move is to disable it right after it's pressed with
button.interactable = false;. The Disabled Color grays it out automatically too. - Use a CanvasGroup to disable in bulk: When you want to make all the buttons in a panel unclickable at once, attach a
CanvasGroupto the parent and toggleinteractableandblocksRaycasts. It's more robust than touching them one by one. - The EventTrigger component is a last resort:
EventTriggerlets you handle PointerDown and such entirely in the Inspector, but it has the side effect of stopping events that start on that UI from reaching its parents (put it on a button inside a scroll view and dragging from there won't scroll). Implementing the interfaces in code is safer. - Gamepad support: To select and confirm buttons with a pad, the EventSystem's
Input System UI Input Moduleand the Button'sNavigationsettings come into play. For the input-side foundation, see Input System Basics.
Summary
- Two ways to register onClick — placed UI uses the Inspector, dynamically born UI uses AddListener.
- A click arrives via the path EventSystem → Graphic Raycaster → UI with Raycast Target on.
- The three top causes of no response are a missing EventSystem, Raycast Target off, and a transparent UI stealing the click. Suspect them in that order.
- The pressed feel comes from Transition (start with a darker Pressed Color) plus a press SFX.
- A long press can't be caught by
onClick— build it yourself with IPointerDown/Up. - Get in the habit of turning off Raycast Target on decorative UI.
Buttons are the very first point where a player touches your game. Do your game's buttons "answer properly" the moment they're pressed?