You want a game world players can roam freely. But modeling every hill and valley by hand in a 3D tool and stitching them together? Just thinking about it is exhausting — terrain is often the first wall you hit when you dream of building an open-world-style game.
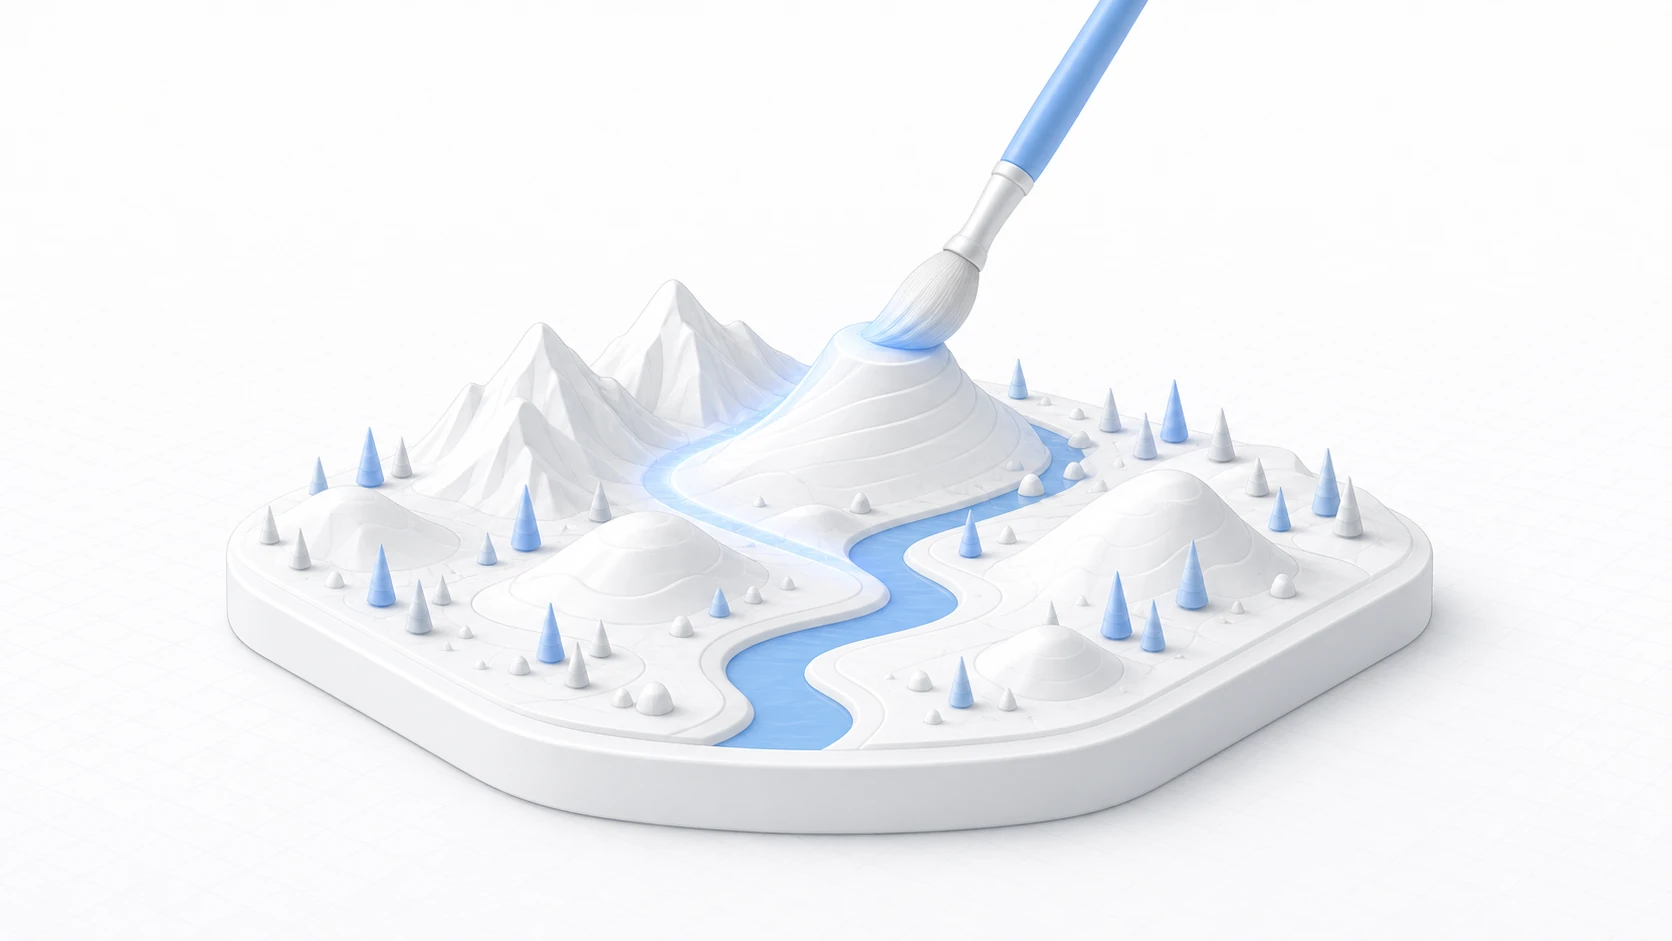
Unity Terrain is Unity's built-in terrain creation system. Raise hills as if painting with a brush, lay down textures, and plant trees and grass — that's all it takes to build vast natural environments efficiently.
What You'll Learn
- Creating terrain starting from
GameObject > 3D Object > Terrain- Sculpting (Raise/Set Height/Smooth/Paint Holes) and shortcuts
- Texture painting with Terrain Layers and placing trees and grass
- Performance optimization (Pixel Error and the various Distance settings)
- Splitting huge maps into multiple Terrain tiles
- Hands-on: building a mountain field with a winding trail from start to finish
Tested with: Unity 6 (6000.x)
- Creating a Terrain
- Paint Terrain: Sculpting and Painting the Landscape
- Terrain Layers: Painting Textures
- Trees: Placing Trees
- Details: Placing Grass and Details
- Terrain Settings: Configuration and Performance Optimization
- Multiple Terrain Tiles
- Manipulating Terrain from Scripts
- The Terrain Tools Package
- Hands-On: Building a Mountain Field with a Winding Trail
- Bonus: Good Things to Know in Advance
- Summary
Creating a Terrain
Simply choose GameObject > 3D Object > Terrain from the menu, and a flat 1000x1000 terrain is generated (with a maximum Height of 600 and a Heightmap Resolution of 513×513).
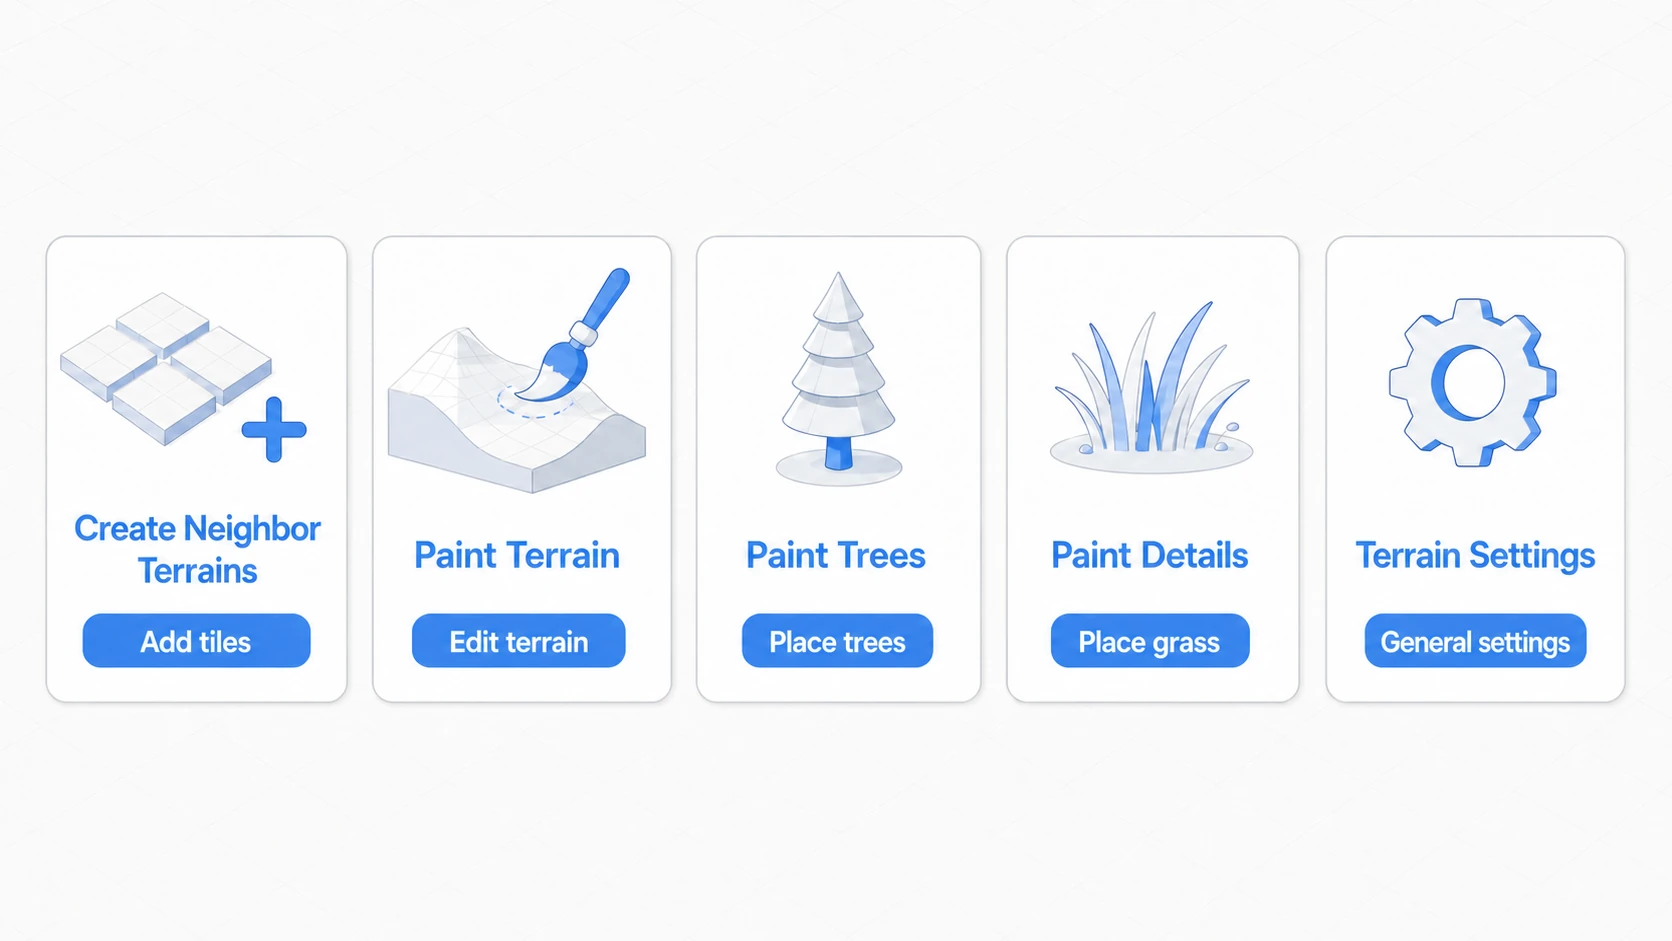
The Five Main Tools
| Tool | Description |
|---|---|
| Create Neighbor Terrains | Create adjacent Terrain tiles |
| Paint Terrain | Sculpt the landscape and paint textures |
| Paint Trees | Place trees |
| Paint Details | Place details such as grass, flowers, and rocks |
| Terrain Settings | General settings (size, resolution, performance) |
Paint Terrain: Sculpting and Painting the Landscape
Sculpting Tools
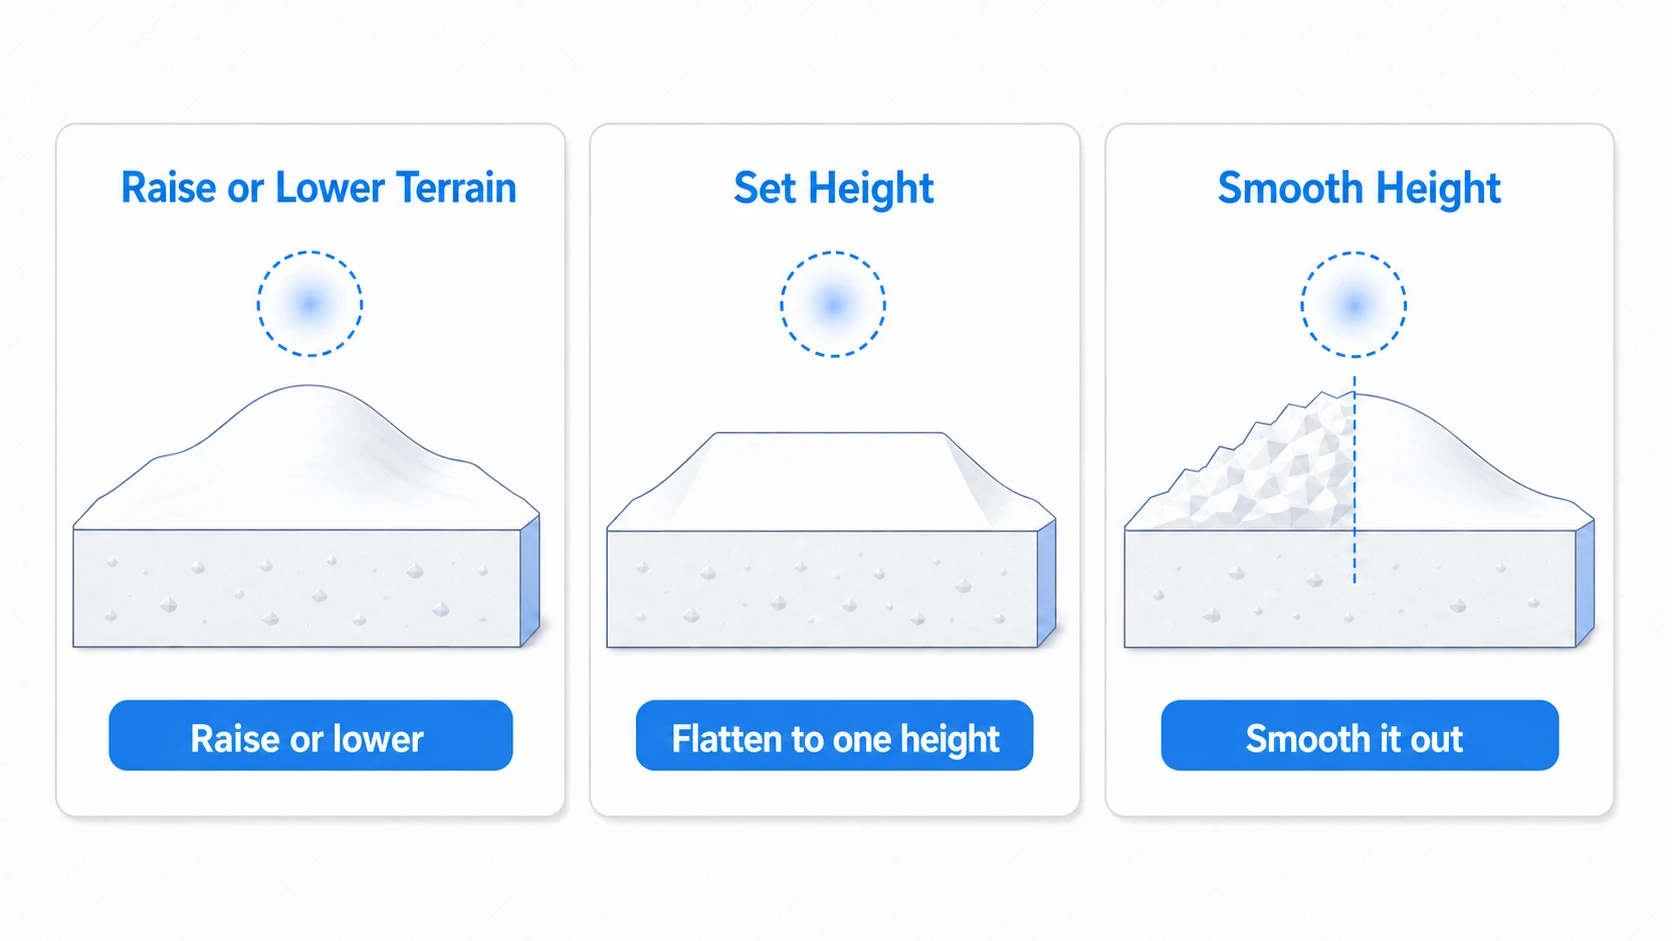
| Tool | Description |
|---|---|
| Raise or Lower Terrain | Raise or lower the terrain height (hold Shift to lower) |
| Set Height | Set a specific height (handy for creating flat plateaus) |
| Smooth Height | Smooth out the terrain |
| Stamp Terrain | Stamp the brush shape onto the terrain |
| Paint Holes | Cut holes into the terrain (cave entrances, etc.) |
Steps for creating a cave:
- Cut a hole in the terrain with Paint Holes
- Place a 3D cave mesh at the hole's position
- Seamlessly connect the mesh edges to the Terrain boundary
- Add colliders as needed
Shortcuts
| Key | Function |
|---|---|
, . | Switch brushes |
[ ] | Change brush size |
- = | Change opacity |
F | Focus the camera on the cursor position on the Terrain |
Terrain Layers: Painting Textures
Creating a Terrain Layer
- Select the Paint Terrain tool
- Choose
Paint Texturefrom the dropdown - Click
Edit Terrain Layers > Create Layer - Set the textures (Diffuse, Normal Map, Mask Map, etc.)
Painting Textures
- Select a Terrain Layer
- Set the brush size and opacity
- Drag across the terrain to paint
Painting at low opacity blends naturally with the layers underneath.
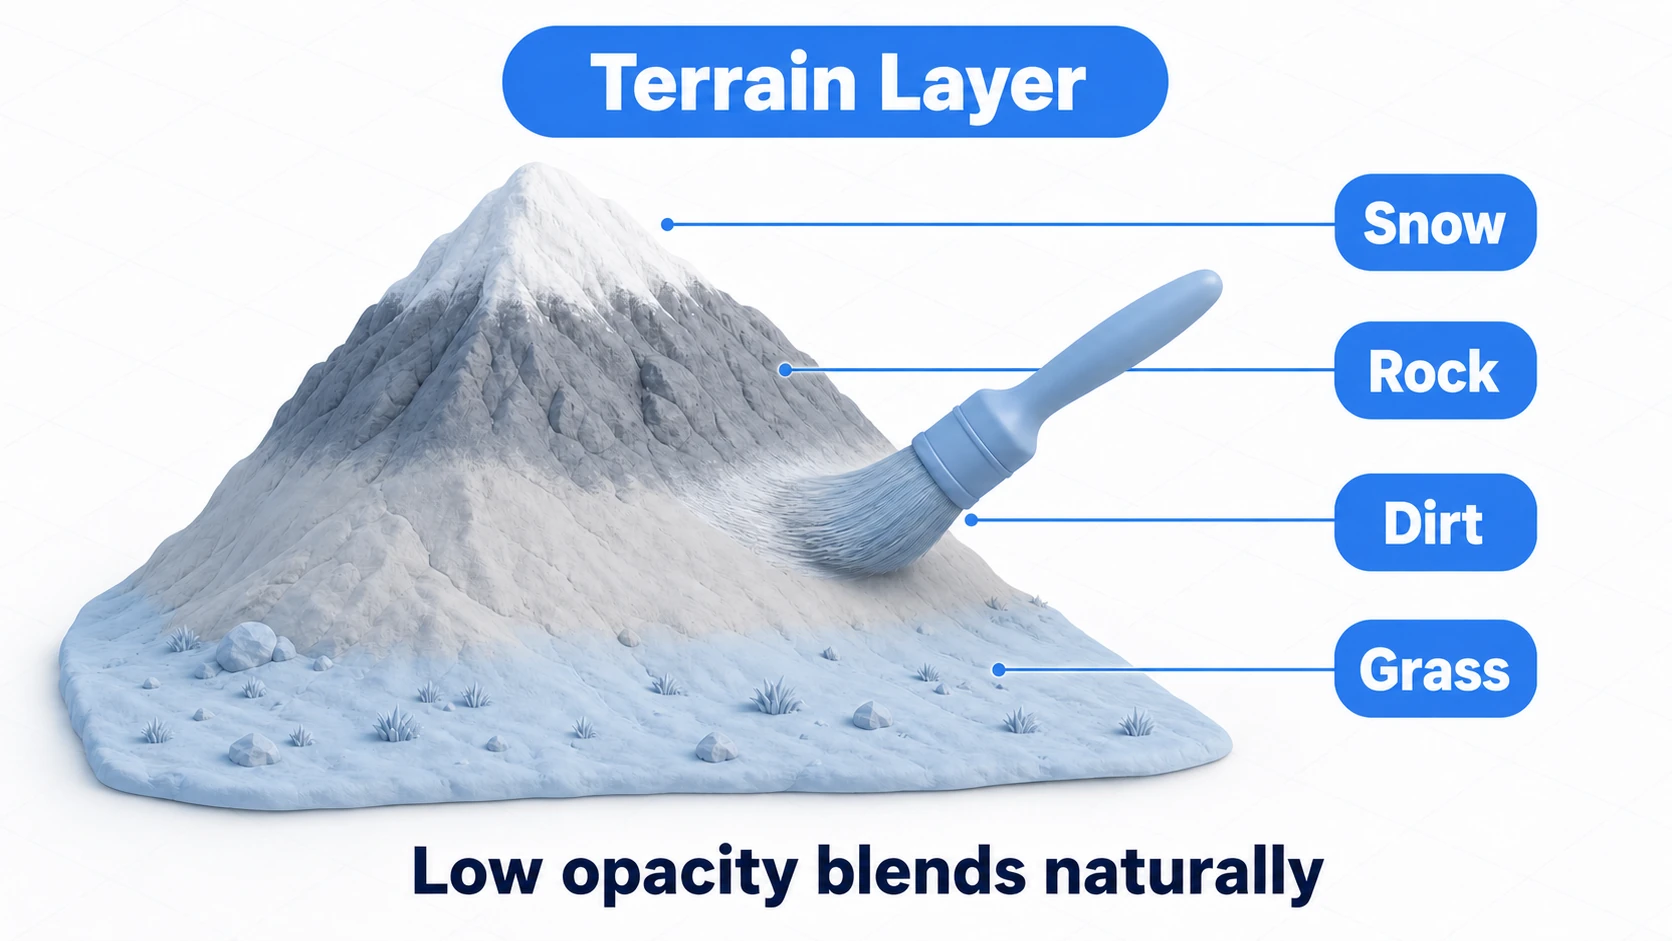
The classic approach is to paint by elevation: grass at the foot, dirt and rock on the slopes, snow at the summit. Rather than hard borders, layering at low opacity so the bands bleed into each other looks far more natural.
Terrain Layer Limits
| Render Pipeline | Layers per draw pass | Notes |
|---|---|---|
| URP and Built-in | 4 layers | No fixed cap, but a 5th layer adds another draw pass |
| Mobile (recommended) | 4 layers | Fits in one draw pass to maintain performance |
| URP Height-based Blend | Up to 4 layers | Blends borders by height. Unavailable with 5 or more layers |
Caution: As the layer count grows, draw passes increase and performance drops sharply. On mobile, keeping it within 4 layers is recommended.
Trees: Placing Trees
Adding Trees
- Select the Paint Trees tool
- Click
Edit Trees > Add Tree - Select a tree Prefab
- Drag across the terrain to place trees (hold Shift to remove)
Mass Place Trees
Mass Place Trees randomly places trees across the entire terrain in one go. Run it with Keep Existing Trees off and every tree you've already planted gets replaced.
Tree Settings
| Setting | Description |
|---|---|
| Bend Factor | How strongly trees sway in the wind (Wind Zone). Set per tree in Edit Trees (affects Tree Editor trees) |
| Billboard Start | The distance at which trees switch to billboard rendering (set in Terrain Settings) |
SpeedTree vs regular Mesh: SpeedTree assets come with a built-in LOD Group and transition between LODs automatically. Regular Mesh trees also switch step by step with distance if you add an LOD Group to the Prefab. If you want high-quality trees, SpeedTree-compatible assets are recommended.
Details: Placing Grass and Details
Detail Types
| Type | Description |
|---|---|
| Grass | Rendered as billboards (flat quads). Lightweight |
| Detail Mesh | Rendered as 3D meshes. Fully three-dimensional |
Adding Details
- Select the Paint Details tool
- Click
Edit Details > Add Grass TextureorAdd Detail Mesh - Drag across the terrain to place them
Terrain Settings: Configuration and Performance Optimization
Basic Settings
| Setting | Description |
|---|---|
| Terrain Width/Length/Height | Terrain size |
| Heightmap Resolution | Heightmap resolution (2^n + 1) |
| Detail Resolution | Detail resolution |
Heightmap Resolution Guidelines
| Project Scale | Resolution | Notes |
|---|---|---|
| Prototype / small | 257×257 | Low memory usage |
| Typical game | 513×513 | Well balanced |
| Large open world | 1025×1025 | High detail but high memory usage |
| Massive scale | 2049×2049 or higher | Splitting into multiple tiles recommended |
Detail Resolution Guidelines
| Project | Resolution | Detail Resolution Per Patch |
|---|---|---|
| Mobile | 512–1024 | 8 |
| PC / console | 1024–2048 | 16 |
| High quality | 2048–4096 | 32 |
Performance Settings
| Setting | Description |
|---|---|
| Pixel Error | LOD accuracy (1–200, default 5. Start from the default and raise it as needed) |
| Base Map Dist. | Distance at which the terrain switches to the base map (simplified rendering) |
| Detail Distance | Distance up to which details are rendered |
| Tree Distance | Distance up to which trees are rendered |
| Draw Instanced | Speeds up rendering with GPU Instancing |
Draw Instanced: Enabling this option speeds up Terrain rendering using GPU Instancing. It is especially effective when using multiple Terrain tiles.
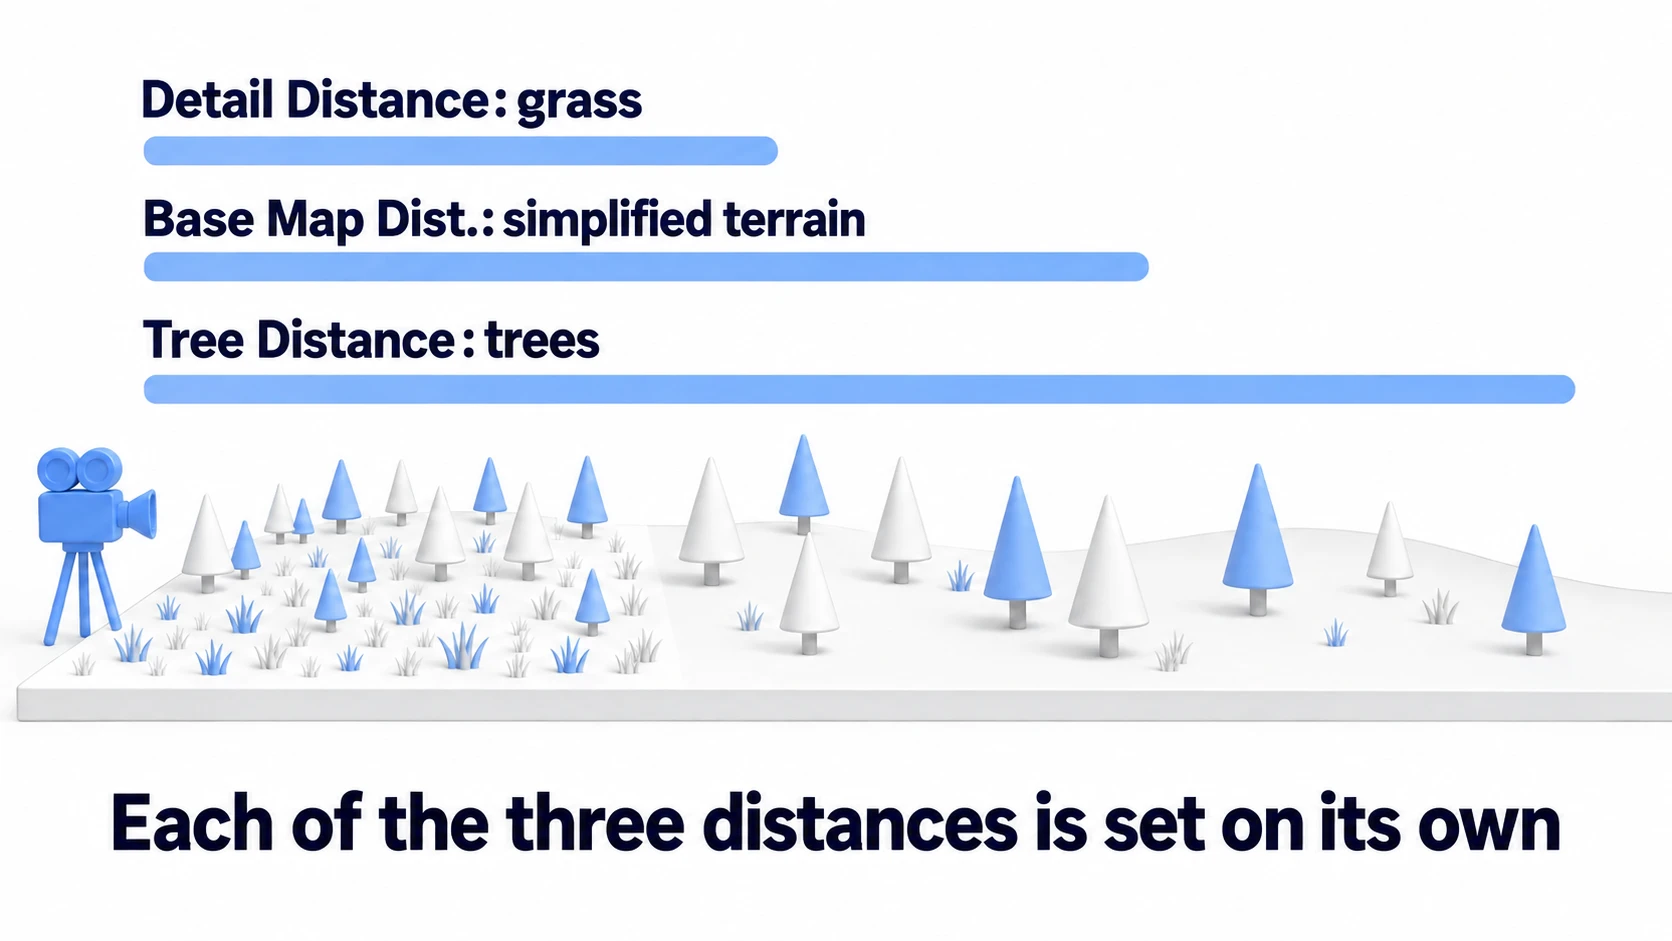
The three distances are independent settings. Even their defaults are all over the place (Detail Distance 80, Base Map Dist. 1000, Tree Distance 5000), so things don't disappear in a fixed order. Shortening each Distance makes rendering lighter at the cost of a sparser far view.
Wind Settings
You can configure grass swaying under Terrain Settings > Wind Settings for Grass.
| Setting | Description |
|---|---|
| Speed | Wind speed |
| Size | Size of the wind waves |
| Bending | How much the grass bends |
Grass Tint: The "Grass Tint" option in the same section adjusts the color tint of the grass — it is a visual adjustment separate from the wind effect.
Scope of Wind Settings:
- Details (Grass Texture, Detail Mesh) → affected
- Trees (placed with Paint Trees) → not affected (trees are configured individually via Bend Factor; SpeedTree trees use SpeedTree's own wind settings)
Multiple Terrain Tiles
When building a large map, splitting it into multiple Terrain tiles can improve performance.
Creating Tiles
- Select a Terrain
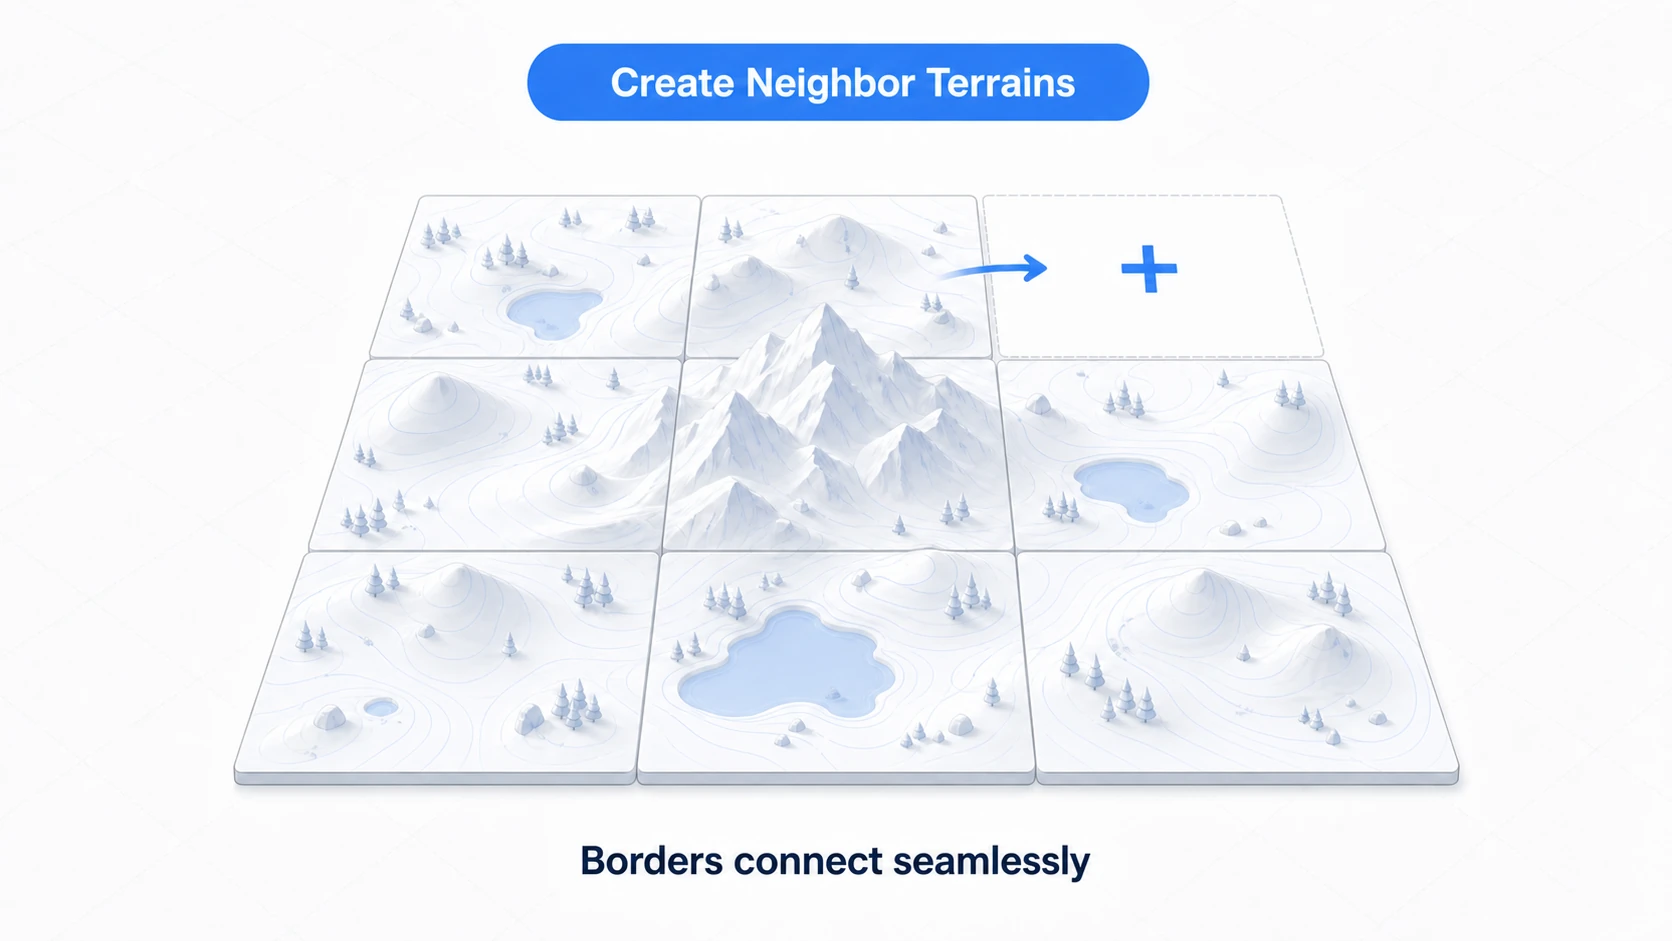
- Click the Create Neighbor Terrains tool
- Choose the direction in which to create the new tile
Neighboring tiles connect automatically so their LOD and normal transitions line up. Edge heights aren't matched, though, so when you create a new tile, make sure Fill Heightmap Using Neighbors is on. With it on, the new tile inherits the heights along its neighbor's edge.
Managing Tiles with Grouping ID
For large maps, give each Terrain the same Grouping ID in Terrain Settings and turn on Auto Connect, and neighboring tiles connect automatically. To connect them from a script, use Terrain.SetNeighbors().
Terrain Tools: The Terrain Tools package (installation is in a later section) makes batch-editing multiple tiles even more convenient.
Importing and Exporting Heightmaps
Terrain Settings > Import Raw / Export Raw lets you read and write 16-bit RAW files. Use this to integrate with external tools such as World Machine and Gaia, or to generate terrain from grayscale images created in Photoshop.
Manipulating Terrain from Scripts
You can manipulate the terrain from scripts through TerrainData.
using UnityEngine;

public class TerrainModifier : MonoBehaviour
{
    Terrain terrain;
    TerrainData terrainData;

    void Start()
    {
        terrain = GetComponent<Terrain>();
        terrainData = terrain.terrainData;
    }

    // Get and set heights (x, y are pixel coordinates)
    // Important: the heights array is indexed as [y, x] (row, column)
    // terrainData.GetHeights(xBase, yBase, width, height) takes arguments in (x, y) order,
    // but the returned array is accessed as heights[y, x]
    public void ModifyHeight(int x, int y, float height)
    {
        float[,] heights = terrainData.GetHeights(x, y, 1, 1);
        heights[0, 0] = height;  // range 0 to 1
        terrainData.SetHeights(x, y, heights);
    }

    // Convert world coordinates to pixel coordinates (with range clamping)
    // With a heightmapResolution of 513, valid pixel coordinates are 0 to 512
    public Vector2Int WorldToHeightmapCoord(Vector3 worldPos)
    {
        Vector3 terrainPos = worldPos - terrain.transform.position;
        int maxIndex = terrainData.heightmapResolution - 1;
        int x = Mathf.Clamp(
            Mathf.RoundToInt(terrainPos.x / terrainData.size.x * maxIndex),
            0, maxIndex);
        int y = Mathf.Clamp(
            Mathf.RoundToInt(terrainPos.z / terrainData.size.z * maxIndex),
            0, maxIndex);
        return new Vector2Int(x, y);
    }

    // Set the texture (Alphamap)
    public void PaintTexture(int x, int y, int layerIndex)
    {
        float[,,] alphas = terrainData.GetAlphamaps(x, y, 1, 1);
        // Reset all layers
        for (int i = 0; i < alphas.GetLength(2); i++)
            alphas[0, 0, i] = 0;
        alphas[0, 0, layerIndex] = 1;
        terrainData.SetAlphamaps(x, y, alphas);
    }
}
Use cases: Procedural terrain generation and runtime terrain deformation (digging, flattening, etc.).
In the Editor: TerrainData is an asset, so terrain you rewrite during Play stays changed after you stop Play. Duplicate the TerrainData asset as a backup before you experiment.
Coordinate system caveat:
heightmapResolutionandalphamapResolutionmay return different values. Be careful not to mix up heightmap coordinates and alphamap coordinates.
Difference between Heightmap and Alphamap resolutions:
| Property | Value Pattern | Examples |
|---|---|---|
| heightmapResolution | 2^n + 1 | 513, 1025 |
| alphamapResolution | 2^n | 512, 1024 |
Procedural Terrain Generation with Perlin Noise
public void GenerateProceduralTerrain(float scale, float heightMultiplier)
{
    int res = terrainData.heightmapResolution;
    float[,] heights = new float[res, res];

    // Add offsets to generate variation,
    // since Mathf.PerlinNoise always returns the same result for the same input
    float offsetX = Random.Range(0f, 10000f);
    float offsetY = Random.Range(0f, 10000f);

    for (int y = 0; y < res; y++)
    {
        for (int x = 0; x < res; x++)
        {
            heights[y, x] = Mathf.PerlinNoise(
                (x + offsetX) / (float)res * scale,
                (y + offsetY) / (float)res * scale
            ) * heightMultiplier;
        }
    }
    terrainData.SetHeights(0, 0, heights);
}
The Terrain Tools Package
Installing the Terrain Tools package unlocks additional sculpting tools and advanced features such as erosion simulation.
Installation
- Open
Window > Package Manager - Click the
+button and chooseAdd package by name... - Enter
com.unity.terrain-toolsand install
Added Tools
| Tool | Description |
|---|---|
| Bridge | Connect two points with a bridge |
| Clone | Copy and paste part of the terrain |
| Erosion | Erosion simulation (weathering, water flow, etc.) |
| Terrace | Create stepped, rice-terrace-like landscapes |
| Noise | Noise-based terrain generation |
Hands-On: Building a Mountain Field with a Winding Trail
The grassland and snowy peaks of an open-world RPG, the forest around your base in a survival crafting game, the mountain range rolling past in the background of a racing game — the genres differ, but "a field with a mountain, a trail, trees, and grass" is the classic thing you build with Terrain. Let's use every tool covered so far to finish one explorable mountain field.
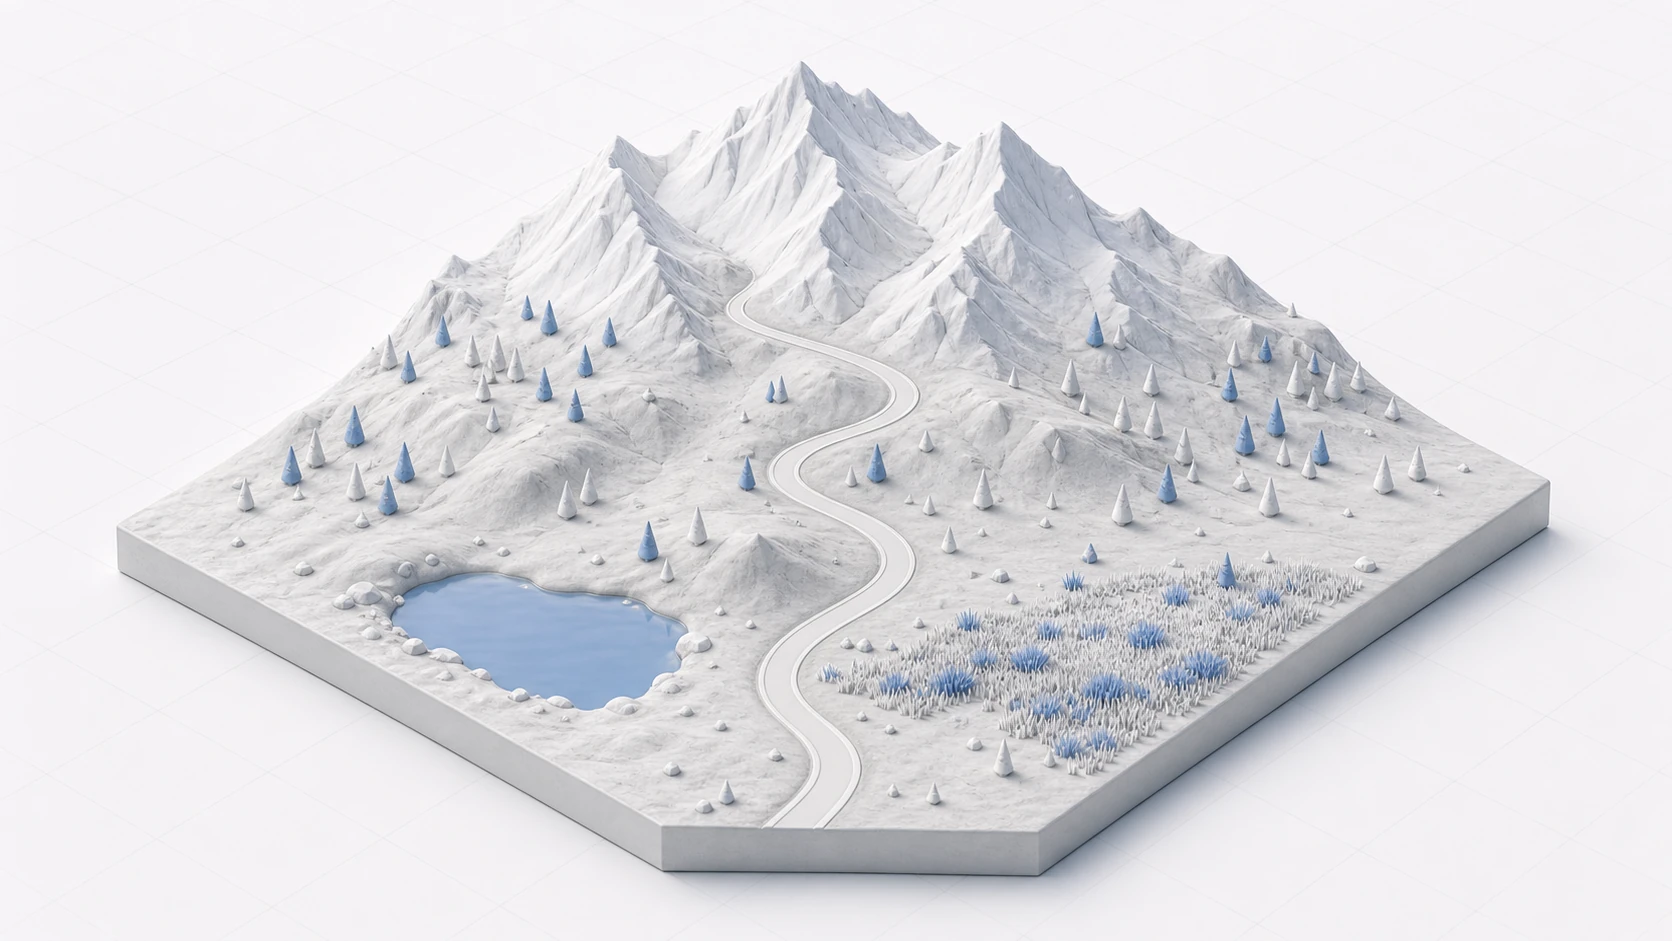
- Decide the size and resolution: In
Terrain Settings, set Width/Length to 500×500 and Heightmap Resolution to 513×513. Finishing a smaller map teaches you far more than abandoning a giant 1000×1000 one - Start with the big shapes: Raise the mountain ridge in the back with a large
Raise or Lower Terrainbrush, then flatten a plateau at the base withSet Height— that's your future village or base site - Lay the trail: Type a number (in meters) into
Set Height'sHeightfield and even out a winding path from the foothills to mid-slope, raising the height section by section (e.g., 5 → 15 → 25 → 40). Painting on at one height gives you a flat trench, not a climbing trail. Finish by runningSmooth Heightover the steps and the edges until it reads as a walkable slope - Paint the textures: Register four layers (grass, dirt, rock, snow) with
Edit Terrain Layers > Create Layerand paint them following the elevation, then overwrite just the trail with the dirt layer (four layers fit in a single draw pass) - Plant trees and grass: Register a tree Prefab with
Edit Trees > Add Tree, bulk-place withMass Place Trees, then Shift-drag to clear the trail and the plateau. Register grass withEdit Details > Add Grass Texture, and keep grass (Details) dense only around the foothills where players actually walk — good looks and good performance at once - Finish with distance tuning: Adjust Pixel Error and Tree/Detail Distance in
Terrain Settings, and check the frame rate with Stats in the Game view
Two points matter most.
- Work from big shapes to details: If you polish trails and small bumps first, re-raising the mountain later destroys them. Mountain → plateau → trail → vegetation means never redoing work
- Design the gameplay flow first: Decide where the trail, base, and vista points go, then shape the terrain around them. Starting from looks tends to produce maps that are beautiful but unfun to traverse
If all those trees and grass start weighing down the frame rate, the draw call optimization guide and the mobile optimization guide will help.
Bonus: Good Things to Know in Advance
Once your field takes shape, these topics come into view next. Even just knowing the names keeps you from getting lost.
- Want AI to walk on your terrain? A Terrain can be baked into a NavMesh (in Unity 6, bake it with the AI Navigation package's NavMesh Surface). See the NavMesh guide for making enemies and NPCs patrol your field.
- Rocks, bridges, and buildings are regular 3D models: Terrain only handles the ground. Props on top of it are imported 3D models — the 3D model import guide covers the details.
- Rendering constraints depend on your render pipeline: Specs like how many Terrain Layers fit in one draw pass (4 on URP and Built-in) are tied to the pipeline. The render pipeline guide gives you the full picture.
Summary
Unity Terrain is a powerful system for efficiently building large-scale natural environments.
- Paint Terrain - Sculpt the landscape and paint textures with brushes
- Paint Trees / Paint Details - Quickly place trees and grass
- LOD and culling - Rich set of performance optimization features
- Multiple tiles - Scales up to huge open worlds
Start with a single 500×500 map. What kind of terrain does your game's world stand on?