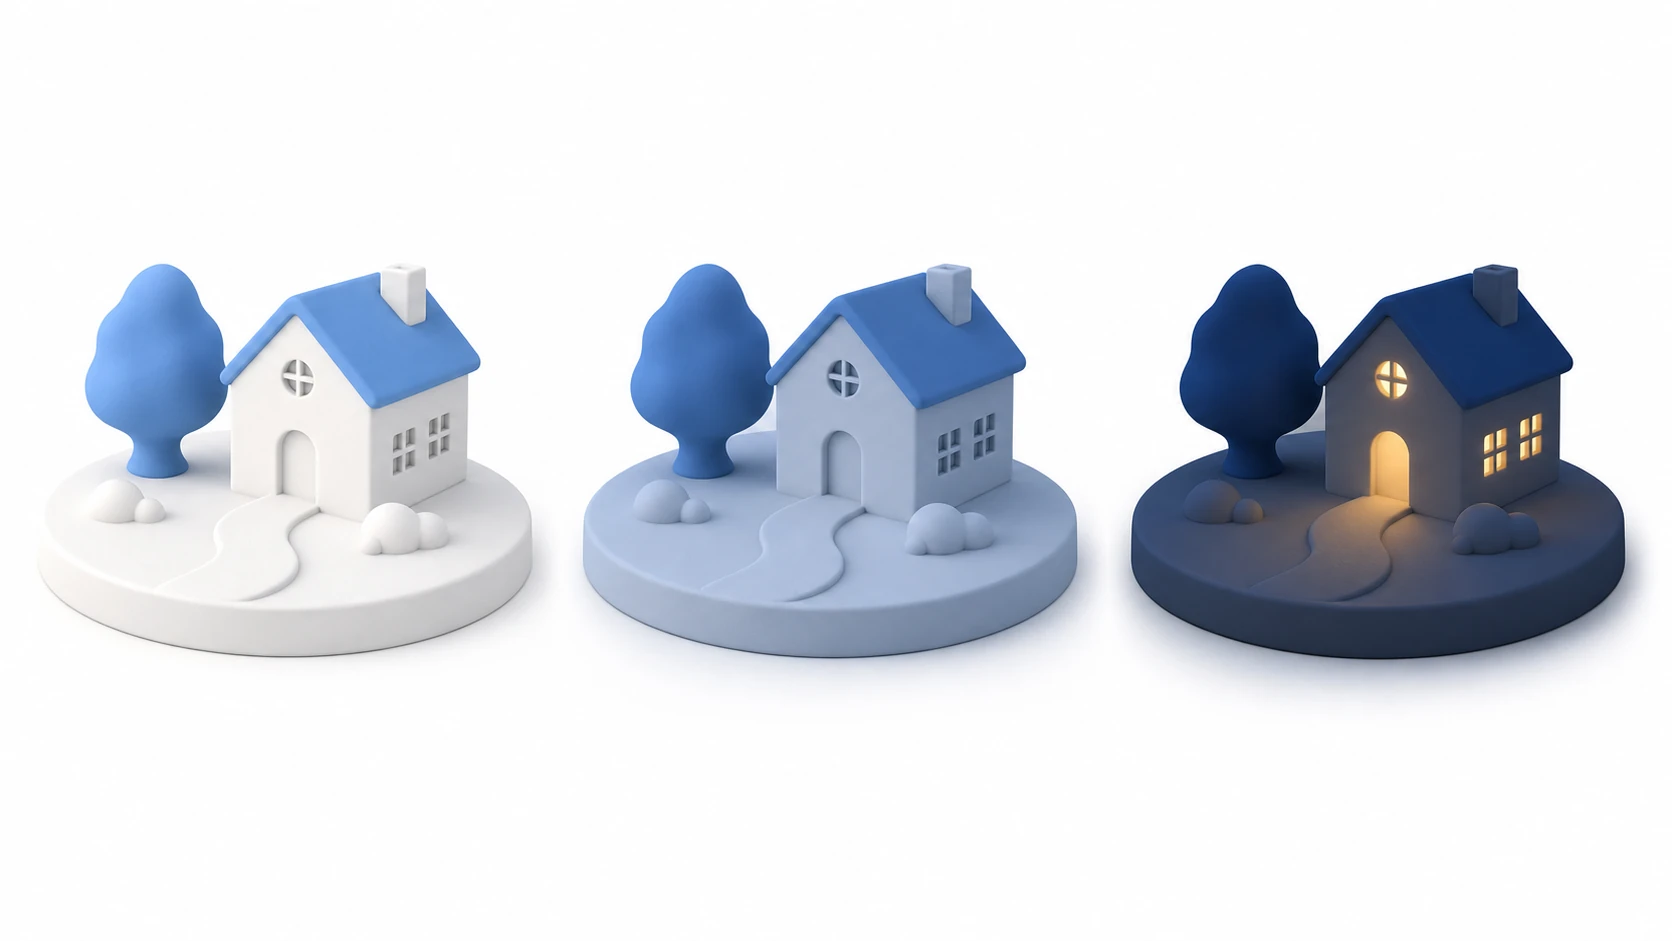
Take the same models and the same textures, and the lighting alone can turn the scene into a crisp afternoon, a quiet night, or an unsettling horror set. Mood, realism, and even where the player looks—light is the single biggest factor in how a 3D scene reads.
The key to understanding lighting in Unity is grasping its two pillars: "realtime" and "baked." In this article, we'll cover the four light types and when to use each, those two pillars, indirect light (Global Illumination), and the cost of shadows.
What You'll Learn
- The roles of the 4 light types (Directional/Point/Spot/Area) and when to use each
- Realtime vs. baked—choosing between "compute every frame" and "bake it in"
- Global Illumination (indirect light) and Light Probes
- The 3 shadow settings and their performance impact
- A practical 6-step workflow for lighting a scene
- Hands-on: finishing a pitch-black room with daylight, a lamp, and a flashlight
Tested with: Unity 6 (6000.x) / URP
The Two Pillars: Realtime and Baked
Unity's lighting broadly falls into two categories: Realtime Lighting and Baked Lighting.
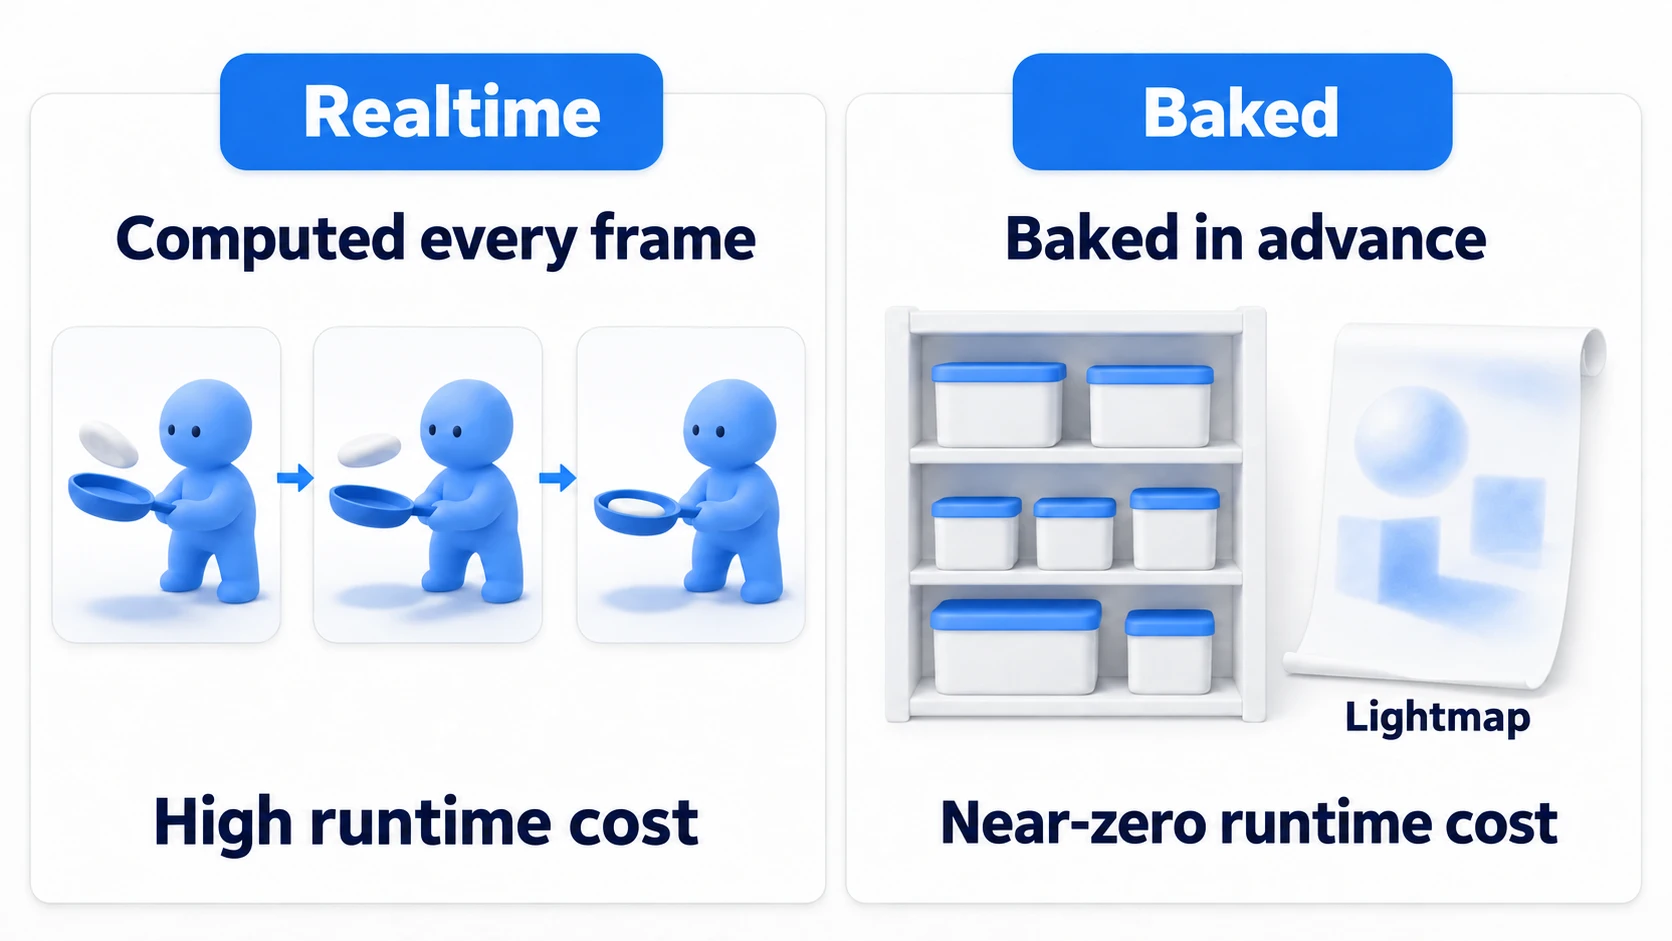
- Realtime: Light and shadow are computed every frame while the game runs. Characters can cast dynamic shadows, and light sources themselves can move (a swaying lantern, a flashing warning light)—but the computational cost is high.
- Baked: Before the game runs (at development time), Unity precomputes all the light and shadow for non-moving objects and burns the result into a special texture called a lightmap. The runtime cost is nearly zero, but baked light can't move.
Think of it like cooking: realtime is cooking each dish to order, while baking is meal prep done in advance. Static backgrounds get the meal prep (baked), and anything that moves gets cooked to order (realtime)—mastering this split is the key to scenes that look great and run light.
The Main Light Types
In Unity, you can add various light types to your scene from the GameObject > Light menu. The fastest way to remember them is by their real-world counterparts.
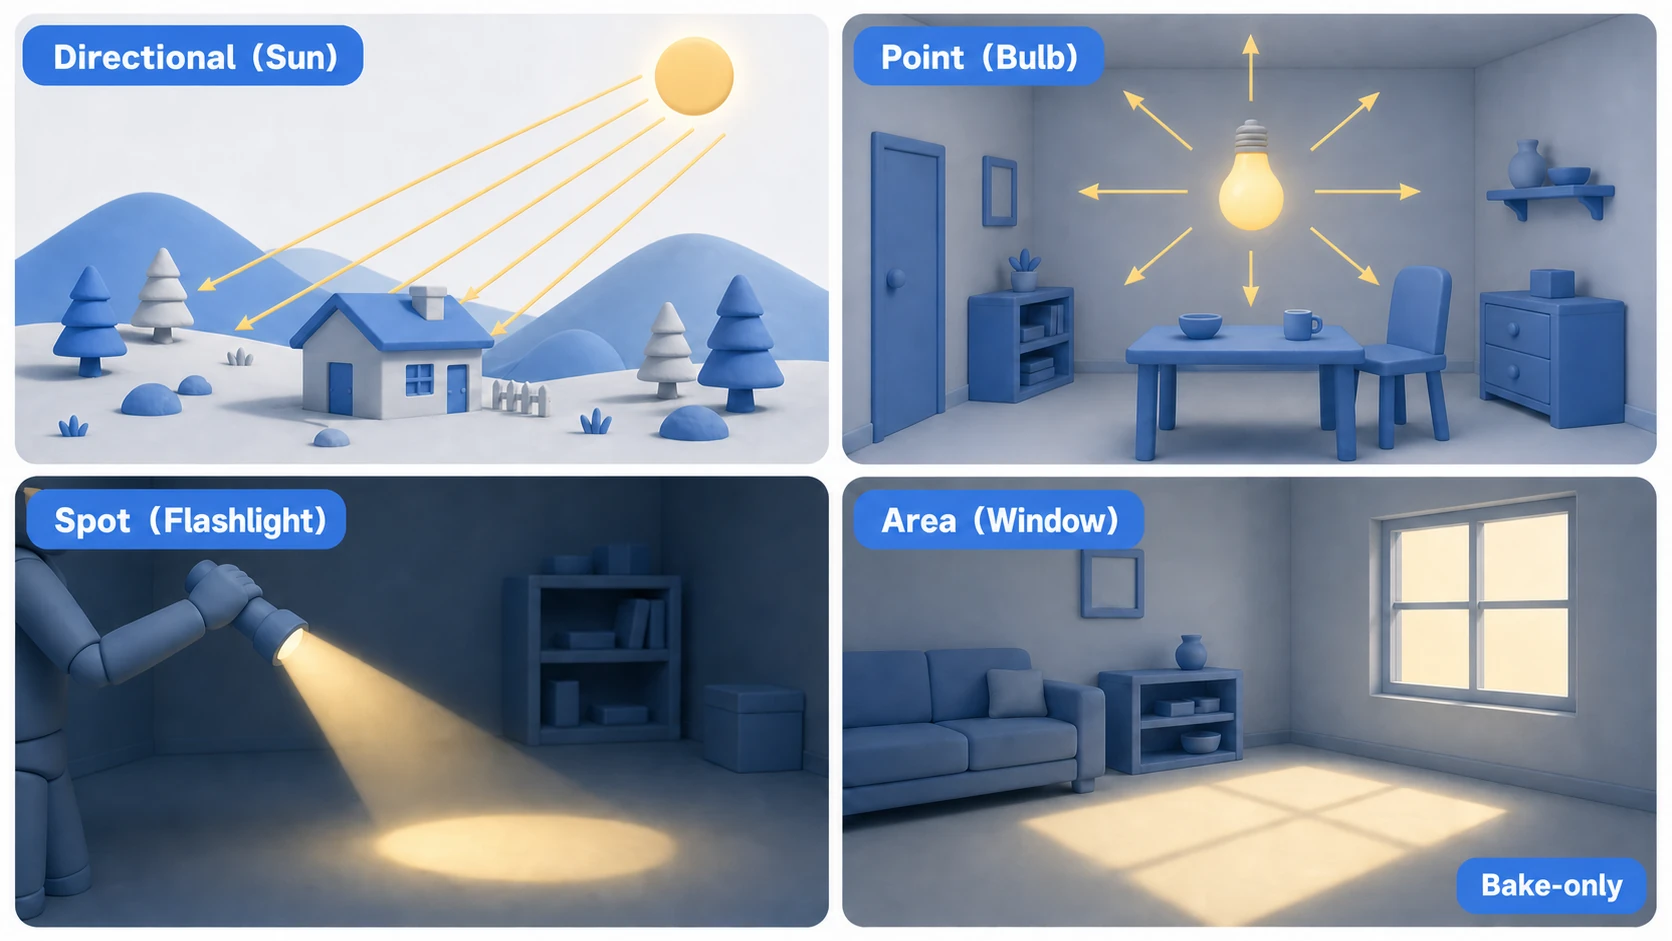
Directional Light
Simulates a light source at infinite distance, like the sun or moonlight. It casts parallel light across the entire scene from one direction. The light's position doesn't matter—only its rotation (angle) determines the light direction. You typically place just one as the main light source for outdoor scenes. A sunset look can be created simply by changing this light's angle and color.
Point Light
Radiates light in all directions from a single point, like a light bulb. The light attenuates with distance. Lamps, campfires, explosion flashes, glowing mushrooms in a cave—it's the all-purpose choice for "light emanating from this spot."
Spot Light
Projects light in a cone from a single point, like a flashlight or stage lighting. You can adjust the cone's angle (Spot Angle) and reach (Range). Great for horror-game flashlights, car headlights, and "look over here" attention direction.
Area Light
Emits light from a rectangular surface, like a window or a ceiling light panel. It produces soft, natural light and shadows, but realtime processing is extremely expensive, so it's bake-only.
Global Illumination (GI)
In the real world, light doesn't just hit objects directly from a source—it bounces off surfaces and indirectly illuminates other objects. A room with red curtains takes on a faint red tint because of this indirect (bounced) light. The technique that simulates this is Global Illumination (GI).
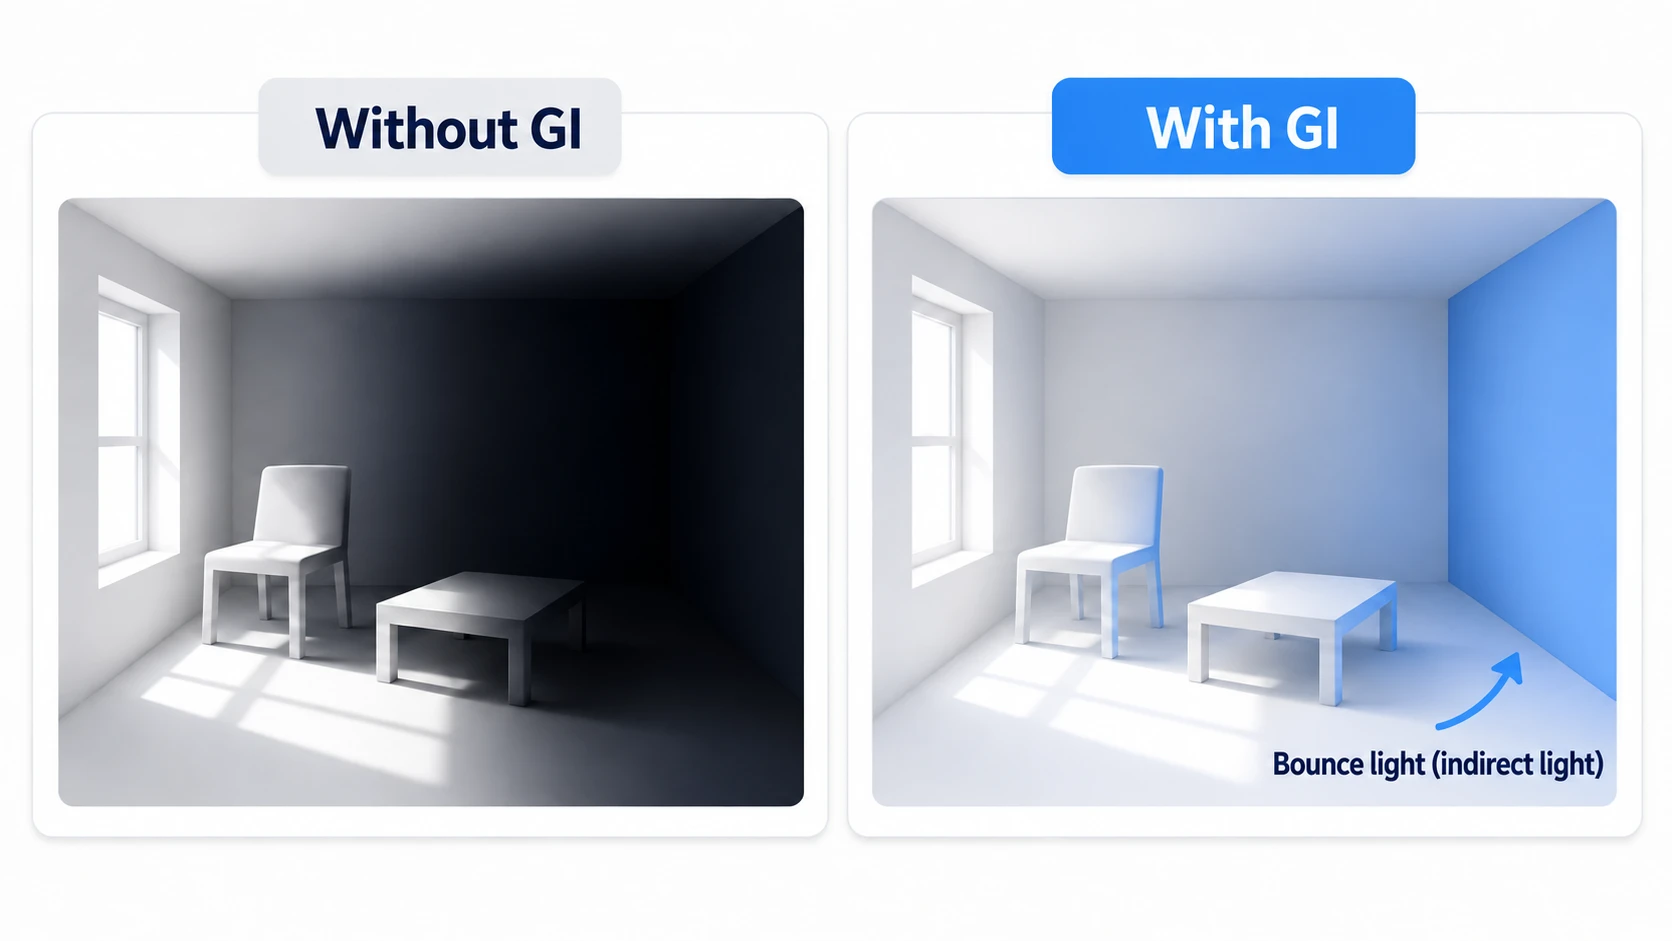
With GI, shadowed areas that receive no direct light don't fall into pure black, and the whole scene gains a more natural, layered look.
In Unity, the standard approach is to bake indirect light for static objects into lightmaps. And the mechanism that lets moving characters receive that baked indirect light is Light Probes. Probes placed throughout the scene record the surrounding light and tell any character passing through, "here's how bright this spot is."
Shadows
Shadows are essential for giving a scene depth and dimensionality. At the same time, they're one of the most expensive parts of lighting. Each light's Inspector offers three options under Shadow Type:
- No Shadows: No shadows are generated. The lightest option.
- Hard Shadows: Crisp-edged shadows. Relatively fast.
- Soft Shadows: Softly blurred, more realistic shadows. The most expensive.
The number of realtime shadow-casting lights and their distance directly impact performance. Adjust shadow quality and rendering distance under Edit > Project Settings > Quality to match your target hardware.
The decision rule fits in one line: "Is this the shadow of something that moves?" Bake the shadows of static objects into lightmaps, and reserve realtime shadows for where they truly matter (the player and enemies).
A Lighting Setup Workflow
Here's a practical sequence for lighting a scene.
- Place the main light sources: Add a
Directional Lightas the scene's key light (for outdoor scenes), plus any keyPoint Light/Spot Lightsources. - Set up ambient light: Open the Lighting window via
Window > Rendering > Lightingand configure the ambient light (sky color, etc.) in theEnvironmenttab. This sets the baseline brightness of the whole scene. - Mark static objects: For objects that never move during gameplay—terrain, buildings—enable the
Staticflag in the Inspector. These become the targets for light baking. - Set each light's mode: Choose each light's
ModefromRealtime,Baked, orMixed. UseRealtimeorMixedfor lights that also hit moving objects,Bakedwhen the light only affects static objects. - Run the light bake: Click
Generate Lightingin the Lighting window to run the bake and generate lightmaps. - Place Light Probes: So moving characters benefit from the baked lighting, place a
Light Probe Groupalong the paths characters travel.
Hands-On: Finish a Pitch-Black Room with Three Lights
Let's walk that workflow once through a tiny scene. The subject: "a small room with a window, plus a player who moves around" — a room in an exploration horror game, an RPG inn, an escape-room puzzle; the light assembly is the same. Start by deleting the Directional Light and, in the Lighting window's Environment tab, setting Environment Lighting's Source to Color with a dark color, so the room is pitch black, then add the lights back one at a time, assigning each a role as you go.
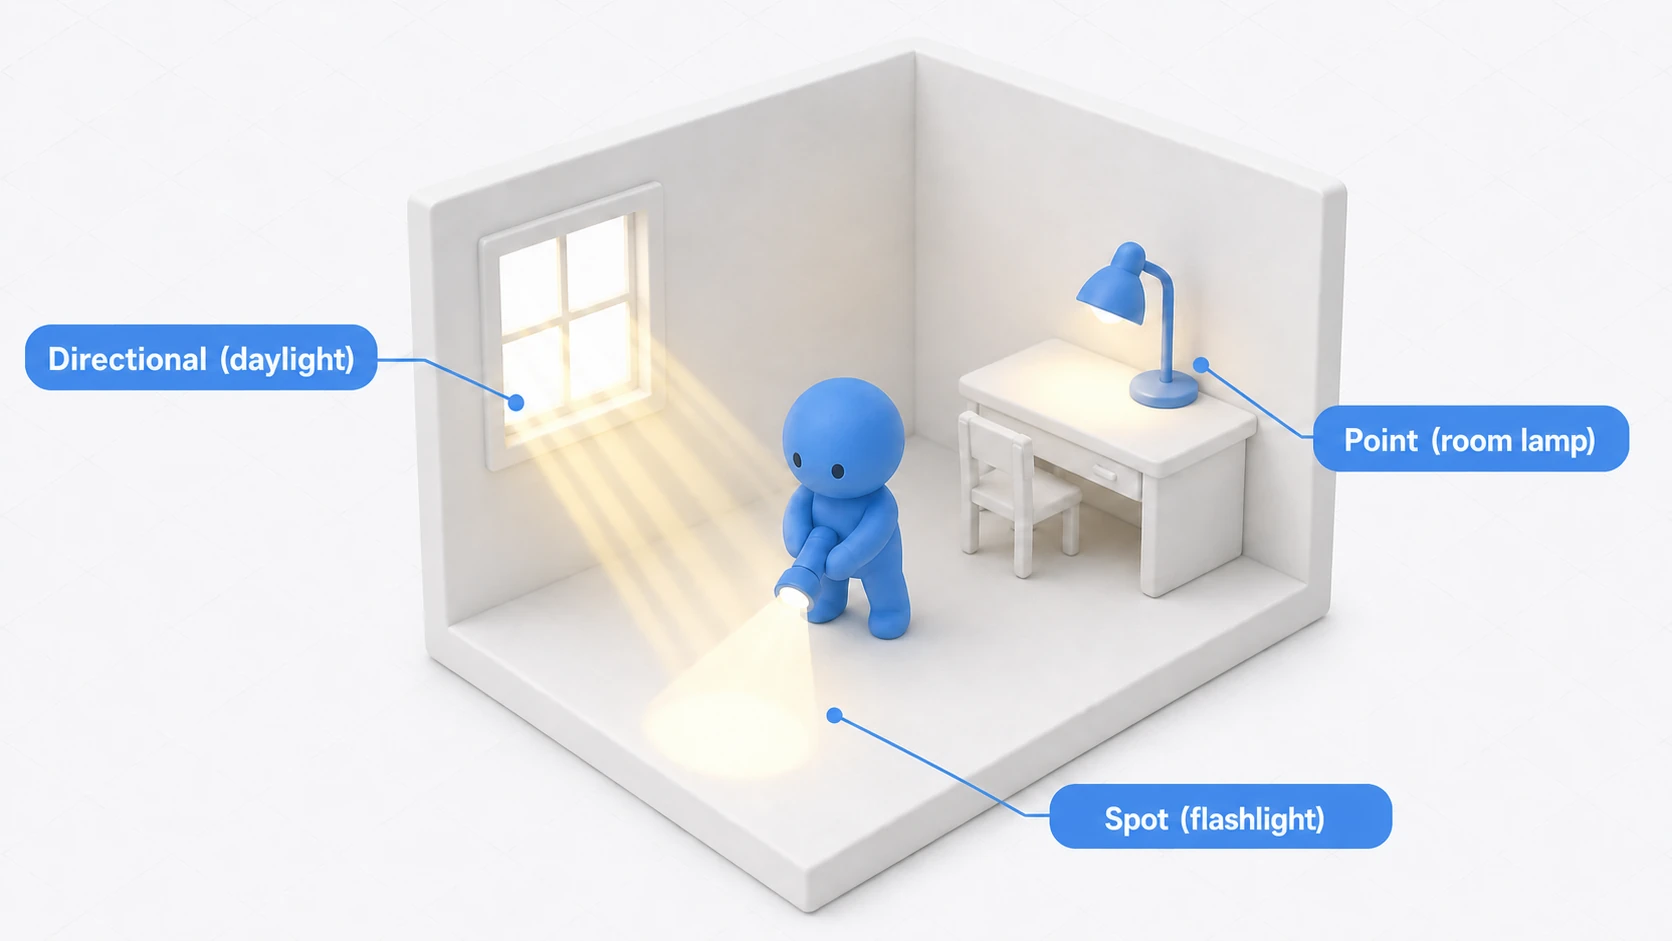
- The world's brightness —
Directional(Mode: Mixed): the sun outside the window. Lower the angle for dusk, shift the color blue for moonlight. This one light decides the room's "time of day" - The local warmth —
Point(Mode: Baked): the desk lamp. Neither the room nor the lamp moves, so bake it (meal-prep it) and its runtime cost drops to zero - The player's light —
Spot(Mode: Realtime): the handheld flashlight. It moves, so realtime is the only option. The lamp's shadows are baked in, so the only lights computing shadows at runtime are this one and the sun - Finish: mark the room's objects
Staticand clickGenerate Lighting. Place aLight Probe Groupalong the player's path
Once it's assembled, turn the lights off one at a time. Kill the Directional and the world outside the window goes dark; kill the Point and the room loses its warmth; kill the Spot and your footing disappears. When you can explain in one line what each light's absence takes away, you've learned to choose lights by role.
Symptoms, Before and After
The "too dark / floating / too heavy" problems you'll meet along the way have well-known culprits.
| Symptom | Culprit | Fix |
|---|---|---|
| Shadowed areas are pitch black and flat | No indirect light | Bake GI with Generate Lighting and check the ambient light in Environment |
| Baked, but the room didn't change | Forgot the room's Static flag | Mark the room Static and re-bake |
| The moving player's brightness looks pasted-on | No Light Probes | Place a Light Probe Group along the path and re-bake |
| It just feels heavy | Everything Realtime + Soft Shadows | Return to the roles (bakeable lights go Baked; realtime shadows only on the lights that need them) |
Finally, glance at the Stats overlay in the Game view — if the framerate is steady, you're done. You can name each light's role, and the room and player brightness sit naturally together. That's this article's goal.
Bonus: Good to Know for Later
Once you're comfortable with lighting, these topics come into view next.
- Lighting works hand in hand with materials: A light's effect depends on the material receiving it (
Metallic,Smoothness). Often, fixing the surface quality helps more than cranking up the light (see the materials and shaders article). - Post-processing is the finishing touch: Overall color grading, Bloom (light glow), and exposure adjustments belong to post-processing—the final pass of image-making (see the post-processing guide).
- The render pipeline changes how lights behave: URP, for example, limits how many realtime lights can affect a single object when the Rendering Path is Forward (4 by default; Forward+ has no limit)—constraints differ by render pipeline (see the render pipeline article).
- Use Reflection Probes for metallic reflections: For mirror-like reflections, place a
Reflection Probethat captures the surrounding scenery. Think of it as the "reflection counterpart" of Light Probes. - 2D uses a different system: the lights in this article are for 3D. For light and shadow in 2D, use URP's 2D Renderer and Light 2D (2D Lighting Basics).
Summary
Lighting is a deep field, but just mastering the basics dramatically improves your scenes.
- Remember lights by their real-world counterparts: Directional = sun, Point = light bulb, Spot = flashlight, Area = window (bake-only).
- Split the two pillars: static backgrounds get baked (meal prep), moving things get realtime (cooked to order).
- Earn performance with the
Staticflag plus baking. - Use GI's bounced light for realism, and Light Probes to bring indirect light to dynamic characters.
- Shadows are expensive. Decide with "is this the shadow of something that moves?"
Start by dropping different lights into a scene and exploring the rich expressions that light and shadow can create.