Picture this: you've placed 50 enemies in a scene, and then decide "actually, I want to change their HP" — now imagine fixing all 50 of them one by one. If you multiply objects by copy-pasting, this nightmare will eventually become reality.
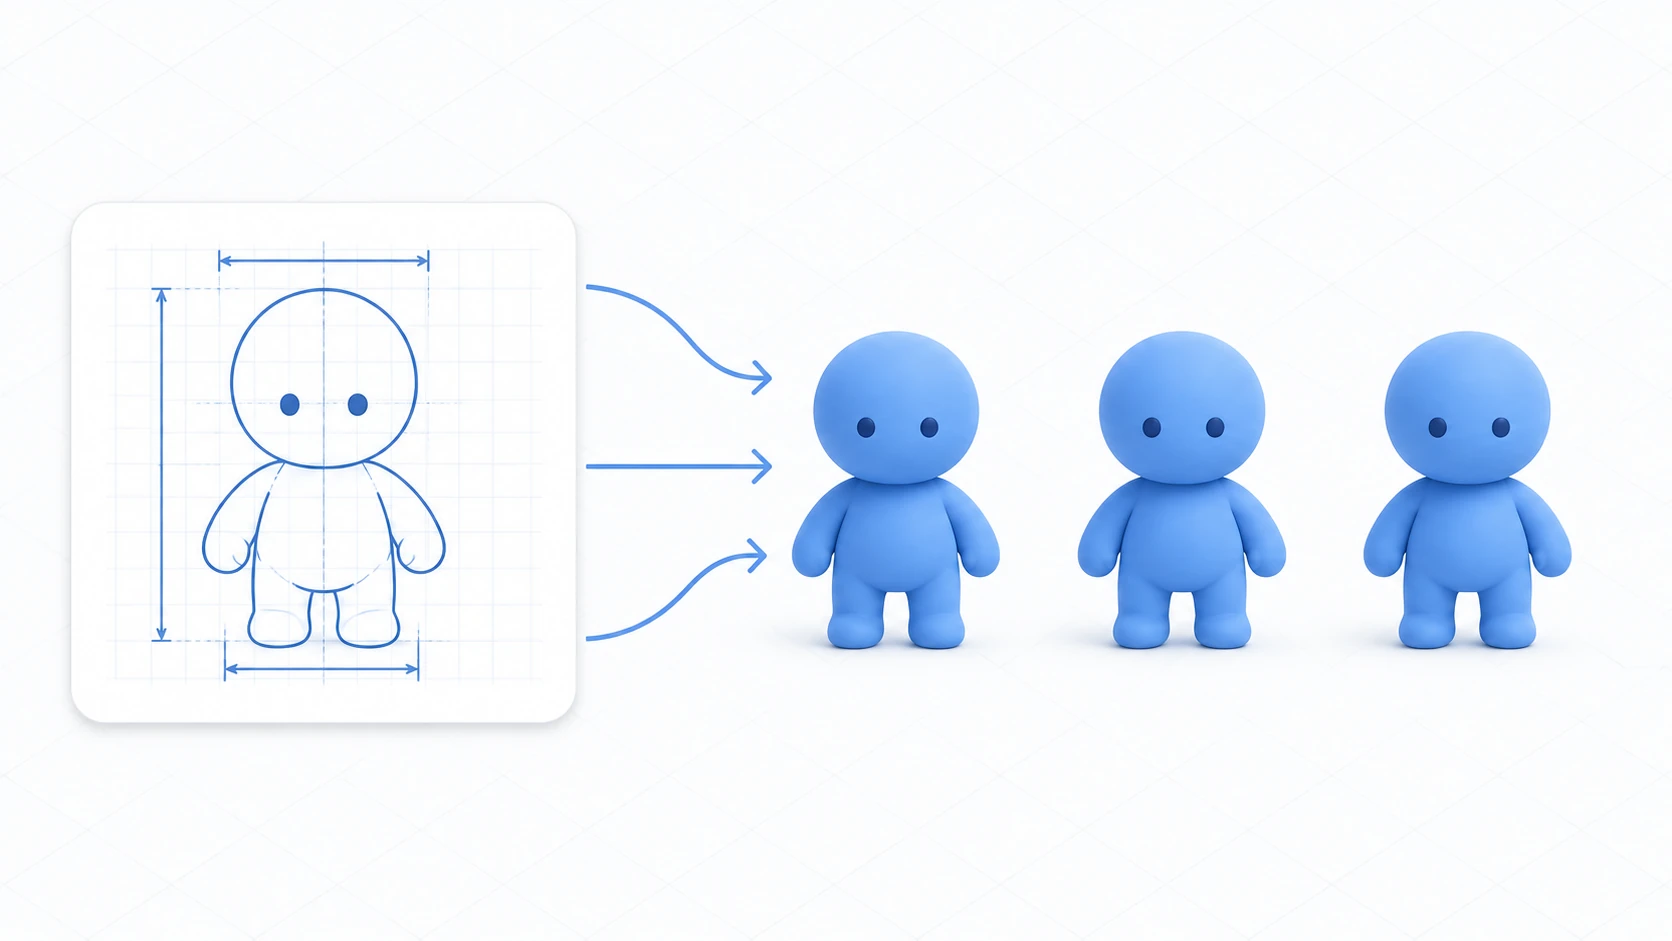
The elegant solution to this problem is one of Unity's most important features: the Prefab. A Prefab is a "blueprint" that bundles a GameObject with its components and settings — and fixing the blueprint in one place updates every object created from it.
What You'll Learn
- How Prefabs work (the blueprint-instance relationship)
- How to create Prefabs, place them in scenes, and spawn them dynamically from scripts
- Overrides: changing the settings of just one specific instance
- Advanced features: Nested Prefabs and Prefab Variants
Tested with: Unity 6 (6000.x)
What Is a Prefab?
A Prefab is a reusable GameObject asset. Create and configure a GameObject in the Hierarchy window, then simply drag-and-drop it into the Project window — that's all it takes to create a Prefab.
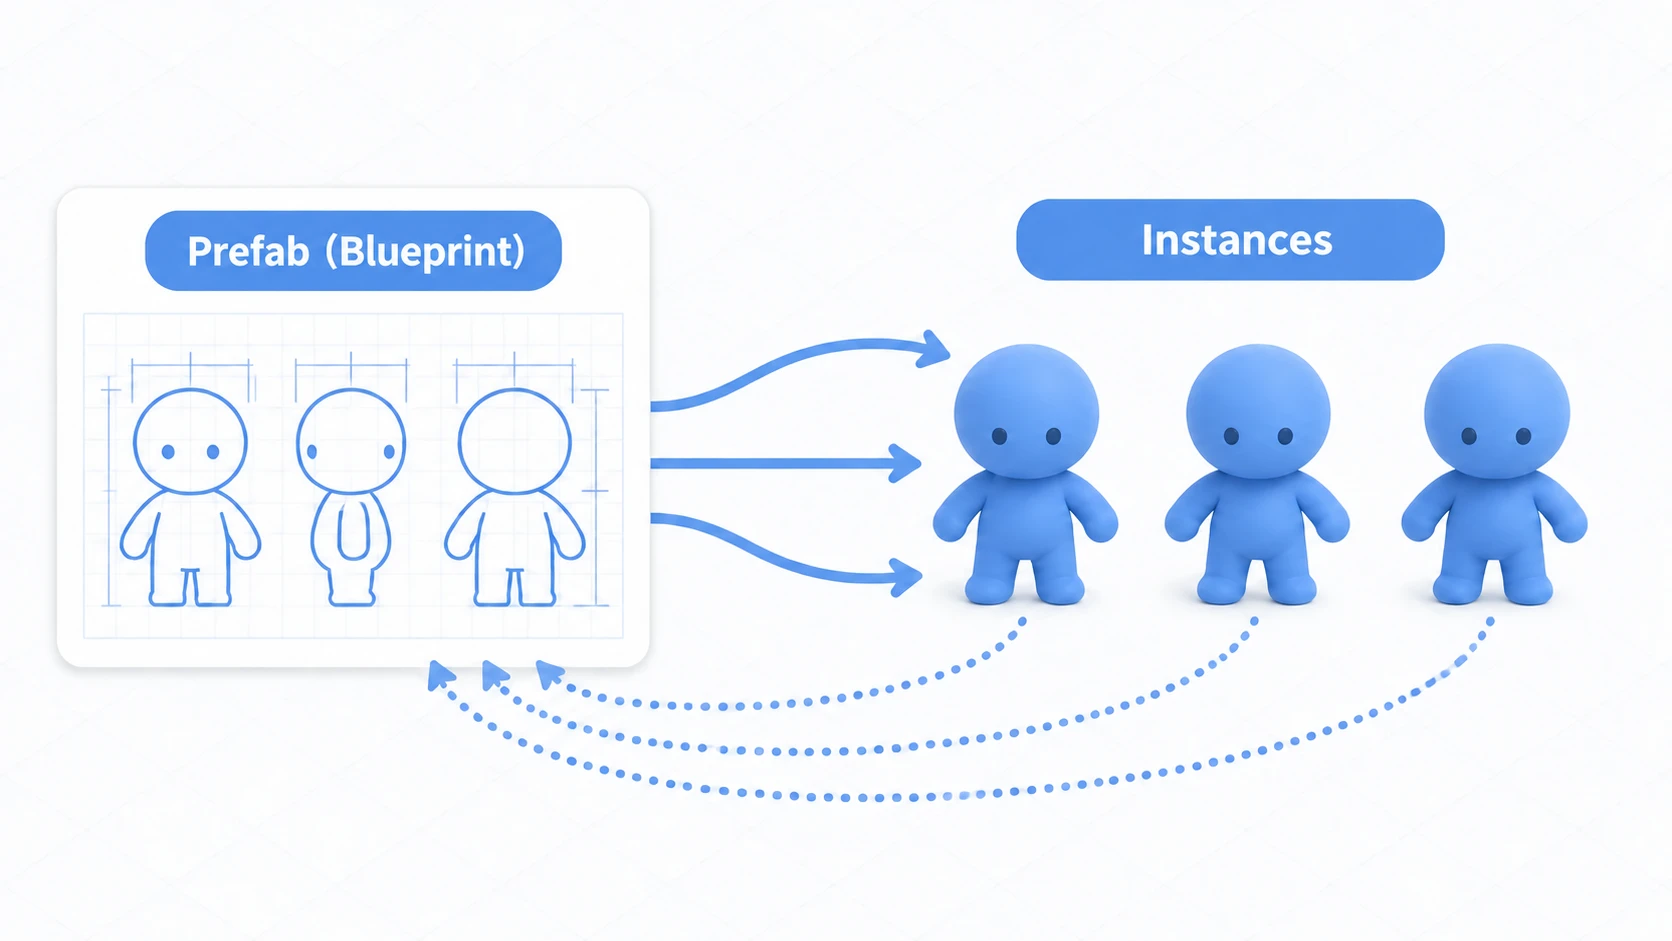
Once turned into a Prefab, you can place (instantiate) that Prefab asset in your scene like a stamp, as many times as you need. And here's the most powerful part: when you modify the original Prefab asset (the blueprint), the change automatically propagates to every instance (scene object) created from it.
Benefits of Using Prefabs
- Reusability: Easily place the same object in scenes as many times as needed.
- Batch Editing: Edit the original Prefab once to update all instances at the same time. This makes your project resilient to specification changes and highly maintainable.
- Dynamic Spawning: Use the
Instantiate()method to dynamically create objects from Prefabs during gameplay. Essential for firing bullets, spawning enemies, and more.
Creating and Using Prefabs
1. Creating a Prefab
- Prepare the Object: In the Hierarchy window, create the GameObject you want to turn into a Prefab, add the necessary components (scripts, Colliders, etc.), and configure the values in the Inspector.
- Turn It into a Prefab: Drag the configured GameObject from the Hierarchy window into any folder in the Project window (creating a
Prefabsfolder is common practice).
That's it — a Prefab asset with a blue cube icon appears in the Project window. At the same time, the original object in the Hierarchy also turns blue, indicating that it is now a Prefab instance.
2. Instantiating (Placing) a Prefab
- Manual Placement: Drag the Prefab asset from the Project window into the Scene view or the Hierarchy window.
- Dynamic Spawning: Create instances from a script using the
Instantiate()method.
using System.Collections;
using UnityEngine;

public class Spawner : MonoBehaviour
{
    // Prefab assigned in the Inspector
    public GameObject enemyPrefab;

    void Start()
    {
        // Start a coroutine that spawns an enemy every 3 seconds
        StartCoroutine(SpawnEnemies());
    }

    IEnumerator SpawnEnemies()
    {
        while (true)
        {
            // Create a new instance from the Prefab
            Instantiate(enemyPrefab, transform.position, Quaternion.identity);
            yield return new WaitForSeconds(3f);
        }
    }
}
What Instantiate() creates is a copy of the blueprint at the moment it's called. If you edit the blueprint later while the game is running, the copies already in the scene don't receive the change.
Editing Prefabs and Overrides
Editing a Prefab
You can edit a Prefab asset in the following way.
- Prefab Mode: Double-click the Prefab asset in the Project window, or select a Prefab instance in the Hierarchy and click the "Open" button in the Inspector, to enter the dedicated "Prefab Mode." Any changes you make here affect all instances.
Overrides
Sometimes you want to change the settings of just one specific instance placed in the scene — for example, "give this one enemy a bit more HP" or "make this one tree slightly bigger."
When you change a value on a scene Prefab instance in the Inspector, that property turns bold and gets a blue line at its left edge, indicating it has been overridden. The change applies only to that instance — the original Prefab and other instances are unaffected. Note that the outermost Position and Rotation of every instance you place in the scene show in bold but get no blue line, because they're per-instance values to begin with. Tell an exception by the blue line, not by bold text.
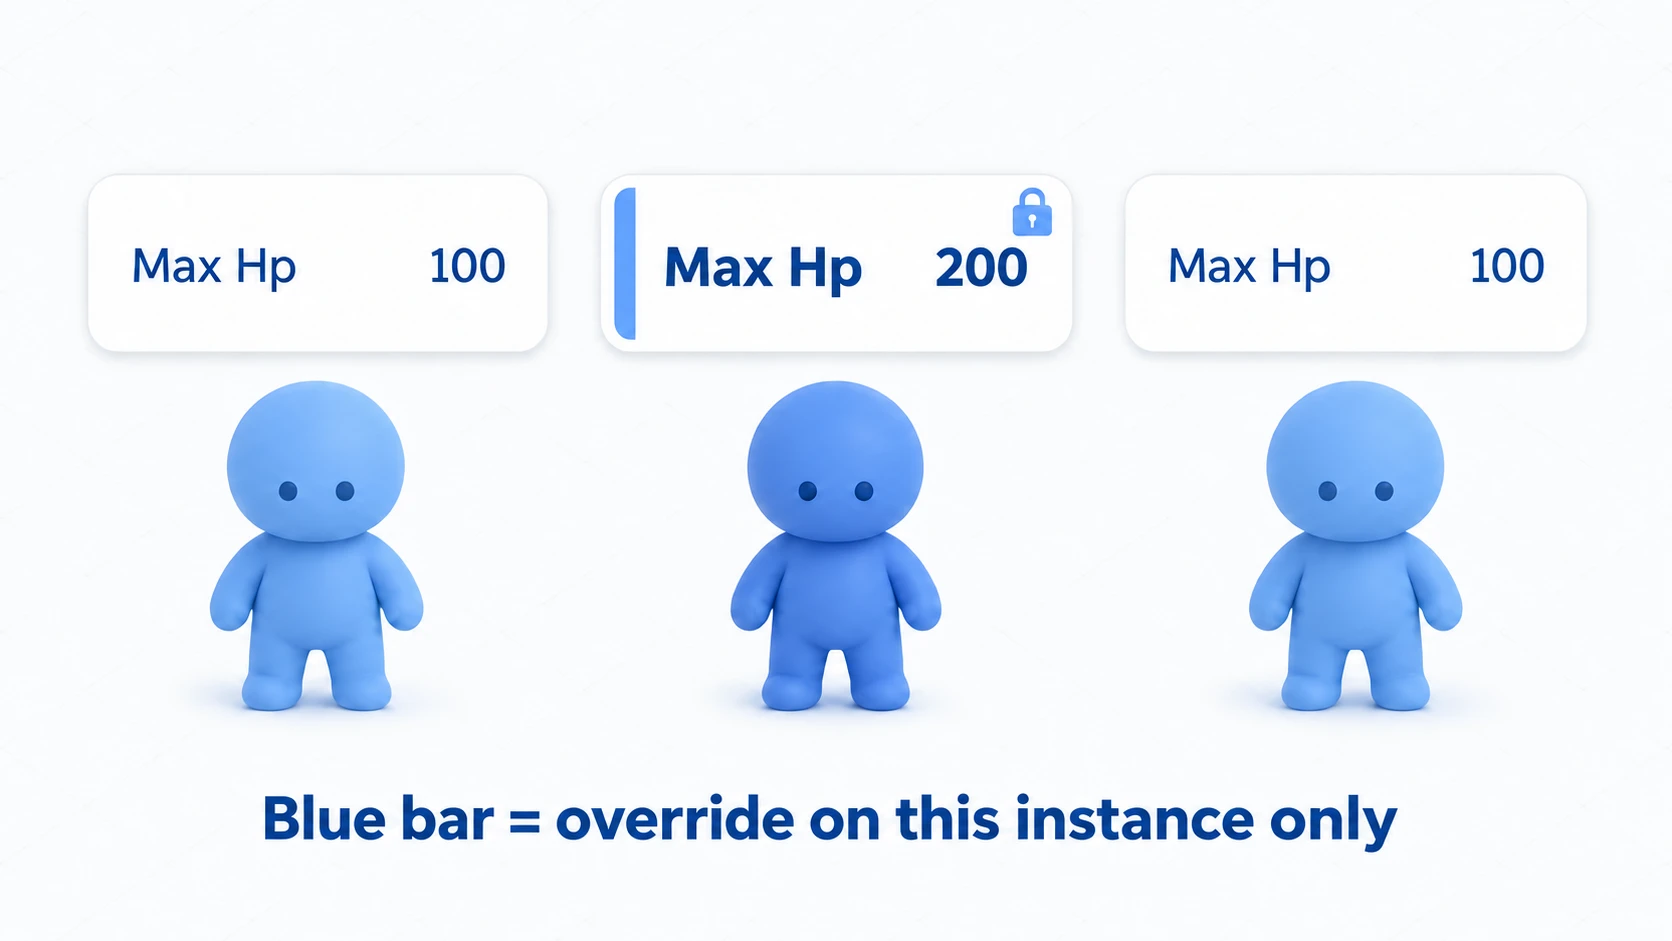
If you decide you want to apply an overridden setting back to the original Prefab, select Apply All from the Overrides dropdown at the top of the Inspector. Conversely, to discard the overrides and revert to the Prefab's settings, select Revert All.
Watch out for the classic Apply All accident:
Apply Allwrites every override on this instance back into the Prefab itself—meaning the change instantly propagates to every other instance. "I meant to buff just this one enemy, and now every enemy in the scene is stronger" is a mistake everyone makes once. (The outermost position and rotation are per-instance values to begin with, so they aren't written back. Scale is.) To apply a single item, pick it individually in theOverridesdropdown and Apply just that one. If you want an instance to keep its differences permanently, a Variant (below) is the safe choice.
Advanced: Nested Prefabs and Prefab Variants
Since Unity 2018.3, Prefabs have become even more powerful.
- Nested Prefabs: You can put a Prefab inside another Prefab. For example, create a "Gun" Prefab and incorporate it into a "Soldier" Prefab. This enables more modular assembly of components.
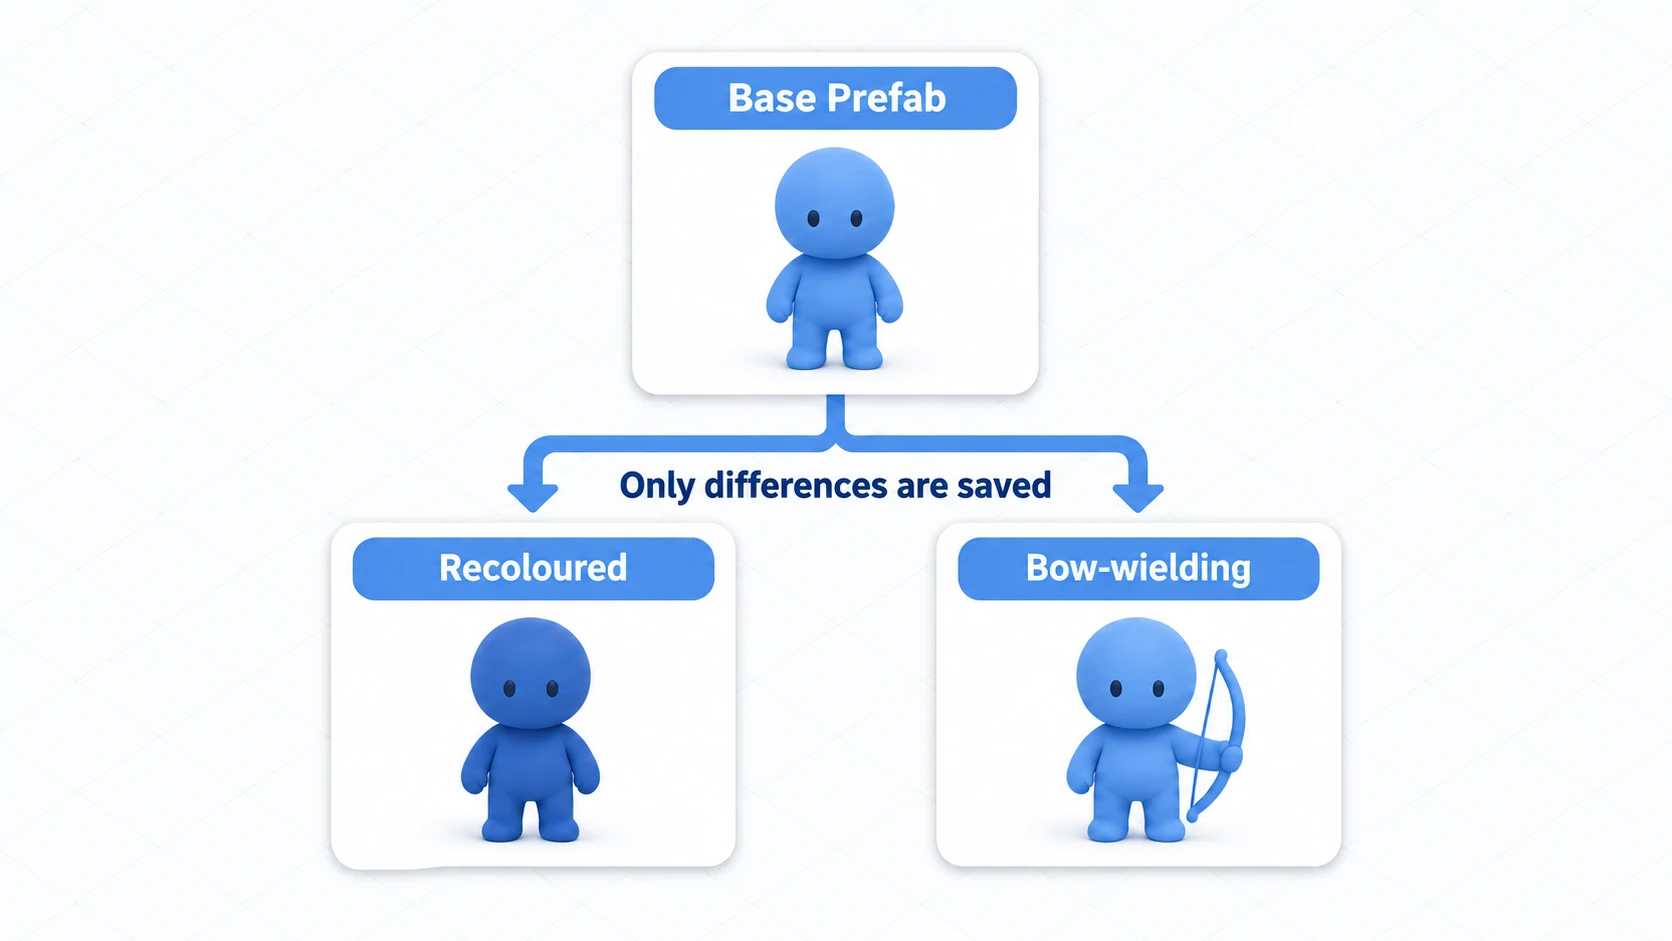
- Prefab Variants: You can create a "variant" Prefab that is based on another Prefab and stores only the differences. For example, from a base "regular Goblin" Prefab, you can create variants like a "Red Goblin" (only the material color differs) or a "Goblin Archer" (the difference being that it carries a bow). If you change the HP on the original "regular Goblin" Prefab, that change is inherited by all variants — an extremely efficient way to manage them.
Go easy on deep inheritance: as convenient as variants are, stacking "a variant of a variant of a variant..." makes it suddenly hard to trace which layer decides which value. One or two levels of inheritance is a good rule of thumb; if it's getting more complex than that, rethink the structure.
Troubleshooting
| Symptom | Cause | Fix |
|---|---|---|
| You edited the Prefab, but one instance in the scene didn't change | That instance overrides the property (bold with a blue line) | Right-click the property and choose Revert to go back to the Prefab's value |
| You changed the outermost Position in Prefab Mode, but the instances in the scene didn't move | The outermost position and rotation are per-instance values | Move each instance in the scene. Put values that all instances should share on a child object |
UnassignedReferenceException | The Spawner's Enemy Prefab field is empty | Drag the Prefab from the Project window into the field |
Bonus: Good to Know for Later
As you start using Prefabs seriously, you'll eventually run into the following "next-level" topics. Just knowing they exist gives you options when you get stuck later.
- Mass
Instantiatecalls cause hitches: For objects that are created and destroyed dozens of times per second, like bullets, repeatedly callingInstantiate/Destroyon a Prefab can cause frame drops. The standard fix is object pooling — reusing already-created instances. See the object pooling article for details. - Use coroutines for timing like "spawn every 3 seconds": The
StartCoroutineused in the Spawner example above is a mechanism called a coroutine. It works for all kinds of time-delayed logic, so it's worth learning early. See the coroutines article. - For pure "data," ScriptableObject may beat a Prefab: If you only want to manage numeric data like enemy HP and attack power, an asset type called ScriptableObject — which has no GameObject — is often a better fit. The ScriptableObject article is a good reference.
- Use Unpack to cut ties with a Prefab: right-click an instance → "Prefab > Unpack" to sever its connection and turn it back into a plain GameObject. Use it when you want to "start from this Prefab as a base, but build something entirely different" (
Unpack Completelyalso unwraps any nested Prefabs). - Decide where things go up front: deciding on a folder like
Assets/Prefabs/saves you from hunting around as the count grows (Unity Project Organization). - If you use Git: two people changing the same Prefab or scene at once causes conflicts that are hard to merge. How to avoid them is in Version Control for Unity Projects.
Summary
Prefabs embody object-oriented thinking in Unity and form the backbone of efficient, scalable game development.
- A Prefab is a reusable "blueprint" for objects.
- Edit the original Prefab, and all instances update at once.
Instantiate()lets you dynamically spawn objects during gameplay.- Overrides let you overwrite settings on just a specific instance.
- Variants let you efficiently manage differential Prefabs that inherit from a base Prefab.
The rule of thumb for what to prefab: things you reuse, things you spawn at runtime, and complex structures you don't want to break. Enemies, bullets, items, and UI parts are near-mandatory Prefabs—but there's no need to mechanically prefab "that one decorative background object that appears once in one scene." Knowing when not to prefab is part of mastering them, and that's a major step beyond the beginner stage.