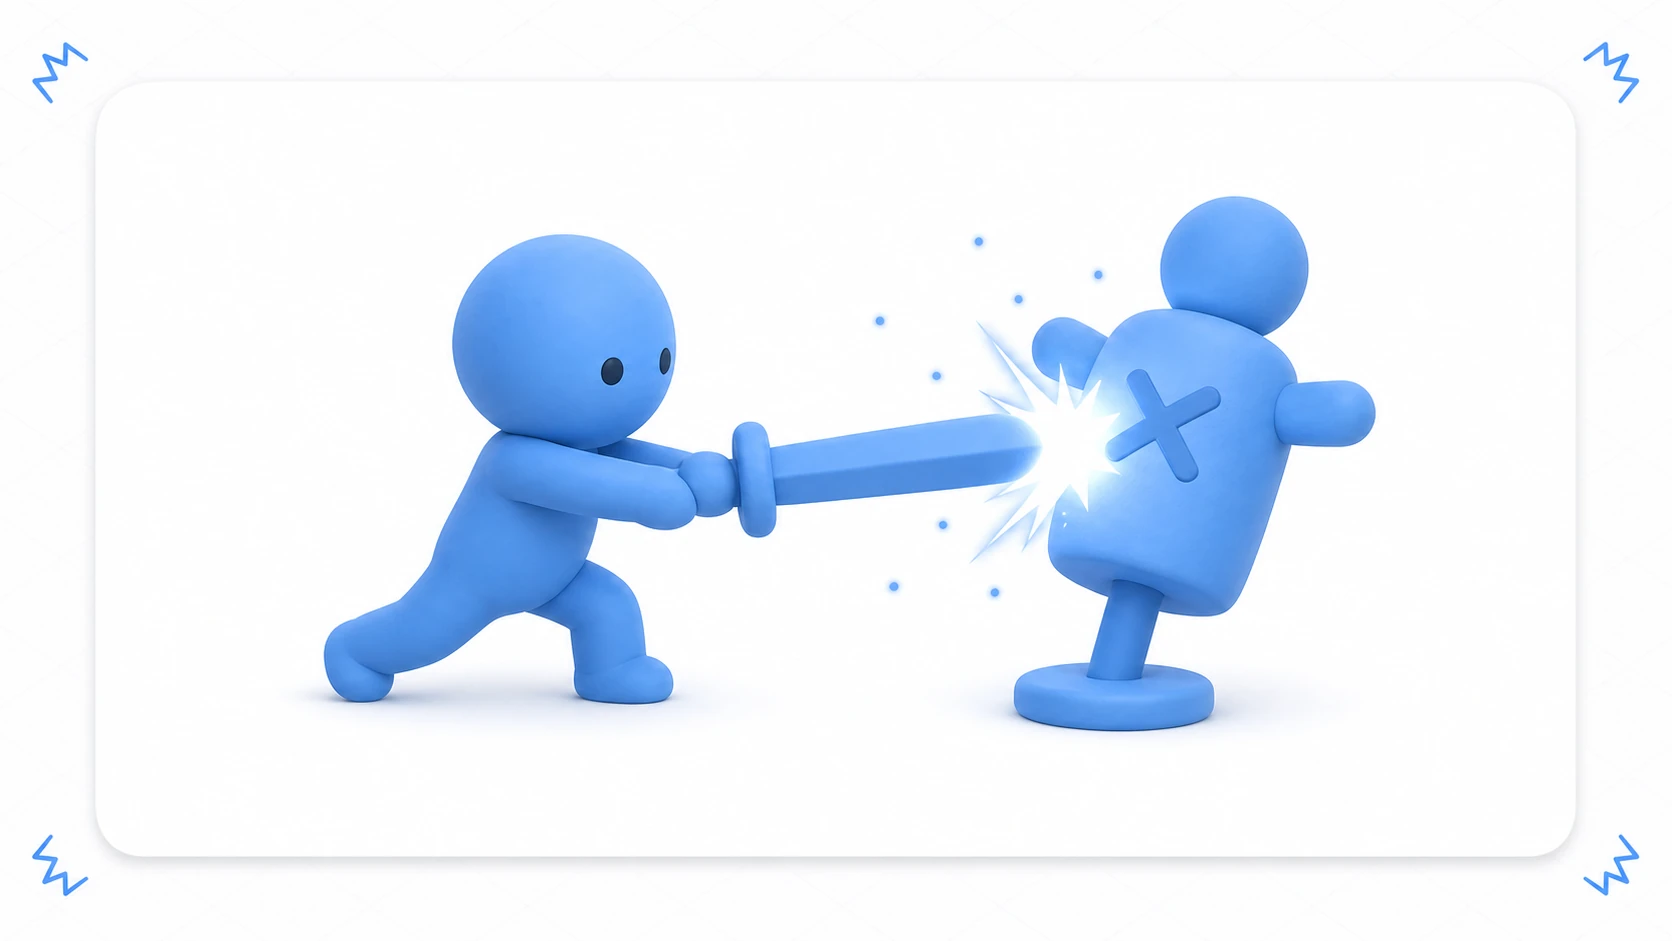
You built hit detection, and HP goes down (the health, damage, and invincibility article). On paper the game is nearly there — but playing it, something is decisively missing. The sword looks like it passes right through the enemy. You have to watch the HP bar to know whether you even connected. That infamous "hitting a pillow" feeling.
This is not a bug. What's missing is the presentation layer (game feel) that delivers the fact "you hit it" to the player's eyes and ears. In this article we layer hit flash, particles, SFX, camera shake, and hit stop onto the same single swing, comparing ON/OFF as we go so you can feel exactly what each effect communicates.
What you'll learn
- The real cause of "weightless" combat — effects are not decoration but information
- How to implement flash, particles, SFX, shake, and hit stop, and what information each one carries
- Avoiding the classic accidents: every enemy flashing (sharedMaterial), a camera that never comes home (competing hand-rolled shakes), and time that never resumes (timeScale restoration leaks)
- Weak/strong/critical intensity presets, and how to know when you've overdone it
Tested with: Unity 6 (6000.x) / Cinemachine 3.x
- Effects Are "Information" — Four Things One Hit Communicates
- Foundation: Funnel the Moment of Impact into One Place
- Hit Flash — "Which One" Got Hit
- Particles and SFX — "Where" It Hit
- Camera Shake — "How Hard"
- Hit Stop — Making the Moment Readable
- Intensity Presets: Weak, Strong, Critical
- Hands-On: An ON/OFF Comparison Scene
- Knowing When to Stop — Motion Sickness, Flashing, Loudness
- Bonus: Good Things to Know Ahead of Time
- Summary
Effects Are "Information" — Four Things One Hit Communicates
Before piling on spectacle, let's install one idea: hit effects are not decoration — they are channels that carry information to the player. The instant an attack lands, the player wants to know four things.
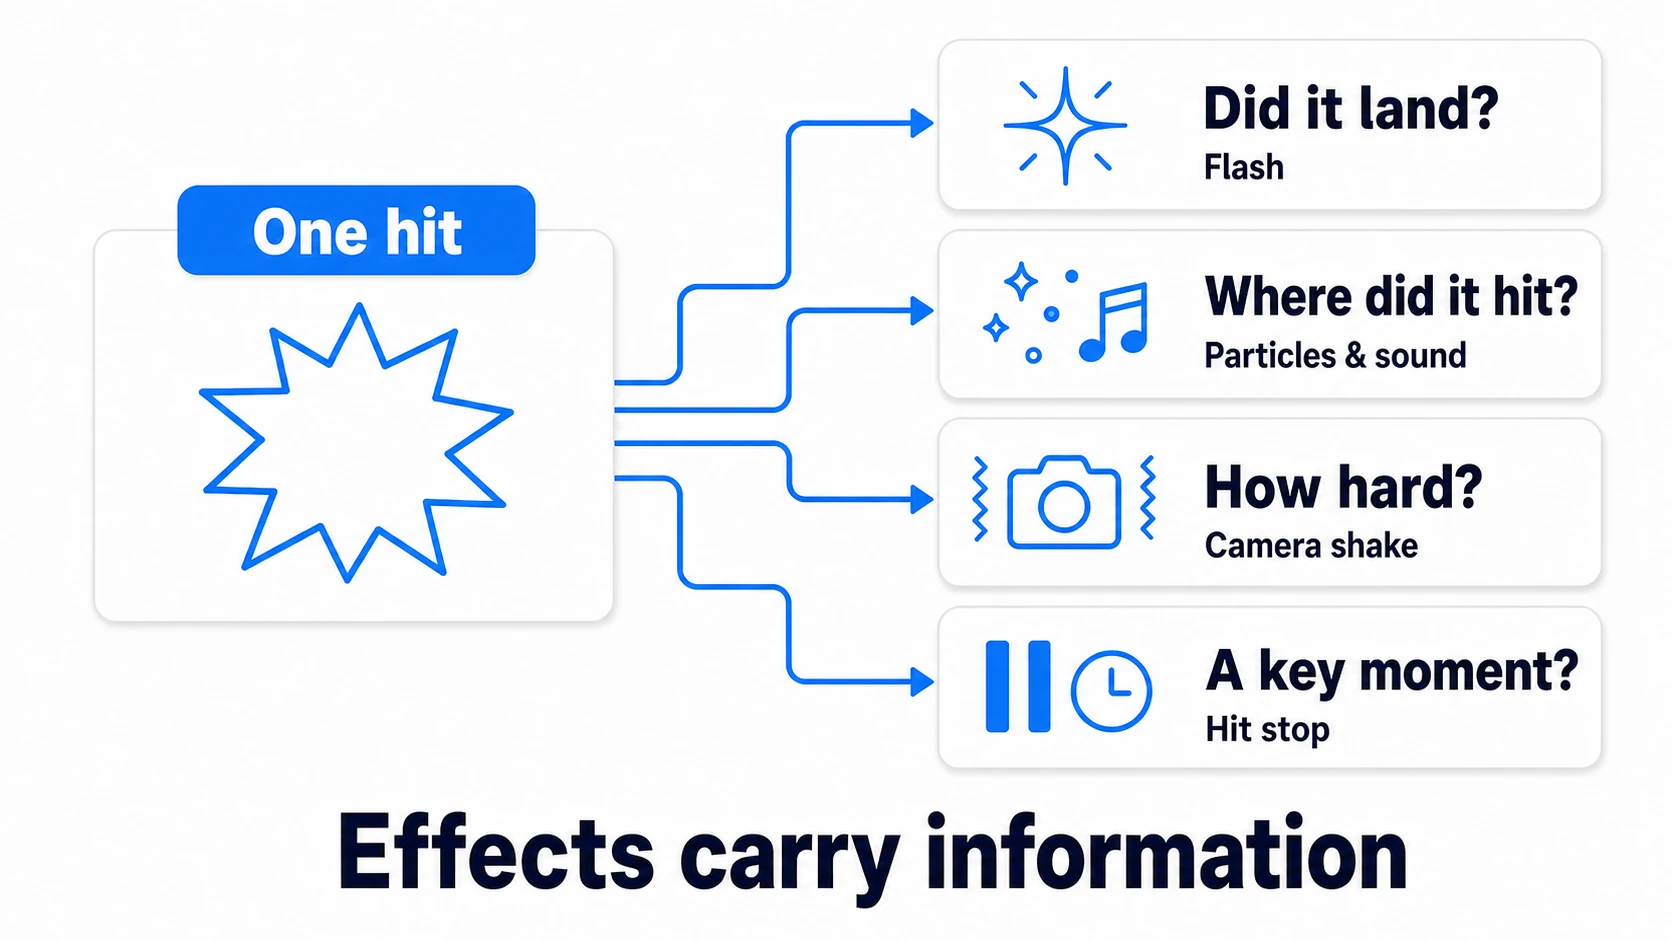
- Did it land? — the hit flash answers this
- Where, and on what? — particles and SFX answer this
- How hard was it? — camera shake answers this
- Is this a moment that matters? — hit stop buys the time to read it
With this framing, when things later feel "too flashy" or "too noisy," you can judge each cut by asking whether removing it loses any information. And if hits feel ambiguous, you can reinforce exactly the effect that carries the missing information — nothing else.
Foundation: Funnel the Moment of Impact into One Place
Before layering effects, decide where in your code the moment of impact is confirmed. If you reuse the structure from the health and damage article, the responsibilities split naturally in two.
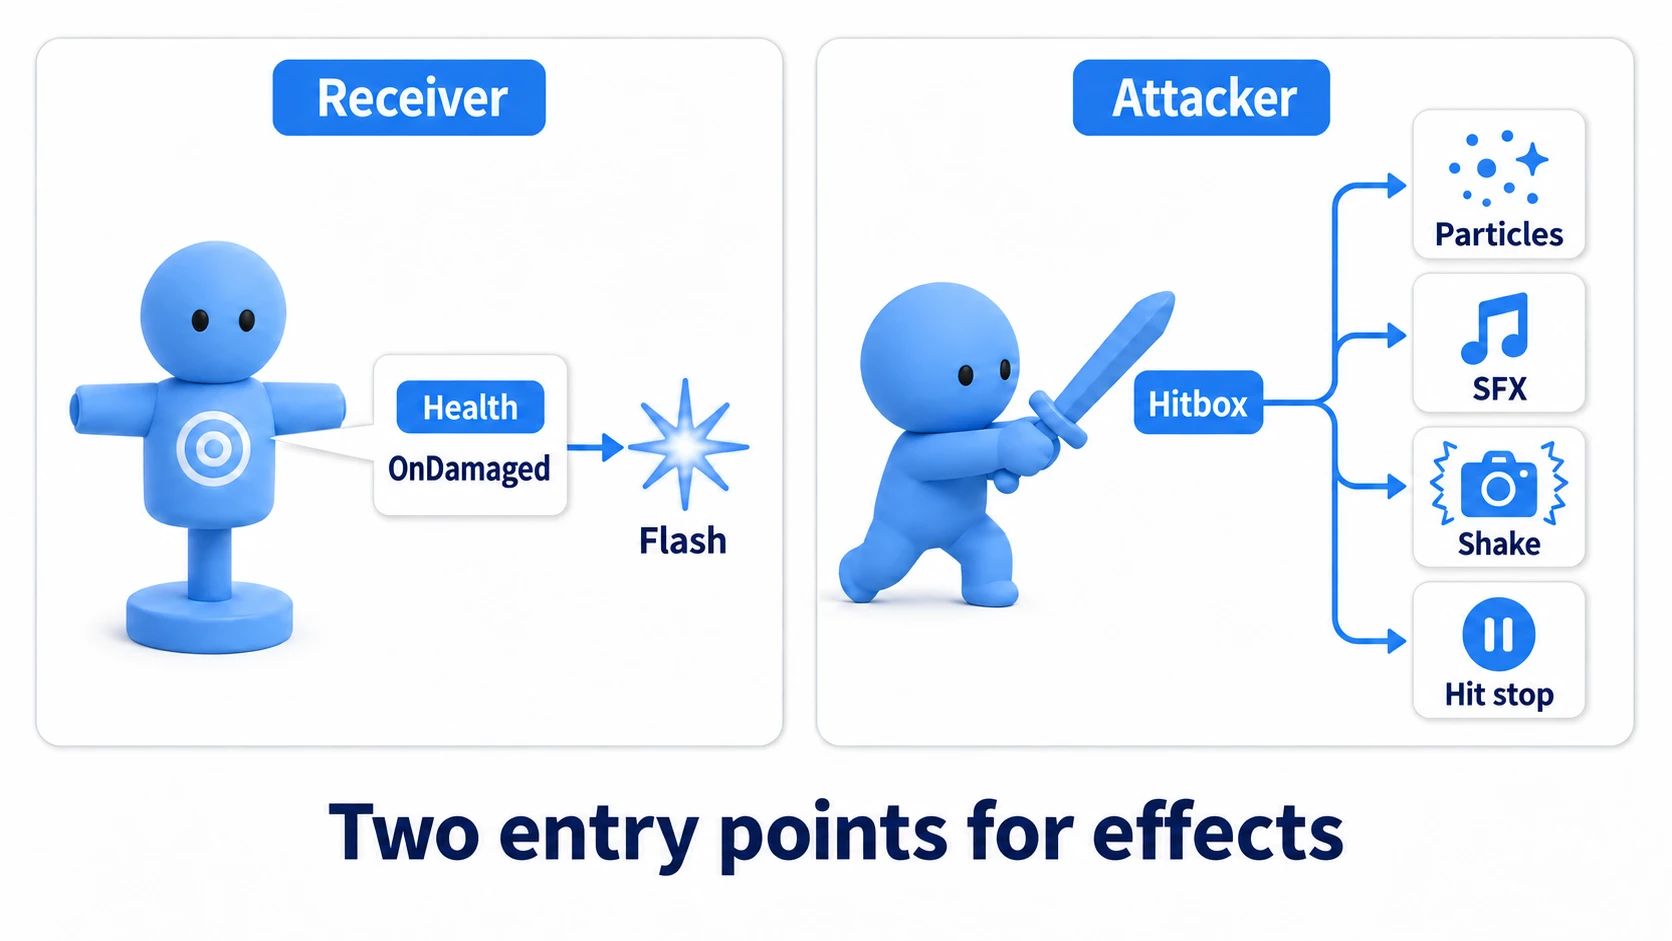
- Effects on the receiving side (flash): subscribe to
Health'sOnDamagedevent. Nobody knows "which object took damage" better than the one that took it - Effects on the attacking side (particles, SFX, shake, hit stop): play them where the attack's hitbox confirms the hit. Nobody knows "where it landed and how hard" better than the attacker
As long as impact confirmation is funneled into the single TakeDamage() call, effects can be layered on afterwards, as many as you like, through these two entry points. Let's add them one at a time.
Hit Flash — "Which One" Got Hit
The first layer is a brief white flash on whatever got hit. It's cheap to implement yet reliably delivers the single most important piece of information — "you connected" — making it the best value-for-effort effect in the whole stack.
Flashing to white takes more than brightening the material's color (color multiplication can't saturate toward white). Prepare a shader that lerps between the base color and white via a _FlashAmount property — the kind you can build in the Shader Graph article — and drive only that value from script.
Here lies a classic trap. Change a value through renderer.sharedMaterial and every enemy using that material flashes at once, because a material is a shared asset.
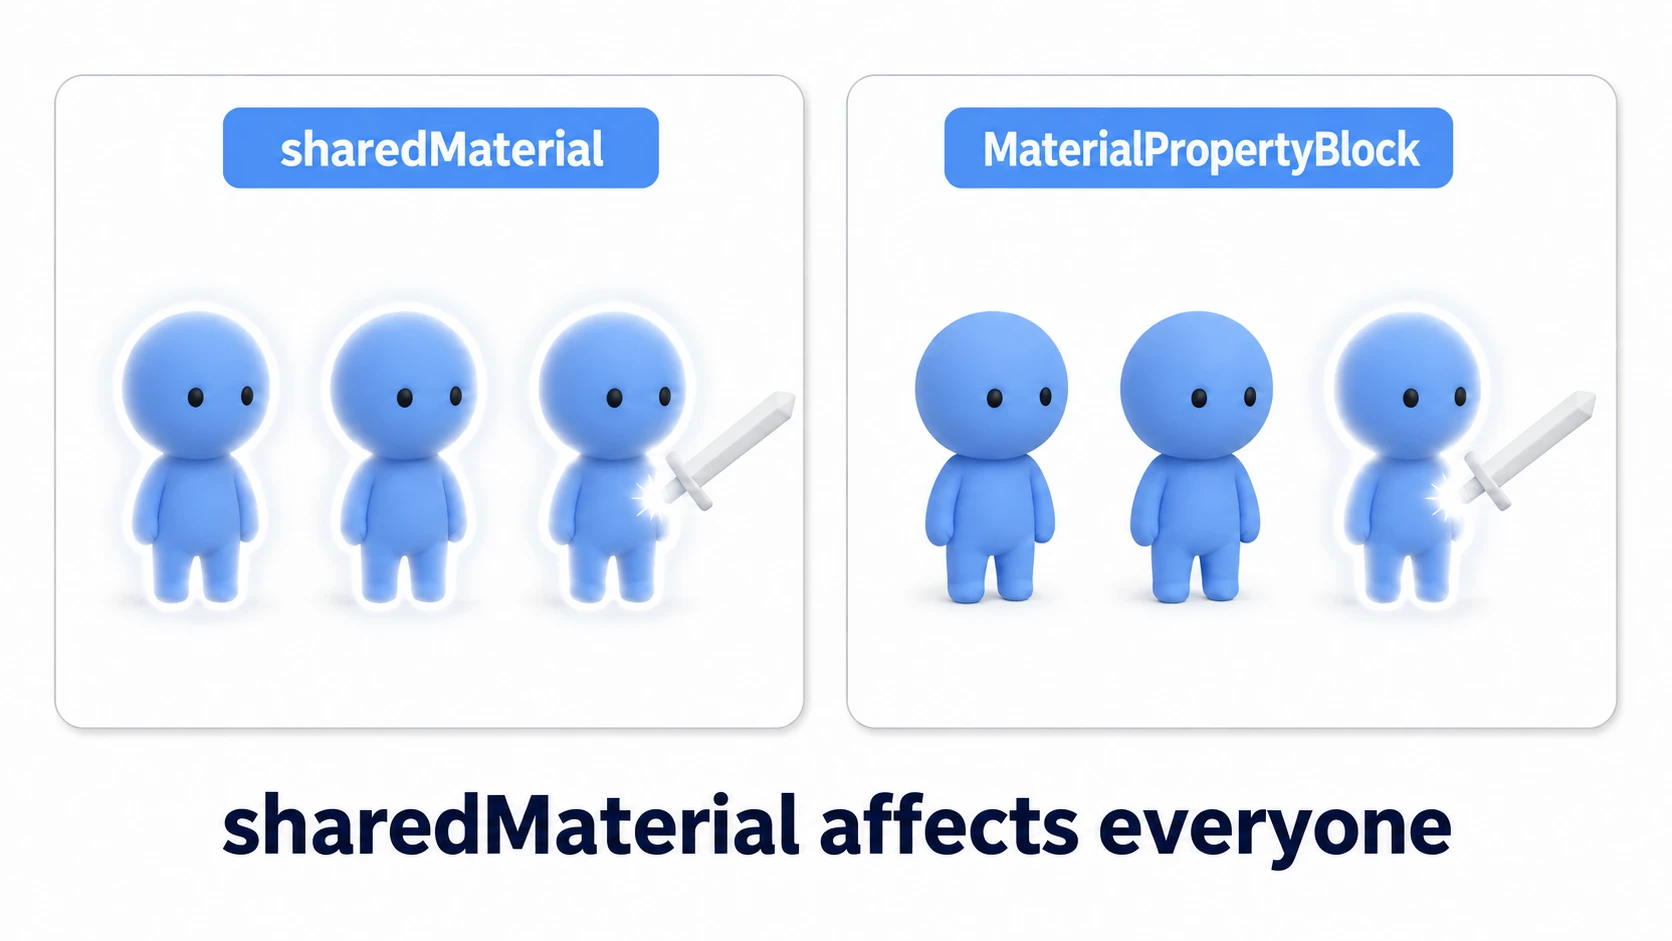
MaterialPropertyBlock is the "draw just this renderer with these values" override — it never dirties the material asset, so only one enemy lights up.
using System.Collections;
using UnityEngine;

public class HitFlash : MonoBehaviour
{
    [SerializeField] private Renderer targetRenderer;
    [SerializeField] private float duration = 0.08f;

    private static readonly int FlashAmount = Shader.PropertyToID("_FlashAmount");
    private MaterialPropertyBlock mpb;
    private Health health;
    private Coroutine current;

    private void Awake()
    {
        mpb = new MaterialPropertyBlock();
        health = GetComponent<Health>();
    }

    private void OnEnable()  { health.OnDamaged += Play; }
    private void OnDisable() { health.OnDamaged -= Play; }

    private void Play()
    {
        if (current != null) StopCoroutine(current); // consecutive hits re-trigger the flash
        current = StartCoroutine(Run());
    }

    private IEnumerator Run()
    {
        SetAmount(1f);
        yield return new WaitForSeconds(duration);
        SetAmount(0f);
        current = null;
    }

    private void SetAmount(float value)
    {
        targetRenderer.GetPropertyBlock(mpb);
        mpb.SetFloat(FlashAmount, value);
        targetRenderer.SetPropertyBlock(mpb);
    }
}
tips: Writing
renderer.materialcreates a per-object material copy on the spot, which technically also gives you individual flashing. But copies pile up to manage. A Renderer with a MaterialPropertyBlock set also stops being drawn together by the SRP Batcher, though for brief flashes on a few dozen enemies that's nothing to worry about. For a handful of enemies MaterialPropertyBlock is plenty — see the Shader Graph article for how to choose when many objects are involved.
Particles and SFX — "Where" It Hit
Flash alone is still just "a light went on and off." Next, add spark particles and an impact sound at the point of contact to communicate "where, and on what kind of thing" the hit landed.
The particles themselves come straight from the hit effect recipe in the particle article. For SFX, follow the audio article's standard play: PlayOneShot() — it layers sounds without cutting off the ones already playing, so rapid hits never clip each other.
What matters most is the playback position. Sparks bursting from the attacker's feet or from the world origin instantly read as fake. The point of impact is something the hitbox knows best, so resolve it there and pass it along.
// AttackHitbox side: at the line where the hit is confirmed, find the hit point and pass it on (the point on the target's collider closest to the hitbox center)
Vector3 hitPoint = other.ClosestPoint(transform.position);
HitFeedbackPlayer.Instance.Play(profile, hitPoint);
ClosestPoint doesn't return the true contact point the physics engine computed; it returns the point on the target's collider closest to the position you pass in. Visually, that's a close enough approximation. The receiving side just moves a scene-resident particle system to that point and plays it (the full code comes together in the hands-on section).
// HitFeedbackPlayer side (excerpt)
hitParticle.transform.position = hitPoint;
hitParticle.Play();
seSource.PlayOneShot(profile.hitSe, profile.seVolume);
tips:
Instantiate-ing a particle prefab per hit spawns a mountain of objects under rapid attacks. The minimal setup is one particle system placed in the scene and reused; once you need several simultaneous burst points, it's time for an object pool.
Camera Shake — "How Hard"
A slight whole-screen shake conveys the "weight" of an attack. Reach for a hand-rolled coroutine here — nudging transform.position by random offsets and moving it back — and a classic accident awaits: consecutive hits make coroutines compete, the next shake starts from an already-displaced position, and the camera never returns home.
If you're using Cinemachine, the answer is the Impulse System. It models a shake as a "shockwave fired by a source," so any number of overlapping impulses blend automatically and always decay back to rest. There is no contention for you to manage.
using Unity.Cinemachine;

[SerializeField] private CinemachineImpulseSource impulseSource;

public void Shake(float force)
{
    impulseSource.GenerateImpulse(force); // force scales the shake strength
}
Setup is two components: add a Cinemachine Impulse Source to whatever fires the shake, and a Cinemachine Impulse Listener to the camera (the CinemachineCamera) via Add Extension. Because the "shooter" and the "listener" are separate, this plugs neatly into the intensity presets coming up.
Hit Stop — Making the Moment Readable
This is the fighting-game and action-game staple: the world freezes for a split second at the moment of impact. Stopping time for a few dozen milliseconds hands the player's brain the time it needs to register "that connected — for real."
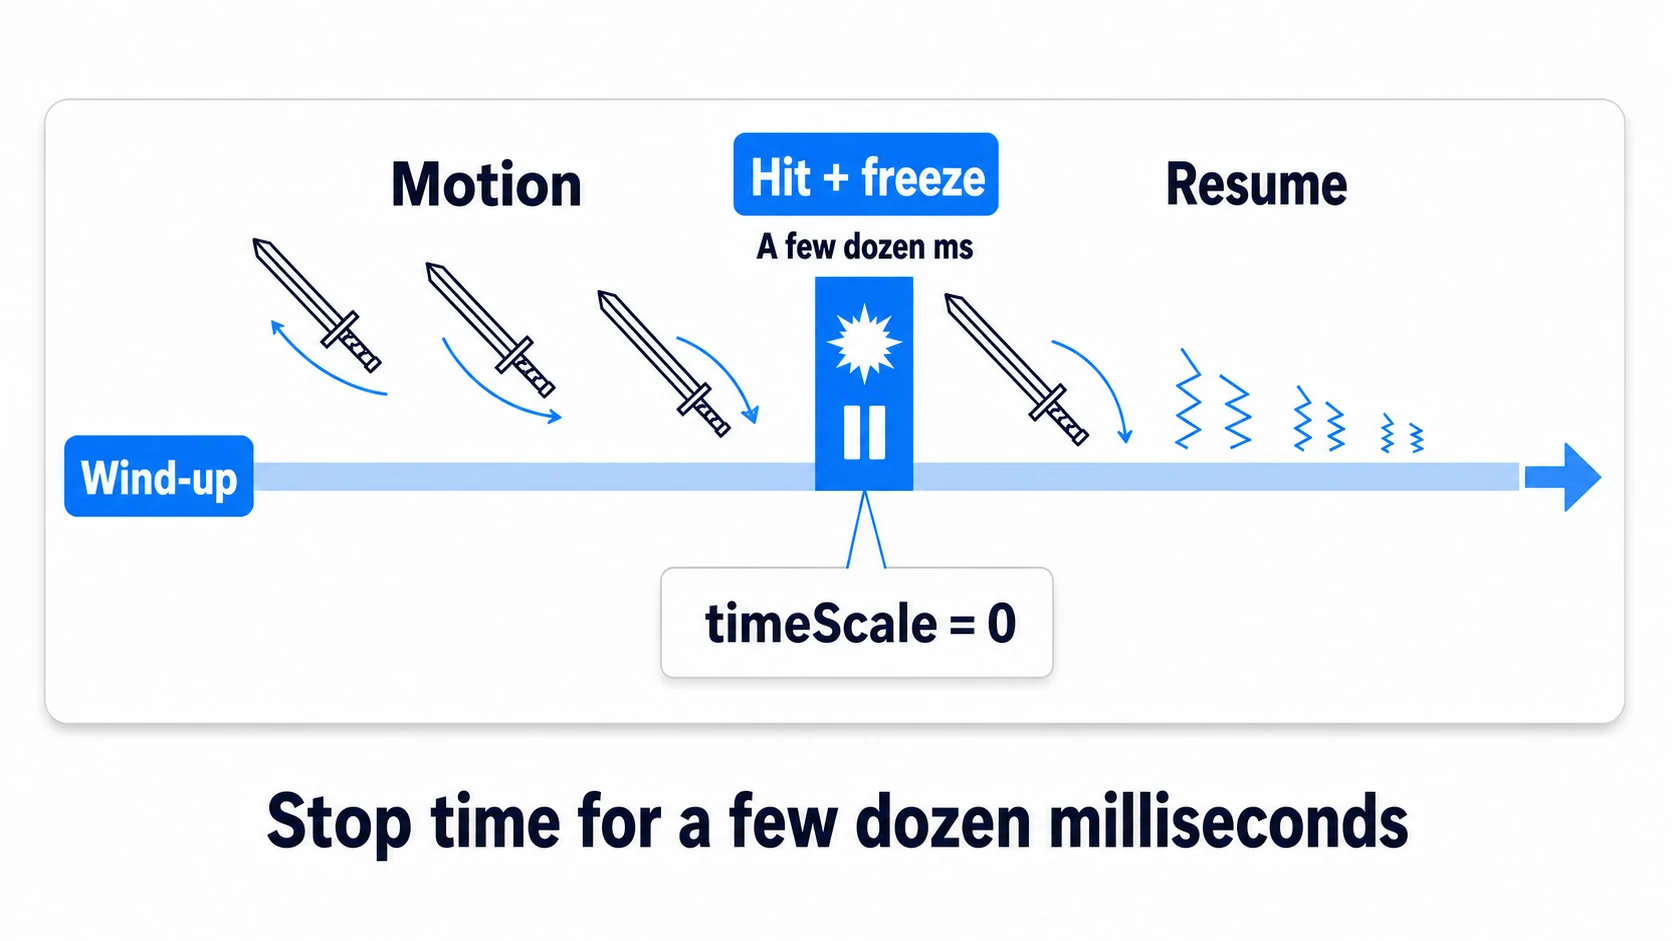
The implementation applies the Time.timeScale knowledge from the pause article. But since we "wait while stopped," the wait must run on real time — WaitForSecondsRealtime. WaitForSeconds counts game time, so with timeScale at 0 it would never finish.
using System.Collections;
using UnityEngine;

public class HitStop : MonoBehaviour
{
    public static HitStop Instance { get; private set; }

    private Coroutine current;

    private void Awake() { Instance = this; }

    public void Play(float duration)
    {
        if (duration <= 0f) return;
        if (PauseManager.IsPaused) return;            // never start during a pause
        if (current != null) StopCoroutine(current);  // keep exactly one instance (restart on re-entry)
        current = StartCoroutine(Run(duration));
    }

    private IEnumerator Run(float duration)
    {
        Time.timeScale = 0f;
        yield return new WaitForSecondsRealtime(duration);
        if (!PauseManager.IsPaused) Time.timeScale = 1f; // don't fight the pause system
        current = null;
    }
}
Short as it is, the two guards are the real substance.
- Keep the coroutine to exactly one instance: with two running from consecutive hits, whichever finishes first restores
timeScaleearly and cuts the other's freeze short. The "remember the starting value and restore it" approach breaks the same way — the second coroutine remembers 0. Stopping the old one and restarting is the reliable move - A treaty with the pause system: pause also uses
timeScale = 0, so blindly restoring to1fmeans a hit stop can accidentally unpause the game. The two lines "never start while paused, check pause before restoring" sever that collision (PauseManageris from the pause article)
tips: During a hit stop, the flash — which runs on
WaitForSeconds— freezes too. This works in your favor: time stops at the exact moment the target burns white, and the flash fades as time resumes. The two effects synchronize themselves for free. The camera shake (Impulse) also runs on game time by default, so it holds during the stop and starts shaking when time resumes.
Intensity Presets: Weak, Strong, Critical
With the full stack in place, the next step is contrast. If every attack shakes the same and stops the same, a normal jab and an ultimate are indistinguishable. Bundle the parameters into a ScriptableObject preset and swap it per attack.
using UnityEngine;

[CreateAssetMenu(menuName = "Game/Hit Feedback Profile")]
public class HitFeedbackProfile : ScriptableObject
{
    [Header("Sound")]
    public AudioClip hitSe;
    [Range(0f, 1f)] public float seVolume = 1f;

    [Header("Camera Shake")]
    public float impulseForce = 0.3f;

    [Header("Hit Stop")]
    public float hitStopDuration = 0.05f;
}
Create three assets — Hit_Weak, Hit_Strong, Hit_Critical — and start from these ballpark values.
| Preset | Shake (force) | Stop (sec) | Where to use |
|---|---|---|---|
| Weak | 0.1–0.2 | 0–0.03 | Normal attacks, mid-combo hits |
| Strong | 0.3–0.5 | 0.05–0.08 | Combo finishers, charged attacks |
| Critical | 0.6–1.0 | 0.1–0.15 | Ultimates, killing blows, boss slams |
What matters is not the absolute values but the difference. The more restrained your weak tier, the harder the strong tier lands. Make everything flashy, and everything becomes ordinary.
Hands-On: An ON/OFF Comparison Scene
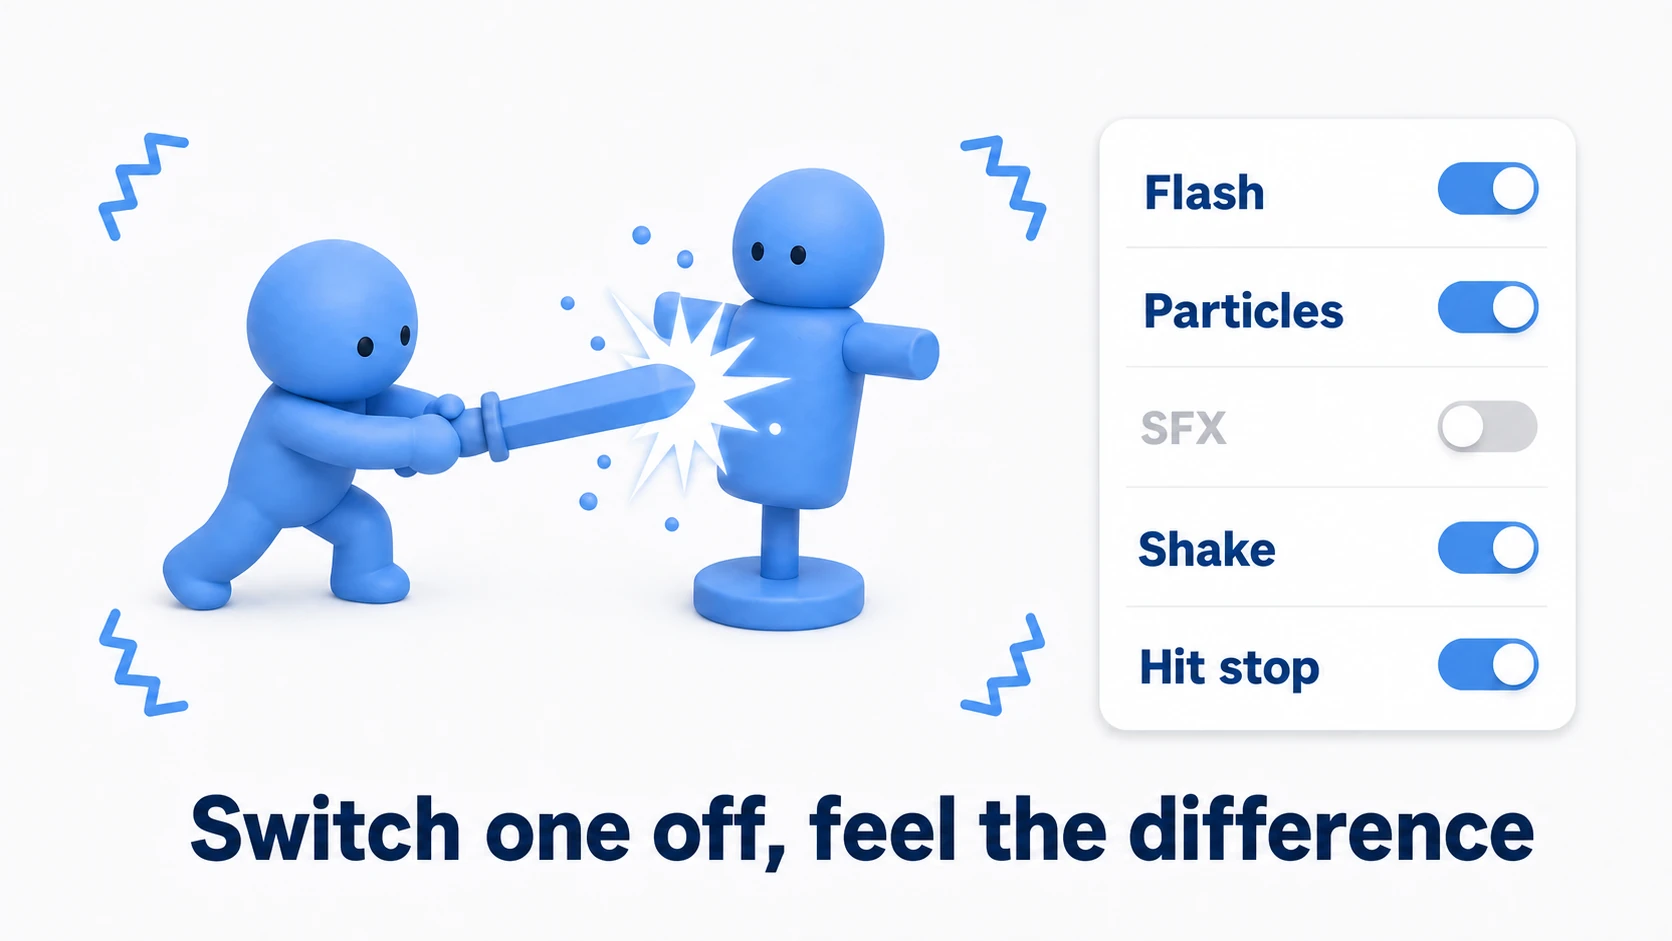
To finish, wire the full stack into the arena from the health and damage article (a player plus a training-dummy enemy) and build a comparison scene where you switch effects off one at a time and feel what information disappears. Whether it's a metroidvania sword slash, a beat-'em-up punch, or a top-down ARPG strike, this wiring transfers as-is.
using UnityEngine;
using Unity.Cinemachine;

public class HitFeedbackPlayer : MonoBehaviour
{
    public static HitFeedbackPlayer Instance { get; private set; }

    [SerializeField] private ParticleSystem hitParticle;
    [SerializeField] private AudioSource seSource;
    [SerializeField] private CinemachineImpulseSource impulseSource;

    [Header("Effect toggles (for comparison)")]
    [SerializeField] private bool useParticle = true;
    [SerializeField] private bool useSe = true;
    [SerializeField] private bool useShake = true;
    [SerializeField] private bool useHitStop = true;

    private void Awake() { Instance = this; }

    public void Play(HitFeedbackProfile profile, Vector3 hitPoint)
    {
        if (useParticle)
        {
            hitParticle.transform.position = hitPoint;
            hitParticle.Play();
        }
        if (useSe) seSource.PlayOneShot(profile.hitSe, profile.seVolume);
        if (useShake) impulseSource.GenerateImpulse(profile.impulseForce);
        if (useHitStop) HitStop.Instance.Play(profile.hitStopDuration);
    }
}
On the attacking side, one line right after the hit is confirmed. The flash is absent here on purpose — the receiver's HitFlash lights up on its own via OnDamaged.
// Inside AttackHitbox's OnTriggerEnter, right after TakeDamage
health.TakeDamage(damage);
HitFeedbackPlayer.Instance.Play(profile, other.ClosestPoint(transform.position));
Press Play and land a few hits with everything ON. That "pillow" feeling should be unrecognizable. Now uncheck the toggles in the Inspector one at a time, striking between each change. Cut the SFX and you're suddenly unsure the hit landed. Cut the hit stop and attacks feel "light." Cut the shake and heavy attacks lose their menace — you'll feel in your hands exactly which effect was carrying which information. And if switching one off changes nothing at all? That effect doesn't belong in this game. Finally, poke at the robustness: mash the attack button — the camera must always come back to rest (that's Impulse doing its job) — and open then close the pause menu mid-hit-stop; time should keep flowing correctly.
Two takeaways. Because impact confirmation was funneled into one place (right after TakeDamage), effects could be layered on afterwards, as many as we liked. And because each effect stayed independent per piece of information, we could switch them off one at a time and measure their contribution.
Knowing When to Stop — Motion Sickness, Flashing, Loudness
Everything so far was addition, so here are the subtraction criteria.
- Shake sickness: precisely because shake is powerful, frequent shakes induce motion sickness. Don't shake on every hit of a combo — save it for the finisher. Ideally expose shake intensity in the options (the settings screen article's
SettingsDataneeds just one more field) - Strobing flashes: rapid white flicker can trigger photosensitivity. Avoid full-screen flashes; keep it to one short flash on the target only
- Loudness: stacked SFX from rapid hits will clip. Capping simultaneous voices is the basic fix. Nudging
pitchby a small random amount per play is a classic trick too, but changing an AudioSource's pitch also affects sounds already playing on it, so play the nudged sounds from a separate AudioSource - Thinning out multi-hits: freezing on every hit of a multi-hit move feels sluggish, not thrilling. Apply hit stop to the first and final hits only, or similar
Bonus: Good Things to Know Ahead of Time
- Syncing with animation multiplies the payoff: opening and closing the hitbox on the exact "contact frames" of the attack motion is covered in the Animation Events article. A hit stop that freezes precisely on the impact frame looks a class above
- Everything transfers to 2D: a flash shader for SpriteRenderer, 2D impulses,
timeScale— this article's toolkit is 2D/3D agnostic - Knockback needs a physics conversation: pushback is powerful feedback too, but it loves to fight your movement code. Ground yourself in the Rigidbody article's ways of applying forces first
- The receiving side uses the same entry point: this article was about making the attacker feel good. Getting-hit feedback — red screen edges, controller rumble, invincibility blinking — hangs off the same
OnDamagedwith the same thinking
Summary
- Hit effects are not decoration but information: confirmation (flash), location (particles and SFX), strength (shake), and timing (hit stop)
- Funnel impact confirmation into one place, and effects can be layered on afterwards, one sheet at a time
- Three classic accidents — sharedMaterial flashing everyone, hand-rolled shakes competing, timeScale restoration leaking — are severed by MaterialPropertyBlock, Impulse, and the "exactly one coroutine" guard
- Build contrast with difference, not absolute values. And every so often, switch effects off one at a time to audit what each one earns
The "attack that lands" has technically worked for a while — today it finally became an attack that feels like it lands. Which piece of information is your game's strike still failing to deliver?