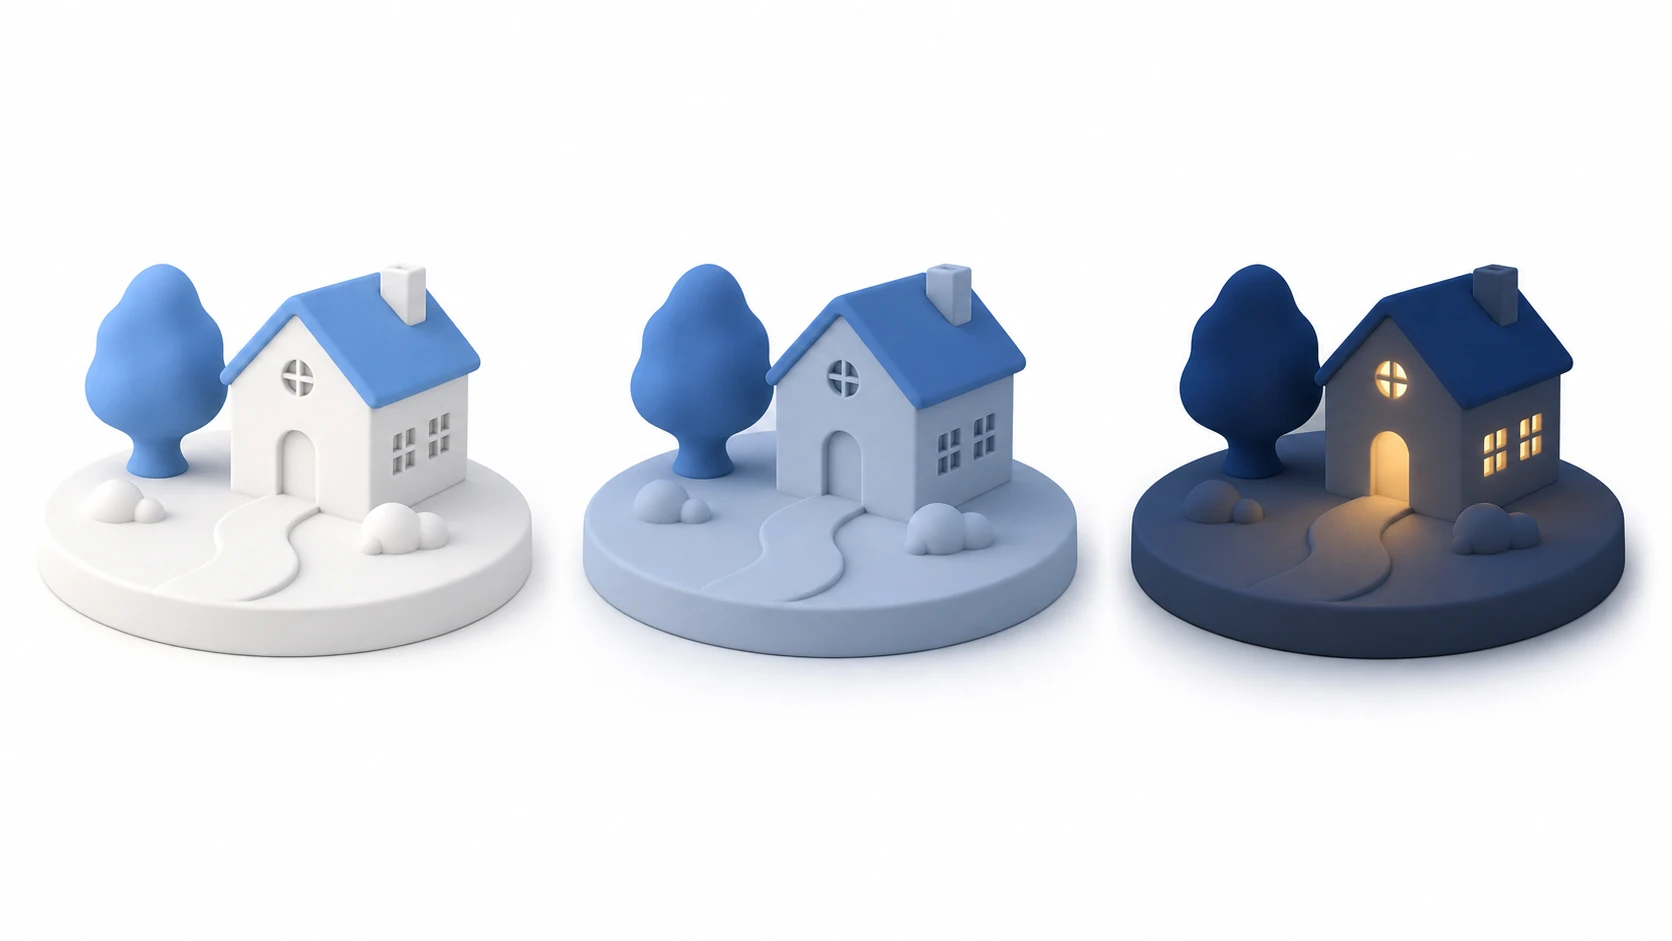
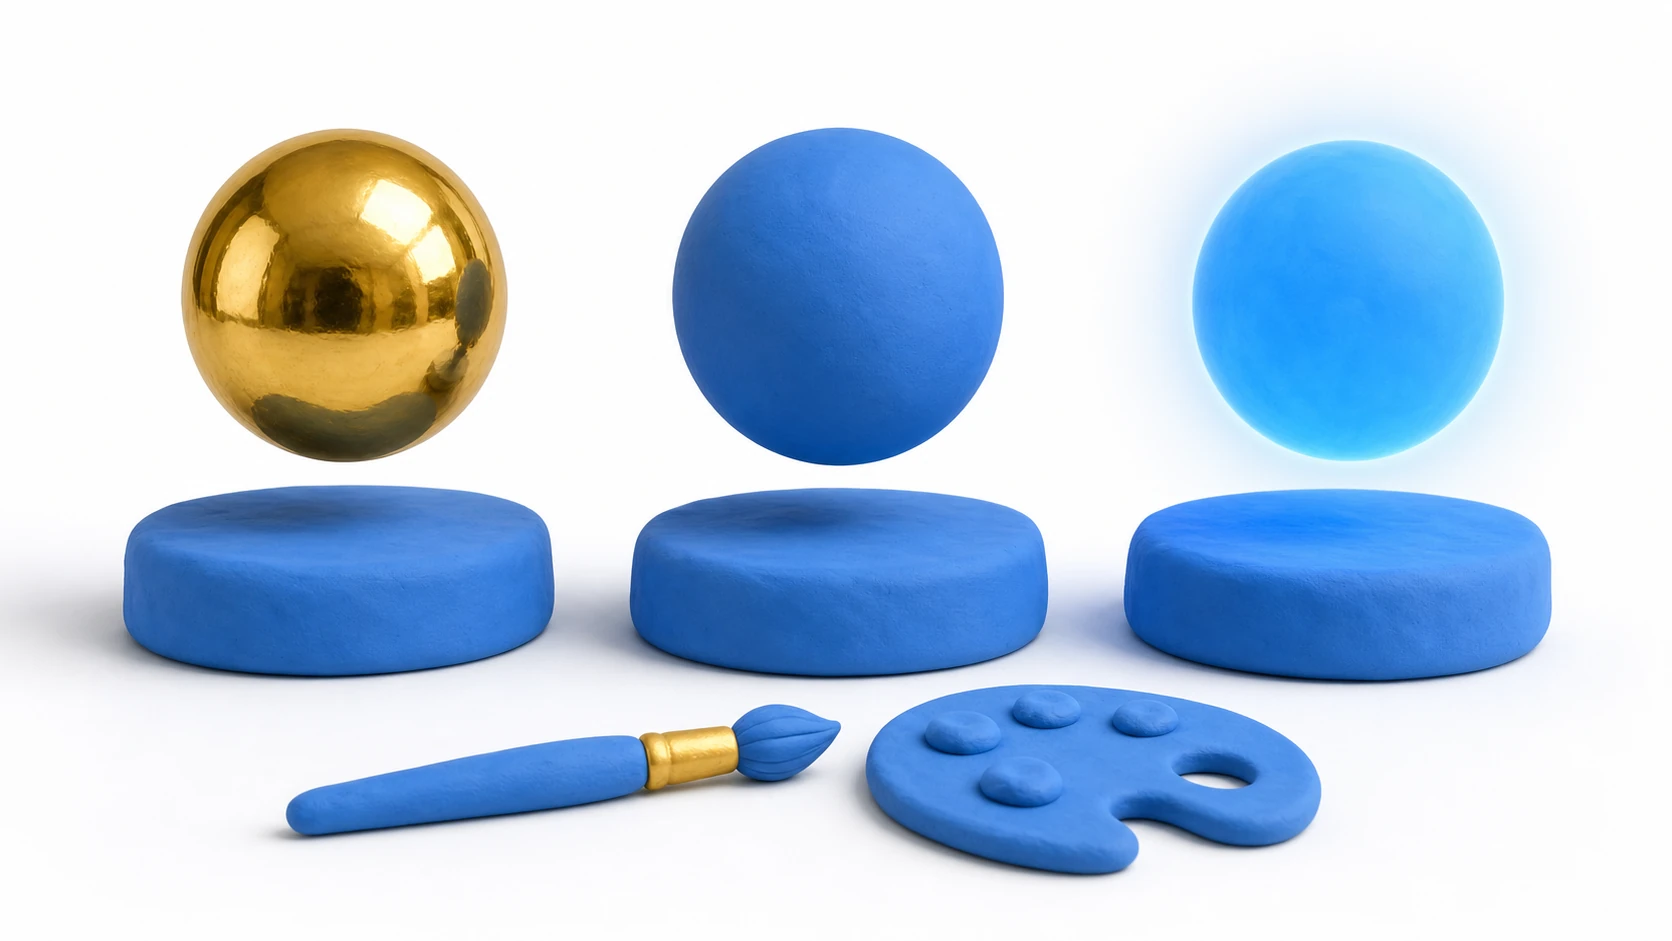
A 3D model (mesh) is nothing more than "shape" data. The same sphere model can look like shiny gold, matte plastic, or glowing neon with a single setting change. What handles this "appearance" is the Material and the Shader.
These two concepts are closely related and often confused, but their roles are clearly different. This article covers how the two relate, how to use Unity's standard shaders (Lit/Unlit), and the basic properties of PBR (Physically Based Rendering).
What You'll Learn
- The relationship between shaders (recipes) and materials (dishes)
- When to use
Litvs.Unlit- The three core PBR properties:
Albedo,Metallic, andSmoothness- Metal, wood, rubber, wet pavement—a quick-reference table of material recipes
- Adding detail and glow with
Normal MapandEmission- A hands-on hit flash — lighting up just the one enemy that got hit — and the
renderer.material/sharedMaterialpitfalls
Tested with: Unity 6 (6000.x) / URP
The Relationship Between Shaders and Materials
- Shader: A program (set of calculations) that determines how an object is drawn (rendered). It defines how light is reflected, how shadows are cast, and how textures are applied.
- Material: An asset that actually applies a shader to an object. You pick one shader, then assign concrete values to the properties that shader exposes (color, textures, smoothness, and so on).
To use an analogy, the shader is a "recipe," and the material is a "dish made by plugging ingredients into that recipe." With the same recipe (shader), changing the ingredients (property values) produces a completely different dish (appearance).
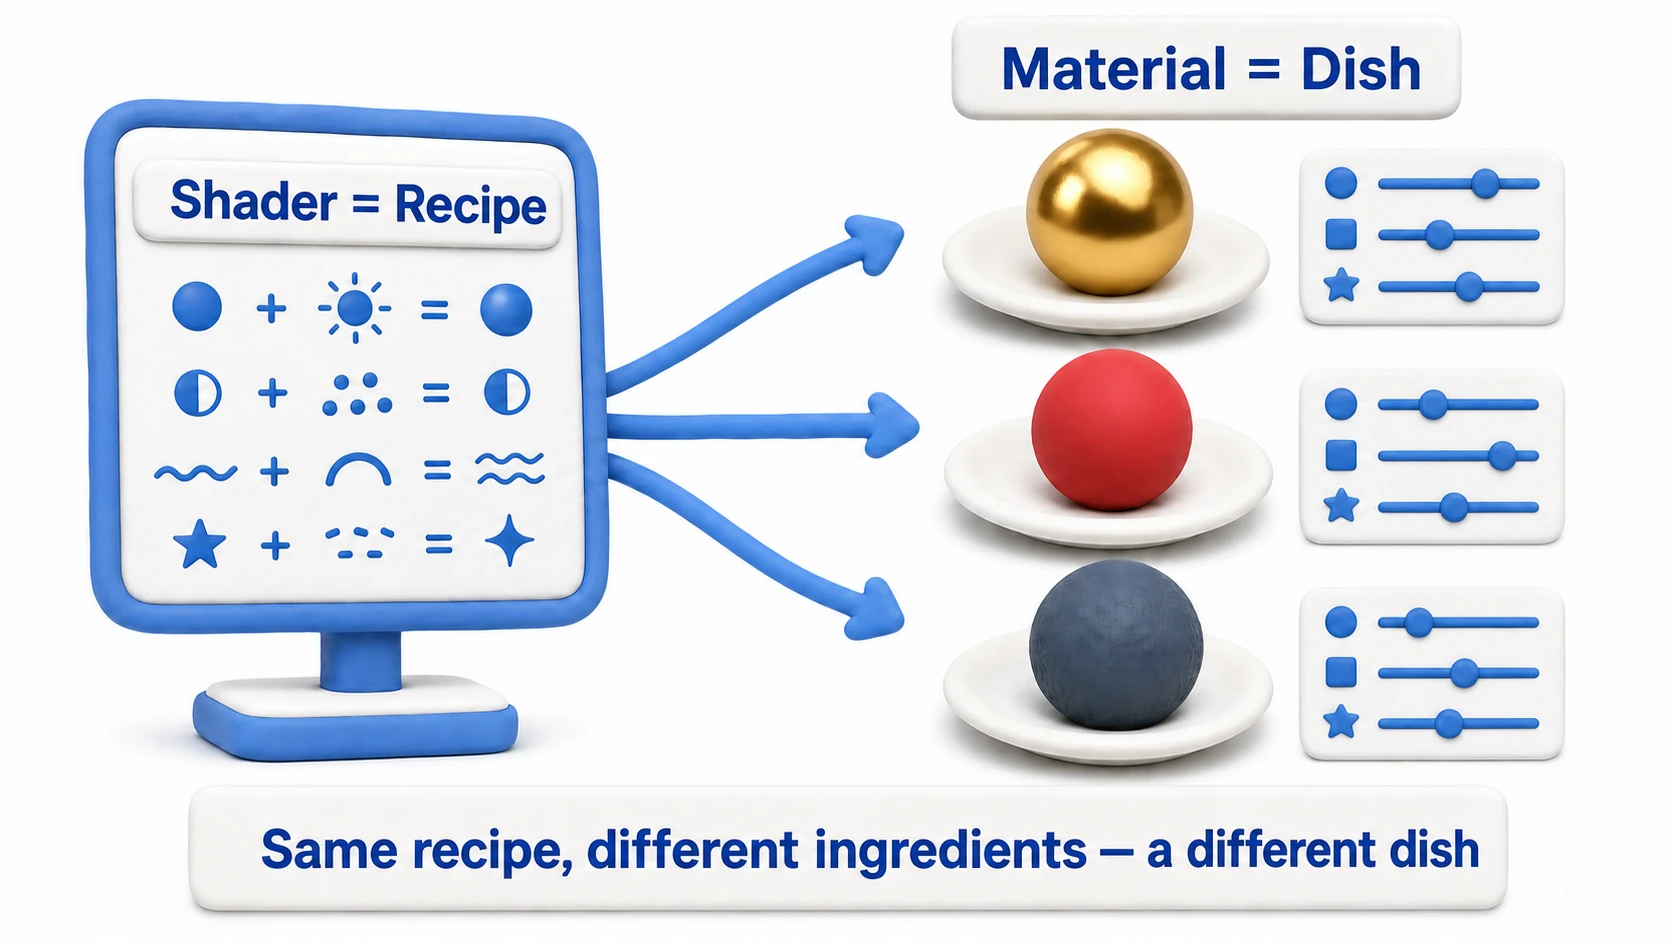
Even if you create 100 materials—"gold material," "wood material," and so on—the recipe (shader) is often the same single Lit shader. That's what a typical project looks like.
Creating and Applying Materials
- Create: Right-click in the Project window and choose
Create > Material. A new material asset (.matfile) is created. - Apply: Drag and drop the material asset onto a 3D object in the Scene view or Hierarchy. The material is then assigned to the
Materialsarray of the object'sMesh Renderercomponent.
To edit materials on a model imported from an FBX, you first need to extract them via "Extract Materials" (see the 3D model import article).
Standard Shader: Lit vs Unlit
With a material asset selected, you can choose its "recipe" from the Shader dropdown at the top of the Inspector. In Unity's Built-in Render Pipeline, the Standard shader is the default. If you're using URP (Universal Render Pipeline) or HDRP, the basics are Lit (affected by lighting) and Unlit (not affected by lighting)—the essential roles are the same.
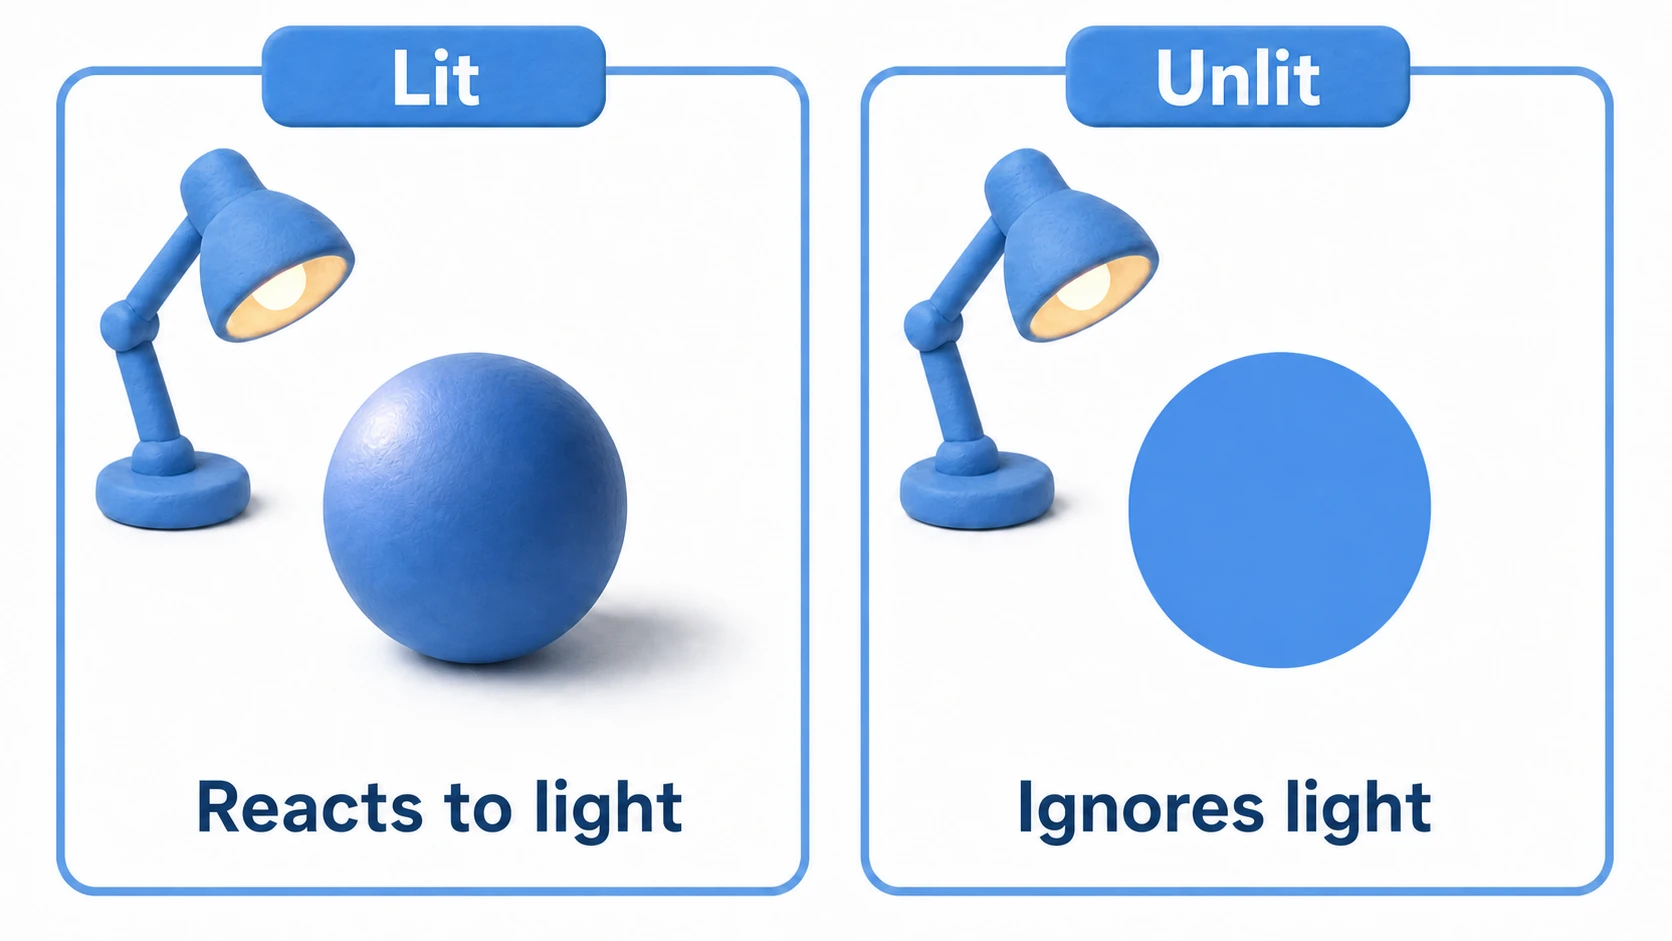
- Lit: Fully affected by the lights in the scene. Shading changes with how light hits the surface, producing a realistic look. Most objects in 3D games use Lit shaders. This is the foundation of PBR (Physically Based Rendering) (for the light-side setup, see the lighting basics guide).
- Unlit: Completely ignores the lights in the scene. The configured color or texture is displayed at its exact brightness (though fog and post-processing such as Bloom still affect it). Used for UI elements, toon-style visuals, special effects, debug displays, and the like.
The decision comes down to one line: "Do you want this appearance to react to light?" If yes, use Lit; if it should always look the same, use Unlit.
Basic Properties of PBR (Physically Based Rendering)
Lit shaders support PBR, which simulates light reflection based on the laws of physics. Just specify the real-world characteristics of a substance, and you get a material that looks realistic in any lighting environment. The key properties to remember are essentially three, plus two.
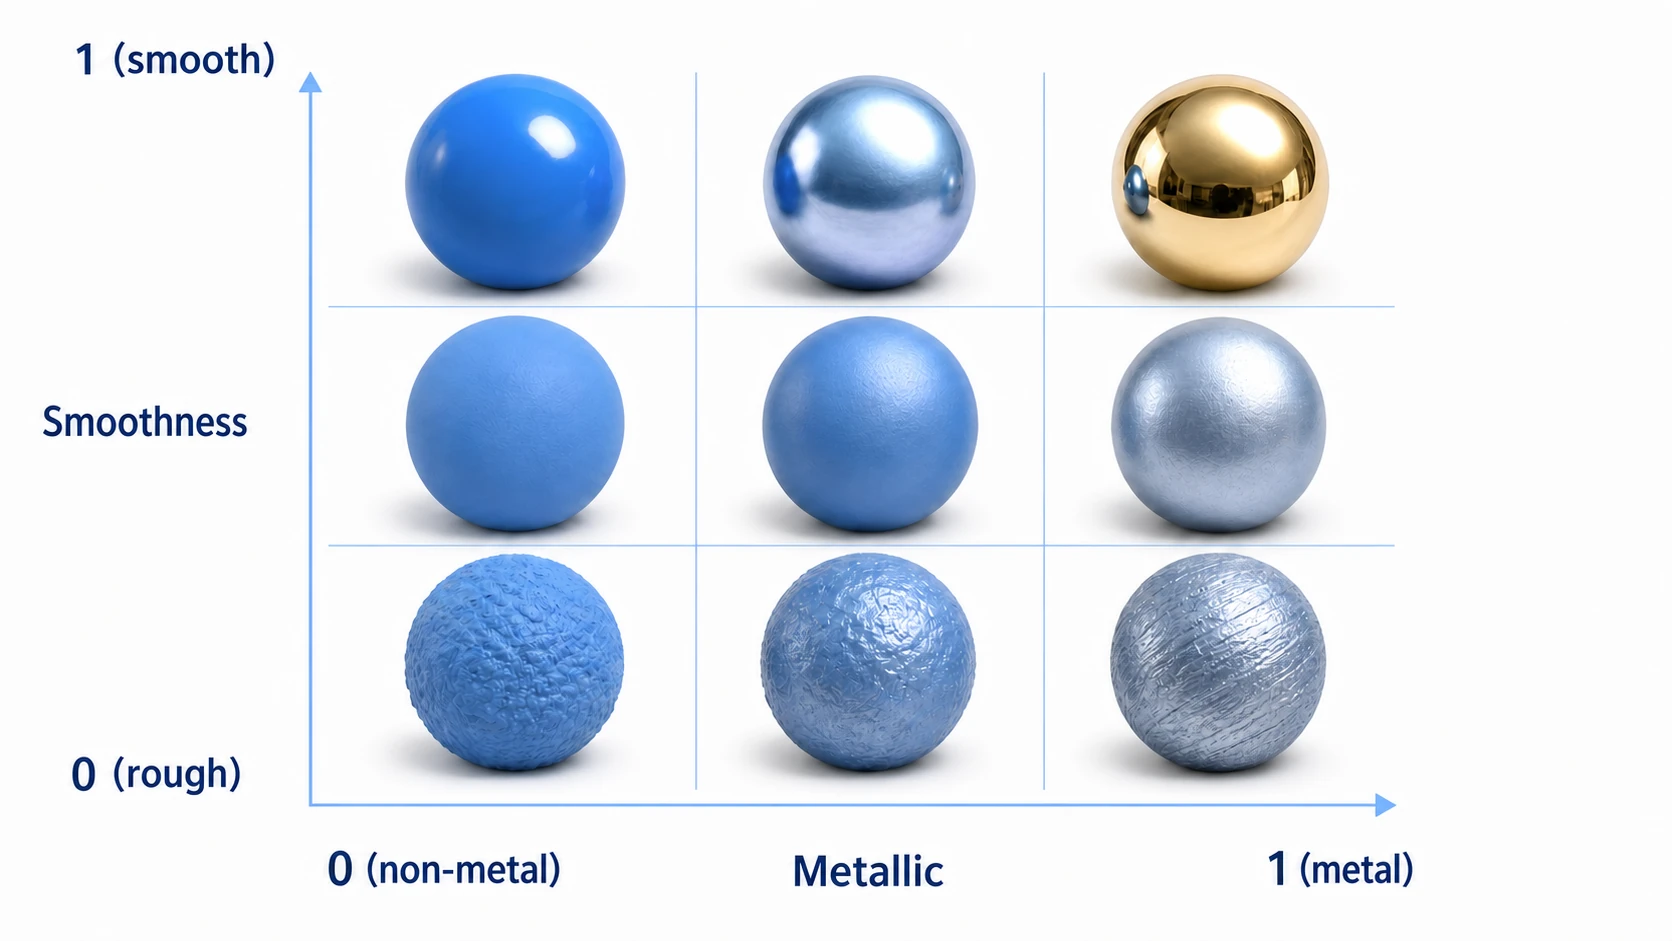
- Albedo: The base color of the object (called
Base Mapin URP's Lit). You typically assign a color texture (an image with the object's pattern and colors) here. - Metallic: How "metal-like" the surface is, from 0 to 1.
0is non-metal (plastic, wood, fabric);1is metal (iron, gold, copper). You normally set it all the way to either 0 or 1—intermediate values are rarely used (because a uniform in-between value looks like neither metal nor non-metal; you do use it at the edges of rust or chipped paint). - Smoothness: How smooth the surface is. Closer to
1reflects light sharply like a mirror; closer to0is rough and scatters light. Gloss, wetness, frosted glass—this is the property that most strongly shapes the impression of a surface. Note: Unity usesSmoothness, while other environments like Unreal Engine useRoughness(= 1 − Smoothness). Same concept, just inverted.
Two more properties take the look up a notch.
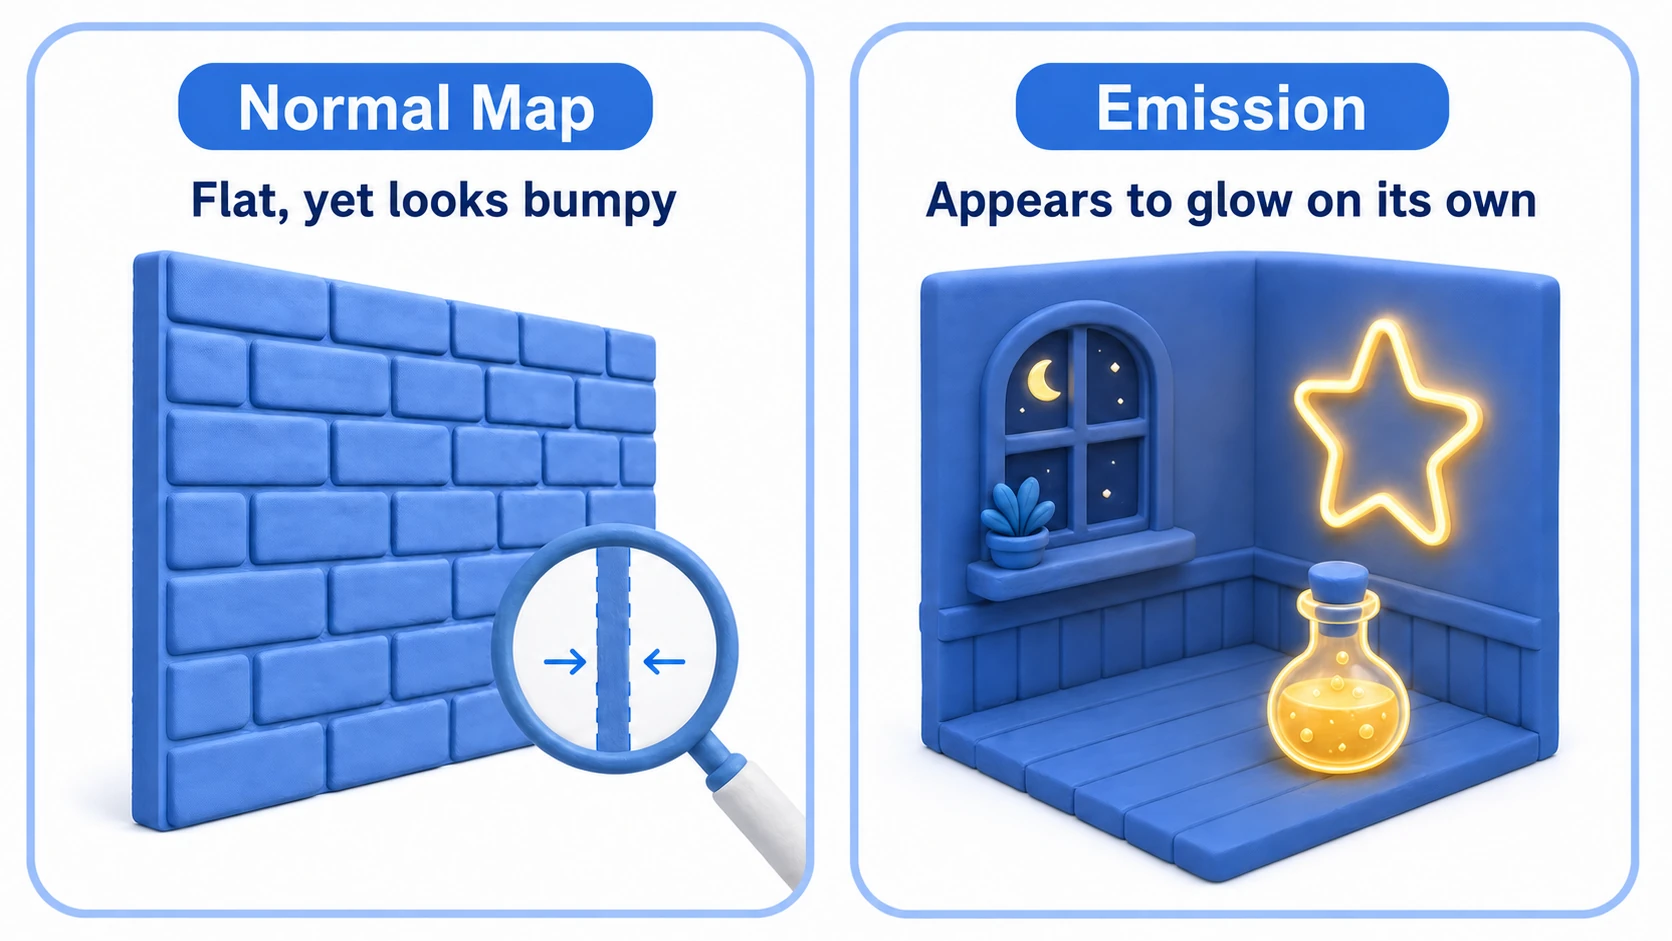
- Normal Map: A special texture that fakes fine surface bumps without adding polygons. Brick grooves, fabric weaves, engraved armor—"low-poly yet rich" is usually this at work.
- Emission: Makes an object appear to emit light on its own. Used for neon signs, magical items, monitor screens, and so on. Combined with the post-processing
Bloomeffect, it produces a beautiful glow (see the post-processing guide).
Material Recipe Quick Reference
Here's a collection of recipes for reproducing surfaces you'll commonly need in real games, using combinations of property values. Start with these values and fine-tune the look from there.
| Target Surface | Metallic | Smoothness | Notes |
|---|---|---|---|
| Gold chest / ornaments | 1 | 0.7–0.9 | Use a golden Albedo. Tune the shine with Smoothness |
| Mirror / chrome parts | 1 | 1 | Environment reflections (Skybox, etc.) matter for the mirror look |
| Plastic toy | 0 | 0.6–0.8 | A high-saturation Albedo gives it a pop feel |
| Wood / furniture | 0 | 0.2–0.4 | A wood-grain texture plus a Normal Map improves the feel |
| Rubber / tires | 0 | 0–0.15 | Barely any shine is what makes it look like rubber |
| Wet pavement | 0 | 0.7–0.9 | The trick is to make the Albedo darker than the dry state |
As the "wet pavement" recipe shows, PBR's clarity comes from being able to translate real-world rules directly into values: getting wet = higher Smoothness and a darker color.
Hands-On: Flash Only the Enemy That Got Hit
To finish, let's touch materials from a script — the classic effect where an enemy flashes white for an instant when your attack lands. Action games, RPGs, shoot-'em-ups: they all have it. We'll build it with three enemies sharing one material.
The setup is simple. Create one Slime.mat and assign it to all three spheres (or enemy models of your choice). First, change the Albedo of Slime.mat in the Project window — all three change color at once. That's what material "sharing" really means, and it feels just as good as bulk-editing a prefab.
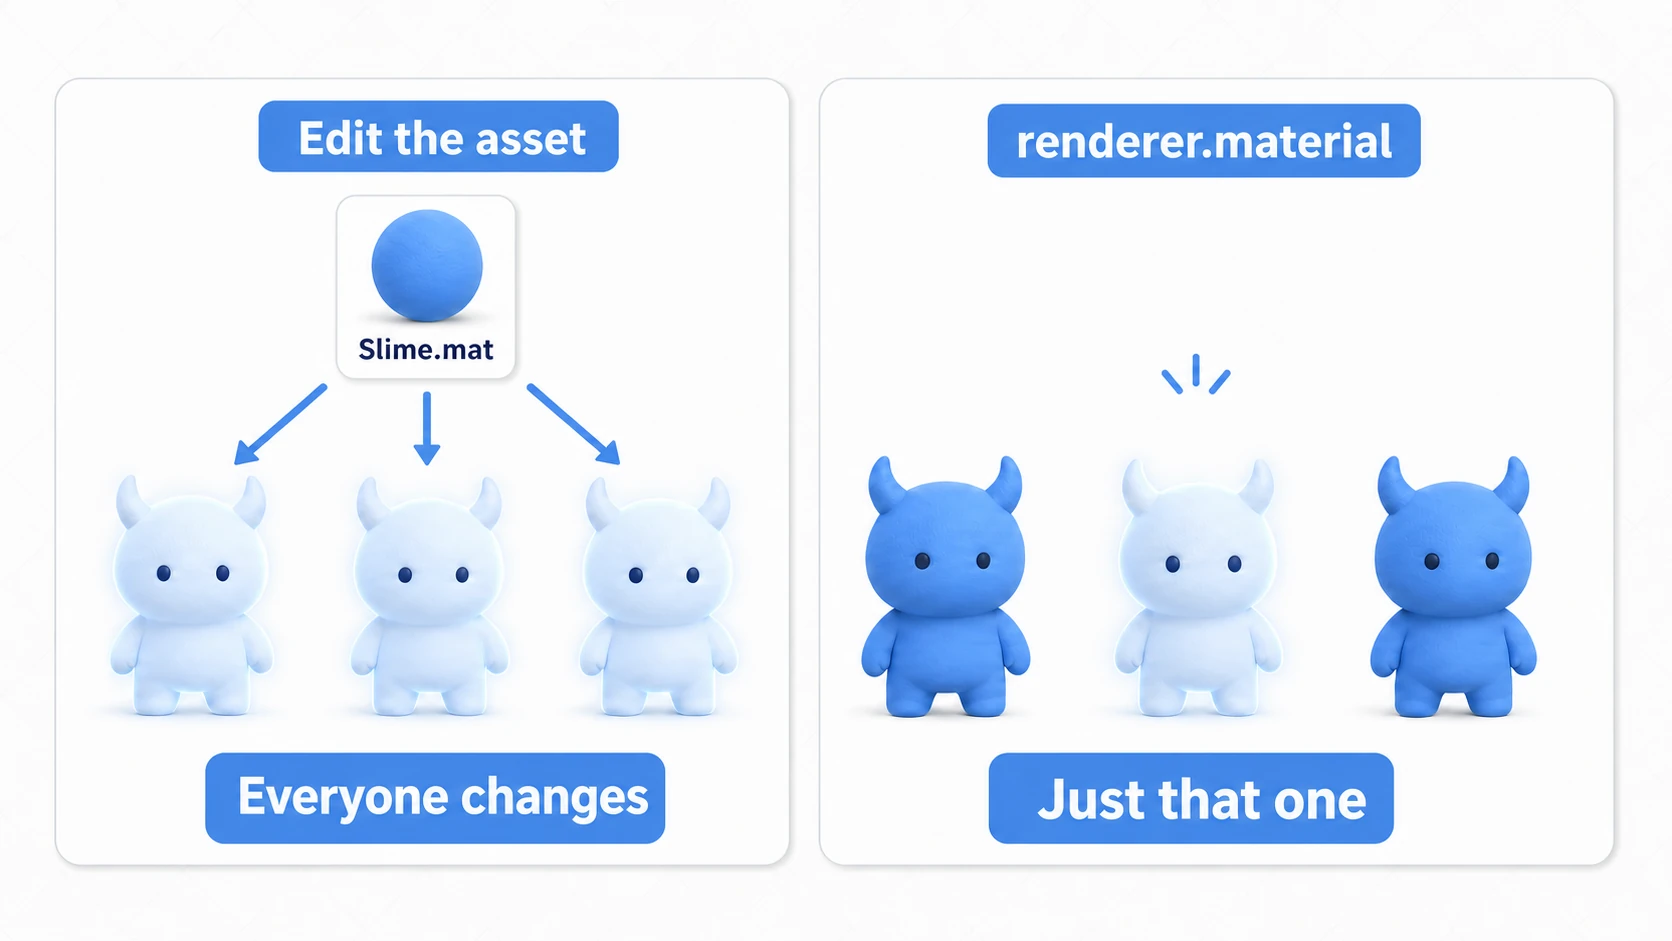
So how do we light up only the one that got hit? Enter renderer.material.
using UnityEngine;
using System.Collections;

public class HitFlash : MonoBehaviour
{
    [SerializeField] private Color flashColor = Color.white;
    [SerializeField] private float flashTime = 0.1f;

    private Renderer rend;
    private Material mat;  // A duplicate unique to this object
    private Color originalColor;

    void Awake()
    {
        rend = GetComponent<Renderer>();
        // The first access to .material spawns a duplicate unique to this object
        mat = rend.material;
        originalColor = mat.color;
    }

    public void Flash()
    {
        StopAllCoroutines();  // So rapid hits don't stack flashes
        StartCoroutine(FlashRoutine());
    }

    private IEnumerator FlashRoutine()
    {
        mat.color = flashColor;
        yield return new WaitForSeconds(flashTime);
        mat.color = originalColor;  // Always restore the original color
    }

    void OnDestroy()
    {
        Destroy(mat);  // Duplicates don't go away on their own, so clean it up yourself
    }
}
Wire up some test code (call Flash() on a clicked enemy, for instance) and only the enemy you hit flashes white for 0.1 seconds while the other two stay blue. On first access, renderer.material automatically creates a material duplicate unique to that object, so you can touch it safely without affecting the shared original — that's the mechanism behind this effect. Duplicates don't go away when the object is destroyed, so the code cleans it up in OnDestroy.
After stopping Play, take one look at Slime.mat — still its original color? The three enemies share a single asset, and only the one you hit flashes and recovers. Once you can confirm that, you've got the etiquette of touching materials from code.
Bonus: Good to Know for Later
Once you start working with materials, these are topics worth knowing early to avoid accidents.
- Pink material = missing shader: If a shader doesn't match your project's render pipeline (Built-in/URP/HDRP), the material turns shocking pink. The differences between pipelines and how to convert are covered in the render pipeline article.
- Build custom shaders with Shader Graph: Unique looks like "dissolve effects" or "holograms" are the world of Shader Graph, where you build shaders by connecting nodes. Now that you have the PBR basics down, it should be an easy entry point.
sharedMaterialrewrites the original: change the hands-on code tosharedMaterialand hitting one enemy lights up everyone using that material. It rewrites the asset itself, so colors changed during Play stay after you stop, and Ctrl+Z won't undo them. When "the color didn't come back after stopping" happens, suspect this first.- Flashing lots of enemies?
MaterialPropertyBlock: it changes one object's color without making a duplicate. But those Renderers stop being drawn together by the SRP Batcher, so it isn't necessarily faster. Measure with the Profiler before switching.
Summary
Materials and shaders are essential elements for bringing 3D objects to life.
- The shader is the "recipe," and the material is the "dish made from the recipe." One shader can spawn countless materials.
Litreacts to light;Unlitignores it. Choose based on "should this react to light?"- The PBR fundamentals are
Albedo(color),Metallic(metal or not, 0 or 1), andSmoothness(the star of surface feel). - Use
Normal Mapfor detail without extra polygons, andEmissionfor self-illumination. - When in doubt, start from the values in the material recipe quick reference.
- To change one object, use
material;sharedMaterialchanges everyone — and the asset itself. If a color won't revert after stopping Play, suspect the latter.
Good materials dramatically boost the believability of your game world.