You bring a model you made in Blender into Unity, and it's the size of a building. You fix that, and now it's lying on its side. It finally stands up — and the material is completely white. Importing 3D models is a rite of passage packed with these classic gotchas.
Almost every one of these issues comes down to a mismatch in "conventions" between your DCC tool (content creation software like Blender or Maya) and Unity. This article walks through the export-side pitfalls and Unity's Model Import Settings (the four tabs: Model, Rig, Animation, and Materials), organized by model type.
What You'll Learn
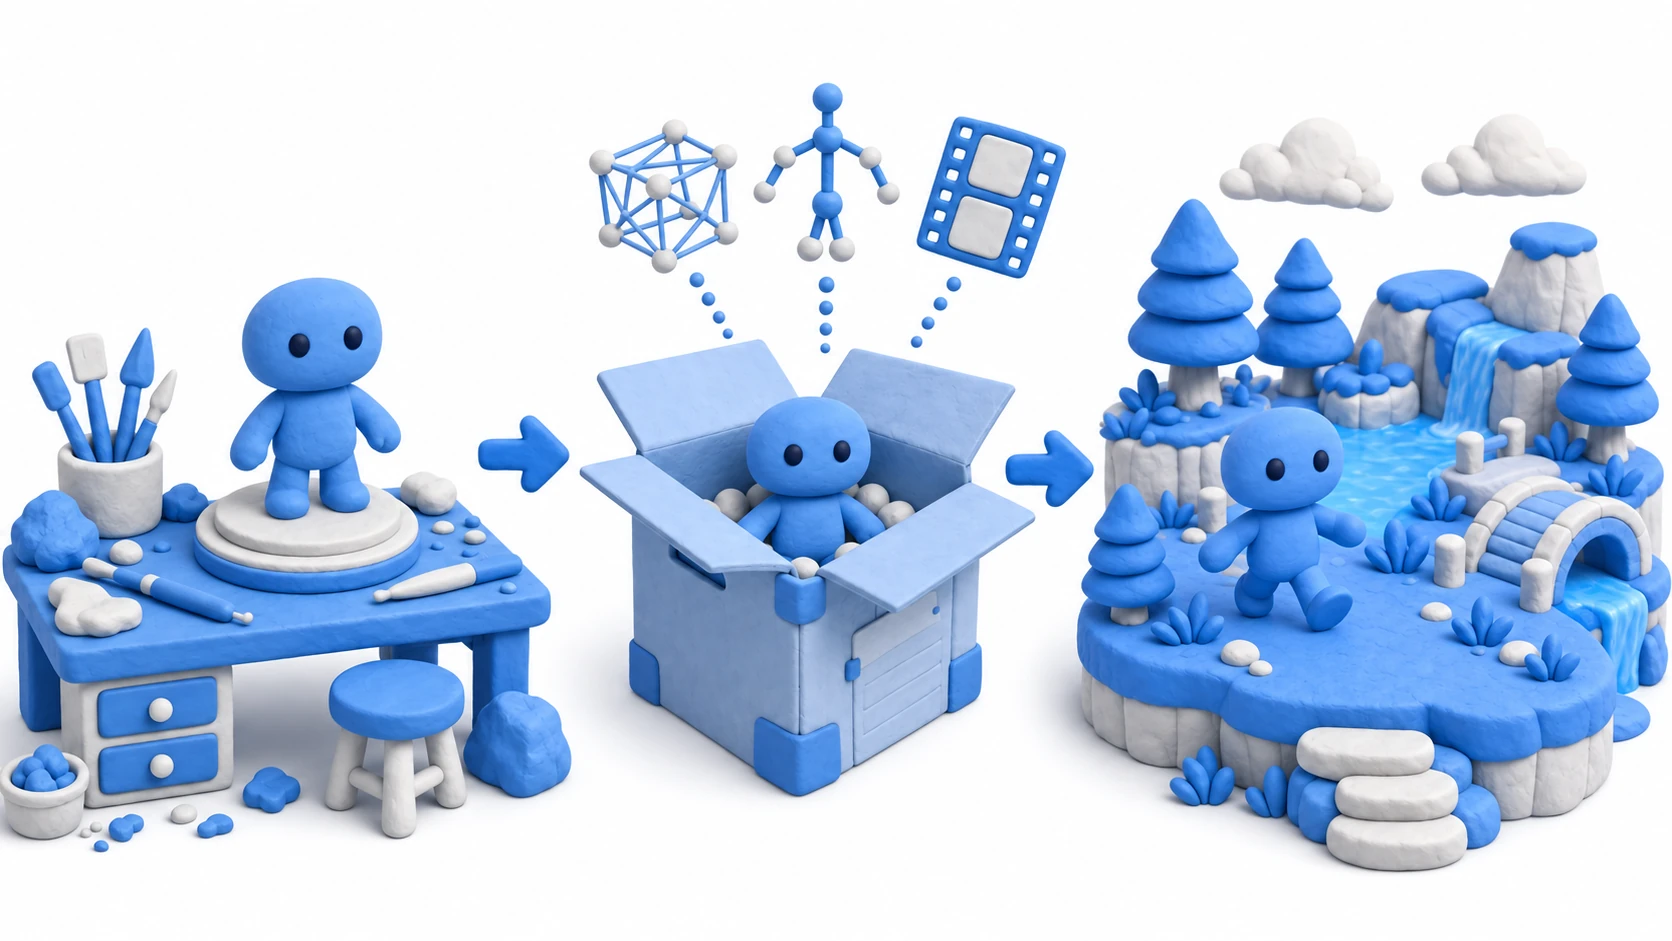
- The big picture of the DCC → FBX → Unity asset pipeline
- Three export-time rules that prevent the "gigantic / sideways" problems
- What each of the four Model Import Settings tabs (Model/Rig/Animation/Materials) does
- Reusing animations across models (retargeting) with the
Humanoidsetting- A cheat sheet of settings by model type — characters, environments, and weapons
- The "health check" routine to run right after every import (size → orientation → materials → prefab)
Tested with: Unity 6 (6000.x)
The Big Picture: The Pipeline from DCC Tools to Unity
Characters, environments, and props for 3D games are usually created in external DCC (Digital Content Creation) tools like Blender, Maya, or 3ds Max, then imported into Unity. The container used for this handoff is the industry-standard FBX (.fbx) format.
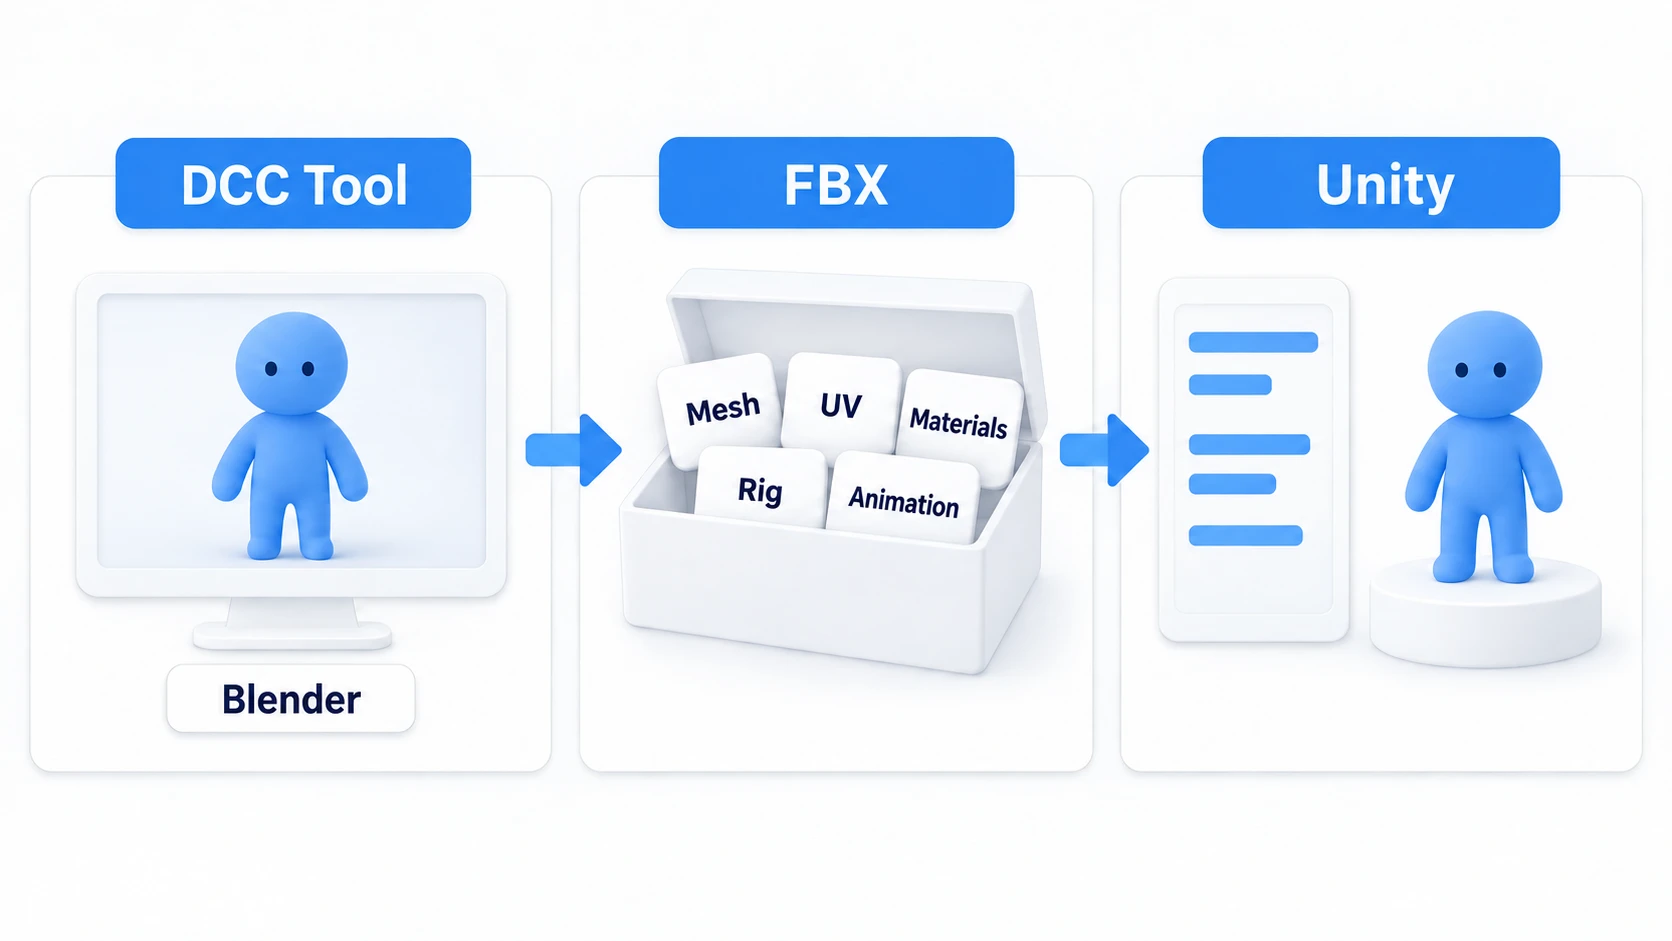
An FBX file can bundle mesh (shape), UVs (texture coordinates), materials, rig (skeleton), and animation into a single file. In other words, the import process is where you tell Unity, via four tabs, "here's how to interpret the contents of this box."
Step 1: Exporting from DCC Tools
Half of all import trouble can be prevented before the model ever reaches Unity. Using Blender as an example, here are three export-time rules to follow.
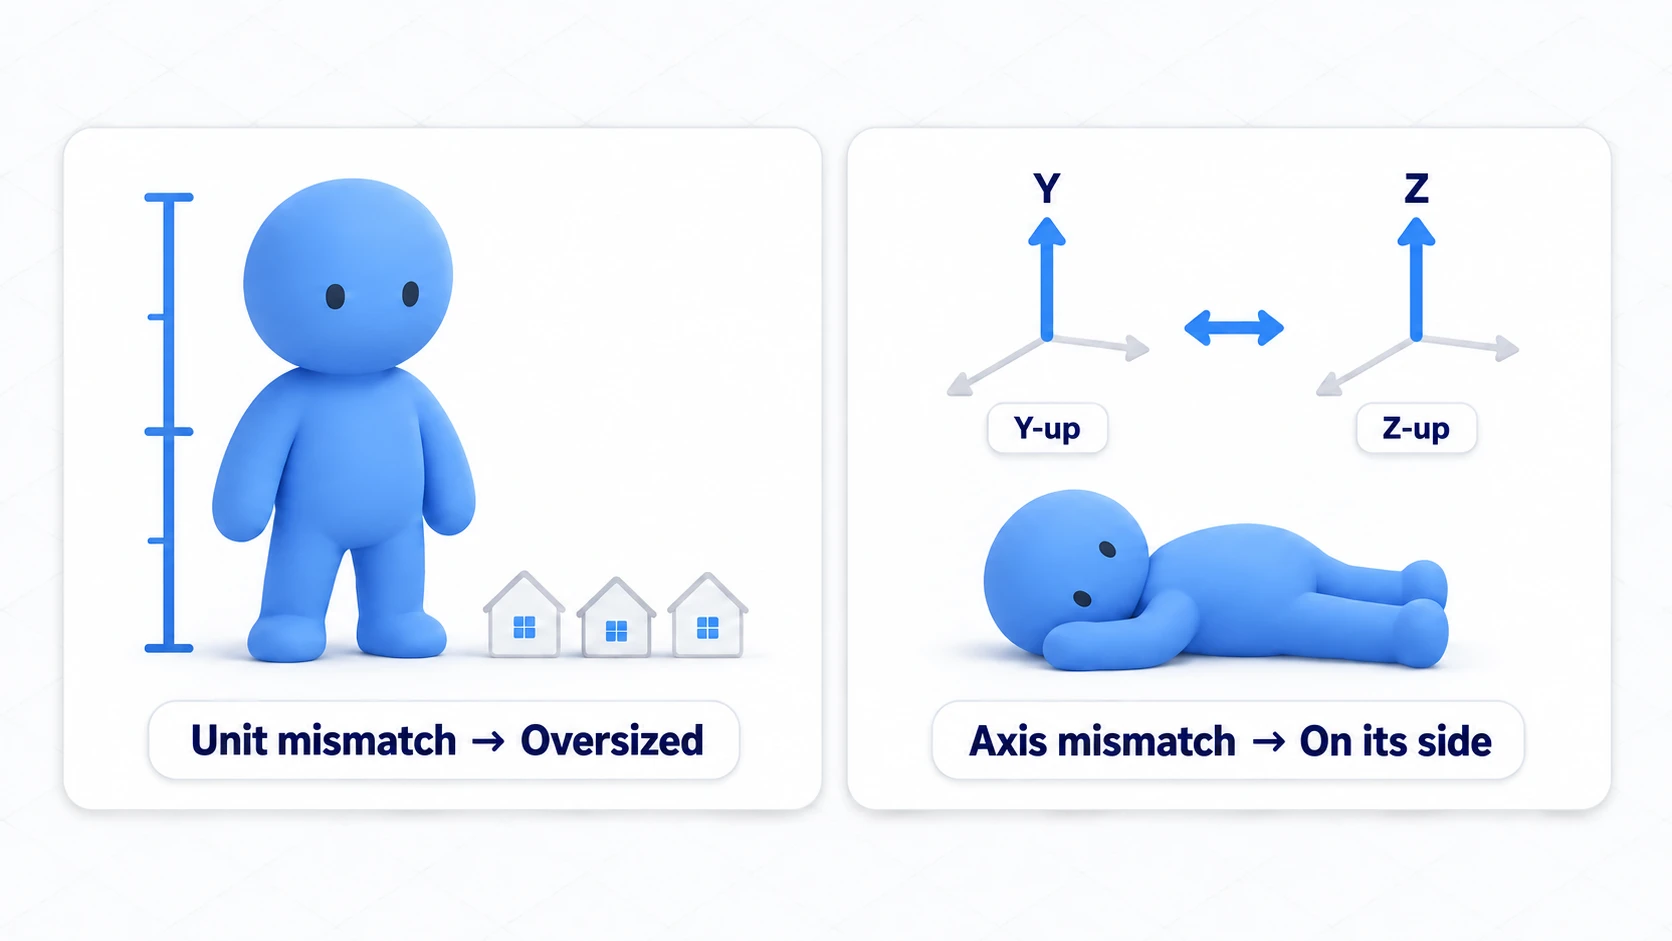
- Match the scale and coordinate system: Unity works in meters (1 unit = 1 meter) and uses a left-handed coordinate system with Y as the up axis. Mismatches here cause the "gigantic" and "sideways" problems from the intro. In Blender, the common export settings are
Transform > ScalewithApply Scalings: FBX All,Forwardset to-Z Forward, andUpset toY Up. - Apply transforms: If an object's scale or rotation isn't (1, 1, 1) or (0, 0, 0), you'll run into baffling behavior in Unity, such as distortion when rotating or physics going haywire. Applying transforms before export (
Ctrl+A > Apply All Transformsin Blender) is the baseline. However, on models with an Armature (bones) or animations, applying mid-production can break the alignment between the rig and its animations. If you apply on a rigged model, always verify the animations still play correctly after export. While you're unsure, a safe rule of thumb: apply on static props, verify first on rigged models. - Export only what you need: Instead of the entire scene, select only the target objects and export with
Limit to: Selected Objects. Cameras and lights are created on the Unity side, so you normally leave them out.
Step 2: Importing into Unity and Model Settings
Drag and drop the exported FBX file into your Unity project's Assets folder to import the model. Select the model asset and the Model Import Settings appear in the Inspector, organized into four tabs: Model, Rig, Animation, and Materials.
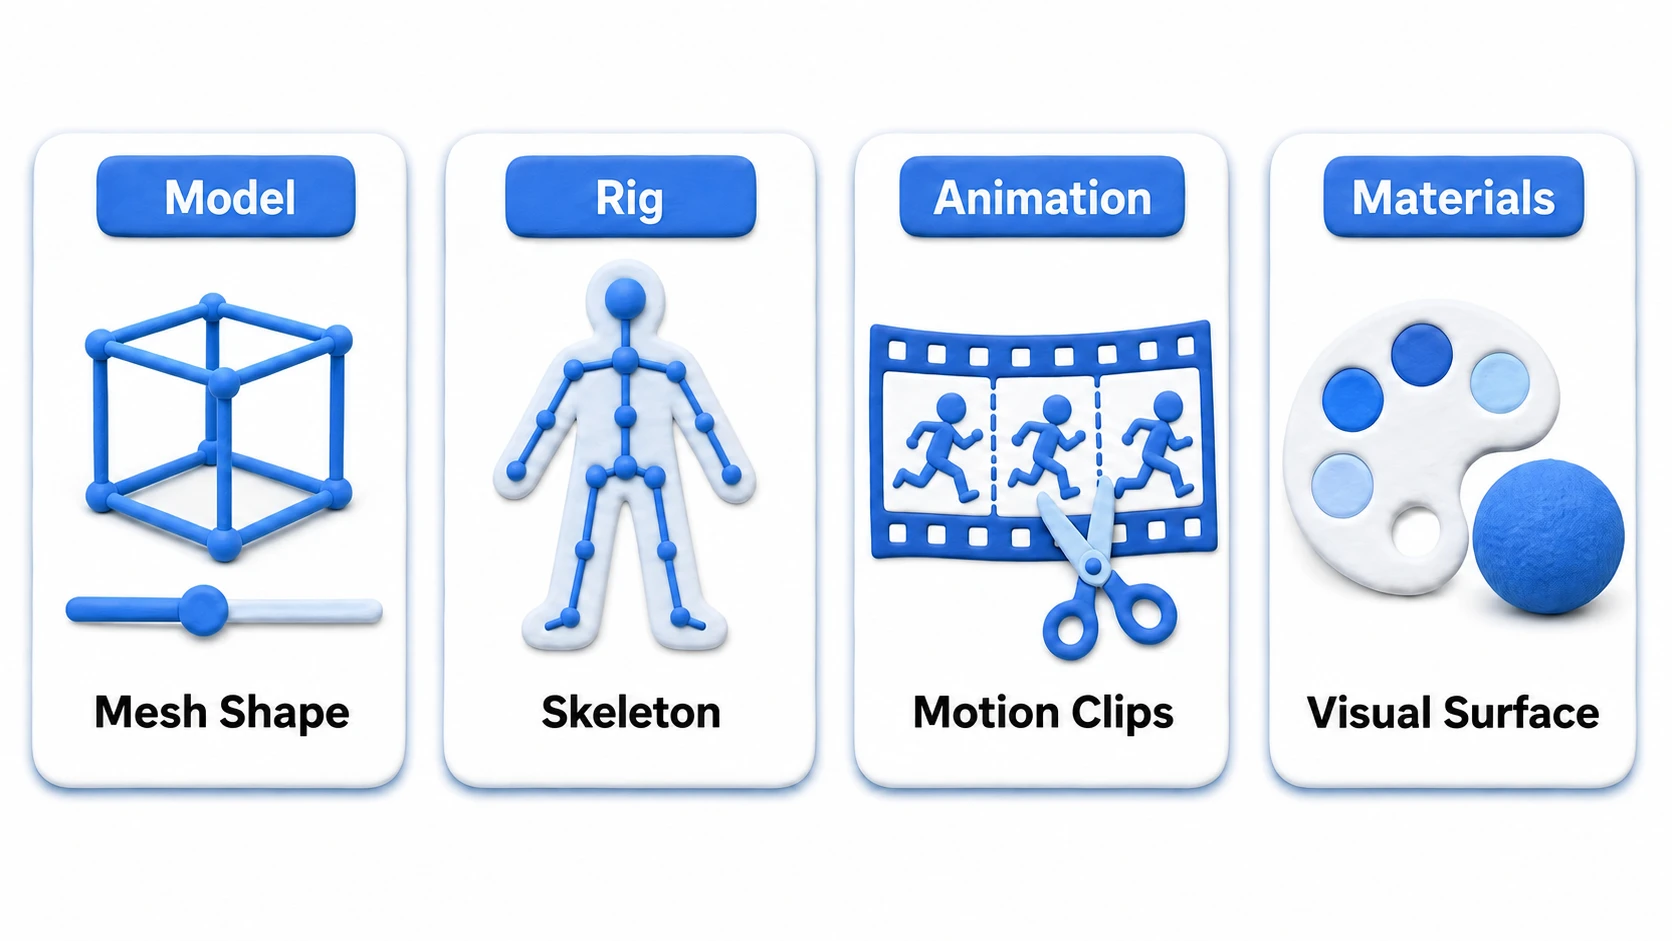
The Model Tab
This tab covers basic mesh settings.
- Scale Factor: Corrects the scale at import time. If the unit settings of your DCC tool and Unity match, you can usually leave it at
1. - Convert Units (Use File Scale in Unity 2022 and earlier): Converts the FBX file's units (such as centimeters) into Unity's meters. Normally leave this on.
- Read/Write Enabled: Turn this on if scripts need to access the mesh data (e.g., reading and writing vertices). Leaving it off when you don't need it reduces memory usage.
- Generate Colliders: When enabled, automatically attaches a
Mesh Colliderbased on the mesh shape. Handy for static environments, but it hurts performance on complex character models — normally leave it off and add aCapsule Collideror similar manually (see the Rigidbody article for choosing colliders).
The Rig Tab
This tab configures the character's rig (skeleton) and animation type. For non-character models (environments, weapons, etc.), leave it as None.
- Animation Type:
None: A static model with no animation.Legacy: For the oldAnimationcomponent. Avoid unless you have a specific reason.Generic: For non-humanoid characters (monsters, animals, etc.) and animated machinery.Humanoid: For bipedal human-like characters.
- Avatar Definition:
Create from This Model: Generates anAvatar(the skeleton mapping data for humanoid models) from this model's rig.Copy from Other Avatar: Reuses anAvatarcreated from another model (use it between models with the same skeleton structure).
What makes Humanoid so powerful is that the Avatar system lets you reuse animations across models (retargeting). Create one "walk" animation (or grab one from the store), and you can apply it as-is to other characters with different body proportions. This is why nearly all animation assets on the Asset Store assume Humanoid rigs.
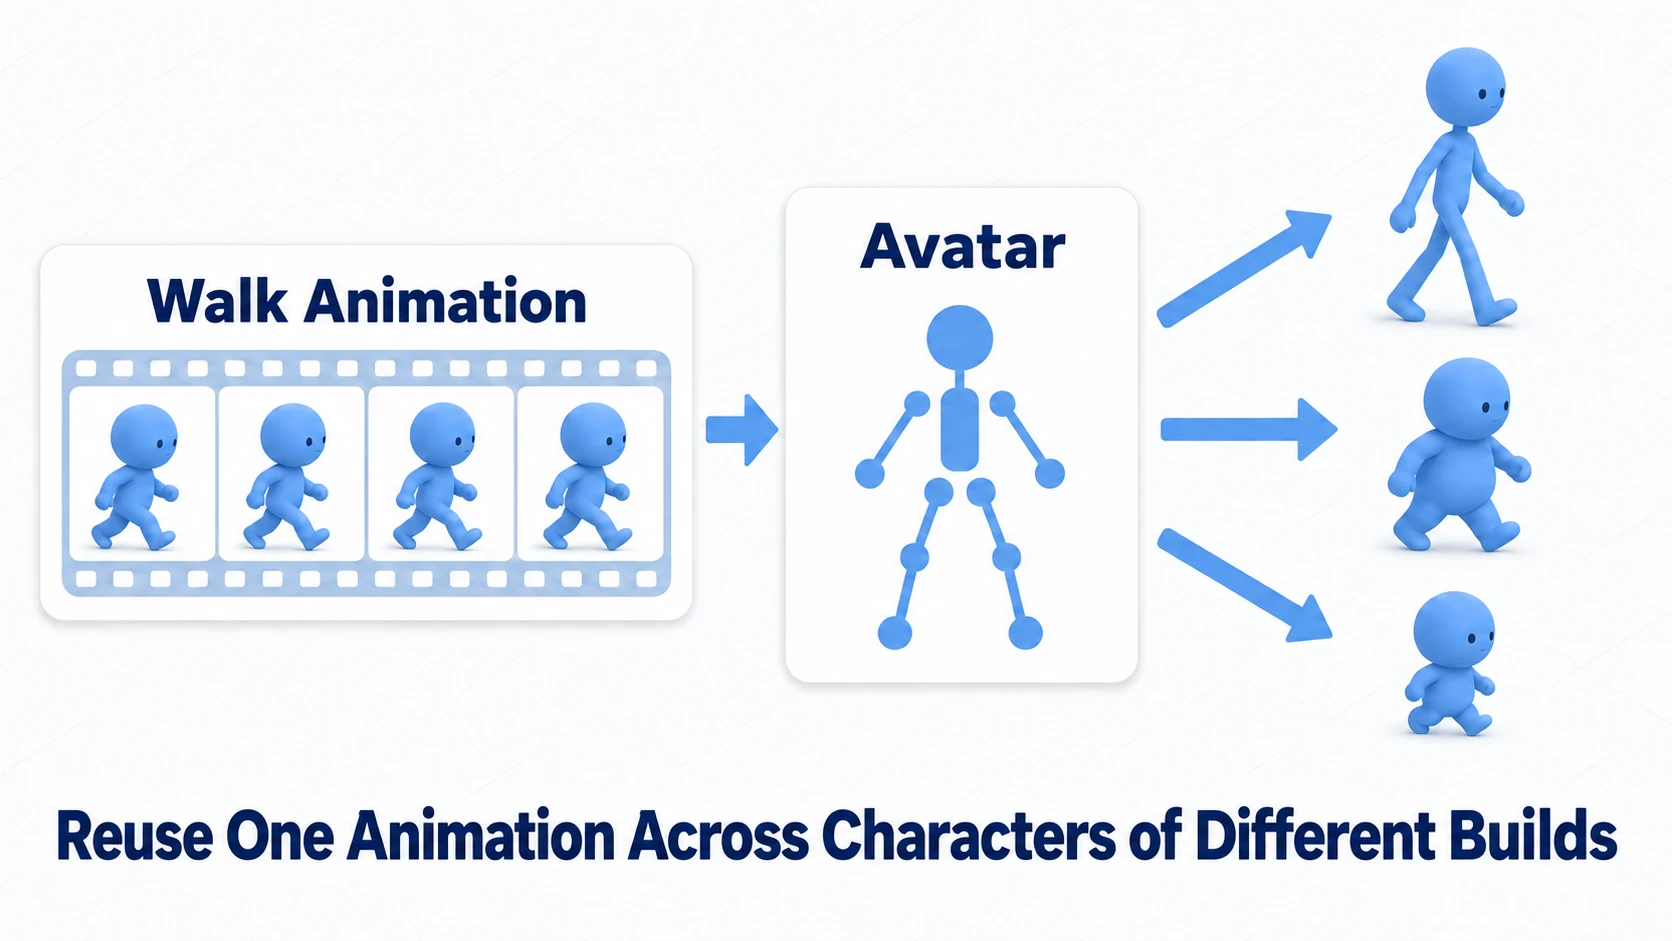
When you select Humanoid, click the Configure... button to verify and fix the bone mapping that Unity assigned automatically.
The Animation Tab
This tab manages the animation clips contained in the FBX file. You can split clips, set looping, and rename them here.
- Import Animation: Uncheck this and no animations will be imported.
- Clips: If the FBX contains multiple animations (e.g., frames 1-30 are walking and 31-60 are running), click the
+button to add clips and split them by specifying each one'sStartandEndframes. - Loop Time: When enabled, the clip plays in a loop (walk, run, idle, and so on).
Controlling playback of the split clips is the Animator's job, covered in the Animator Controller article.
The Materials Tab
This tab configures how materials and textures are imported.
- Location:
Use Embedded Materials: Uses the material settings embedded in the FBX. However, you can't edit them until they're extracted as Unity materials.Use External Materials (Legacy): The old approach. Normally not used.
- Material Creation Mode:
Import via MaterialDescriptionis recommended. - Extract Textures... / Extract Materials...: Extracts the textures and materials embedded in the FBX into your project as editable assets (
.png,.mat, etc.). You'll typically do this once after import so you can adjust the materials in Unity.
Note (classic gotcha: materials turn pink): If your imported model shows up in shocking pink, that's Unity screaming "shader not found." Most often it's a Built-in material opened in a URP project — convert it in "Window > Rendering > Render Pipeline Converter" by choosing Built-in to URP, ticking Material Upgrade, and pressing Initialize And Convert (see the render pipeline article for details).
Settings Cheat Sheet by Model Type
In practice, the combination of settings is largely determined by the type of model. Try mapping your project's assets onto these three patterns.
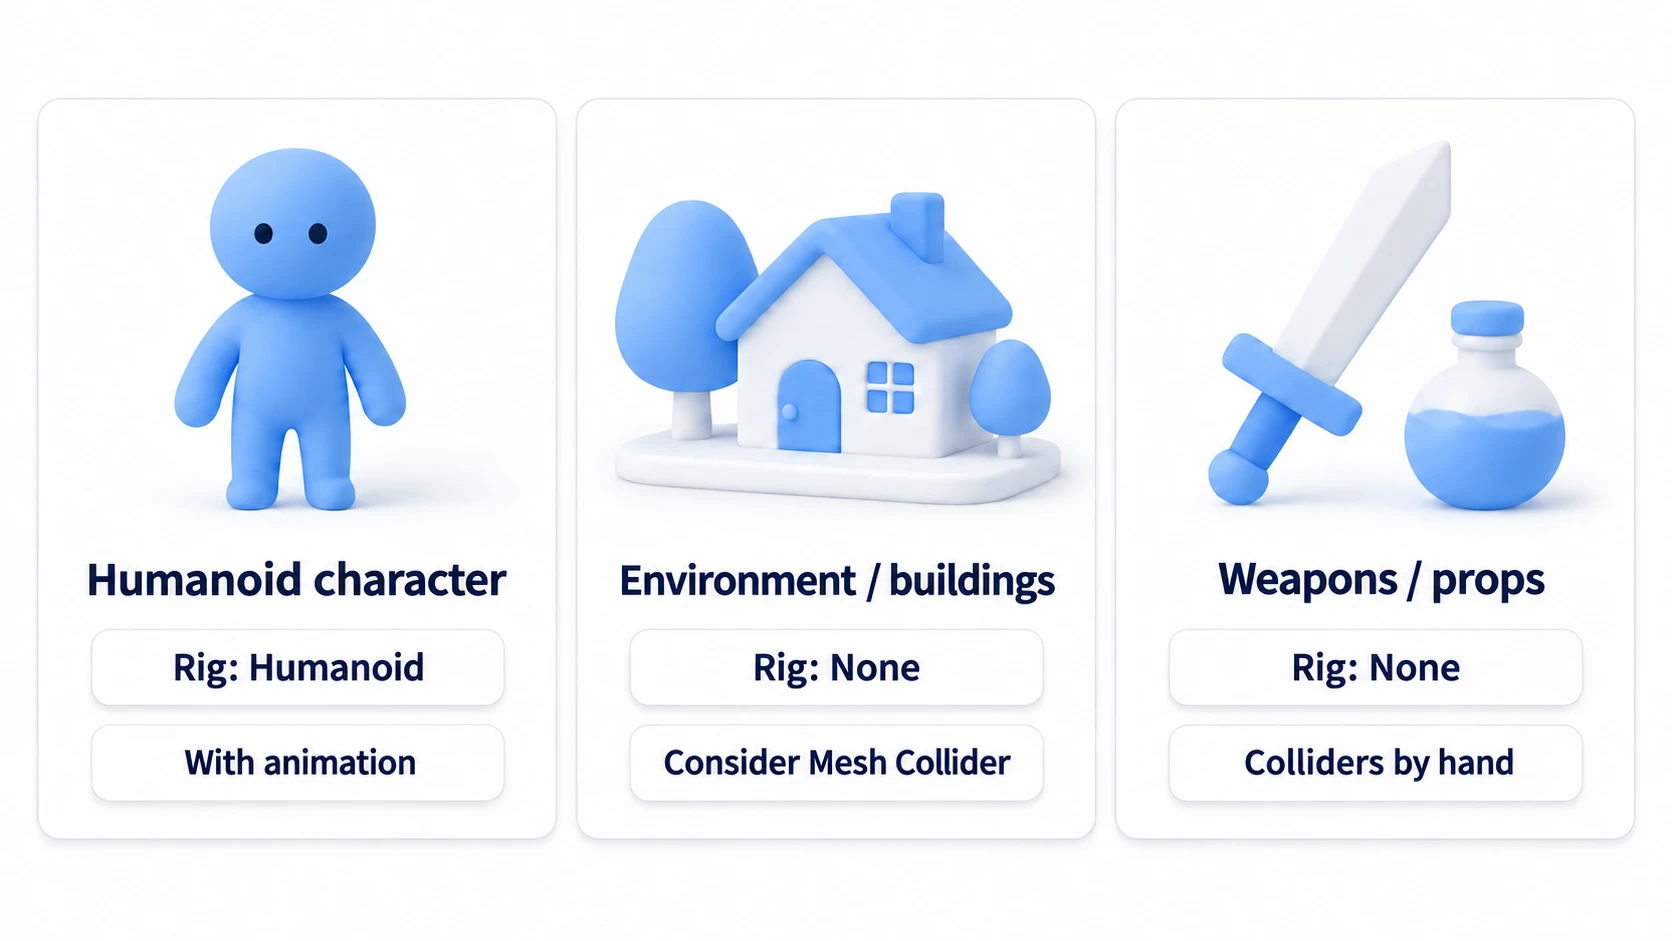
| Setting | Humanoid Character | Environment / Building | Weapon / Prop |
|---|---|---|---|
| Rig / Animation Type | Humanoid (Generic for non-humanoids) | None | None |
| Animation | Split clips, set looping | Not needed | Not needed |
| Generate Colliders | Off (add a Capsule Collider manually) | On when appropriate (Mesh Collider) | Off (add manually if needed) |
| Read/Write Enabled | Off | Off | Off |
| Materials | Extract and adjust | Extract and adjust | Extract and adjust |
Hands-On: The Five-Minute Post-Import Health Check
Run the same checkup in the same order every time you bring in a new model, and every one of those opening "gotchas" gets caught on the spot. An RPG character, a racing-game car, a horror-game cabinet — the examination order never changes.
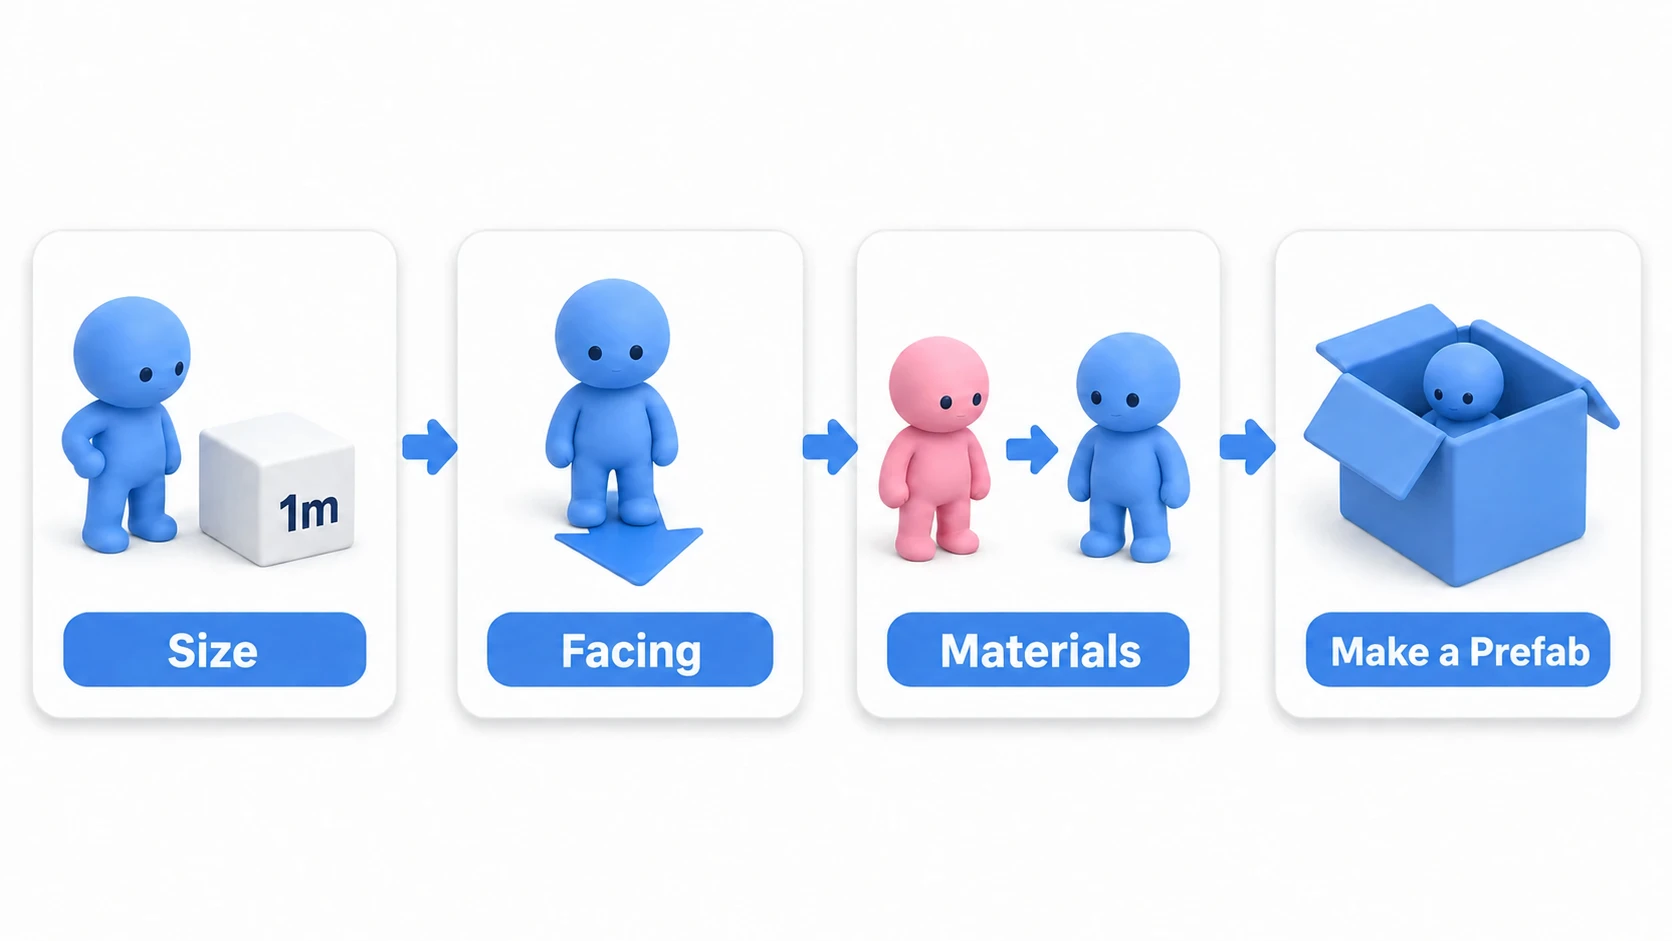
- Size — line it up next to a 1m reference Cube: a Cube from
GameObject > 3D Object > Cubeis exactly one meter per side. Drop your model into the scene beside it and "my human is 2.5m tall" or "my car is smaller than the cube" becomes obvious instantly - Orientation — does it face forward at rotation (0, 0, 0)?: if the freshly placed model lies sideways or faces backward, your axis settings are off
- Materials — any pink or pure white?: pink means a missing shader (fix with the URP converter); pure white means no texture is connected to the material (Base Map is empty). Bring the texture into the project and assign it to Base Map (if it's embedded in the FBX,
Extract Textures...pulls it out) - (Characters only) Avatar and animation — all bones green in
Configure...?: after choosingHumanoid, openConfigure...and confirm every bone mapping is green. Even one red bone means retargeting won't work correctly. Also play the preview in theAnimationtab and check the walk isn't mangled - Passed? Make it a prefab: from now on, what you place in scenes is this prefab (see the Prefabs article)
When a symptom does show up, separate "patch it for now" from "fix it at the source."
| Symptom | Fix on the Unity side | Fix on the DCC side |
|---|---|---|
| Gigantic / tiny | Adjust Scale Factor in the Model tab (avoid shrinking it with the scene Transform's Scale) | Match the unit settings, apply scale, re-export |
| Sideways / backward | Nest it under an empty parent and rotate the parent | Fix the export axis settings (-Z Forward / Y Up) |
| Pink / pure white | URP conversion, assign the texture to Base Map | Export with textures embedded (Path Mode: Copy) |
Fixes on the Unity side get today's work moving right away. If you'll keep updating the same model, fixing it on the DCC side makes the mismatch itself disappear from the next import onward. Once this checkup takes five minutes, importing stops being a scary step.
Bonus: Good to Know for Later
Once your imports are stable, these topics are worth having on your radar.
- Importing .blend files directly is discouraged: Unity can read
.blendfiles, but it just launches Blender under the hood to convert them to FBX — meaning the project won't open on machines without Blender installed. For team development, always export as FBX. - Textures have their own import settings: Textures come with settings like
Max Size(maximum resolution) and compression format. Using 4K textures as-is eats memory, so capping them at 1024-2048 is standard practice on mobile (see the mobile optimization article for optimization in general). - Import settings can be saved as presets: If you're repeating the same settings across dozens of models, use the preset icon at the top right of the Inspector to save and apply them. Going further, you can automate import settings with
AssetPostprocessor(an advanced use of editor extensions). - Use Terrain for wide landscapes: for broad ground like mountains and meadows, Unity's terrain system is easier than importing a model (Getting Started with Terrain)
Summary
Understanding the import settings is essential for using externally created 3D models correctly in Unity.
- On the DCC side, match the scale and coordinate system to Unity, apply transforms, then export as FBX. This is where you prevent the gigantic/sideways problems.
- In Unity's Model Import Settings, configure the four tabs according to the model type.
- The
Modeltab: Configure scale, collider generation, and so on. - The
Rigtab: Set humanoid characters toHumanoidso animations can be reused across models. - The
Animationtab: Split animation clips and set looping. - The
Materialstab: Extract materials and textures to make them editable. Pink = missing shader.
Get these settings right once, and your model is ready to be placed in the scene, animated, and put to work as a key actor in your game.