When you import your first image for a 2D game, chances are you'll hit the same wall as everyone else. Your carefully crafted pixel art comes out blurry. The size ratio between characters and backgrounds is completely off. Neither problem is caused by the image itself—both come from Unity's import settings.
This article covers the correct import settings for Sprites, the foundation of 2D game visuals, and then how to slice and use sprite sheets—multiple frames packed into a single image.
What You'll Learn
- Basic Sprite settings and the
Sprite Renderer- How to fix blurry pixel art (
Filter ModeandCompression)- Pixels Per Unit—unifying the "size standard" of your 2D world
- Slicing sprite sheets with the Sprite Editor (Automatic / Grid)
- Why pack frames into one image (draw calls and Sprite Atlas)
Tested with: Unity 6 (6000.x)
What Is a Sprite?
Almost everything you see on screen in a 2D game—characters, backgrounds, items, effects—is an image asset called a Sprite.
When you import a PNG or other image into Unity, its Texture Type defaults to Default (a 3D texture). To use it in 2D, switch it in the Inspector:
- Select the image asset in the Project window.
- Change
Texture TypetoSprite (2D and UI)in the Inspector. - Press
Apply.
tips: If you chose the 2D template when creating your project, images are imported as Sprites from the start. When mixing 2D into a 3D or URP 3D project, you'll need to change this manually.
Sprites placed in the scene are drawn by the Sprite Renderer component. Tinting via Color and flipping via Flip X/Y (for facing direction) are also handled by this component.
Blurry Pixel Art: Filter Mode and Compression
"My source image is crisp pixel art, but it turns blurry inside Unity." This is the single most common 2D question, and it comes down to two settings.
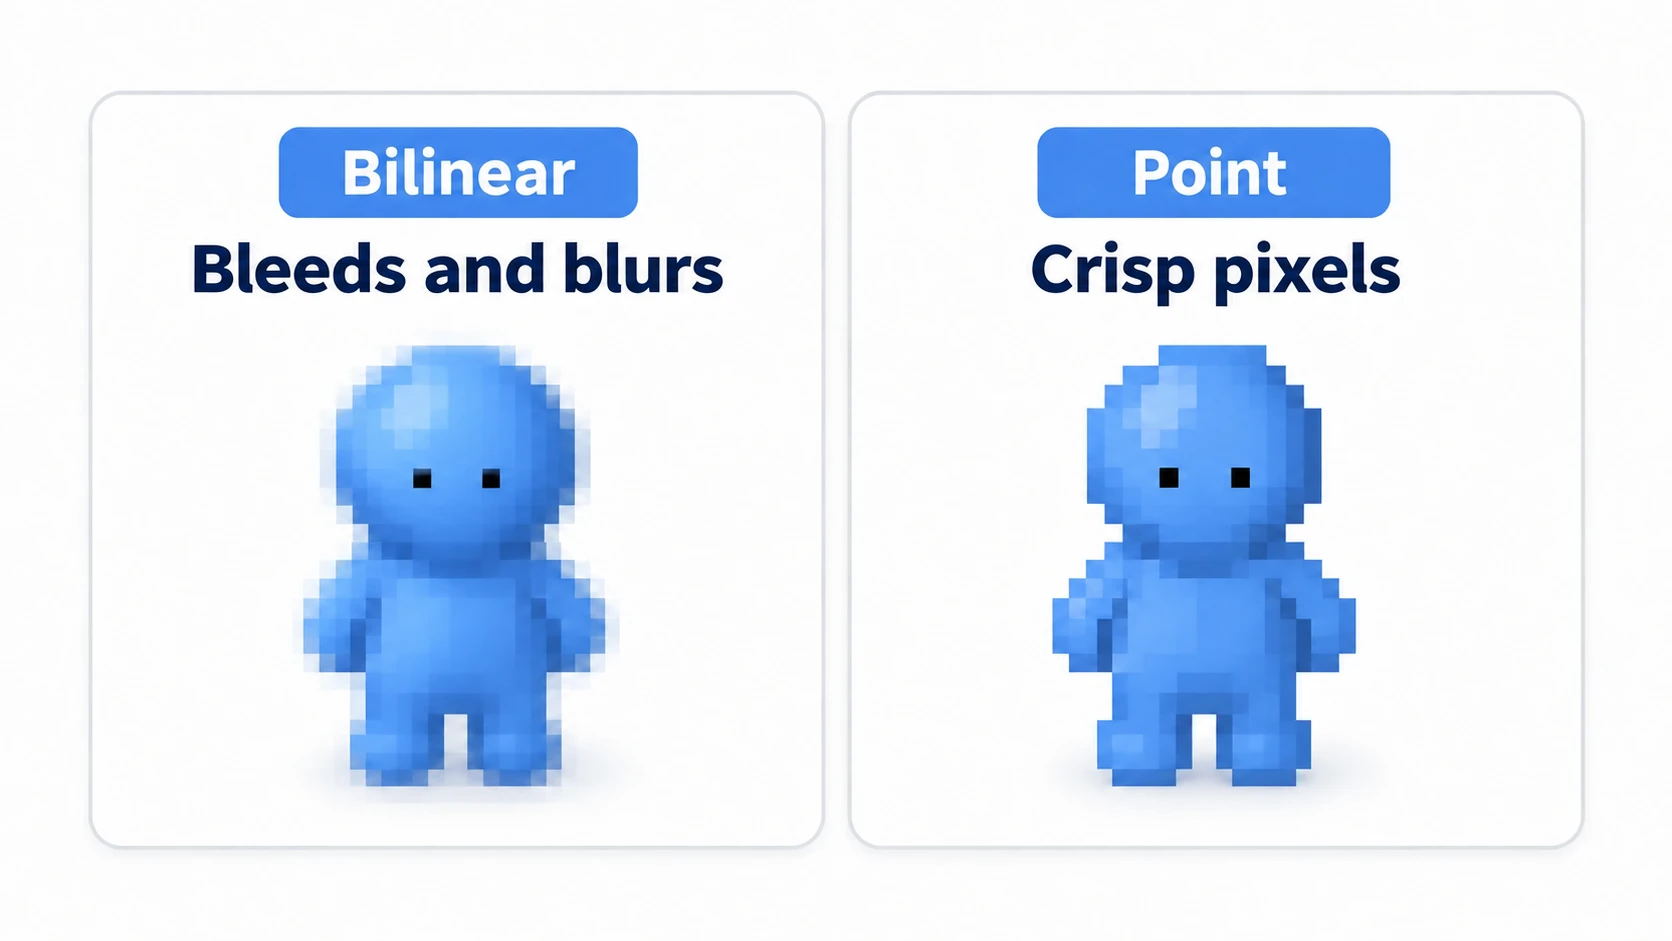
Filter Mode: How the image is interpolated when scaled. The defaultBilinearblends neighboring pixel colors for smoothness, which turns pixel art into a smudge. For pixel art, switch toPoint (no filter)—pixel corners stay exactly as drawn.Compression: Texture compression. It works well for photographic images, but on pixel art it causes color artifacts and grime. For pixel art,Noneis the rule.Max Size: Images larger than the default 2048 get scaled down without any error, and they blur. For big sheets, raise it to at least the image size.
Conversely, high-resolution hand-drawn illustrations are perfectly fine with the default Bilinear plus compression. Just remember the pair: "pixel art means Point + None."
Pixels Per Unit: Unifying the Size Standard
Pixels Per Unit (PPU) defines how many pixels of the image count as one scene unit (default 100).
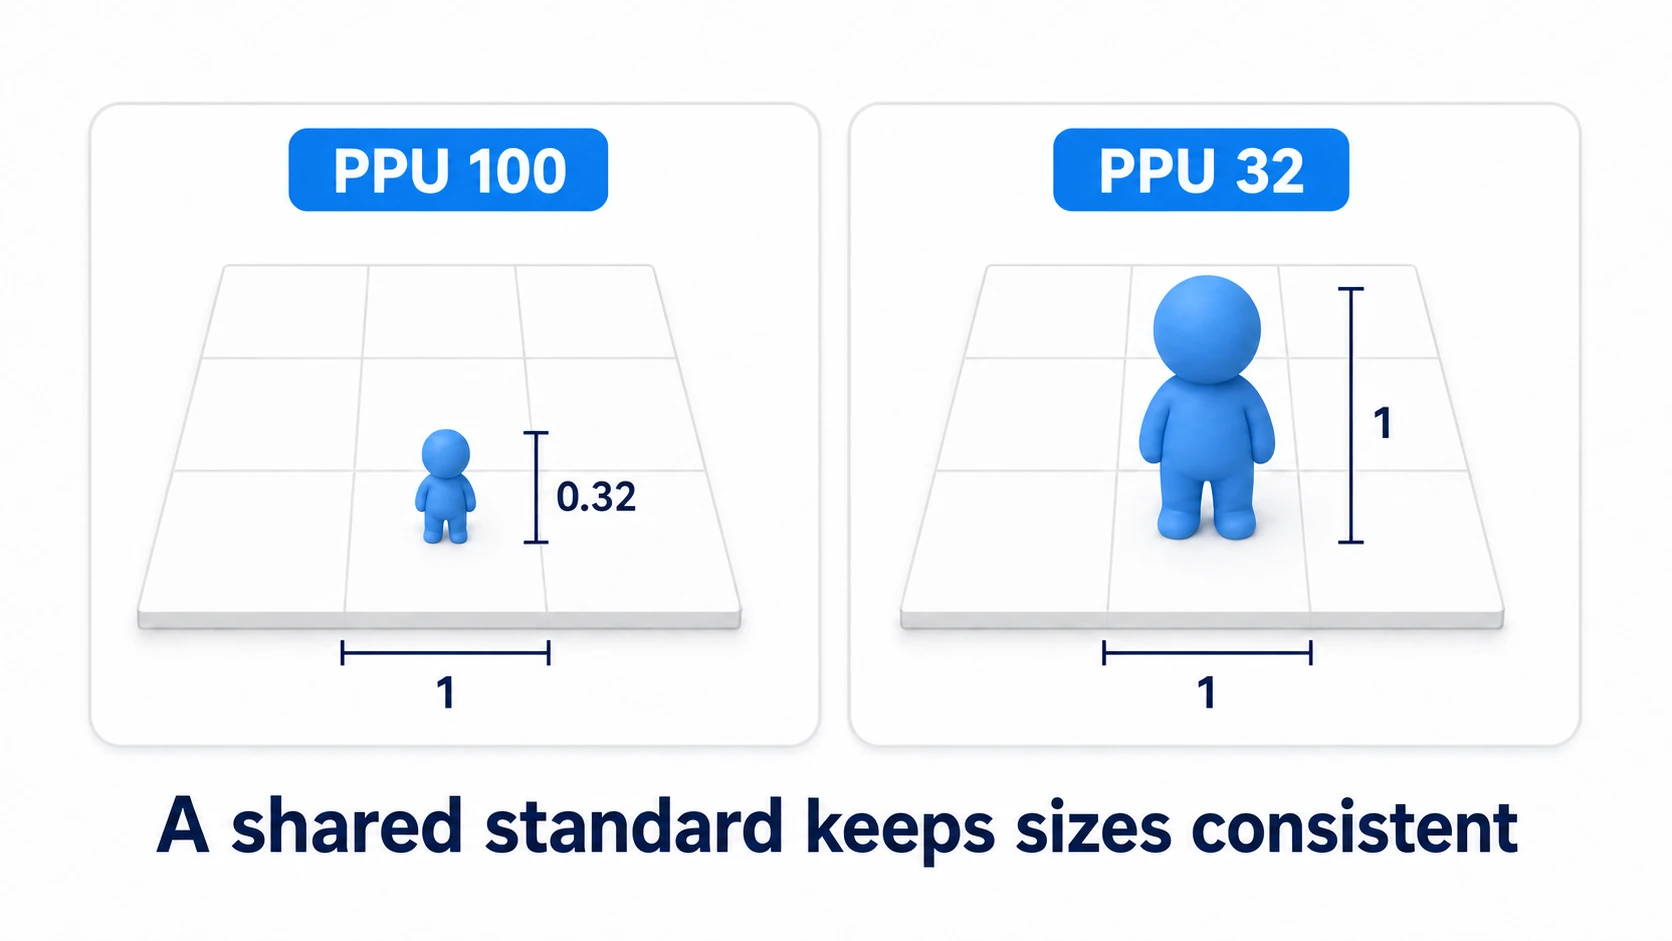
For example, a 32×32-pixel character at PPU 100 shows up in the scene as a tiny 0.32-unit figure. Set PPU to 32 and it becomes exactly one unit—one grid cell—tall.
What matters more than the specific value is keeping the standard consistent across your project. If characters use 32 while background tiles use 16, you'll be adjusting scales at every placement. For pixel art, the convention is "pixels per tile = PPU." Physics also treats one unit as roughly one meter, so a unified PPU pays off in 2D physics behavior too.
Sprite Sheets and the Sprite Editor
Sequential frames like a character's walk or jump are best managed not as one file per frame, but as a "sprite sheet"—all frames packed into a single image.

Above is a real sprite sheet for a slime animation. Splitting this single image into individual frames inside Unity is the Sprite Editor's job.
Slicing with the Sprite Editor
- Check Sprite Mode: Select the image and make sure
Sprite ModeisMultiplein the Inspector (it'sMultiplefrom the start in Unity 6; in older versions, switch it fromSingle). - Open the Sprite Editor: Click the
Sprite Editorbutton. - Automatic slicing: In the
Slicemenu at the top left, runSlicewithType: Automaticto detect individual sprites by analyzing transparent areas. Best for assets of varying sizes. - Grid slicing (Grid by Cell Size): For sheets with evenly spaced frames,
Type: Grid by Cell Sizewith the frame's pixel size (e.g., 32×32) slices more precisely. Use this for animation sheets. - Manual adjustment: You can create and modify rectangles by dragging. Sprite names and pivots can also be set individually.
- Apply: Don't forget
Applyat the top right—without it, your slicing isn't saved.
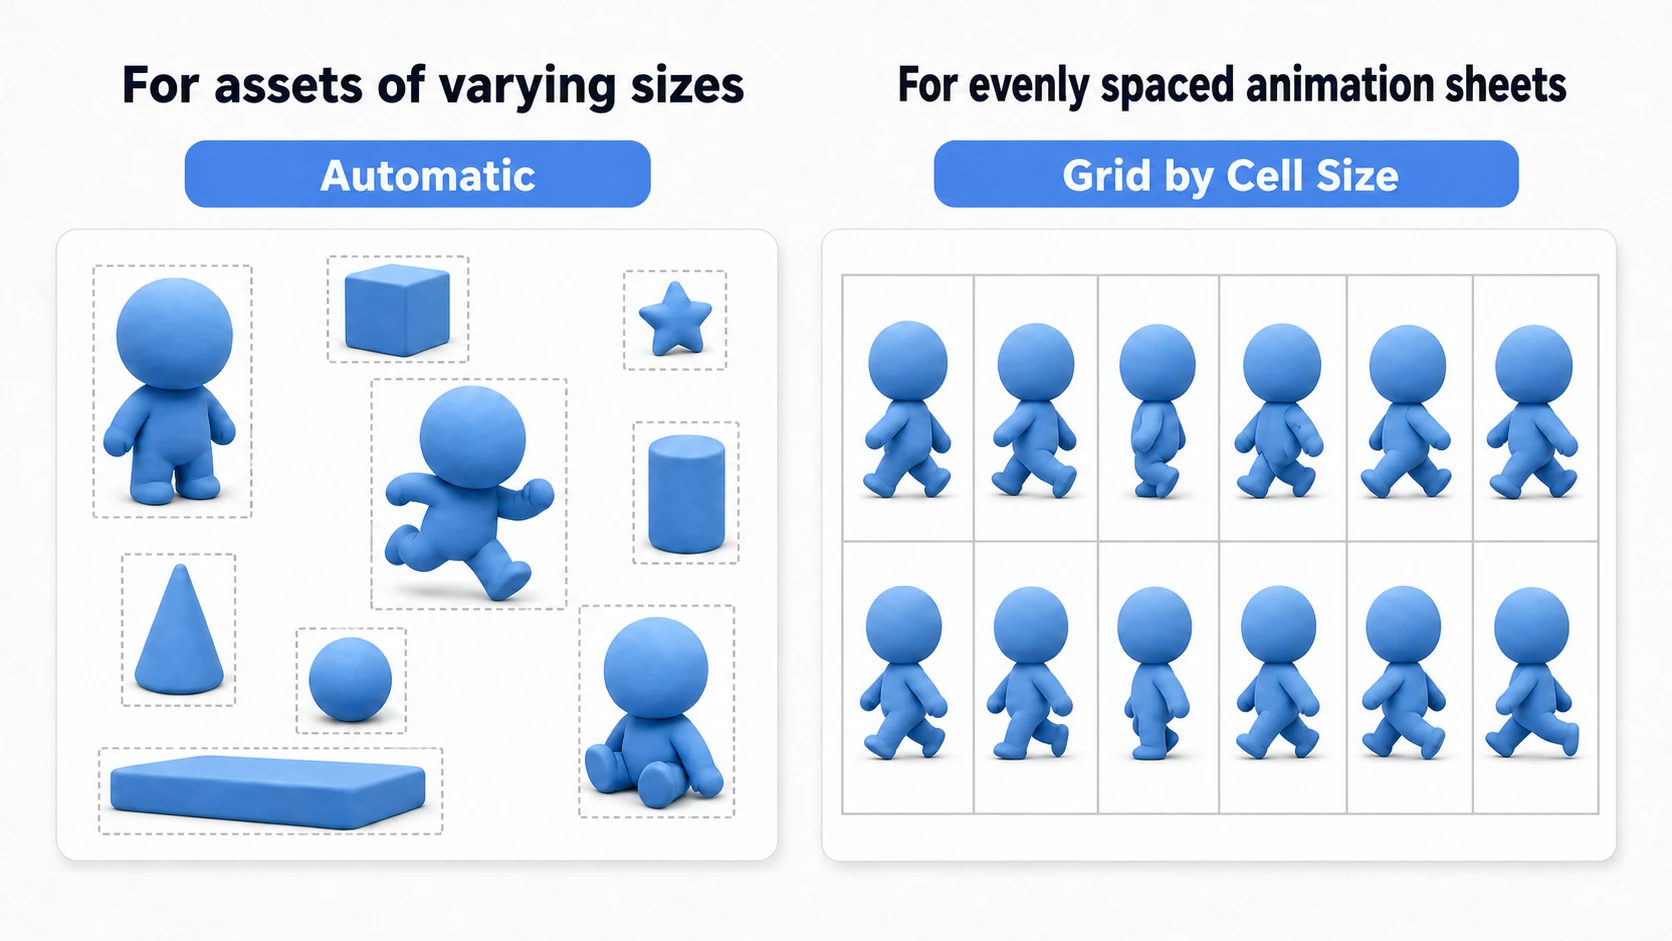
Choose between Automatic and Grid by Cell Size based on how the assets are laid out. Animation sheets with same-size frames at even intervals—walks, attacks—slice reliably with Grid. Asset collections with effects and items crammed in at arbitrary sizes suit Automatic, which analyzes the transparency for you.
After Apply, expand the asset's arrow in the Project window and the sliced sprites appear as child assets. You can use them directly to create clips in 2D animation.
Why Use Sprite Sheets?
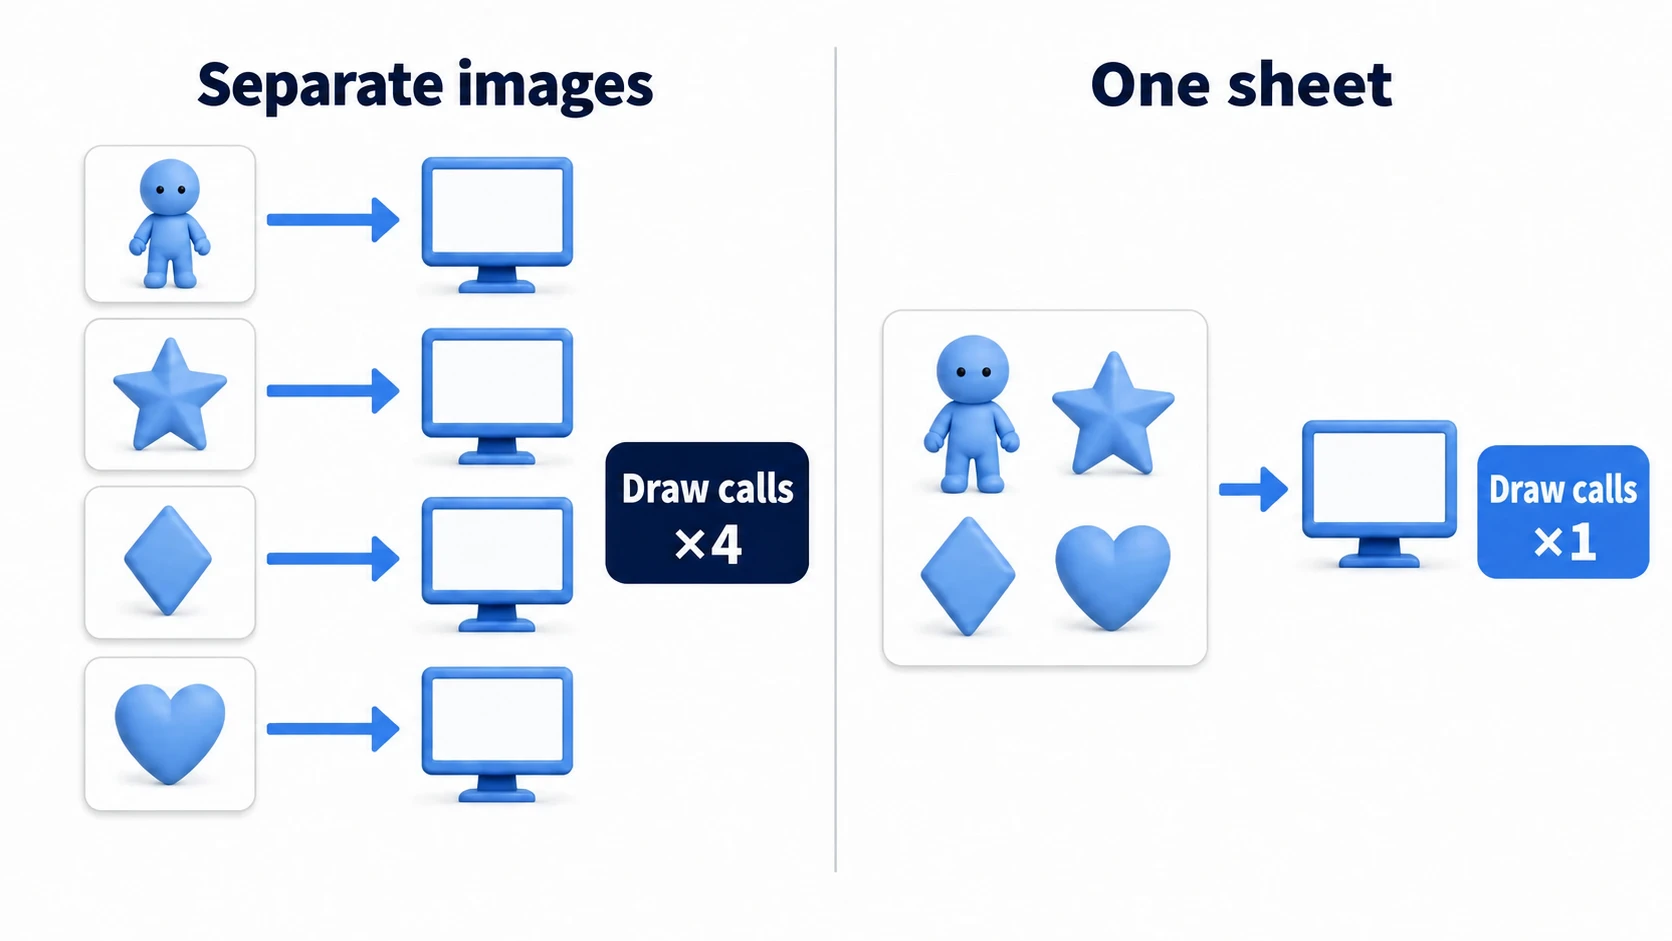
- Better performance: When multiple sprites share the same texture (and material) and nothing else is drawn in between, Unity can batch them into a single draw command (a draw call). In 2D games with hundreds of sprites on screen, this optimization matters a lot (see the draw calls and batching article for details).
- Easier management: Related images live in one file, keeping your assets tidy.
- Memory efficiency: One large image is more memory-efficient than many small ones.
tips: Unity's official feature for "automatically packing separate image files into one" is the Sprite Atlas. You get the same benefit without redrawing your assets into a single sheet (see the Bonus section).
Hands-On: Building a Walk Animation from a Sheet
A platformer hero's walk cycle, four-direction walking in a top-down RPG, a side-scroller's run—almost every "character in motion" in 2D games comes from the same pipeline: slice one sprite sheet and turn it into an animation. Let's put the import settings from earlier into an actual production workflow.
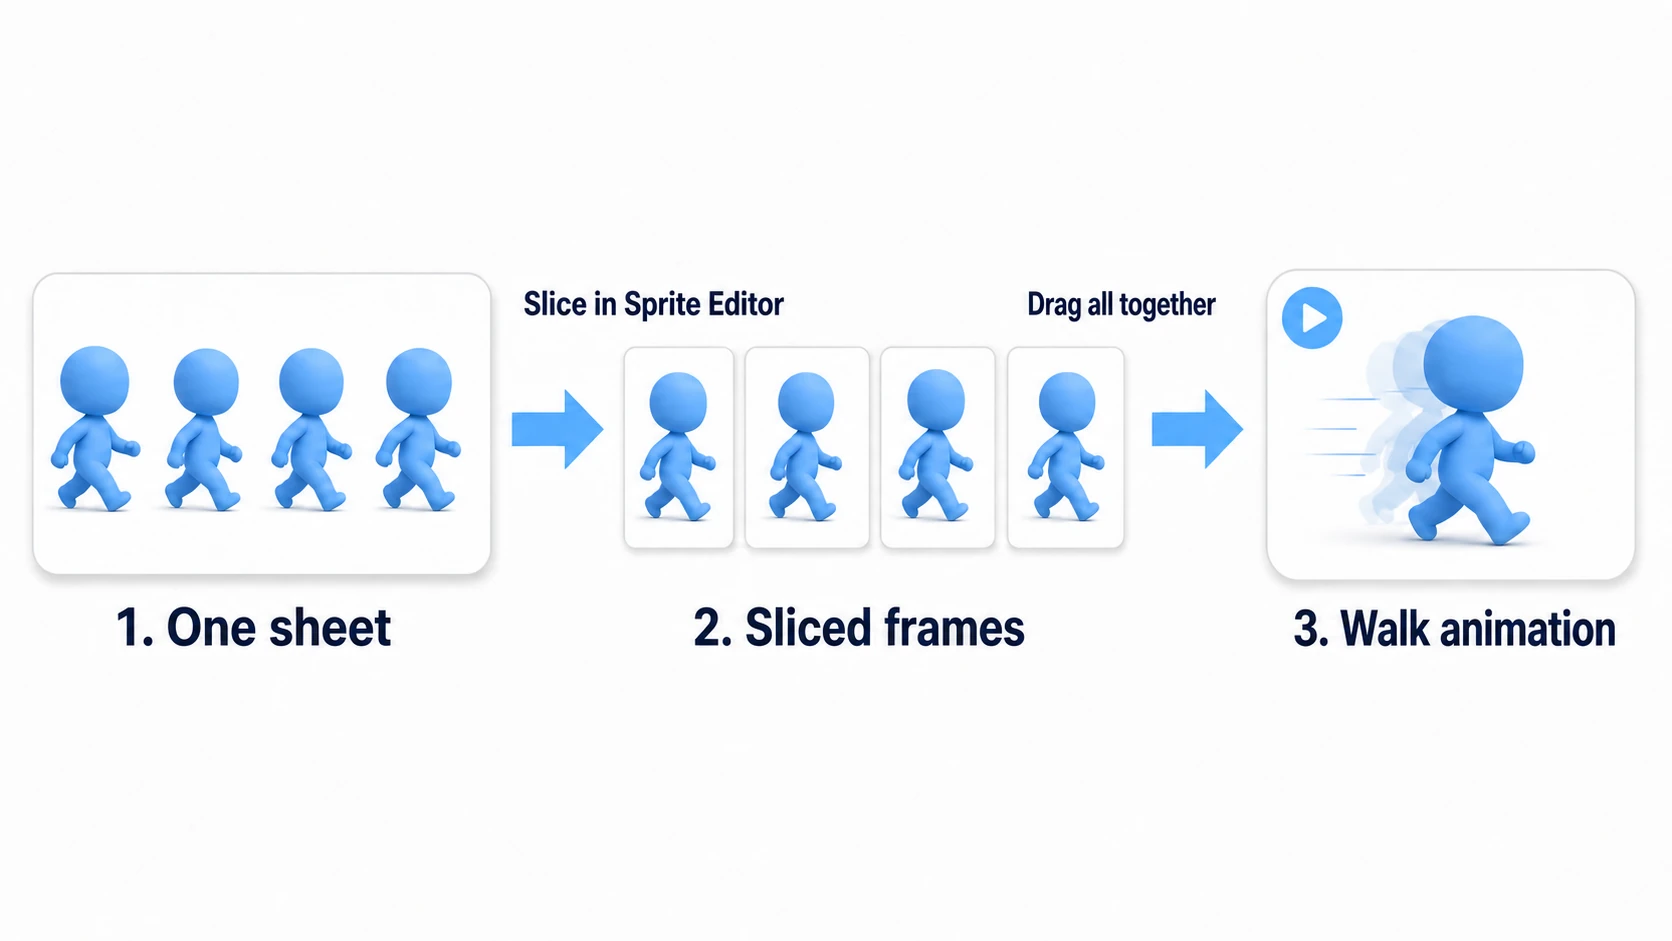
- Import and base settings: Import a PNG with walk frames laid out horizontally, and set
Texture TypetoSprite (2D and UI). For pixel art, useFilter Mode: PointandCompression: None, and match PPU to the pixel size of one frame (the three settings covered earlier). - Check for Multiple: Make sure
Sprite ModeisMultiple(switch it if it'sSingle). - Slice with Grid by Cell Size: Open the
Sprite Editor, enter the frame size (e.g., 32×32), thenSlice→Apply. For evenly spaced frames,Gridis less error-prone thanAutomatic. - Animate: In the Project window, select all the sliced child sprites and drag them together onto an empty spot in the Scene view. Unity automatically creates a new GameObject along with an
Animation Clipand anAnimator(name it something likewalkin the save dialog).
Two points matter most here.
- Pick the slicing mode by how the assets are laid out: evenly spaced animation sheets get
Grid by Cell Size; mixed-size effect collections getAutomatic. Get this wrong and the frames misalign, making the animation stutter on playback. - Keep the pivots consistent across frames: if each frame's pivot differs, the character bobs up and down during playback. Set every frame's
PivottoBottomin the Sprite Editor and the feet stay planted while walking smoothly.
Playback speed, looping, and switching between "walk" and "idle" for the clip you just made are controlled by the Animator, covered in the 2D animation intro. Go as far as wiring states with conditions, and you'll have a character that actually moves on player input.
Bonus: Good to Know for Later
- Sprite Atlas: Create one via
Create > 2D > Sprite Atlasand register target folders, and it packs multiple sprites into one texture at runtime. It's the go-to for cases like UI icons where you want separate files but fewer draw calls. - 9-slicing: For images like window frames and buttons where "corners stay fixed, only edges stretch," set a Border in the Sprite Editor and switch the
Sprite Renderer'sDraw ModetoSliced—corners stay intact at any size. - Where pivots help: Setting a character's pivot to
Bottommakes ground placement and scaling intuitive. The pivot is also the center of rotation. - Draw order: Front-to-back ordering in 2D is controlled by
Sorting LayerandOrder in Layer. Use those, not the Z coordinate—that's the 2D way. - Building terrain from tiles: to lay out sliced sprites into a stage, move on to Unity 2D Tilemap Basics.
Summary
- Images for 2D use
Texture Type: Sprite (2D and UI). - Pixel art means
Filter Mode: Point+Compression: None. That's almost always the cause of blur. - Unify PPU across the project (for pixel art, tile size = PPU is the convention). It affects physics behavior too.
- Pack sequential frames into a sprite sheet, then slice with
Sprite Mode: Multiple+Sprite Editor. Evenly spaced frames call forGrid by Cell Size. - Sharing a texture tends to reduce draw calls. For assets you can't pack, use Sprite Atlas.
Import settings are unglamorous, but they're the first step that determines your 2D game's visual quality. Get "Point, None, unified PPU" out of the way first, then dive into building.