You fixed the projectile collision. It works now. Then later you notice the door won't open — a place you never touched has broken.
In a game with ten features, every fix means checking ten things by hand before you can relax. Twenty features, twenty checks. Automated testing hands that repetition to the machine, and it ships with UE. This article covers Functional Tests — writable in Blueprint alone — and takes you through building one, running it, and deliberately turning it red before making it green.
What You'll Learn
- Where checking by hand breaks down
- UE has two kinds of tests (Blueprint users start with Functional Test)
- Making a Blueprint with
Functional Testas its parent- Writing assertions with the
Assertnodes- Running them from Session Frontend
- Hands-on: test HP going 100 → 80, and turn it red once
Where Checking by Hand Breaks Down
On a small prototype, checking by hand is faster. Three features, three things to poke.
The problem is that feature count and checking effort multiply.
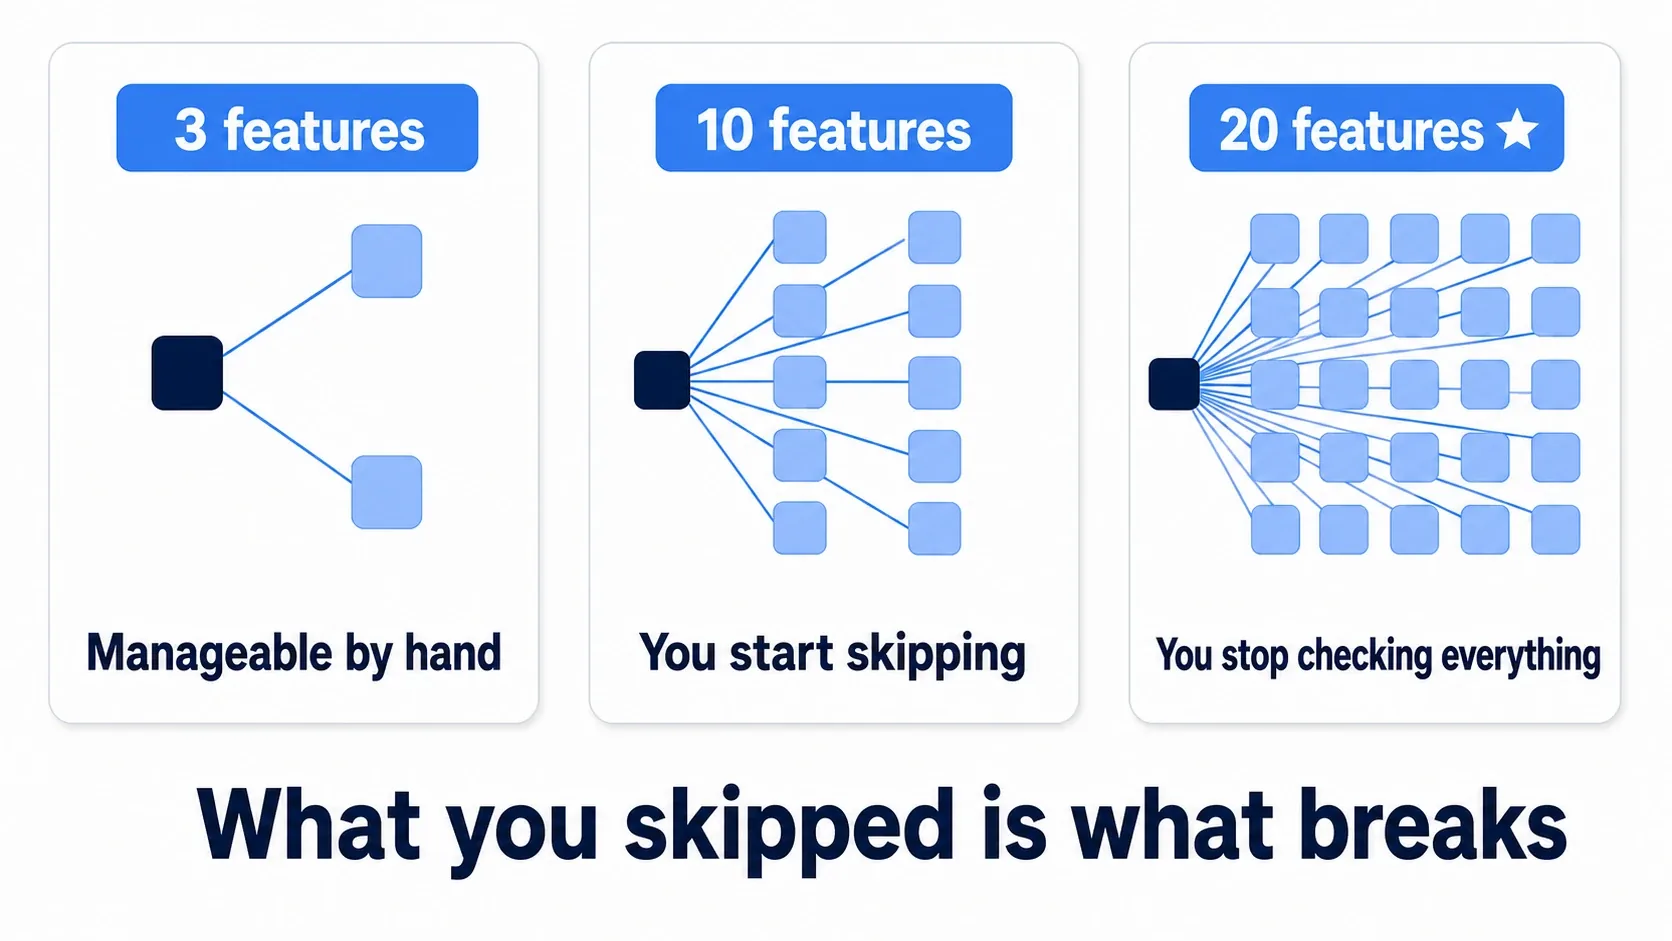
| Features | Things to check after one fix | Reality |
|---|---|---|
| 3 | 3 | Manageable by hand |
| 10 | 10 | You start skipping some |
| 20 | 20 | You stop checking everything |
And what you skipped is what breaks. The place you were sure you hadn't touched was affected through a shared variable or a common parent class.
The value of automated testing is that confirming nothing is broken becomes free, every time. Write it once, run it forever.
This series has run "break it on purpose, then fix it" many times. Automated testing is the flip side: the tool for confirming, every time, that it's still not broken.
Two Kinds of Tests
UE has two kinds of tests, and which one you start with changes the difficulty enormously.
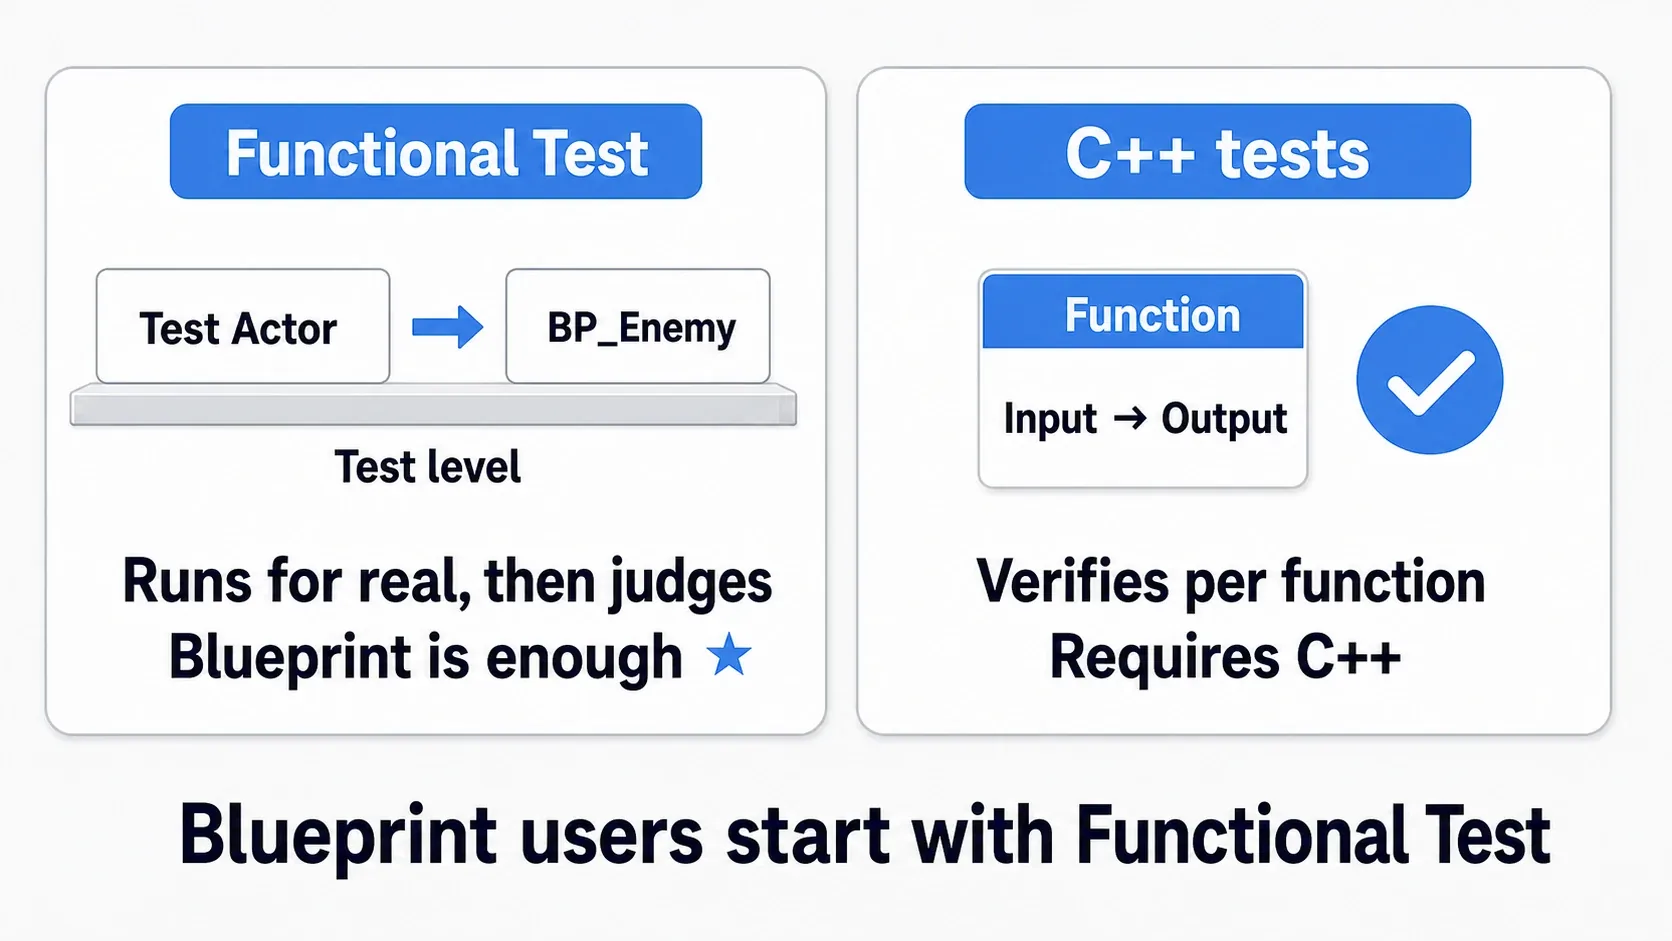
| Kind | What it does | Suits | Requires |
|---|---|---|---|
| Functional Test | Places an Actor in a test level and runs it for real, then judges | Gameplay verification (the shot hits, the door opens) | Blueprint only |
| C++ tests | Verifies at function level | Calculation logic (damage formulas) | C++ |
If you build in Blueprint, Functional Tests are the right entry point.
Functional Tests have a distinctly UE-shaped design: the test itself is an Actor you place in a level.
- Make a test level
- Place a test Actor in it (a Blueprint parented to Functional Test)
- That Actor drives the game itself and judges the result
It's less "writing test code" and more "building a test stage." It's nearly the same work as making a game, so it's approachable if you're comfortable in Blueprint.
Your First Functional Test
Three steps.
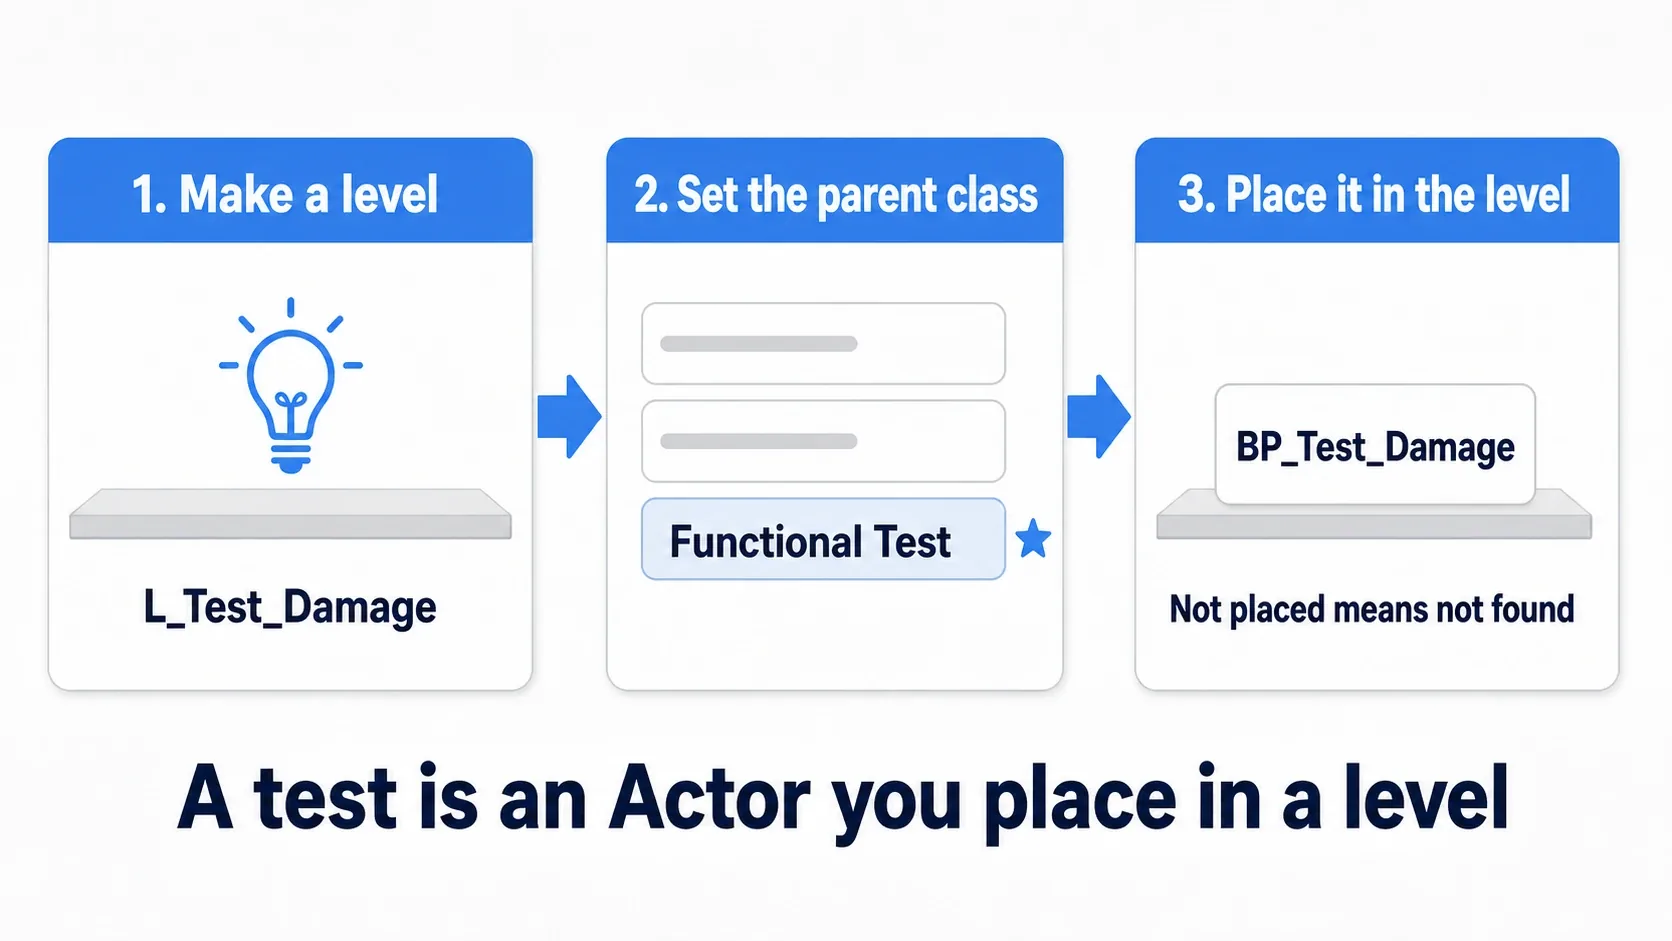
- Make a test level (
L_Test_Damage). It's test-only, so a floor and a light is enough - Make a Blueprint with
Functional Testas its parent class (search under "All Classes") - Place that Blueprint in the test level
Parenting to Functional Test unlocks dedicated events.
| Event / Node | Role |
|---|---|
| Event Start Test | The test begins. Write your verification from here |
| Finish Test | The test ends. Hand it success or failure |
| Assert family | Compares against expected values (next section) |
The crucial part is always calling Finish Test. Without it the test never ends and fails by timeout.
The value you pass to Finish Test's Test Result decides the outcome.
Succeeded— passedFailed— failedInvalid— preconditions weren't met, so it wasn't a valid test
Writing Assertions
The verification itself uses the Assert nodes — nodes that check whether the actual value matches what you expected.
| Node | Checks |
|---|---|
| Assert True | The condition is true |
| Assert False | The condition is false |
| Assert Equal (Int) | An integer matches the expected value |
| Assert Equal (Float) | A float matches (with a tolerance) |
| Assert Is Valid | A reference is valid |
Every one of them has a Message pin. Whatever you write there appears in the log when it fails.
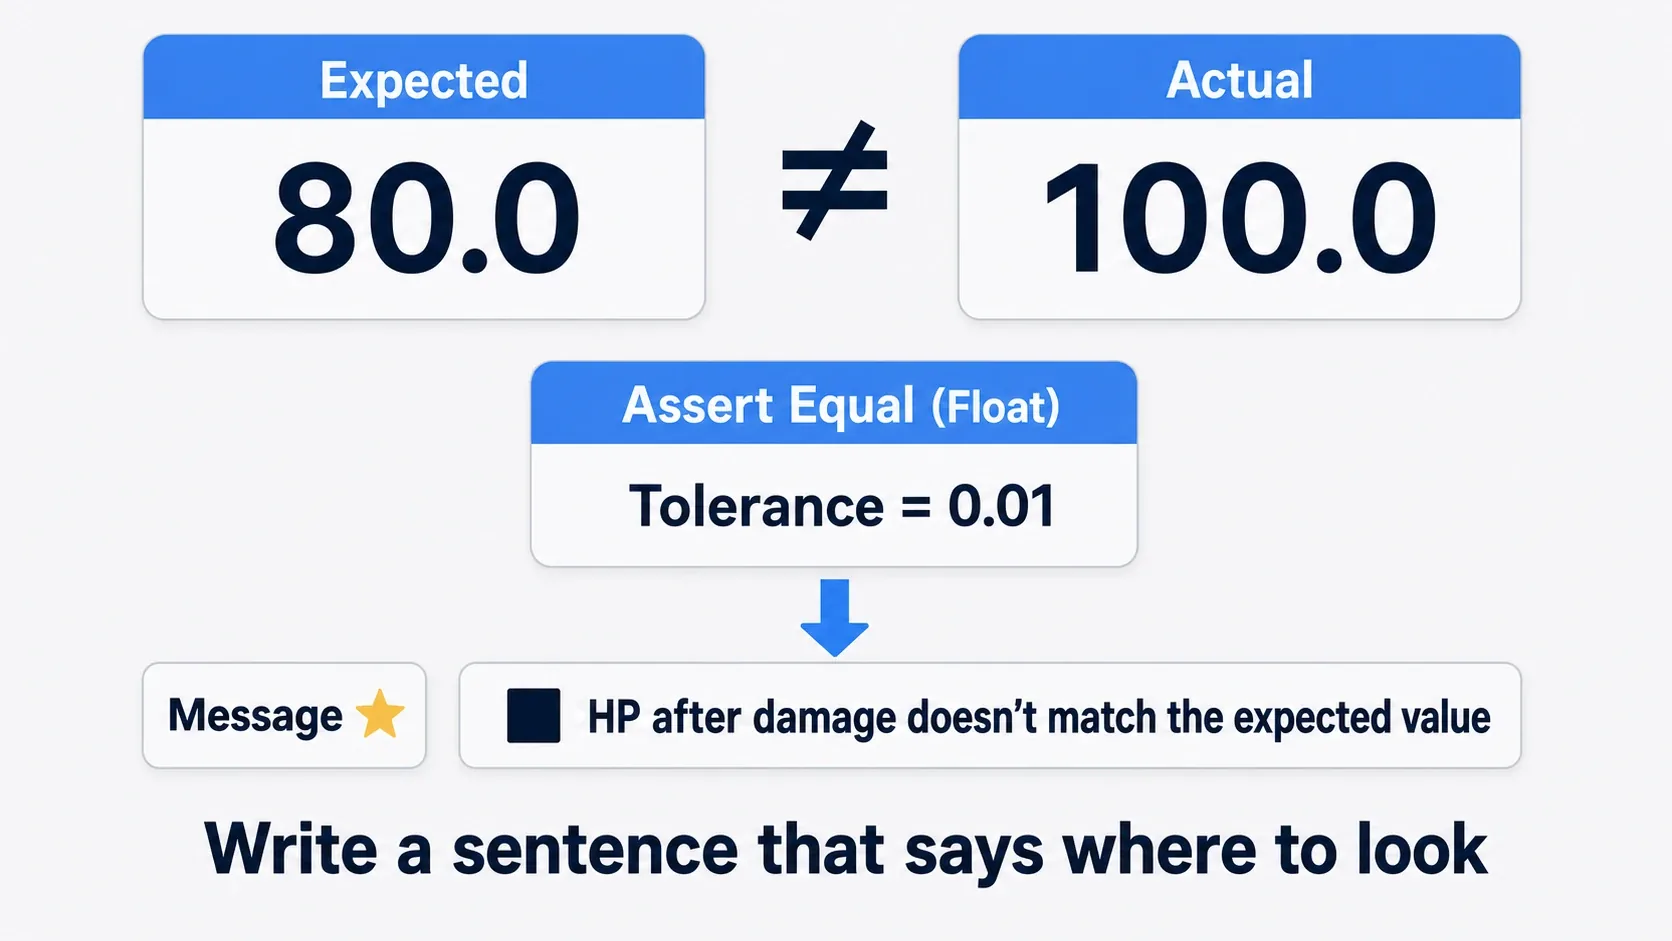
Always write the Message. Knowing "a test failed" without knowing what differed means investigating from scratch. Write something like "HP after damage doesn't match the expected value" — a sentence that tells you where to look the moment you read it (→ Print String and the Output Log).
Careful with float comparisons.
Assert Equal (Float)takes a Tolerance. Floating-point math produces tiny discrepancies, so around0.0001of slack is normal.Integerhas no such error, so compare it directly.
Running Them
Tests run from Session Frontend.
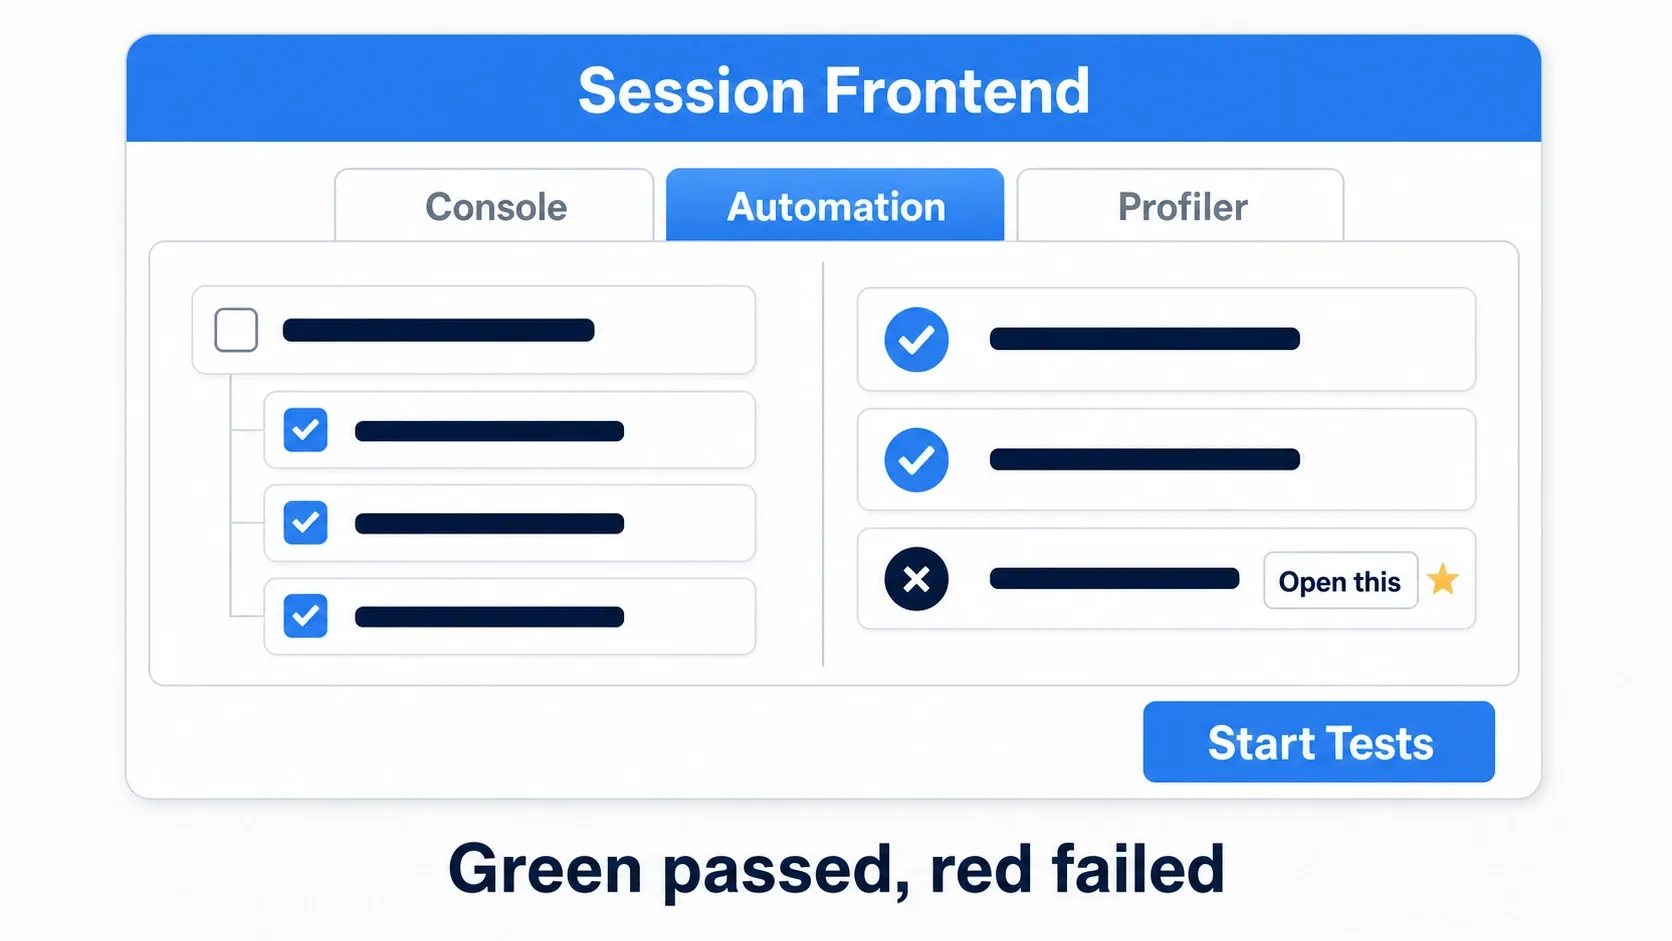
- Open
Tools → Session Frontend - Select the
Automationtab - Find your test in the tree and check it. Functional Tests appear under
Project - Press Start Tests
The test level loads automatically, the test runs, and results appear in a list. Green passed, red failed.
Open a failed row and you see the text you wrote in the Assert's Message. That tells you where to go.
If your test doesn't appear in the list, you forgot to place the Actor in the test level. Functional Tests are discovered by being placed in a level, so creating the Blueprint alone isn't enough.
Hands-On: Test That HP Goes 100 → 80
Roguelike damage math, fighting-game combo scaling, RPG elemental multipliers. Whether numbers are correct is exactly what playing the game won't reveal. We'll turn the damage handling verification into a test, and deliberately turn it red first.
What you need
| Item | Details |
|---|---|
BP_Enemy | Variables MaxHealth (Float, 100.0) and CurrentHealth (Float, 100.0). Event AnyDamage subtracts Damage from CurrentHealth |
| Test level | L_Test_Damage (floor and light only) |
| Test Actor | BP_Test_Damage (parent: Functional Test) |
Decide the values the test uses up front.
| Variable | Type | Value |
|---|---|---|
TestDamage | Float | 20.0 |
ExpectedHealth | Float | 80.0 (100 − 20) |
What goes in the test
Four steps on BP_Test_Damage's Event Start Test.
Spawn Actor from Classto placeBP_Enemyin the test level (the origin is fine)- Call
Apply Damage(Damaged Actor: the spawned enemy, Base Damage:TestDamage=20.0) Assert Equal (Float)comparing the enemy'sCurrentHealthagainstExpectedHealth(80.0), withTolerance0.01andMessage"HP after damage doesn't match the expected value"- Call
Finish Test(Test Result = Succeeded)
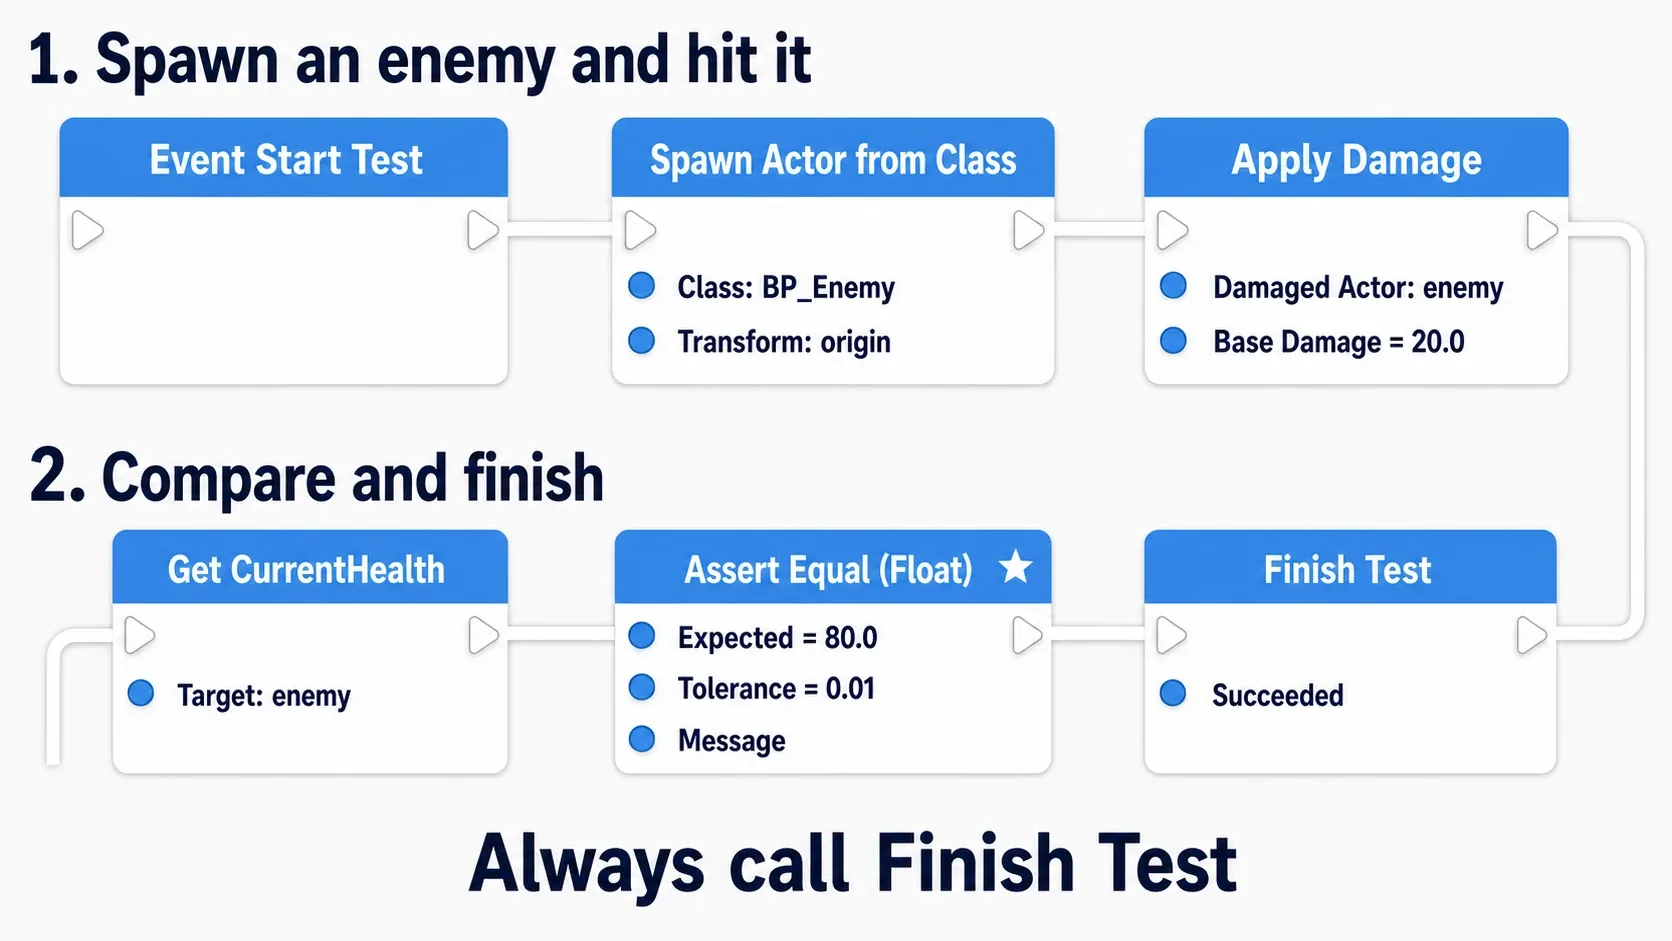
BP_Test_Damage (Event Graph)
Event Start Test
  → enemy = SpawnActorFromClass(Class = BP_Enemy, Transform = origin)
  → ApplyDamage(
        DamagedActor = enemy,
        BaseDamage   = TestDamage)          // 20.0
  → AssertEqual_Float(
        Actual    = enemy.CurrentHealth,
        Expected  = ExpectedHealth,         // 80.0
        Tolerance = 0.01,
        Message   = "HP after damage doesn't match the expected value")
  → FinishTest(TestResult = Succeeded, Message = "")
A failing Assert marks the test as failed on its own, so passing Succeeded to Finish Test is fine (if the assertions pass, it simply succeeds).
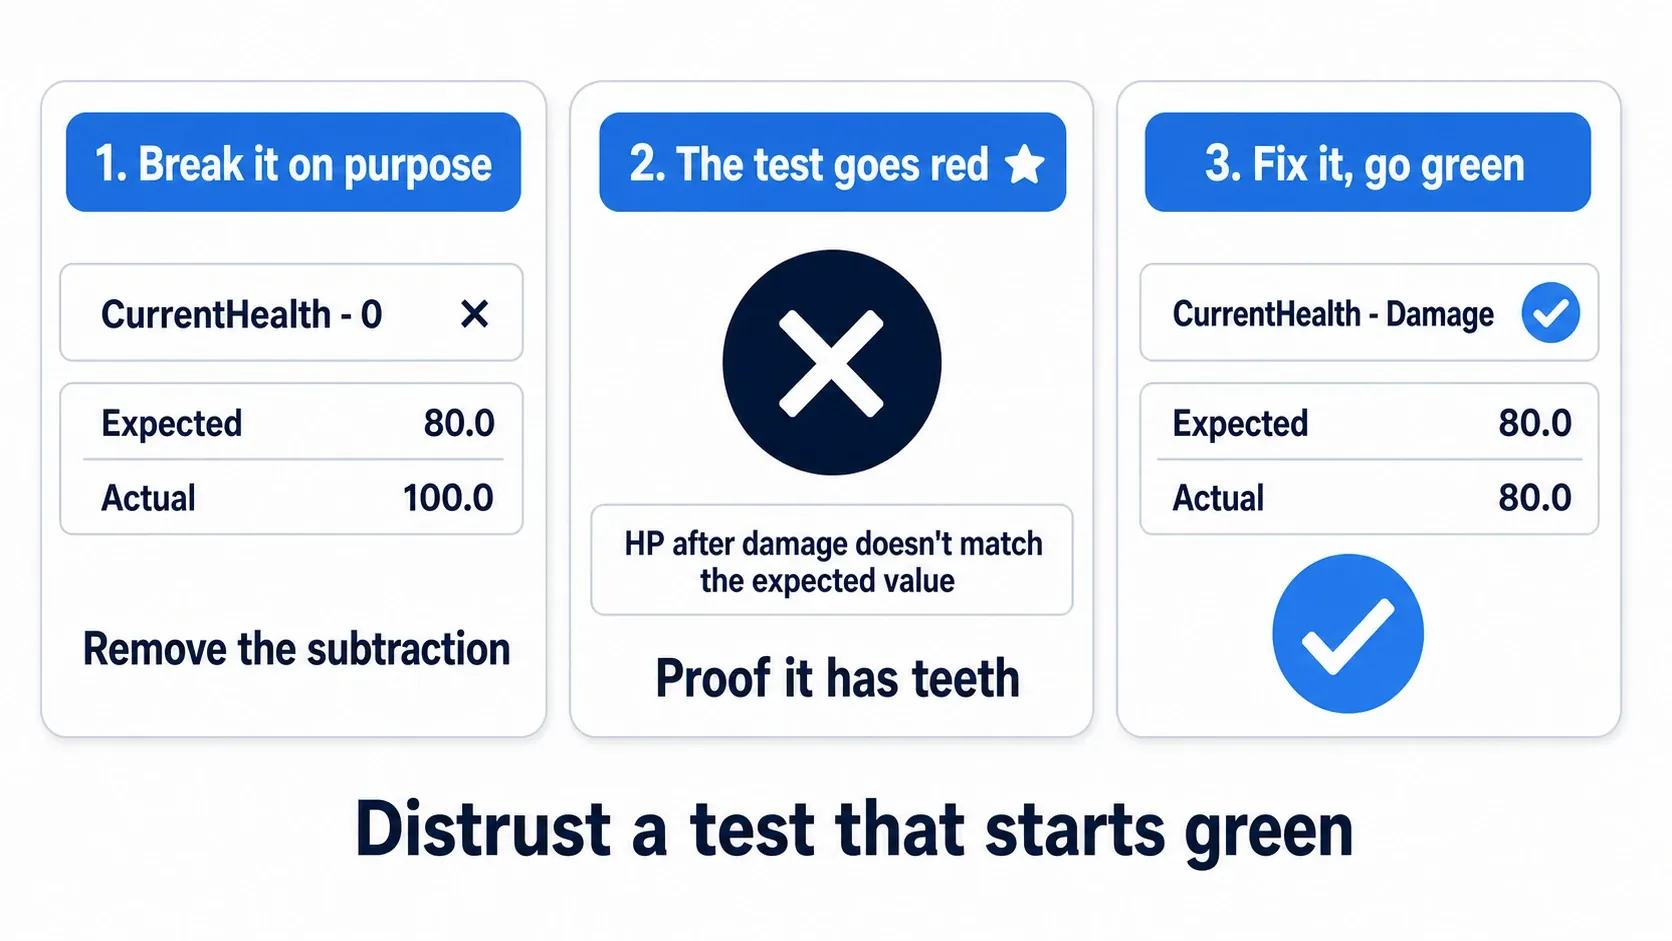
First, turn it red
This is the important part: proving the test actually works.
Deliberately break BP_Enemy's Event AnyDamage subtraction. Change CurrentHealth - Damage to CurrentHealth - 0, or remove the subtraction entirely.
Run the test from Session Frontend in that state and it fails, red.
Open the row and there's your Message: "HP after damage doesn't match the expected value", along with the fact that the expected 80.0 came back as 100.0.
Seeing that red is half the reason to write tests. A test that's green from the start may be verifying nothing (a forgotten Assert connection, for instance).
Fix it, and go green
Restore the subtraction (CurrentHealth - Damage) and run again. Green.
The rule "an attack removes 20 HP" is now mechanically enforced. However much you change elsewhere, running this test confirms that one point is still intact, instantly.
Troubleshooting:
- The test doesn't appear in the list → You haven't placed
BP_Test_Damagein the test level. Creating the Blueprint isn't enough - It fails by timeout → You aren't calling
Finish Test. Make sure every path reaches it Assert Equal (Float)fails on a tiny difference →Toleranceis0.0. Set around0.01- The enemy doesn't spawn →
Spawn Actor from Class'sTransformis unset, or the Collision Handling setting is rejecting the spawn
Two things to take away.
- Red first, then green: breaking it deliberately and watching it fail proves the test has teeth. Don't take a green result on faith
- Put "where to look" in the
Message: write it so you, six months from now, can start investigating immediately. That sentence is all you'll see in the results list
When you find and fix a bug, adding one test that reproduces it is highly effective. Once the Blueprint Debugger pins down the cause, encode those conditions as a test so you never step in the same hole twice.
Bonus: Good to Know for Later
Don't write too many. Chasing full coverage on a solo project means test maintenance eating your game-making time. Narrow it to what hurts when it breaks, and what has broken once. A good starting trio: damage math, saving and loading, progression flags — all easy to break unnoticed, all expensive when discovered late.
They run from the command line. You can run tests via executable arguments without opening Session Frontend, which enables "run everything every night" (CI). For solo work, though, build the habit of running them by hand first.
Terminology differs in localized UI. In the Japanese UI, Session Frontend and the Automation tab appear under translated names. Following English tutorials against a localized UI causes friction, so keeping the editor in English avoids a class of confusion (→ initial setup).
Run them before packaging. Running the suite once before packaging cuts down on "discovered it after shipping." With five tests, that's a few dozen seconds.
Summary
- As features grow, manual checking inevitably gets skipped — and the skipped part breaks
- UE has two kinds. Blueprint users start with Functional Test
- A Functional Test is an Actor placed in a test level. Building one feels like building a game
- Judge with the
Assertnodes, and put "where to look" in theMessage - Always call
Finish Testor it fails by timeout - Turn it red once before you make it green. Distrust a test that starts green
You don't need to test everything. Start with the one place that hurts. Where in your game is a break hardest to notice?