Your game is finished and playable in Japanese. You want to reach players abroad, so you want an English version. But the thought of hand-translating and replacing every UI string one by one is exhausting.
UE5 has a dedicated system called the Localization Dashboard that automatically gathers the strings in your game, holds a translation per language, and switches between them at runtime. There's one big prerequisite at the door, though: only the Text type gets translated, and the String type is ignored . Build without knowing that and you'll arrive at release day with a UI that's half untranslated and needs rebuilding. This article covers the overall picture of localization, up to switching between Japanese and English from a settings screen.
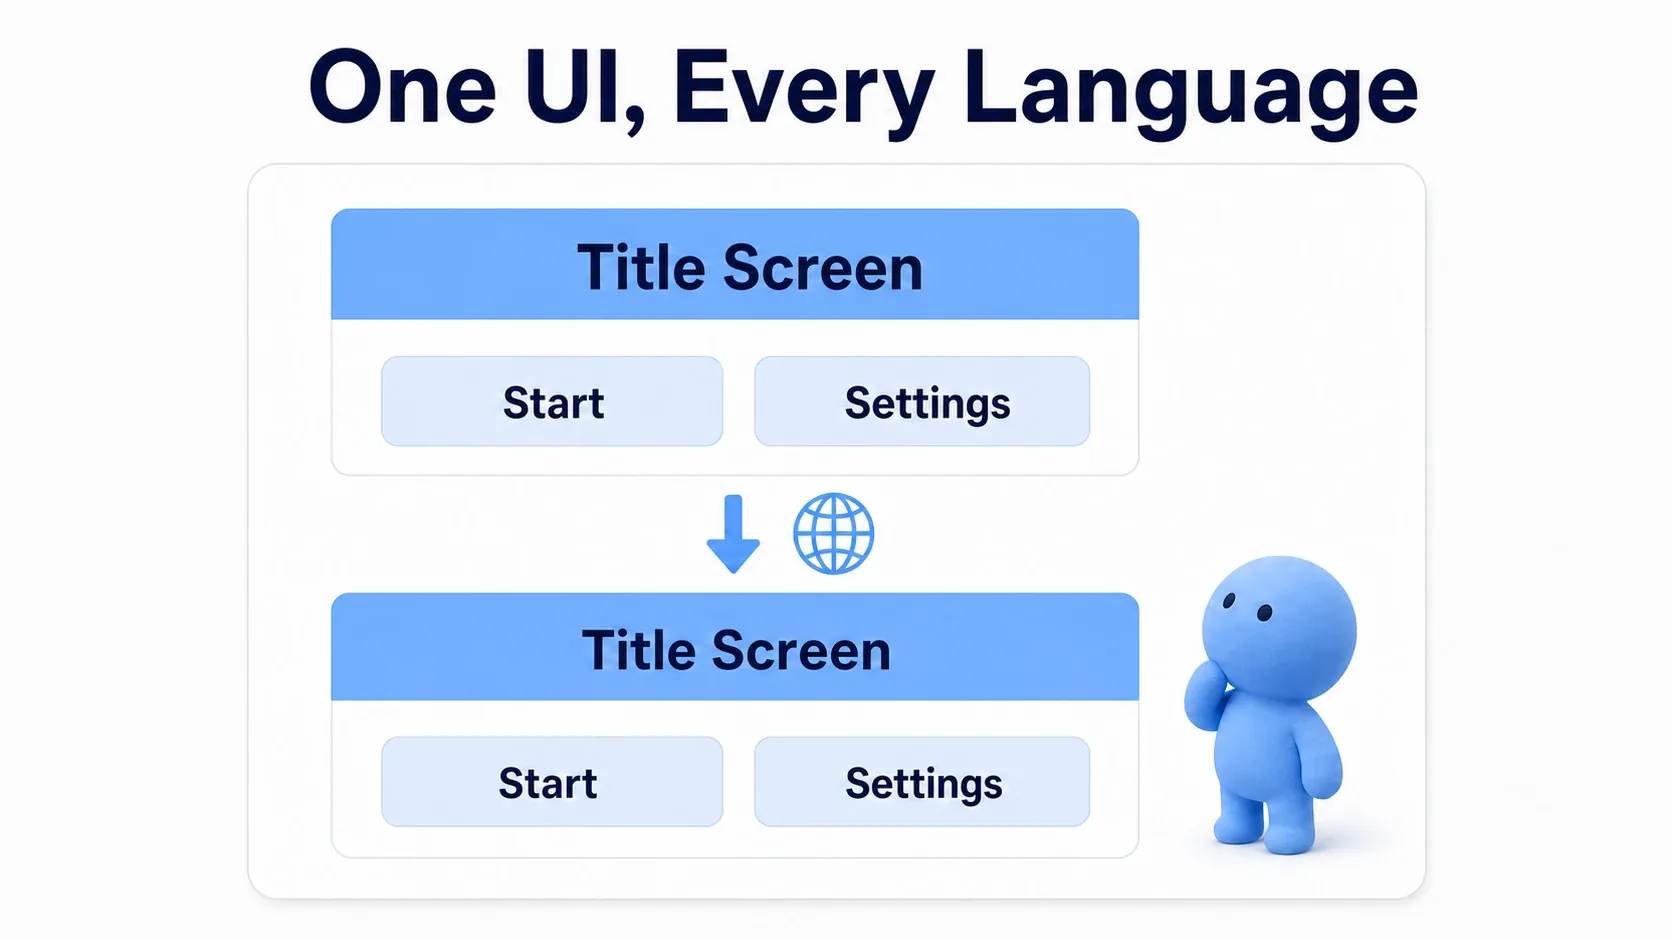
What You'll Learn
- The difference between Text and String: only Text gets translated
- The Localization Dashboard's three steps: Gather → Translate → Compile
- Set Current Culture for switching languages at runtime
- The font pitfall that turns Japanese into empty boxes (tofu)
- Hands-on: switch between Japanese and English from a combo box in the settings screen
- Format Text, so sentences with numbers and variables don't break translation
The Difference Between Text and String
UE5 has two broad string types, and for localization the distinction is decisive.
- Text (FText): strings for display. This is the one that gets translated . The contents of a UMG Text Block, FText columns in a Data Table, and so on are held as Text.
- String (FString): strings for processing. Suited to filenames, debug logs, and anything that doesn't need translating. It is neither gathered nor translated .
In other words, the rule is that every character a player sees should be held as Text. A string assembled as a String stays in the original language on screen no matter how much translation work you do.
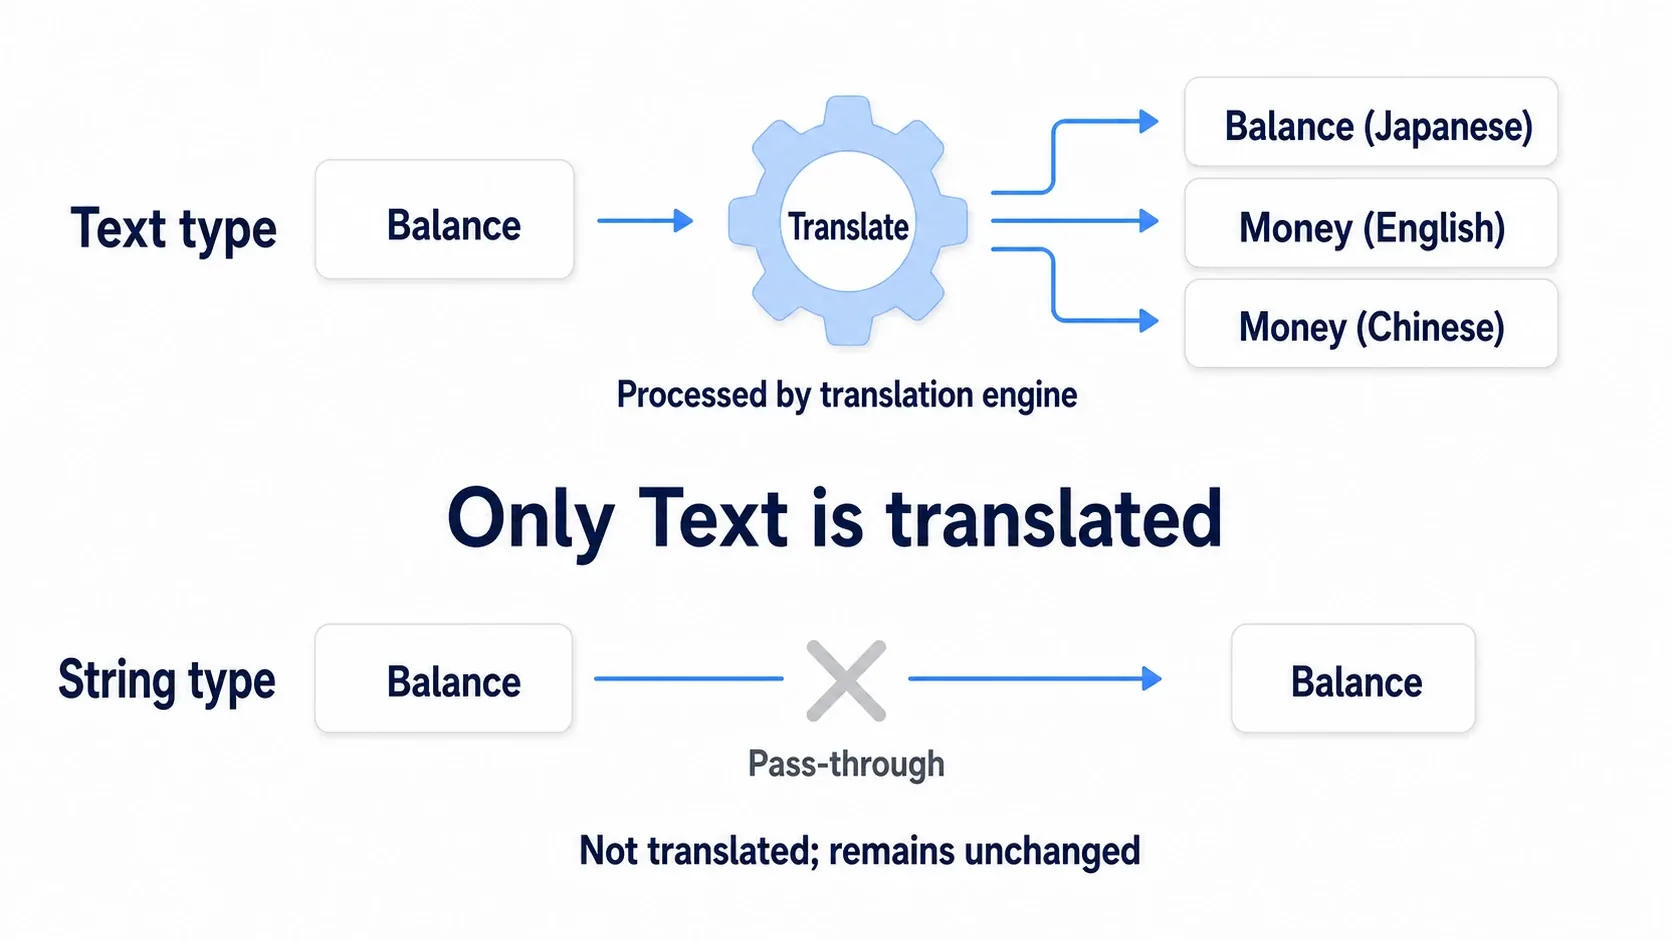
The most accident-prone spot is string concatenation . Append "Gold: " and a number as Strings and that entire sentence drops out of the translation set. When you want to mix in numbers or variables, use Format Text (covered below) to assemble it while staying in Text.
The Dashboard's Three Steps
Open the Localization Dashboard from the menu at Tools > Localization Dashboard . There are three steps.
- Gather: collect the Text-type strings in scope from wherever your Gather settings point. Save your Widgets (Save All) first , then press the "Gather Text" button.
- Translate: fill in a translation per language for the strings you gathered. Open the translation editor from "Edit Translations for this culture" (the pencil icon) on the culture you added, and type the English against the Japanese source text.
- Compile: convert the translations into a form the game can read (
.locresfiles). Press the "Compile Text" button.
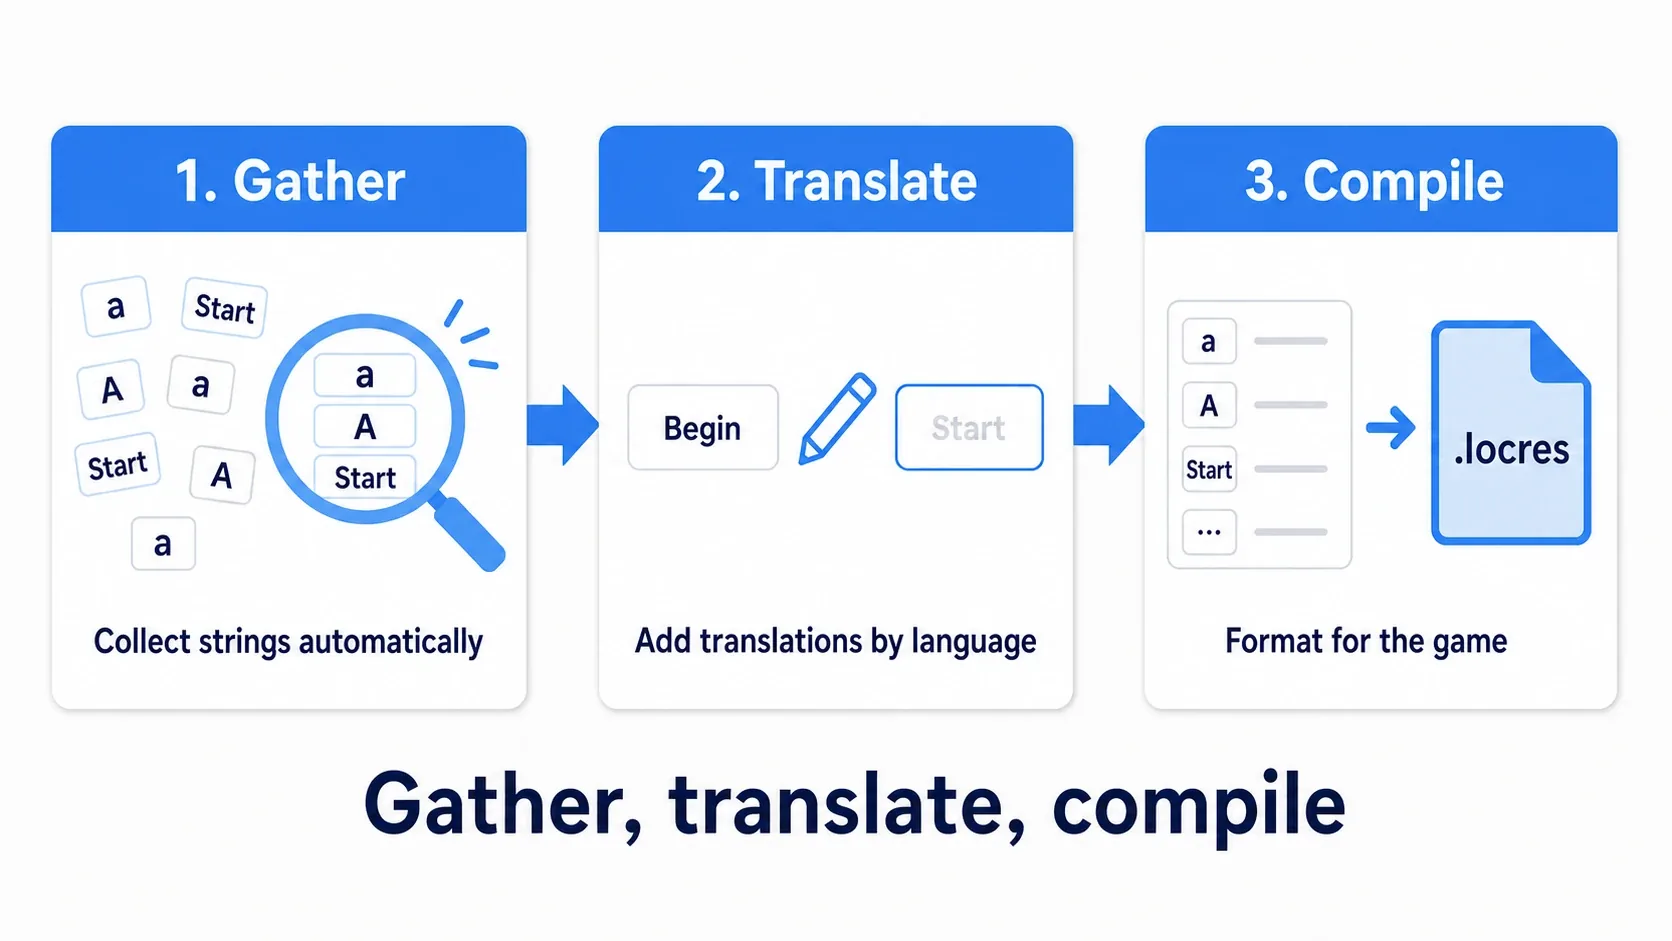
Set up your languages (cultures) first. Since the source text is written in Japanese, set the Native Culture (the language of the source) to ja and add en as a translation target. Without a Native Culture set, the translation editor can't treat the Japanese correctly as source text. The Gather scope is configurable under the "Gather Text" settings, but at the start it's fine as long as your project's whole Content folder is included.
The important habit is that when you add a string, save and then re-Gather . Add a new line of dialogue or a new button and forget to save or Gather, and that string never appears in the translation list, so you can't translate it.
Switching Languages at Runtime
Once you've compiled, you can switch languages during the game. The node for it is Set Current Culture . Pass it a culture name string ( "en" or "ja" ) and the display language changes on the spot.
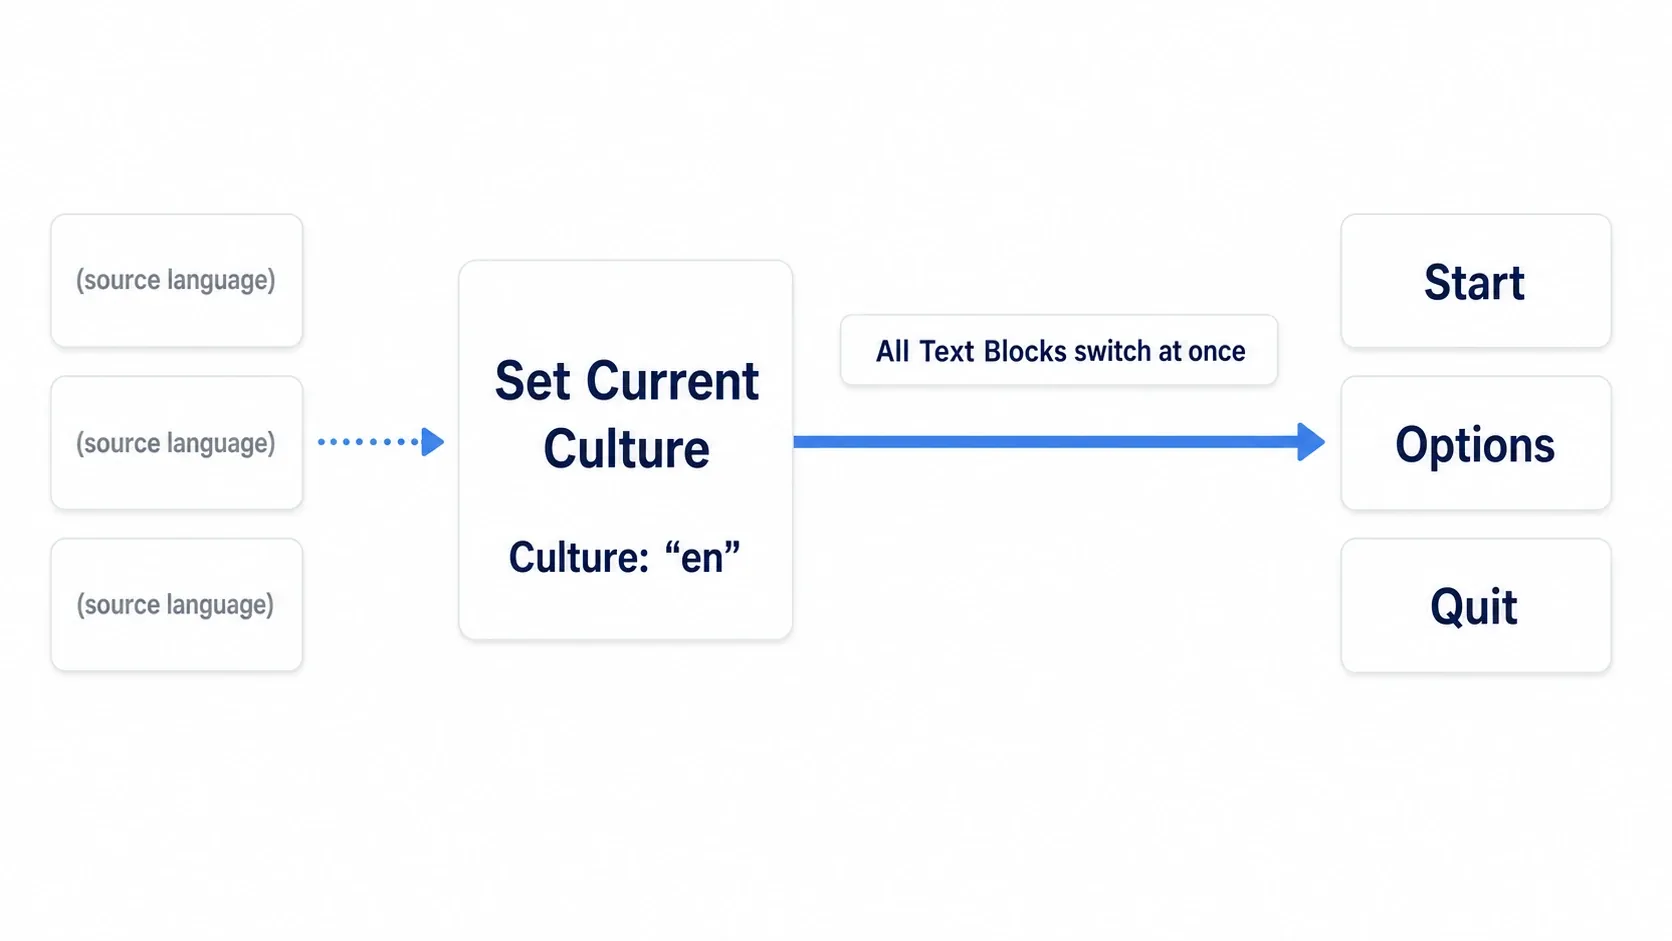
Text typed directly into a Text Block is swapped to its matching translation automatically when you switch languages. You don't rebuild the UI. That's the biggest payoff for building with Text from the start.
If you want the choice remembered, just set Save to Config to true on Set Current Culture and the selected language is stored in the user settings and kept on the next launch. If you'd rather manage it yourself, you can also record the language name in your own save data.
The Font Pitfall
You switch languages, English renders beautifully, and then you switch back and the text becomes empty boxes (tofu) . This is a symptom everyone runs into at least once during localization.
The cause is the font. UE5's default font (Roboto) contains no Japanese glyphs. It only carries the Latin alphabet, so trying to display Japanese tends to produce those boxes, which literally mean "no picture exists for this character".
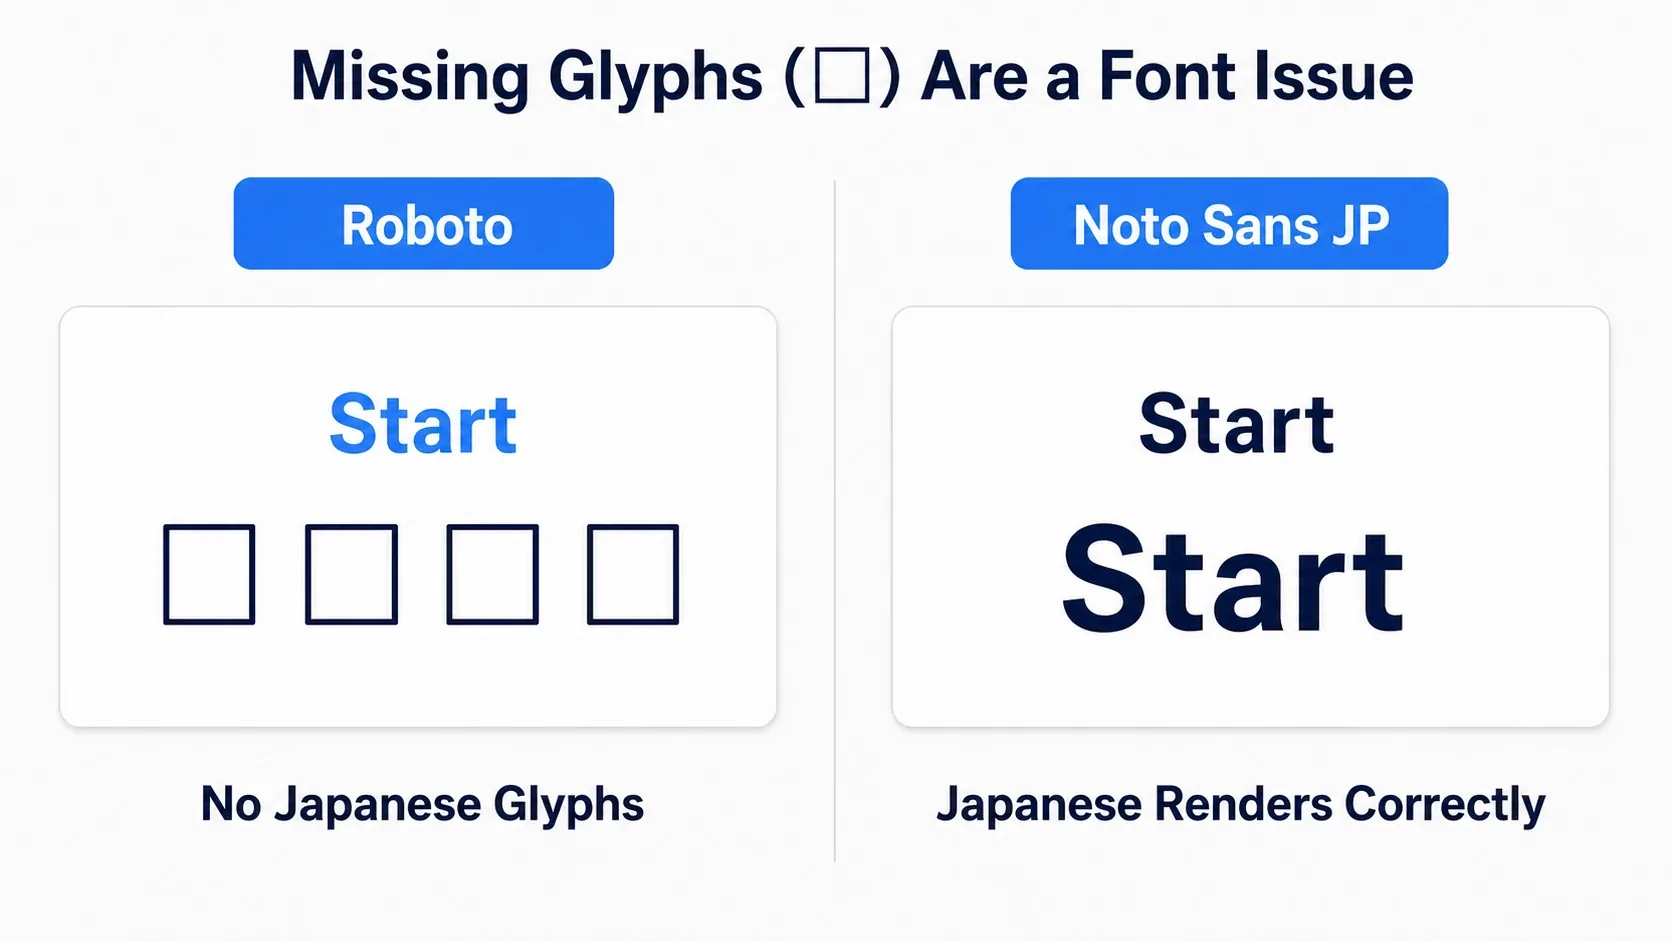
The fix is to import a font that includes Japanese (such as Noto Sans JP ) and set it on your UI. If you're also supporting Chinese or Korean, you'll need additional fonts covering those glyphs. Font files are large, so it's most efficient to add them once your supported languages are decided.
Hands-On: Switching Japanese and English in a Settings Screen
Let's take the work you always do before release all the way through.
RPG option screens, puzzle game title menus, visual novel preferences. Whatever the genre, settings screens have a language row. Here we'll build one where choosing a language in the settings screen's combo box changes the whole UI's language on the spot .
Here's what it looks like running. The instant you pick "English" in the combo box, the title and buttons switch to English. And if there's a single string you happened to build as a String, that one spot stays in Japanese, exposing exactly what needs fixing.
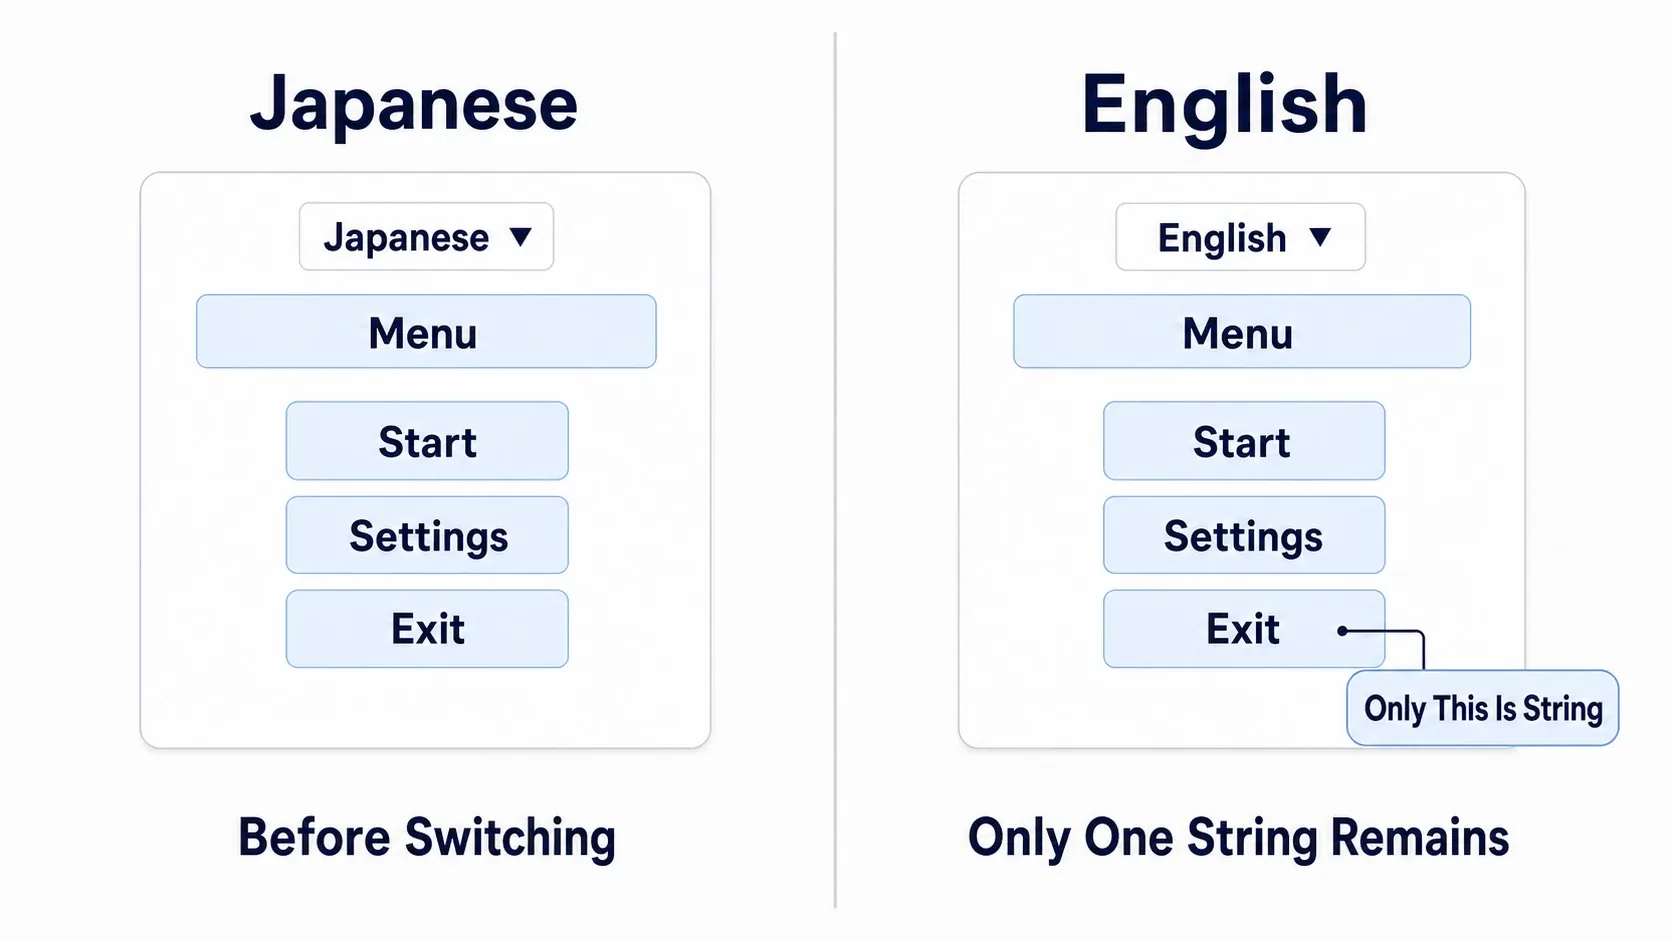
Setup
- Place one Combo Box (String) on your settings Widget and add "Japanese" and "English" to Default Options in the Details panel.
- Make sure every display string in the UI you intend to translate is held as Text (a Text Block's Text, for example).
- In the Localization Dashboard, set Native Culture to
ja, addenas a target, and take the Widget through save → Gather → enter the English → Compile .
Building the graph
Call Set Current Culture when the combo box selection changes.
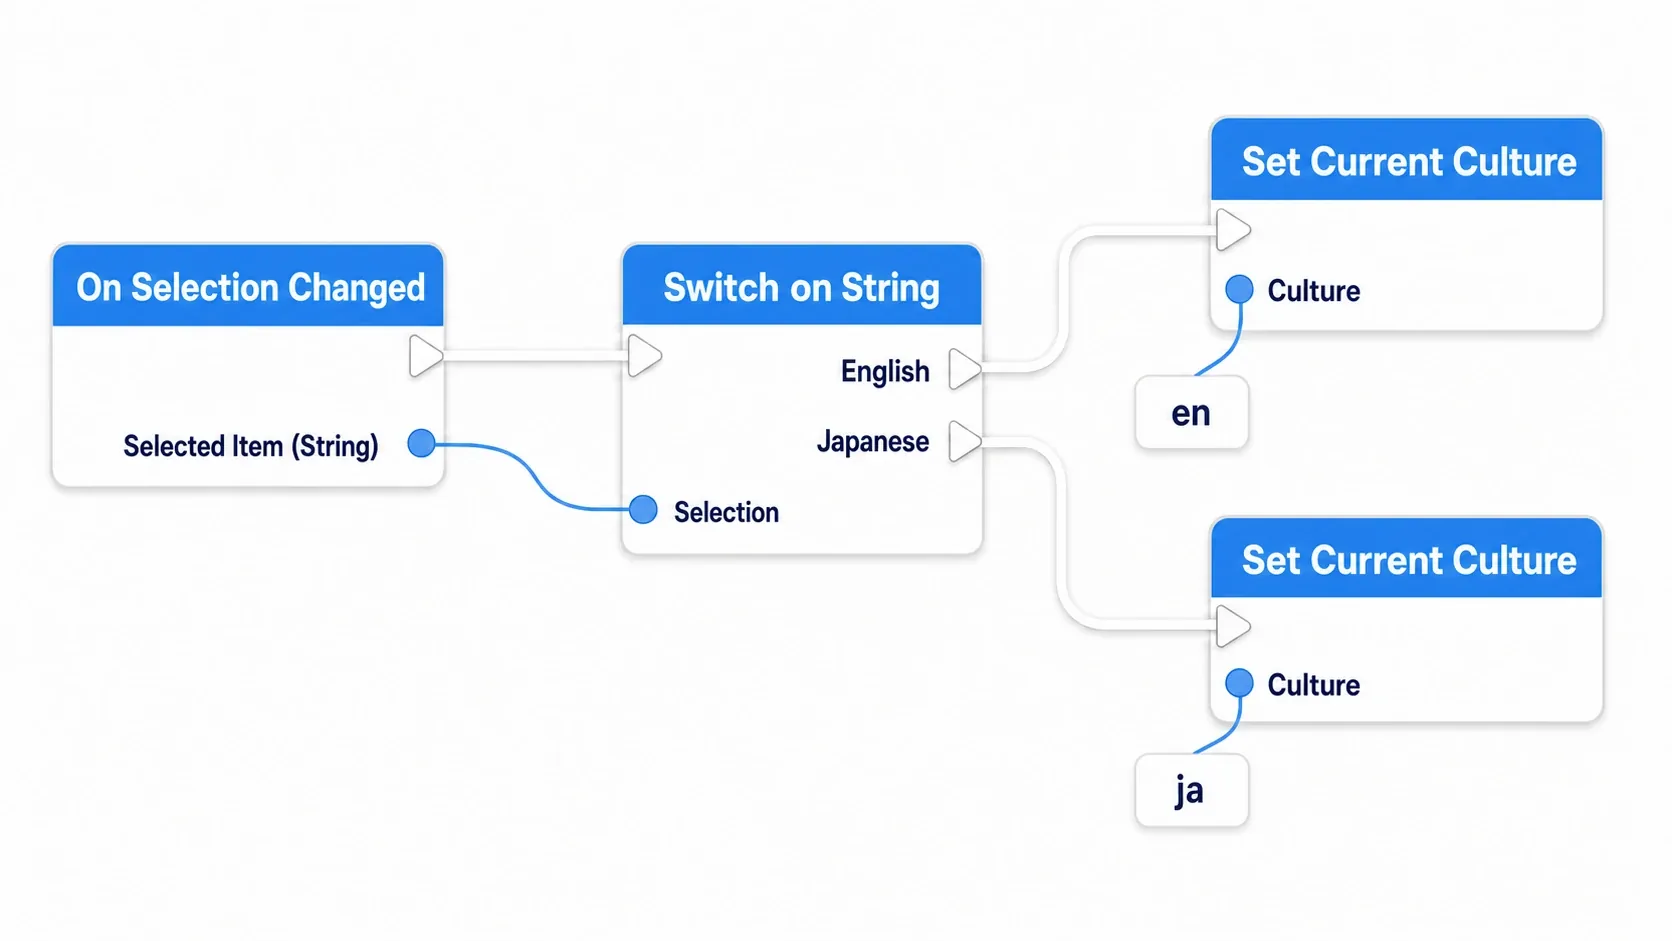
Wire it up like this.
- Create the combo box's On Selection Changed event (the event gives you the Selected Item string)
- Feed that Selected Item into the Selection pin of Switch on String (add the
EnglishandJapanesecase pins manually on the node) - For "English", call
Set Current Culture (Culture = "en"); for "Japanese", callSet Current Culture (Culture = "ja")
As read-along pseudocode, it looks like this.
On Selection Changed (Selected Item)
  Switch on String (Selected Item):
      case "English":  SetCurrentCulture("en")
      case "Japanese": SetCurrentCulture("ja")
Verifying it
To make the answer easy to check, put your original text (say, the Japanese source for "Start the game") in the start button's Text Block, and enter "Start Game" as its translation in the translation editor. Play, open the settings screen, and pick "English" in the combo box. If it worked, that button changes to "Start Game" the instant you select it, and the other titles and buttons turn English too. Pick "Japanese" again and it goes back.
Here's how to narrow things down when it doesn't work.
- Nothing changes at all → a missed Gather, or a missed Compile. Save, then redo Gather → Compile
- One spot stays in Japanese → that string is built as a String. Next likely: a missed Gather or a blank translation. Convert it to Text, then save and redo Gather → enter the English → Compile
- Tofu (□) when you switch back to Japanese → the font has no Japanese glyphs (see the font pitfall)
- It switches in the editor but the exe shows no translations → the language isn't in
Localizations to Package(below)
Two things to take away.
- Build translatable display text as Text from the start: converting String to Text later means rebuilding UMG, which costs real time. Anything the player sees that needs translating should be held as Text (player names, internal values, and other displayed-but-untranslated strings are a separate matter)
- Re-Gather whenever you add strings: new text never appears in the translation list unless it's gathered. If a translation is blank, suspect a missing Gather first
Also, so that language switching works in a packaged build, include ja and en in Localizations to Package under Project Settings > Packaging before release. Miss that and it switches in the editor but the exe shows no translations. The steps for building and distributing itself are covered in Packaging and Building.
Language is just another setting, so you can put the saving of this choice on the same mechanism as building a settings screen.
Bonus: Good to Know for Later
Build sentences with numbers or names using Format Text. When you want to embed a variable, as in "You obtained {Name}!", use the Format Text node rather than String concatenation. Injecting the variable into the braces {Name} keeps the whole sentence as Text and therefore translatable. It also means translators can reorder the pieces per language, which matters when word order differs.
You can hand translation off as PO files. Export from the Localization Dashboard in PO format and you can pass it to a translator or translation service, get it back with the translations filled in, and import it again. If you're not doing all the translation yourself, this is the standard flow.
Plurals need more than a CSV. Languages where the ending changes with the number, as in "1 item" versus "2 items", can't be handled with a simple lookup table. UE5 does support plurals, but writing sentences that avoid the singular/plural distinction in the first place saves you trouble later.
Summary
Whether localization goes well is actually decided before you start building. It comes down to these five points.
- Only Text is translated. String concatenation slips through, so hold display text as Text from the start
- Turn the Gather → Translate → Compile crank. Re-Gather after you add strings
- Switch at runtime with Set Current Culture. Set
Save to Configto true and the choice persists across restarts - Read the symptom to find the cause: tofu (□) = fonts, half-untranslated = String
- To ship a packaged build, include the languages in Localizations to Package
How much of your game's UI is Text right now? Before release, take one pass through and check that no String concatenation slipped in.