You want a minimap in the corner of the screen. A wall monitor showing another room. A character select screen where the chosen character spins in place.
All of these come from one mechanism: capture a camera feed and use it as a texture. In UE, that's Scene Capture Component 2D paired with Texture Render Target 2D. This article covers building that three-part setup, the settings specific to minimaps, and the cost — because this is a feature that's expensive if you don't know what it does.

What You'll Learn
- A Render Target is a texture you rewrite at runtime (you choose the update rate)
- The three parts (capture, receiver, destination)
- Putting it on a UMG
Image- Orthographic for minimaps, Perspective for monitors
- 🚨 Scene Capture draws the scene again (clear both
Capture Every FrameandCapture on Movement)- Hands-on: build both a minimap and a security camera
A Render Target Is a Moving Texture
An ordinary texture is an image file with the picture baked in. Load it a thousand times and you get the same picture.
A Render Target is different. It's a texture you can rewrite at runtime — think of it as a box holding whatever a camera captured.
How often it gets rewritten is up to you. It updates every frame by default, but as you'll see below, that frequency is the cost, so in practice you deliberately thin it out.
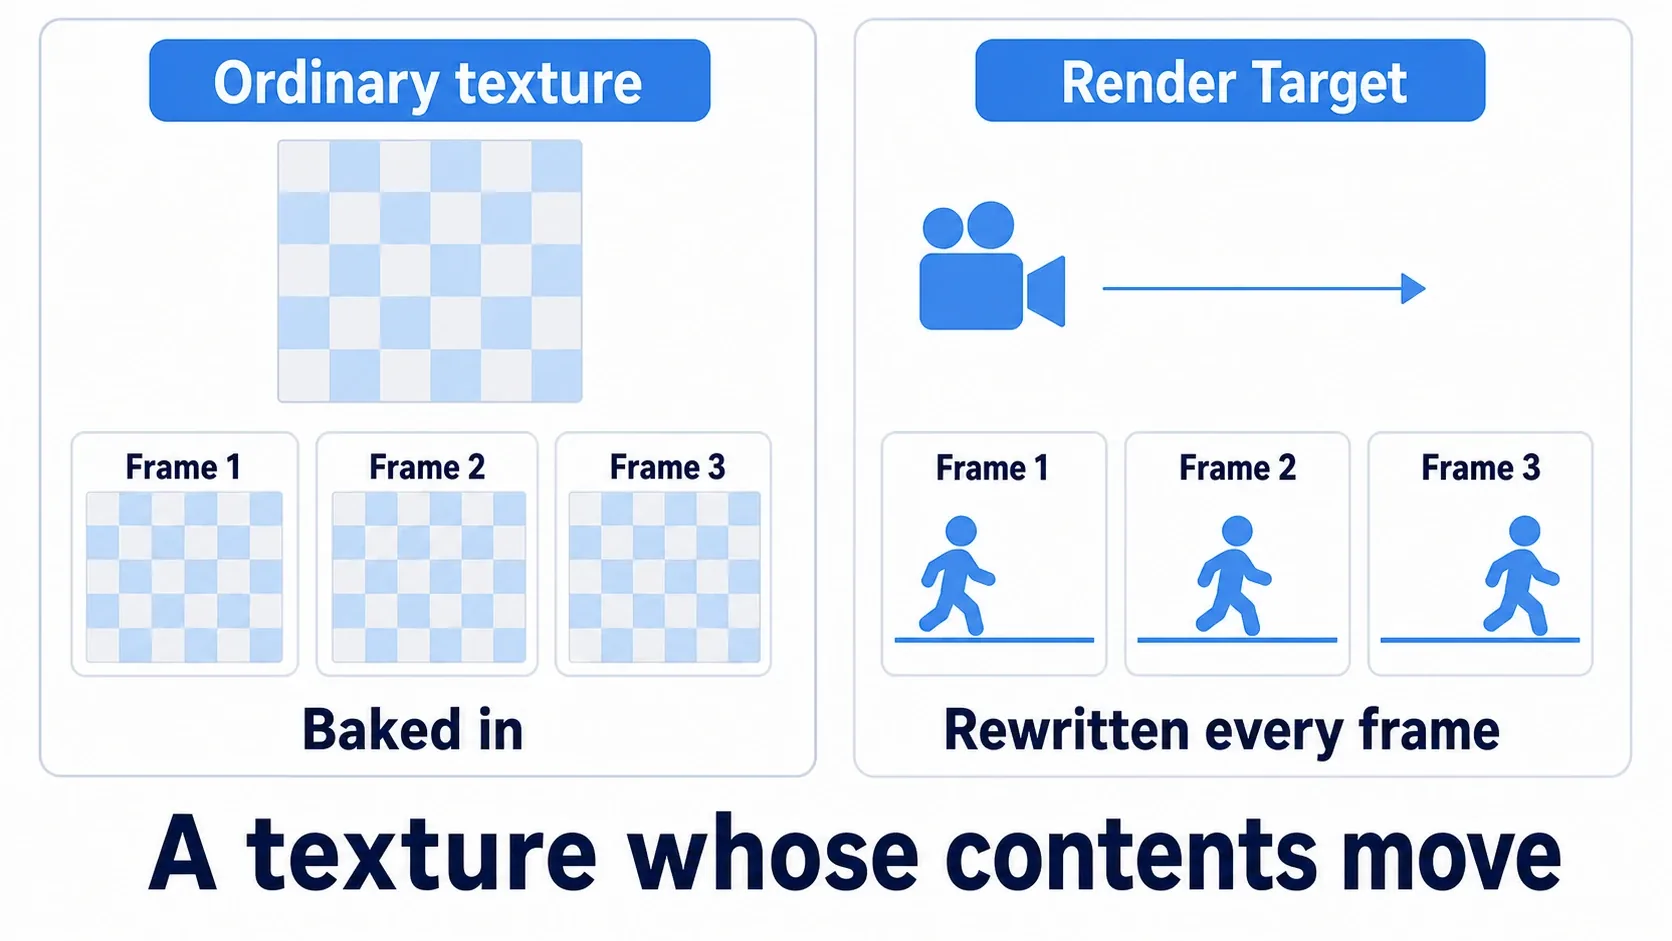
Because it's a texture, it works everywhere a texture works. You can put it in a material, or on a UMG Image. Which is why all of these come from the same setup:
| What you build | What it captures | Where it goes |
|---|---|---|
| Minimap | Terrain from directly above the character | A UMG Image |
| Security monitor | Another room | A material on a wall mesh |
| Character select preview | A character on a pedestal | A UMG Image |
| Rear-view mirror | Behind the car | A material on a mirror mesh |
The Three Parts
You need exactly three things: something to capture, a receiver, and a destination.
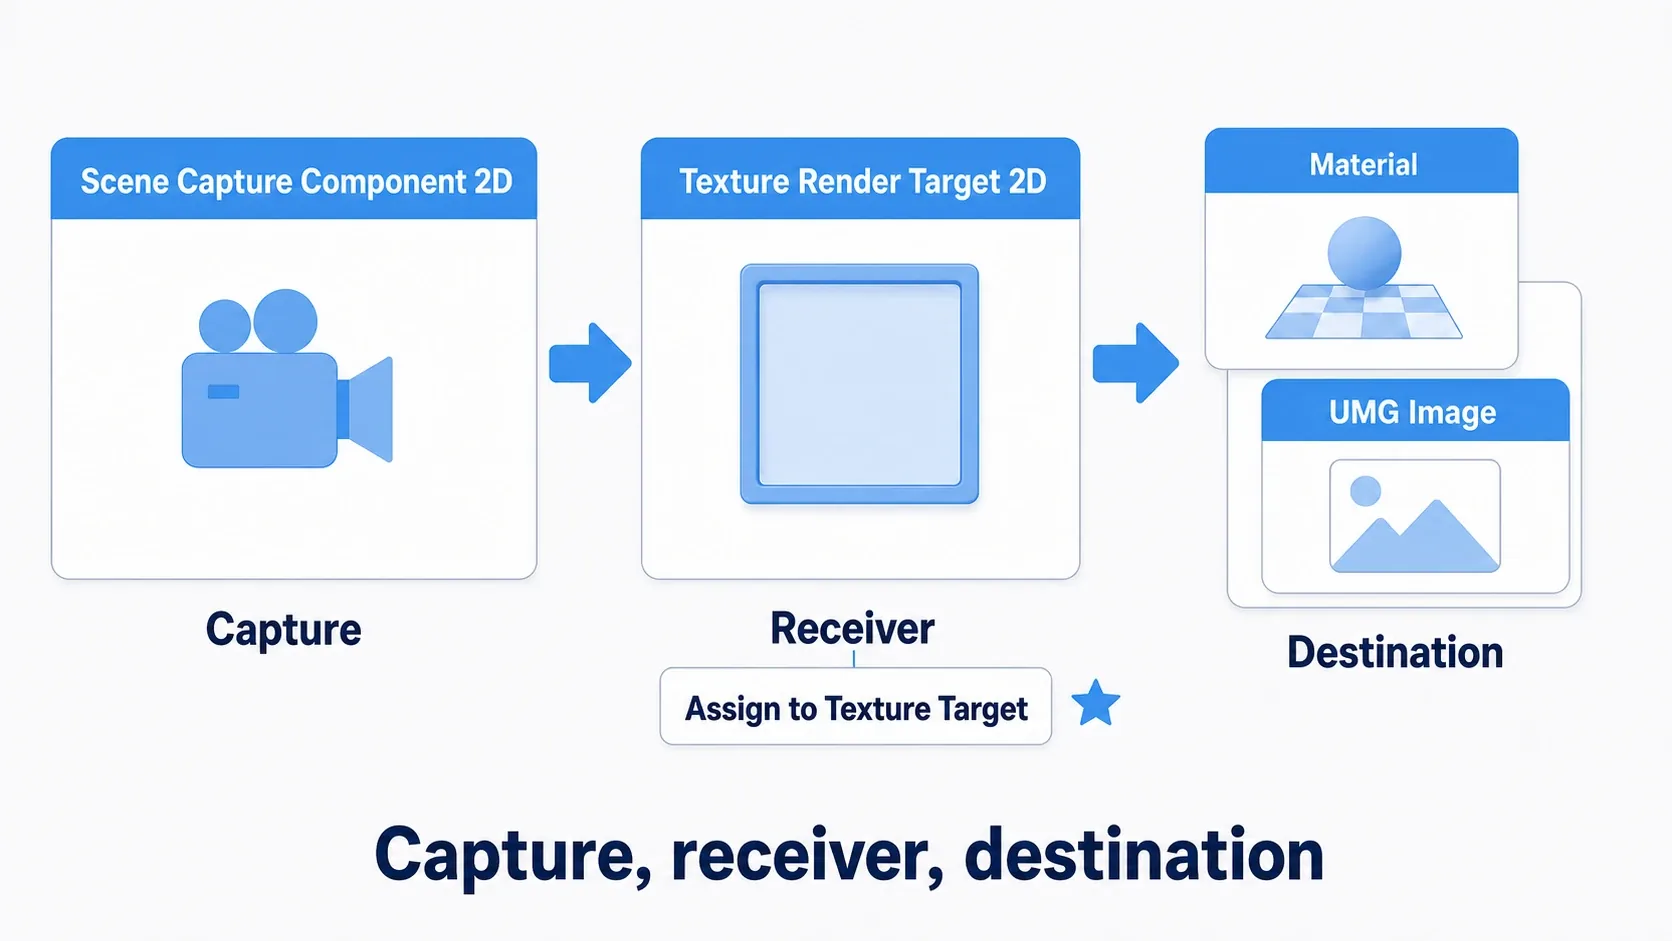
| # | Name | Role |
|---|---|---|
| 1 | Scene Capture Component 2D | The capturer. A camera-like component |
| 2 | Texture Render Target 2D | The receiver. The asset the feed lands in |
| 3 | Material or UMG Image | The destination. Displays the receiver's contents |
The procedure:
- In the Content Browser, right-click → Texture → Render Target (name it
RT_Minimap). It's pure black at first - Add a
Scene Capture Component 2Dto an Actor - In that component's details panel, set
Texture Targetto the Render Target from step 1
That third step is the connection. The moment you assign the receiver to Texture Target, its contents start updating.
Double-click the Render Target in the Content Browser and you'll see the live feed. If it stays black, either Texture Target isn't set or the camera is pointed at nothing.
Resolution is set on the asset. Configure
Size X/Size Yin the Render Target's details.512×512is plenty for a minimap;256×256for a small monitor. Bigger costs more, so keep it minimal.
Putting It on the UI
For something like a minimap that lives on screen, use a UMG Image.
A UMG Image's Brush takes a texture directly. A Render Target is a texture, so it goes straight in.
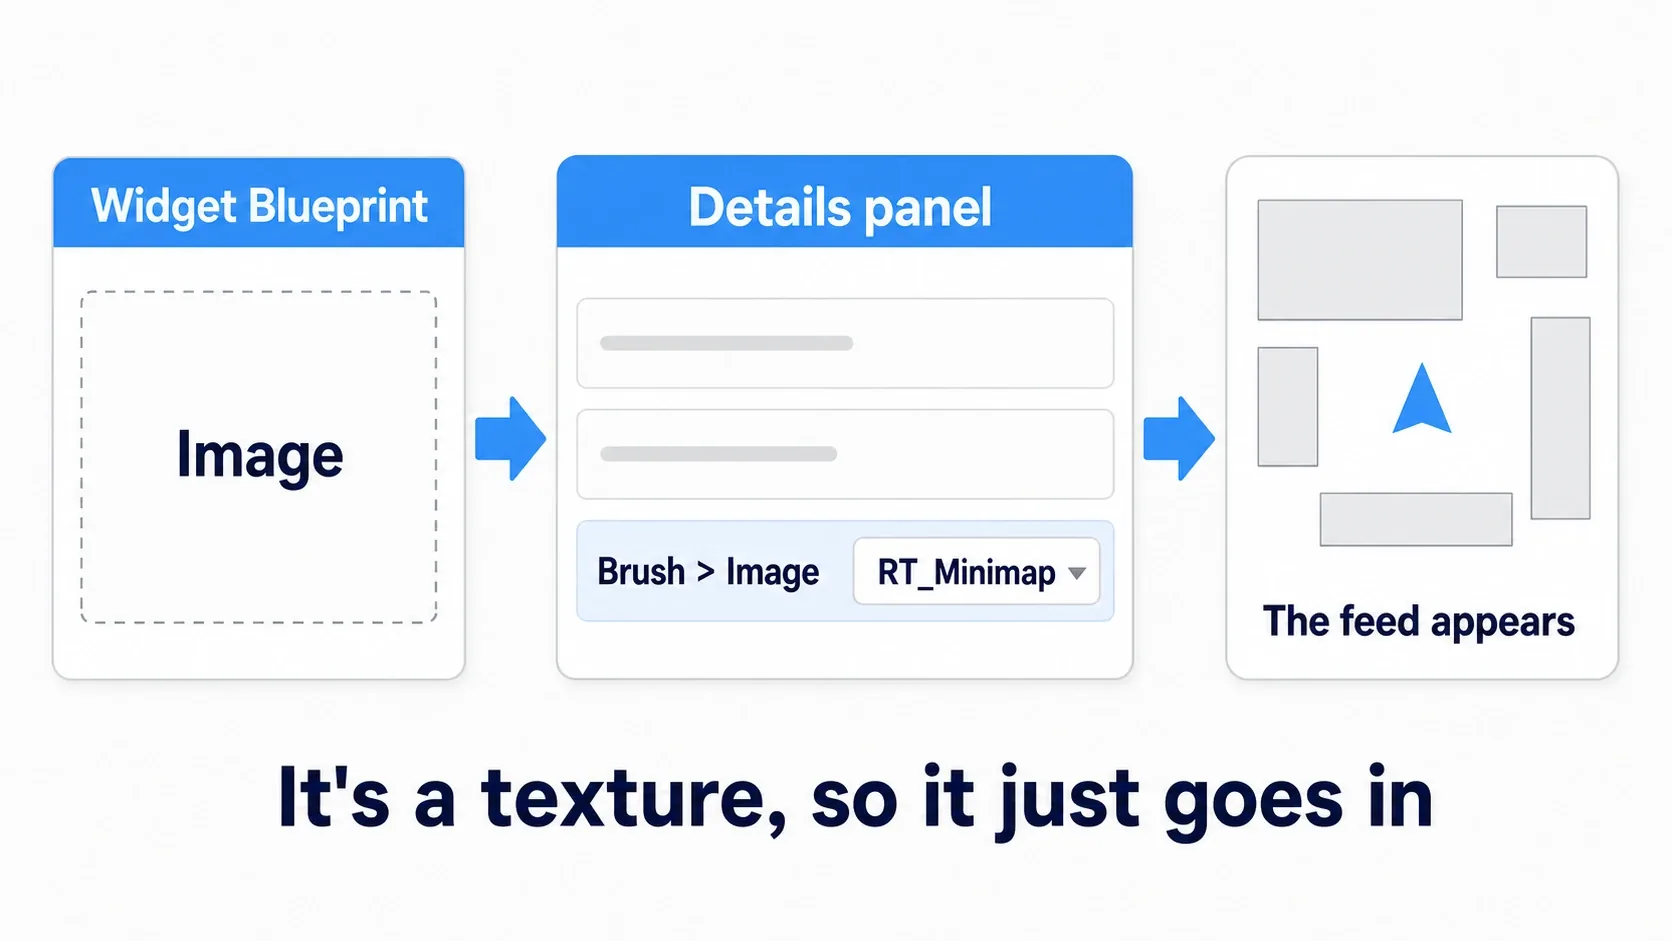
- Place an
Imagein a Widget Blueprint - In the details panel, set Appearance → Brush → Image to your Render Target
- Adjust size and position (top-right, bottom-left, wherever)
That's it. The camera feed is now on your UI.
For something projected onto a mesh in 3D space, like a wall monitor, go through a material. Create one, drop the Render Target in as a Texture Sample node, and wire its output to Emissive Color. Emissive is the right pin because a monitor should look like it's emitting its own light (→ Material Basics).
Minimap Settings
Two settings on Scene Capture Component 2D are enough to make a minimap work.
First, Projection Type.
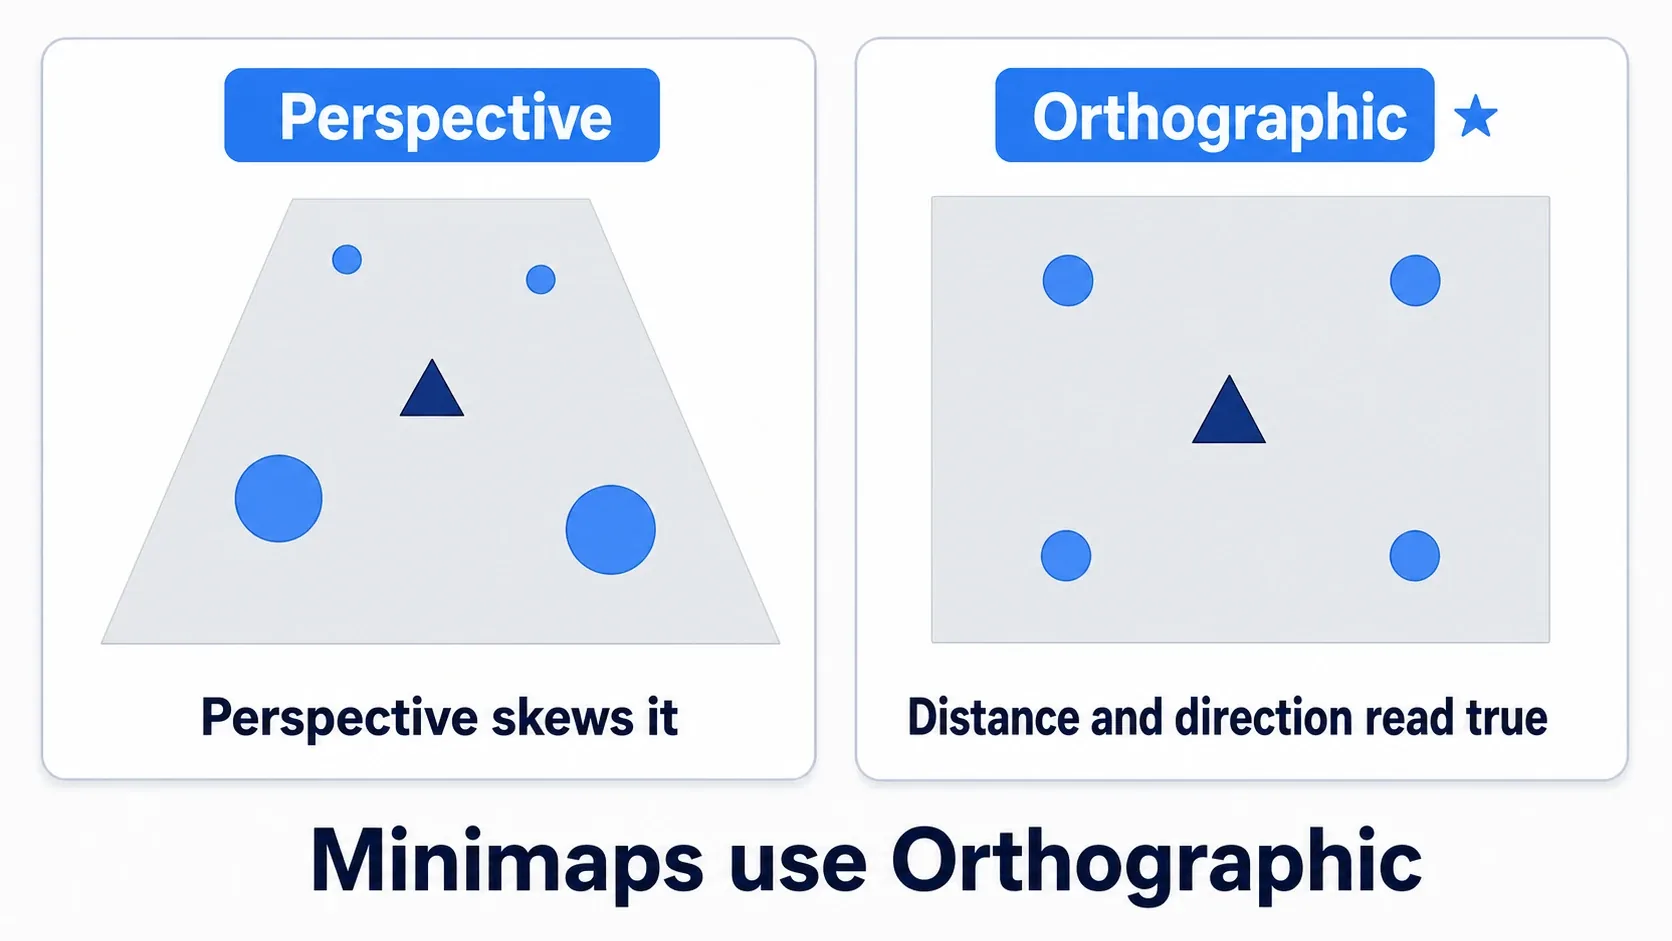
| Type | How it looks | Good for |
|---|---|---|
| Perspective | Perspective applies (distant things shrink) | Security cameras, mirrors, character previews |
| Orthographic | No perspective (everything the same size) | Minimaps, blueprint-style overhead views |
Minimaps use Orthographic. With perspective, enemies near the edge of the view shrink and skew, and positions stop reading accurately. Orthographic behaves like a real top-down map: distance and direction come through unchanged.
With Orthographic, the covered area comes from Ortho Width. That number is your minimap's scale. Bigger shows more, smaller zooms in.
Second, whether the camera follows the character's rotation.
Parent the camera to the character and place it overhead and position follows automatically. The choice is about rotation.
| Approach | How it reads | Suits |
|---|---|---|
| Rotation follows | You always face up | Action. Intuitive while moving |
| Rotation fixed | North stays up | Exploration. Easier to memorize the layout |
Both are valid. To keep it fixed, enable Absolute Rotation in the component's details so it ignores the parent's rotation.
🚨 About the Cost
This is the most important section in the article.
Scene Capture Component 2D draws the scene a second time. Once for the main camera, once for the capture. Dropping one in roughly doubles your render cost.
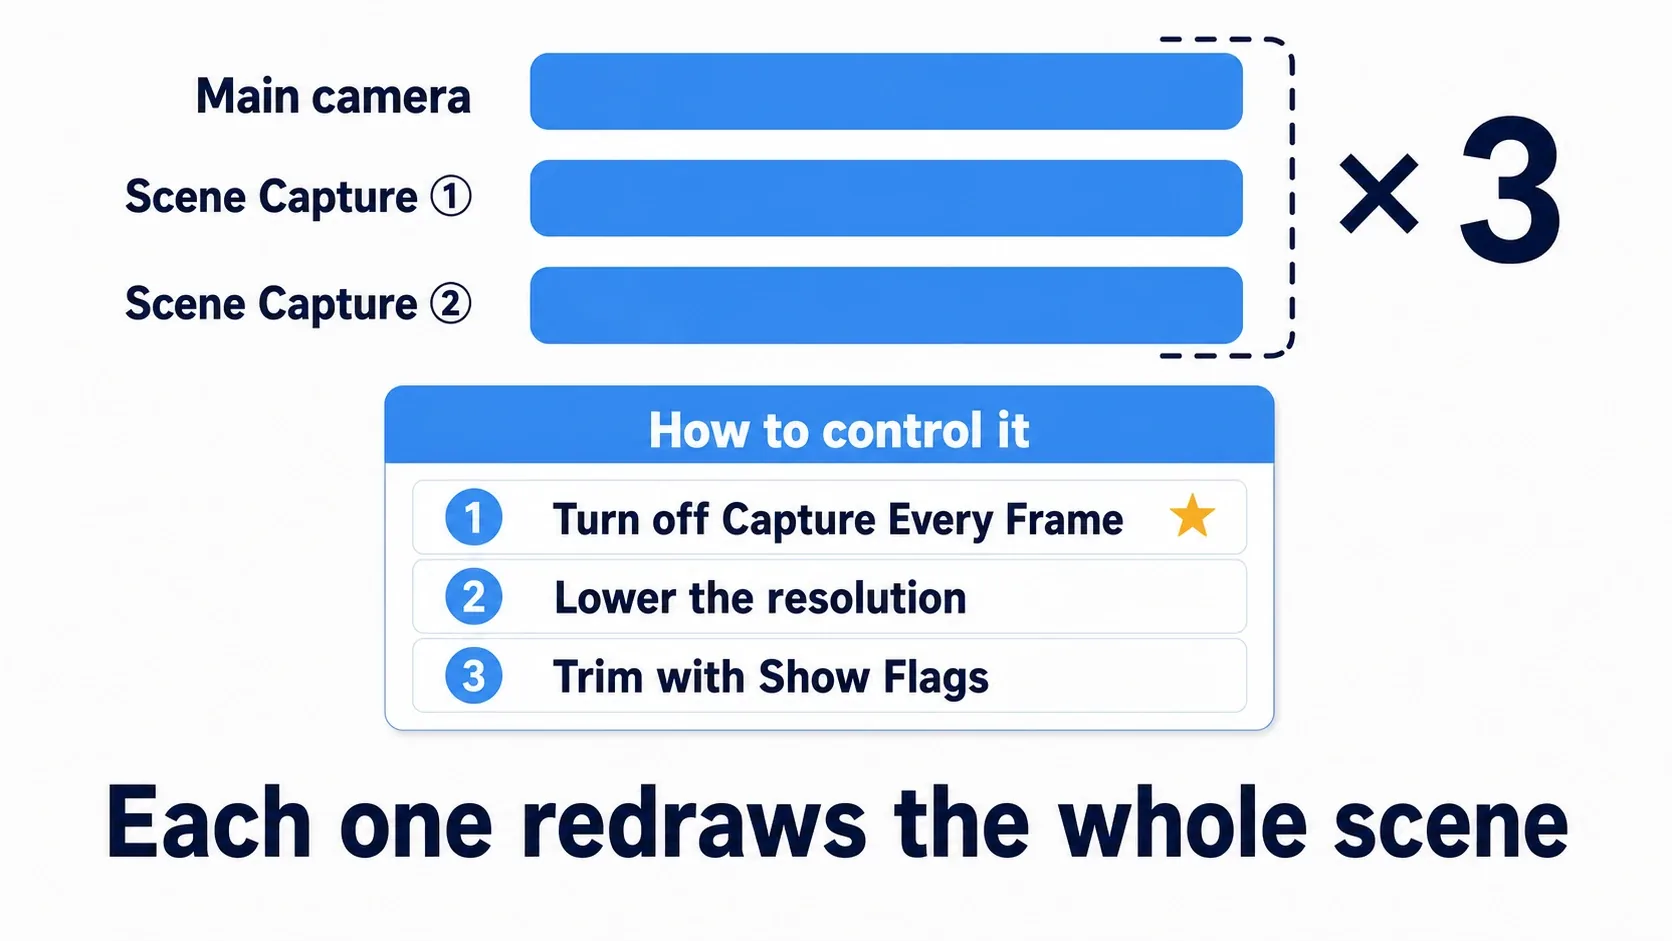
Two Scene Captures means three passes. "It got slow the moment I added both a minimap and a security camera" is exactly the arithmetic working out.
There are three ways to control it, in order of impact.
| Measure | How | Impact |
|---|---|---|
| Stop automatic capture | Turn off both Capture Every Frame and Capture on Movement, then call Capture Scene only when needed | Largest. Every 0.2 s is plenty for a security camera |
| Lower the resolution | Shrink the Render Target's Size X / Y | Large. 1024 → 256 is 1/16 the pixels |
| Capture less | Turn off unneeded elements (particles, fog, depth of field) in Show Flags | Medium to large. A minimap doesn't need fog |
Capture on Movement is the one that gets missed. There are two checkboxes to clear for manual updates.
| Setting | Default | What it does |
|---|---|---|
Capture Every Frame | On | Captures every frame |
Capture on Movement | On | Captures whenever the camera moves |
Clear only Capture Every Frame and a minimap sees no benefit at all. The minimap camera is a child of the player, so it moves whenever you walk. Capturing on every move is barely different from capturing every frame.
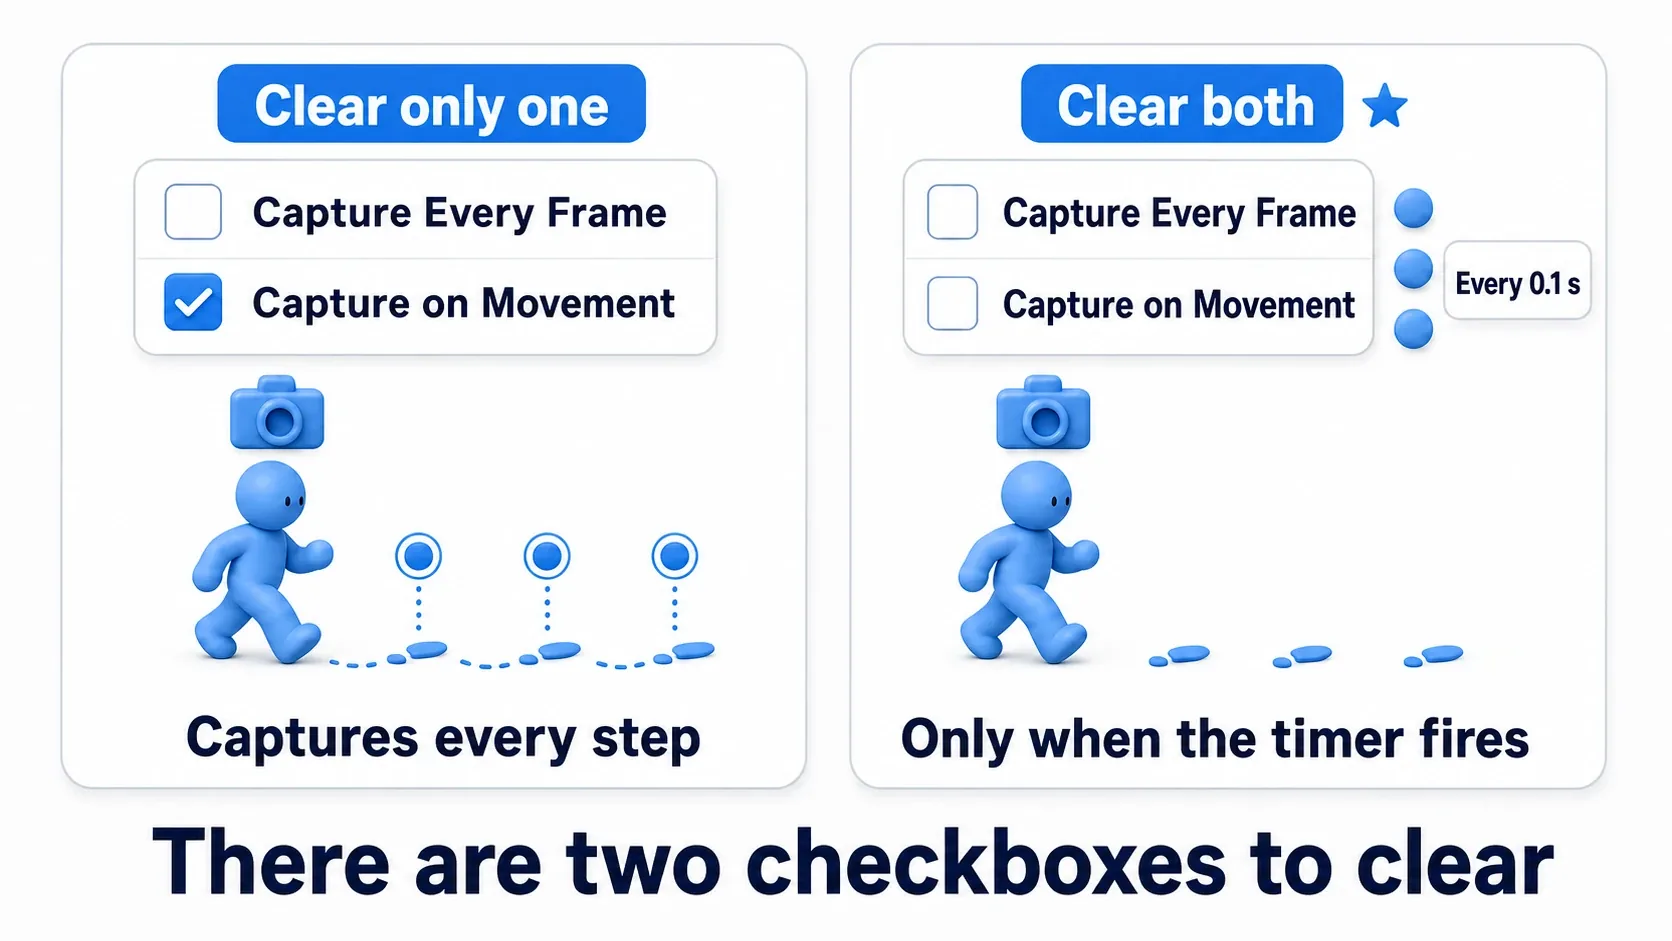
With both off, capture happens only when Blueprint calls Capture Scene. Firing that from Set Timer by Event every 0.1–0.2 seconds looks essentially identical at a fraction of the cost (→ Designing Without Tick).
To see the actual cost, watch Draw and GPU in stat unit (→ the stat commands). Measure before and after adding the Scene Capture.
Hands-On: A Minimap and a Security Camera
An ARPG minimap, a stealth game's security monitor, a racing game's rear-view mirror. Same three parts, different settings. Let's build two contrasting cases so the settings make sense in your hands.
What we're building
| ① Minimap | ② Security camera | |
|---|---|---|
| Where it captures | 1500 above the player | Another room's ceiling |
Projection Type | Orthographic | Perspective |
Ortho Width | 3000.0 | (unused) |
| Render Target | RT_Minimap (512×512) | RT_SecurityCam (256×256) |
| Destination | UMG Image (top-right) | Material on a wall mesh |
Capture Every Frame | Off | Off |
Capture on Movement | Off | Off |
| Capture interval | Capture Scene every 0.1 s | every 0.2 s |
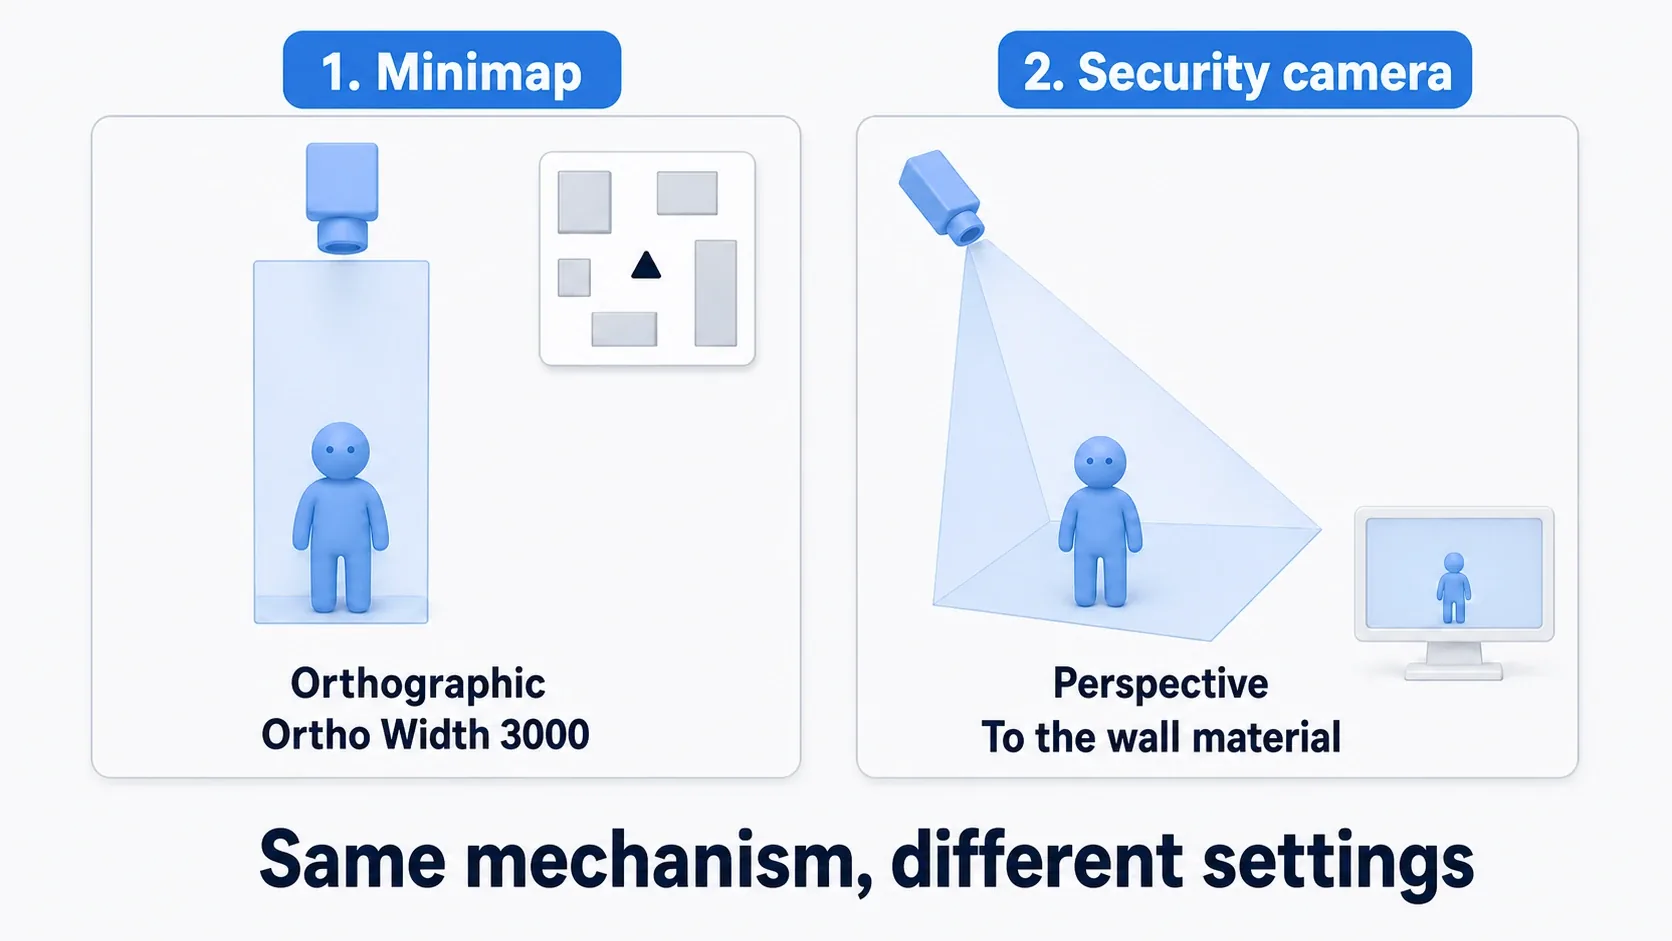
① The minimap
- Create
RT_Minimap(right-click → Texture → Render Target,Size X/Y = 512) - Add a
Scene Capture Component 2Dto the player Blueprint atLocation = (0, 0, 1500),Rotation = (0, -90, 0)(pointing straight down) - In its details:
Texture Target = RT_Minimap,Projection Type = Orthographic,Ortho Width = 3000.0, and bothCapture Every FrameandCapture on Movementoff (it's a child of the player, so leavingCapture on Movementon captures every time you walk) - Place an
Imagein a Widget Blueprint, set its Brush toRT_Minimap, and anchor it to the top-right - On the player's
Event BeginPlay, addSet Timer by Event(Time = 0.1,Looping = true) and callCapture Scene(Target: the Scene Capture Component) from that event
② The security camera
- Create
RT_SecurityCam(Size X/Y = 256) - Place an empty Actor in another room, add a
Scene Capture Component 2D, and aim it down at the room - Set
Texture Target = RT_SecurityCam, leaveProjection Typeon Perspective, and turn bothCapture Every FrameandCapture on Movementoff - Create a material
M_Monitor, feedRT_SecurityCamthrough aTexture SampleintoEmissive Color - Apply
M_Monitorto a flat mesh on the wall - On that Actor's
Event BeginPlay, callCapture Scenefrom aSet Timer by Event(Time = 0.2)
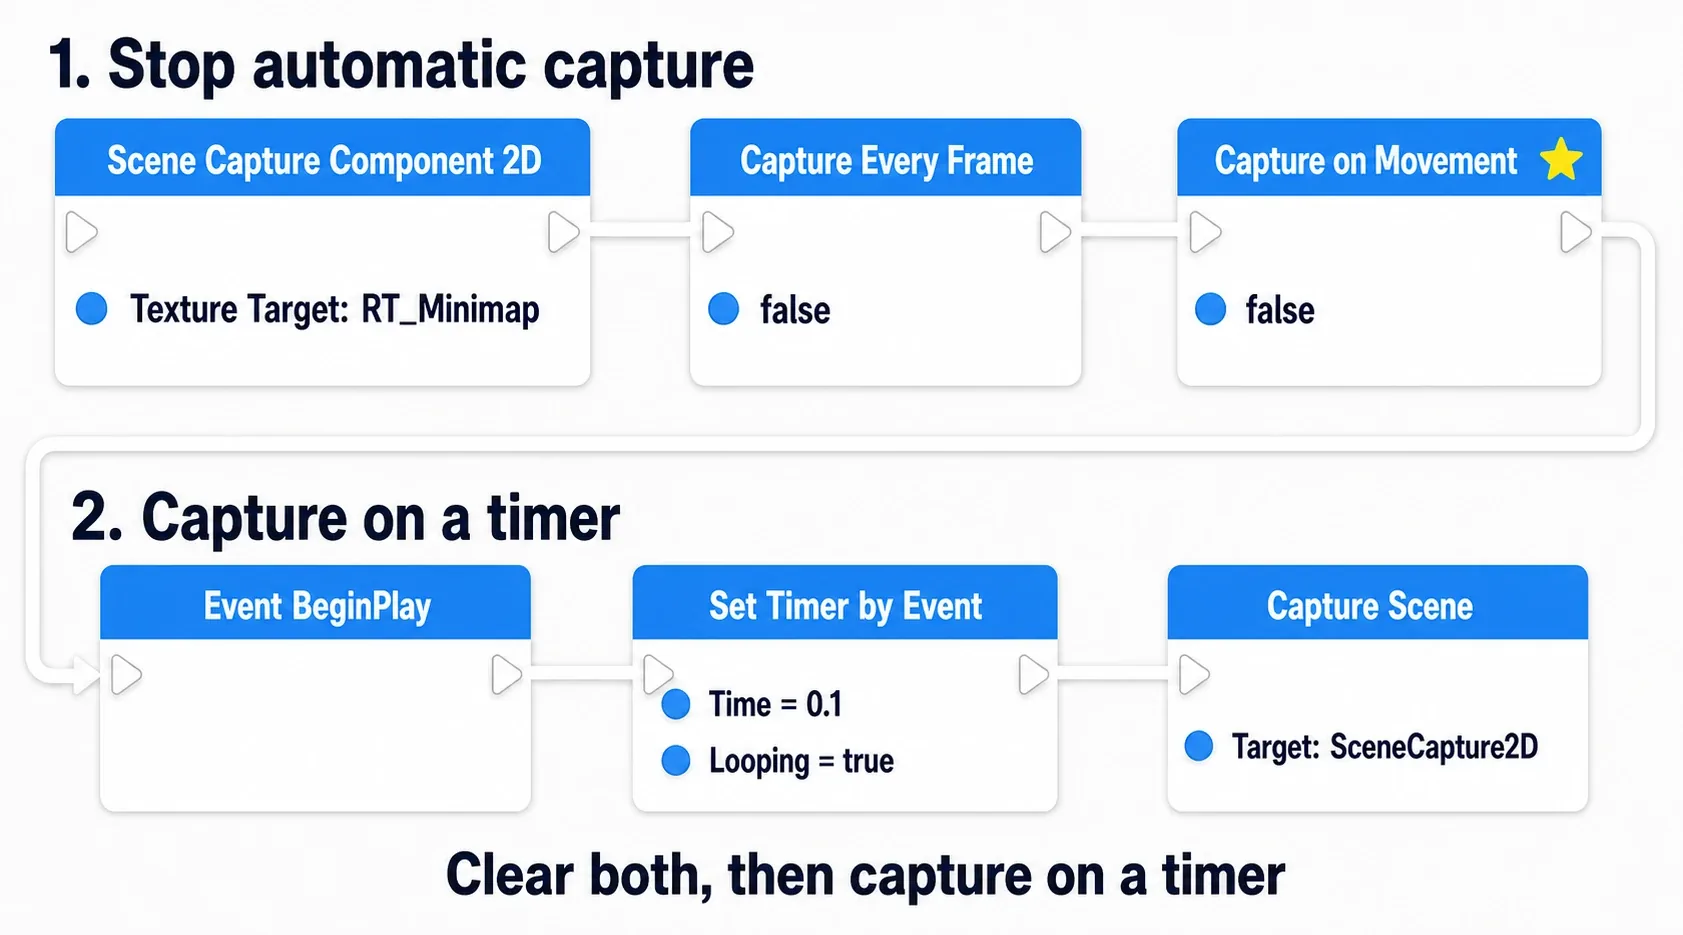
As read-aloud pseudocode:
BP_Player (Event Graph)
Event BeginPlay
  → Set Timer by Event (Time = 0.1, Looping = true)
      └→ bound to custom event "UpdateMinimap"

UpdateMinimap (Custom Event)
  → Capture Scene (Target: SceneCapture2D)
Checking it
Hit Play and look at the top-right. If it worked, there's a top-down view of the terrain with you at its center. Walking makes the terrain flow past while you stay centered. Change Ortho Width from 3000 to 1500 and the visible area halves and zooms in.
The security camera should show the other room on the wall monitor. Put a moving Actor in that room and it moves inside the monitor too.
Finally, bring up stat unit and check Draw and GPU. Even with two Scene Captures, the numbers shouldn't spike much as long as both checkboxes are off. Now turn just the minimap's Capture on Movement back on and walk around. The numbers rise even with Capture Every Frame still off. That's why you clear both.
Troubleshooting:
- The minimap is black →
Texture Targetisn't set, or you disabled automatic capture and never calledCapture Scene - You disabled it but nothing got faster →
Capture on Movementis still on. On a player-following camera, that alone is equivalent to capturing every frame - Everything renders except your character → The overhead camera is too close and the character is inside the near clip plane. Raise its Z
- The edges look skewed →
Projection Typeis stillPerspective. Minimaps wantOrthographic - It suddenly got heavy →
Capture Every Frameis on, or the resolution is too high
Two things to take away.
- Capture frequency is the cost: turning off both
Capture Every FrameandCapture on Movementand thinning with a timer is the single most effective optimization here. 0.1 s for a minimap and 0.2 s for a monitor look virtually identical - Choose Orthographic vs. Perspective by "map or view": Orthographic when positions must read accurately, Perspective when you want the actual camera view. Perspective on a minimap makes it harder to read
To go further by drawing less, LOD and culling takes over.
Bonus: Good to Know for Later
Character select previews are the same setup. Put a pedestal and a character somewhere nobody goes, capture it with a Scene Capture Component 2D, and show it in UMG. "Spin the character to show it off" just means rotating the character being captured.
It's also the doorway to portals. A door you can look through is an extension of the same idea: put a camera on the far side, capture it, apply it to the door's material. It's a step harder, because the camera has to move with the player's viewpoint.
Canvas Render Target 2D is a different route. Rather than capturing a camera, you draw lines and shapes into it yourself. For "a minimap that's just dots for enemy positions," this is far cheaper than capturing a scene. Worth considering when you don't need the terrain rendered.
Show Flags are a goldmine. The Scene Capture Component 2D details panel has a checklist of what to render (Show Flags). For a minimap you can switch off particles, fog, depth of field, and bloom entirely. Looks the same, costs less — the most satisfying kind of optimization.
Summary
- A Render Target is a texture you can rewrite at runtime, usable anywhere a texture is. You choose the update rate
- The three parts are Scene Capture Component 2D (capture) + Texture Render Target 2D (receiver) + Material / UMG Image (destination)
- Minimaps use Orthographic with
Ortho Widthfor scale; monitors use Perspective - 🚨 Scene Capture draws the scene again. Turning off
Capture Every FrameandCapture on Movement, then thinning, comes first - Lowering resolution and trimming
Show Flagsboth help
One mechanism, and the settings turn it into a minimap, a security monitor, or a preview screen. Which one do you want to build first?