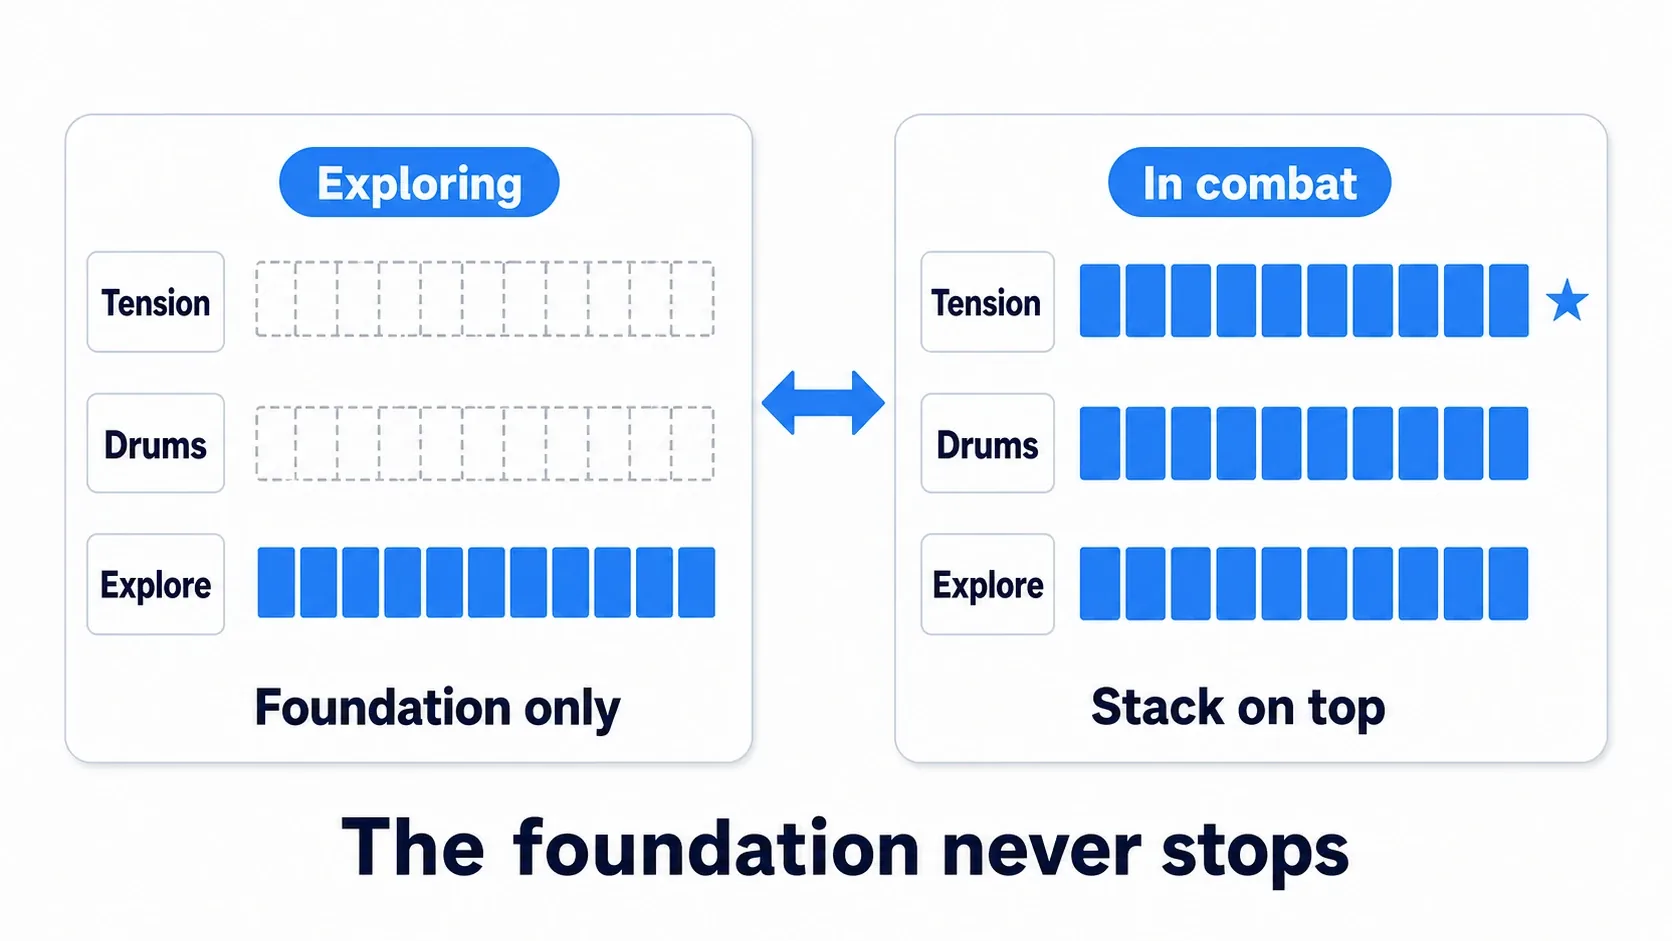
Quiet ambience while you explore. The moment an enemy spots you, drums enter and strings stack on top, and the tension arrives. Clear the fight and it settles back down.
Music that reacts to the situation changes how a game feels. And UE is unusually strong here — MetaSounds was built for exactly this. This article covers the shift in thinking (a soundtrack as layers), how to build it in MetaSounds, and how to push the combat intensity in from Blueprint.
What You'll Learn
- Treat music as layers, not one finished song
- Vertical layering vs. horizontal transitions (start vertical)
- Running several Wave Players simultaneously in MetaSounds
- Pushing combat intensity in with
Set Float Parameter- Hands-on: a combat layer that fades in as an enemy approaches
Music as Layers
Ordinary game music is one finished song. Play it and the same thing runs start to finish.
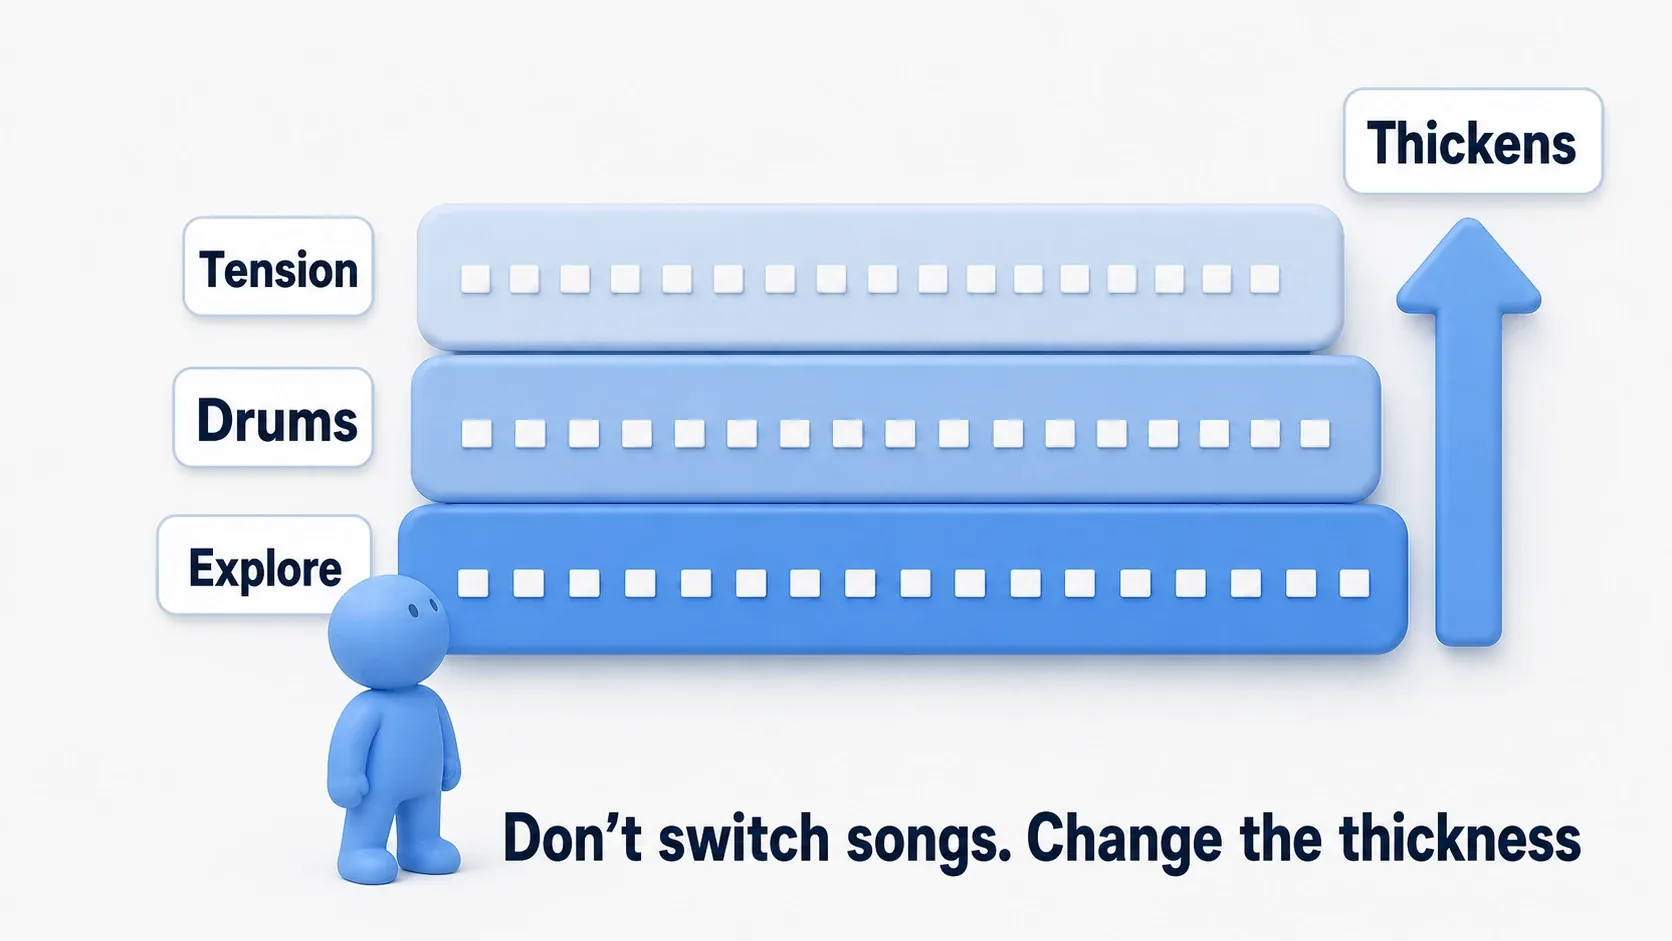
Interactive music splits that into several layers.
| Layer | Contents | When it plays |
|---|---|---|
| Exploration | Pads, arpeggios | Always (the foundation) |
| Drums | Percussion | Added when an enemy detects you |
| Tension | Strings, brass | Added when the fight intensifies |
The foundation never stops. You only add and remove what sits on top.
Framed this way, it isn't "the song changed" — it's "the same song got thicker." To the player, the music never breaks, yet the tension has quietly risen. That's what makes it feel natural.
Vertical vs. Horizontal
Interactive music splits into two broad approaches.
| Approach | What you do | Difficulty |
|---|---|---|
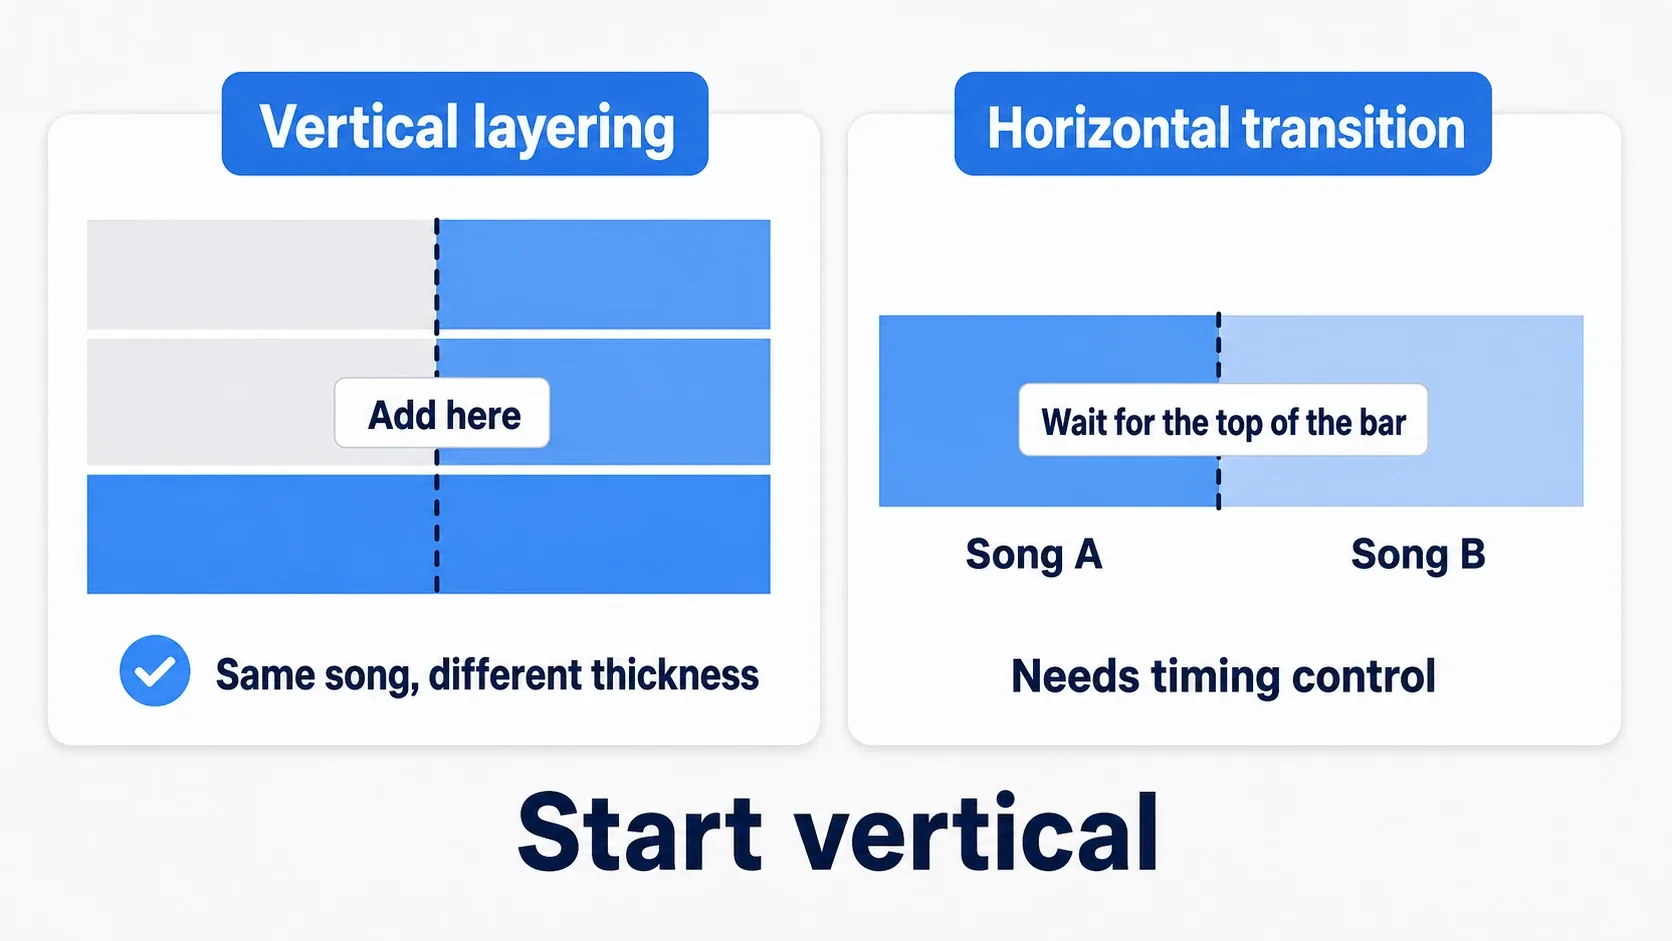
| Vertical layering | Add and remove instruments within one song | 🟢 Easy |
| Horizontal transitions | Swap song A for song B at a musical boundary | 🔴 Hard |
This article covers vertical layering, for three reasons.
- Nothing drifts out of phase: every layer plays from the start, so they stay locked together
- Nothing cuts out: you only move volume, so there's no silent gap at the switch
- The effect is large: one drum track entering visibly changes how tense a scene feels
Horizontal transitions need timing control — "finish the current bar, then switch." That's a step more complex, and you usually need extra transition material composed for the seams too. Build vertical first; reach for horizontal when you actually need it.
What the Audio Has to Be
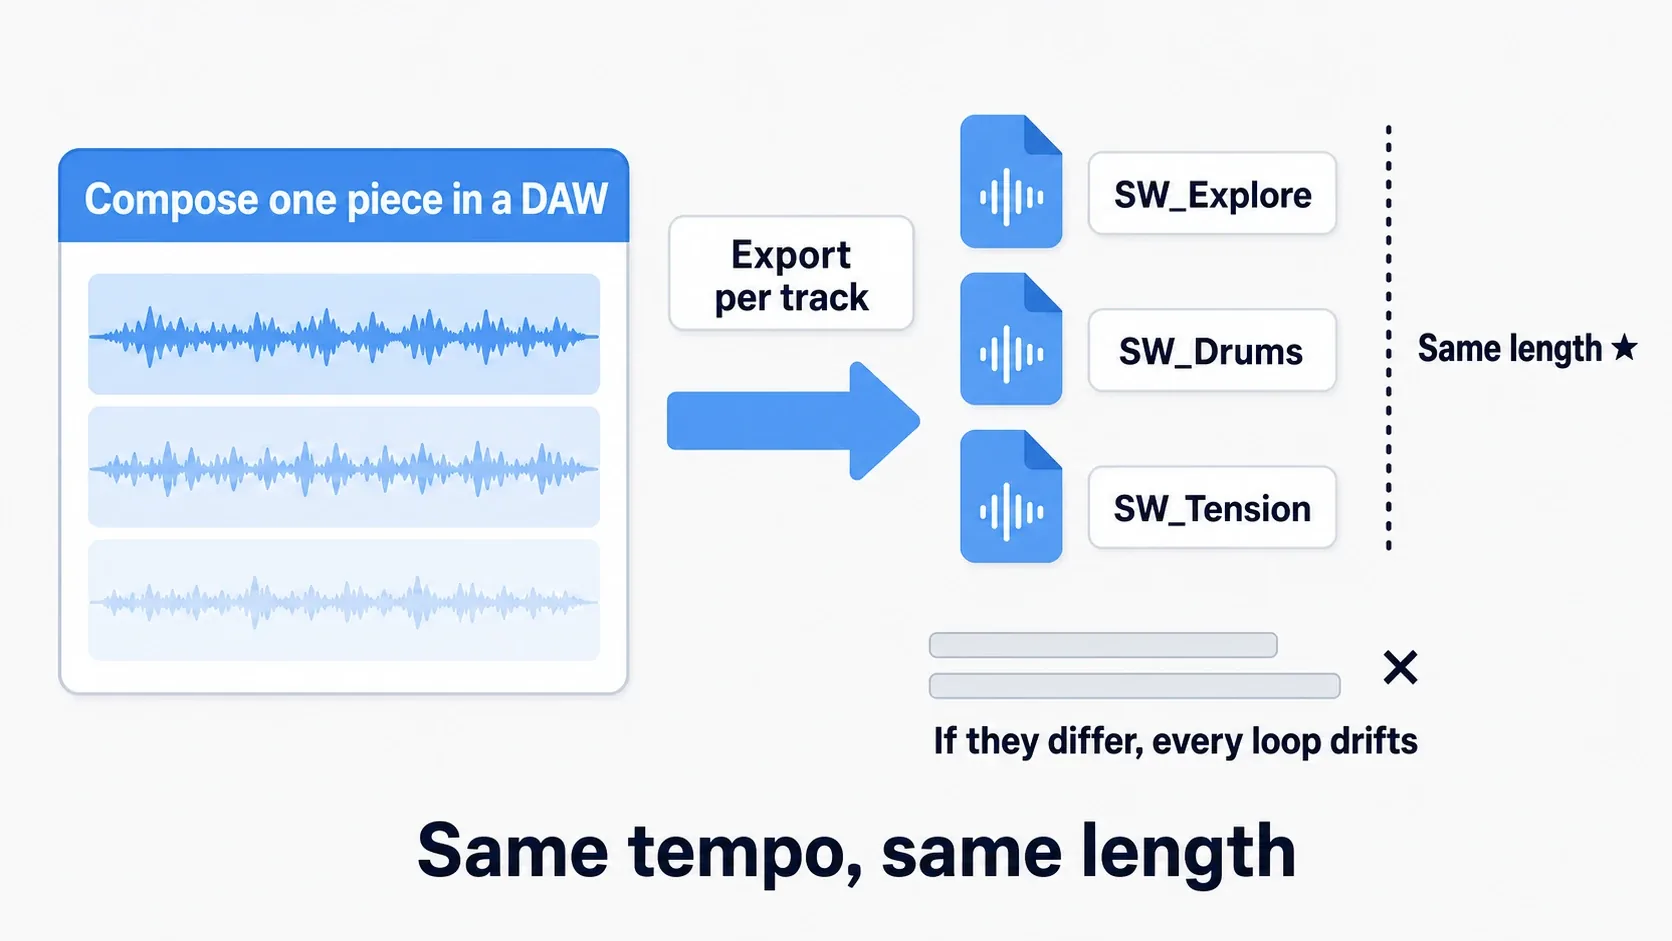
Skip this and you can't reproduce any of it. Vertical layering needs several tracks exported at the same tempo and the same length.
The process:
- Compose one piece in your DAW (exploration and combat share a tempo and a chord progression)
- Export per track group (pads / drums / strings)
- Make every file exactly the same length (32 bars on the nose, say)
A mismatch of even one sample compounds with every loop. After a few passes it's audibly wrong. Matching lengths at export is the lifeline of this approach.
Trying it with what you have. Even without purpose-built material, separate loops at the same tempo are enough to practice on. Search free asset sites with matched conditions like "120 BPM / 8 bars." Imperfect alignment still teaches you the mechanism.
Building the Layers in MetaSounds
Take the Wave Player from MetaSounds Basics and place one per layer.
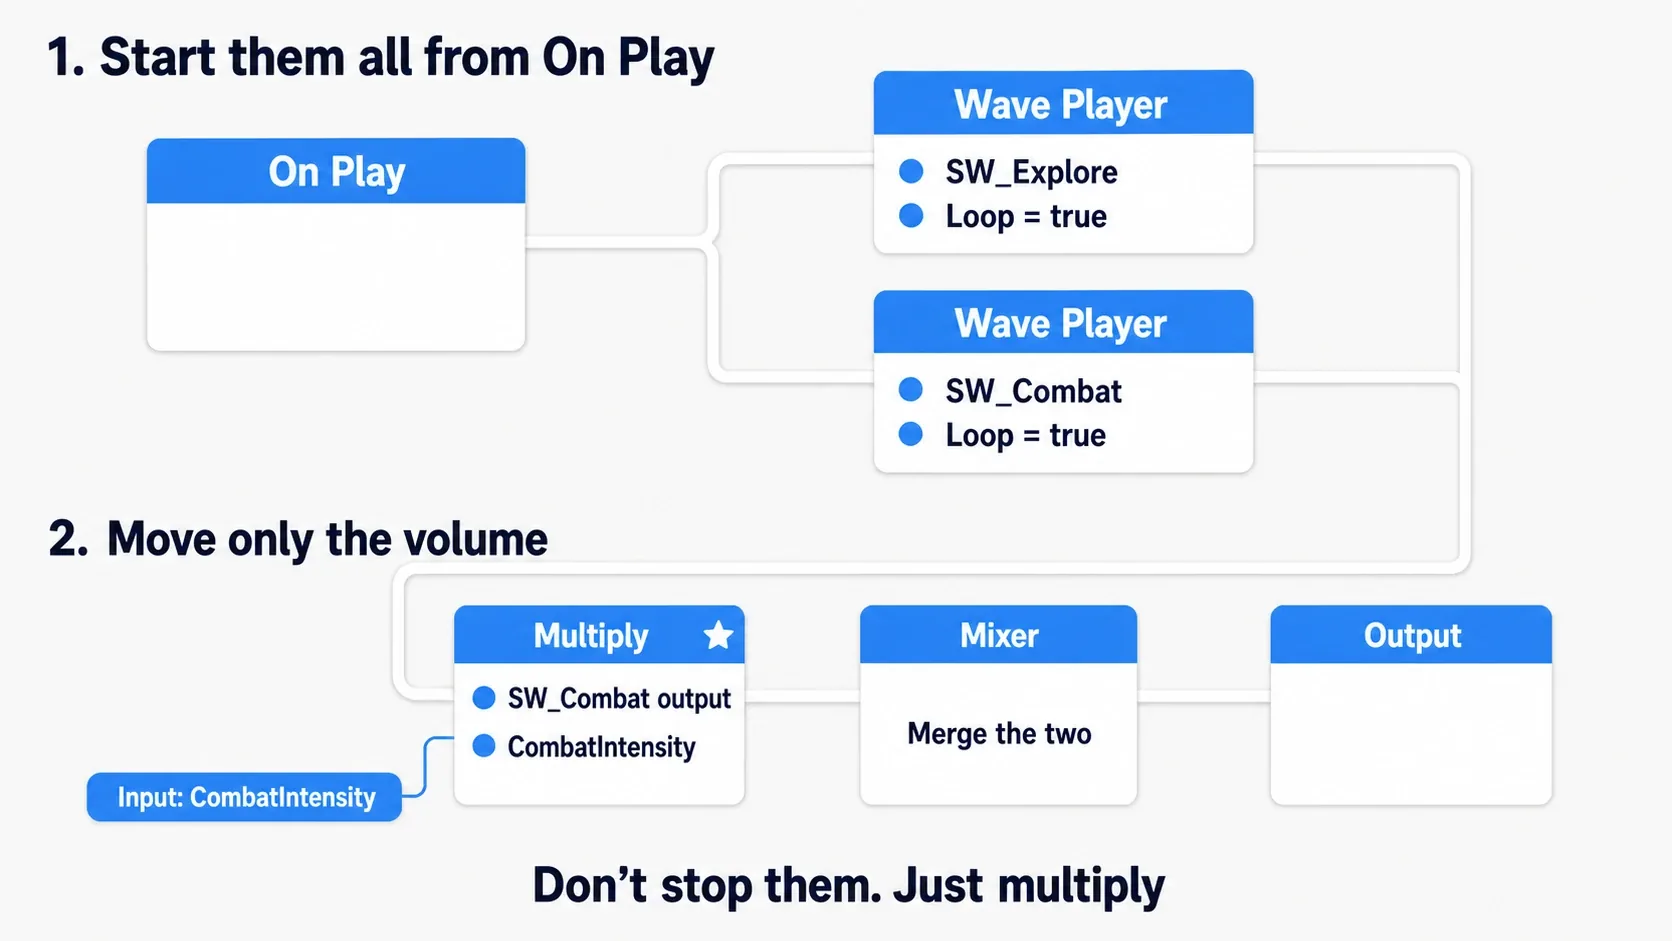
The structure is simple.
| Part | Role |
|---|---|
| On Play (built into MetaSound Source) | The start signal. Fans out to every Wave Player |
| Wave Player (one per layer) | Plays each track simultaneously |
| Multiply (per layer) | Multiplies that layer's volume (0.0–1.0) |
| Mixer | Merges all layers |
| Input (Float) | Receives combat intensity from outside |
The first thing to wire is On Play. A MetaSound Source has an On Play Trigger output, and Wave Player has a Play Trigger input. Without connecting those two, the Wave Player never makes a sound.
And branch that one On Play out to every Wave Player. Not one at a time from different places — fan out from the same On Play. That's what keeps them in sync.
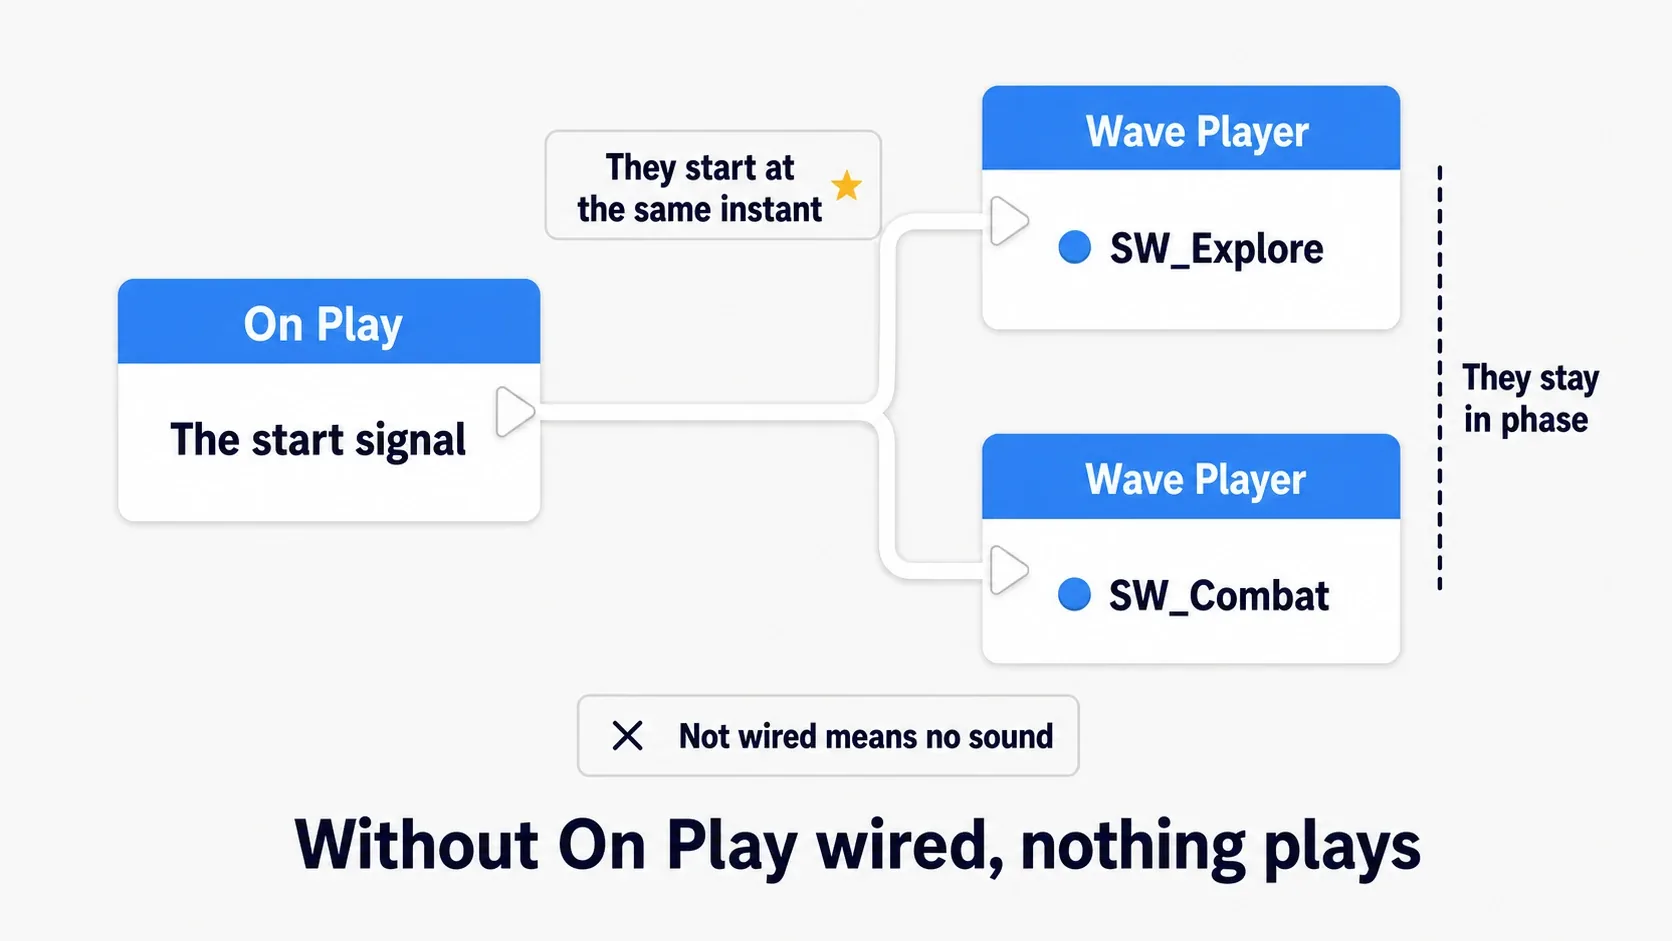
The key is that every Wave Player starts together and never stops. A layer you don't want heard just gets 0.0 multiplied into it. It's still playing.
That's what keeps them in phase. If instead you "start the drums when combat begins," they start mid-song and the beat won't line up. Start everything, move only the volume. That's the core of the approach.
Turn Loop on for every Wave Player. With identical file lengths, they stay aligned forever.
Volume via multiplication. The value feeding
Multiplyruns0.0(silent) to1.0(full). Snapping between0and1produces an audible click, so move it smoothly from Blueprint (next section).
Pushing a Value from Blueprint
Add an Input to the MetaSound (Float, named something like CombatIntensity) and you can push values in from outside.
The node is Set Float Parameter, called on the playing Audio Component.
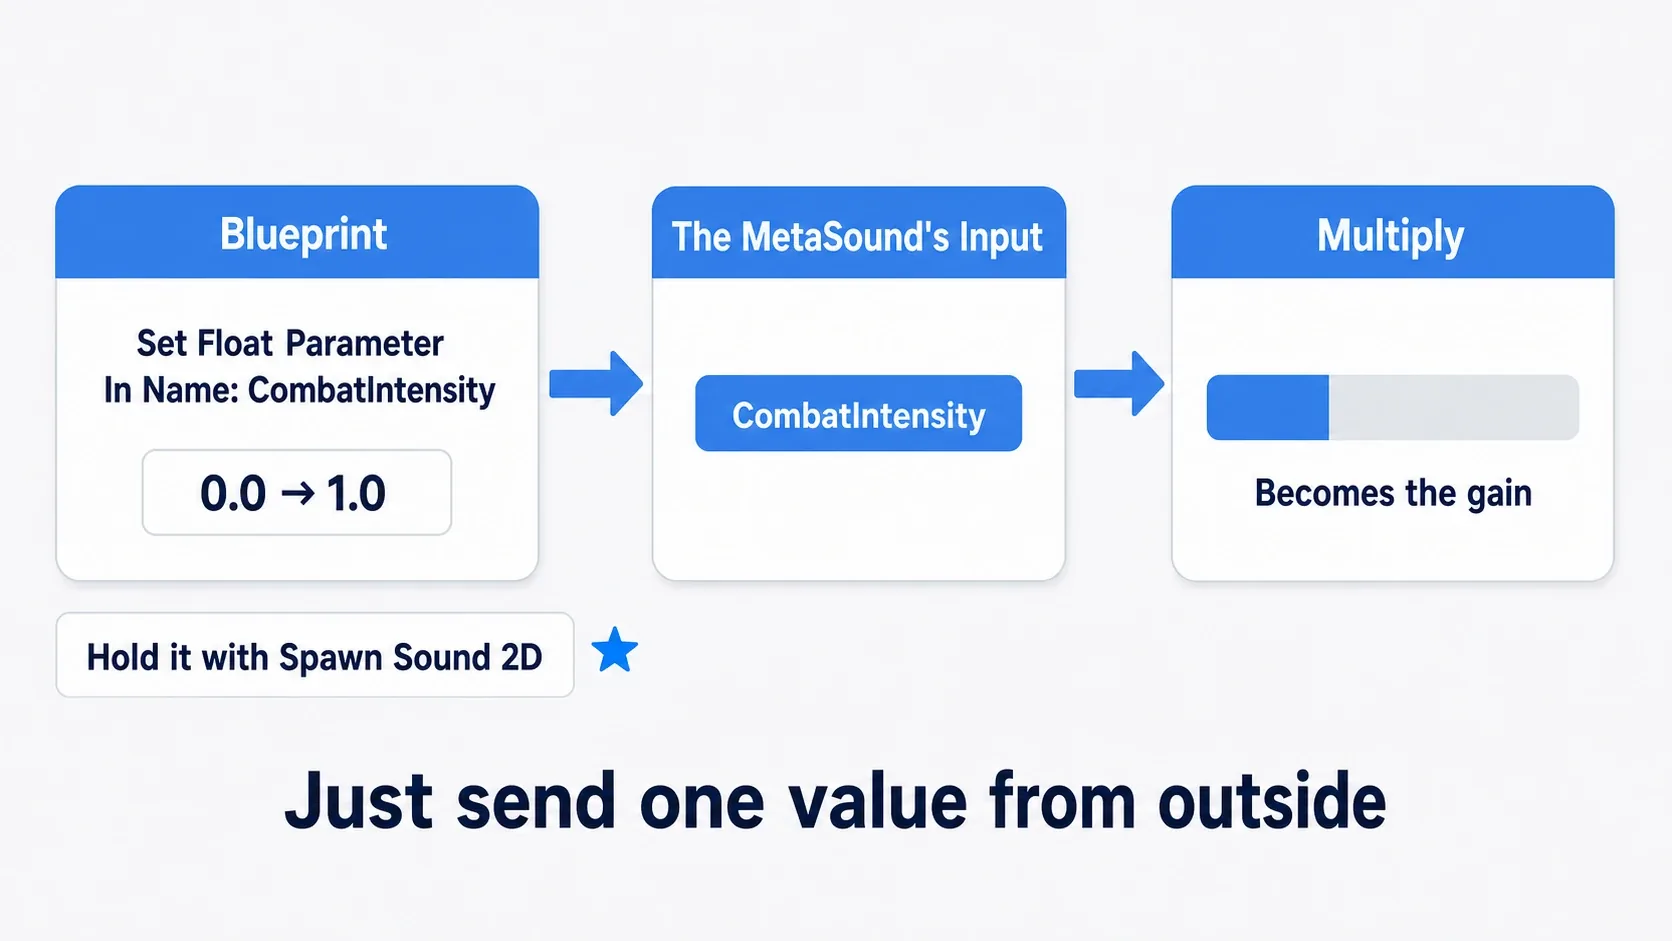
| Pin | What goes in |
|---|---|
| Target | The Audio Component playing the music |
| In Name | The Input's name on the MetaSound side (CombatIntensity) |
| Float | The value to send (0.0–1.0) |
What matters here is holding the music as an Audio Component. A fire-and-forget node like Play Sound 2D leaves nothing to send values to (→ 3D Sound and Mixing).
- ❌
Play Sound 2D— no return value, so nothing to operate on later - ⭕
Spawn Sound 2D— returns an Audio Component you can store in a variable
And interpolate the value rather than snapping it. Jumping from 0.0 to 1.0 in a frame makes the drums appear out of nowhere. Running it through FInterp To gives you tension that creeps in, which is the satisfying version (→ Rotation and Interpolation Basics).
Interp Speedis not a duration.FInterp Tocloses in based on the distance to the target, so it slows as it approaches and never strictly arrives. That means you can't specify "switches over in N seconds." What you're setting here is how the change feels. If you have a hard requirement like "fully switch two seconds after combat starts," use something that lets you state the time explicitly, like a Timeline node.
Hands-On: The Combat Layer Enters
The moment a stealth game spots you, the moment a horror game's chase begins, the moment you cross into an ARPG boss room. "The situation changes and the music thickens" lands in any genre. We'll build the minimum two-layer version.
What you need
| Item | Details |
|---|---|
| Audio | Two loops at the same tempo and length: SW_Explore (pads) and SW_Combat (drums) |
| MetaSound | MS_BattleMusic |
| Enemy | The BP_Guard from AI Perception, firing events on detection |
| Where the music lives | The player Blueprint (or GameState) |
Two variables:
| Variable | Type | Default | Purpose |
|---|---|---|---|
MusicComponent | Audio Component | (none) | Holds the playing music |
TargetIntensity | Float | 0.0 | The combat intensity to aim for |
① Build the MetaSound
- Create
MS_BattleMusic - Place two
Wave Players withSW_ExploreandSW_Combat.Loopon for both - Branch
On Playinto bothWave Players'Playinputs (forget this and you get silence and no clue why) - Add one
Input: type Float, nameCombatIntensity, default0.0 - Run the
SW_CombatWave Player's output through aMultiply, withCombatIntensityon the other input - Merge
SW_Explore's output and step 5's output in aMixer, then intoOutput
Now CombatIntensity at 0.0 gives you the exploration layer alone; 1.0 gives you both. Audition it in the MetaSound editor and confirm the exploration layer plays before moving on.
② Play it and send values from Blueprint
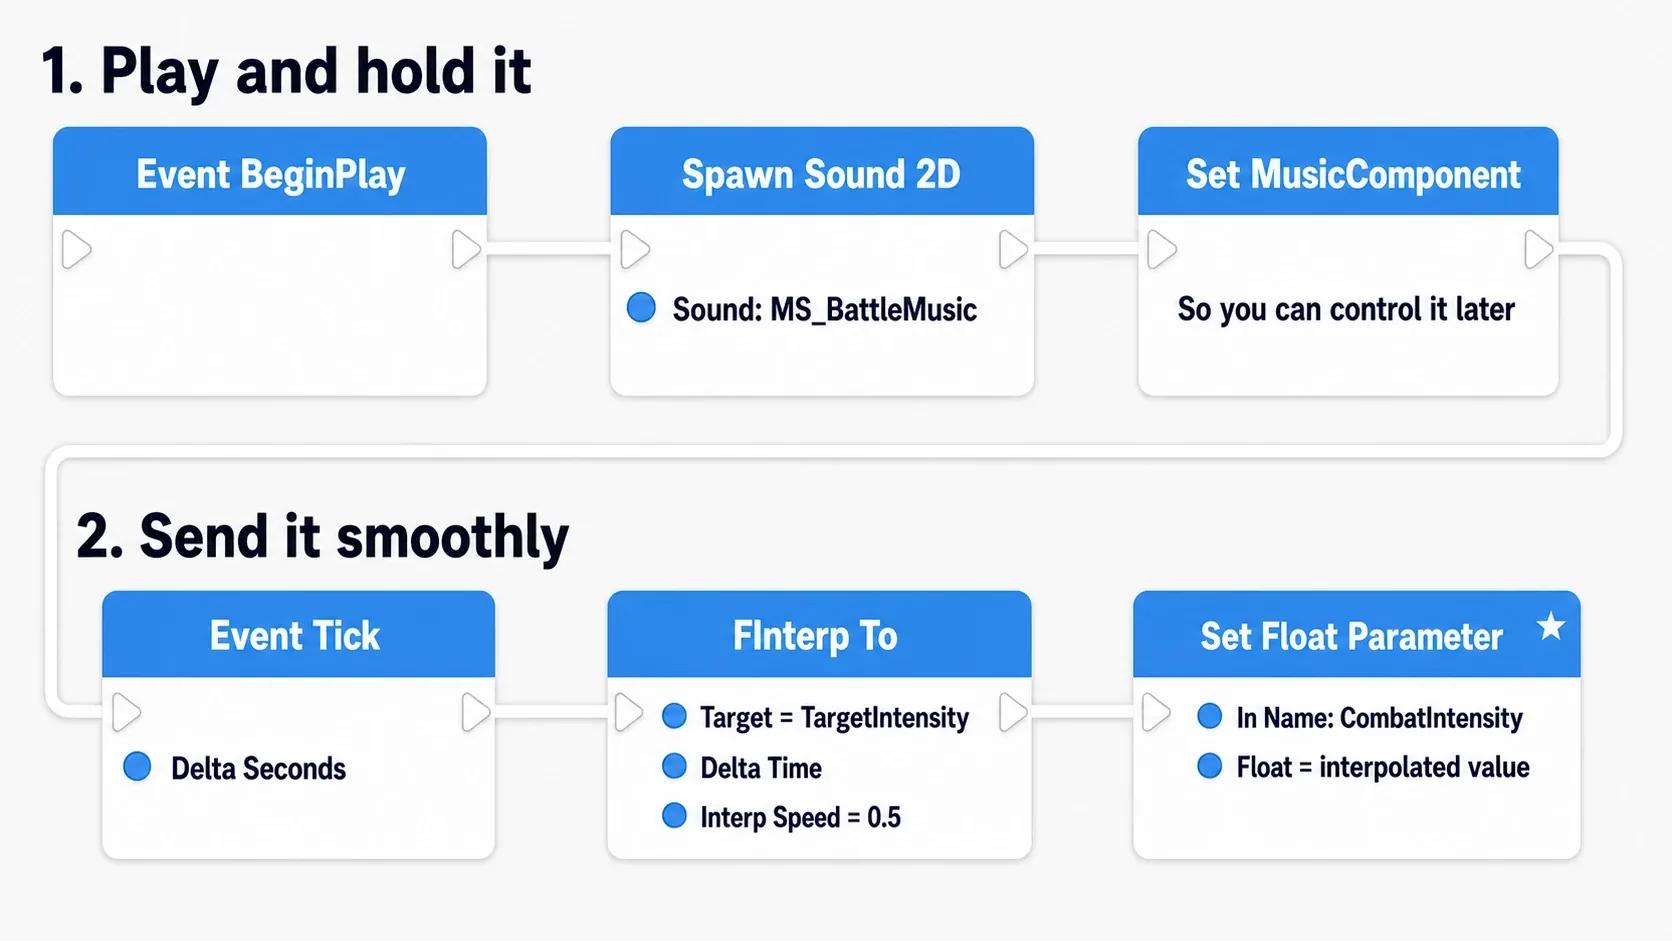
BP_Player (Event Graph)
Event BeginPlay
  → comp = SpawnSound2D(Sound = MS_BattleMusic)
  → Set MusicComponent = comp

Event Tick (Delta Seconds)
  → newValue = FInterpTo(
        Current     = CurrentIntensity,
        Target      = TargetIntensity,
        DeltaTime   = Delta Seconds,
        InterpSpeed = 0.5)          // a closing rate, not a duration
  → Set CurrentIntensity = newValue
  → MusicComponent.SetFloatParameter(
        InName = "CombatIntensity",
        Float  = newValue)

// Called by the enemy
OnDetected  → Set TargetIntensity = 1.0
OnLostSight → Set TargetIntensity = 0.0
Call OnDetected and OnLostSight from BP_Guard's On Target Perception Updated.
Checking it
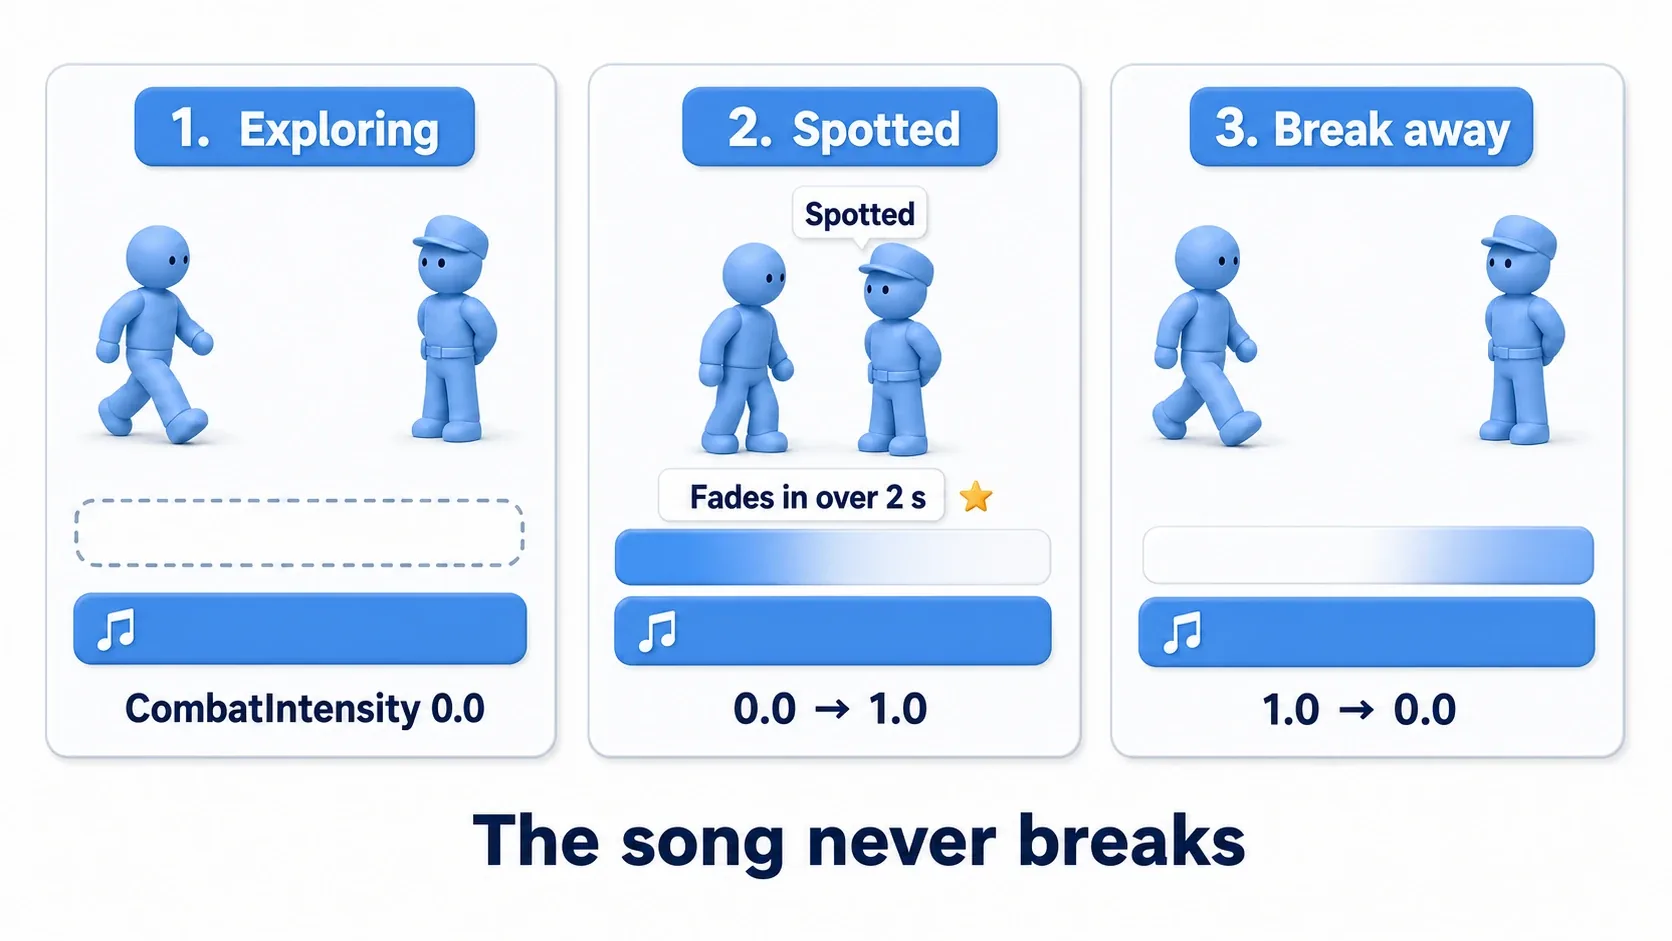
Hit Play and you get quiet pads alone. Step into the guard's view and drums stack in over a second or two. The song never breaks; the tempo and the beat never move.
Break away and lose the guard, and the drums recede at the same rate. The pads have played continuously the entire time.
Try raising InterpSpeed from 0.5 to 3.0. The shift gets sharp and urgent. Drop it to 0.2 and it changes so gradually you barely register the tension. That one number defines the character of the effect.
Troubleshooting:
- No sound at all → You didn't wire
On Playinto theWave Players'Playinputs. By far the most common cause. Audition in the MetaSound editor to isolate it - The drums play from the start → The
Input's default isn't0.0, or theMultiplyis wired to the wrong output - It drifts after a few loops → The two files aren't the same length. Re-export them
- Sending values changes nothing → You played with
Play Sound 2Dand have no Audio Component, orIn Namedoesn't match the MetaSound'sInputname - You hear a click at the switch → You're sending
0and1directly without interpolating
Two things to take away.
- Never stop a layer: inaudible layers keep playing. That's the only way to keep them in phase — "start it when needed" guarantees the beat won't line up
- Always interpolate the value: not a
0/1switch, butFInterp To. That gap is what makes the music feel responsive.Interp Speedis a feel, not a duration, so set it by ear
Final balance — music against effects, the volume sliders in your options screen — belongs to Submixes and Mixing.
Bonus: Good to Know for Later
Keep it to three or four layers. Silent layers still cost playback. Ten layers costs ten tracks' worth. In practice, exploration, drums, and tension is enough for a lot of expression.
Sound Cue can do a simple version. Before MetaSounds, this was done with Crossfade by Param and friends in Sound Cue. MetaSounds is the natural choice for new work, but there's no need to force a migration if an existing project is already built on Sound Cues (→ Sound Cue vs. Sound Wave).
When you do want horizontal transitions. For "the boss fight has a completely different song," you need to change the song itself. MetaSounds can fire logic on musical divisions, so you build it as "wait for the top of the next bar, then switch." Expect the composition side to need transition material too.
It doesn't have to be 0 or 1. CombatIntensity is continuous, so you can send 0.3 or 0.7 based on distance to the enemy. "The closer they get, the thicker the music" costs one variable. Pairing it with a stealth game's alert meter works especially well.
Summary
- Hold your soundtrack as layers, not one finished song
- Start with vertical layering. Horizontal transitions are a large jump in difficulty
- Export audio at the same tempo and the same length. Everything collapses if that slips
- In MetaSounds, keep every layer playing and move only the
Multiplygain - On the MetaSound side, wire
On Playinto everyWave Player'sPlay(forget it and you get silence) - From Blueprint:
Spawn Sound 2Dto hold it, thenSet Float Parameter, with the value interpolated (Interp Speedis not a duration)
Mechanically it's "multiply by a gain," but the experience changes dramatically. What event in your game should thicken the music?