You've built out your models and your lighting, and yet the image just doesn't come together. It never quite looks like the examples. This is where Post Process Volume comes in. Like developing a photograph, it handles the final pass over the finished image.
There are two things beginners reliably trip over: placing one and seeing no effect, and dark areas brightening on their own. This article covers both fixes, the order to build color in, and how to make the air change when you walk into a cave.
What You'll Learn
- Nothing happens because the camera is outside the volume (Unbound)
- Dark areas brighten because of auto exposure, and there's a way to stop it
- Build color in this order: exposure → contrast → temperature → saturation
- Per-area switching comes from Priority and Blend Radius
- Hands-on: making the air change when you enter a cave
Post Processing Is "Developing the Photo"
Post processing means applying effects to the finished image after everything has been rendered.
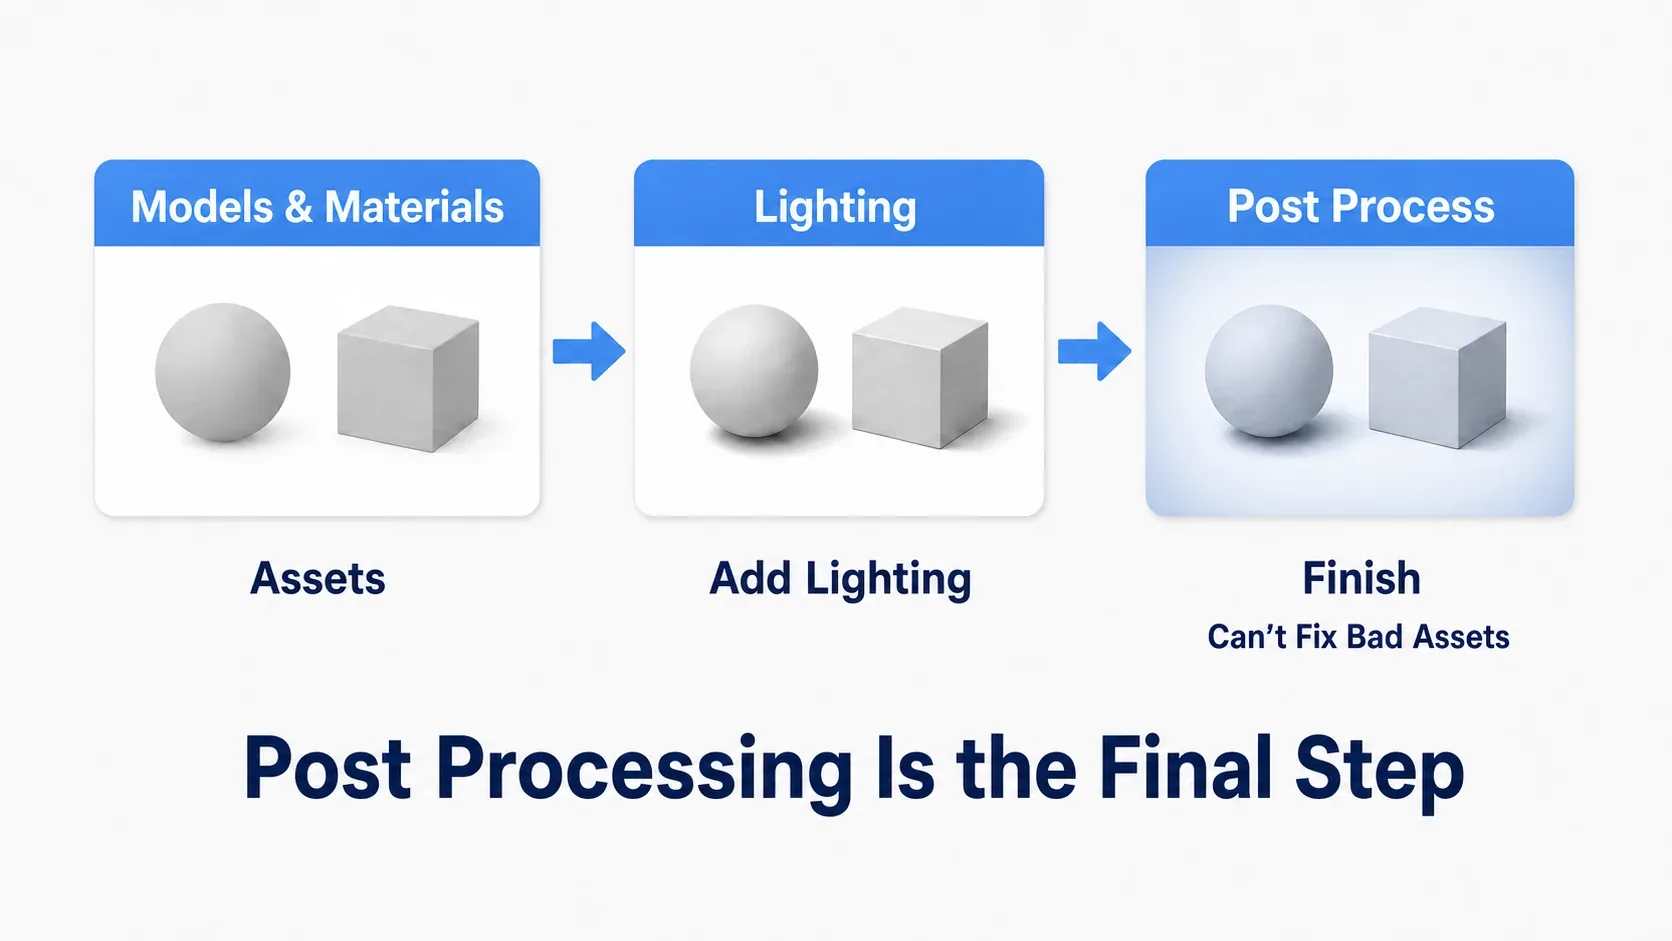
In cooking terms, models and lighting are the ingredients and the cooking, while post processing is plating and final seasoning. Order matters, and post processing cannot rescue bad ingredients.
So everything in this article pays off once your lighting is reasonably built. No amount of color adjustment will brighten a pitch-black scene.
Division of labor with Lumen: In UE5, Lumen computes light bounces and reflections. How things physically light up is lighting and Lumen; how the final image reads is post processing. Keep that line in mind and you'll know which one to reach for.
Pitfall 1: Nothing Happens
You drop a Post Process Volume into the level from Place Actors and start changing settings. Still nothing. Almost everyone stalls here first.
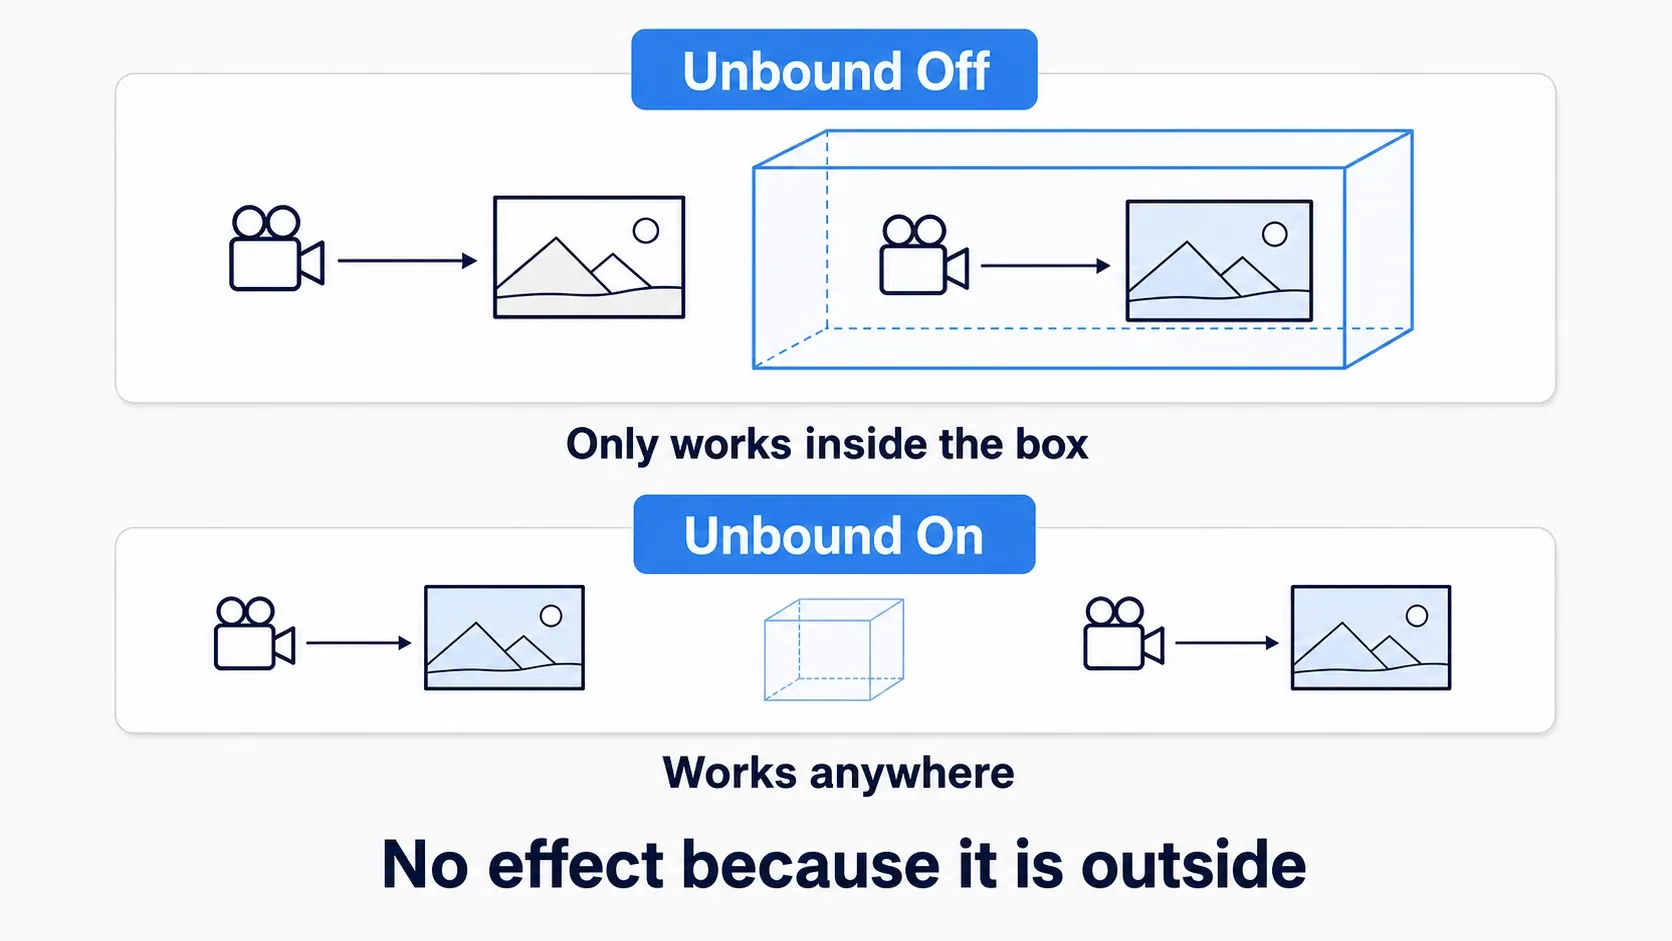
The reason is simple: a Post Process Volume only applies while the camera is inside its box. Put a small box in a corner of the level and nothing happens unless the player walks into it.
To affect the whole scene, enable Infinite Extent (Unbound) in the Details panel (typing unbound in the search box is the fast way). Now it applies constantly, regardless of the box's position or size.
Here's how to split the two.
| Type | Unbound | Purpose |
|---|---|---|
| Base volume | On | The game's baseline look. Place one |
| Local volume | Off | Effects for a cave, underwater, or one specific room |
Start by placing a single Unbound base volume.
Pitfall 2: It Brightens on Its Own
This is the next one you'll meet. You walk into a dark cave, and after a few seconds the screen brightens and ruins the darkness you were going for.
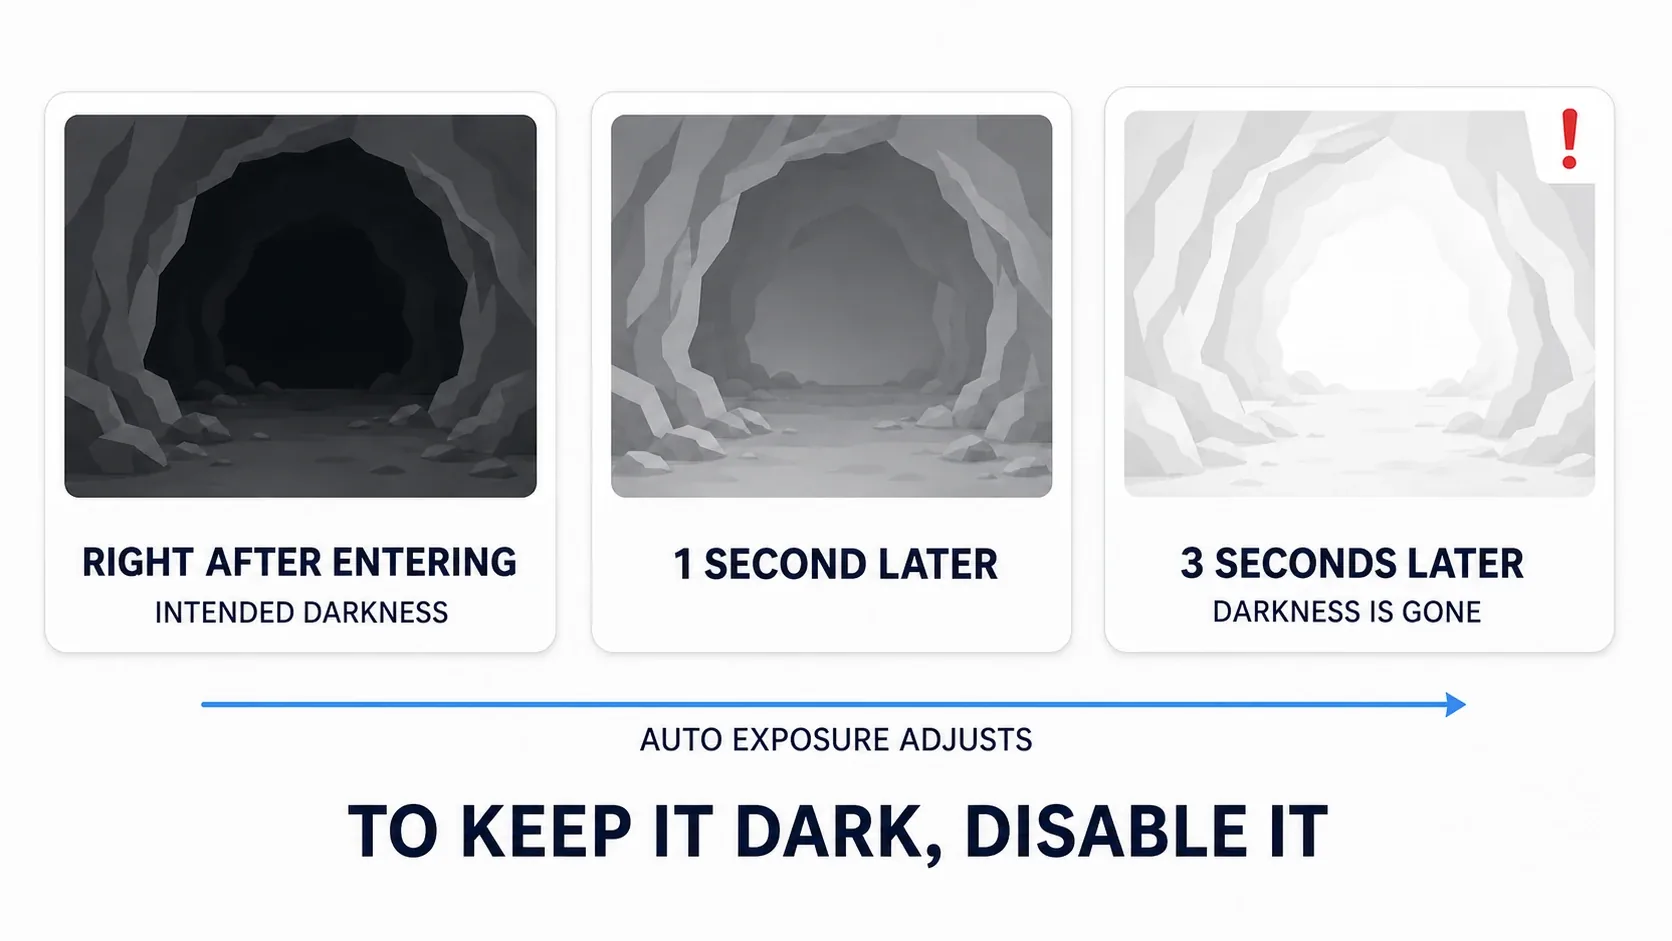
This isn't a bug, it's auto exposure. Just like a human eye adjusting to darkness, UE watches screen brightness and adjusts exposure automatically.
It's realistic, but it gets in the way when you want darkness as a deliberate effect. There are two ways to stop it.
Option 1: Narrow the range and lock it
Under the Exposure category, set Min EV100 and Max EV100 to the same value. With no room to adjust, brightness is locked.
Option 2: Set Metering Mode to Manual
Full manual control. In this case brightness comes from things like the camera's Exposure Compensation.
Option 1 is enough to start with. Hard-coding a single brightness for the whole game leaves you unable to tune outdoors versus indoors separately. Narrowing the range is easier to work with, and you can widen it again later.
Even if you keep auto exposure, adjusting Speed Up / Speed Down (the adaptation rate) softens how abruptly it switches.
The Order to Build Color In
There are a huge number of settings, but fixing the order you touch them keeps you oriented.
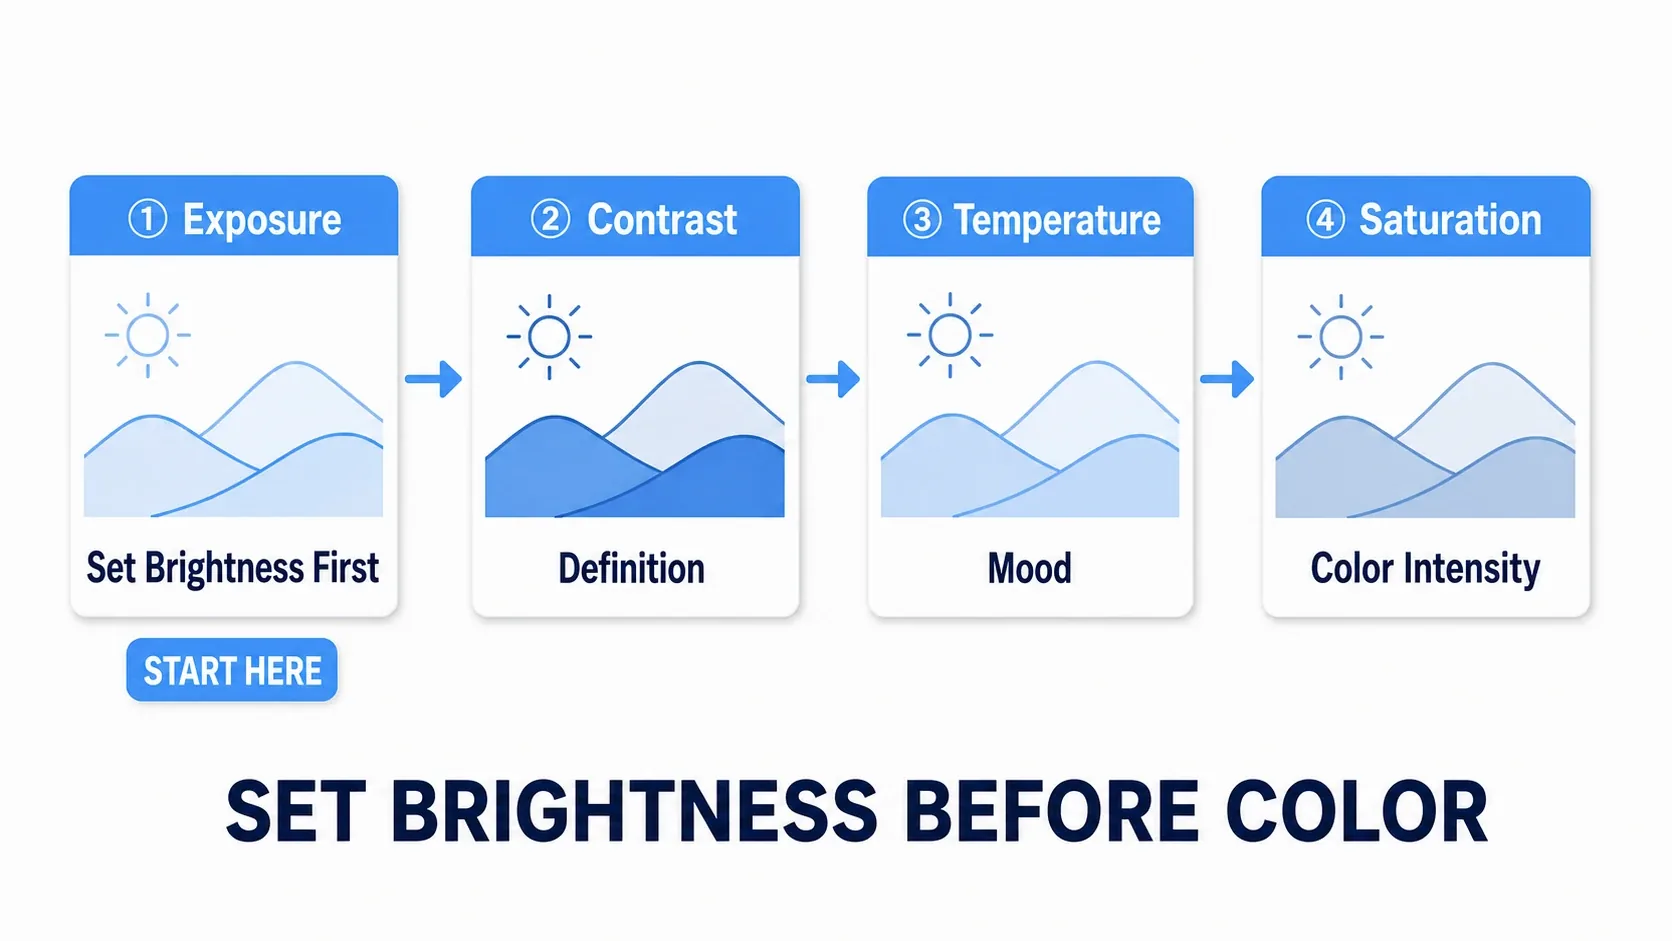
| Order | Setting | Location | Effect |
|---|---|---|---|
| ① | Exposure | Exposure | Decide overall brightness first |
| ② | Contrast | Color Grading → Global | Punch. Start around 1.0 → 1.1 |
| ③ | Temperature | Color Grading → Temperature | Warm or cool. The biggest lever on mood |
| ④ | Saturation | Color Grading → Global | Lower for a muted look, raise for vivid |
Deciding brightness first is what matters. Grade color before exposure is settled and changing brightness later will shift the color impression too, sending you back to the start.
Here are a few starting points for mood.
| Mood You Want | Adjustment |
|---|---|
| Warm, nostalgic | Push Temperature warm / drop Saturation slightly |
| Cold, uneasy | Push Temperature cool / raise Contrast |
| Faded, decayed | Drop Saturation a lot / lower Contrast slightly |
To finish, adding Vignette (darkening the screen edges) very slightly pulls the eye toward the center and tightens the image. Same with Bloom (light glow): push it hard and things instantly look cheap, so keep it restrained.
Always tick the checkbox before adjusting. Without the checkbox on the left of each setting enabled, changing the value does nothing. When "I'm moving it and nothing changes," check there first.
Hands-On: The Air Changes When You Enter a Cave
A horror game basement, an RPG dungeon, an underwater adventure section. "The mood shifts when you enter a specific area" is directly tied to immersion. Here we'll build a smooth shift in color and brightness when moving from outdoors into a cave.
Setup: prepare a level with a bright outdoor area and a dark cave (or an enclosed room). A space walled off with Cubes is fine.
| Type | Name | Settings |
|---|---|---|
| Post Process Volume | PPV_Base | Unbound on / Priority = 0 |
| Post Process Volume | PPV_Cave | Unbound off / Priority = 1 / sized to cover the cave |
Step 1: Build the base. Place PPV_Base and enable Infinite Extent (Unbound). This is where the game's baseline color is decided.
| Setting | Value |
|---|---|
| Exposure → Min EV100 / Max EV100 | Both 1.0 (locked, so dark areas don't get lifted) |
| Color Grading → Global → Contrast | 1.05 |
| Color Grading → Temperature → Temp | 6500 (fairly neutral) |
Hit Play and confirm the outdoor area displays at the brightness you intended. If moving somewhere dark doesn't brighten the image, the exposure lock worked.
Step 2: Place the cave volume. Put PPV_Cave inside the cave and scale it to enclose the cave space. Leave Infinite Extent (Unbound) off and set Priority to 1.
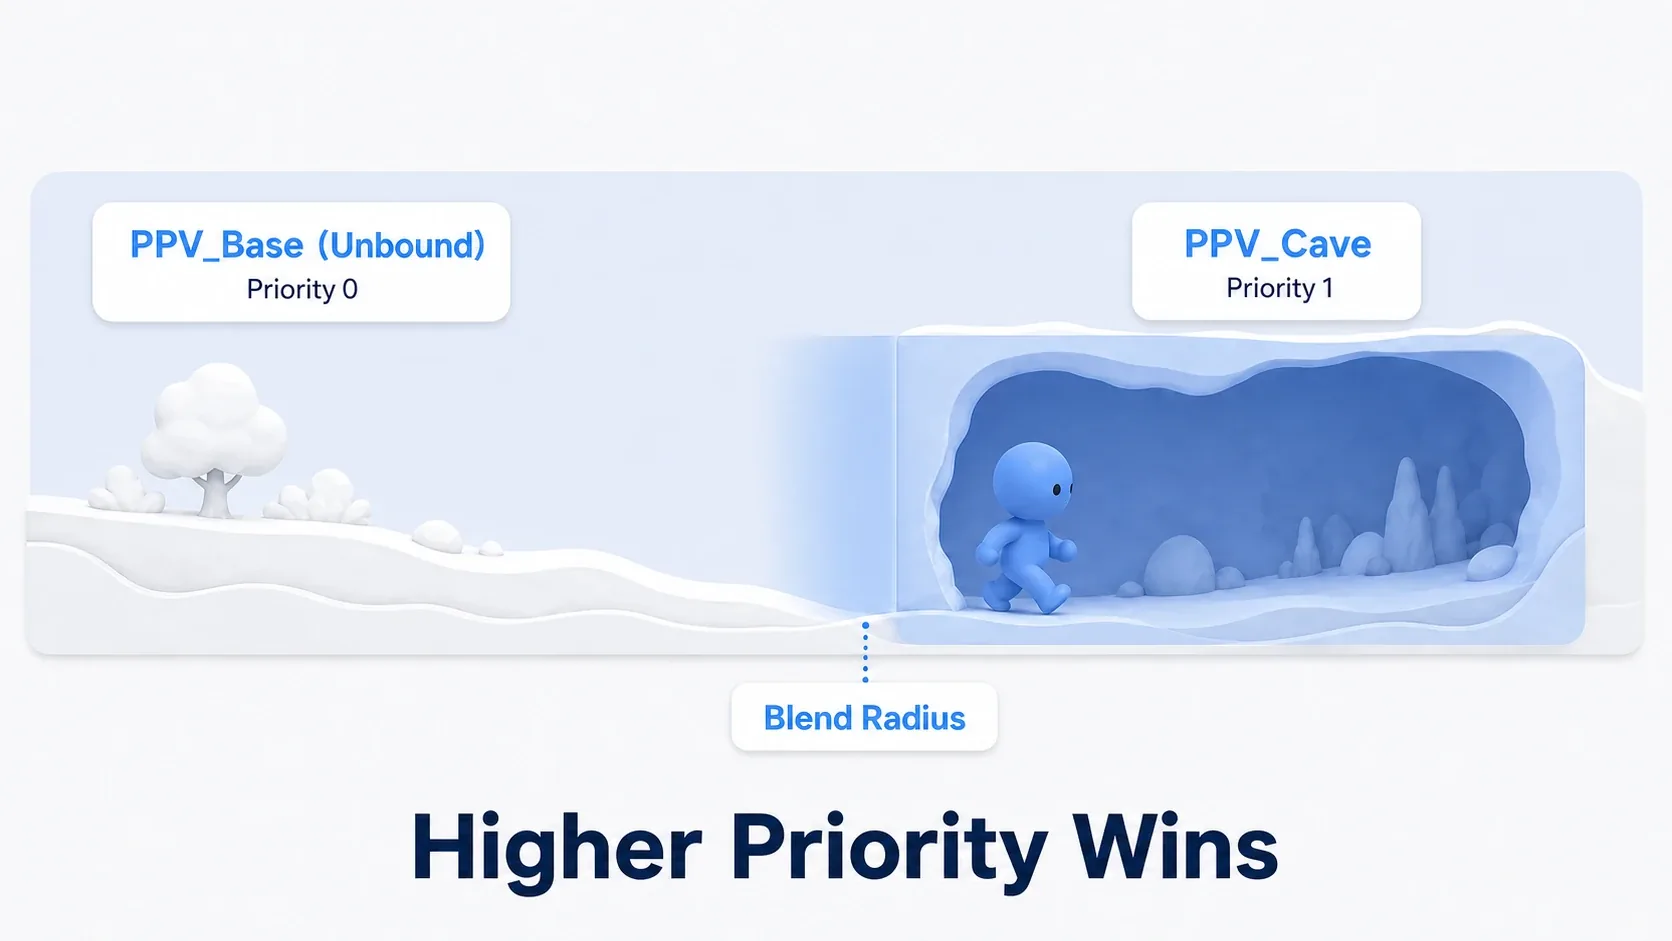
Higher Priority wins. The base is 0 and the cave is 1, so the cave's settings take over while you're inside it.
Step 3: Build the cave's color. Give PPV_Cave settings different from outdoors.
| Setting | Value | Intent |
|---|---|---|
| Exposure → Min/Max EV100 | Both 1.0 (same as the base) | Keep exposure pinned, don't let it drift |
| Exposure → Exposure Compensation | -1.0 | Darker than outdoors |
| Color Grading → Temperature → Temp | 4500 | Cold, bluish air |
| Color Grading → Global → Saturation | 0.8 | Desaturated and gloomy |
| Lens → Vignette → Intensity | 0.6 | The pressure of a narrowed field of view |
Don't lower EV100 when you want things darker.
Min/Max EV100sets which scene brightness the exposure adapts to, so lowering it makes the image brighter (it's adapting your eyes to a darker scene). "I want it darker, so -1.0" does the opposite. Keep exposure pinned and pushExposure Compensationnegative instead — it's the straightforward route, and the sign points the way you'd expect.
Step 4: Smooth the boundary. This is the finishing touch. As it stands, crossing the cave entrance makes the image snap over instantly, which feels wrong.
In PPV_Cave's Details panel, set Blend Radius to around 200.0. Now the effect blends gradually across 200 units from the volume boundary.
Blend Weight is the overall strength of the volume (1.0 means full effect), so leave that at 1.0.
Hit Play and walk slowly from outdoors into the cave. The image should darken and cool bit by bit as you approach the entrance, fully switched over once you're inside. Confirm that and you're done.
If something's off, here's how to narrow it down.
- Nothing changes inside the cave →
PPV_Cave'sPriorityis at or below the base, or the volume doesn't contain the camera - The cave look applies outdoors too →
PPV_CavehasInfinite Extent (Unbound)enabled - It snaps at the boundary →
Blend Radiusis 0 - You darkened it but it brightens back → Exposure's Min/Max aren't matched
- Changing values does nothing → The checkbox to the left of the setting isn't ticked
Two things to take away.
- One base plus several locals is the standard structure: Decide the overall color with an Unbound volume and layer only the special places on top. With that shape, "I want everything a bit warmer" is one edit to the base
- It only becomes an effect once you add Blend Radius: An instant switch reads as "a setting got applied." Changing gradually is what makes it feel like the air changed
If you want to change the light itself rather than the screen's color, that's a job for light settings and Lumen. To change the look per material, see Material Basics.
Bonus: Good to Know for Later
Don't enable effects you aren't using. Every post process setting you enable costs rendering time. Depth of Field and Motion Blur in particular are on the expensive side, so think about whether you actually need them before turning them on.
Cameras have the same settings. Camera Components and Cine Camera Actors have Post Process Settings that apply while that camera is shooting. That's handy for "change the color for this one shot." In terms of ordering, camera settings apply after volumes.
Use Show → Post Processing to compare. Turning post processing off from the viewport's Show menu shows you the raw state. It's useful for checking whether you've overdone it, since things tend to creep louder the longer you work.
You can drive it dynamically from Blueprint. Effects like a red flash on taking damage can be built by holding the Post Process Volume in a variable and changing values with nodes like Set Scalar Parameter Value. For anything complex, though, registering a dedicated material under Post Process Materials is the better fit.
Summary
Post Process Volume trouble comes down to these three.
| Symptom | Cause | Fix |
|---|---|---|
| No effect at all | The camera is outside the volume | Enable Infinite Extent (Unbound) |
| Changing values does nothing | The setting's checkbox is off | Tick the checkbox left of each setting |
| Dark areas brighten on their own | Auto exposure | Set Min/Max EV100 to the same value |
And one structural rule: place one Unbound base and layer locals only where you need something special. With that shape, global tuning and per-area effects never break each other.
In your game, do dark places stay dark?