You blended walking and running with a state machine and got movement working, more or less. But it's far from that smooth movement in AAA titles, where feet plant on a sharp stop and the body leans on a turn . Preparing hundreds of motions yourself and building transitions isn't realistic in solo development.
The UE5-generation answer is Motion Matching . And happily, using Epic's official Game Animation Sample (GASP) , you can bring a movement set of over 500 motions into your game without fully understanding the theory . This article covers, from Motion Matching's thinking to getting GASP and walking your own character, leaning toward "using" over "making".
Motion Matching became Production-Ready in UE5.4, and GASP is published on Fab for UE5.4 and later. Both have kept receiving updates in later versions, so check the supported version shown on Fab when you grab it.
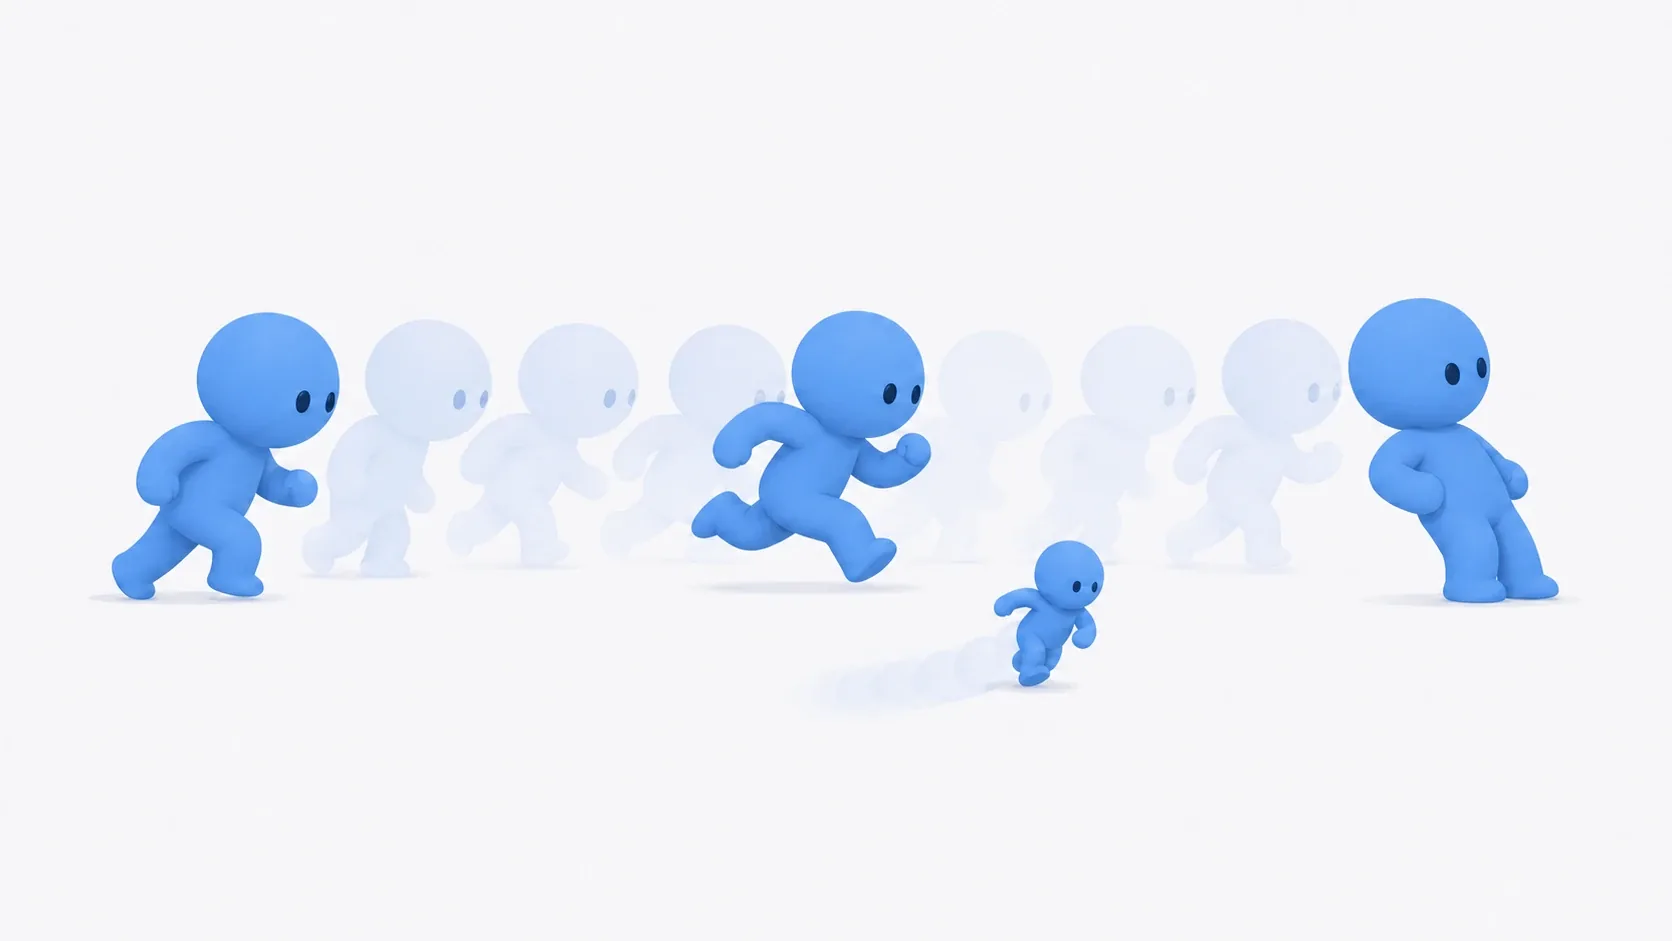
What You'll Learn
- What Motion Matching is: search the best moment from many motions each frame
- The roles of the parts (Pose Search Database, Chooser, Motion Matching node)
- Getting and touring the Game Animation Sample (GASP)
- Swapping in your own character via retargeting
- The division with State Machine
- Hands-on: put your own character into GASP and try walking, running, sharp stops
What Motion Matching Is
Motion Matching's thinking is fundamentally different from a state machine. This is the starting point.
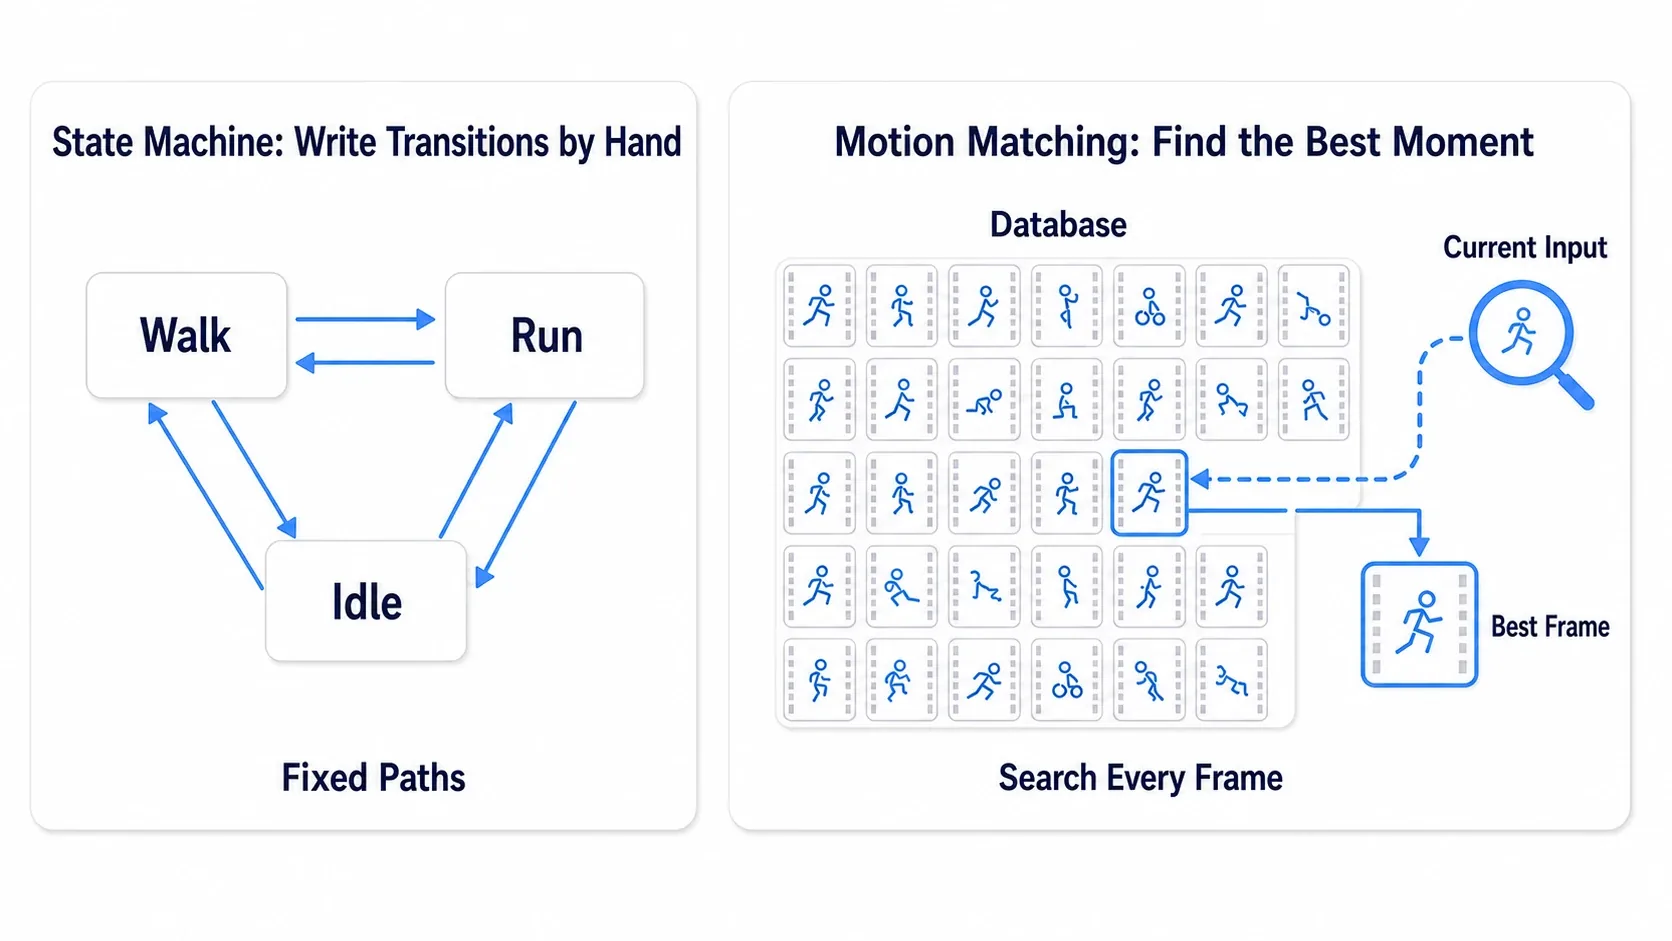
- State Machine (write transitions): make states like "walk", "run", "stop", and build the transitions between them by hand. Movement is decided by the number of states you prepared
- Motion Matching (search the best moment): gather many motions into a single database , and each frame, search for and play the moment that best fits the current input and posture from within it
So where State Machine "decides the routes in advance", Motion Matching "picks out the most natural movement for that moment from many candidates". That's why the movement in the gaps between states, like sharp stops, turns, and starts, becomes astonishingly smooth . It's a mechanism that offloads the complexity you can't write out by hand to a search from a database.
The Roles of the Parts
Get down just the roles of the parts that support Motion Matching. You don't need to go deep, just to understand "what does what".
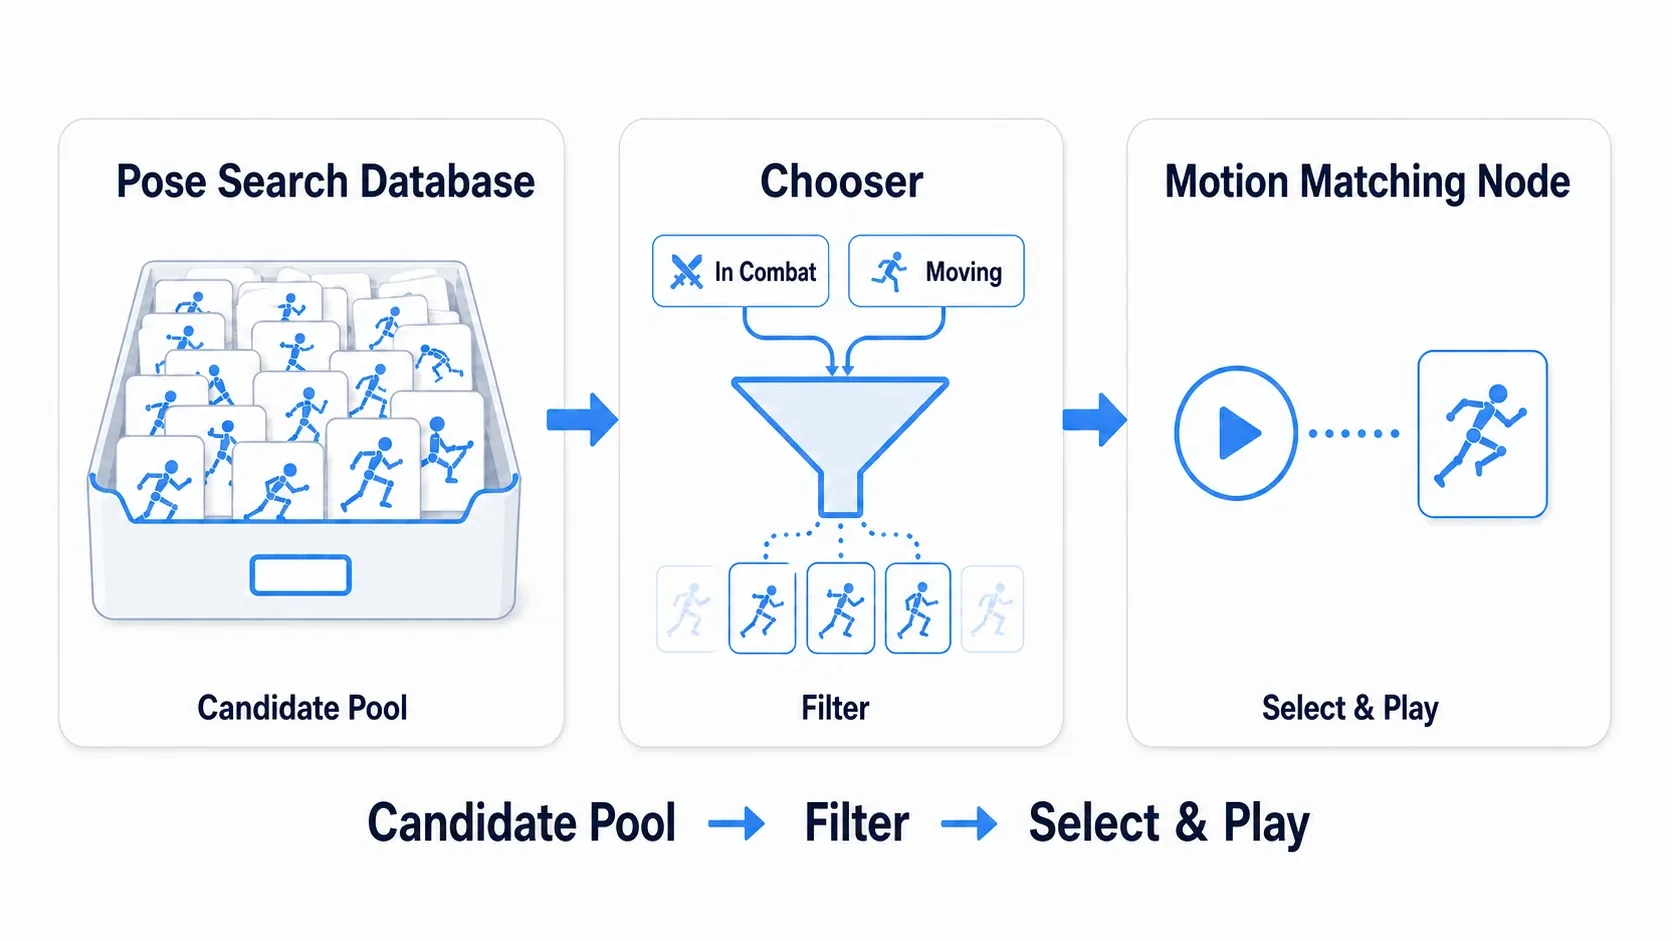
- Pose Search Database: a collection of candidates that gathers many motions in a searchable form
- Chooser: narrows down which database to use according to the situation, like "now in combat" or "now moving"
- Motion Matching node: the central node that actually picks and plays the moment that best fits now , each frame
The flow is "the Chooser narrows candidates fitting the situation, and the Motion Matching node searches within them for the best moment and plays it". In GASP, these are set up from the start. So the big advantage is that you can start from a working state without building the mechanism from scratch .
Getting the Game Animation Sample
If you're going to "use" Motion Matching, Epic's official Game Animation Sample (GASP) is the shortest path. It's a free sample project with over 500 motions and the Motion Matching mechanism set up from the start.
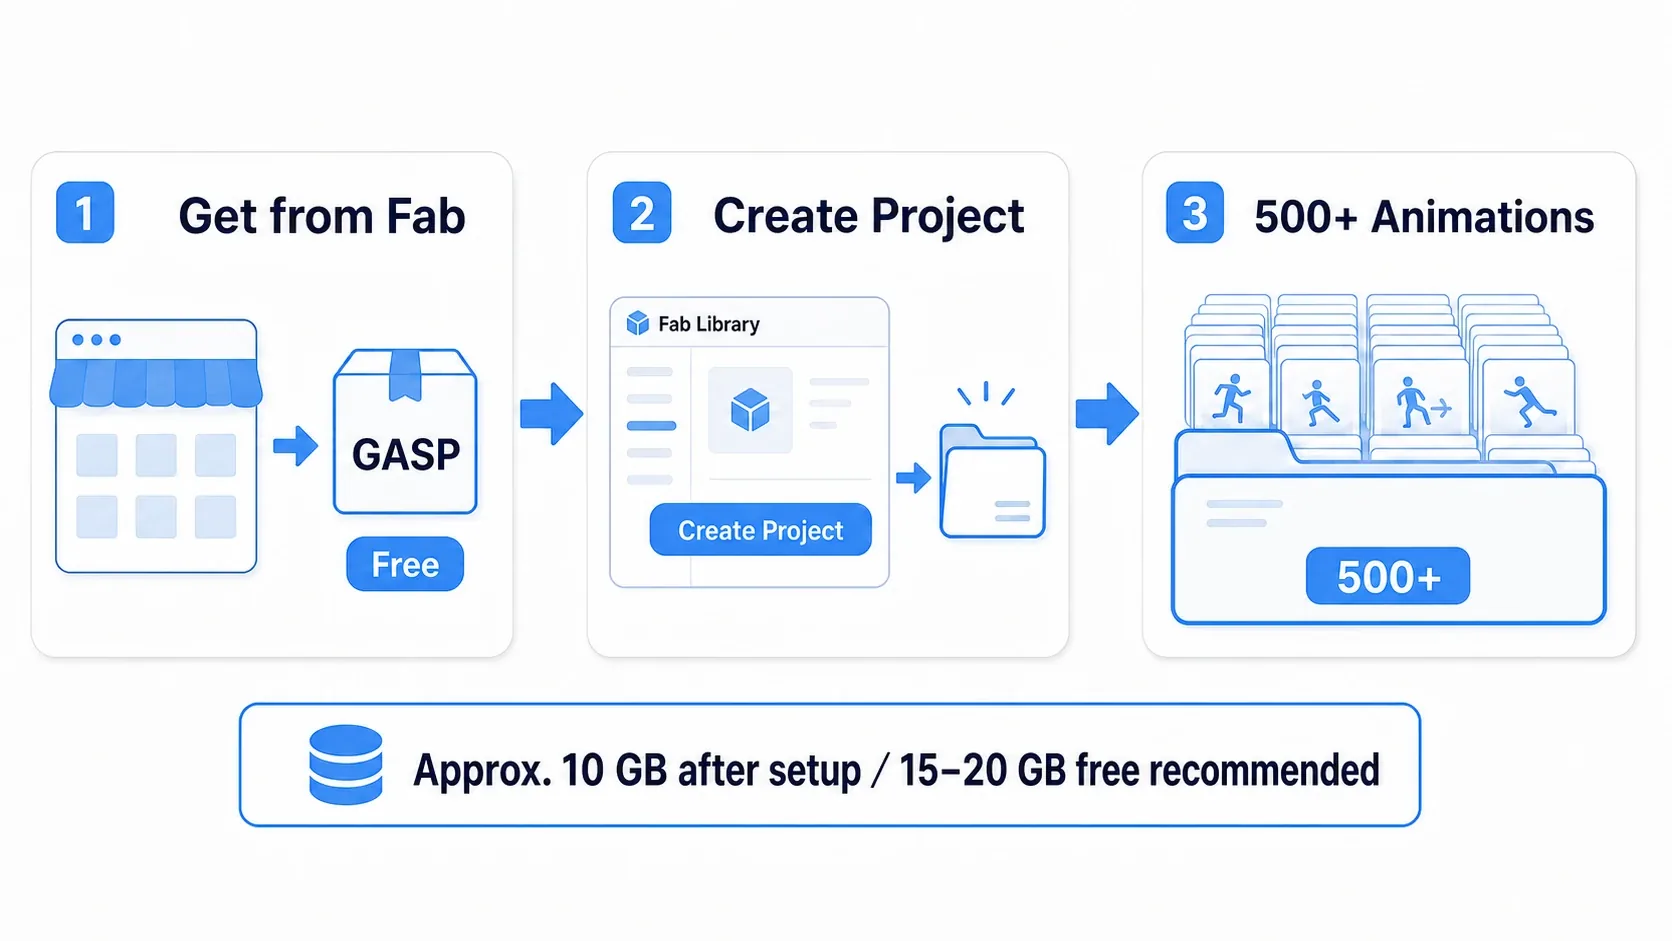
Getting it goes like this.
- Get on Fab: get the Game Animation Sample for free on Fab
- Create with Create Project: choose Create Project from the Fab Library and create it as a new project with GASP in it
- Look at the contents: open the project and you can actually run the smoothly-moving character in a demo level to check
What to be careful about here is the size . Because GASP includes over 500 motions, it's around 10GB after creation. Budgeting about 15-20GB of free space for download and creation is reassuring (check the Fab display for exact figures). Opening this GASP project first and feeling "do I want this in my game" is the first step.
Swapping In Your Own Character
Swap GASP's demo character with your own character . What comes alive here is animation retargeting.
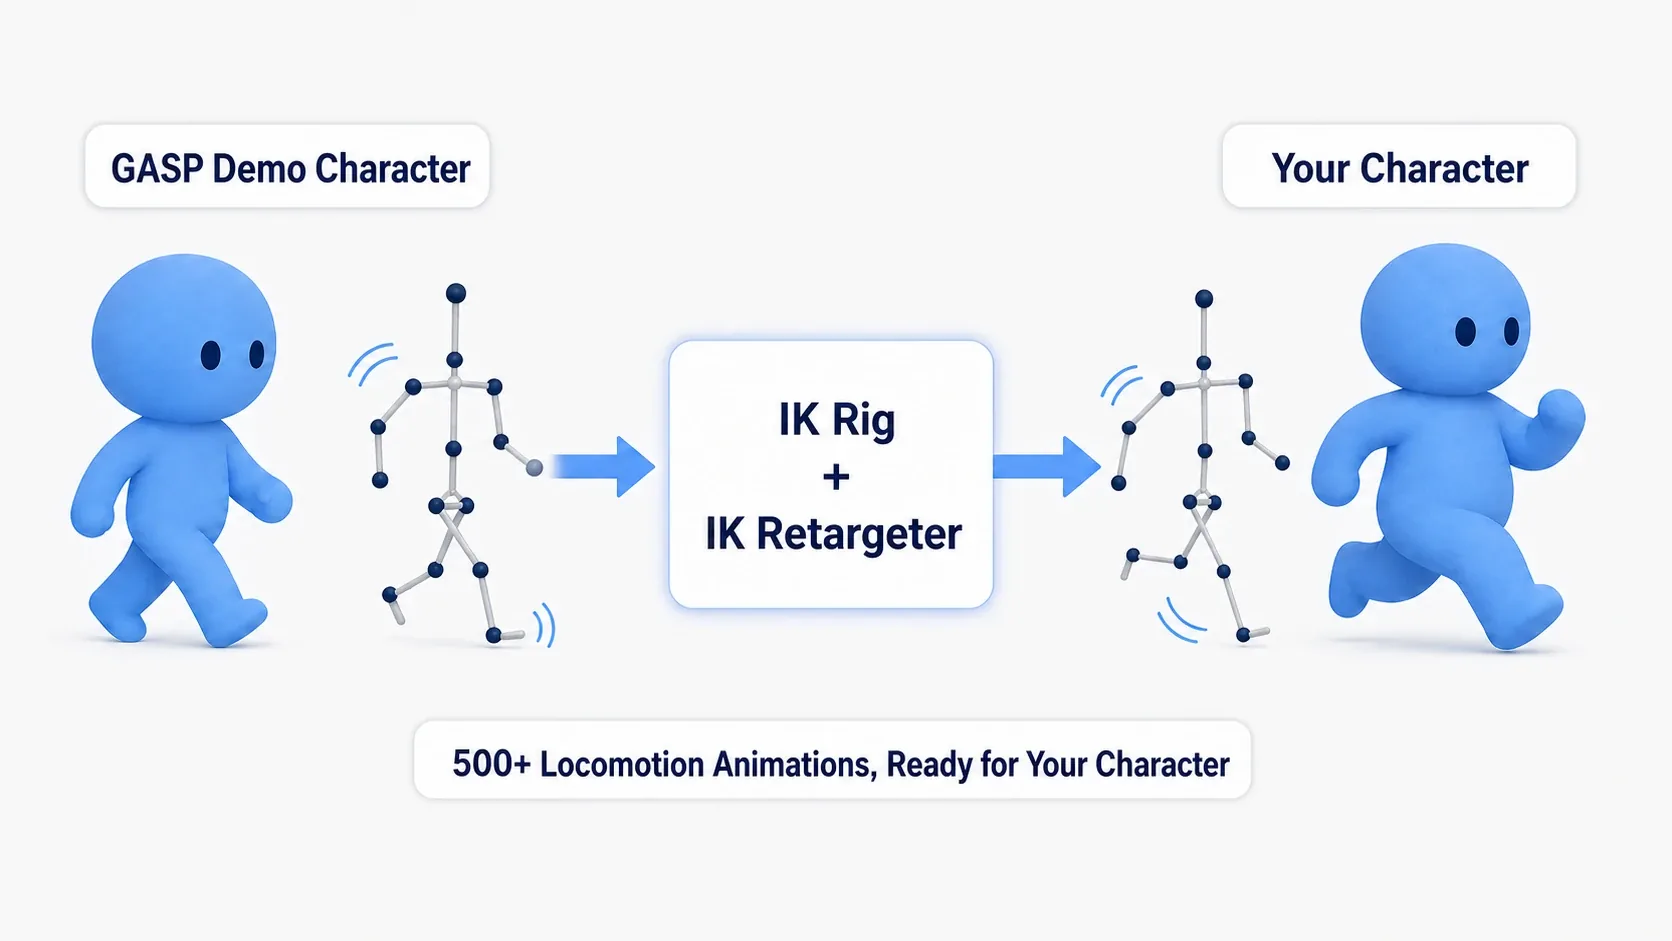
What you do is exactly the same as the retargeting article.
- Make an IK Rig on your character
- Move motions from GASP's skeleton onto your character's skeleton with the IK Retargeter
- Replace GASP's character with your own
Now the over 500 smooth movement motions GASP has move on your own character as-is . If you know the retargeting steps once, you can move your character in a modern way without understanding Motion Matching's internals. It's close to the feeling of "buying the look of movement".
The Division with State Machine
Motion Matching is powerful, but not every game needs it . Divide it from the traditional State Machine by purpose.
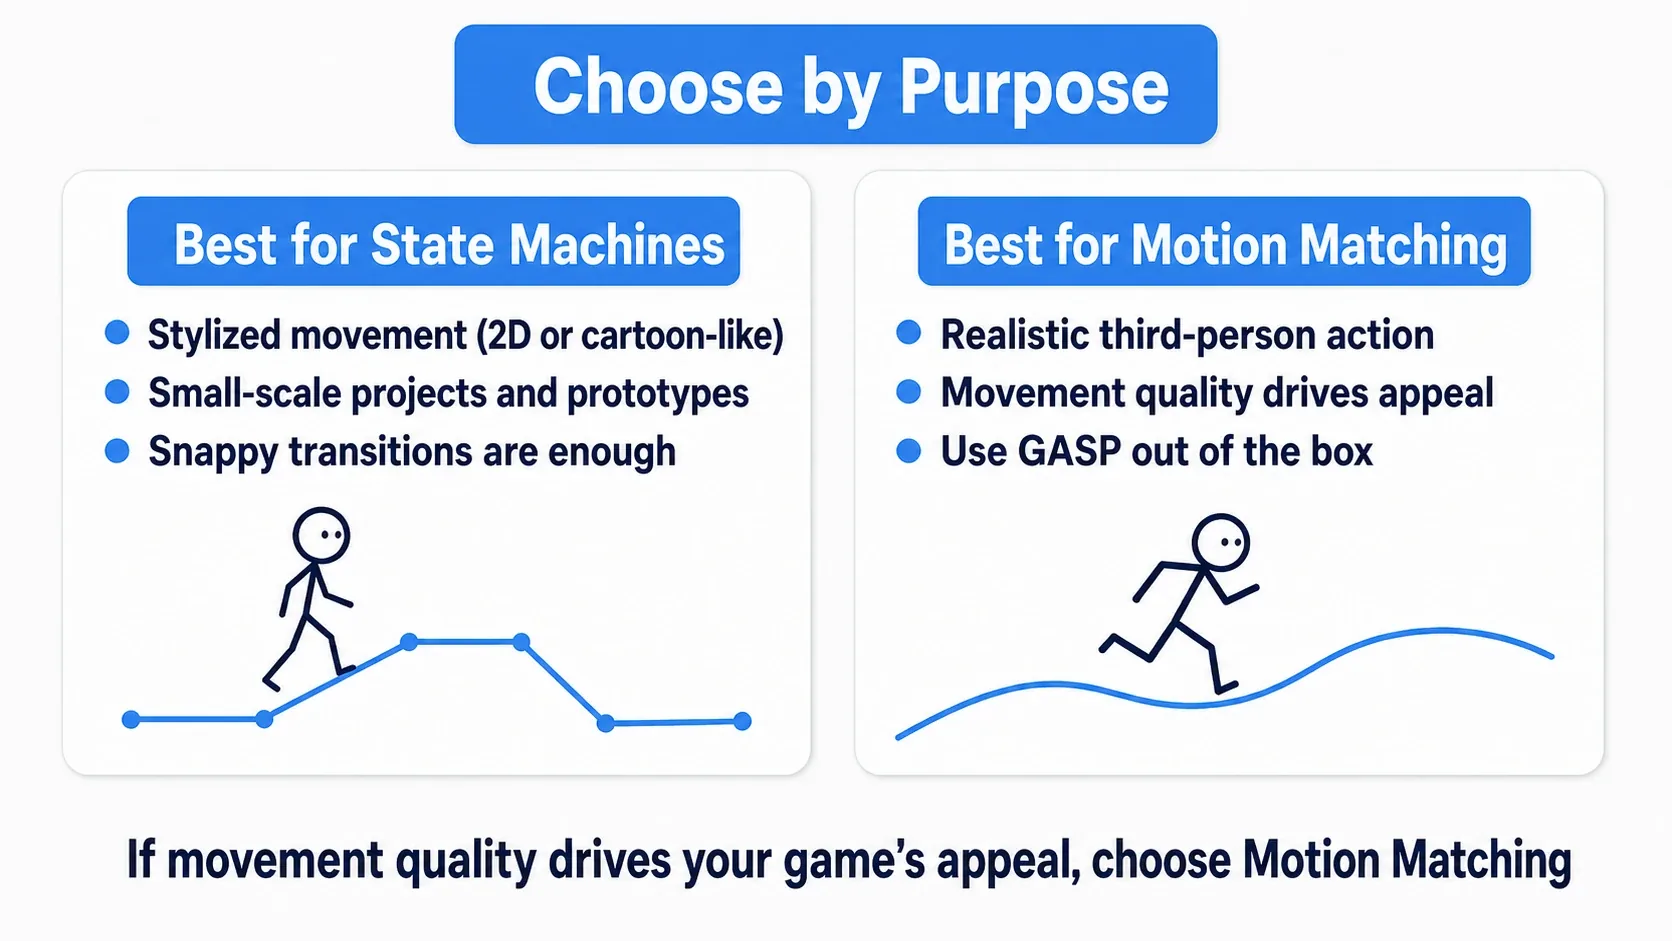
| For a game like this | Recommendation | Reason |
|---|---|---|
| Stylized movement (2D-like, low-poly, deformed) | State Machine | Crisp transitions are enough. Light on size too |
| Real-style movement as the main draw (third-person action, exploration) | Motion Matching | Smoothness ties directly to the game's appeal |
| Small scale / prototype | State Machine | Keeps learning cost and size down |
| Want to raise movement quality | Motion Matching (GASP) | Usable without making. You can buy the foundation |
What matters is whether movement quality ties directly to the game's appeal . A game with a deformed look doesn't need realistic movement. Conversely, in a real-style third-person action game, the smoothness of movement greatly affects the play experience. GASP, "usable without making", is a powerful shortcut for the latter.
Hands-On: Walking, Running, and Sharp Stops with Your Character
Third-person action, real-style adventure, souls-like exploration movement. "Smooth movement with weight" is the foundation of a real-style game. Here we build one lap of it, putting our own character into the GASP project and running around the demo level to check.
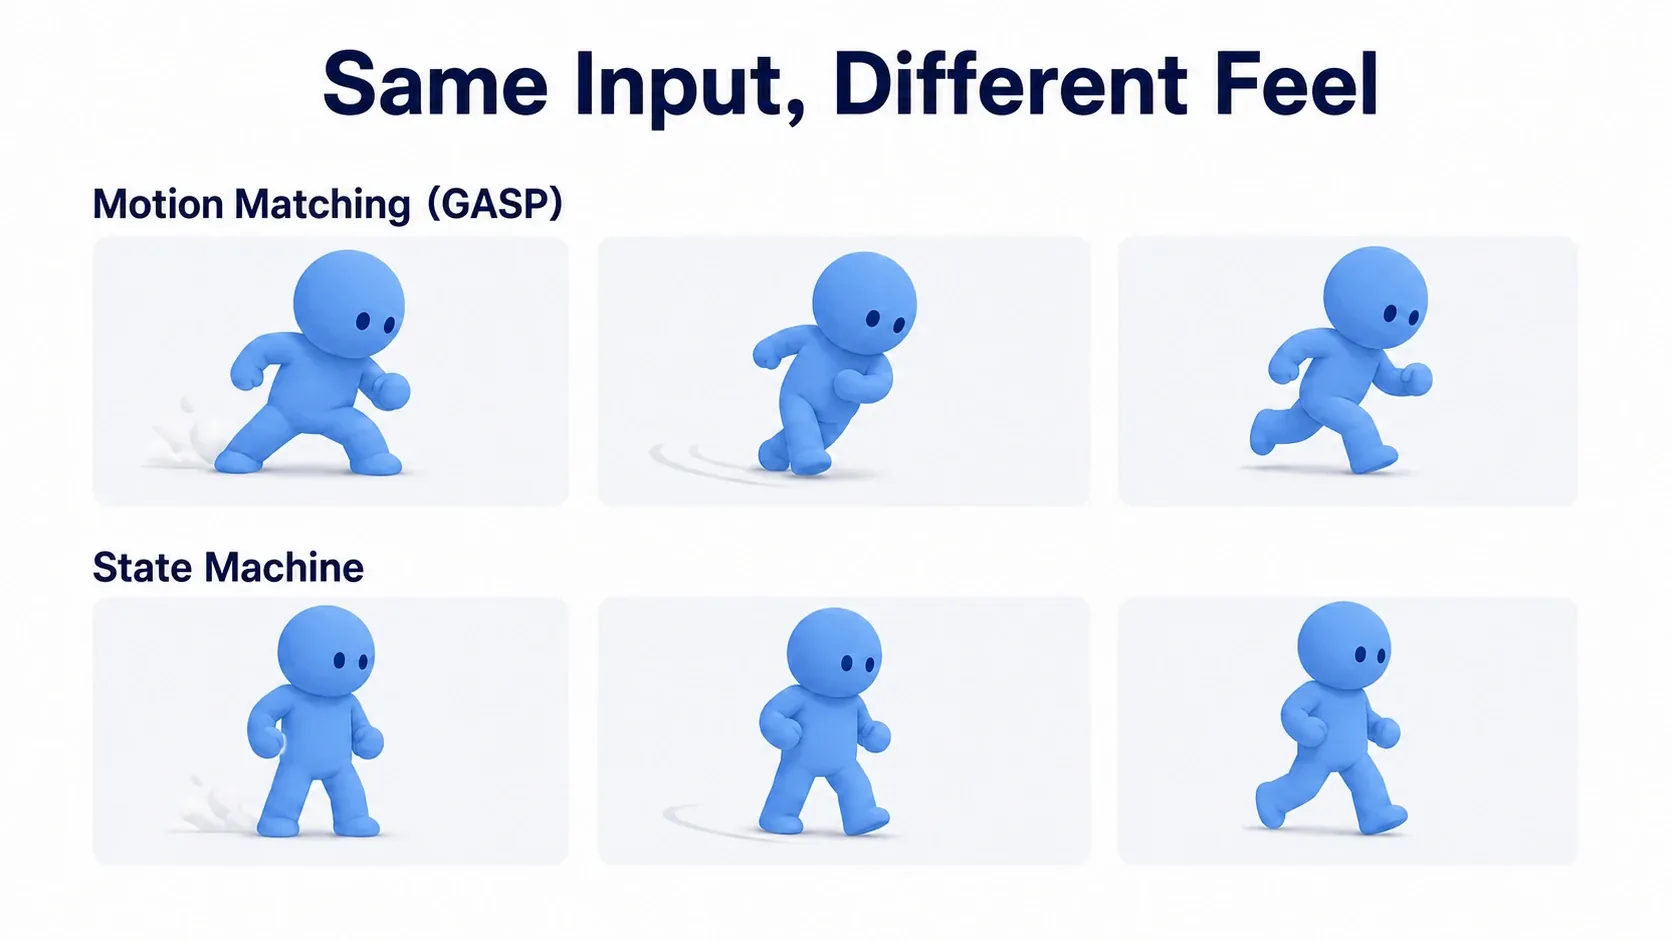
We're building a state where your own character is swapped into GASP via retargeting, and you can try walking, running, sharp stops, and turns .
Here's what it looks like running. Start running with your character and weight shows in the first step. Stop sharply and the feet plant firmly to stop. Turn and the body leans inward. Run this side by side with the same input as your State Machine version character, and the difference in movement quality is clear at a glance.
Steps
| Step | What to do |
|---|---|
| 1. Open GASP | Open the GASP project you got on Fab |
| 2. Prepare your character | Prepare the character (Skeletal Mesh) you want to swap in |
| 3. IK Rig | Make your character's IK Rig with the retargeting steps |
| 4. Retargeter | Move motions from GASP's skeleton to your character with the IK Retargeter |
| 5. Swap | Replace the demo character with yours and run around the demo level |
Verifying It
Run your character in the demo level. If it worked, feet plant on a sharp stop, the body leans on a turn, and weight shows in the first step . If you can feel the difference in smoothness by running side by side with the State Machine version under the same input, it worked.
Here's how to narrow it down when it doesn't work.
- The character freezes in a T (T-pose) → the retargeting isn't working. Check the IK Rig's chain settings and the Retargeter's mapping
- Moves but the feet slide / don't match the ground → the IK Rig's foot chains or root settings. Re-check the retargeting article steps
- The demo is heavy / won't open at all → size and specs. GASP is large, so check your free space and machine specs
Two things to take away.
- Buy movement, make actions: what you get with Motion Matching is the "look of movement". Attacks and gimmicks you make yourself with Montage as before. Buying the movement foundation and layering your own actions on top is the practical division
- Retargeting is the bridge: what connects GASP and your character is retargeting. As long as you know these steps, you can bring modern movement into your game without understanding Motion Matching's internals
Bonus: Good to Know for Later
Adding custom motions is harder. GASP's movement is usable as-is, but adding "your own unique movement motions" needs a level deeper understanding, like registering to the Pose Search Database. Using the existing motions to the fullest first and making custom additions a later task is realistic.
Size and acceptance. GASP is large at around 10GB, so decide "is this a game that cares about movement quality" first before adopting it. For a prototype or a stylized game, State Machine is often lighter and easier to handle. Being able to decide whether to adopt it is itself one of this article's goals.
Don't confuse it with the GAS technique. The names are similar, but GASP (Game Animation Sample) is an animation sample, separate from the "GAS" of things like Gameplay Ability System. Remember GASP as the foundation of movement animation.
Summary
Modern smooth movement is obtained with this flow.
| Stage | What to do | Tool |
|---|---|---|
| Understand | Know it's search, not transitions | Motion Matching's thinking |
| Get | Create the sample | Game Animation Sample (Fab) |
| Swap | Move with your character | IK Rig / Retargeter |
| Draw the line | Buy movement, make actions | Use alongside Montage |
And the principle running through it is "using" over "making" . Without fully understanding the theory, using the GASP foundation lets you bring AAA-class movement into your game.
With this, you can clear the wall of movement quality even solo. Is your game the type where movement smoothness ties directly to appeal? If so, first open GASP and feel that movement.
Further Learning
- AnimBP State Machine and Blend Space — the contrast with the traditional approach
- Animation Retargeting — the hands-on depends directly on it
- Animation Montage and Notify — the action part you keep using after adopting Motion Matching
- Importing Assets with Fab — GASP's acquisition route