The moment a boss shows up. A heavy door swinging open. The opening of your title screen. These showcase moments are what players remember. But try building one out of Blueprint nodes alone, moving a camera while syncing character animation and sound, and it tangles up fast.
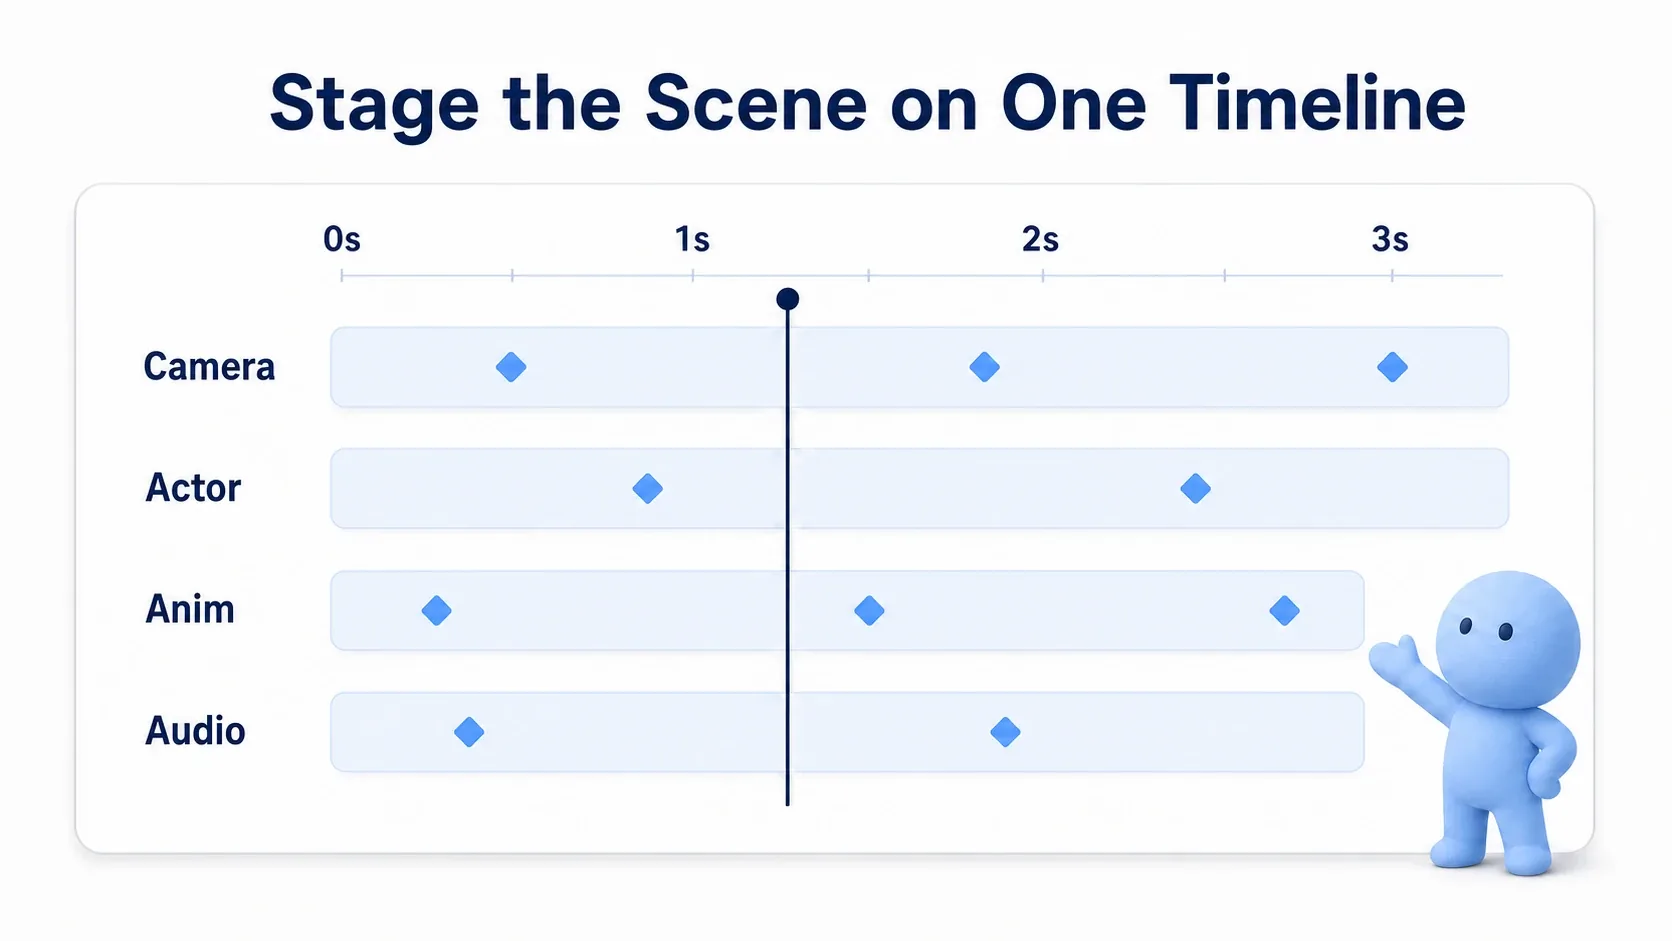
The tool for these timeline-based moments is Sequencer. It lets you lay cameras, animation, sound, and effects onto a single timeline and bundle them together. Just like a video editor, you stack tracks and place keyframes to build a cinematic cutscene. This article covers Sequencer basics, then builds a sequence where entering the boss room makes the camera show the boss and return, end to end.
What You'll Learn
- The difference between Sequencer and the Timeline node (bundling multiple Actors vs. interpolating inside one BP)
- Level Sequence tracks (Transform / Camera Cut / Audio and more)
- Keyframes and interpolation (Auto / Linear / Cubic)
- Playing from Blueprint with Play and On Finished
- Stopping input during the sequence with Set Cinematic Mode
- Hands-on: entering the boss room makes the camera show the boss and return
Sequencer vs. Timeline
UE has two systems for driving something over time. The names are similar enough to confuse, so let's sort them out first.
- Timeline node: smoothly changes a value inside a single Blueprint. Suited to small, self-contained interpolation like a door angle from 0 to 90 degrees, or a gradual color change.
- Sequencer (Level Sequence): bundles multiple Actors, cameras, and sounds onto one timeline. Suited to cinematic moments where you switch cameras, move characters, and play sound.
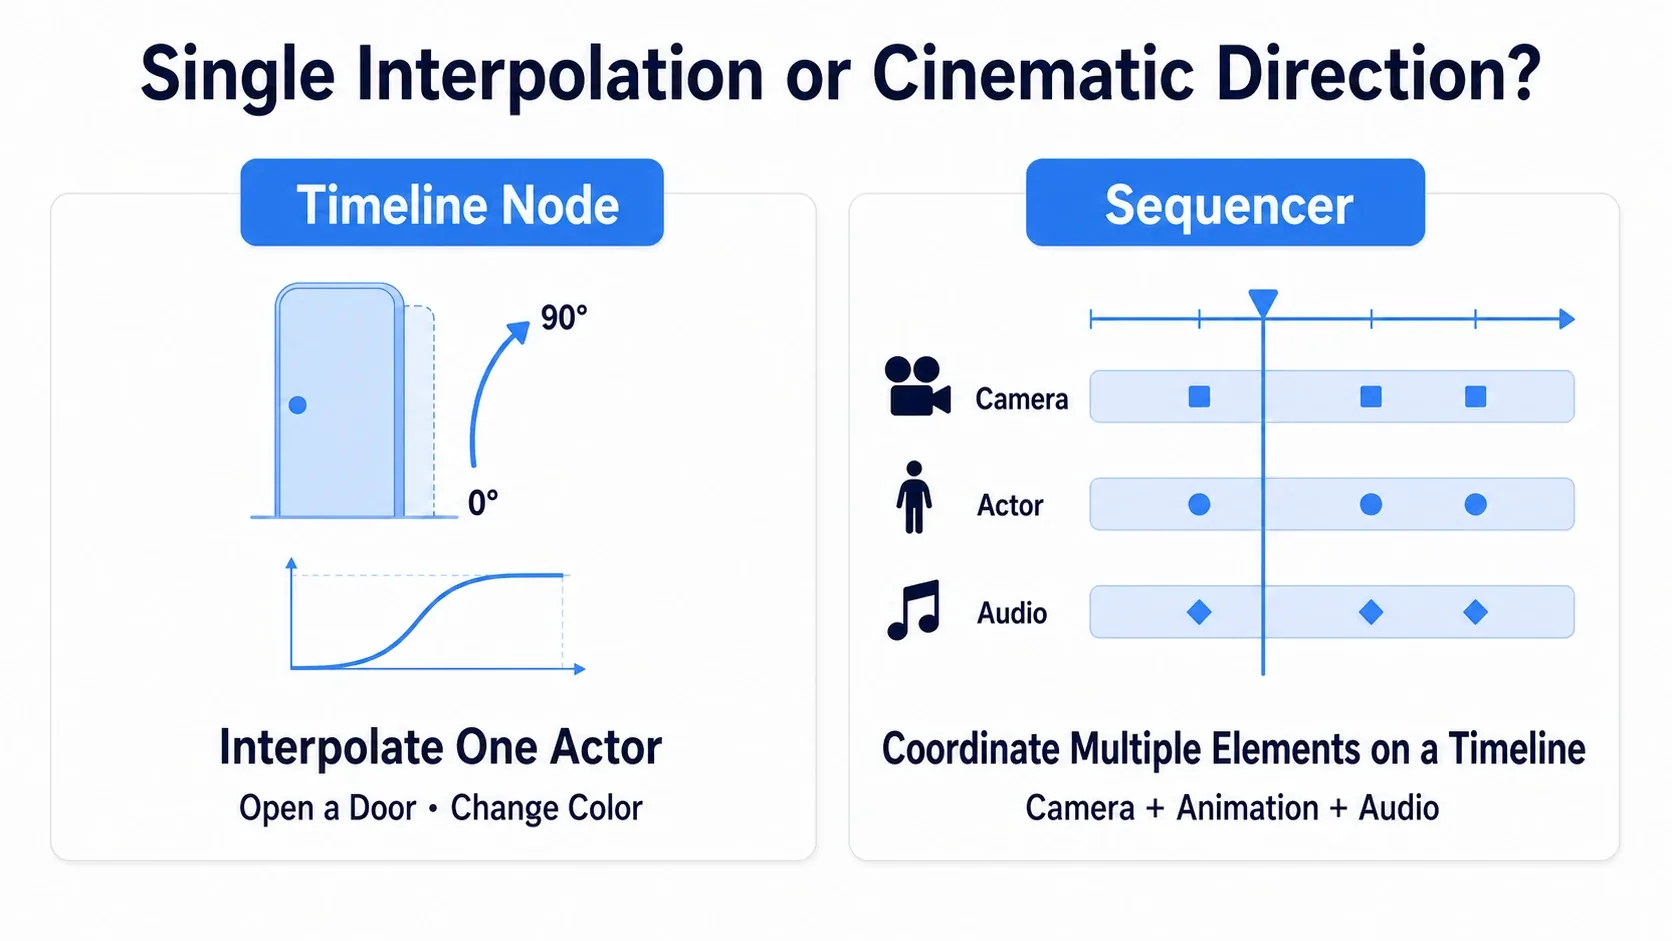
The call is simple. One thing moving, just value interpolation goes to the Timeline node. The camera moves, or several things move at once goes to Sequencer. If you're building a showcase moment, it's Sequencer.
Level Sequences and Tracks
The container for a Sequencer shot is a Level Sequence. Create one with right-click in the Content Browser → Cinematics > Level Sequence, and double-click to open it. A wide timeline appears at the bottom.
You add tracks to it. A track is a band representing "what gets driven." Drag an Actor from the level into Sequencer and a track for that Actor is added.
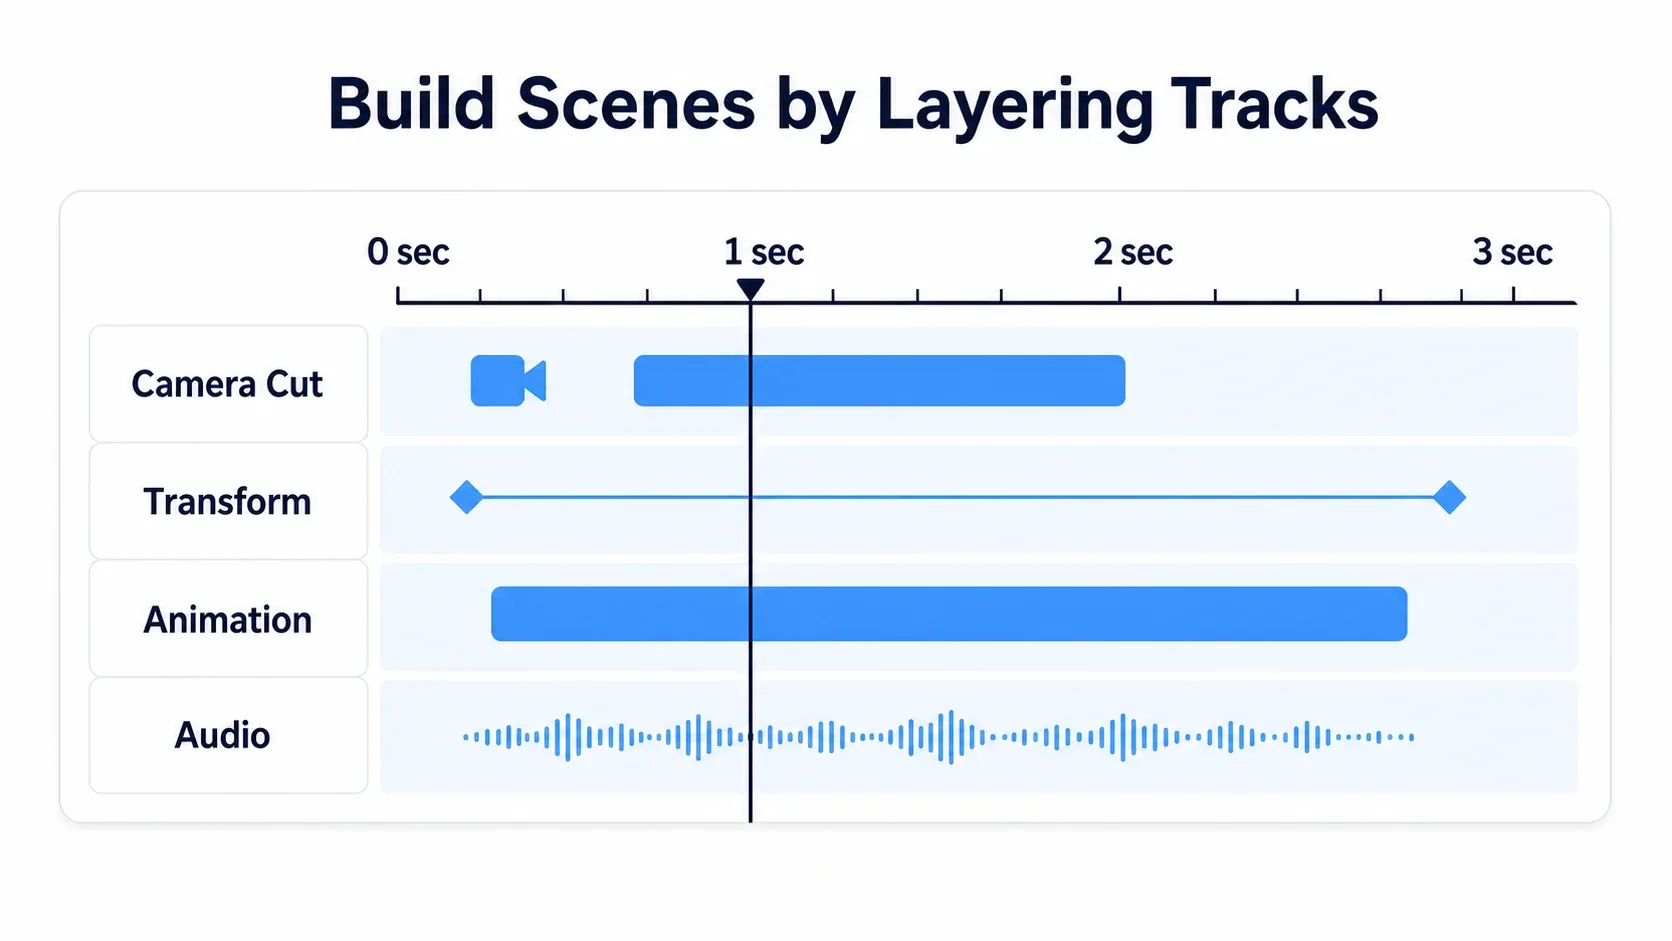
The four tracks you'll use most are these.
- Camera Cut: specifies which camera is showing. This is how you switch cameras during the sequence.
- Transform: changes an Actor's location, rotation, and scale over time. Moving the camera uses this too.
- Animation: plays an animation (Animation Sequence) on a character.
- Audio: plays music or sound effects.
When moving a camera for a sequence, place a Cine Camera Actor in the level, add it to Sequencer, and select that camera on the Camera Cut track. Cine Camera has cinematic settings like focal length and depth of field.
Keyframes and Interpolation
Keyframes are what decide "when, and what value" within a track. Put the playhead at the target time, set the value, and press the ◆ button (or Enter) to place a keyframe. After placing the first key, enable Auto Key and keys are added automatically whenever you change a value.
For example, place keyframes at 0 seconds and 3 seconds on a camera's Transform track, and the camera automatically moves smoothly between them. Interpolation decides how smooth that movement in between is.
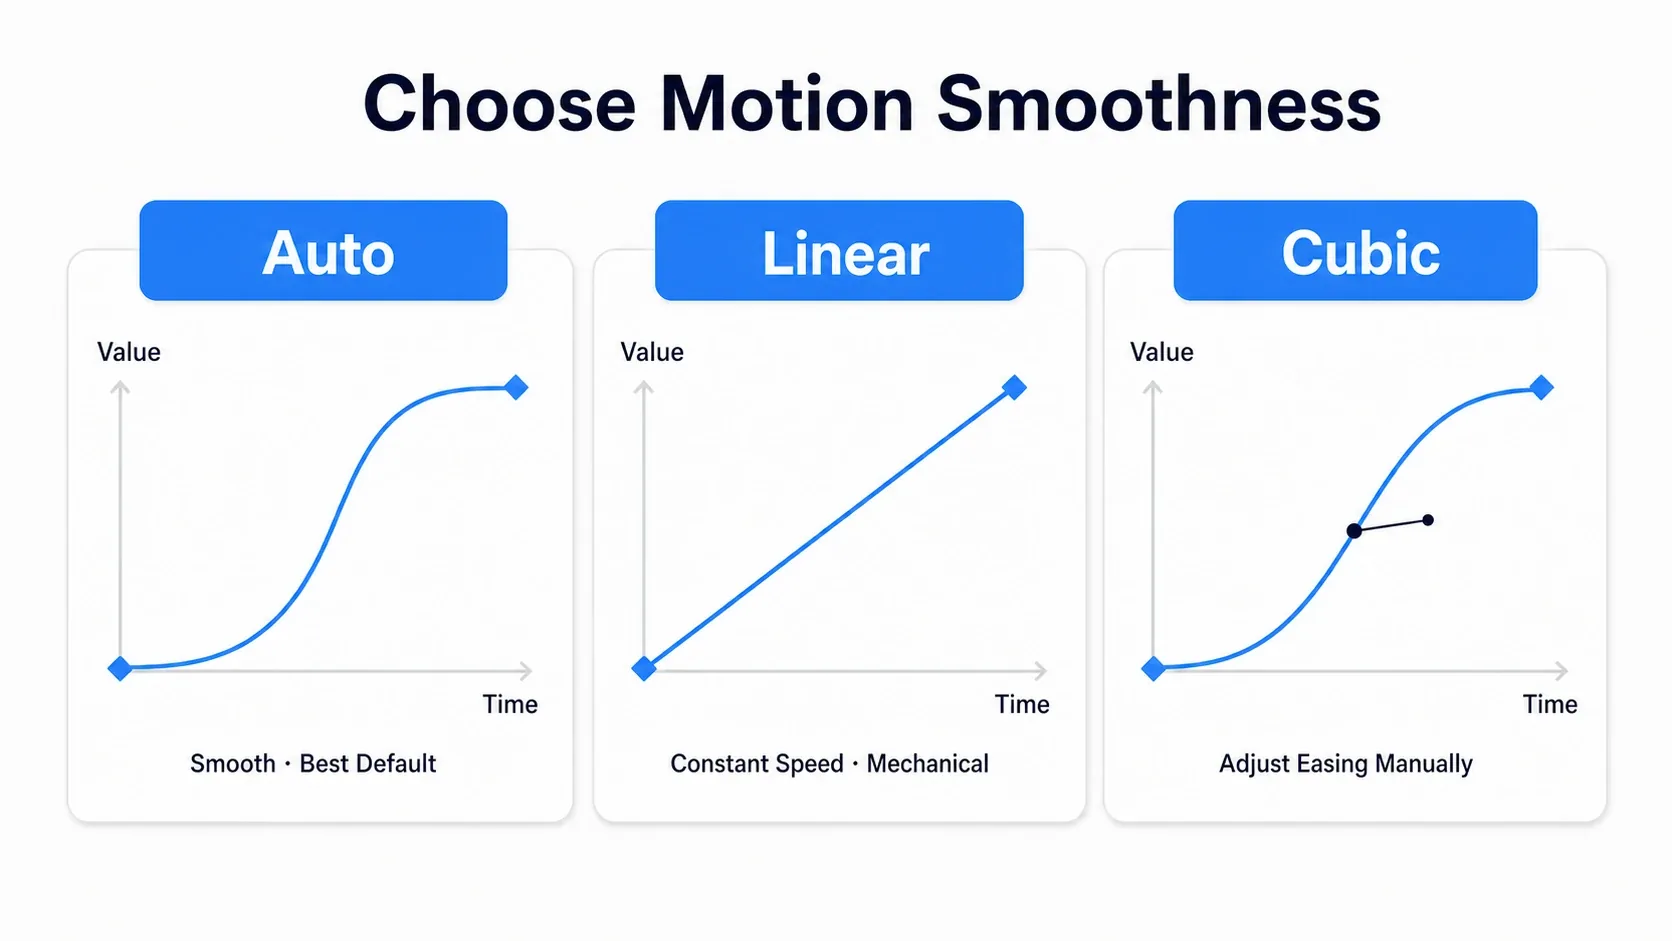
Three interpolation types cover most cases.
- Auto (Cubic Auto): automatically computes tangents from the surrounding keys to build a smooth curve. Tends to ease in and out at the start and end. Use this when in doubt.
- Linear: constant-speed, straight movement. Good for mechanical motion.
- Cubic (User): adjust the curve by hand for fine control over easing.
Leaving camera work on Auto gives you natural movement with a bit of weight to it.
Playing from Blueprint
A Level Sequence doesn't play during gameplay on its own. You send the play signal from Blueprint.
Place a Level Sequence Actor in the level (dragging a Level Sequence into the level creates one), and it contains a Sequence Player. You can't call Play on the actor directly, though — there's one node in between.
- Get a reference to the Level Sequence Actor (select the actor in the level, then right-click in the Level Blueprint and create a reference, or store it in a variable)
- Pull Get Sequence Player off that reference
- Call Play on the Sequence Player it returns
That extra step — grabbing the player inside the actor rather than using the actor itself — is where people get stuck first. If you can't find Play, you're almost certainly searching from the actor's pin.
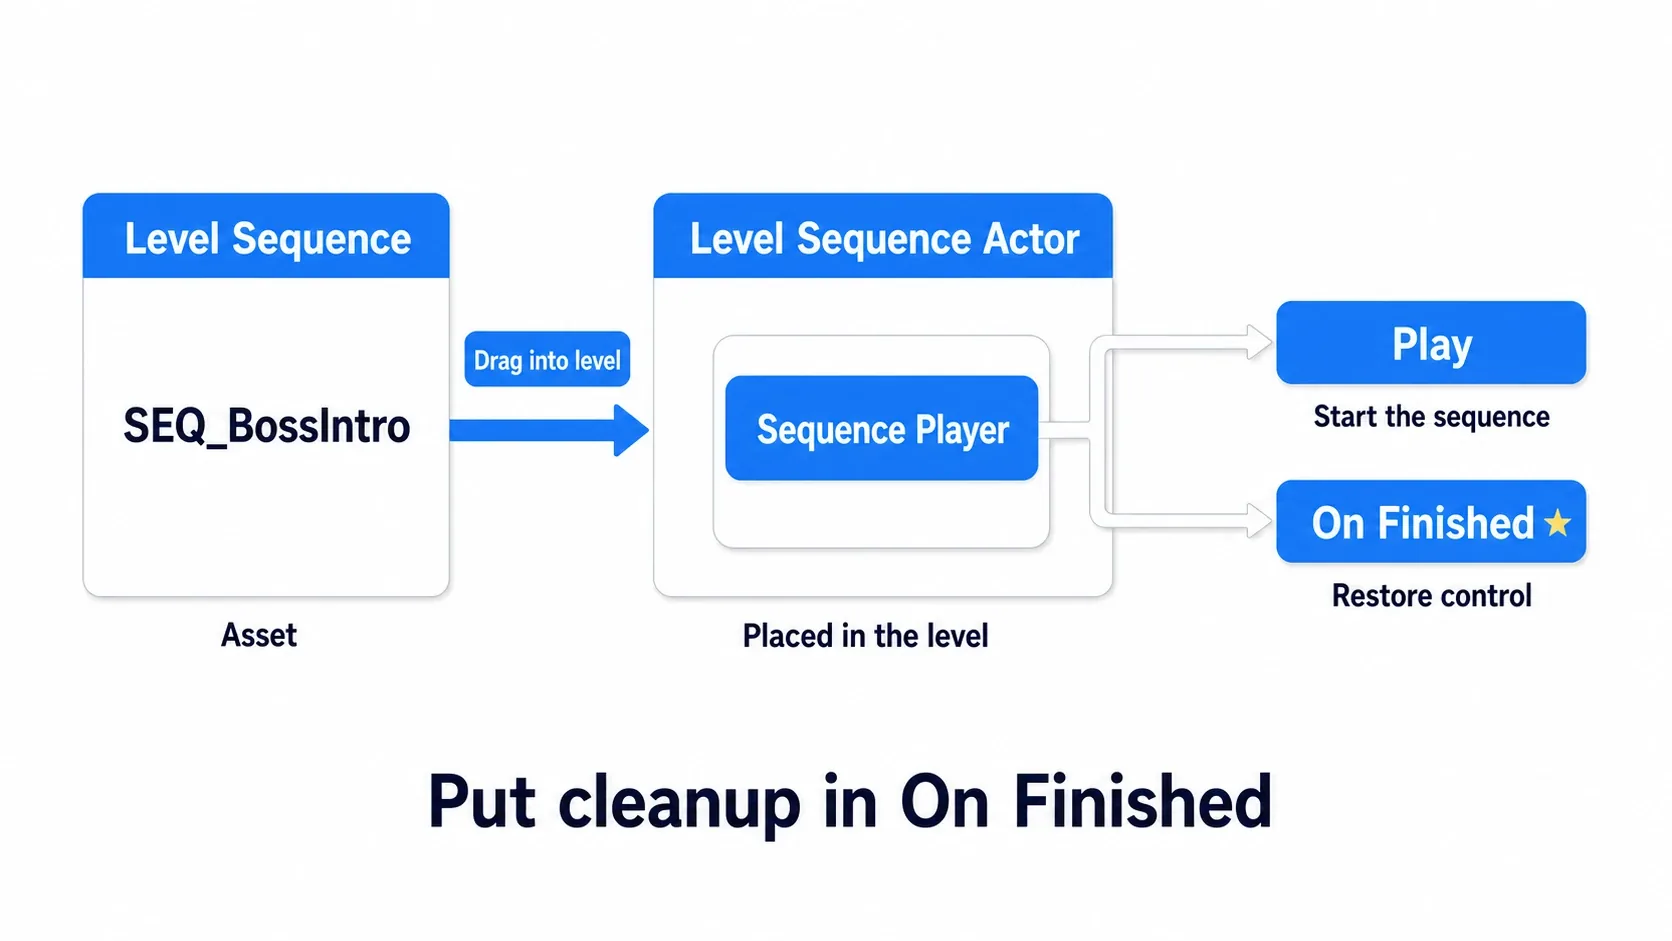
You can catch the end of playback with the same Sequence Player's On Finished event. Cleanup like "restore control once the sequence ends" always goes here. Forget it and the player is frozen in place after the cutscene.
Bind before you Play. If you call
Playbefore wiring anything toOn Finished, a very short sequence can finish before the binding is in place. Make bind → Play your habit.
Hands-On: A Boss-Reveal Camera Sequence
Let's build one concrete sequence end to end.
An ARPG boss reveal, a first encounter in a horror game, a puzzle mechanism activating. The player enters a spot, control is taken away for a moment, the camera shows something, and then it comes back. It's the showcase-moment template every genre uses.
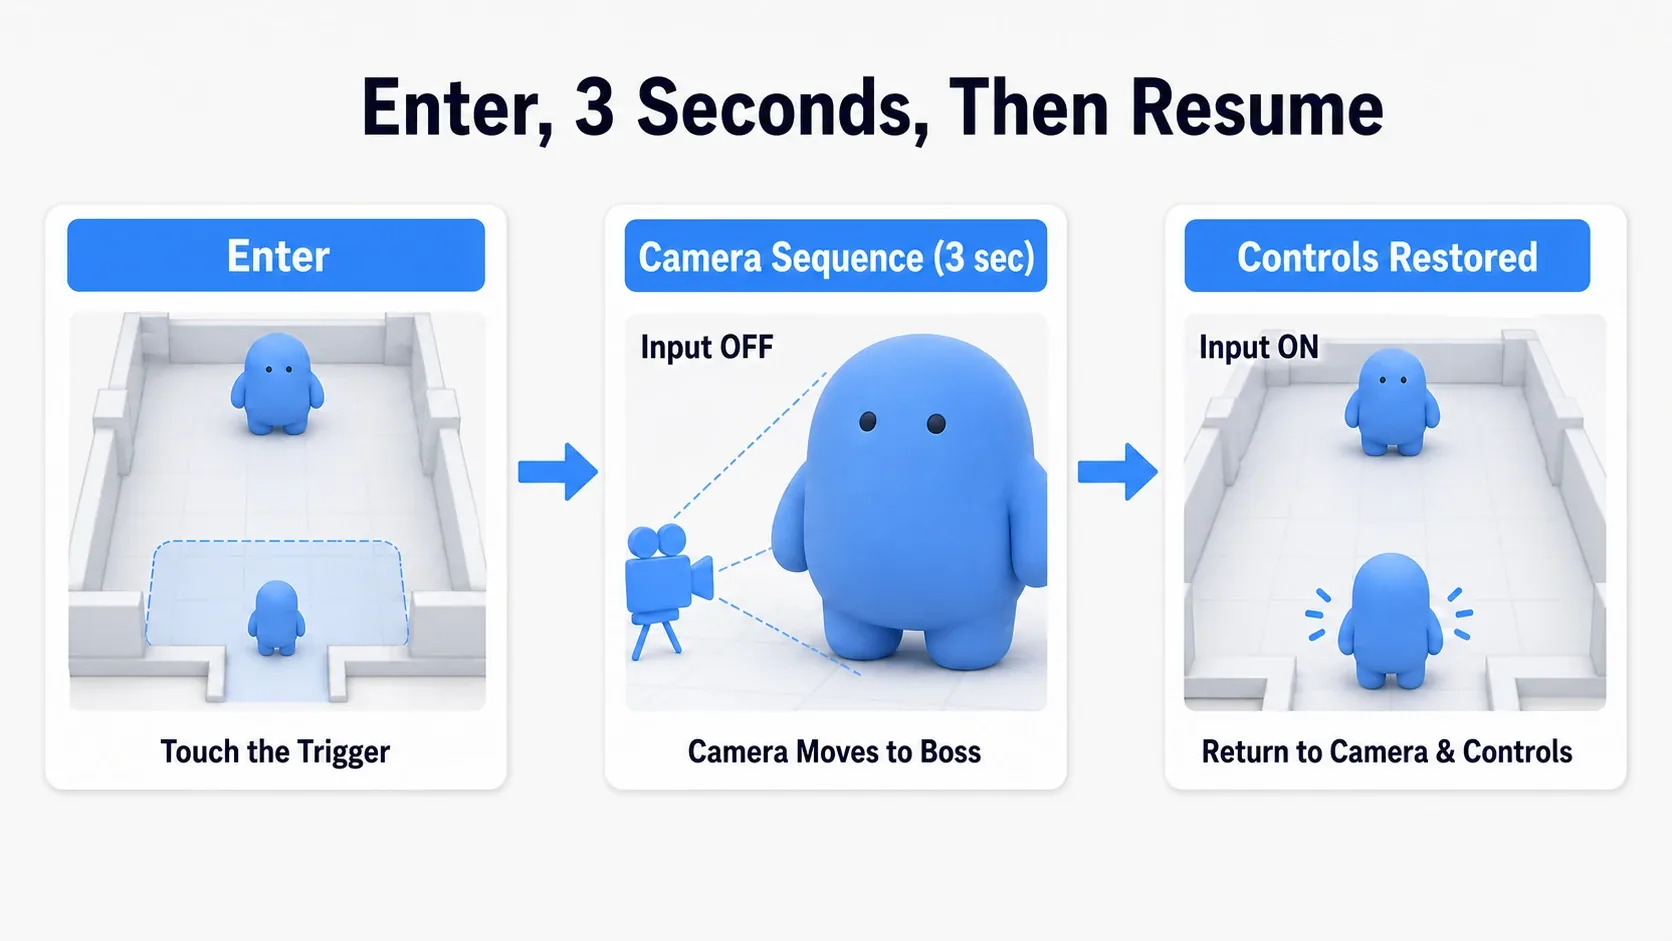
We're building this: entering the boss room doorway makes the camera show the boss for 3 seconds, during which the player can't move, and control returns when it ends.
Here's what it looks like running. The instant the player touches the trigger, input stops responding, the camera cuts to the boss and pushes in. After 3 seconds the camera returns to third person and control comes back.
Building the Sequencer Side
First, build the sequence itself.
- Place a Cine Camera Actor in the level and frame it looking down at the boss.
- Create a Level Sequence in the Content Browser (say,
SEQ_BossIntro) and open it. - Add the Cine Camera to Sequencer and select that camera on the Camera Cut track.
- On the camera's Transform track, place keyframes at 0 seconds (wide) and 3 seconds (close). Interpolation on Auto.
- Put an entrance animation (a roar, for example) on the boss's Animation track, and a sound effect on the Audio track. Use an Animation Sequence compatible with the boss's Skeleton.
- Set the end of the Playback Range to 3 seconds and lay the Camera Cut section from the start to the end. Placing a key at 3 seconds doesn't necessarily mean the whole sequence ends at 3 seconds.
Now 3 seconds of camera work, the boss animation, and sound are bundled into one asset. Drag SEQ_BossIntro into the level to create a Level Sequence Actor, and in the details panel set Auto Play = off, Loop = Don't Loop, Pause at End = off.
Wiring Up Playback and Input Control in Blueprint
Place a Trigger (Box Collision) at the doorway and build the graph in its Blueprint.
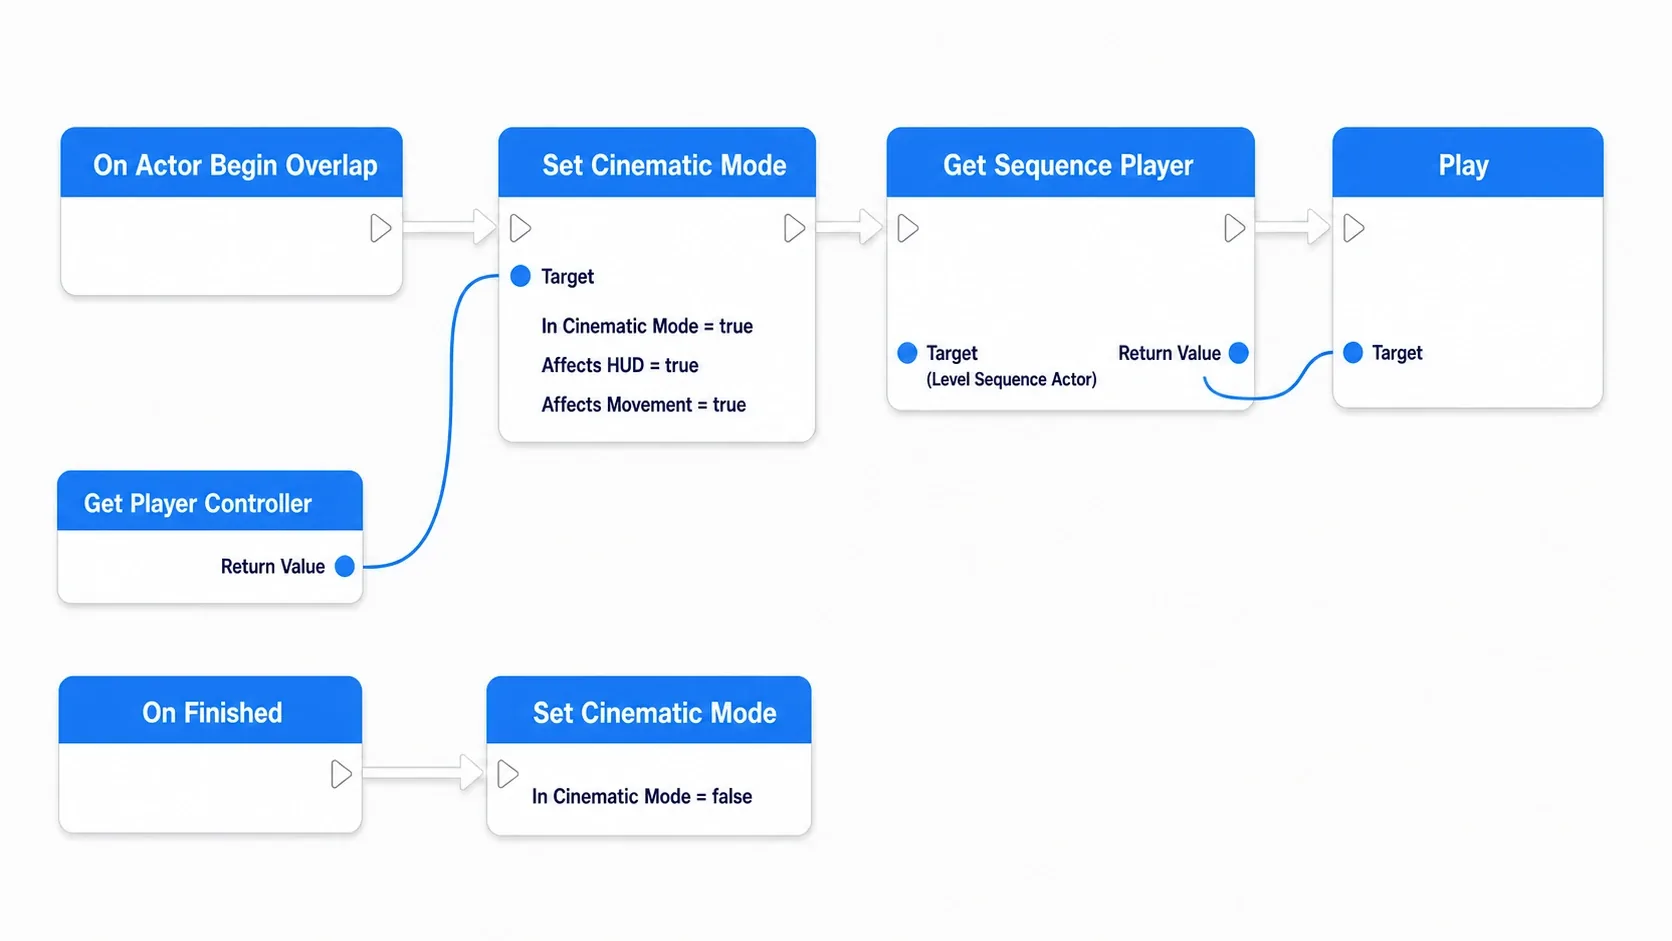
Here's the flow.
- On On Actor Begin Overlap, confirm the other actor is the player with a Cast (Cast to your character class), and route it through DoOnce so it runs only once
- Place Get Player Controller and wire its return value into the Target of Set Cinematic Mode. Set
In Cinematic Mode = trueand enableAffects HUD,Affects Movement, andAffects Turningto stop movement, look controls, and the HUD (it doesn't stop action inputs like firing or using items) - Get Get Sequence Player from the
SEQ_BossIntroLevel Sequence Actor, bind the cleanup to its On Finished first, then call Play - In the On Finished handler, call Set Cinematic Mode again with
In Cinematic Mode = false(Affects options enabled the same way) to restore control
As read-along pseudocode, it looks like this.
On Actor Begin Overlap (Trigger)
  if Cast to PlayerCharacter(Other Actor) succeeds:
    DoOnce:
      pc = GetPlayerController()
      pc.SetCinematicMode(InCinematicMode=true, AffectsHUD=true, AffectsMovement=true, AffectsTurning=true)
      player = BossIntroActor.GetSequencePlayer()
      bind "restore input" to player.OnFinished
      player.Play()

restore input:
  pc.SetCinematicMode(InCinematicMode=false, AffectsHUD=true, AffectsMovement=true, AffectsTurning=true)
Verify It
Hit Play and walk the player to the boss room doorway. If it works, control stops responding the moment you enter, and the camera cuts to the boss and pushes in for 3 seconds. When it ends, the camera returns to third person and you can move again.
If you're frozen and can't move after the sequence, Set Cinematic Mode(false) on On Finished isn't being called. That's the heart of the cleanup. If nothing happens at the trigger, check whether the overlapping actor is really the player (make sure another Actor isn't firing it early) and whether the Sequence Player reference is correct.
There are two key points.
- If you stop input, always restore it in On Finished: pair the true and false calls of Set Cinematic Mode with Play and On Finished. Forget one side and you lock the player out
- Let the Camera Cut track own the camera: keep camera switching on the Sequencer side and let it return to the player's camera automatically. Don't try to drive the camera by hand
For a one-time sequence, the DoOnce above stops the second trigger. If you want to Destroy the trigger itself, do it after On Finished. Destroying it mid-playback takes the restore logic with it, leaving the player stuck.
Bonus: Good to Know for Later
You can call gameplay logic with an Event Track. Place event keys on Sequencer's Event Track and hook them to a target Blueprint with Quick Binding, and you can call gameplay logic at a specific time on the timeline. That's how you tie a sequence to game progress, like "raise the door flag the instant the camera pushes in on the boss."
Make it skippable. Players want to skip a cutscene on the second viewing. Calling Go to End and Stop on the Sequence Player from a confirm button jumps the sequence to the end. Note that this is an explicit stop and On Finished may not run, so call the input restore (Set Cinematic Mode to false) from the skip path as well. The longer the sequence, the more a skip option is a kindness.
Keep sequences short. Time spent without control feels longer than it is. For a boss reveal, around 3 seconds is plenty. Building longer sequences on the assumption they'll be skipped keeps the pacing intact.
Summary
Sequencer is the tool for showcase moments, bundling camera, animation, and sound onto one timeline. There are four patterns to keep in mind.
| Scene | What to use |
|---|---|
| Interpolation inside one Actor | Timeline node (not Sequencer) |
| Multi-Actor / camera staging | Sequencer (Level Sequence) |
| Play and cleanup | Play from Blueprint, restore with On Finished |
| Stop input during the sequence | Set Cinematic Mode (true to stop, always false to restore) |
Small interpolation goes to the Timeline node; cinematic moments go to Sequencer. Get this template down and you can build moments your players remember.
What's the one moment in your game you most want players to see? That's where your first cutscene goes.