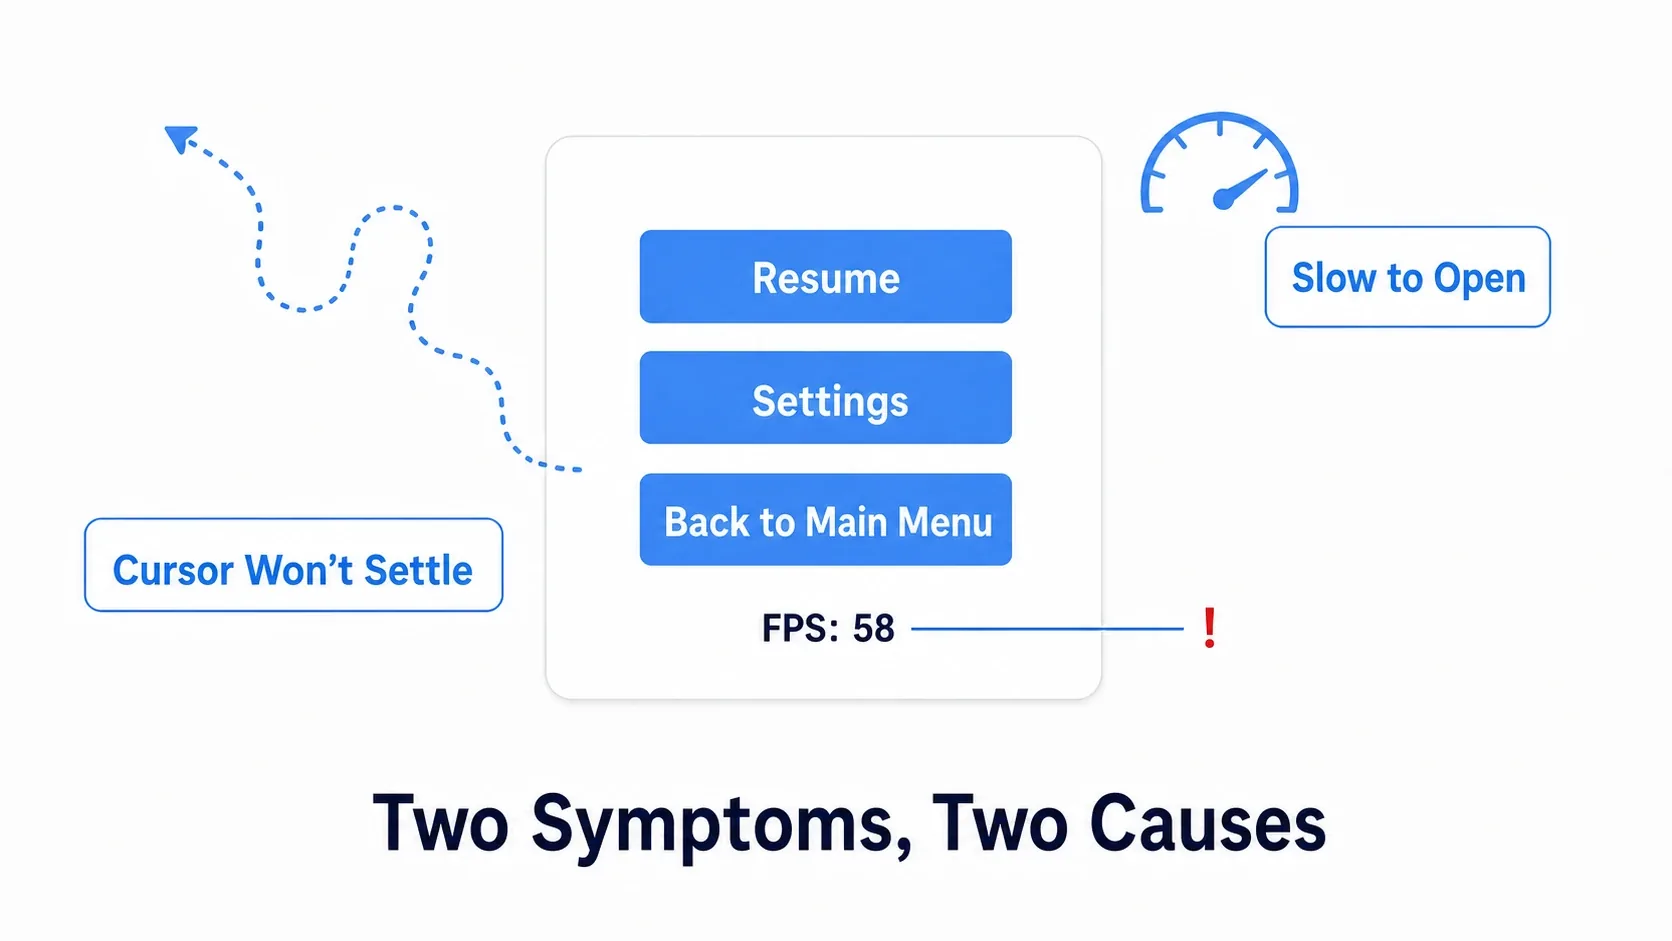
Once your UI starts taking shape, two walls show up almost at the same time. Selection jumps to strange places when you use a gamepad , and the frame rate drops the moment you open the UI . Both are the kind of problem you never notice while building and only discover during polish.
This article covers how to control focus (which widget is currently receiving input) yourself, plus the causes of slow UI and what to do about them. At the end, we fix a real pause menu .
Terminology: In this article, focus means "the thing receiving input," which is separate from the mouse cursor . The gamepad D-pad moves focus, and that is also different from the visual change you get when hovering with the mouse (Hovered).
What You'll Learn
- Focus jumps because automatic navigation guesses wrong
- Four things to check when
Set User Focushas no effect- Slow UI comes from either your own logic or drawing
- Invalidation Box caches calculations, Retainer Box bakes to a texture
- Hands-on: fixing both focus and performance in a pause menu
Why Focus Jumps
Focus is the state that says "which widget is currently accepting input." With a mouse alone you never have to think about it, but the concept jumps to the front the moment someone plays with a gamepad or keyboard .
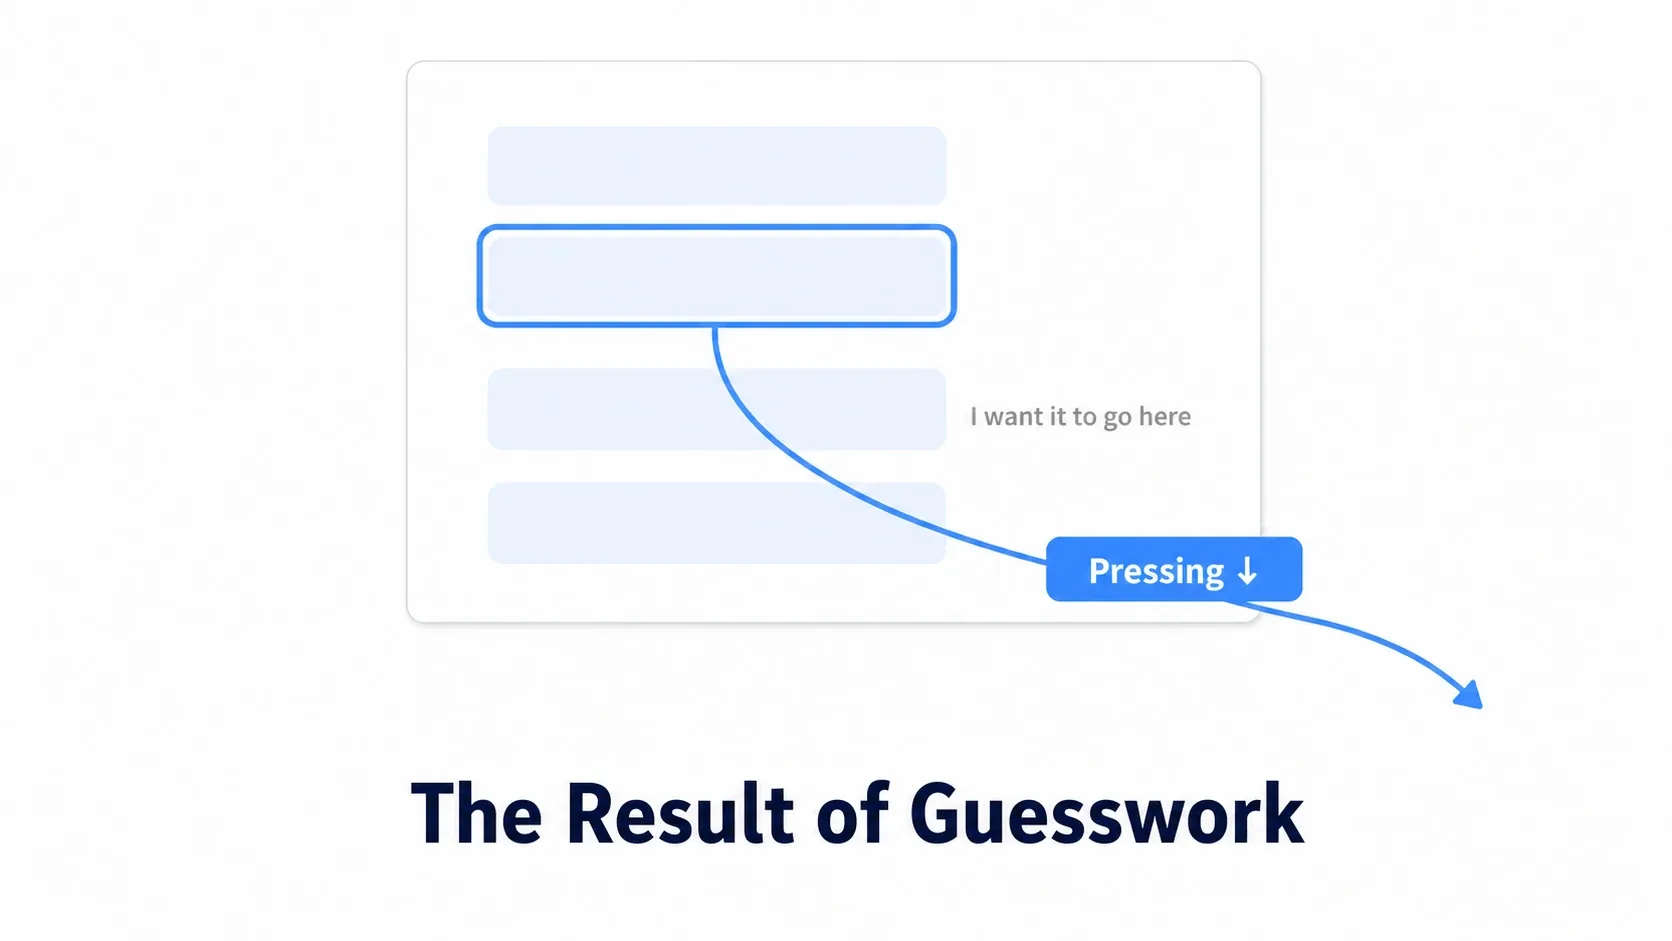
By default, UMG automatically looks for the widget nearest in the direction you pressed and moves focus there. That guess only works well when your buttons line up neatly in a row or column.
The guess goes wrong in cases like these:
- An invisible container sits between buttons, shifting the positions from what you expect
- Hidden widgets (Collapsed / Hidden) are mixed in, changing the pool of candidates
- Buttons are laid out in a grid, so "down" has no single obvious answer
In other words, jumping focus isn't a bug. It's the result of leaving things to a guess . That also makes the fix obvious: stop the guessing and specify the destination yourself .
Stop the Guessing with Explicit Navigation
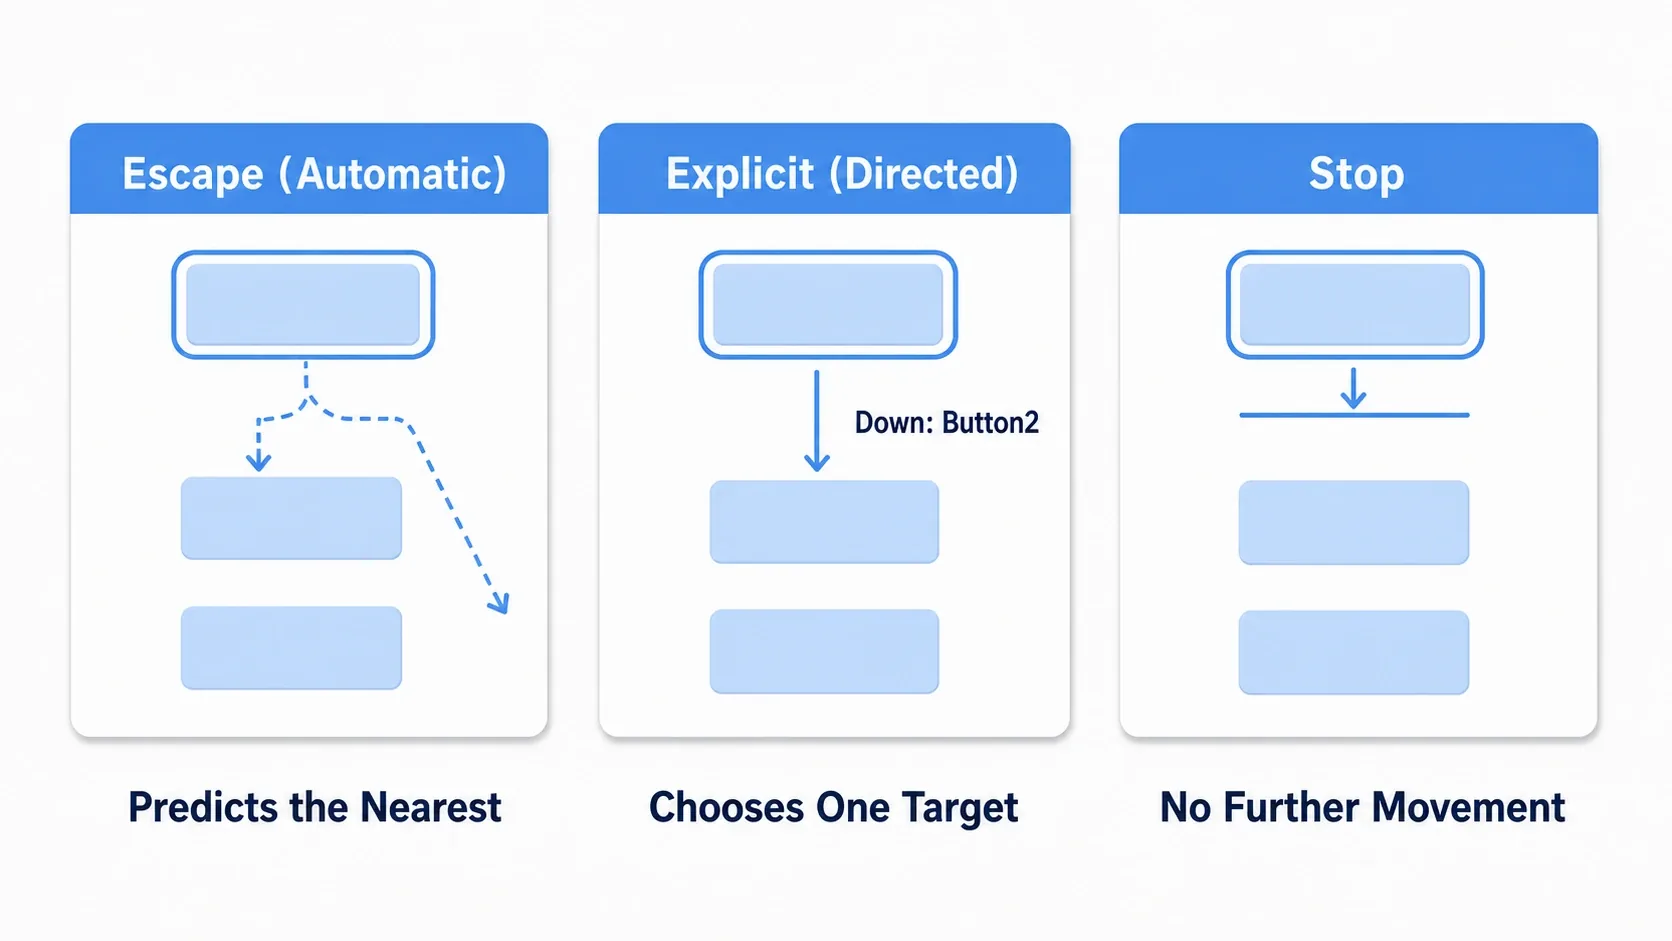
Select a widget you want players to operate (a Button, for example) and scroll down in the Details panel to find Navigation . You can specify how movement works for each of the four directions.
| Mode | Behavior | When to Use |
|---|---|---|
| Escape (default) | Automatically searches for the nearest widget | Simple menus laid out in a straight line |
| Explicit | Name a single destination | Any menu where you want a guaranteed order |
| Custom | Decide the destination with a function | Special rules such as grid movement |
| Stop | No movement in that direction | The end of a list, or a dialog you don't want to leave |
For a menu with several buttons in a row, setting Up and Down to Explicit on every button is ultimately the fastest fix. Point "the bottom button's Down" at the top button and you get looping for free.
There's one more thing that will bite you every time you forget it: where focus lands first .
Call
Set User Focusafter the widget is in the Viewport. Calling it while the widget doesn't exist on screen yet does nothing. Calling it insideEvent Constructcan fail, so call it afterAdd to Viewport.If it still doesn't land, check these four things: (1) is the target visible (
Collapsed/Hiddenwon't take focus), (2) isIs Focusableenabled , (3) is the Owning Player correct , and (4) is something later overwriting the focus .
Event BeginPlay (Player Controller)
  → Create Widget (Class: WBP_PauseMenu)
  → Set MenuRef
  → Add to Viewport (Target: MenuRef)
  → Set User Focus (Target: MenuRef's StartButton, Player Controller: Self)  ← after it's on screen
Why UMG Gets Slow
UMG cost splits into two broad categories. Mixing them up means optimizing the wrong thing and burning time.
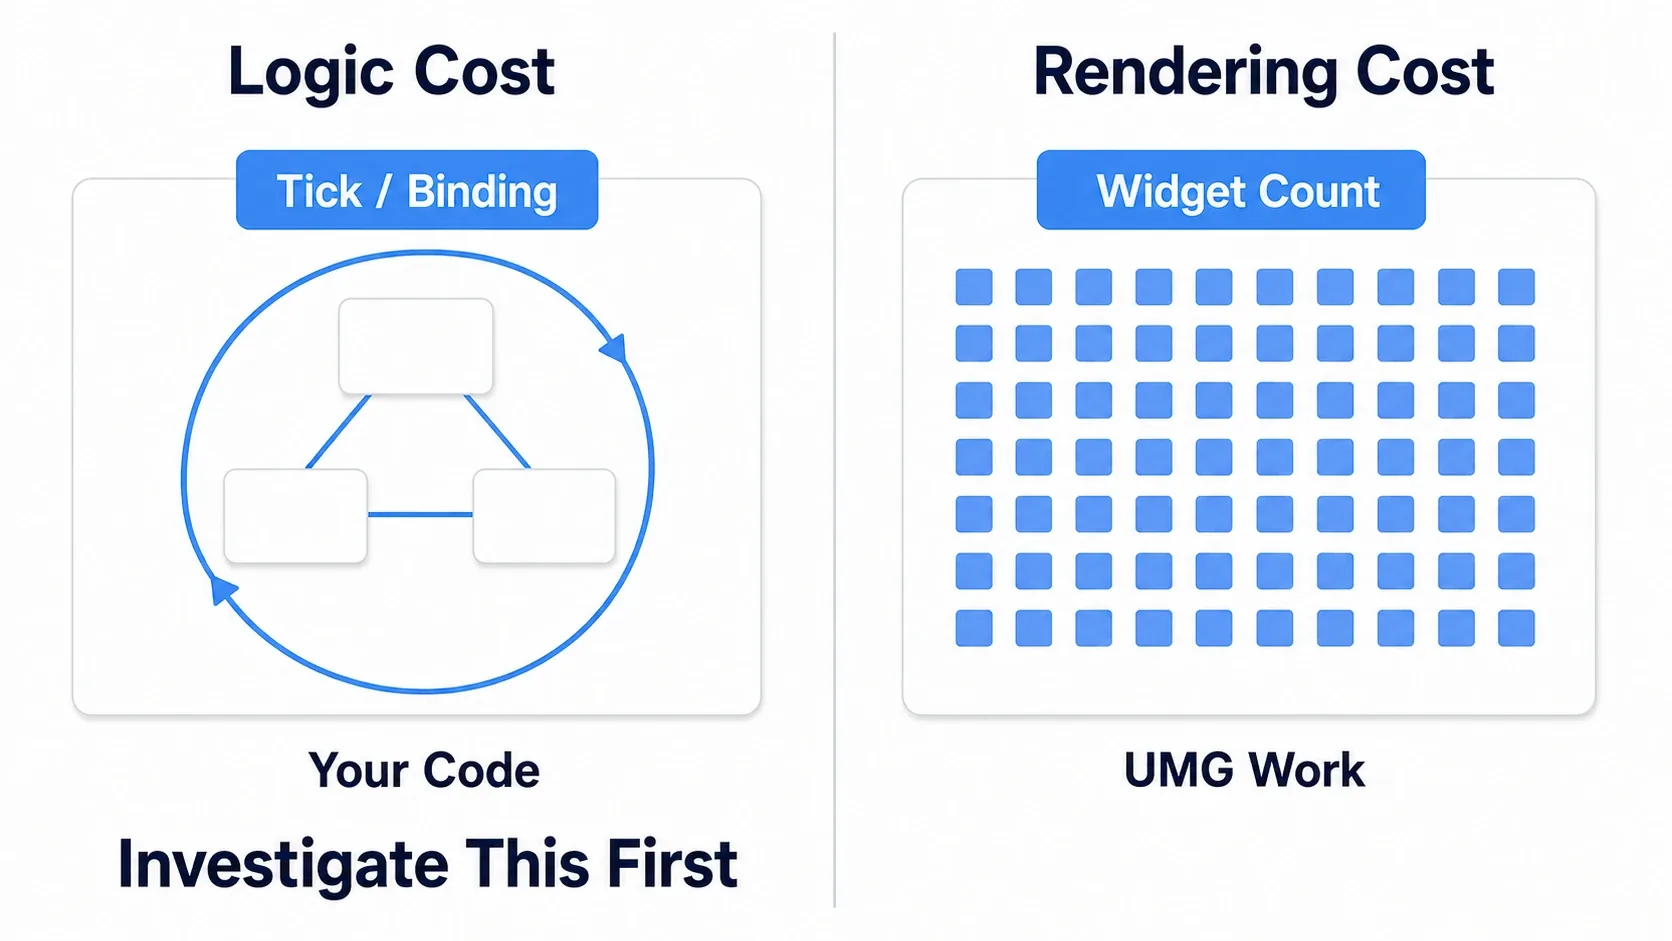
- Logic cost:
Event Tick, Binding functions, and theCastor search operations inside them. In short, the code you wrote - Draw cost: layout calculations and rendering, scaling with the number of widgets. In short, UMG's own work
It's more efficient to suspect the first one first . Your own code is easier to pin down, and fixes show clear results.
- Logic in
Event Tick: UI Tick keeps running as long as the game runs. It can even run while the widget isn't displayed, so the safest choice is not to use it at all - Heavy work in a Binding: Bindings are called continuously while the widget is displayed. If there's a
Get All Actors Of Classsearch inside one, it runs forever
The fix is the same in both cases: change it to update only when the value changes (see Loose Coupling with Event Dispatchers).
Draw cost becomes the bottleneck when you have a huge number of widgets (inventory slots, long lists) or when you use large translucent areas or complex materials . The threshold depends on resolution and content, so don't ask "how many widgets is too many." Measure and decide .
Invalidation Box and Retainer Box
The names are similar and people mix them up, but they cache different things .
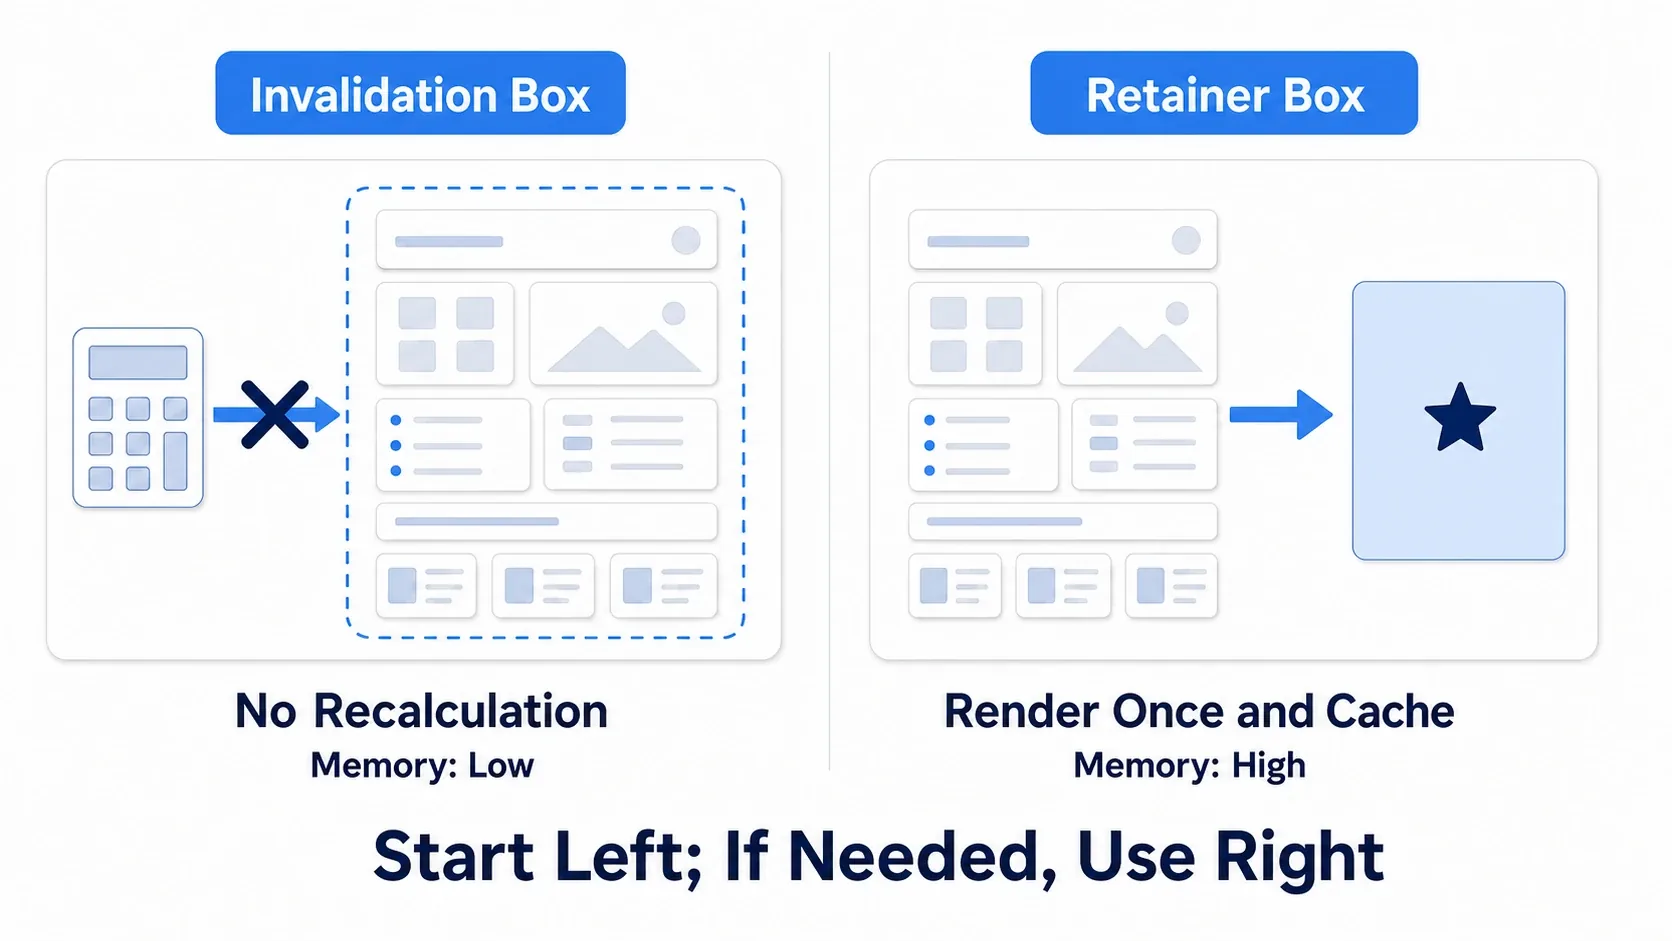
| Invalidation Box | Retainer Box | |
|---|---|---|
| What it caches | The calculation results needed to draw | The texture of the drawn result |
| Cost it addresses | Layout calculation and draw preparation | Drawing itself (draw calls) |
| Memory | Small | Large (it holds a texture) |
| What it enables | Skipping updates | Skipping updates + applying materials |
| Good fit for | Complex UI whose contents rarely change | Heavy UI with stacked translucency, blur effects |
Invalidation Box works on the idea of "if nothing inside changed, there's no need to recalculate." When a child widget's property changes, the cache is discarded automatically and rebuilt on the next draw.
- Effective for: complex hierarchies that stay on screen and only change occasionally (status panels, equipment lists)
- Not effective for: simple widgets like a single text block, or anything that changes every frame (you keep throwing the cache away, which is a net loss)
Retainer Box bakes a drawn result into a texture and pastes that. It's powerful but eats memory, so limit it to cases where Invalidation Box isn't enough or where you want to apply a material effect to the UI . Setting Phase Count and Phase reduces the update rate (for example, Phase Count = 3 updates roughly once every three frames). Note that it still updates when a child requests invalidation.
Neither one is a superset of the other. Invalidation Box is a tool for skipping CPU-side recalculation and draw preparation . Retainer Box is a tool for turning the drawn result into a texture, lowering the update rate, and applying materials . They serve different purposes, so pick the one that matches your case.
There is, however, an order of operations. (1) Fix Tick/Bindings → (2) reduce unnecessary widgets → (3) use a Box where appropriate. Skipping steps 1 and 2 to start with a Box means spending time on the smallest wins.
Hands-On: Fixing a Pause Menu
A pause screen in an action game, a status screen in an RPG, a crafting menu in a survival game. Every genre has that one UI that runs slowly even though the game is frozen behind it. Here we take a typical pause menu and fix both focus and performance .
The open/close flow itself and the details of Trigger When Paused are the main subject of Implementing a Pause Menu. This article uses the pause screen as a subject and focuses on fixing focus and performance.
Setup to reproduce it: first, set up a pause key with Enhanced Input (see Getting Started with Enhanced Input).
| Type | Name | Settings |
|---|---|---|
| Input Action | IA_Pause | Digital (Bool). Check Trigger When Paused (explained below) |
| Input Mapping Context | Add to an existing one | Assign Esc or similar to IA_Pause |
| Widget Blueprint | WBP_PauseMenu | Layout below |
Variable on BP_PlayerController | MenuRef | Object Reference of type WBP_PauseMenu |
Lay out WBP_PauseMenu so that automatic navigation deliberately gets it wrong .
| Element | Placement |
|---|---|
ResumeButton / OptionButton | Side by side in a Horizontal Box (upper part of the screen) |
QuitButton | Alone below them (lower part, offset slightly to the right) |
ItemCountText | Displays how many items the player holds ( this is where we plant the heavy Binding ) |
Create a Binding on ItemCountText's Text that calls Get All Actors Of Class (BP_Item) and counts the results . This is the classic "wrote it for debugging and forgot about it" case.
Confirming the symptoms: hit Play, open the pause menu, and press a direction on the gamepad. Nothing should have focus at all (because Set User Focus is never called). Even if something does, the two upper buttons and the single lower button are offset, so Down sends focus somewhere you didn't intend . And the Game time in stat unit rises only while the menu is open.
Step 1: open it, then set focus. On the Player Controller side, set focus after adding the widget.
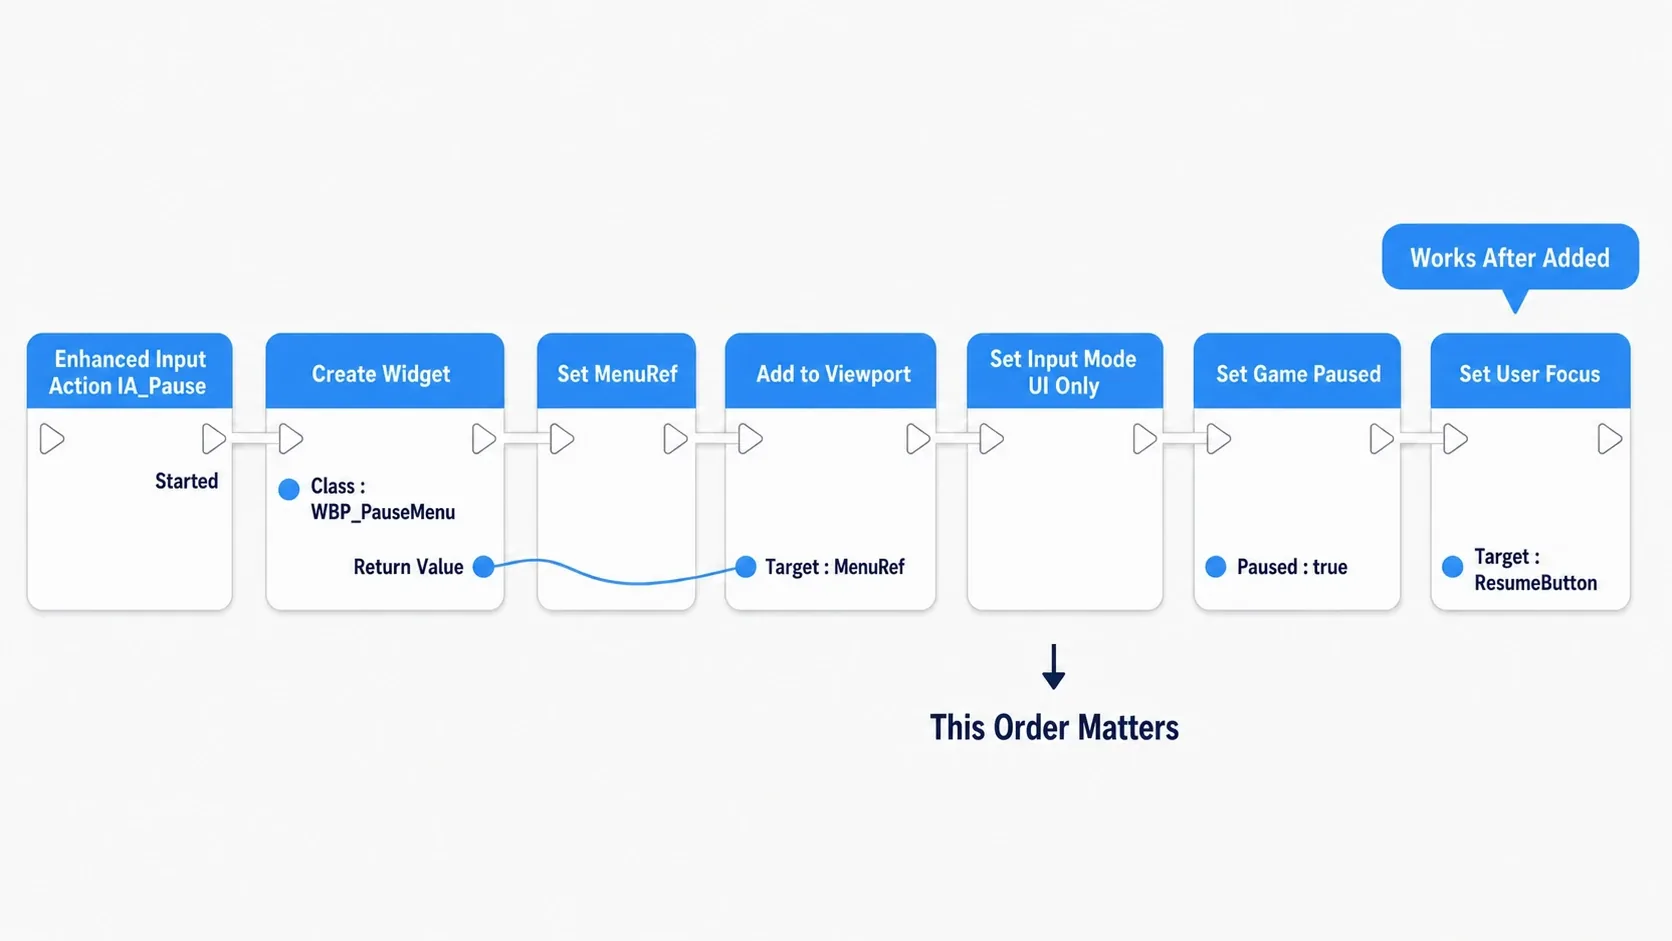
Enhanced Input Action IA_Pause
  Started
    → Branch (Condition: Is Valid (MenuRef))
        False (= open)
          → Create Widget (Class: WBP_PauseMenu, Owning Player: Self)
          → Set MenuRef
          → Add to Viewport (Target: MenuRef)
          → Set Input Mode Game and UI (In Widget to Focus: MenuRef)
          → Set Show Mouse Cursor (true)
          → Set Game Paused (true)
          → Set User Focus (Target: MenuRef's ResumeButton)      ← after it's on screen
        True (= close)
          → Remove from Parent (Target: MenuRef)
          → Set MenuRef (None)
          → Set Input Mode Game Only
          → Set Show Mouse Cursor (false)
          → Set Game Paused (false)
Two things will trip you up if you forget them.
- Enable
Trigger When PausedonIA_Pause. Without it, pressing the same key while paused does nothing, and you can't close the menu - Use
Game and UIas the input mode . WithUI Only, the Player Controller's game input (unpausing) never arrives
Step 2: name the destinations. Set each Button's Navigation to Explicit and specify where focus goes. The upper row is horizontal and the lower button stands alone, which is exactly the layout automatic navigation struggles with , so being explicit here stabilizes the behavior.
| Button | Left | Right | Down | Up |
|---|---|---|---|---|
ResumeButton | OptionButton | OptionButton | QuitButton | QuitButton |
OptionButton | ResumeButton | ResumeButton | QuitButton | QuitButton |
QuitButton | — | — | ResumeButton (loop) | ResumeButton |
Step 3: drop the Binding and update on an event instead. Delete the Binding on ItemCountText and count once, the moment the menu opens , instead.
For a pause menu this is the most reliable approach. World Timers also stop after Set Game Paused (true) , so "update periodically with a Timer" isn't an option. And since the value can't change while paused anyway, counting once on open is enough.
WBP_PauseMenu's Event Construct
  → Get All Actors Of Class (Actor Class: BP_Item)
  → Length
  → Set Text (Target: ItemCountText, In Text: the count as a string)
It's the same Get All Actors Of Class, but running it every frame versus once on open is a completely different cost . We didn't make the operation cheaper. We reduced how often it's called .
Step 4: address drawing if you need to. With three buttons, you're done. If you have a complex block that never changes , like an equipment list or an inventory, wrap just that part in an Invalidation Box . Only the static part, not the entire menu.
Hit Play and check. Resume should have focus the instant the menu opens, the direction keys should move between all three buttons as intended, and Esc should close it again. And the Game time in stat unit should be roughly unchanged from before you opened it. If all of that holds, you're done.
Here's how to narrow things down when it doesn't work.
- Nothing has focus →
Set User Focusruns beforeAdd to Viewport. Or the target is hidden or hasIs Focusableoff - Can't close the menu → Check
Trigger When PausedonIA_Pause, or the input mode isUI Only - Direction keys do nothing → Check the input mode, and also check whether focus moved to a different widget
- Still slow → Look for a remaining
Event Tickor Binding. Adding a Box comes after that
Two points to take away.
- Set focus after the widget is on screen: at
Create Widgettime, it doesn't exist on screen yet. Once the order is right, also keep visibility,Is Focusable, and Owning Player on your checklist to narrow problems down faster - Count the calls before you optimize the work: the same operation costs an order of magnitude more per frame than once. Reviewing when something is called is usually more effective than optimizing what it does
If you want to revisit your UI design from the ground up, go to Getting Started with UMG. If you want to learn how to measure cost in detail, go to stat Commands.
Bonus: Good to Know for Later
When mouse and gamepad are both in play, keep the states straight. Hovering with the mouse changes Hovered, which is a different state from the focus you move with the direction keys. Clicking, however, does move focus there. To avoid "I was selecting with the pad and then touching the mouse changed my selection," the standard approach is to detect the input device switching and reapply focus .
Don't forget the "focus is invisible" problem. A UMG Button's Style has Normal / Hovered / Pressed / Disabled, and no Focused entry . If you want the focus position to be visible, either use the standard focus outline (Focus Brush) or read the focus state and change the visuals yourself instead of relying on Is Hovered. Even correct behavior means nothing to the player if it isn't visible.
Widget Reflector shows you structure and updates. Open Tools → Debug → Widget Reflector in the editor and click your UI with Pick Painted Widgets to walk the widget hierarchy. When you want to find what is being redrawn , also enable Invalidation Debugging and Paint Debugging. It's the shortest path when you have no idea what's slow.
Consider whether you can just have fewer widgets. Images and Borders stacked purely for decoration, and empty containers, all cost something. When UI feels slow, opening the Hierarchy and deleting unnecessary layers is often more effective than any optimization technique.
Summary
Both of UMG's big problems have clear causes.
| Symptom | Cause | Fix |
|---|---|---|
| Focus jumps somewhere odd | Automatic navigation guessing | Name destinations with Explicit Navigation |
| Nothing has focus at first | Set User Focus runs too early | Call it after Add to Viewport |
| Direction keys do nothing | Input mode is still Game Only | Set Input Mode Game and UI (keeps the unpause key; UI Only suits title screens) |
| Slow when opened | Tick / Binding | Update only when the value changes |
| Slow with hundreds of widgets | Draw cost | Invalidation Box, then Retainer Box as a last step |
Be explicit instead of leaving it to a guess. Run things when values change instead of every frame. Those two principles clear up most UMG problems.
Take a look at the UI you're building right now. Is there a Binding in there that you added for debugging and never removed?