You lined 3,000 trees across a field. It looks great — but stat unit shows Draw climbing. Is cutting trees the only option?
There's a way that doesn't require it. When you place many copies of one mesh, collapse the draw commands into one — that's instancing. This article covers why Draw grows, how to choose between ISM, HISM and Foliage, how to drive it from Blueprint, and the question everyone asks: do I need this if I'm using Nanite?

What You'll Learn
- One mesh = one draw command (why Draw climbs)
- Instancing means sending only an array of positions
- Choosing between ISM / HISM / Foliage (when in doubt, ISM)
- Distance thinning means entering
Cull DistanceyourselfAdd Instanceand the index-management gotcha- Whether you need this with Nanite
- Hands-on: convert 3,000 actors to ISM and compare Draw
Why Draw Climbs
The Draw figure in stat unit (→ the stat commands) is time spent by the CPU telling the GPU "draw this."
As a rough mental model: putting out many copies of one mesh as separate Actors tends to multiply the number of commands.
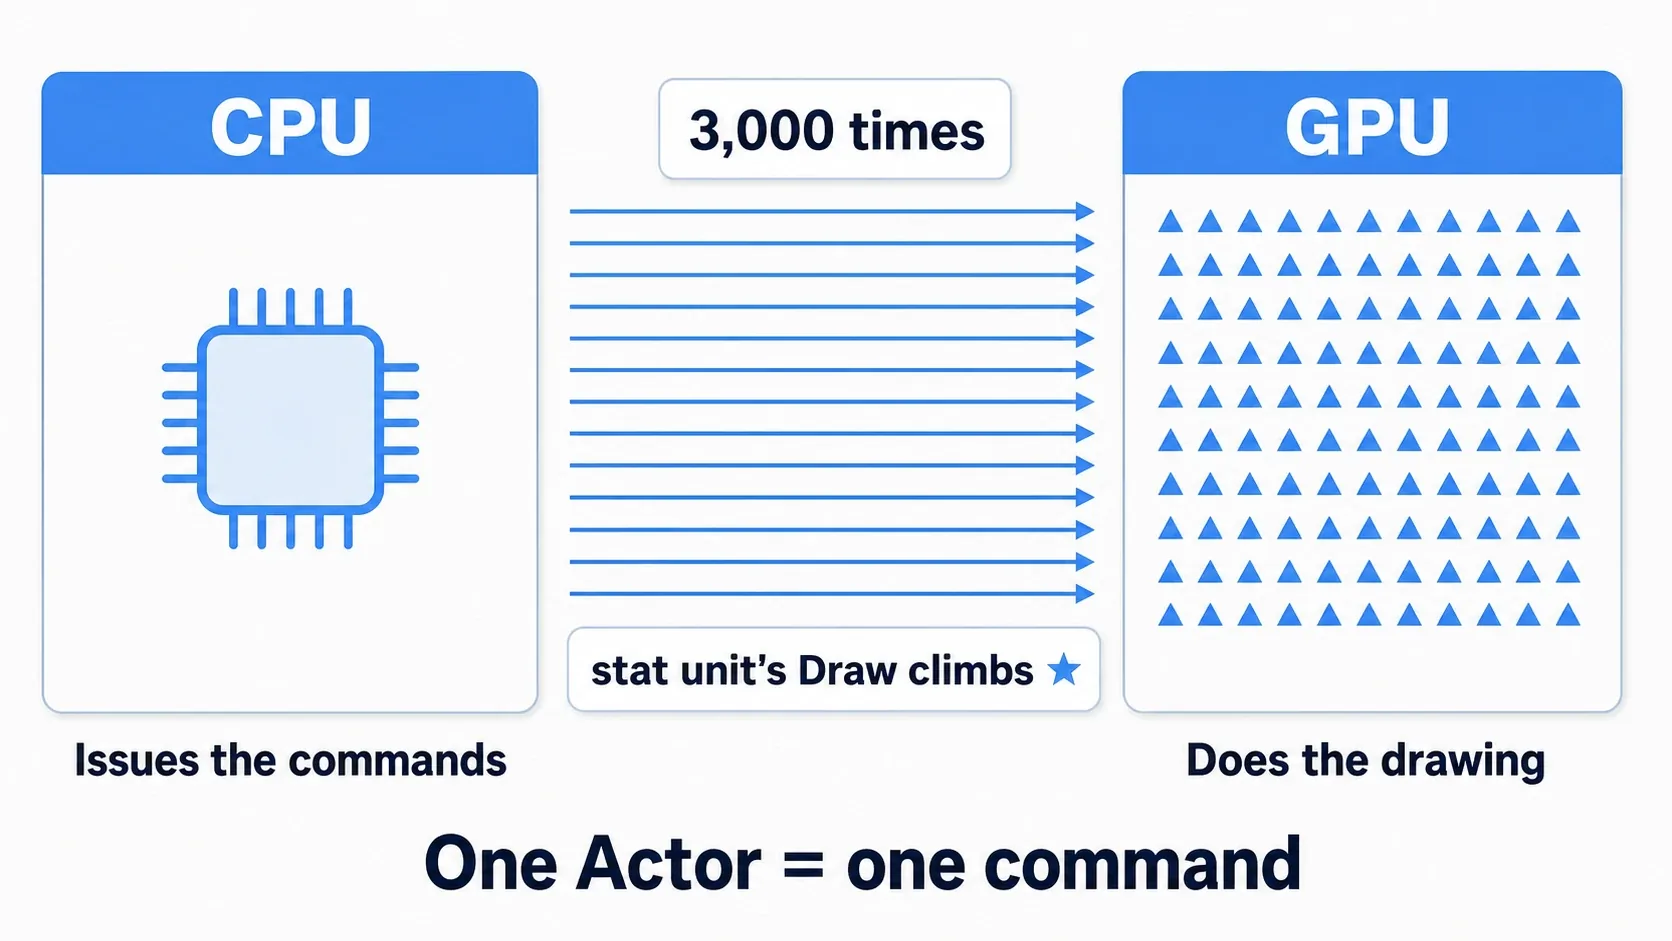
3,000 trees means something close to 3,000 commands. Each is brief, but stacked that deep, Draw climbs.
"One Actor = one command" is an entry-level model, nothing more. The real number also depends on material slot count, render passes, shadows, and culling, so it won't be exactly 3,000. Take away only the intuition that more objects means more commands. We'll measure the actual number with
stat rhilater.
The important part: it's the CPU that's loaded, not the GPU. Halving each tree's polygon count leaves the command count at 3,000, so Draw doesn't move.
| Symptom | Cause | What helps |
|---|---|---|
Draw is large | Too many commands | Instancing, culling |
GPU is large | Too much to draw (polygons, pixels) | LOD, resolution, cheaper shaders |
If stat unit shows Draw as the outlier, this article applies. If GPU is the outlier, that belongs to LOD and culling or Nanite.
One Command for All of Them
The idea behind instancing is almost anticlimactic.
Say "draw this shape at these 3,000 places" once.
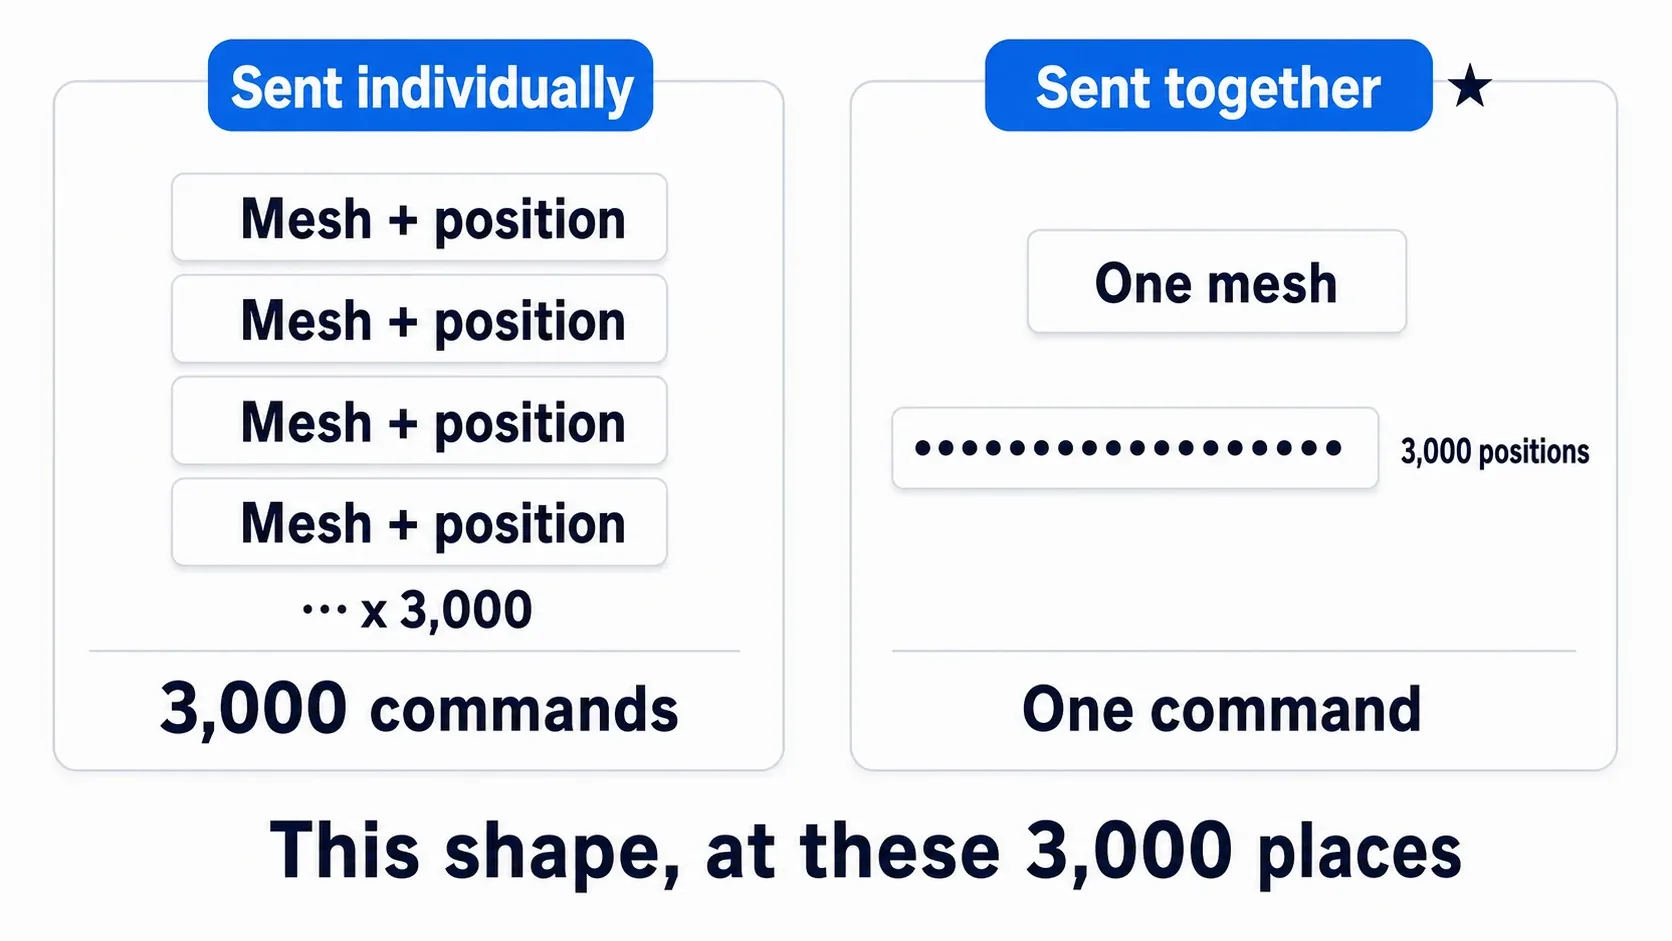
You send two things:
- The mesh description (shape and material), once
- Position, rotation and scale, as an array of 3,000
The command count becomes one. The GPU still draws the shape 3,000 times in different places, but the CPU's work is a single command.
The condition is that everything shares one mesh and one material. Three tree species means three commands — still overwhelmingly fewer than 3,000.
Same shape, varied appearance. Rotation and scale are per-instance, so a stand of trees doesn't look mechanical. To vary color or surface per individual, Material Instances offer
Per Instance Custom Data.
Three Options
UE gives you three routes into instancing. They're the same machinery underneath.
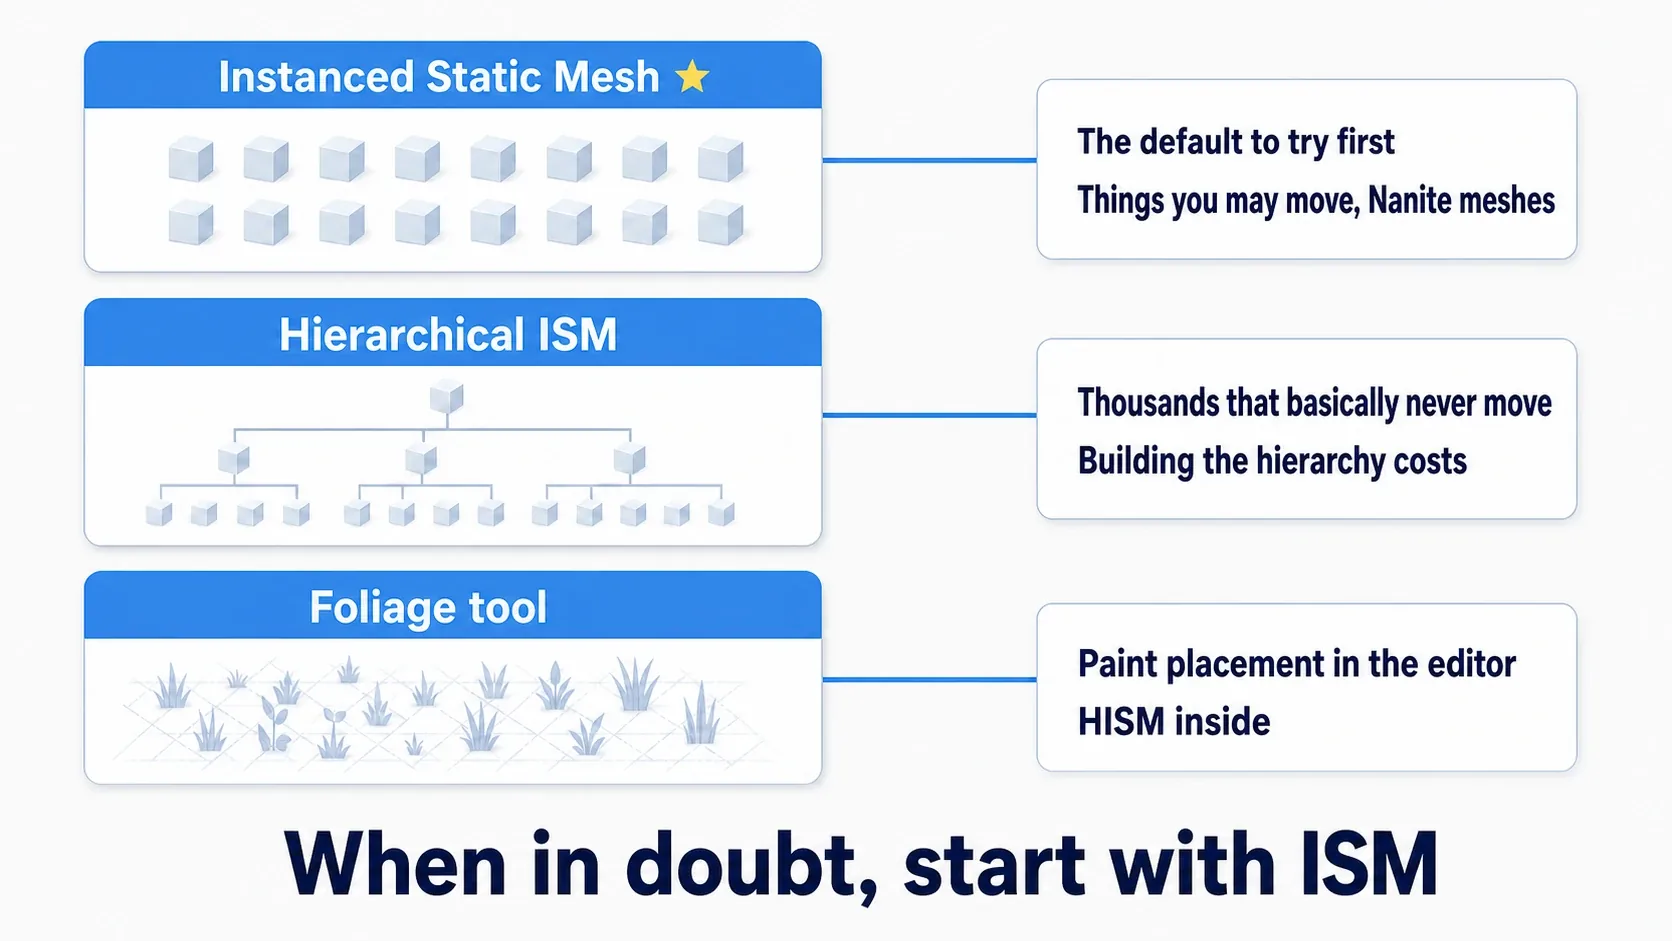
| Route | What it does | Suits |
|---|---|---|
| Instanced Static Mesh (ISM) | Add positions to a Component | The default to try first. Things you may move, Nanite meshes |
| Hierarchical ISM (HISM) | ISM plus a spatial hierarchy | Thousands that basically never move |
| Foliage tool | Paint placement in the editor. HISM inside | Natural props you want to place by hand |
When in doubt, start with ISM. You'll often read "use HISM when there are many," but that's a premise from older UE. Modern ISM performs per-instance culling and LOD on the GPU, so it isn't true that "ISM draws everything forever."
HISM earns its place with thousands of things that basically never move. It holds placement as a hierarchy (a tree), letting it quickly narrow a wide area down to the visible clusters. Building that structure costs something, though, and moving instances means rebuilding it.
| Situation | Pick |
|---|---|
| Dozens to hundreds, or things you may move | ISM |
| Nanite-enabled meshes | ISM (fits naturally with how Nanite works) |
| Thousands of place-and-forget foliage or rocks | HISM |
| You want to paint by hand in the editor | The Foliage tool (HISM inside) |
The Foliage tool is a UI for painting HISM by hand. Same machinery, so the split is: Foliage when you want to place in the editor, your own Component when you want to add instances from Blueprint (→ Landscape Basics).
And decide which is faster by measuring. Swap with the same count from the same viewpoint and compare stat unit. That's the only correct approach in this area.
Driving It from Blueprint
In Blueprint, add an Instanced Static Mesh Component (or Hierarchical Instanced Static Mesh Component), assign one mesh, then add positions.
| Node | What it does | Returns |
|---|---|---|
| Add Instance | Adds one instance | The index it was given |
| Remove Instance | Removes the given index | Success |
| Update Instance Transform | Moves the given index | Success |
| Clear Instances | Removes all | — |
Add Instance takes a Transform (position, rotation, scale). Call it 3,000 times in a loop and you get 3,000 of them.
And here's the classic trap.
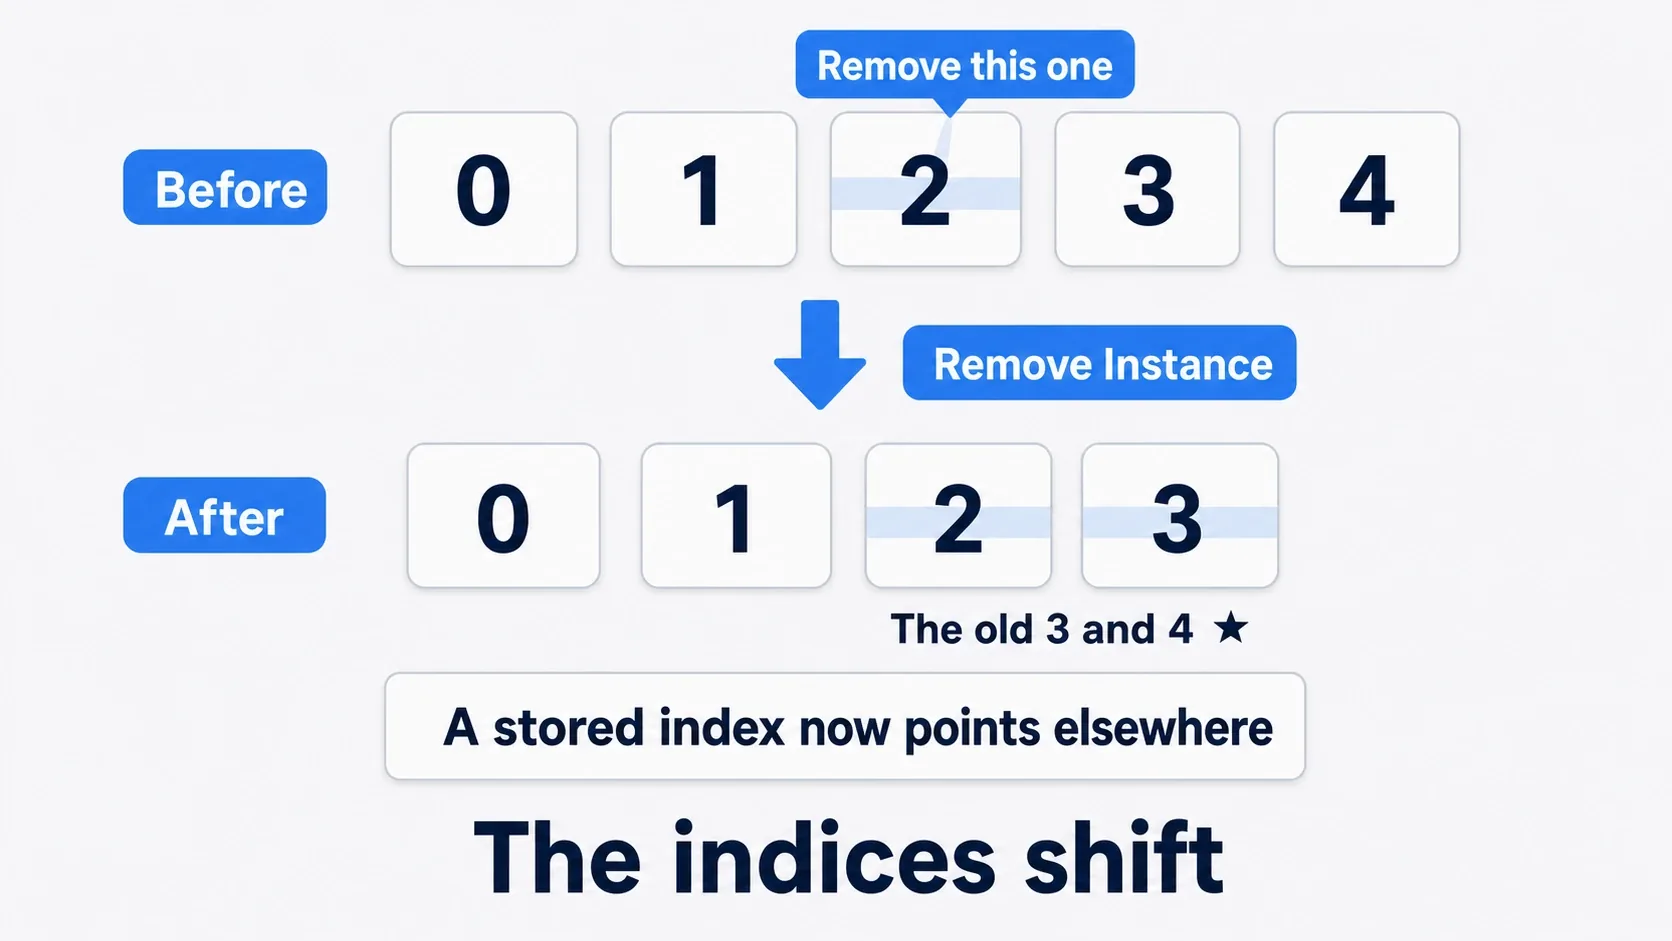
Remove Instance on a middle instance shifts the later indices down.
- Before:
01234 - Remove
2→0123(the old3becomes2, the old4becomes3)
If you stored "this tree is number 3" in a variable, number 3 now refers to a different tree.
Two ways around it:
- Don't store indices: fetch the index at the moment you remove, and remove immediately
- Don't remove: move it below the floor with
Update Instance Transformso it "looks" removed
This is structurally the same problem as removing array elements mid-loop. Instances are an array internally, so every array caveat carries over.
When It Doesn't Help, and Nanite
There are cases instancing doesn't suit.
| Situation | Why |
|---|---|
| Different materials | Separate batches. They don't collapse into one |
| You want to move them individually | Moving needs Update Instance Transform, which gets expensive in bulk |
| You need per-instance collision events or logic | Instances aren't Actors, so they can't have Overlap or their own logic |
The third matters most in practice. An instance is "a thing that gets drawn." Anything that needs per-individual behavior — a tree you shoot down, a chest you open — stays an Actor.
And now the question everyone has: what about Nanite?
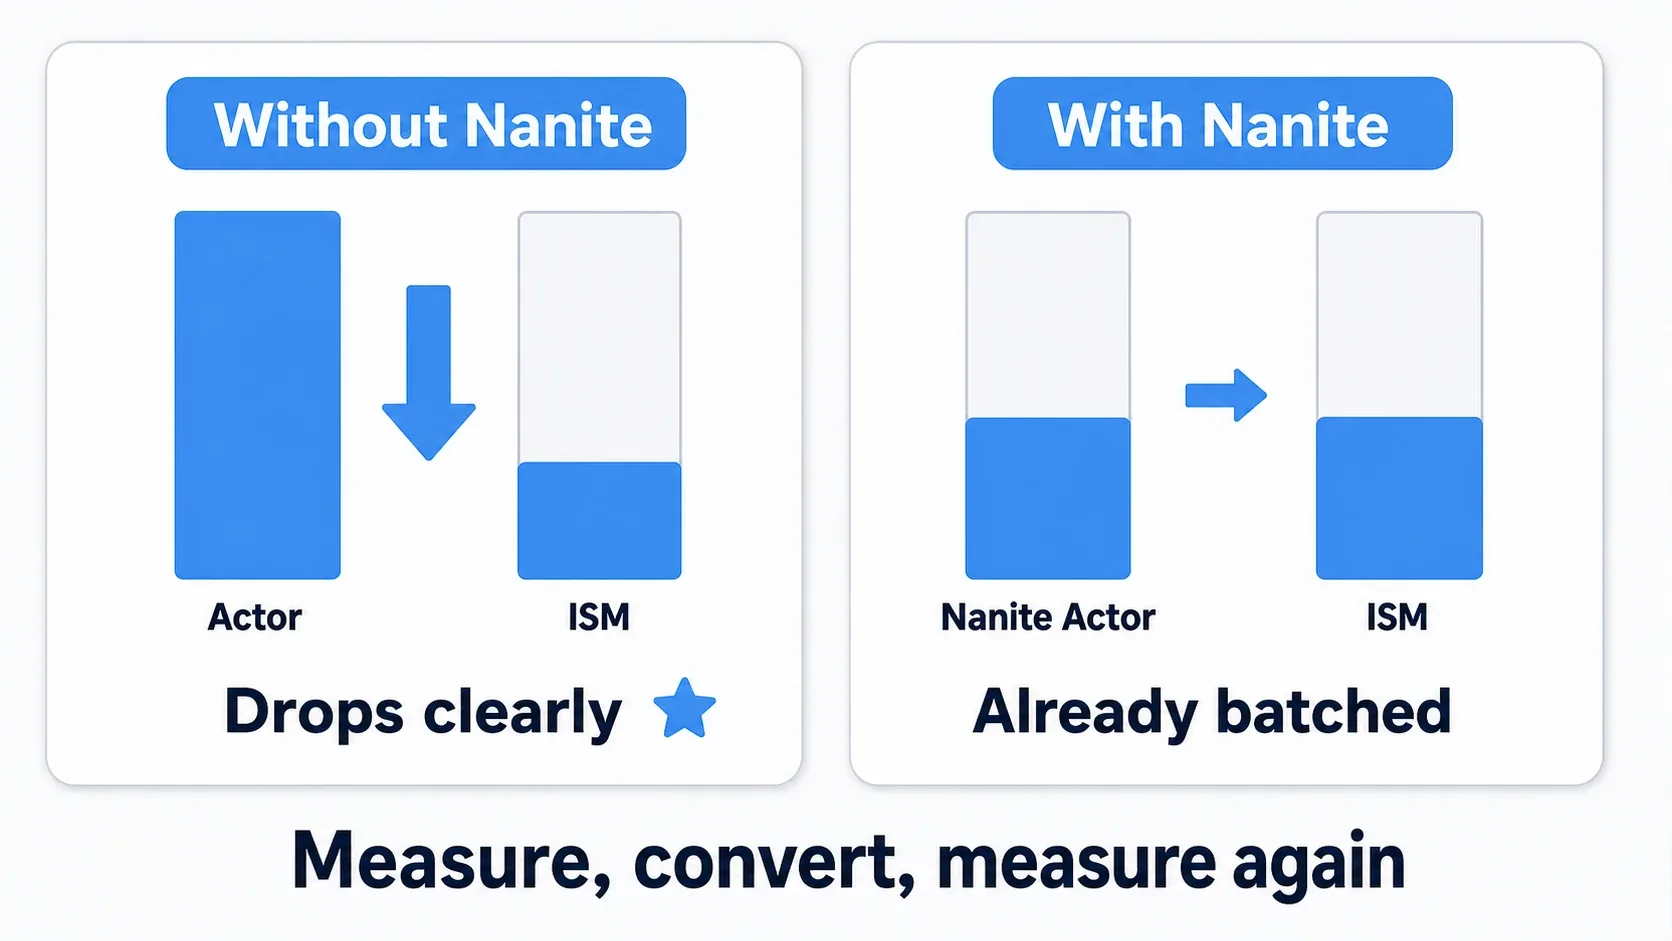
Nanite-enabled meshes are batched on the Nanite side. So if you're placing a lot of Nanite meshes, converting them to ISM reduces Draw far less.
That said, Nanite can't simply be enabled on every mesh (coverage has advanced across versions), and existing projects will have plenty of non-Nanite meshes.
The decision is easy: measure stat unit's Draw, convert, measure again. If it drops, it worked. If it doesn't, look at other measures (LOD and culling) for that case. Deciding by numbers rather than guesswork is the only correct approach here (→ Unreal Insights).
Hands-On: Convert 3,000 and Compare Draw
An open-field forest, roguelike rubble, tower defense obstacles. Placing many copies of one thing shows up in every genre. Let's actually convert and watch the numbers move.
Building the case
| Item | Details |
|---|---|
| Mesh | Any Static Mesh (Starter Content's SM_Rock works) |
| Count | 3,000 |
| Environment | Standalone Game (not editor Play) |
Start with 3,000 Actors. Placing them by hand is infeasible, so lay them out from Blueprint.
Create BP_ForestA (Actor) and on Event BeginPlay, run a For Loop (0–2999) placing Static Mesh Actors in a grid with Spawn Actor from Class.
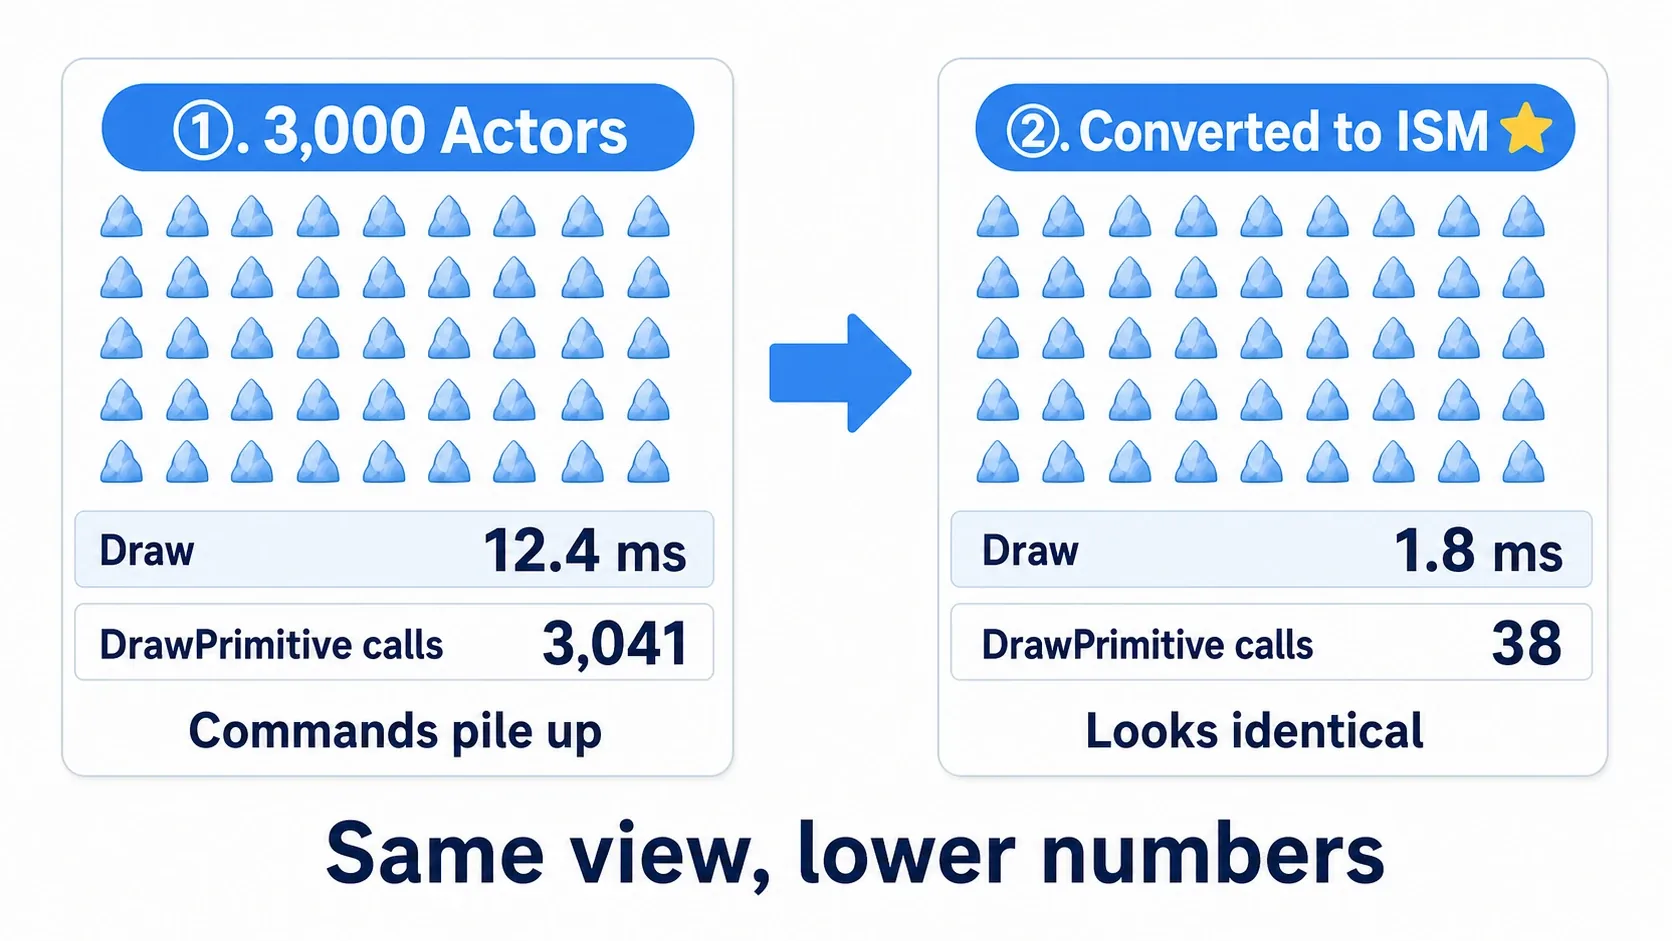
① Measure the Actor version
Launch Standalone and type stat unit. Write down Draw (also check stat rhi's DrawPrimitive calls to see the command count itself).
Fix the camera position and orientation while measuring. Change what's visible and the numbers change, which ruins the comparison.
② Convert to ISM
Create a new BP_ForestB (Actor).
- Add an
Instanced Static MeshComponent namedTrees - Set its
Static Meshto the same mesh as ① - On
Event BeginPlay, run aFor Loop(0–2999) - Inside the loop, build a
Make Transformfrom the grid position and feed it toAdd Instance(Target:Trees)
Only Spawn Actor from Class became Add Instance — the layout logic is identical to ①.
③ Thin out the distance (set the values yourself)
Distance thinning doesn't happen unless you enter the values. Two settings in the Component's details panel.
| Setting | Value | Meaning |
|---|---|---|
Instance Start Cull Distance | 4000 | Where they begin fading |
Instance End Cull Distance | 6000 | Where they disappear entirely |
Units are centimeters, so that's fading from 40 m and gone by 60 m. Expecting "the distant ones should disappear" without entering values won't work. This isn't automatic — it's a number you choose.
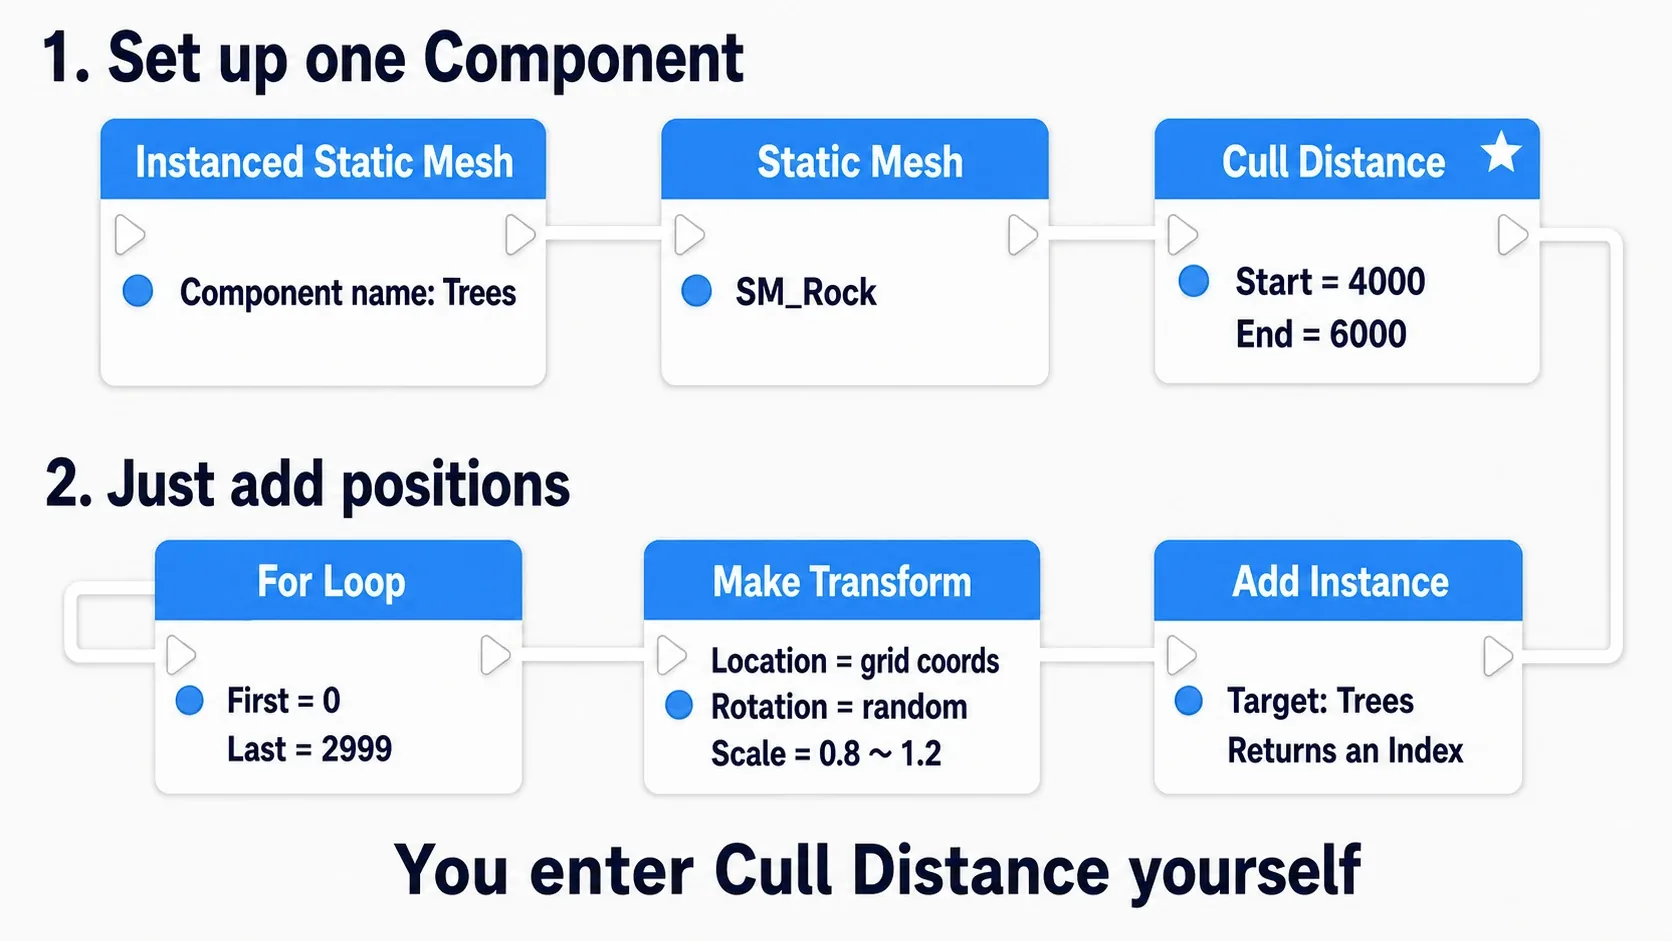
BP_ForestB (Event Graph)
Event BeginPlay
  → For Loop (First = 0, Last = 2999)
      Loop Body:
        // Lay out a grid (50 columns x 60 rows, 400 spacing)
        x = (Index % 50) * 400.0
        y = (Index / 50) * 400.0
        t = MakeTransform(
              Location = (x, y, 0.0),
              Rotation = (0, 0, RandomFloatInRange(0, 360)),   // vary the facing
              Scale    = (1.0, 1.0, RandomFloatInRange(0.8, 1.2)))
        → Trees.AddInstance(Transform = t, bWorldSpace = false)
Checking it
Swap in BP_ForestB, launch Standalone from exactly the same position and orientation as ①, and bring up stat unit.
The view looks essentially identical (3,000 rocks in a grid), yet Draw has clearly dropped. stat rhi's DrawPrimitive calls shows nearly 3,000 commands falling dramatically.
Now check step ③. Pull the camera back and move away from the cluster. Past the End Cull Distance of 6000 (60 m), the distant rocks disappear. Change 6000 to 3000 and you'll watch the vanishing point move closer. That's the values you set doing exactly what you told them — not magic.
Troubleshooting:
- Nothing renders → You forgot to assign
Static Mesh. Check the Component's details panel - They're all stacked in one spot →
Make Transform'sLocationis the same every iteration. Confirm you're computing coordinates fromIndex - Draw doesn't drop → The original mesh most likely has Nanite enabled. It's already batched, so this conversion has nothing to gain
- Distant rocks don't disappear →
Instance Start / End Cull Distanceare still0. Zero means "don't thin," so enter values - The numbers differ each run → The camera moved. Measure from the same place
Two things to take away.
- It only helps when Draw is the problem: confirm Draw is the outlier in
stat unitfirst. It does nothing for GPU-bound slowness - Don't convert anything that needs its own behavior: instances aren't Actors, so no per-instance collision events or logic. Move only background dressing to ISM
- Distance thinning is a value you enter:
Instance Start / End Cull Distancedefault to0(don't thin). When "I converted it and nothing got faster," look here first
If you'd rather paint the trees by hand in the editor, the Foliage tool puts the same machinery behind a UI (→ Landscape Basics).
Bonus: Good to Know for Later
PCG uses this internally. The meshes PCG's Static Mesh Spawner places are instanced under the hood. "Thousands of trees stay relatively cheap" is this article's machinery at work. If you use PCG, you're already benefiting.
Consolidate materials. Separate materials for leaves and trunk split you into two batches immediately. Where possible, give background dressing a single material to cut batch count (atlasing textures is the same idea).
Pair it with an editor tool. An Editor Utility Widget that "converts the selected Actors into instances" lets you optimize existing levels in bulk. Valuable when you already hand-placed a lot of Actors.
Collision still works. Instances can't have individual events, but collision does function per instance — the player still bumps into the trees. "Solid, but doesn't react individually" is exactly right for background obstacles.
Summary
stat unit's Draw is command count. More objects, more commands (measure the real number)- Instancing means saying "this shape, at these 3,000 places" once
- When in doubt, start with ISM. Modern ISM also culls and LODs per instance on the GPU. HISM is for thousands that basically never move
- Distance thinning means entering
Instance Start / End Cull Distanceyourself (they default to 0 = don't thin) Add Instancereturns an index, andRemove Instanceshifts them- With Nanite, the gain is small. Measure, convert, measure again
The value here is dropping Draw without cutting a single tree. What's the most numerous mesh in your level?