You set out to build a game level and start making wall and floor models in Blender right away. But when you place them in UE, dimension redos pile up: "the corridor's too narrow", "the ceiling's low and cramped", "the jump doesn't reach". Before polishing looks, you want to check the feel of size, height, and distance first.
Doing that inside UE alone, without external software, is grey-boxing . With UE5's Modeling Mode , you can place boxes and stairs on the spot and verify the fun of the game. This article covers, from entering Modeling Mode to carving boxes into rooms and towers, while building a small watchtower.
What You'll Learn
- What grey-boxing is: checking size, height, and distance before looks
- How to enter Modeling Mode (Shift+5)
- Placing Box / Cylinder / Stairs by numeric values
- Carving rooms with PolyEdit and Boolean
- A sense of dimensions based on the player capsule
- Hands-on: building a climbable watchtower as a grey box
What Grey-Boxing Is
Grey-boxing is the step of assembling a level's shape with only grey boxes , no textures or decoration, to check the feel of play first . It's also called blockout.
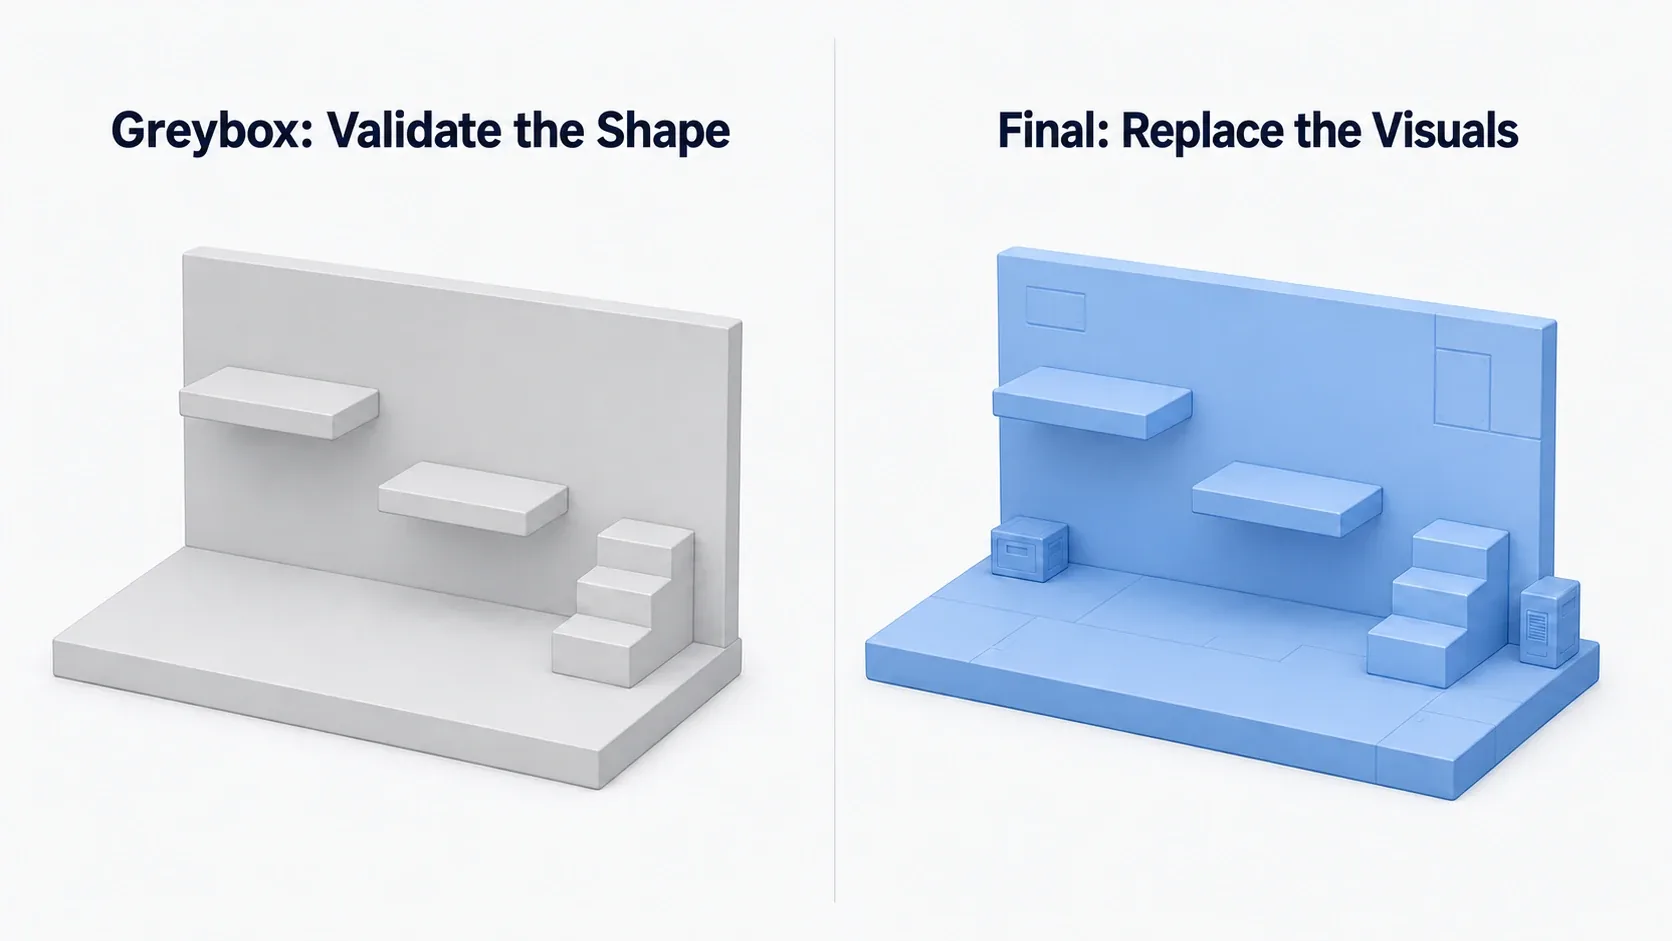
Why put looks off? Because fun is decided by dimensions .
- Size: is this room too wide and dull, or too narrow and cramped
- Height: is the ceiling free of pressure, and at a height the jump reaches
- Distance: is the gap between platforms at just the right tension
These aren't solved by applying pretty textures. Rather, if you realize "the corridor's actually narrow" after polishing the looks, it means remaking the models. So while it's still grey boxes, adjust only the dimensions over and over . This is grey-boxing's aim.
Entering Modeling Mode
Modeling Mode has been built into the editor since UE5.0. No separate install is needed.
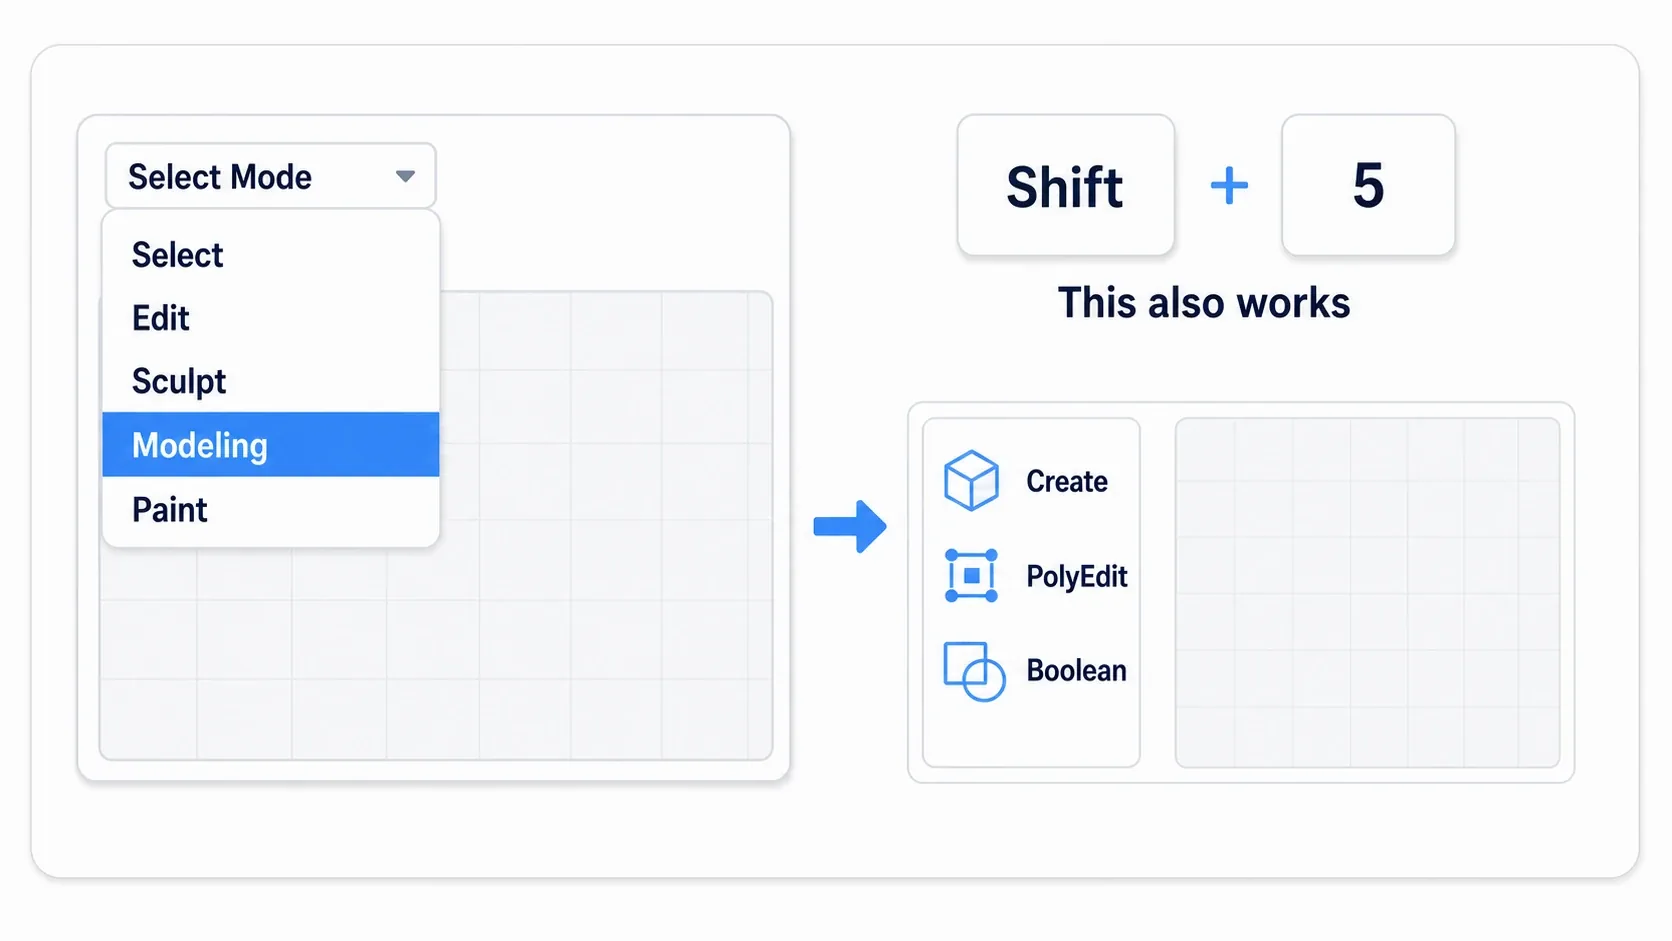
There are two ways in.
- From the mode switcher: open the dropdown labeled
Select Modeat the top-left of the viewport and chooseModeling - Shortcut: press
Shift + 5
Enter Modeling Mode and a panel of tools lines up on the left. Tools are grouped by category, like Create, PolyEdit, and Boolean. Placing a box from Create first is the clearest first step. When you're done, return to the normal mode with Select Mode (or Shift + 1 ).
Placing Boxes, Cylinders, and Stairs
With Modeling Mode's Create tools, you can place basic shapes on the spot. The three you'll use most in grey-boxing are these.
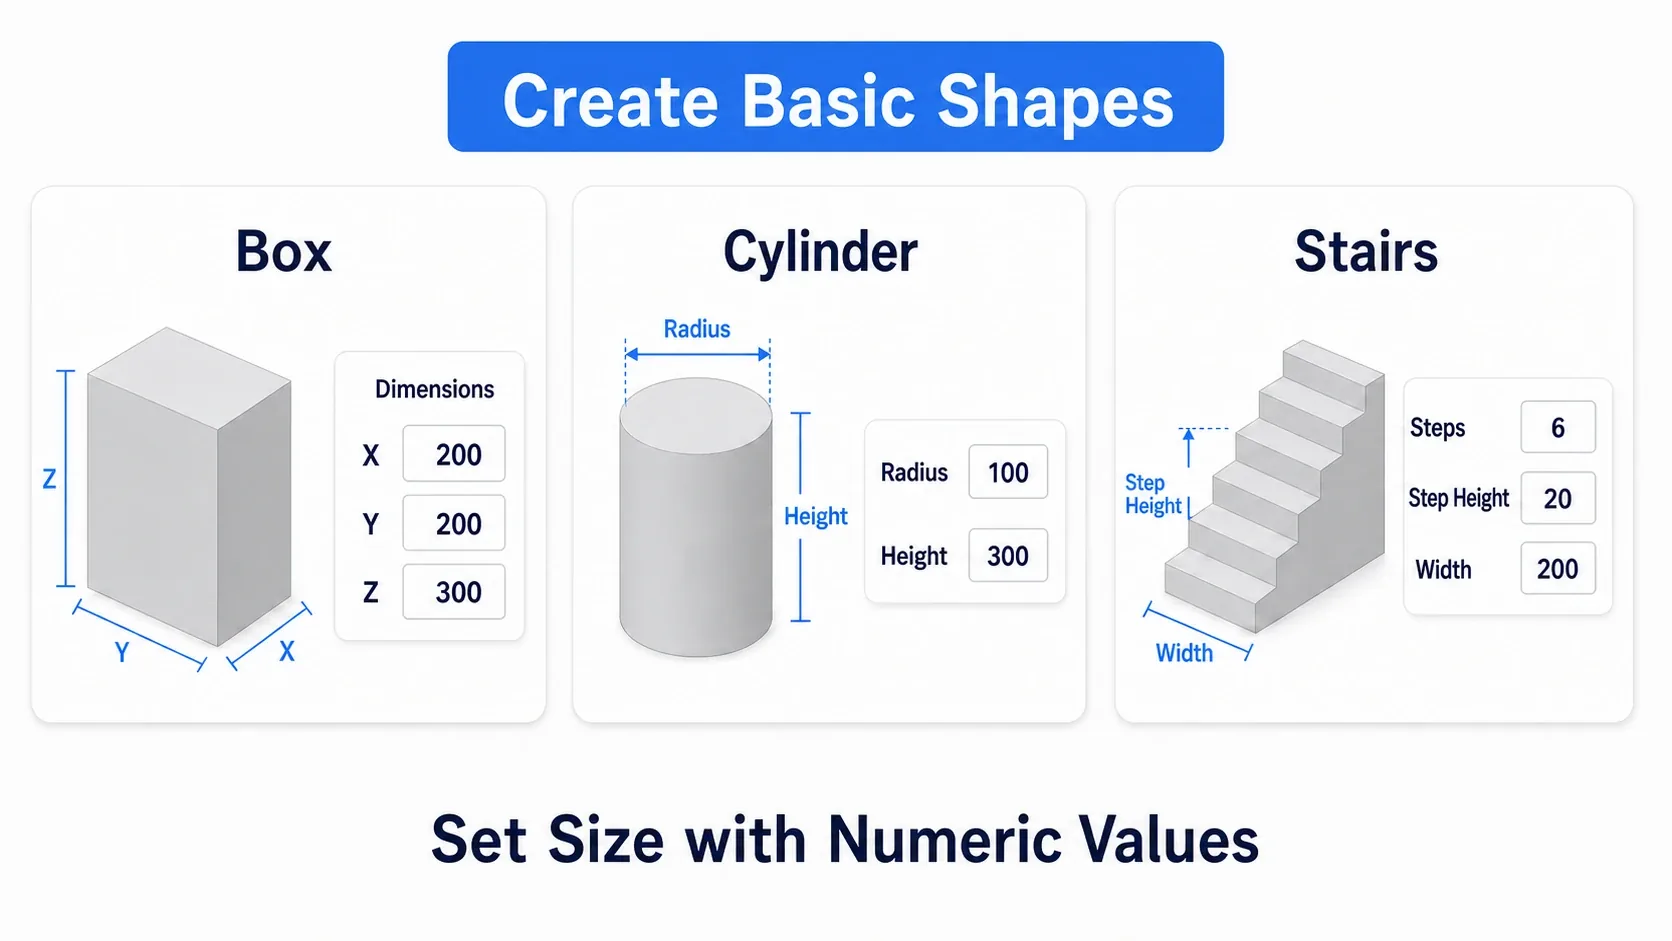
- Box: the basis for floors, walls, and platforms. Select the tool and set the size by specifying X / Y / Z in
Dimensionsnumerically - Cylinder: for pillars, tanks, and round platforms
- Stairs: specify the step count, per-step height, and width, and make stairs in one shot
The key is that you can specify the size numerically . Rather than dragging by eye, you place things by number, like "a wall 200cm wide and 300cm tall", so you can manage dimensions precisely. In grey-boxing, this numeric specification is the foundation of dimension verification.
Carving with PolyEdit and Boolean
Beyond just placing boxes, carving boxes into room shapes is Modeling Mode's strength. What you use here is PolyEdit and Boolean.
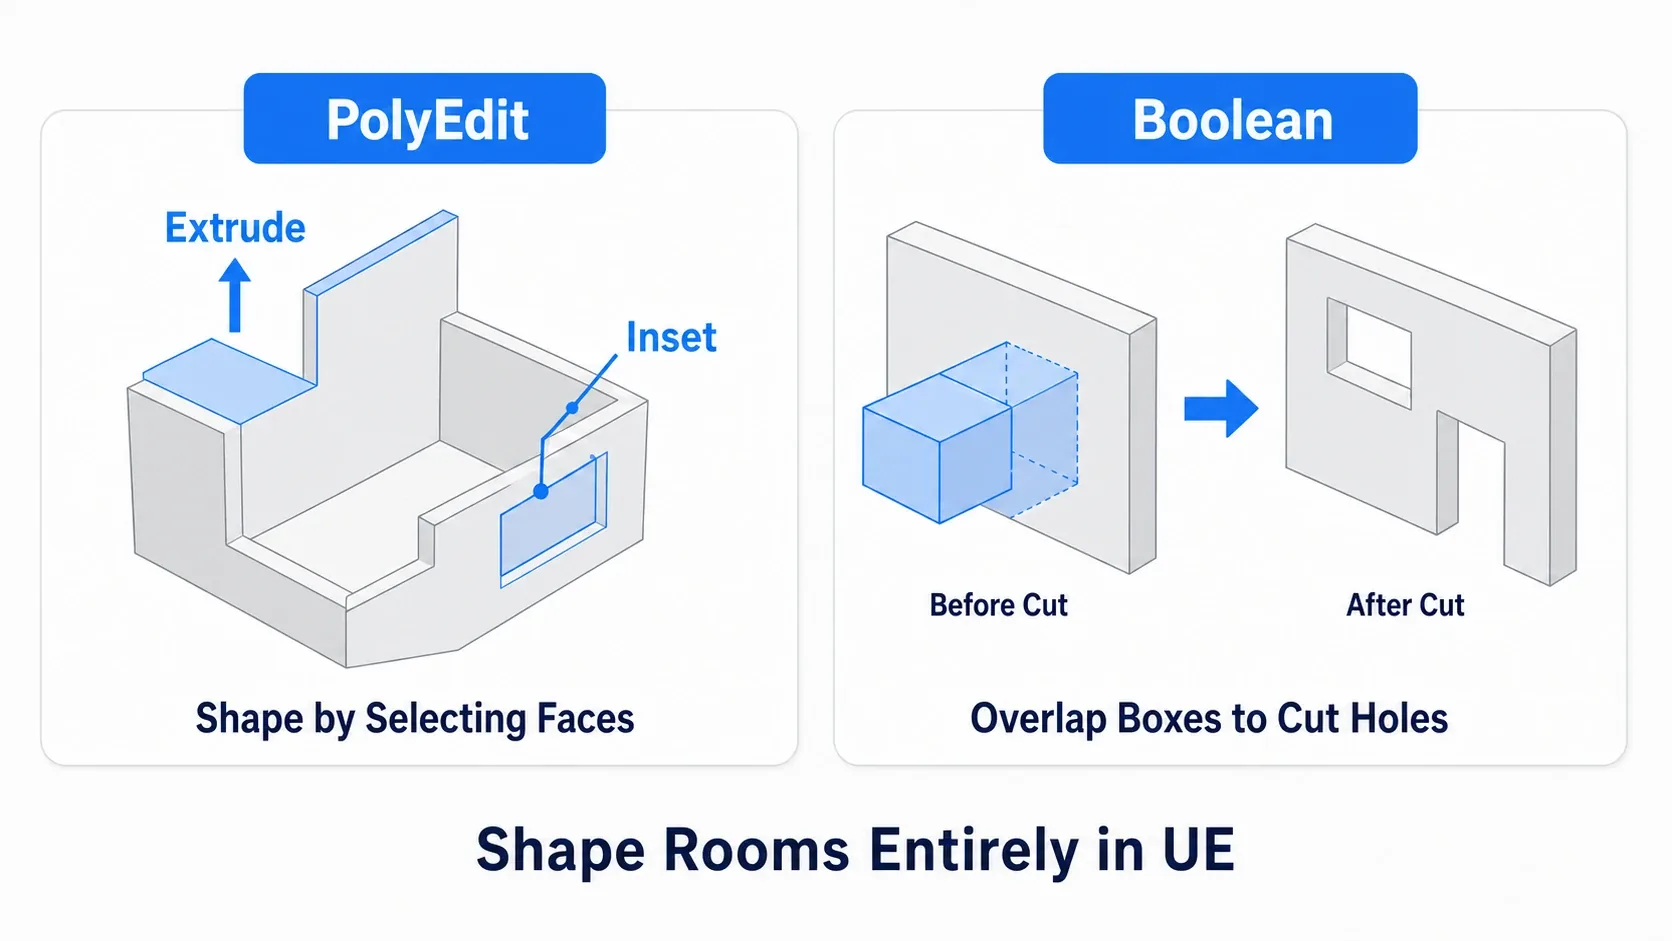
- PolyEdit: select and edit a box's faces. With Extrude you push a face out to extend a wall, and with Inset you make a slightly smaller face inside a face, carving the ins and outs of a room from a box
- Boolean: use the overlap of two shapes to cut one out of the other. Overlap a small box onto a wall box and Boolean it, and a window or entrance hole opens
For example, with the flow "place a box → Extrude the wall up with PolyEdit → overlap a small entrance box and cut it with Boolean", you assemble a room with an entrance. Making room shapes inside UE alone, without launching external modeling software, that's Modeling Mode's convenience.
A Sense of Dimensions That Pays Off Later
The most important thing in grey-boxing isn't how to use the tools, it's a sense of dimensions . And the reference for measuring dimensions is the player's capsule .
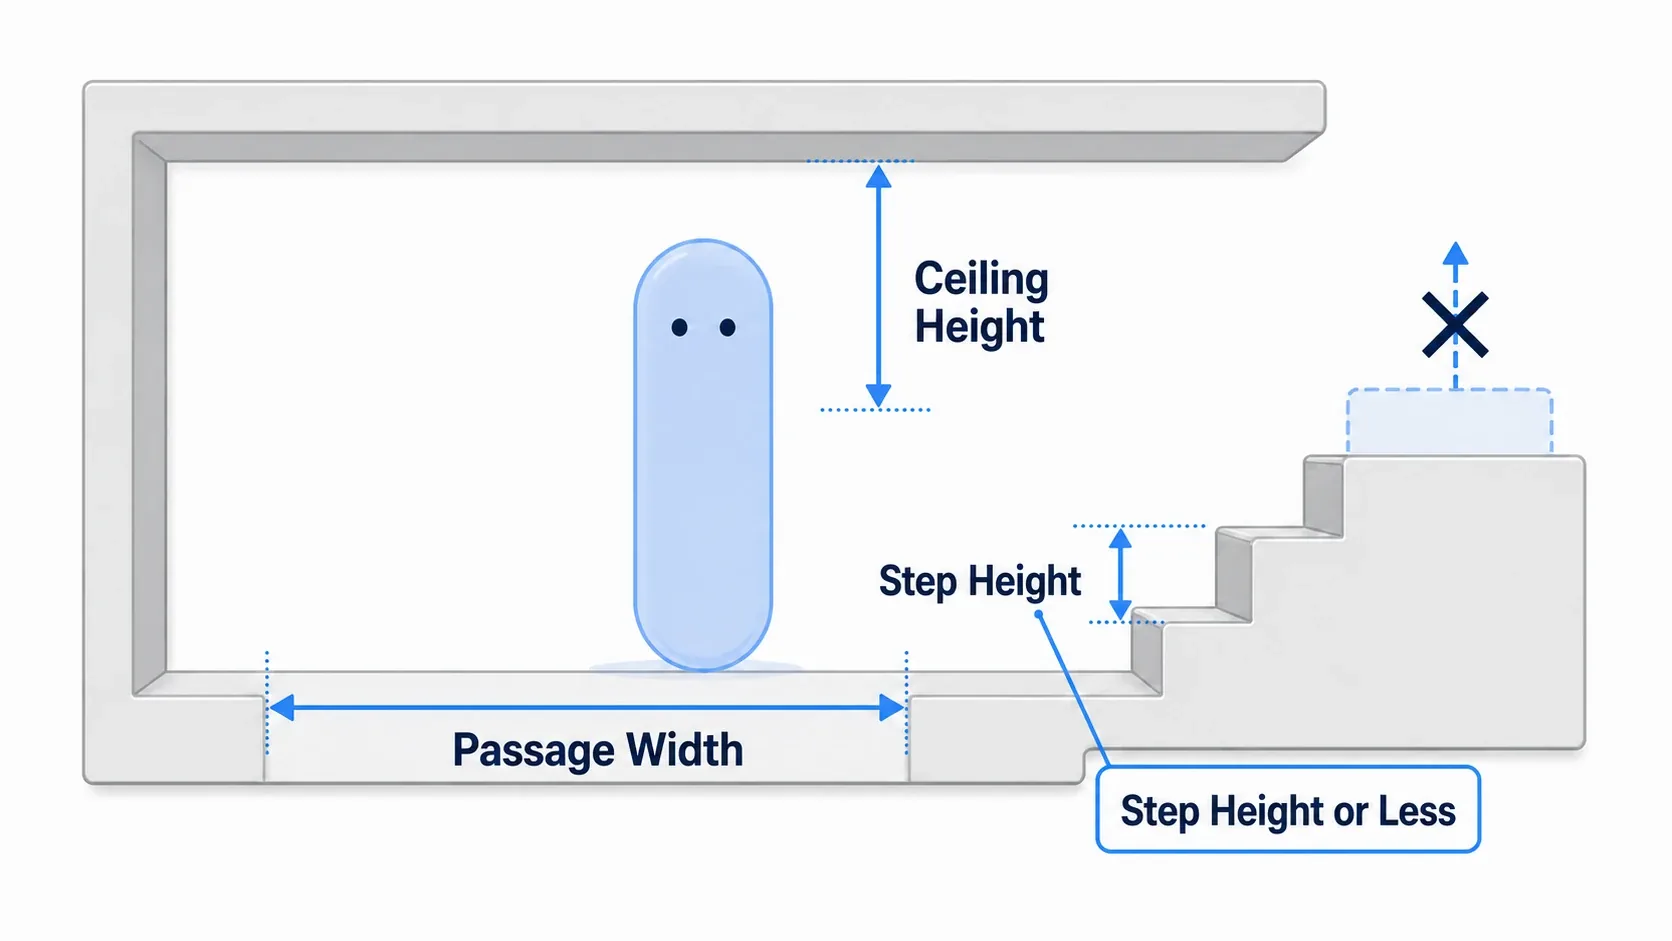
UE's standard character has its size set by the Character Movement capsule. Use this capsule as a ruler to decide dimensions.
- Corridor width: can the capsule pass with room to spare. Too narrow and it snags
- Ceiling height: is there room above the capsule's head. Does it bump its head on a jump
- Step height: is the per-step height not exceeding the character's Step Height . Exceed it and it can't climb, and the stairs don't function
Especially the relationship between step height and Step Height is a spot people often trip on in grey-boxing. Even if it looks like stairs, if a step is too tall the character can't climb. When making stairs with Modeling Mode's Stairs, keeping the per-step height at or below Step Height is the iron rule. With Modeling Mode, where you can place by number, this adjustment is easy.
Hands-On: Building a Climbable Watchtower
An action game's vantage point, a stealth game's watchtower, a platformer's mid-goal. "A climbable tower" is a structure many games want. Here we build one, as a Modeling Mode grey box, all the way to actually climbable.
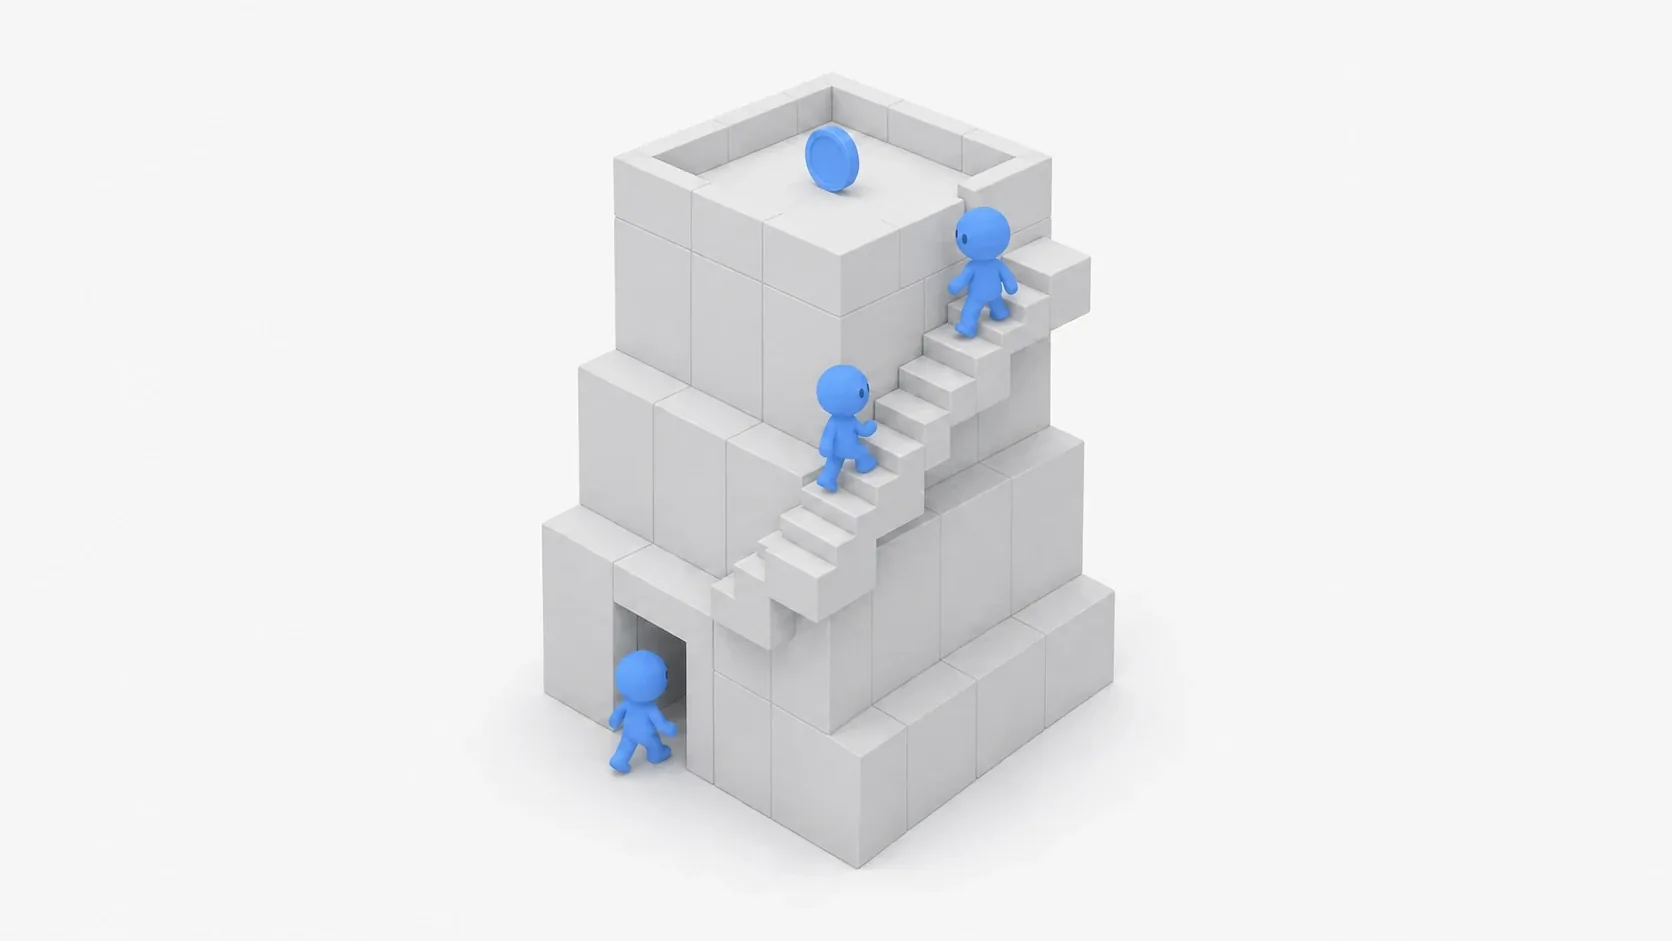
We're building a watchtower you can climb to the roof of, with a base from Box, walls raised with PolyEdit, stairs circled with Stairs, and an entrance cut with Boolean .
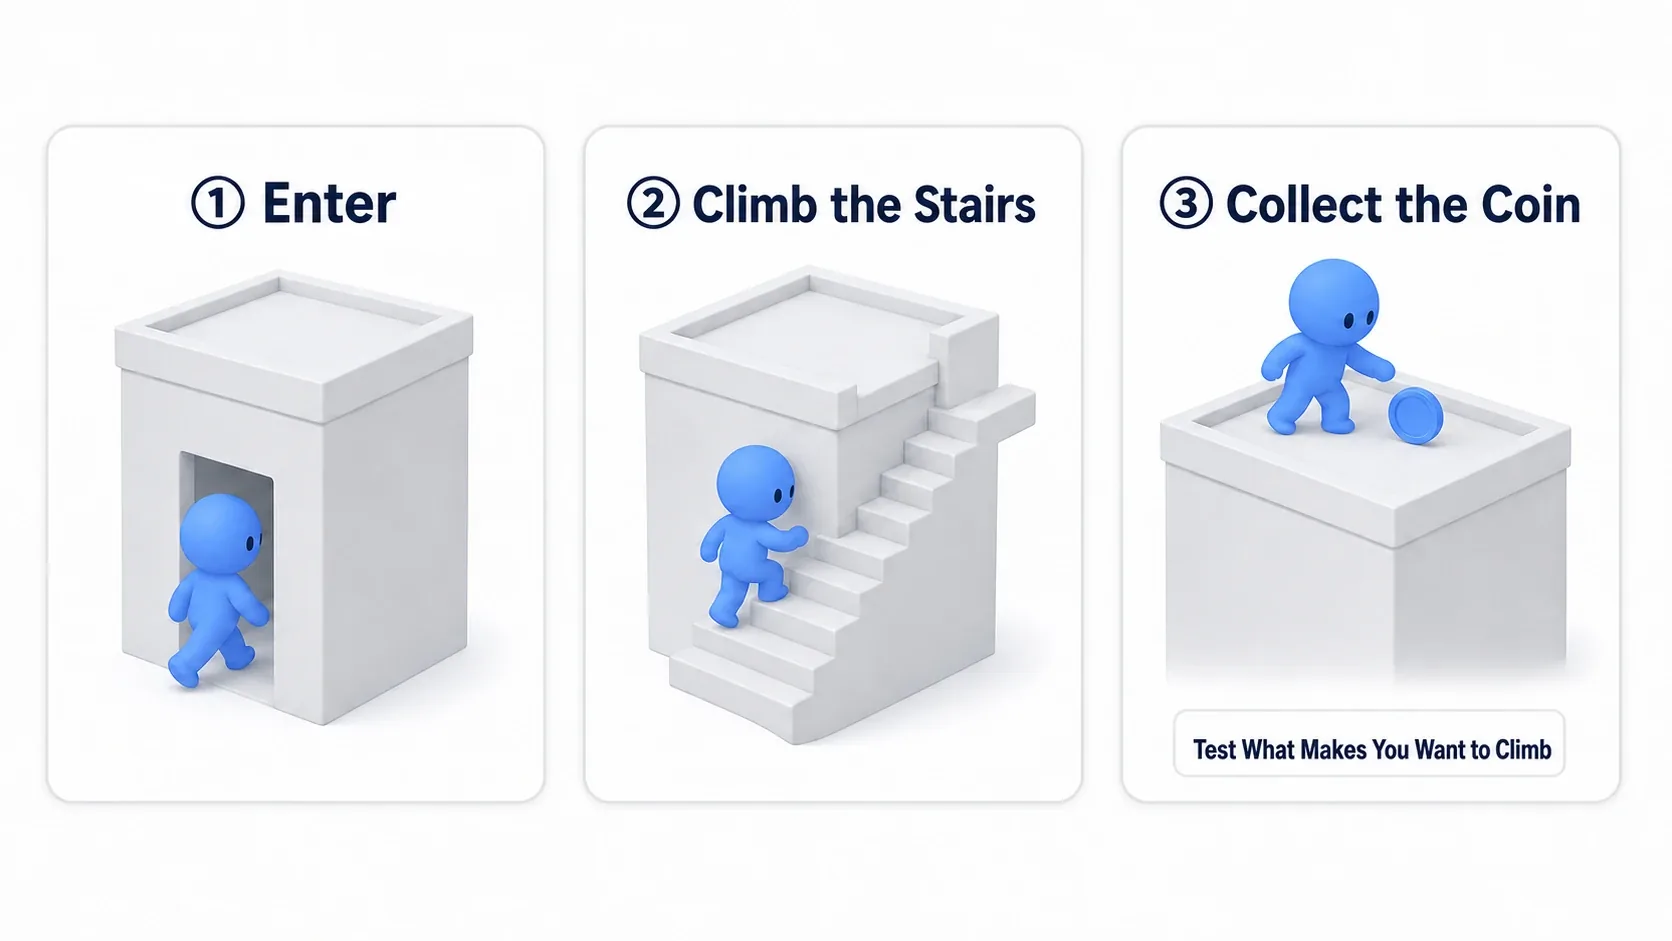
Here's what it looks like running. Control the character in PIE and you can enter the tower through the entrance, climb the stairs, and reach the roof. A coin is placed on the roof, so you can check "is this a shape worth climbing for" by actually climbing.
Steps
| Step | What to do |
|---|---|
| 1. Base | Place a Box for the tower's base (e.g. 500×500×100cm) |
| 2. Walls | Raise four walls with Box, or Extrude walls from the floor with PolyEdit |
| 3. Stairs | Make stairs with Stairs. Keep the per-step height at or below Step Height |
| 4. Entrance | Overlap a small Box on the wall and cut it with Boolean |
| 5. Verify | Actually climb in PIE. Place a coin (the one you build in Capstone: Coin Collecting Game) on the roof |
Verifying It
Send the character toward the tower in PIE. If it worked, you enter through the entrance and climb the stairs to the roof . Reaching the coin on the roof means success.
Here's how to narrow it down when it doesn't work. This dimension verification is the main event of grey-boxing .
- Stops, unable to climb a step partway → a step's height exceeds Step Height . Lower the Stairs' Step Height and remake (compare against Character Movement's Step Height)
- The entrance won't pass, or snags → the entrance width is narrow for the capsule. Make the box you cut with Boolean bigger
- Falls off the roof, no railing → add a railing Box. As part of dimension verification, look at fall prevention too
Two things to take away.
- Dimension verification is the main event: grey-boxing isn't about making a pretty tower, it's about checking "is it climbable" and "is it worth climbing". If a step can't be climbed, that's a dimension problem, not a looks problem. Adjust here over and over
- You can fix it because you place by number: Modeling Mode lets you set size numerically, so fine adjustments like "make the step 5cm lower" are immediate. Redoing dimensions is far faster than modeling by eye
Bonus: Good to Know for Later
Swap to assets once the shape is set. Once a "fun shape" is settled in grey box, swap the looks with Fab assets or your own models, on the grey-box foundation. Proceeding in the order "shape first, looks later" keeps you from getting dragged into dimension redos. Think of the grey box as a throwaway rough draft.
Generated mesh save location and collision. Meshes made in Modeling Mode are saved to the location set by the Asset Generation Location under Project Settings > Plugins > Modeling Mode (by default a _GENERATED folder at the same level as the level). Also, generated meshes get Simple Collision, so they function as walls and floors right away. If collision doesn't work as expected, check the generated mesh's collision settings.
Landscape for outdoors, Modeling Mode for man-made. Natural things like terrain and mountains suit Landscape, while man-made things like rooms, towers, and corridors suit Modeling Mode. Remembering this division keeps you from wavering over which tool to use in level building.
Summary
Level building without external software proceeds with this flow.
| Stage | What to do | Tool |
|---|---|---|
| Enter | Into Modeling Mode | Shift+5 / mode switcher |
| Place | Basic shapes by number | Box / Cylinder / Stairs |
| Carve | Make rooms and entrances | PolyEdit (Extrude/Inset) / Boolean |
| Verify | Climbable, playable | Check dimensions in PIE |
And the principle running through it is dimensions before looks . Build the size, height, and distance while it's still grey boxes, and the feel of play holds even as you just swap in the looks later.
With this, you can assemble level shapes without Blender. In the stage you want to build, where's the most exciting "climbable spot" for the player? First, place one grey box.
Further Learning
- Making Terrain with Landscape — Landscape for outdoors, Modeling Mode for man-made
- Basic Editor UI Operations — the basics of editor operation
- Importing Assets with Fab — swapping from grey box to assets
- Character Movement Component — the reference for dimension verification (Step Height)