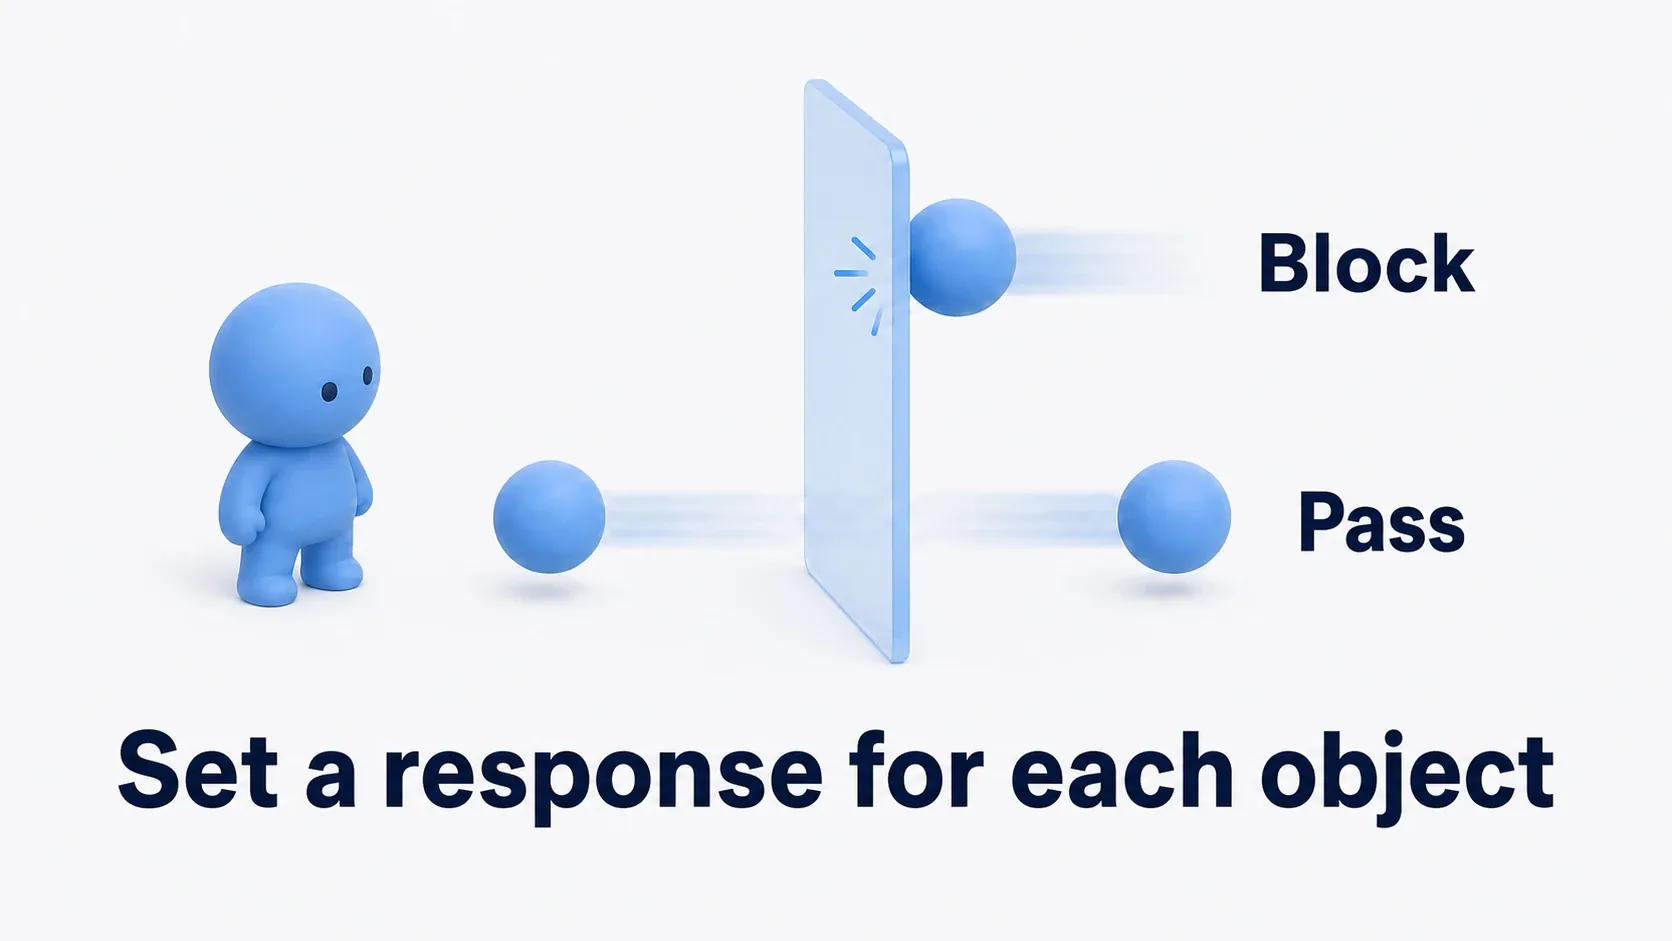
"I want the shield to block enemy bullets but let friendly ones through." "I want this trigger to react only to the player." Requirements like these show up the moment your game starts taking shape. But toggling between Block and Overlap only gives you "everything collides" or "everything passes through."
This is where collision channels and collision profiles come in. UE's collision isn't a single axis of "collides or not"; it's built as a table where you can vary the response per target.
This article explains how to read that table and how to design with it. At the end, we'll build a shield that blocks only enemy bullets from scratch.
What You'll Learn
- A channel is a name tag for what you are; a profile is a table of how you respond to whom
- Object Channels and Trace Channels serve different purposes
- What the three options
Ignore/Overlap/Blockactually mean- Collision is mutual, and if either side says Ignore, nothing happens
- Hands-on: building a shield that blocks only enemy bullets
Channels and Profiles: The Name Tag and the Response Table
Until you can tell these two apart, opening the settings screen will just keep confusing you. Let's make it clear first.
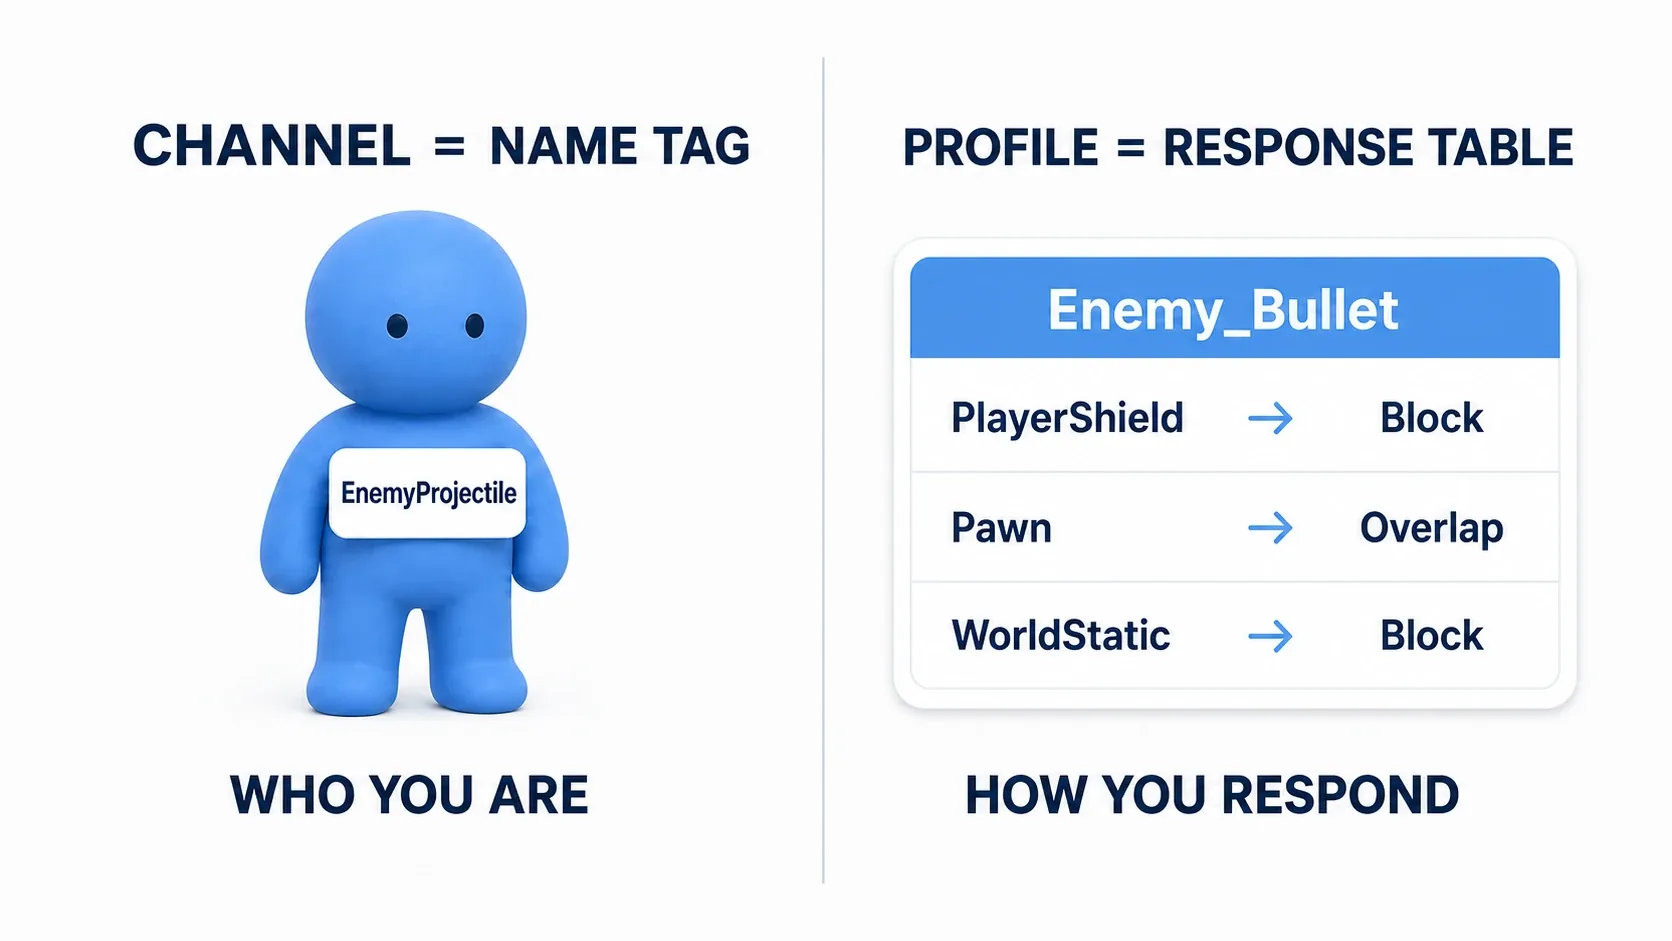
- Collision channel = a name tag declaring what you are. It says "I'm a Pawn" or "I'm an enemy bullet," and nothing more
- Collision profile = a table of how someone wearing that name tag responds to each other party. It's a list of rows like "blocks Pawn, ignores WorldStatic"
The important part is that creating a channel alone does nothing. A new name tag doesn't change your behavior. Behavior changes only once you build a table of responses (a profile) and apply it to a component.
There's one more thing that nearly every beginner trips over.
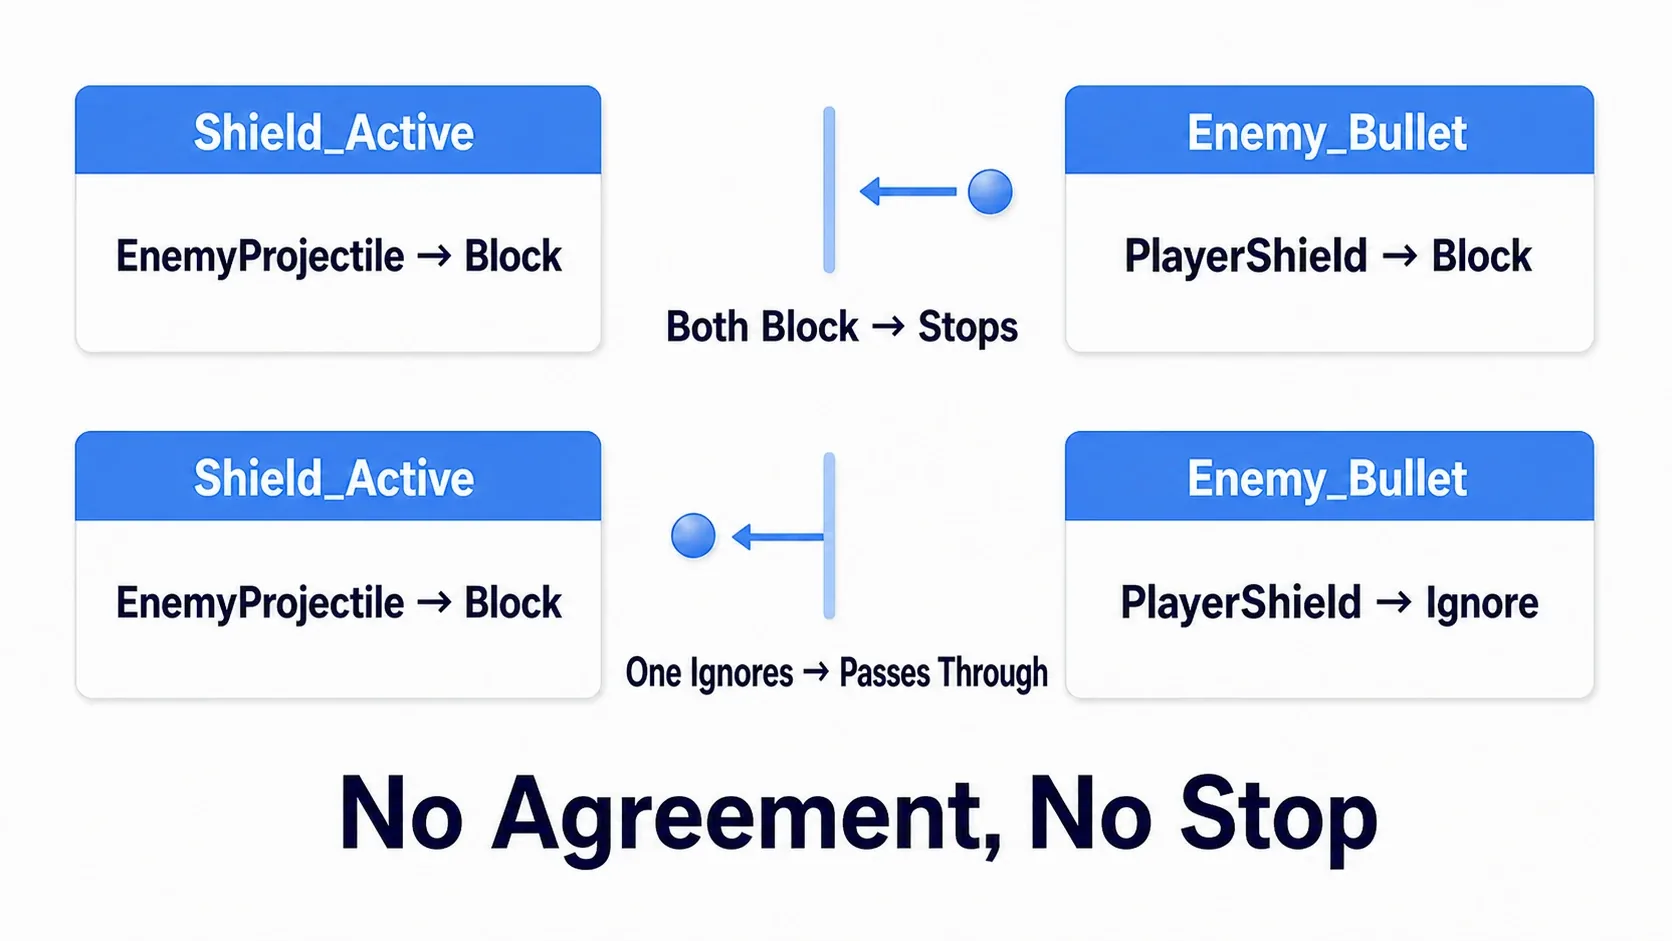
The response is determined by both sides' settings. Line up A's and B's settings and think of it as the weaker one winning. If either side says
Ignore, you getIgnore; if one saysBlockbut the other saysOverlap, you getOverlap; only when both sayBlockdo you getBlock. Most "I set it up but it doesn't stop" cases come from this.
Object Channels and Trace Channels
There are two kinds of channels, with clearly separate purposes.
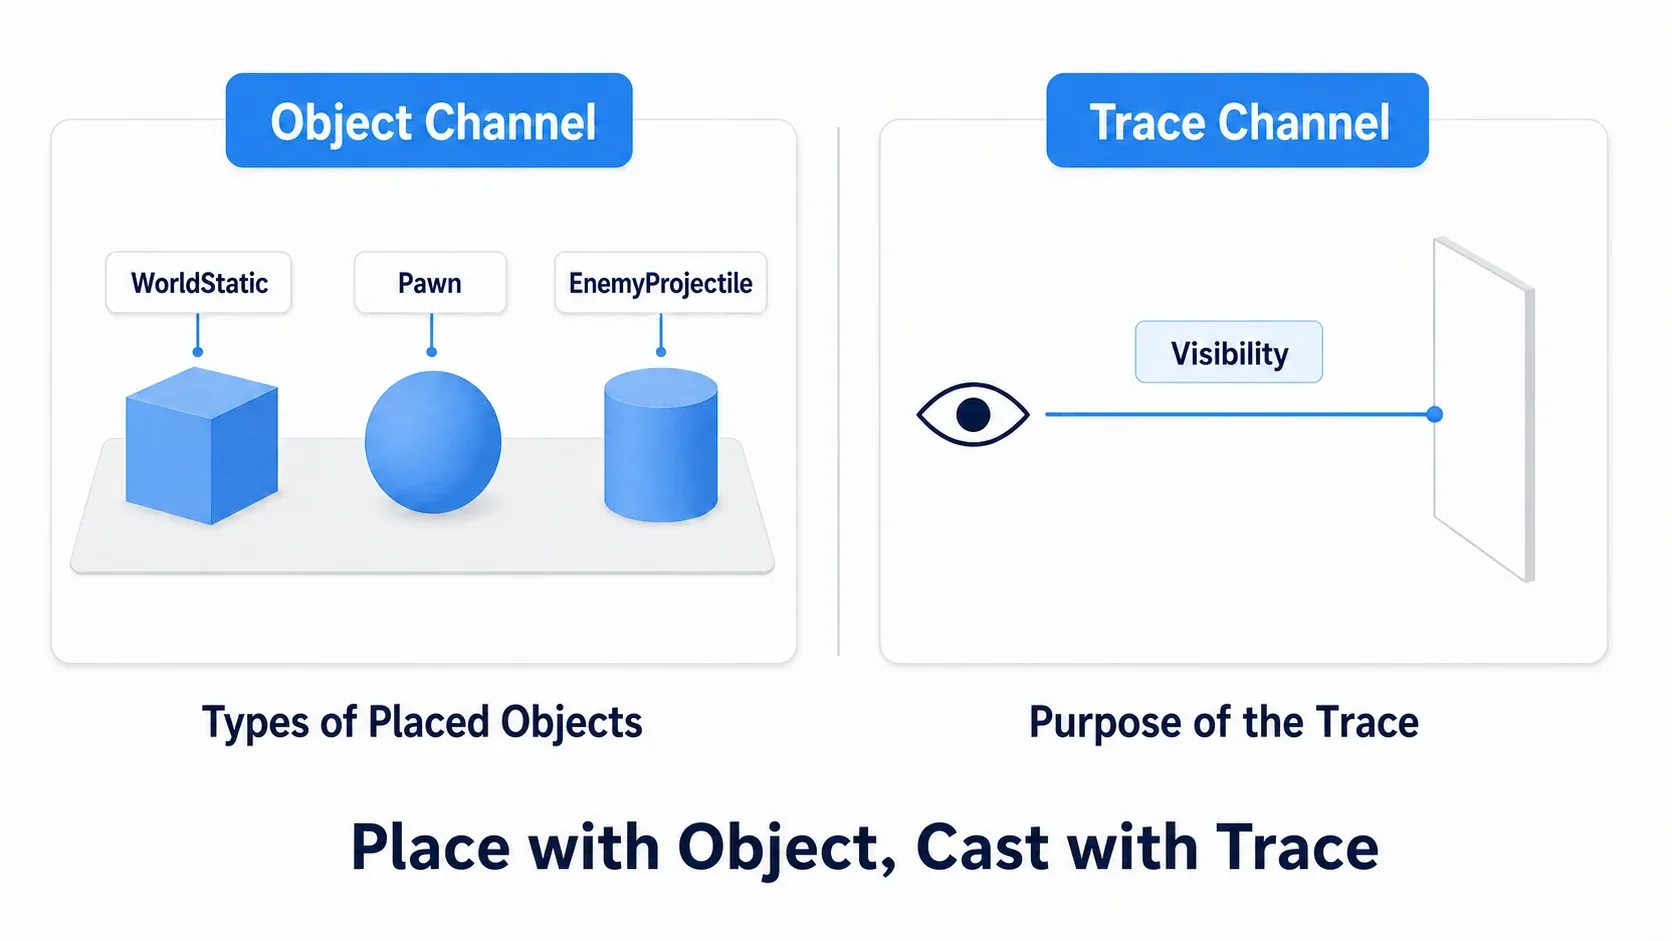
| Kind | What it represents | Examples |
|---|---|---|
| Object Channel | The kind of a Component that has collision. Applies to invisible triggers too | Pawn, WorldStatic, (custom) EnemyProjectile |
| Trace Channel | The purpose of a line query. Never attached to things | Visibility, Camera, (custom) Interact |
Telling them apart is simple. If it's placed in the level, it's Object; if it's passed as an argument to Line Trace, it's Trace.
Bullets, shields, invisible trigger volumes and other things that exist in the level use Object Channels, while checks like "is there something interactable in front of me" use Trace Channels. Mix these two up and you get stuck on "I made the channel but it doesn't appear in the dropdown."
You can create either in project settings (Edit → Project Settings → Engine → Collision). The cap is 18 total across Object and Trace, so adding them without a plan will hurt later.
The Three Responses: Ignore / Overlap / Block
There are only three responses. Nail these down precisely and the settings tables suddenly become readable.
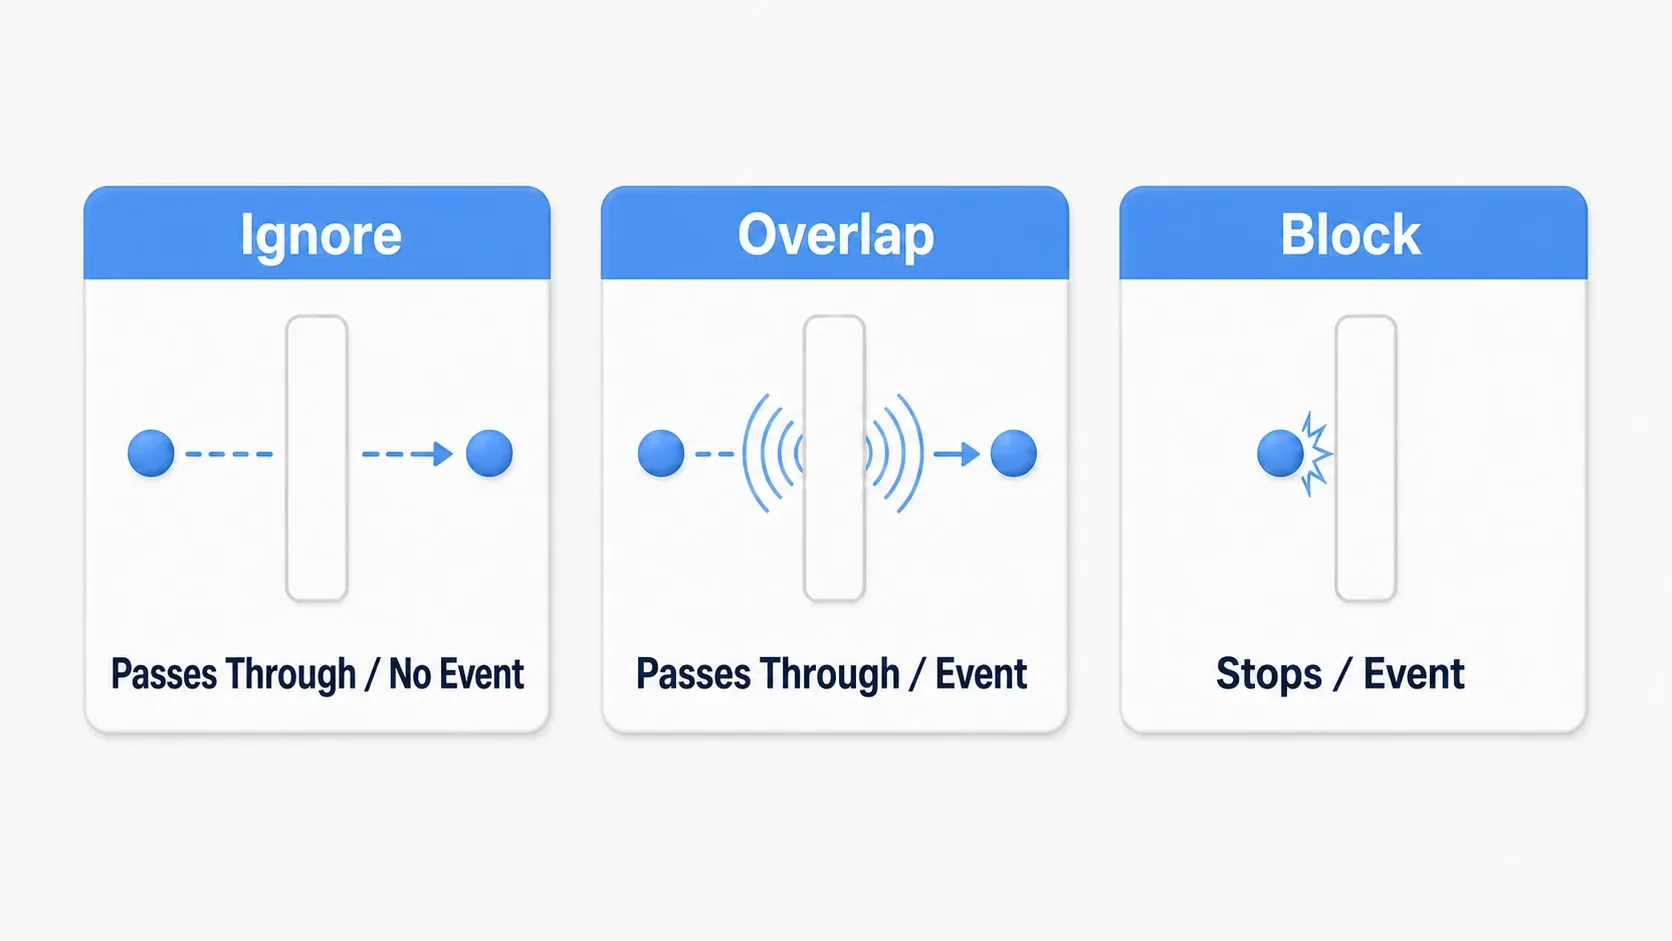
| Response | What happens physically | Event | What it's for |
|---|---|---|---|
| Ignore | Passes through | Nothing fires | Irrelevant parties. This is the baseline |
| Overlap | Passes through | On Component Begin Overlap fires | You want to detect the pass-through (triggers, item pickups, damage checks) |
| Block | Stops (bouncing needs separate Projectile Movement settings) | On Component Hit if the conditions are met | Walls, floors, things that block |
Ignore and Overlap both pass through. The only difference is whether a notification fires. Overlap is for "let it through, but tell me it went through."
Two caveats. First, receiving Overlap notifications requires Generate Overlap Events enabled on both Components. Second, Block only stops things and does not bounce them. To bounce bullets, use Should Bounce on Projectile Movement.
Pick your Default Response based on which accident bothers you more. If an unintended collision with an unknown party is worse, start from
Ignore; if an unintended pass-through is worse, start fromBlock. Things that only relate to specific parties, like bullets and shields, are easier to manage starting fromIgnoreand punching only the holes you need, while things that should stop everything by default, like walls, naturally start fromBlock.
Hands-On: Building a Shield That Blocks Only Enemy Bullets
A shooter's barrier, an action RPG's magic ward, a roguelite's reflect shield. "Stop only this specific thing" shows up in every genre. Here we'll build a shield that blocks enemy bullets but lets the player body and friendly bullets through.
Setup: Rather than making the shield a separate Actor, attach it as a Component on the player. That takes care of following the player and reading key input naturally.
| Where | Name | Settings |
|---|---|---|
BP_Player | ShieldCollision | Sphere Collision Component. Sphere Radius = 150.0 (add a separate decorative Static Mesh if you want it visible) |
BP_Player | bShieldOn | Boolean / default false |
BP_EnemyBullet | BulletCollision | Sphere Collision (Radius 10) at the Root, plus a Projectile Movement. Initial Speed = 2000 |
BP_PlayerBullet | BulletCollision | Same as above |
Adding Projectile Movement matters. Without it the bullet doesn't travel, and moving it by hand doesn't sweep, so it punches through even when Block is set.
Step 1: Make three name tags. Open Edit → Project Settings → Engine → Collision and press New Object Channel... three times under Object Channels.
| Channel name | Default Response |
|---|---|
PlayerShield | Ignore |
EnemyProjectile | Ignore |
PlayerProjectile | Ignore |
Make a dedicated channel for friendly bullets too. The stock Projectile profile isn't guaranteed to exist in every project, so preparing your own is more reliable.
Step 2: Build the response tables. Press New... under Preset on the same screen. Don't forget to write the other side's table as well.
Shield_Active (for the shield):
| Field | Value |
|---|---|
| Collision Enabled | Query Only |
| Object Type | PlayerShield |
EnemyProjectile | Block ← enemy bullets stop here |
PlayerProjectile | Ignore ← friendly bullets pass |
Pawn | Ignore |
| Everything else | Ignore |
Enemy_Bullet (for enemy bullets):
| Field | Value |
|---|---|
| Collision Enabled | Query Only |
| Object Type | EnemyProjectile |
PlayerShield | Block ← match it on both sides |
Pawn | Overlap ← damage when it hits the body |
WorldStatic | Block ← disappears on walls |
| Everything else | Ignore |
For Player_Bullet (friendly bullets), set Object Type to PlayerProjectile, PlayerShield to Ignore, and WorldStatic to Block.
Step 3: Open up the easily-forgotten "other side." This is the biggest trap. If the player's Capsule leaves EnemyProjectile on Ignore, enemy bullets pass right through and deal no damage.
Select CapsuleComponent on BP_Player, set Collision Presets to Custom..., and change EnemyProjectile to Overlap. Also confirm that Generate Overlap Events is checked on both the Capsule and the bullet.
Step 4: Apply them to the components. Set ShieldCollision's Collision Presets to Shield_Active, BP_EnemyBullet's BulletCollision to Enemy_Bullet, and BP_PlayerBullet to Player_Bullet.
Step 5: Toggle the shield on and off. In BP_Player's Event Graph, swap the profile in response to key input. Since it lives on the player itself, you can use Enhanced Input events directly.
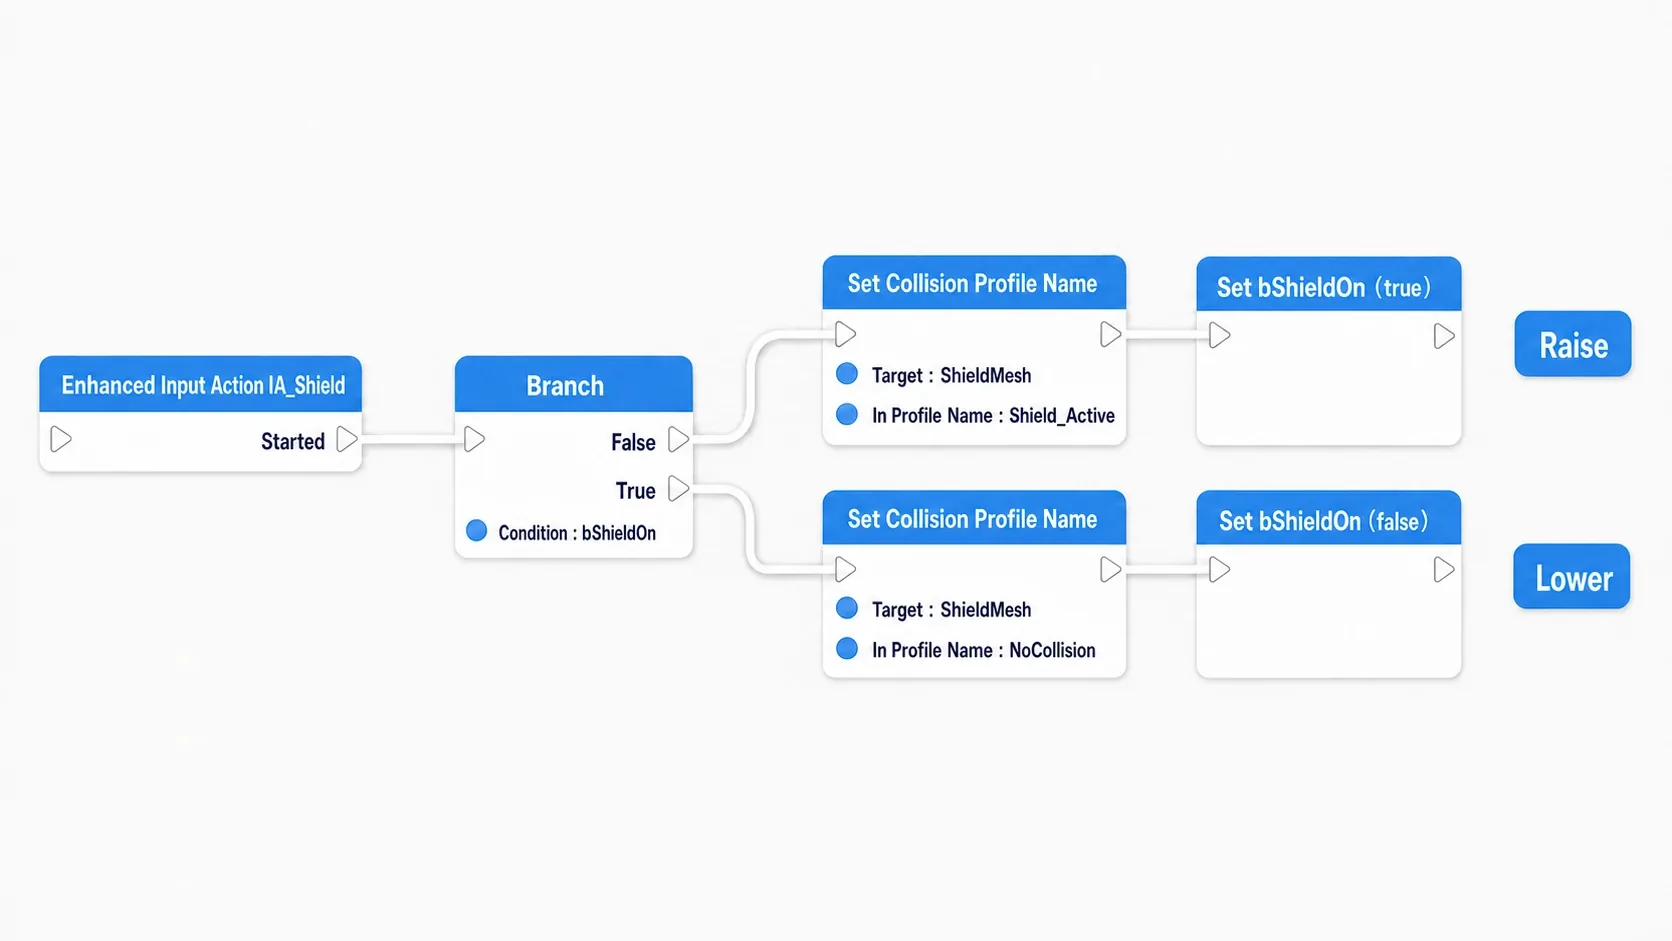
Enhanced Input Action IA_Shield
  Started
    → Branch (Condition: bShieldOn)
        False → Set Collision Profile Name (Target: ShieldCollision, In Collision Profile Name: "Shield_Active")
              → Set bShieldOn (true)
        True  → Set Collision Profile Name (Target: ShieldCollision, In Collision Profile Name: "NoCollision")
              → Set bShieldOn (false)
Don't forget to keep bShieldOn's default false and ShieldCollision's initial profile NoCollision in sync. If those disagree, the first input does the opposite of what you intended.
Hit Play and have an enemy shoot at you. While the shield is up, enemy bullets stop at the surface of the sphere; drop it and they hit your body and fire an Overlap. And friendly bullets can still be fired with the shield up. Confirm those three and you're done.
When it doesn't work, narrow it down in this order.
- Enemy bullets pass through the shield → one of the two tables isn't set to
Block. Check both - Enemy bullets stop at the shield, but dropping it deals no damage → the player Capsule's
EnemyProjectileis stillIgnore(Step 3) - Bullets fly forever without hitting anything → there's no
Projectile Movement, orUpdated Componentisn't set to a Component that has collision - Friendly bullets stop too → check whether the friendly bullet's Object Type is set to
EnemyProjectileby mistake
Two things to take away.
- Block requires agreement from both parties: If either side says
Ignore, you getIgnore. When something "doesn't collide," opening the other side's table rather than your own is the fastest way to narrow it down - Profiles can be swapped by name: With
Set Collision Profile Nameyou can change how something collides mid-game. Invincibility frames, pass-through platforms, bosses whose hardness changes per phase — the applications are wide
If you want an effect the instant the shield stops a bullet, use On Component Hit, but Hit events require movement with a sweep (using Projectile Movement satisfies that). If it's the shape of the collision that doesn't fit, see choosing between Simple and Complex.
Bonus: Good to Know for Later
Learning the four Collision Enabled options alongside this keeps you out of trouble. This field at the top of a profile decides what the collision is used for.
| Setting | What it can do |
|---|---|
| No Collision | Nothing |
| Query Only | Participates in traces, overlaps, and sweeps (no rigid body simulation) |
| Physics Only | Rigid body simulation only |
| Collision Enabled | Both |
Query Only is the one people misread. You can still "stop" things with physics off. Character Movement and Projectile Movement move via sweeps, so they collide properly with a Query Only wall. Query Only is plenty for bullets and triggers.
Before adding a channel, ask whether a tag would do. The 18-channel cap fills up faster than you'd think. Channels are for splitting collision behavior or trace targets at the collision stage. If you just want to change what happens after the hit, like "this enemy is fire-attribute," that's Gameplay Tags territory, and adding a Gameplay Tag doesn't change collision responses.
What this looks like in C++. You can set it on a component in one line, from a constructor or any function.
// Initial setup in the constructor
ShieldMesh->SetCollisionProfileName(TEXT("Shield_Active"));

// Switching during gameplay
void AMyCharacter::SetShieldEnabled(bool bEnabled)
{
    ShieldMesh->SetCollisionProfileName(bEnabled ? TEXT("Shield_Active") : TEXT("NoCollision"));
}
You just pass a name as an FName, and it does exactly what Blueprint's Set Collision Profile Name does. Passing a name that doesn't exist leaves you running without the intended settings applied, so watch your spelling. If you're worried, Get Collision Profile Name tells you what's actually set.
Summary
Collision design gets straightforward when you think in these three steps.
| Step | What you do | The trap |
|---|---|---|
| 1. Decide the name tag | Create an Object Channel (default Ignore) | Mixing it up with a Trace Channel |
| 2. Build the response table | Create a Preset and set only the parties you need to Block / Overlap | Setting only one side and getting no collision |
| 3. Apply it | Set the component's Collision Presets | Being satisfied with just creating the channel |
And the thing you can't forget: collision is decided by mutual agreement. When something doesn't collide, open the other party's table, not your own.
What in your game is something you want just one specific thing to pass through?