Once a project grows a little, you start hesitating every time you add a feature. Should this enemy's HP logic live in C++, or is Blueprint fine? Without a rule, the answer becomes whatever felt right that day, and later you cannot find anything.
UE has a standard shape for this split: write the parent class in C++ and create its child in Blueprint. This article covers that shape, the criteria for deciding what goes where, and a walkthrough of actually splitting an enemy character class.
What You'll Learn
- The basic shape is C++ parent, Blueprint child
- The deciding question is "does this change often, or never?"
- Why not to put everything in C++: your iteration slows down
- Why not to put everything in Blueprint: no readable diffs, and references snowball
- Hands-on: split an enemy character class across C++ and BP
The Basic Shape: C++ Parent, Blueprint Child
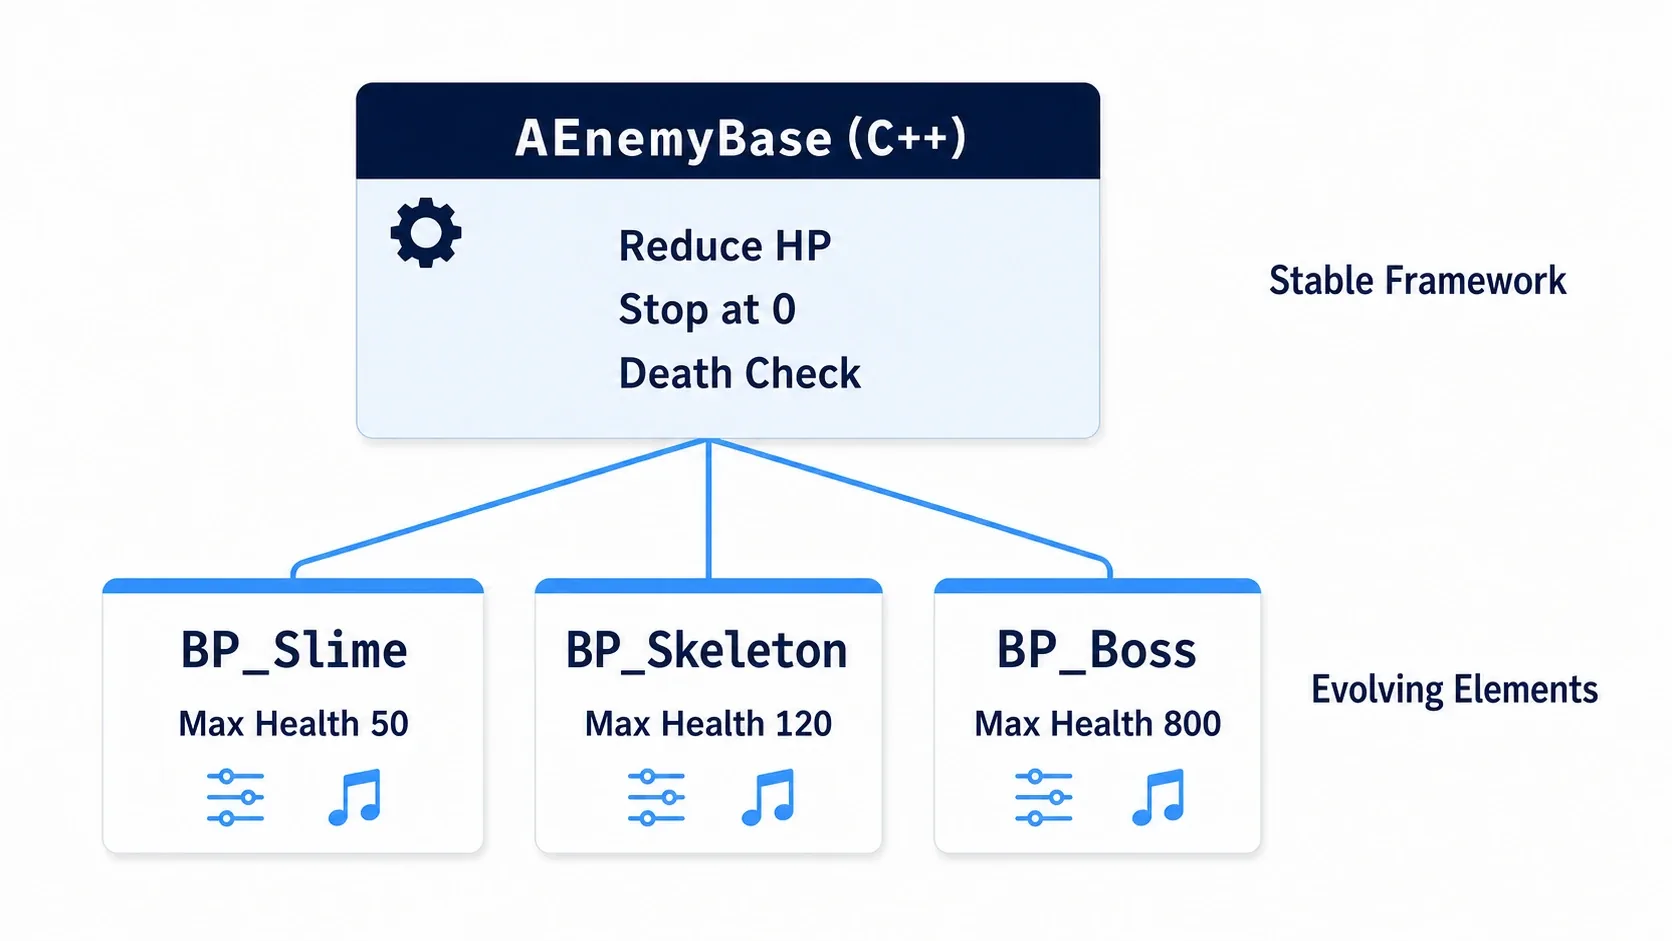
UE classes connect through inheritance, and a class you write in C++ can serve directly as a Blueprint parent. That is where the whole division of labor comes from.
| Layer | Responsibility | Examples |
|---|---|---|
| C++ (parent) | The skeleton that never changes | HP subtraction, death checks, state type definitions, communication plumbing |
| Blueprint (child) | Everything that keeps changing | Max HP values, which mesh to use, hit effects, death SFX |
The benefit shows up in how fixes propagate. To change the HP formula you touch one C++ parent, and it reaches all 20 child BPs. To change the slime's HP from 50 to 60 you touch one number in BP_Slime, and no build happens.
Creating a child Blueprint from a C++ class is covered in Your First Step from Blueprint to C++. This article is the next question: what belongs in the parent.
The Deciding Question: "Does This Change Often?"
Splitting by "C++ is faster" usually goes wrong. The axis that actually works is a single one: how often will this code change from here on?
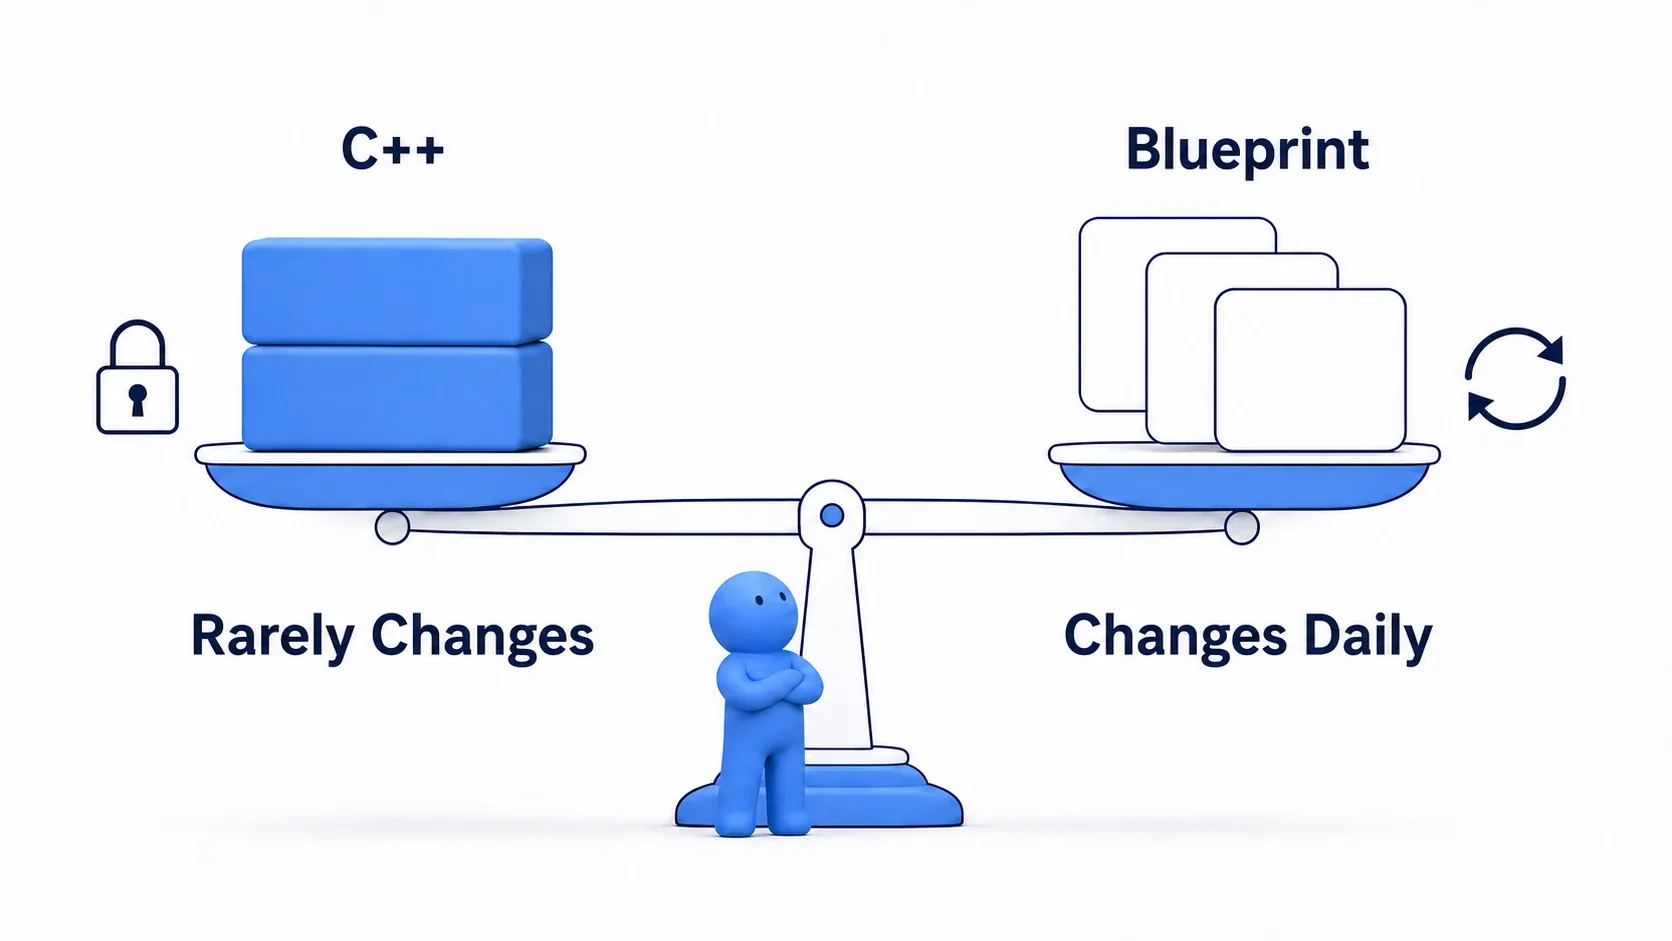
- Things that rarely change go to C++. If it barely changes, you almost never pay the build-wait cost
- Things that change daily go to Blueprint. Numbers, assets, and presentation get swapped constantly as the design evolves
There is a secondary axis too: do you need many copies of the same thing? If 20 enemies share the same logic, that logic is easier to distribute from a C++ parent. If a gimmick only appears in one level, leaving it in Blueprint is fine.
As for speed, you only need to think about it once you have measured a real bottleneck. See the stat command article for how to measure.
Quick Reference for What Goes Where
Here are the cases that cause the most hesitation. The best answer shifts with project size, but for solo work through small teams, this layout will not steer you wrong.
| Item | Where it goes | Why |
|---|---|---|
| Struct / Enum type definitions | C++ | Blueprint versions tend to corrupt existing data when fields change |
| Base classes (Character, GameMode, Component) | C++ | The foundation handed to children. Changes reach everything |
| Subsystems (save, settings, progression) | C++ | Persistent systems whose specs settle down early |
| Per-frame loops and bulk processing of many actors | C++ | One of the few places where execution speed actually differs |
| Stat values (HP, speed, cooldown) | Blueprint / Data Asset | You do not want a build between every tuning pass |
| Which mesh, animation, or material to use | Blueprint | Assigning asset references in the editor is faster |
| VFX, SFX, camera shakes and other presentation | Blueprint | The highest swap frequency of anything |
| UMG widget layout and animation | Blueprint | Designers touch the visuals directly |
| Level-specific gimmicks (a door used in one stage) | Blueprint | The cost of C++ does not pay off for one-offs |
Note: Stat values can either live in the child BP's defaults or be extracted into a Data Asset. With three to five enemy types, child BPs are plenty. Past twenty types, moving to Data Assets makes them much easier to manage.
Why Not Put Everything in C++
Leaning too hard on C++ slows development down for reasons that have nothing to do with code quality.
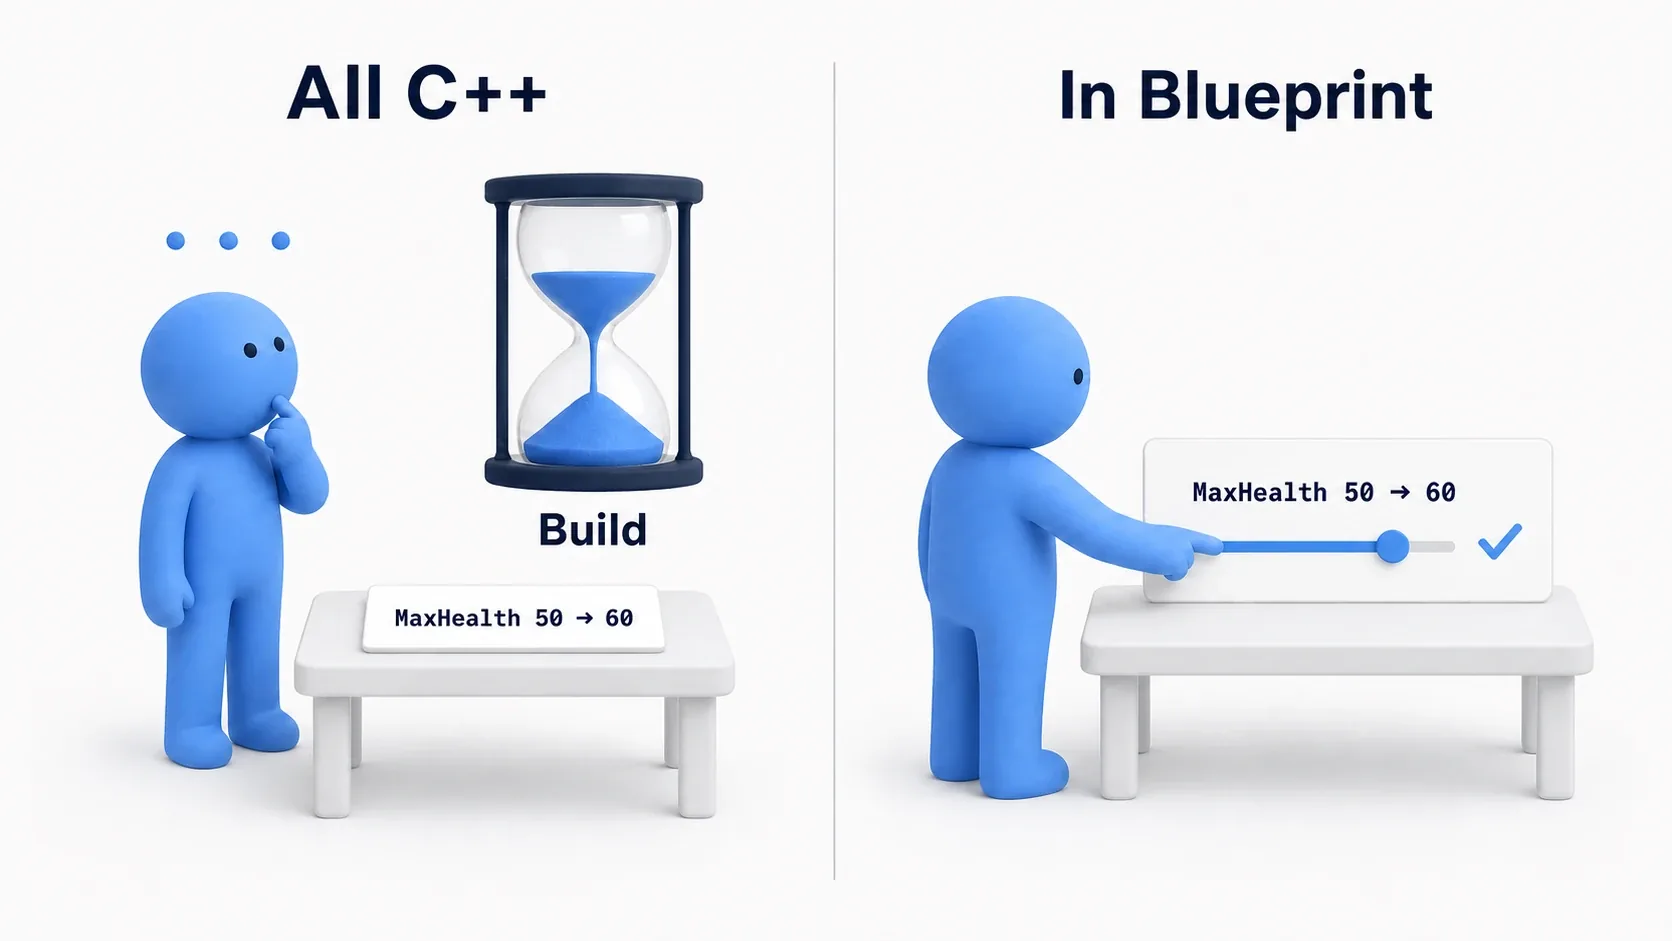
- Every tweak means waiting for a build: changing an enemy's HP from 50 to 60 becomes edit code, build, restart the editor. Even at tens of seconds each, doing it dozens of times a day adds up
- Touching the header means closing the editor: adding a single variable cannot go through Live Coding. Hitting that mid-experiment breaks your train of thought
- Some things are simply faster in the editor: Timelines, curves, UMG layouts, Animation Blueprint states. These are adjusted by eye, so writing them in code buys you nothing
- Non-programmers lose access: on a team, if numbers and presentation are not exposed on the BP side, every tuning request lands on a programmer
Why Not Put Everything in Blueprint
Push through with Blueprint alone and a different set of problems shows up once the project grows.
- Git cannot show diffs: Blueprints are binary assets. You cannot review what changed since yesterday, and if two people edit the same BP, one person's work has to be thrown away
- References snowball: when a BP directly references another BP, loading one pulls the other into memory with it. Stacked up, that comes back as startup load time
- No sweeping edits: when you want to rename a function, neither text search nor find-and-replace is available. You open every referencing asset and fix them one by one
- Struct changes corrupt data: adding a field or changing a type on a Blueprint-authored Struct can reset the existing values that used it. Keeping type definitions in C++ avoids that accident
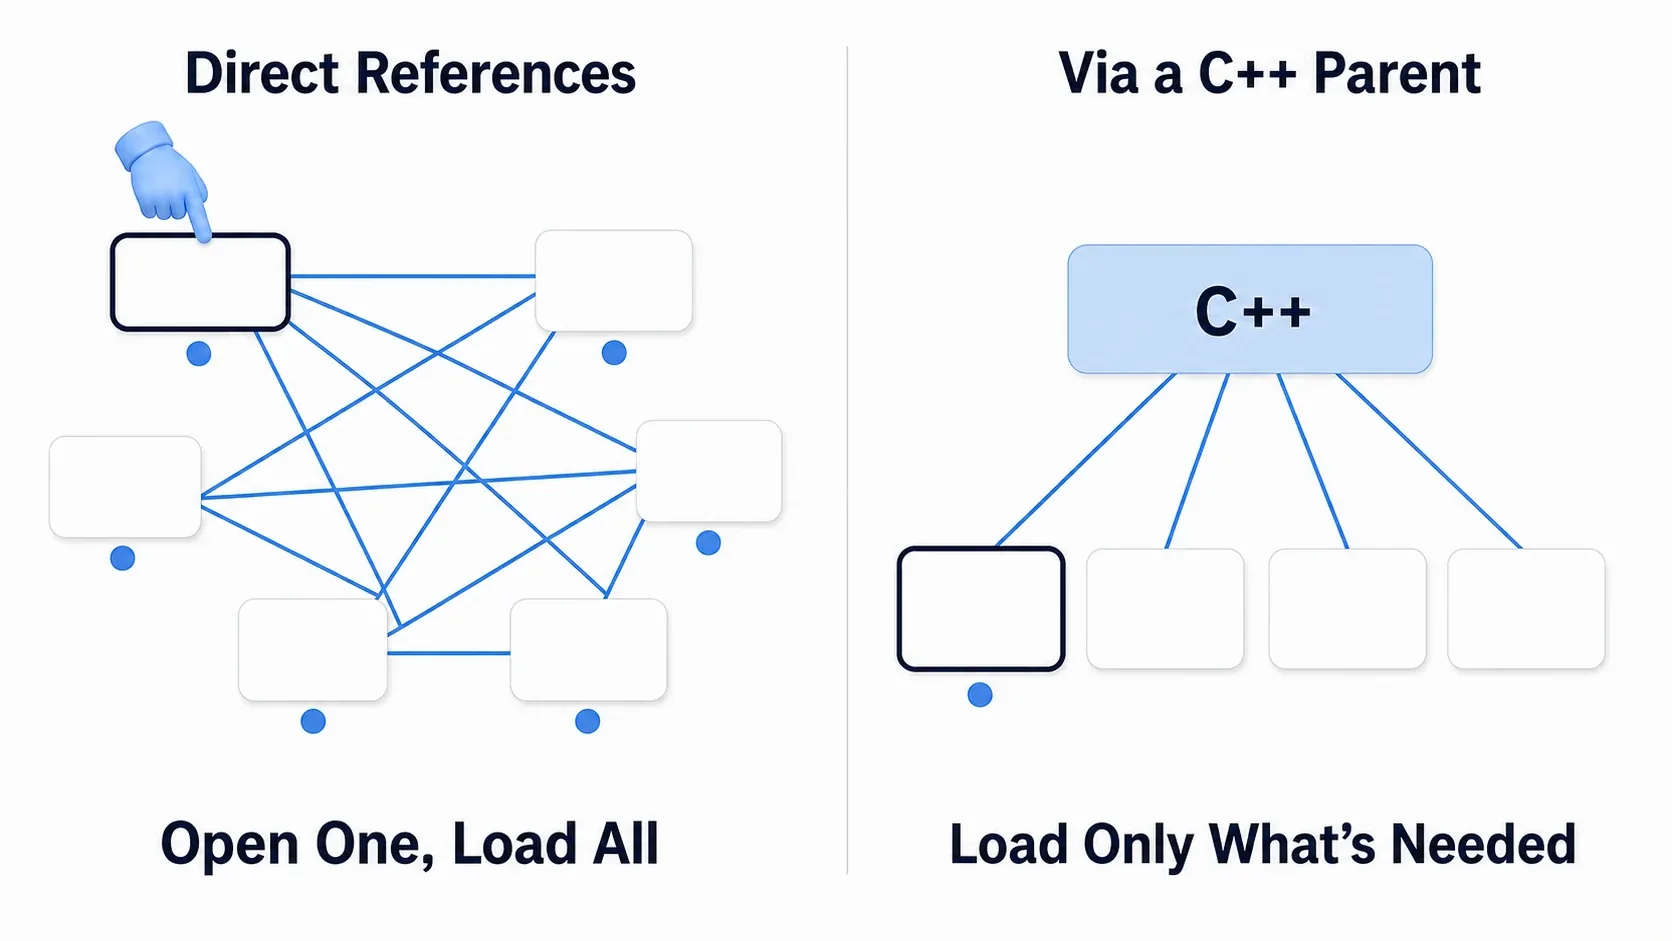
Note: You can also shrink reference bloat from the BP side. Putting a Blueprint Interface or an Event Dispatcher between BPs instead of a direct reference thins out the dependency lines. It is worth reviewing that before moving anything to C++.
Hands-On: Splitting an Enemy Character Class
Let's build one enemy, split across C++ and Blueprint. A trash mob in a top-down ARPG, a grunt in a side-scrolling action game, an attacking unit in a tower defense: "it has HP, it takes damage, it dies at zero" is the same in every genre.
The Finished Result
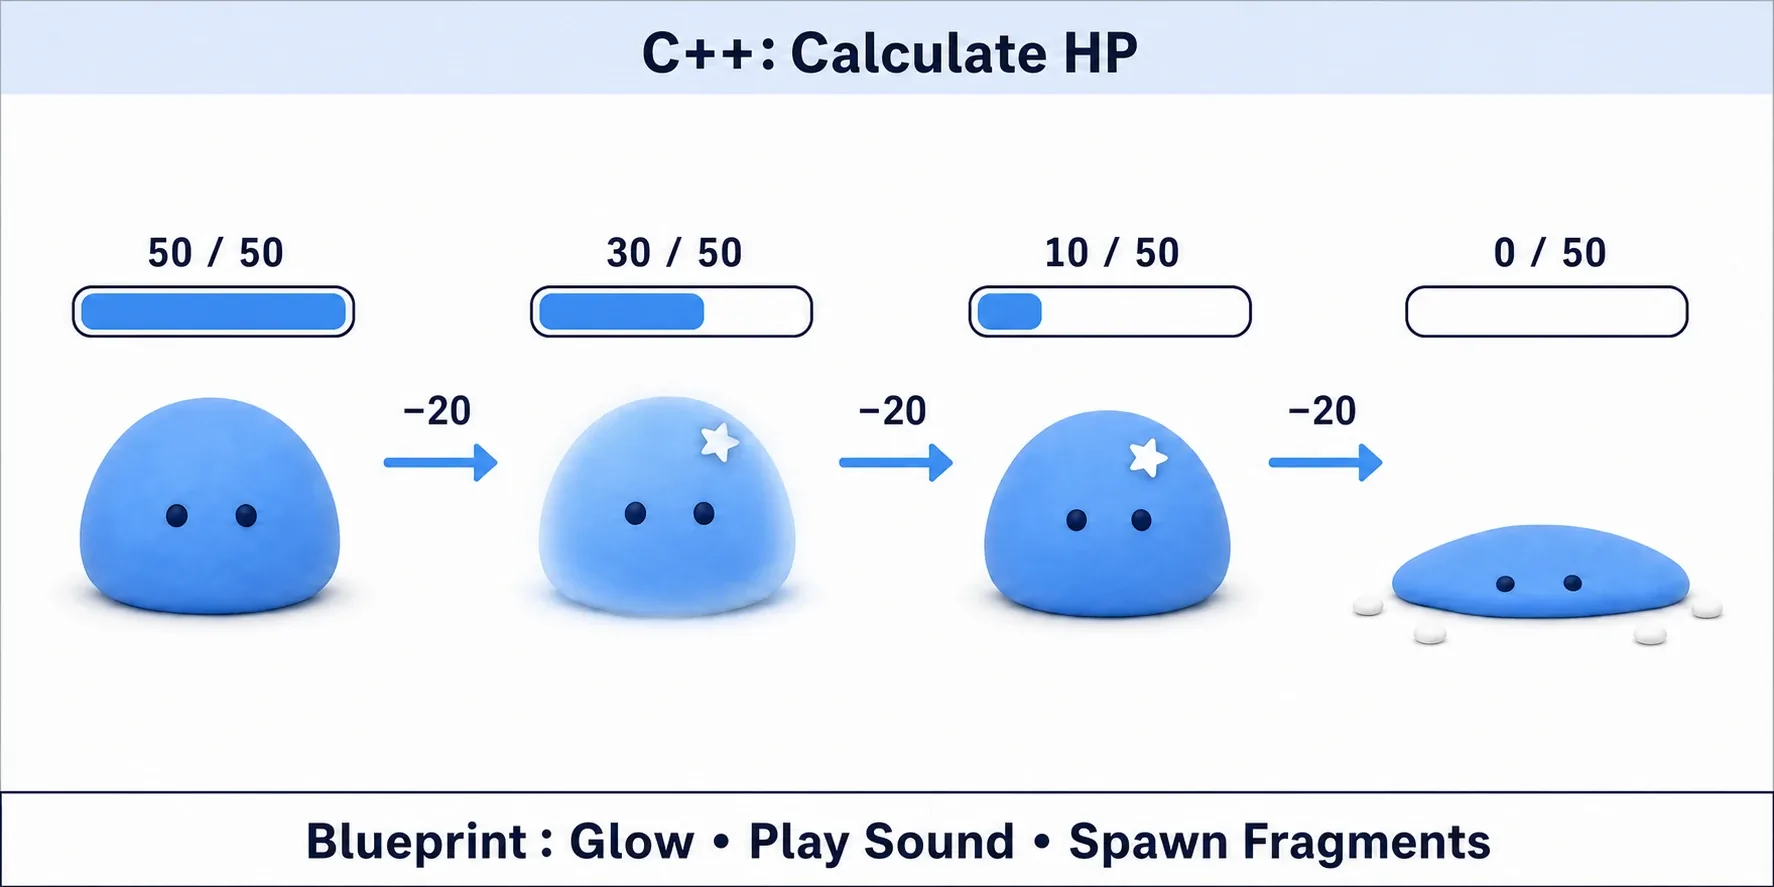
The C++ class AEnemyBase handles everything up to "take damage, reduce HP, die at zero." The child BP only holds the max HP value and the hit and death presentation.
Setup
Give AEnemyBase (parent class: Character) the following members.
| Member | Type | Initial value | Specifiers | Where it lives |
|---|---|---|---|---|
MaxHealth | float | 100.0f | EditDefaultsOnly, BlueprintReadOnly | Declared in C++, value set in BP |
CurrentHealth | float | 0.0f | VisibleAnywhere, BlueprintReadOnly | C++ only |
bIsDead | bool | false | VisibleAnywhere, BlueprintReadOnly | C++ only |
TakeDamage(...) | virtual float override | — | (existing AActor function) | C++ only |
GetHealthPercent() | const function returning float | — | BlueprintPure | Implemented in C++, used in BP |
OnDamagedEffect(float) | function (one float param) | — | BlueprintImplementableEvent | Declared in C++, implemented in BP |
OnDeathEffect() | function (no params) | — | BlueprintImplementableEvent | Declared in C++, implemented in BP |
The key detail is that MaxHealth uses EditDefaultsOnly. That means it can be edited in the child BP's class defaults but not per instance placed in a level, which prevents the accident of two identical slimes having different HP depending on where they were dropped. For a full read on specifiers, see the first-step article.
C++ Side: The Skeleton That Never Changes
// EnemyBase.h
#pragma once

#include "CoreMinimal.h"
#include "GameFramework/Character.h"
#include "EnemyBase.generated.h"

UCLASS()
class MYPROJECT_API AEnemyBase : public ACharacter
{
    GENERATED_BODY()

public:
    AEnemyBase();

    // Override the existing AActor function. This is the entry point for Apply Damage
    virtual float TakeDamage(float DamageAmount, FDamageEvent const& DamageEvent,
                             AController* EventInstigator, AActor* DamageCauser) override;

    // For wiring to an HP bar. Becomes a green node with no execution pins
    UFUNCTION(BlueprintPure, Category = "Enemy|Status")
    float GetHealthPercent() const;

protected:
    virtual void BeginPlay() override;

    // Set in the child BP's class defaults. Not editable per instance
    UPROPERTY(EditDefaultsOnly, BlueprintReadOnly, Category = "Enemy|Status")
    float MaxHealth = 100.0f;

    UPROPERTY(VisibleAnywhere, BlueprintReadOnly, Category = "Enemy|Status")
    float CurrentHealth = 0.0f;

    UPROPERTY(VisibleAnywhere, BlueprintReadOnly, Category = "Enemy|Status")
    bool bIsDead = false;

    // Presentation is implemented on the Blueprint side
    UFUNCTION(BlueprintImplementableEvent, Category = "Enemy|Effects")
    void OnDamagedEffect(float DamageAmount);

    UFUNCTION(BlueprintImplementableEvent, Category = "Enemy|Effects")
    void OnDeathEffect();

    void Die();
};
// EnemyBase.cpp
#include "EnemyBase.h"
#include "Components/CapsuleComponent.h"
#include "GameFramework/CharacterMovementComponent.h"

AEnemyBase::AEnemyBase()
{
    PrimaryActorTick.bCanEverTick = false;
}

void AEnemyBase::BeginPlay()
{
    Super::BeginPlay();

    // Use the MaxHealth set in the child BP as the starting HP
    CurrentHealth = MaxHealth;
}

float AEnemyBase::TakeDamage(float DamageAmount, FDamageEvent const& DamageEvent,
                             AController* EventInstigator, AActor* DamageCauser)
{
    const float ActualDamage =
        Super::TakeDamage(DamageAmount, DamageEvent, EventInstigator, DamageCauser);

    // Do nothing if already dead or the damage is zero or less
    if (bIsDead || ActualDamage <= 0.0f)
    {
        return 0.0f;
    }

    CurrentHealth = FMath::Clamp(CurrentHealth - ActualDamage, 0.0f, MaxHealth);

    UE_LOG(LogTemp, Log, TEXT("%s took %.1f damage. HP: %.1f / %.1f"),
           *GetName(), ActualDamage, CurrentHealth, MaxHealth);

    // Leave the hit presentation to the BP side
    OnDamagedEffect(ActualDamage);

    if (CurrentHealth <= 0.0f)
    {
        Die();
    }

    return ActualDamage;
}

void AEnemyBase::Die()
{
    bIsDead = true;

    // Stop collision and movement once it goes down
    GetCapsuleComponent()->SetCollisionEnabled(ECollisionEnabled::NoCollision);
    GetCharacterMovement()->DisableMovement();

    // Leave the death presentation to the BP side
    OnDeathEffect();
}

float AEnemyBase::GetHealthPercent() const
{
    return (MaxHealth > 0.0f) ? (CurrentHealth / MaxHealth) : 0.0f;
}
Blueprint Side: Just Values and Presentation
Right-click EnemyBase, create BP_Slime, and set the following.
| Setting | Value |
|---|---|
| Max Health (class defaults) | 50.0 |
| Mesh | Slime skeletal mesh |
| Anim Class | ABP_Slime |
| Event On Damaged Effect | Hit SFX + white material flash |
| Event On Death Effect | Dissolve VFX + Destroy Actor after 2 seconds |
BP_Slime (child class)
Event On Damaged Effect (receives Damage Amount)
  → Play Sound at Location (Sound: SFX_SlimeHit)
  → Set Scalar Parameter Value on Materials (Parameter: "HitFlash", Value: 1.0)
  → Delay (0.1) → Set Scalar Parameter Value on Materials (Value: 0.0)

Event On Death Effect
  → Spawn System at Location (System: NS_SlimeBurst)
  → Play Anim Montage (Montage: AM_SlimeDeath)
  → Delay (2.0) → Destroy Actor
Make BP_Skeleton (Max Health = 120.0) the same way and your second enemy is done without adding a single line to C++.
Verify
Call Apply Damage (Damage = 20.0, Damaged Actor = the enemy) from the player's attack and hit BP_Slime three times.
- The first hit drops HP from 50 to 30, and the Output Log shows
BP_Slime_C_0 took 20.0 damage. HP: 30.0 / 50.0 - The second hit takes it from 30 to 10, with the hit SFX and white flash playing both times
- The third hit stops HP at 0, not -10 (the
Clampis doing its job), the death VFX plays, and it disappears after 2 seconds - If you wired an HP bar to
GetHealthPercent, it moves 1.0 → 0.6 → 0.2 → 0.0
If HP never drops, check that the attacker is calling Apply Damage. TakeDamage is UE's damage entry point, so it is reached through Apply Damage rather than called directly (how to send and receive Apply Damage is covered in Health and Damage in UE5). If the presentation never plays, check that the Event On Damaged Effect node is actually placed in the child BP's event graph (see the debugging article).
Two things to take away.
- C++ holds "the things that must happen in this order": reduce HP, clamp at zero, set the death flag, disable collision. That order is identical for every enemy, so letting child BPs write it produces one ordering bug per enemy type
- All you hand to BP is "when to call":
OnDamagedEffecthas no idea what it does. Swapping the presentation triggers no C++ build, and fixing the HP math leaves the presentation untouched. This split follows the same thinking as Event Dispatchers
Bonus: Good to Know for Later
- You do not have to start in C++: prototyping in Blueprint and lifting the parent class into C++ once the shape settles is a perfectly good order. Existing BPs can be re-pointed at a C++ parent with File > Reparent Blueprint
BlueprintNativeEventis the middle ground:BlueprintImplementableEventcan only be implemented in BP, butBlueprintNativeEventlets you write a default implementation in C++ that only the child BPs that need to can override. Good for "usually the same, occasionally different" logic- Split categories with
Parent|Child: writingCategory = "Enemy|Status"produces nested headings in the Details panel. It starts paying off once you pass about ten C++ variables - Do not count on Blueprint Nativization: the feature that auto-converted BPs to C++ was removed in UE5. Where speed matters, write the C++ by hand from the start
- When in doubt, put it in Blueprint: moving something to C++ later is possible, but moving C++ back to BP is a chore. If you cannot decide, get it working in BP first and see how it behaves
Summary
- The basic shape is C++ parent, Blueprint child. Fixes flow from C++ to everything; tuning happens per BP
- The deciding axis is not speed but "does this change often?" Unchanging things to C++, daily changes to BP
- Type definitions (Structs and Enums), base classes, and Subsystems go in C++; numbers, assets, and presentation go in Blueprint
- All-C++ costs you iteration speed; all-Blueprint traps you in diffs and references
- The core of the hands-on is that C++ owns the order and BP owns the look, so neither blocks the other's builds and swaps
Of the features you are building right now, which ones have you changed the value of three or more times this week? Those belong on the Blueprint side.