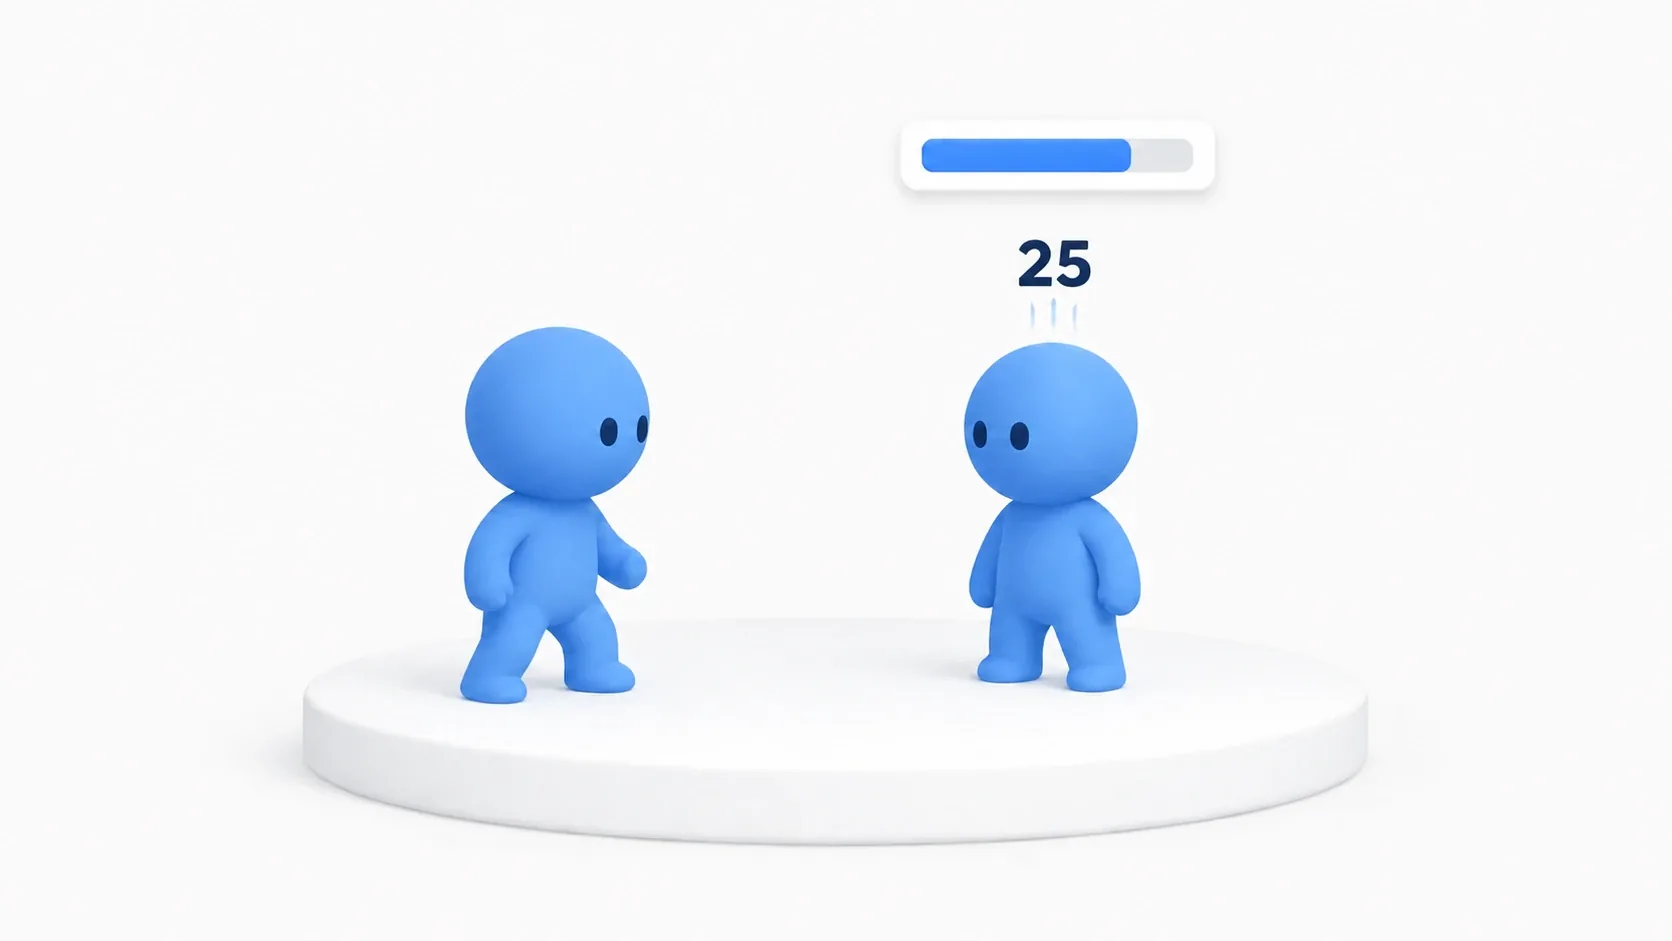
You're landing hits on the enemy and damage is going in. But you want an HP bar above the enemy's head, and it stays stuck in the corner of the screen instead of following the enemy. You want a "25" to pop on every hit, and you can't figure out how to make it appear.
These need a different mechanism from the HUD you build in UMG. A HUD is UI pinned to the screen, but an overhead HP bar and damage numbers are UI that follows an Actor inside the world . This article covers the tool at the center of that, the Widget Component , plus how to show damage numbers lightly, while building a scene where numbers fly during an enemy rush.
What You'll Learn
- The difference between screen-pinned UI (Add to Viewport) and Actor-attached UI (Widget Component)
- A Widget Component's Space: choosing between Screen and World
- Updating an overhead HP bar with Get User Widget Object
- Showing damage numbers lightly with the screen-projection method (avoiding per-hit spawns)
- The precautions for keeping it light even when a lot of them show
- Hands-on: an overhead HP bar plus damage numbers that fly on a hit
Screen-Pinned UI vs. Actor-Attached UI
There are two broad roads to displaying a UMG Widget. This difference is the starting point for building an overhead bar.
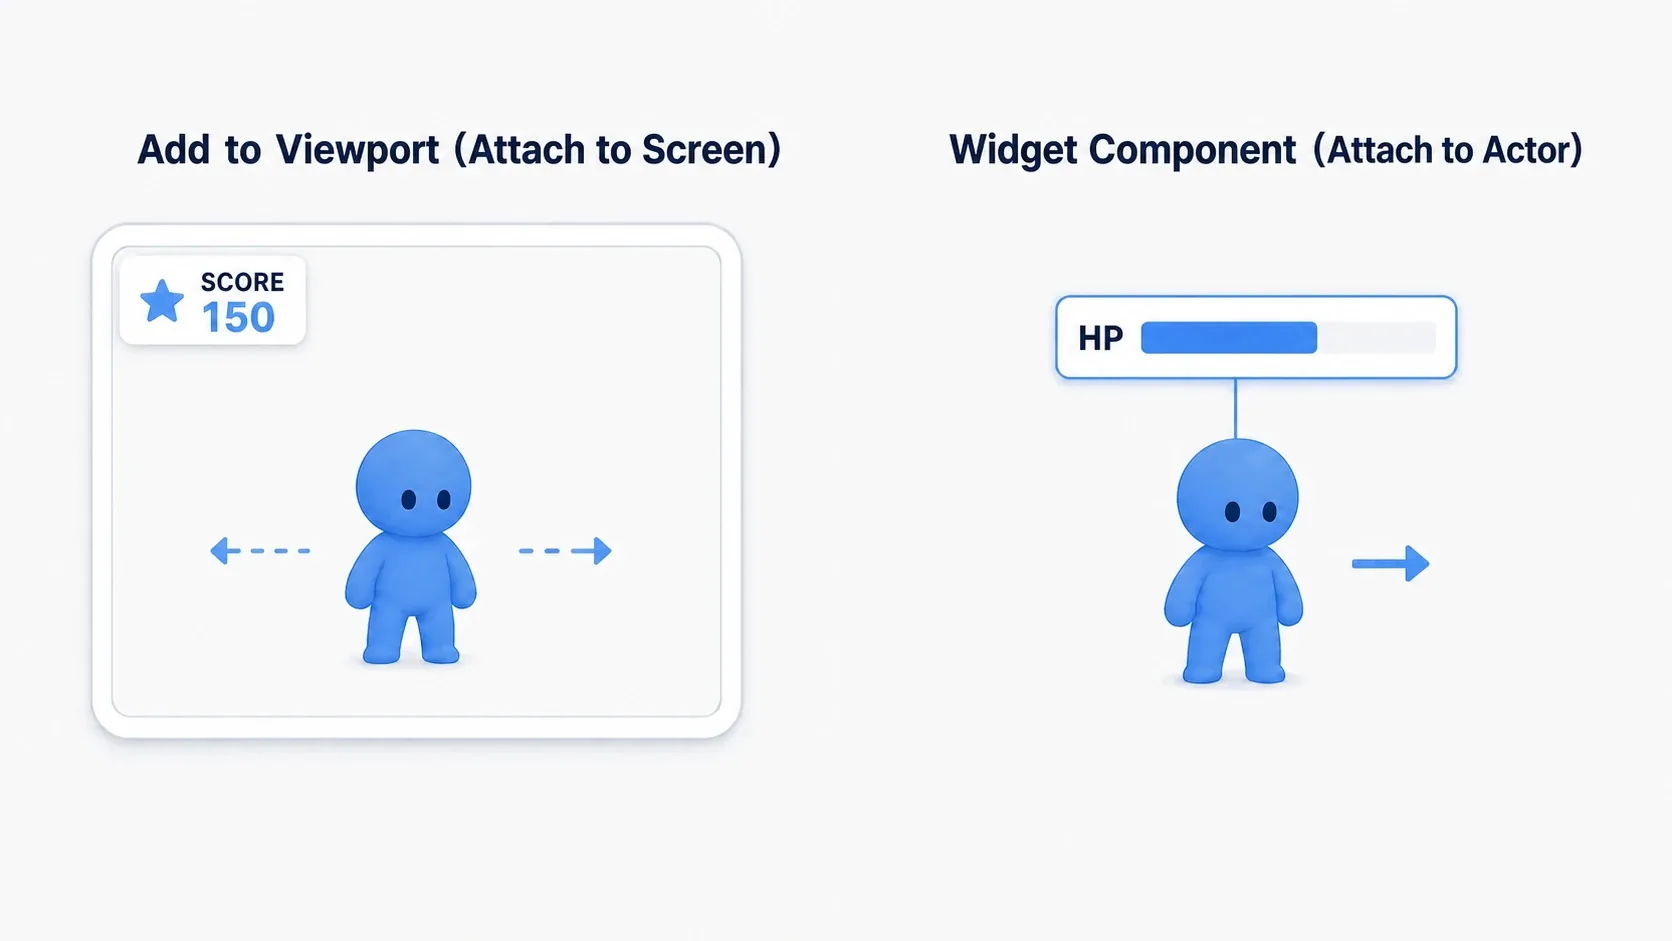
- Add to Viewport (pin to the screen): pins the Widget flat on the frontmost layer of the screen. For HUDs like a score or minimap. It stays at the same spot on screen no matter where you look in the world
- Widget Component (attach to an Actor): gives the Widget to an Actor as a component. When the parent Actor moves, the Widget moves with it. Overhead HP bars and nameplates are this one
If you want a "bar that follows the enemy" but build it with Add to Viewport , it pins to the screen and can't track the enemy. Deciding "does this UI move with an Actor, or is it pinned to the screen" is the first branch.
Adding a Widget Component
An overhead bar starts by adding one Widget Component to the enemy Blueprint.
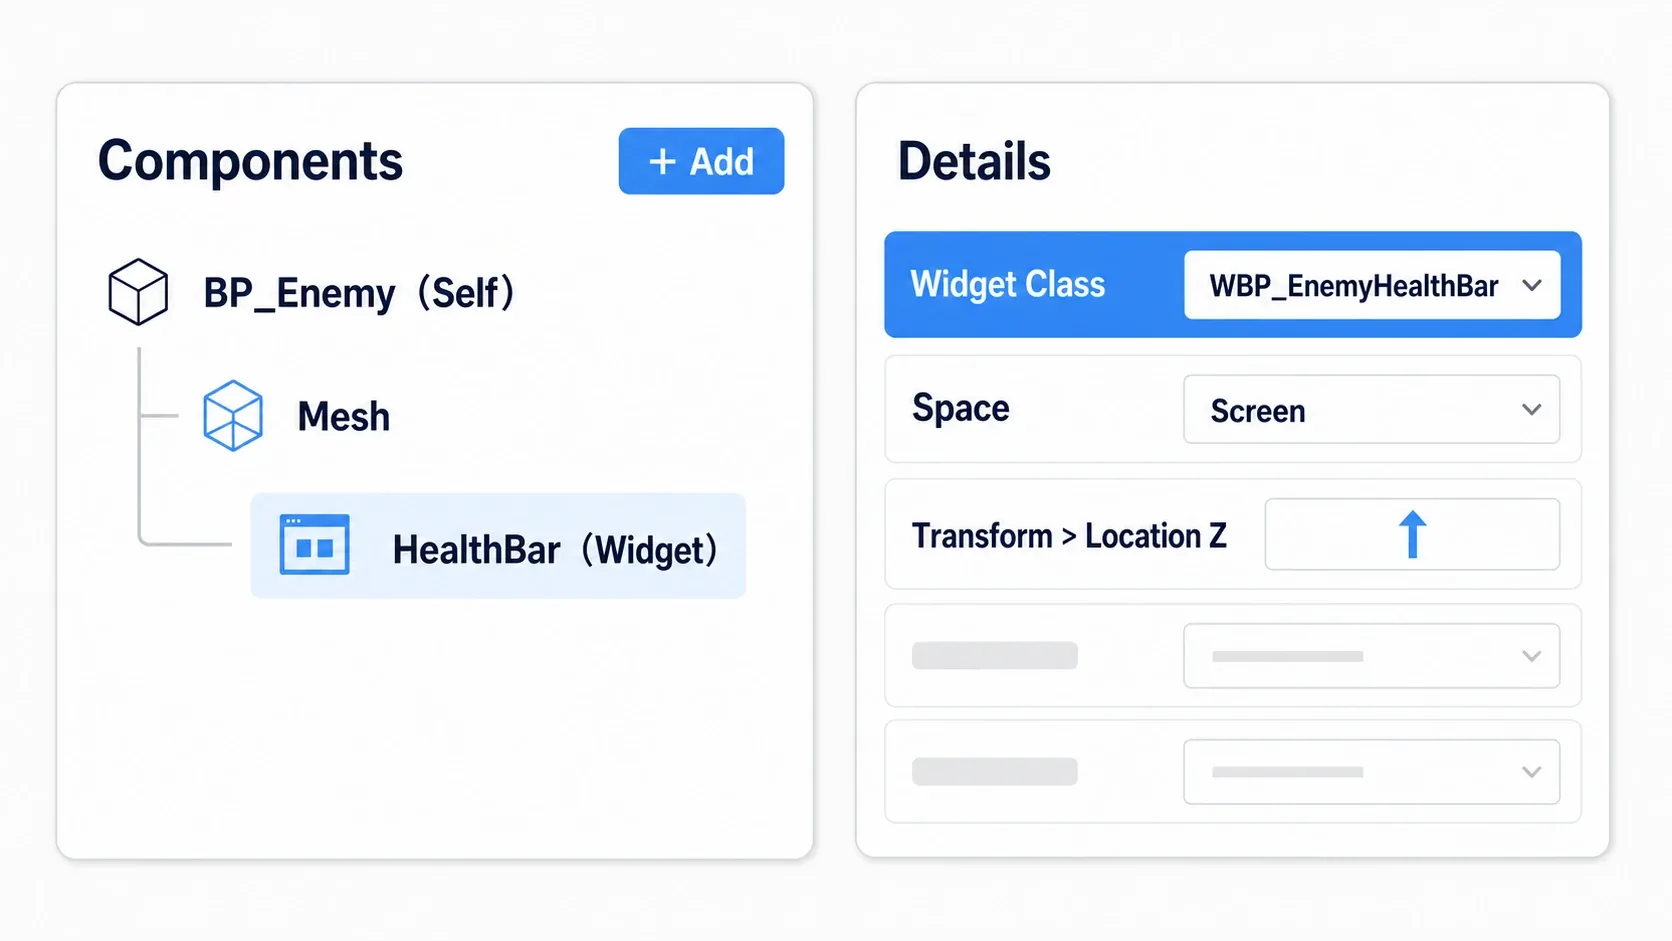
- In the enemy Blueprint's Components panel, pick Add → Widget , added as a child of the Mesh
- Select the added Widget Component, and assign the UMG you want to show (e.g.
WBP_EnemyHealthBar) to Widget Class in the Details - Raise the position Z in the Transform to move the bar up above the head
That alone shows the Widget above the enemy's head, and the bar follows when the enemy walks. All that's left is to update the Progress Bar inside it to match the enemy's HP.
Screen Space vs. World Space
When you select a Widget Component, there's a setting called Space in the Details. This governs how the HP bar looks.
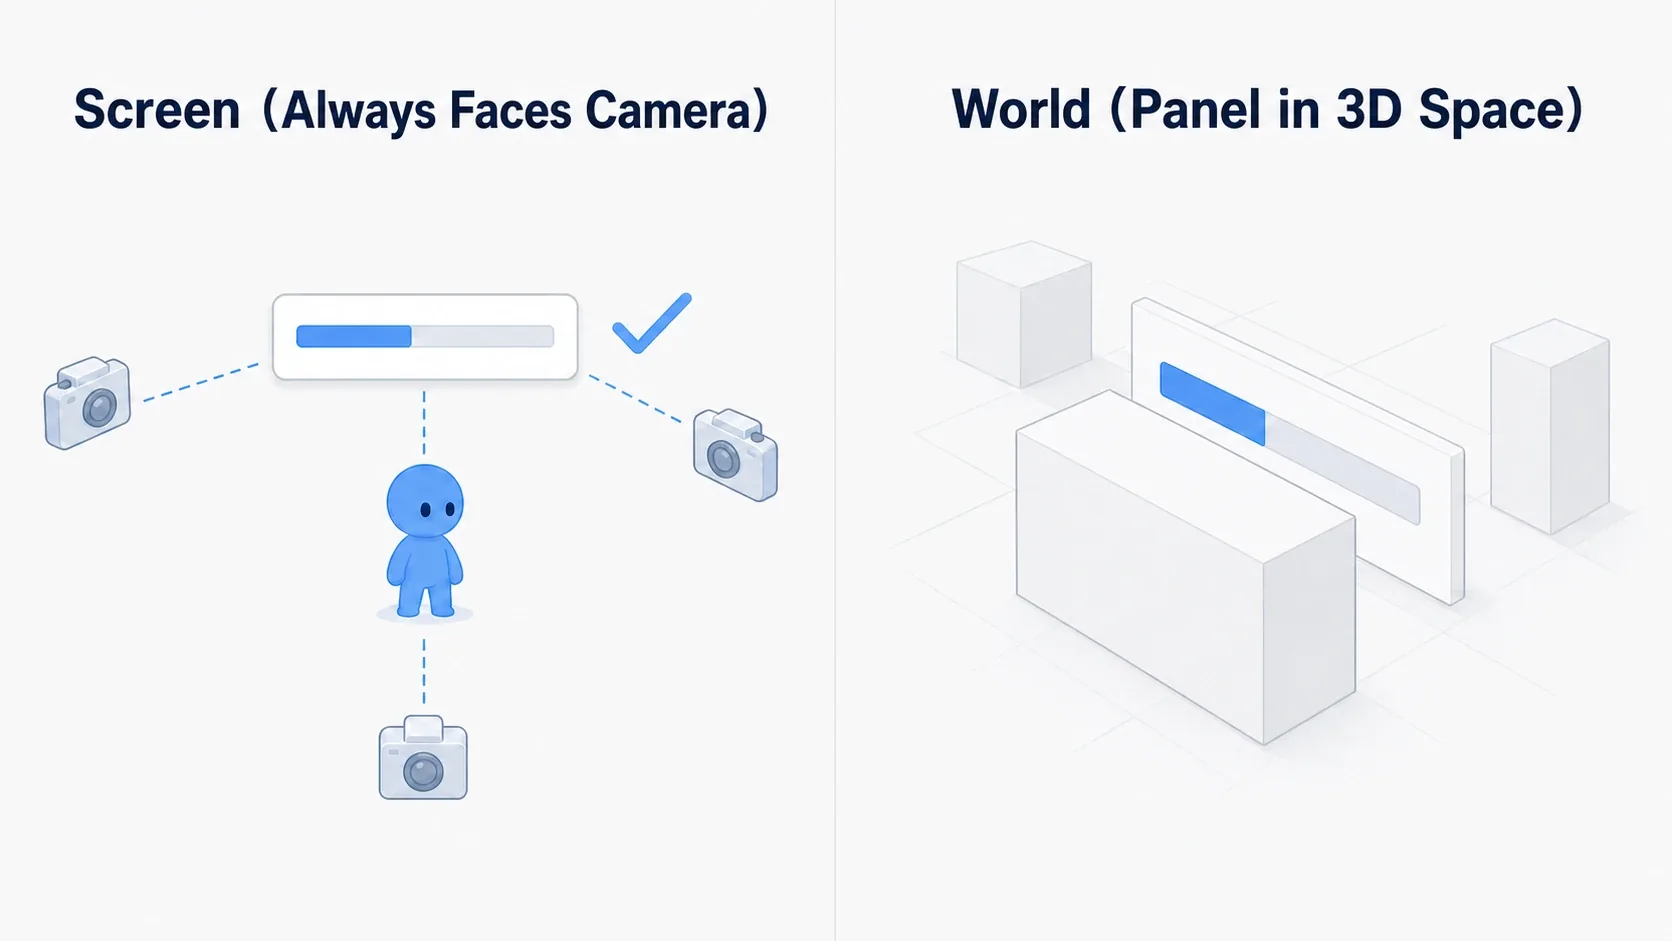
- Screen: the Widget always faces the camera (head-on to the screen). It's readable from any angle, so it's suited to overhead HP bars and nameplates . It doesn't tilt with perspective and is hard to hide behind other objects
- World: the Widget is placed as a board polygon in 3D space. It shrinks with distance, takes on an angle, and gets occluded by things in front. It's for UI you want blended into the world , like a wall control panel or a placed terminal
For an overhead bar, starting with Screen won't steer you wrong. Switch to World when you want to show it as a "board within the world".
Updating the Overhead HP Bar
Even with a Widget Component attached, it's only a "container for the Widget". To update the Progress Bar inside, you have to pull the actual Widget out of the container .
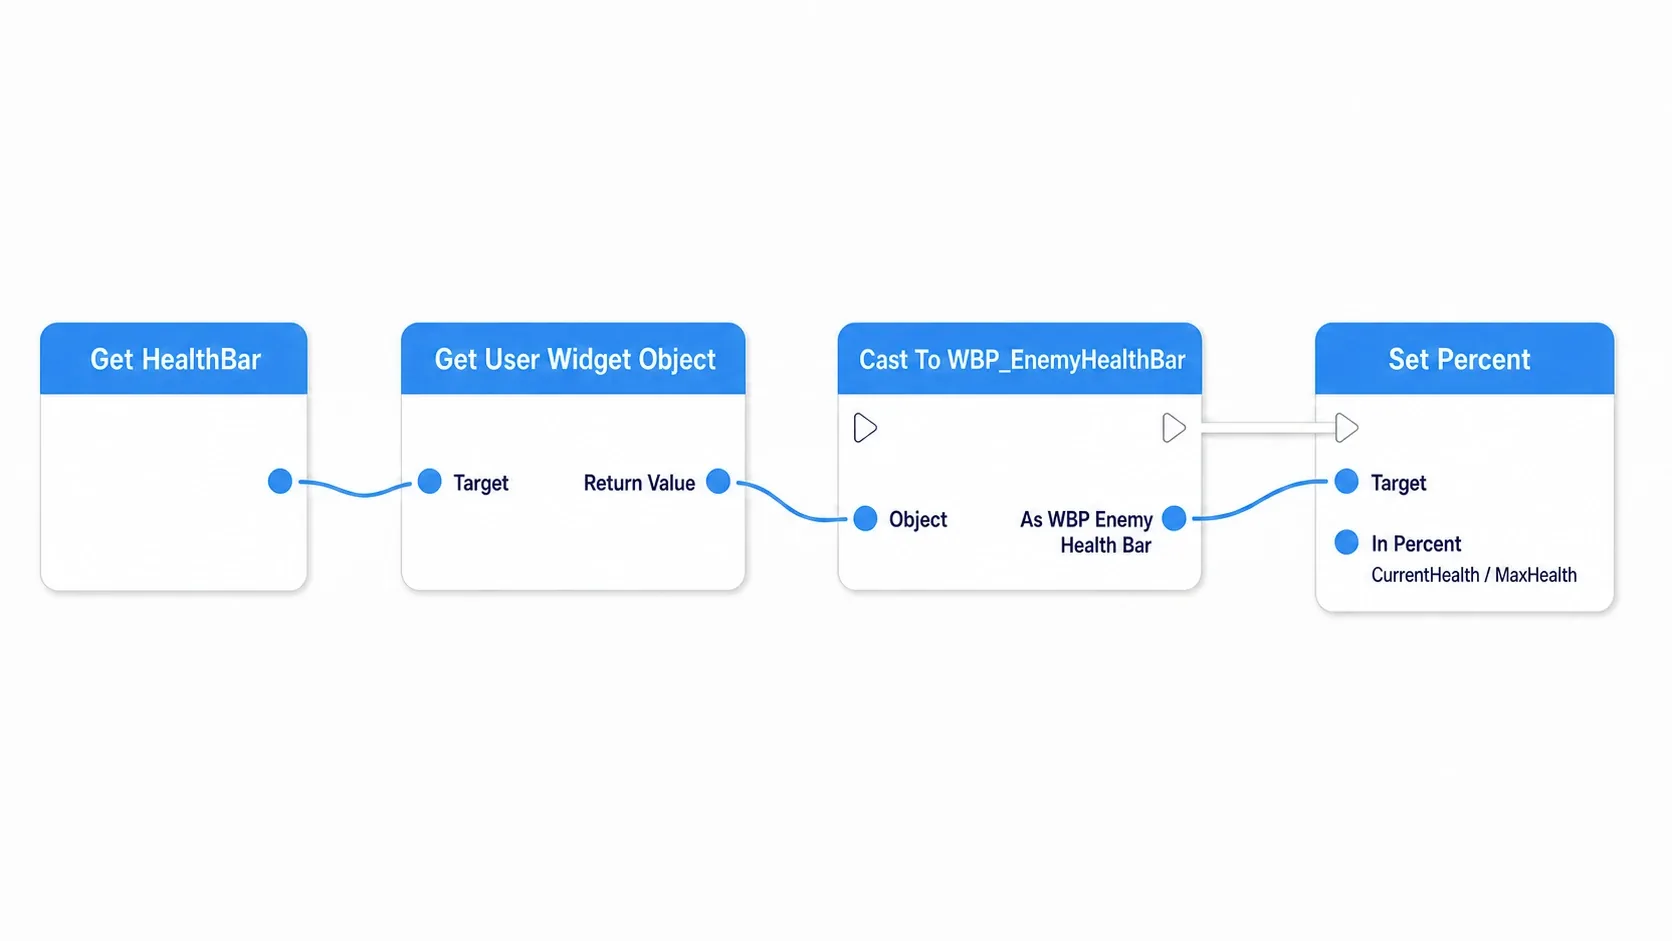
The node for that is Get User Widget Object . Pull the inner Widget out of the Widget Component with this node, and once you Cast it to your UMG class ( WBP_EnemyHealthBar ), you can reach the Progress Bar and functions inside.
(Enemy Blueprint) When HP changes
Get (HealthBar Widget Component)
  → Get User Widget Object
  → Cast To WBP_EnemyHealthBar
  → Set Percent (= CurrentHealth / MaxHealth)
The important thing here is to not use Binding . If you pull the Progress Bar's Percent from a function every frame with Binding, that calculation runs every frame for every enemy. Calling Set Percent only at the moment HP changes is far lighter (see UI performance optimization).
Showing Damage Numbers Lightly with Screen Projection
The "25" that pops on every hit. This too looks like you could build it with a Widget Component like the overhead bar, but spawning and destroying a Widget Component on every hit is a bit heavy . It starts to matter in scenes where numbers rain down during an enemy rush.
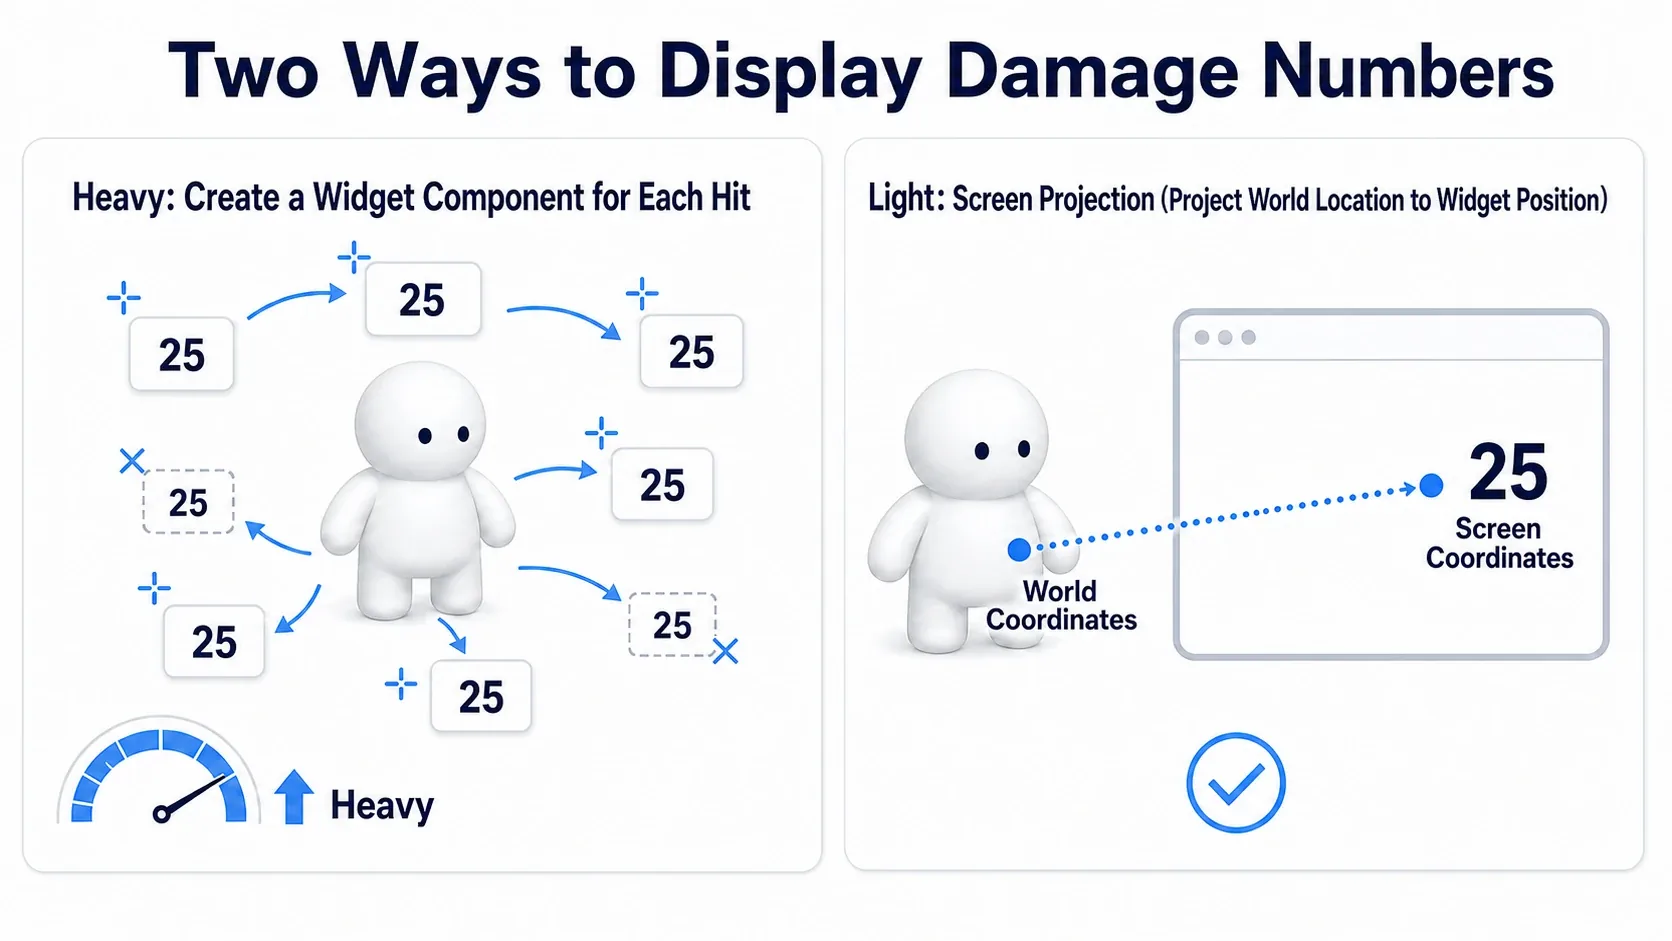
The light standard is the screen-projection method .
- On a hit, Create Widget the
WBP_DamageNumber→ Add to Viewport (place it on screen) - With Project World Location to Widget Position , convert the 3D hit location's coordinate to a 2D coordinate on screen and move the number there
- Float it up and fade it out with a UMG animation, and when it's done, self-destruct with Remove from Parent
Project World Location to Widget Position is a node that converts a world coordinate into "where that spot is showing on screen right now". Using it, you can put the number at the correct screen position without building a heavy Widget Component every time.
Hands-On: Building the Overhead Bar and Damage Numbers
An ARPG's mob fights, a tower defense's enemy rush, a hack-and-slash's rain of numbers. "The overhead bar drops and numbers fly on a hit" is a staple expression across every genre. Here we build one of them, with an overhead bar (Widget Component) and damage numbers (screen projection).
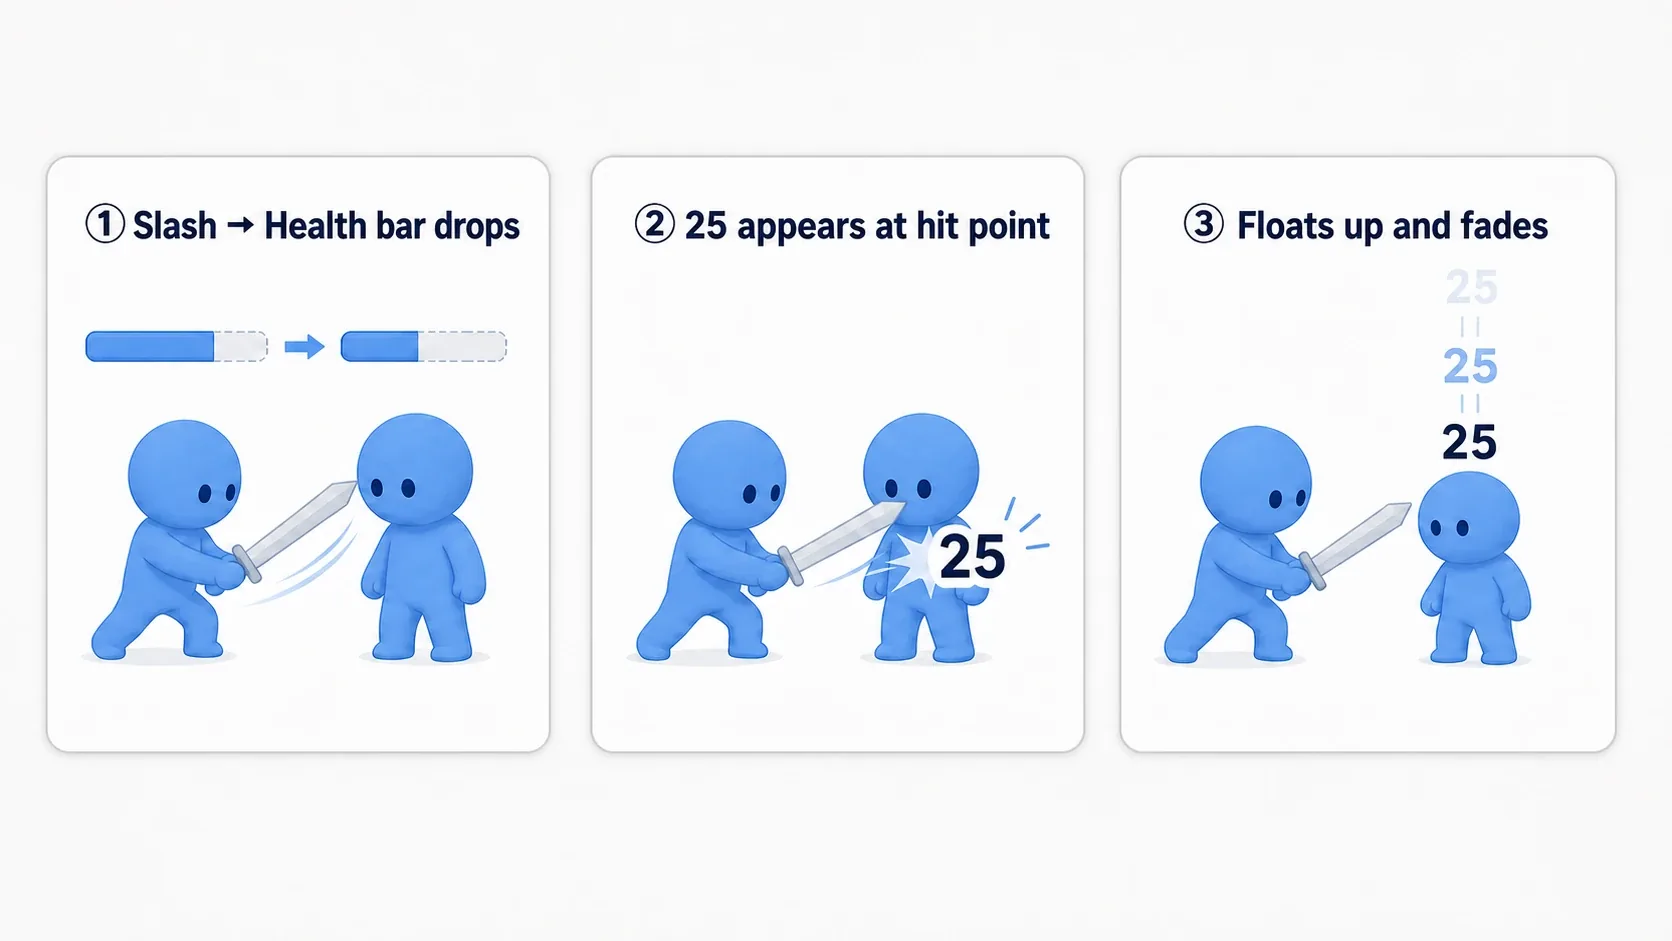
We're building a scene where the enemy's overhead bar drops on every attack, and a "25" floats up at the hit location and disappears .
Here's what it looks like running. Slash at the enemy and the HP bar above its head drops smoothly. At the same time, a "25" appears at the spot you hit, floats up over 0.6 seconds while fading, and vanishes. Land hits in a row and the numbers stack and fly out one after another.
Setup Conditions
| Item | Setting |
|---|---|
Enemy BP_Enemy (Character) | Variables CurrentHealth (Float, 100.0 ), MaxHealth (Float, 100.0 ). Add a Widget Component HealthBar with Space = Screen |
Overhead bar WBP_EnemyHealthBar | One Progress Bar. Updated via Set Percent |
Damage number WBP_DamageNumber | One Text Block. Build one UMG animation (0.6 sec) that moves up 40px and fades |
| Where damage comes from | Event AnyDamage (reaches the enemy via Apply Damage) |
Step 1: Update the Overhead Bar on a Hit
In BP_Enemy 's Event AnyDamage , reduce HP and then call the overhead bar's Set Percent .
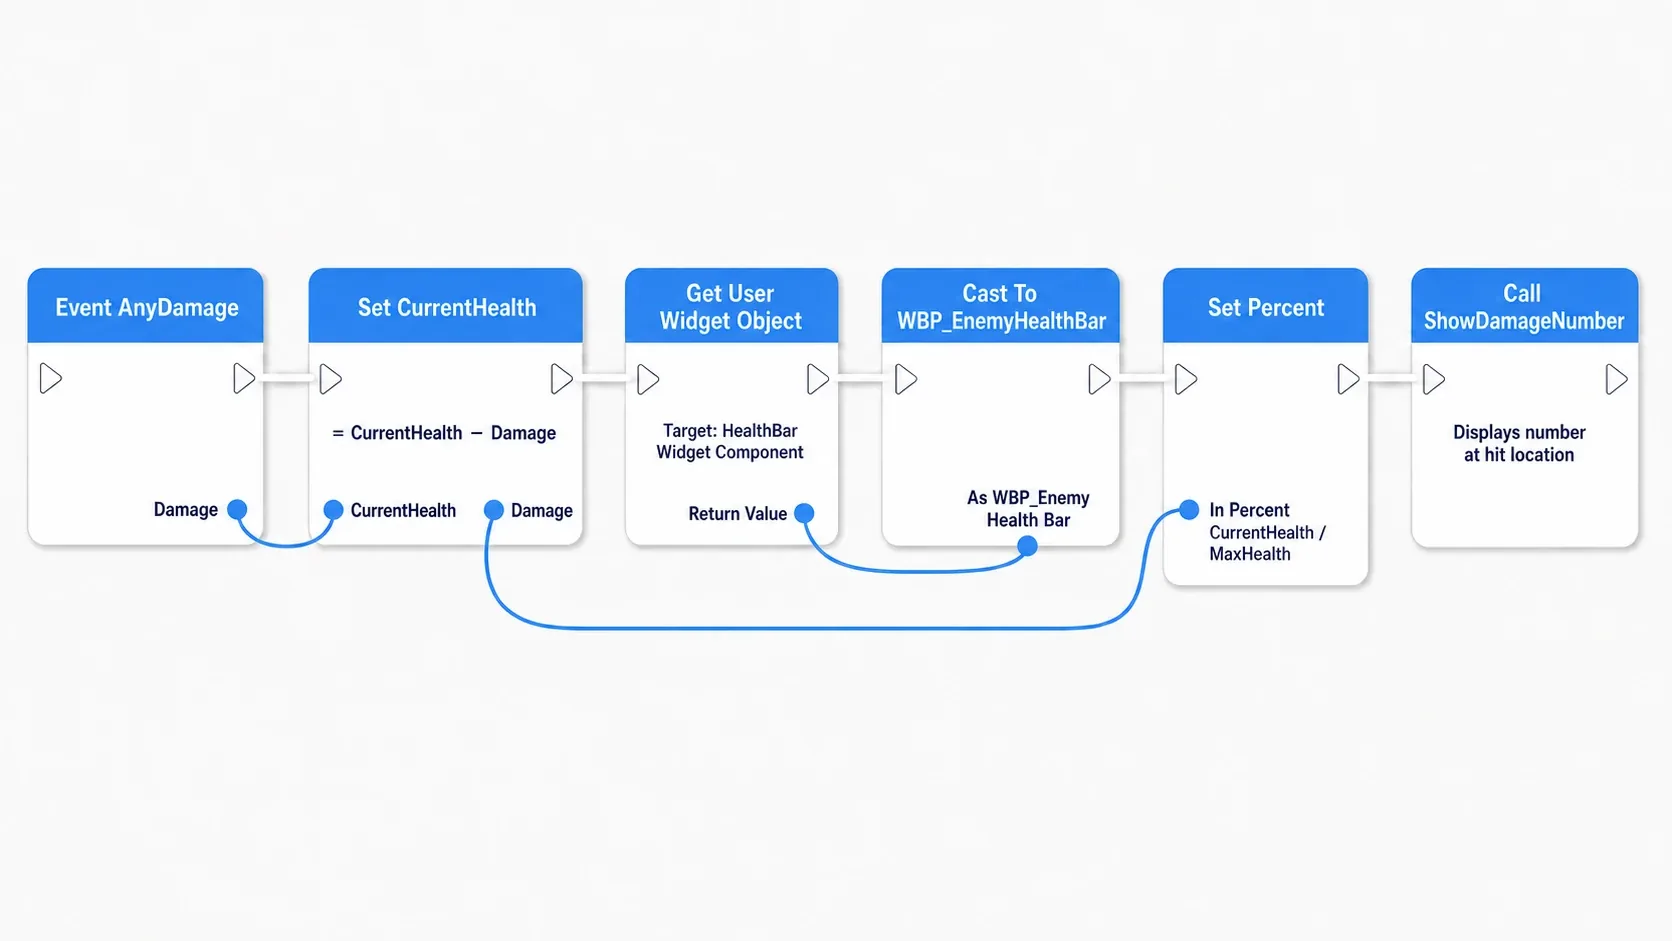
BP_Enemy (Event Graph)
Event AnyDamage (Damage)
  → Set CurrentHealth = CurrentHealth − Damage
  → Get (HealthBar Widget Component) → Get User Widget Object
  → Cast To WBP_EnemyHealthBar
  → Set Percent (= CurrentHealth / MaxHealth)
  → (at the hit location) call ShowDamageNumber (Step 2)
Step 2: Show a Damage Number at the Hit Location
Show the number with the screen-projection method, in the order Create Widget → Add to Viewport → Project World Location to Widget Position .
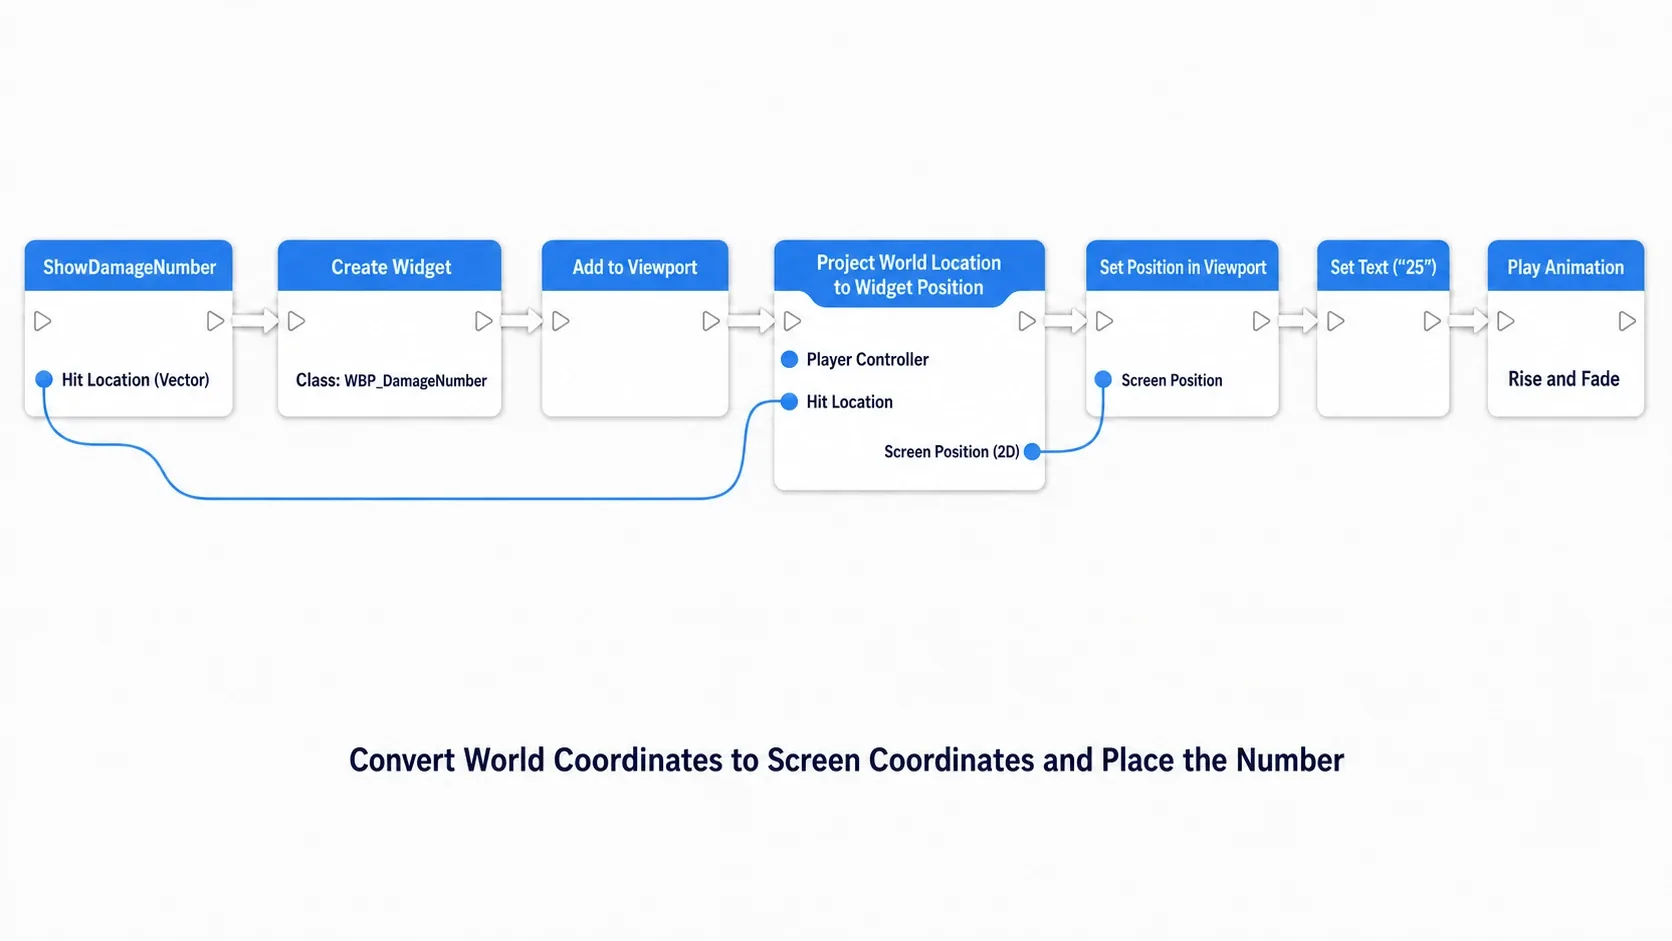
ShowDamageNumber (receives the hit location HitLocation)
  → Create Widget (Class: WBP_DamageNumber)
  → Add to Viewport
  → Project World Location to Widget Position (Player Controller, HitLocation)
  → Set Position in Viewport (= the converted 2D coordinate)
  → Set Text ("25")
  → Play Animation (float up and fade)
  → (on anim finished event) Remove from Parent
Once the number fades and disappears, always Remove from Parent . Forget this and transparent number Widgets keep piling up on screen, getting gradually heavier.
Verifying It
Play and attack the enemy. If it worked, the overhead HP bar drops, and a "25" floats up at the spot you hit and disappears over 0.6 seconds.
Here's how to narrow it down when it doesn't work.
- The bar doesn't drop → the
CastafterGet User Widget Objectis failing. Check that you assignedWBP_EnemyHealthBarto the Widget Class - The number shows in a weird spot → the coordinate passed to
Project World Location to Widget Positionis wrong. Check that you're passing the hit location (HitLocation) - Numbers don't disappear and pile up → the
Remove from Parentafter the animation isn't being called
Two things to take away.
- Things that follow use Widget Component, things that fly use screen projection: the overhead bar attaches to the Actor and keeps moving, so Widget Component; the damage number vanishes in an instant, so the light screen projection. This division is the fork that keeps it light even as enemies increase
- Always clean up what you show: the more momentary the UI, the easier it is to forget
Remove from Parent. For number and effect Widgets, always write "show" and "remove" as a set (see UI performance optimization)
Bonus: Good to Know for Later
Cull by distance, tidy the facing. With overhead bars appearing even on distant enemies, the screen fills with bars. If the distance to the player is beyond a threshold, hiding the Widget Component with Set Visibility shows bars only on the nearby enemies and reads better. With Screen space, it always faces the camera, so you don't need to adjust the facing.
Add information with number color and size. Damage numbers can do more than show a count. Making criticals red and large, normals white and small ramps up the feel at once. If you set up WBP_DamageNumber so the Text Block's color and size can be passed as arguments, one Widget covers a wide range of expression.
Reusing with a pool is even lighter. In a full-blown hack-and-slash where dozens of numbers fly per second, even Create Widget every time adds up and gets heavy. An "object pool", where you make a few dozen ahead of time and reuse them by hiding rather than destroying when done, brings the spawn cost close to zero. Building it with spawn-and-destroy first and considering this once it gets heavy is plenty.
Summary
UI that follows the world is built by dividing two tools.
| Use | Tool | Reason |
|---|---|---|
| Overhead HP bar / nameplate | Widget Component (Space=Screen) | Attaches to the Actor and keeps moving. Always faces the camera |
| Flying damage numbers | Screen projection (Add to Viewport + Project World Location to Widget Position) | Vanishes in an instant. Avoids per-hit spawns to stay light |
| Updating the contents | Get User Widget Object → Cast | Pulls the real Widget from the container to operate on it |
And the shared discipline is to avoid Binding and clean up what you show . Following UI multiplies with the number of enemies, so every bit of lightness adds up.
With this, you can return the feel of a hit to the screen. How much damage does an enemy in your game take before it falls? Try flying that number above its head.
Further Learning
- UMG Widget Blueprint (Basics to Advanced) — the basics of screen-pinned HUDs
- Health and Damage (Apply Damage) — the source that drops the overhead bar
- UI Performance Optimization — the pitfalls of Binding and redraws
- Game Feel and Hit Feedback — the effects you layer along with numbers