You've built the health and damage system, and you can even get the player to the point of dying. But after they die, nothing happens. The screen freezes, they lie there, and the game grinds to a halt.
Death isn't the end of a game. It's the start of a retry. Action, platformer, or shooter, none of them hold together without a loop where dying sends you back a little way. This article builds the flow of death effect → disable input → short wait → revive , plus the mechanism for resuming from the last checkpoint you touched, in a platformer where falling into lava sends you back to a flag.
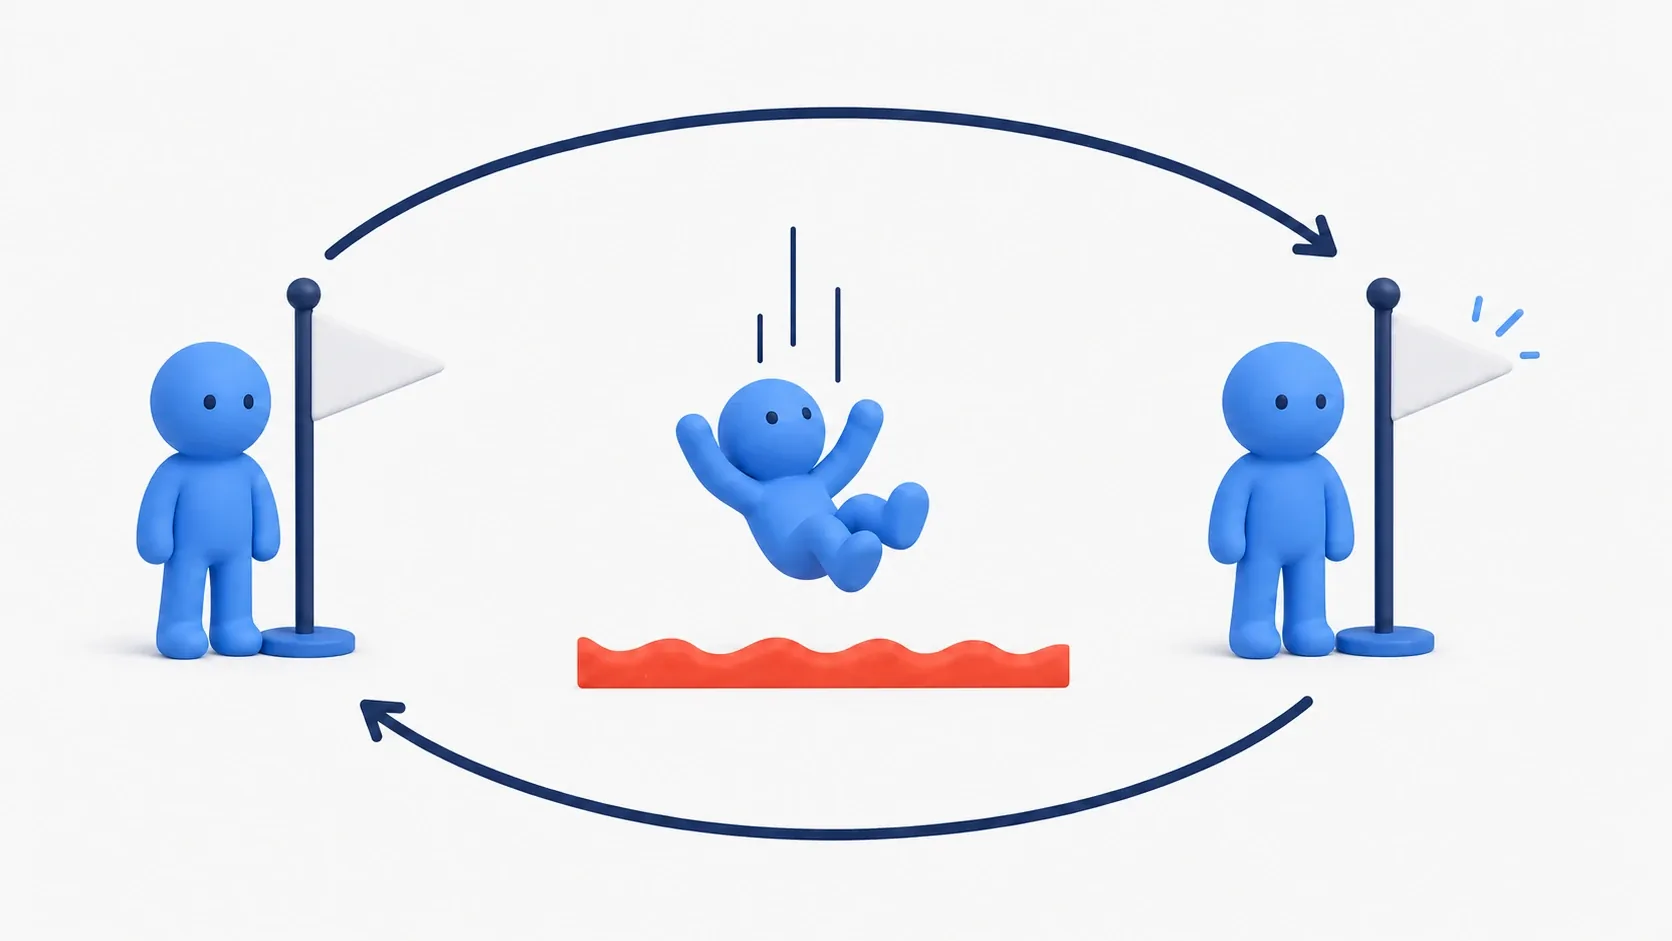
What You'll Learn
- The four beats to hit when a player dies (effect → stop → wait → revive)
- Using a checkpoint Actor to remember only the last spot touched
- The two respawn methods: rebuild vs. reposition
- Catching the void with a Kill Volume (the reliable way in Blueprint)
- The design call of what to reset and what to keep on revive (full HP, but keep coins)
- Hands-on: a lava platformer that sends you back to the last flag
What Should Happen When You Die
We say "die then revive" in one breath, but if you warp the player somewhere else instantly, they can't tell what happened. A good death hits four beats in order.
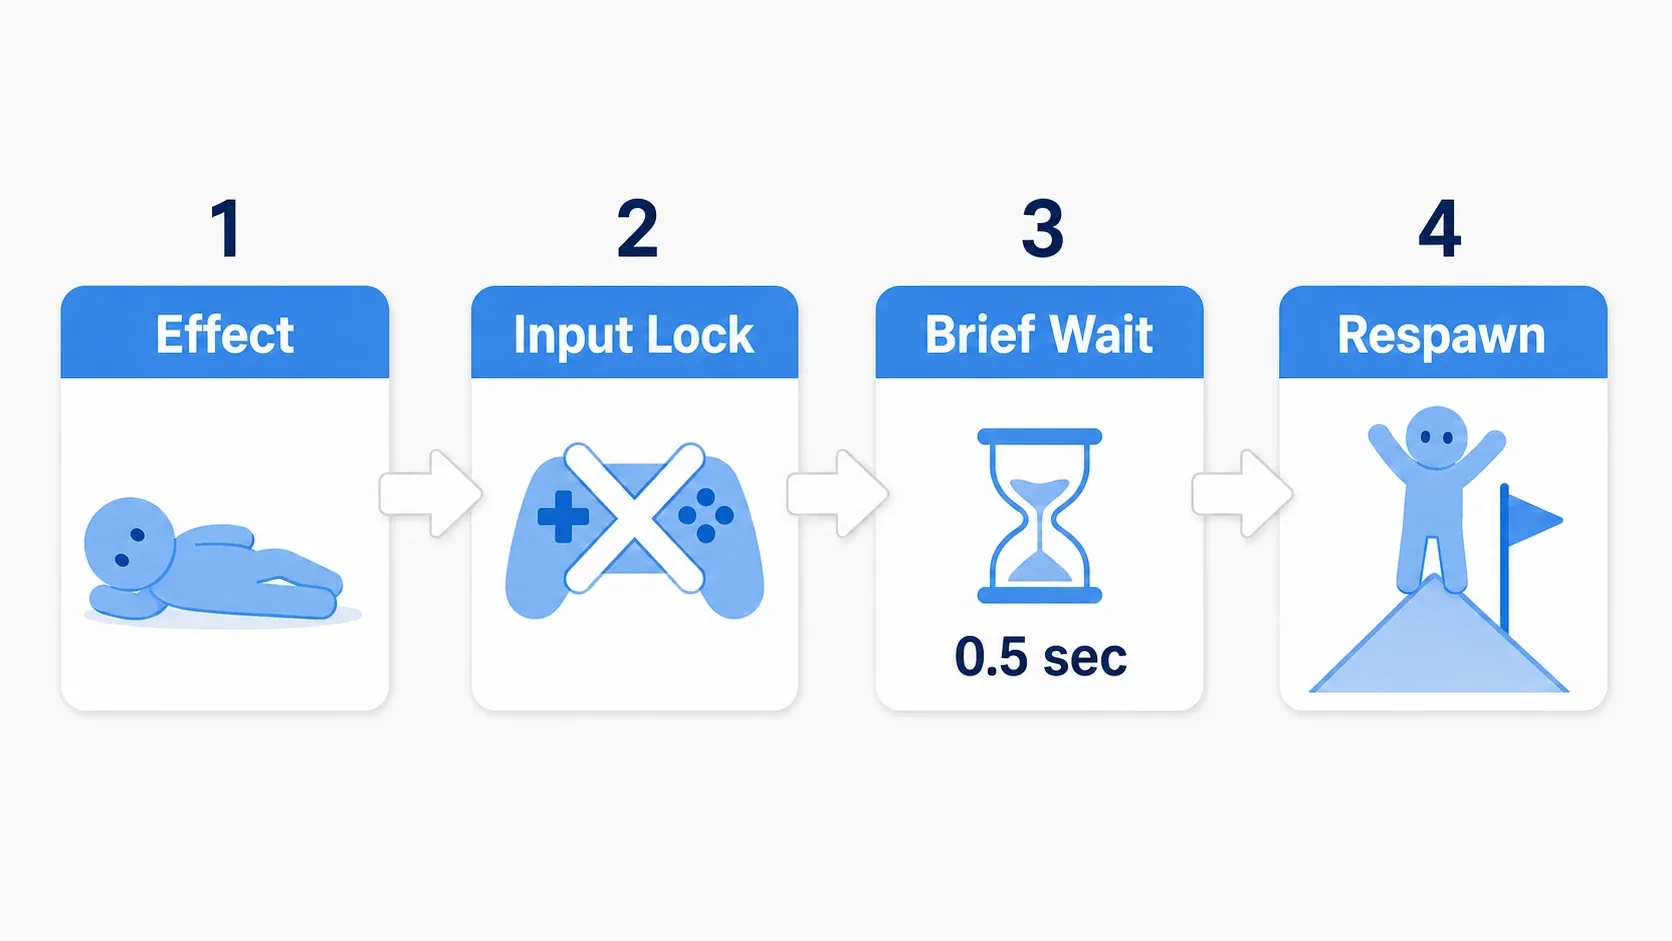
- Effect: fall over, flash, tint the screen red. Communicate "you just died"
- Disable input: don't accept controls while dead. Moving around mid-collapse ruins it
- Wait a beat: a 0.5 to 1 second pause. Time for the player to take in the situation
- Revive: return to the saved spot, reset state, and hand input back
Just following this order turns death from an "unfair interruption" into a "break in the flow". In the implementation, bundling these four beats into one function (say HandlePlayerDeath ) lets every kind of death run through the same flow.
Remembering the Last Spot with a Checkpoint
The checkpoint decides where you revive. It remembers a spot the player passed, and sends them back there when they die.
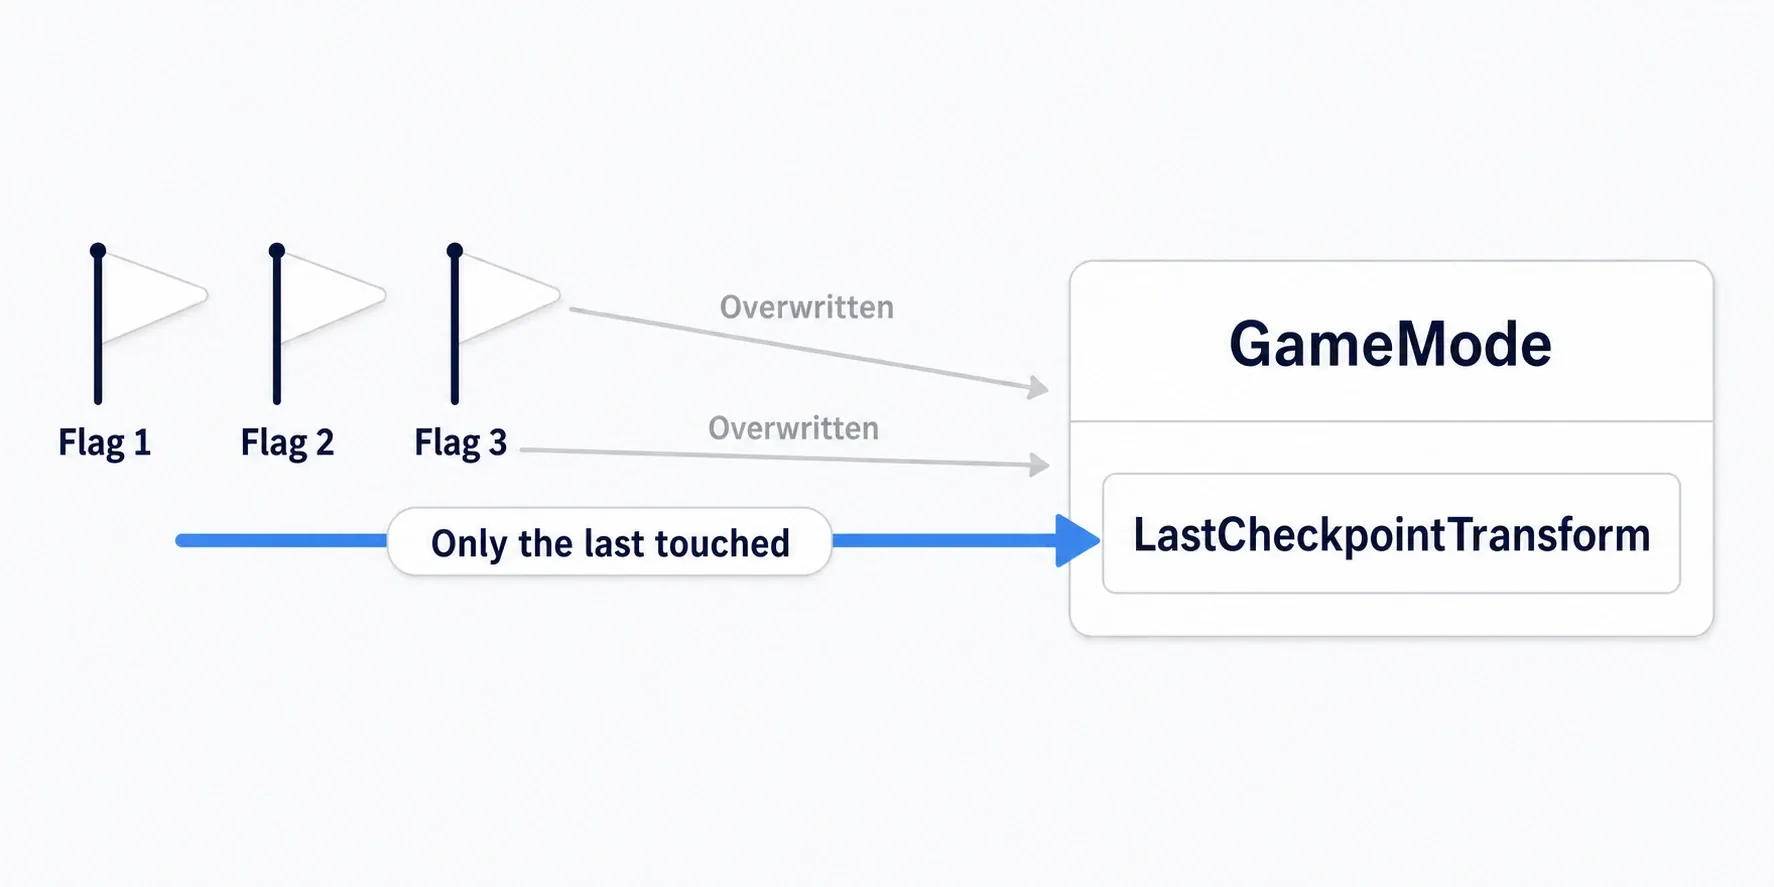
The mechanism is simple. Place a BP_Checkpoint (with a Box Collision) like a flag or a campfire, and when the player touches it, record that one spot . Touch the next checkpoint and it overwrites, so the "last spot touched" is always your revive point.
Since this record is the state of the whole game , GameState is a natural home (the record survives even if the player dies and gets rebuilt). For clarity here, we'll give GameMode, the center of rule decisions, a LastCheckpointTransform (Transform type).
Don't save the record: this checkpoint only needs to be remembered while the game is running. So we don't write it out to a Save Game, we just hold it in a variable. If you want progress to survive closing the game, write that value to disk with the Save/Load system. "Reviving within a session" and "saving across launches" are two different jobs.
Two Respawn Methods: Rebuild or Reposition
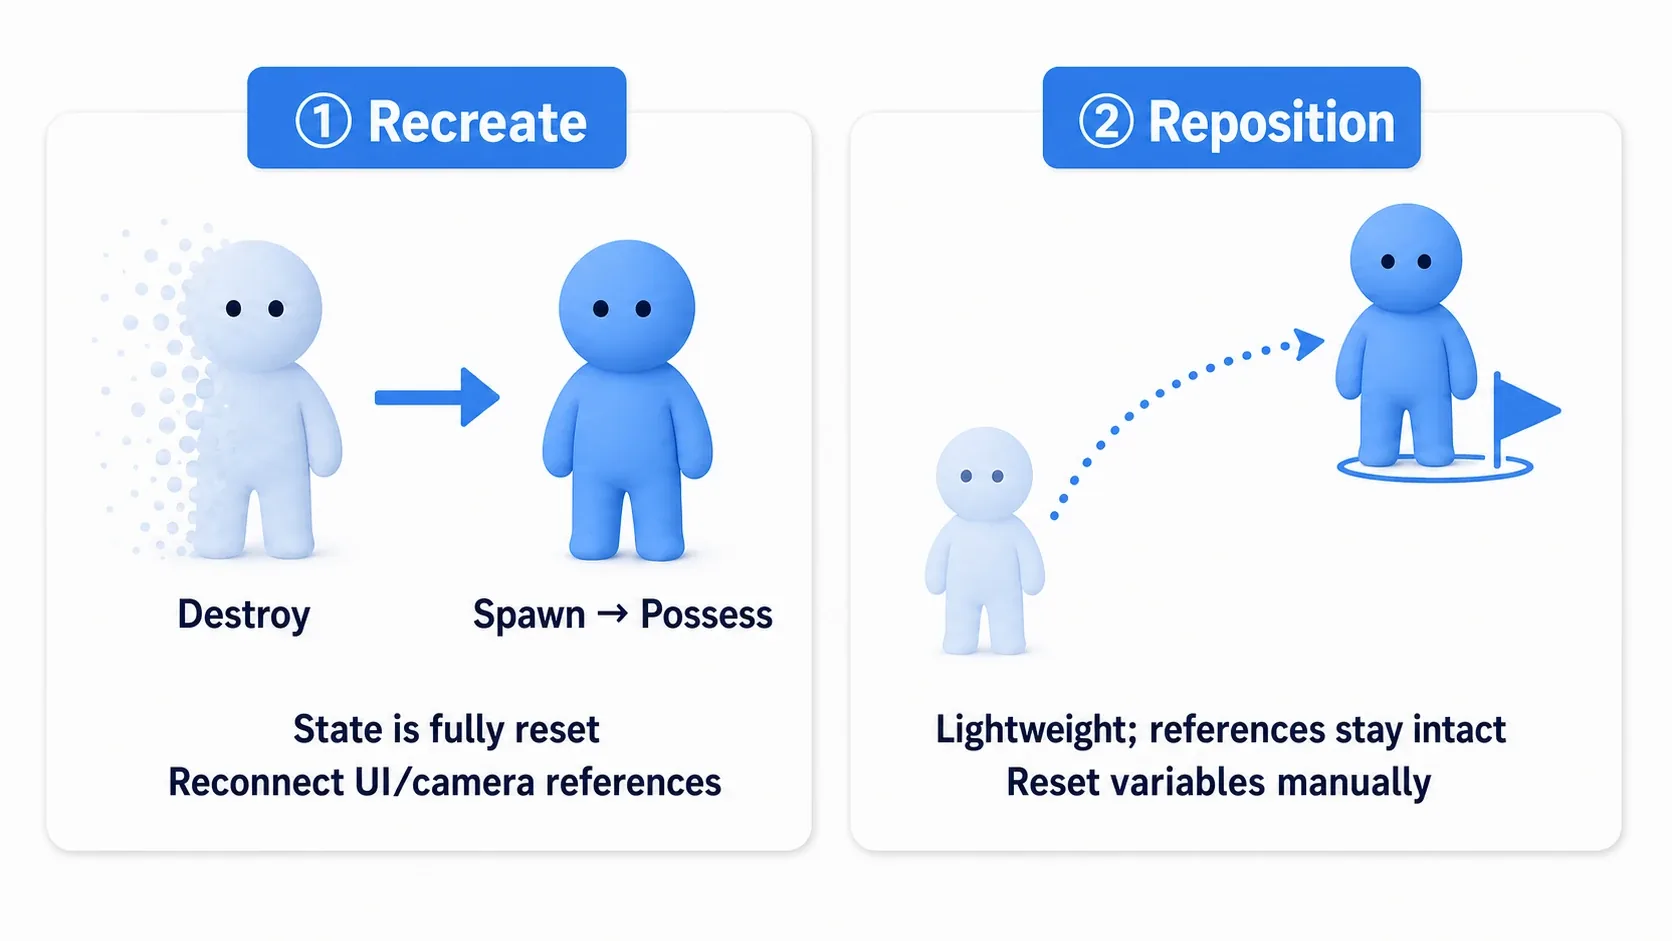
There are two ways to revive, each with its own strengths and weaknesses.
| Method | What it does | Strength | Weakness |
|---|---|---|---|
| 1. Rebuild | Destroy the current Pawn → Spawn at the saved spot → Possess (or RestartPlayerAtTransform ) | State is reliably reset . No carried-over bugs | If UI or camera references that Pawn, the reference breaks and needs rebuilding |
| 2. Reposition | Set Actor Location to the saved spot, then reset variables (HP, etc.) by hand | Lightweight. UI and camera references don't break | A variable you forget to reset becomes a breeding ground for bugs |
The RestartPlayer family of nodes (like RestartPlayerAtTransform ) belongs to GameMode and is callable from Blueprint. But GameMode exists only on the server, so in multiplayer you call it server-side.
For small solo projects, the reposition method is easier to handle, because it doesn't break even with the HP bar or camera still referencing the player. This article builds it with method 2 as well. We'll close off the "forgot to reset" weakness with the "what to reset, what to keep" table below.
Catch the Void with a Kill Volume
In a platformer, the cause of death is usually "falling". This is where beginners get stuck: on how UE's standard Kill Z works.
World Settings' Kill Z calls into an Actor that drops below that height. But that notification ( FellOutOfWorld ) is a C++ function that Blueprint can't receive directly . You get stuck at "I set Kill Z but I can't fire death logic in Blueprint".
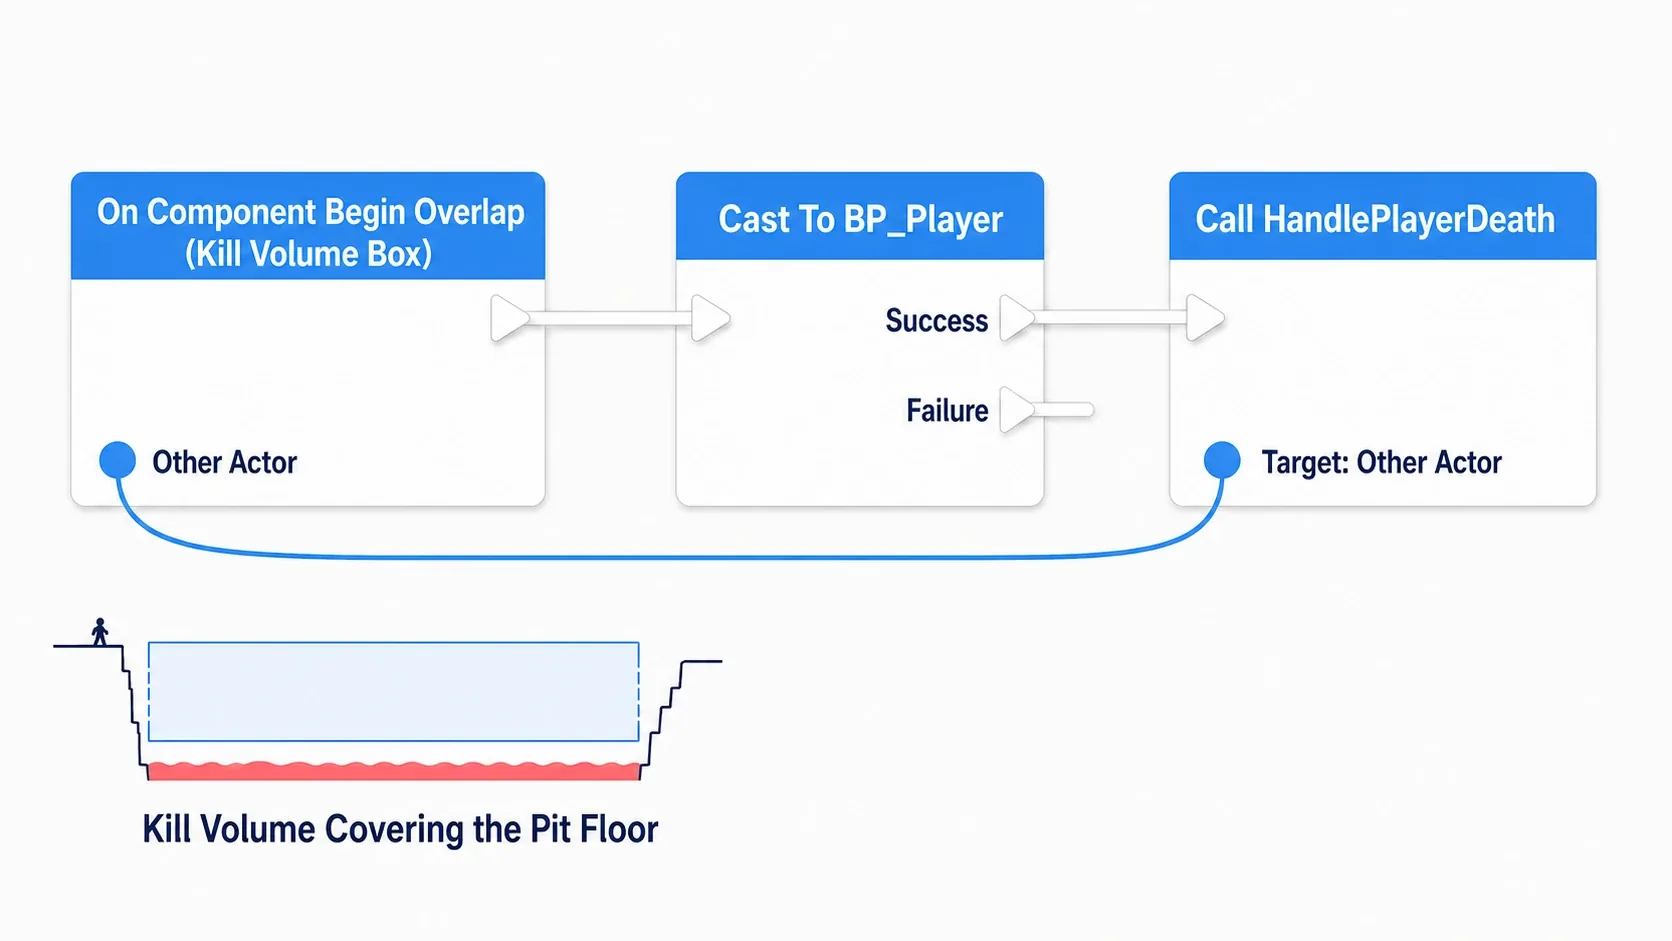
If you're building in Blueprint only, the answer is simple. Lay one large Box Collision "Kill Volume" across the bottom of the void . The instant a fallen player touches it, call your death logic from On Component Begin Overlap . You don't have to watch the Kill Z height yourself every frame, you can leave it to collision detection.
What to Reset, What to Keep
The weak point of the reposition method was "forgetting to reset". You can prevent that by deciding upfront what to reset and what to keep on revive . And this isn't just bug prevention, it's game design itself .
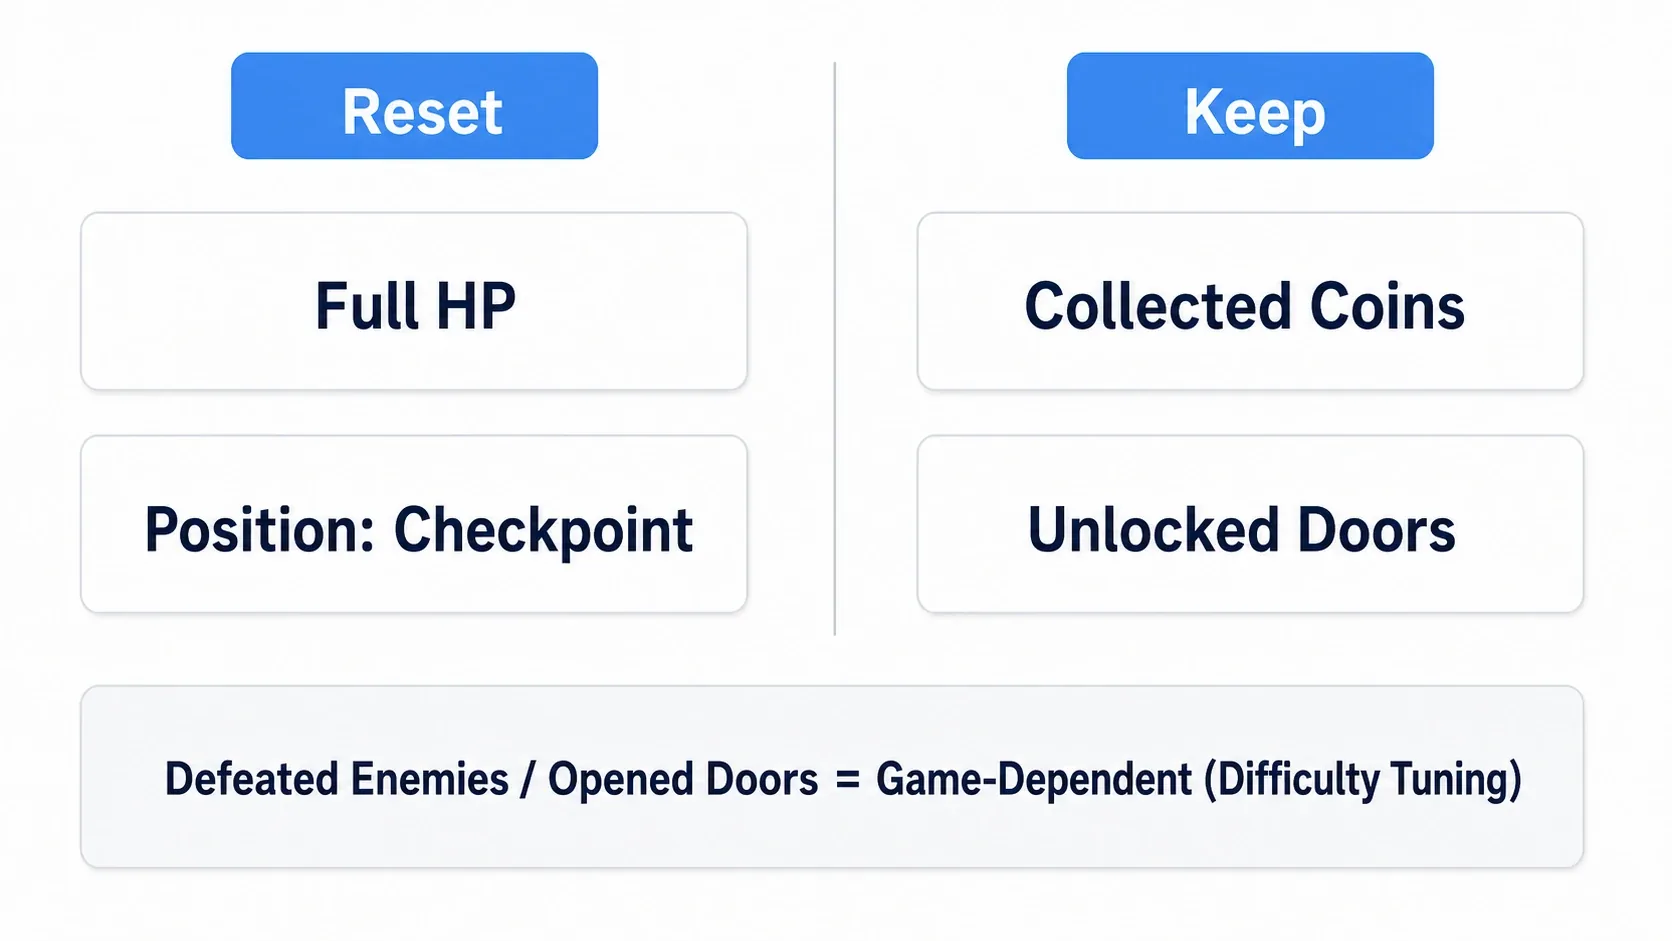
| Item | What to do | Reason |
|---|---|---|
| HP | Reset to full | Revive them near-death and they just die again instantly |
| Position / facing | Return to checkpoint | This is the core of reviving |
| Collected coins / keys | Keep | Confiscate them each death and the will to explore breaks |
| Opened doors / defeated enemies | Depends on the game | Souls-like: respawn. Player-friendly: keep. This is your difficulty dial |
Whether "everything rolls back on death" or "the progress you made stays" changes the feel of the game enormously. Rewriting this table to match your game's difficulty is the crux of respawn design.
Hands-On: Building a Lava Platformer
A 3D action game's platforming stretch, a horror game's instant-death trap, a racing game's course recovery. "Fall and retry from the last spot" is a staple across every genre. Here we build one of them, with flag checkpoints and a lava void.
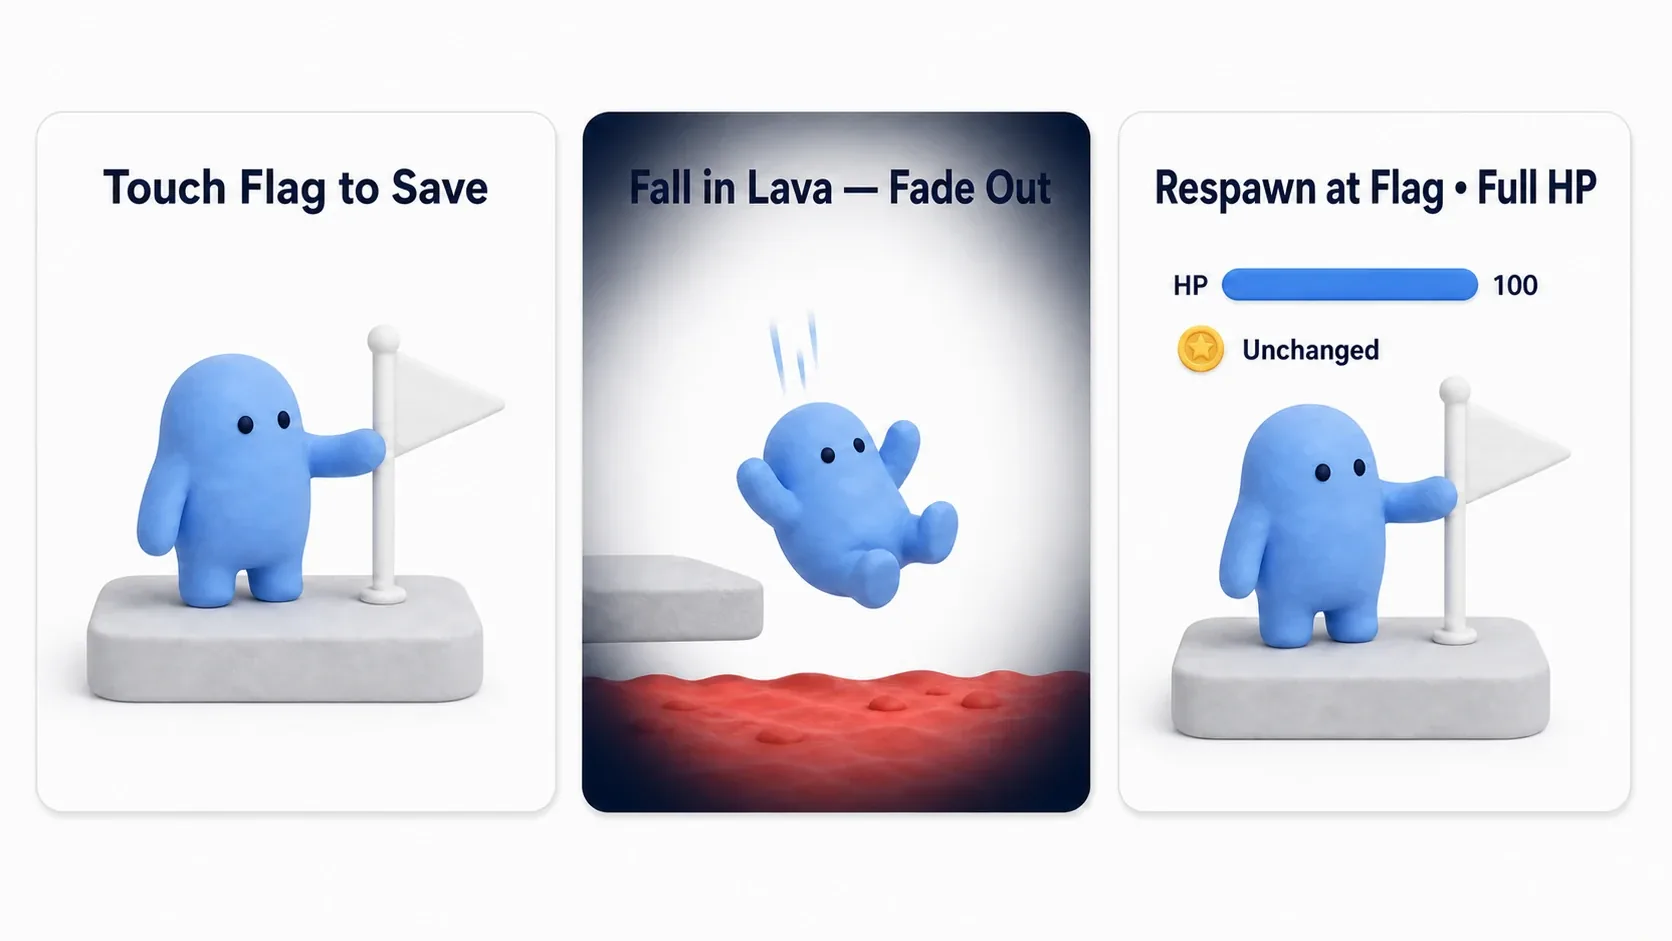
We're building a platformer where touching a flag records it, falling into lava fades the screen to black, and you revive on top of the previous flag with full HP and your coins intact .
Here's what it looks like running. The player crosses the platforms and touches a flag. On the next platform they misstep and fall into lava. The screen fades smoothly to black, and when it clears they're standing on the previous flag, HP bar full, collected coins still there. Fall without touching a single flag and you go back to the start.
Setup Conditions
| Item | Setting |
|---|---|
GameMode BP_GameMode | Variable LastCheckpointTransform (Transform). Initial value can be the Player Start's location |
Player BP_Player (Character) | Variables CurrentHealth (Float, 100.0 ), MaxHealth (Float, 100.0 ), bIsDead (Boolean, false ) |
Checkpoint BP_Checkpoint | Static Mesh (flag) + Box Collision. Collision Presets = OverlapAllDynamic |
Kill Volume BP_KillVolume | Large Box Collision. Covers the bottom of the lava. Collision Presets = OverlapAllDynamic |
| For the fade | WBP_Fade (a full-screen black Image). See the interpolation in the Timeline node |
Step 1: Record When the Checkpoint Is Touched
BP_Checkpoint just writes the touching player's position into GameMode's LastCheckpointTransform .
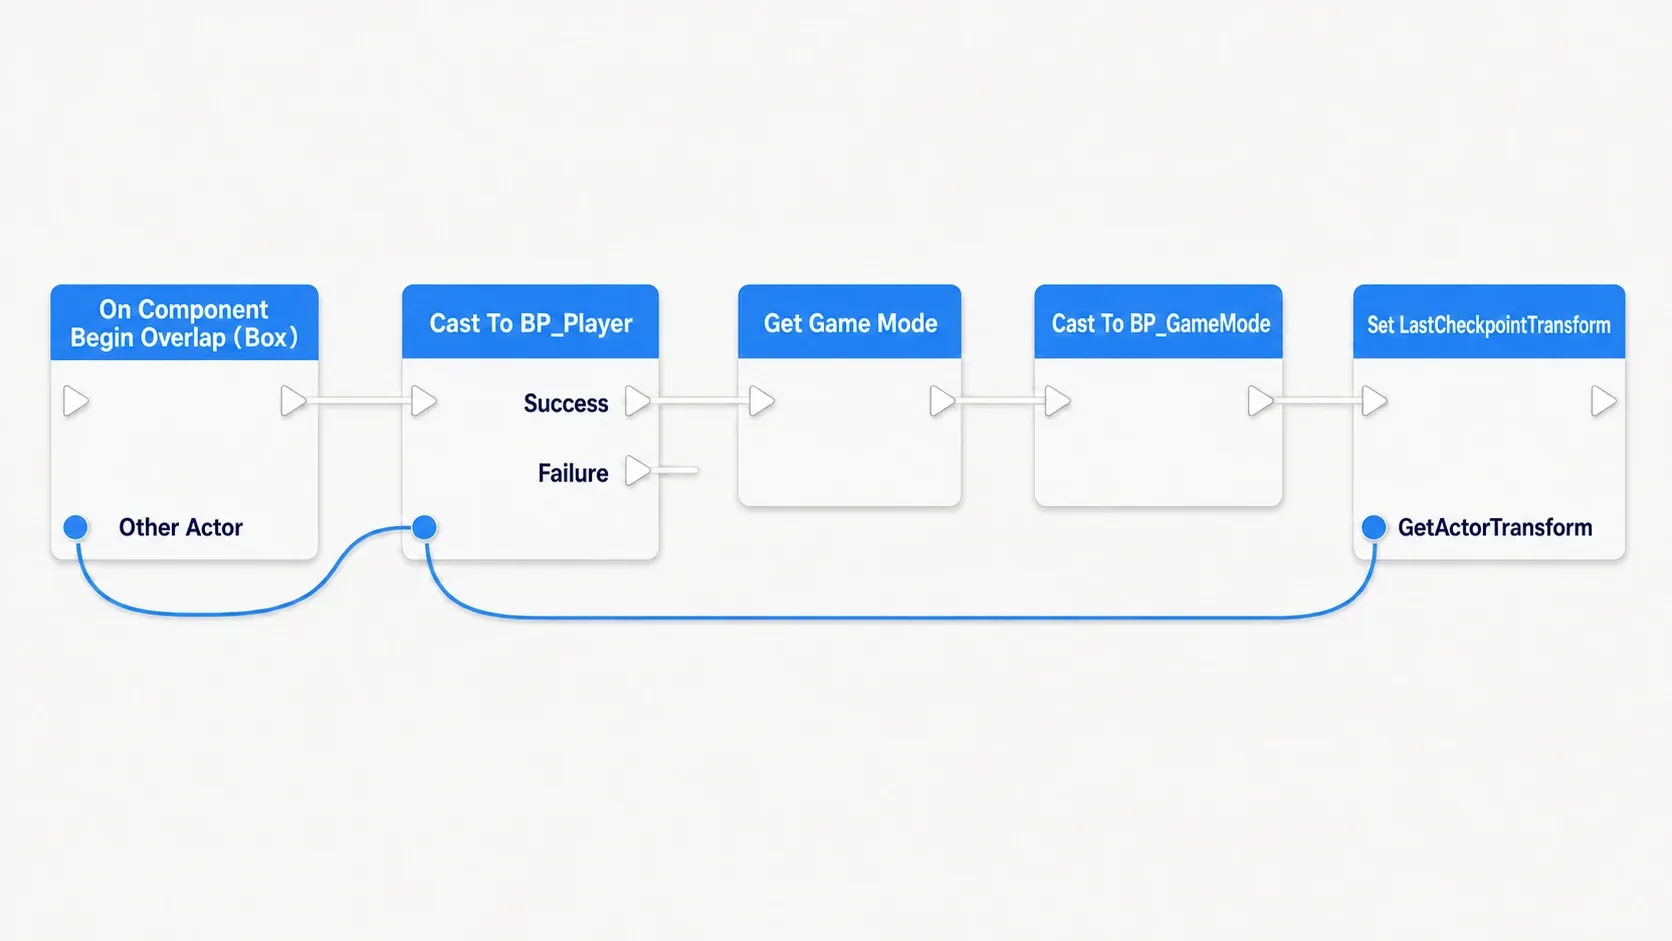
BP_Checkpoint (Event Graph)
On Component Begin Overlap (Box)
  → Cast To BP_Player (Other Actor)
  → (success) Get Game Mode → Cast To BP_GameMode
  → Set LastCheckpointTransform (= Other Actor's GetActorTransform)
  → Print String("Checkpoint recorded")
The Cast To BP_Player is there so the record isn't overwritten by something other than the player (a small prop that fell in, say).
Step 2: Call Death Logic When You Fall into Lava
BP_KillVolume just calls the touching player's HandlePlayerDeath .
BP_KillVolume (Event Graph)
On Component Begin Overlap (Box)
  → Cast To BP_Player (Other Actor)
  → (success) Call HandlePlayerDeath (Target: Other Actor)
Step 3: Build the Four-Beat Death Logic
Make a HandlePlayerDeath (Custom Event) on BP_Player , running effect → stop → wait → revive as a single chain.
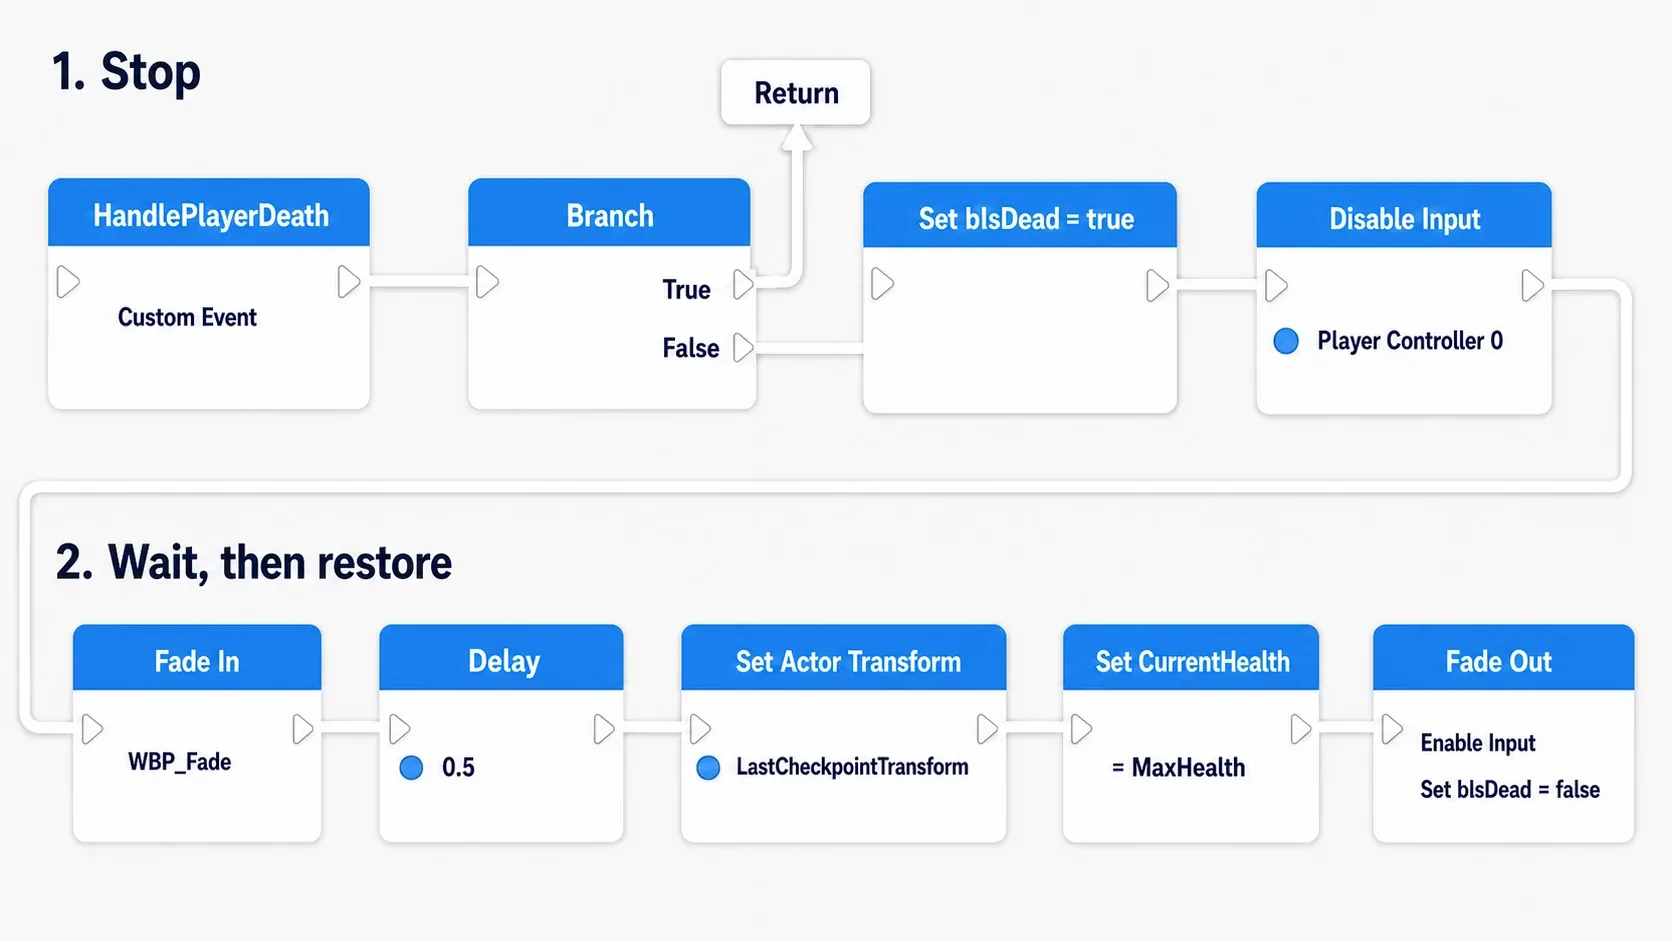
BP_Player (Event Graph)
HandlePlayerDeath (Custom Event)
  → Branch (bIsDead == true) → True: Return   // prevent double death
  → Set bIsDead = true
  // 1. effect + 2. disable input
  → Disable Input (Get Player Controller 0)
  → Add WBP_Fade to Viewport → fade in (screen to black)
  // 3. wait a beat
  → Delay (Duration = 0.5)
  // 4. revive: reposition
  → Get Game Mode → Cast To BP_GameMode → Get LastCheckpointTransform
  → Set Actor Transform (Target: self, New Transform = LastCheckpointTransform)
  → Set CurrentHealth = MaxHealth        // full HP (reset)
  → fade out (screen back to bright) → Remove WBP_Fade from Parent
  → Enable Input (Get Player Controller 0)
  → Set bIsDead = false
The bIsDead check at the top is the key. Even if you touch the Kill Volume multiple times while falling, death logic runs only once . Coins and keys do nothing here, so they're kept as-is (just as the reset-or-keep table says).
Verifying It
Play, touch a flag, then dive into the lava. If it worked, the screen fades to black over 0.5 seconds, and when it clears you're standing on the previous flag, HP bar full, coins intact . Fall without stepping on a single flag and you return to the initial value of LastCheckpointTransform (the Player Start).
Here's how to narrow it down when it doesn't work.
- Nothing happens when you fall → check that the Kill Volume's
Collision PresetsisOverlapAllDynamic, and thatGenerate Overlap Eventsis ticked - Fades out and never comes back →
Enable InputorRemove from Parentisn't being called. Check that everything afterDelayis connected - Revives over and over → the
bIsDeadcheck is missing. You keep touching the Kill Volume andHandlePlayerDeathfires repeatedly
Two things to take away.
- Funnel death into one function: fall death, killed-by-enemy death, trap death, the entrances differ but they all arrive at the same
HandlePlayerDeath. Write the four beats in one place and every death feels the same - Decide what to reset and what to keep upfront: full HP, keep coins. This sorting is the difficulty itself, so design it together with the death check in Health and Damage
Bonus: Good to Know for Later
When you need the rebuild method. If state gets tangled enough that "repositioning can't fully reset it", rebuild the whole Pawn with RestartPlayerAtTransform (which GameMode owns). In that case you have to re-wire the UI and camera references yourself. Think of it as: reposition while small, rebuild once it gets complex.
Growing beyond a single checkpoint. In a roguelike's floor saves, or an exploration game with branching paths you can return to, you'll want to remember multiple checkpoints. Then, instead of a single Transform, manage an array of checkpoints or IDs. Grasping the mechanism with "just the last one" first is plenty.
Save it if you want it kept across launches. The record in this article disappears when you close the game. If you want "continue from yesterday", write LastCheckpointTransform and the coin count to disk with the Save/Load system. Reviving within a session (this article) and saving across launches (save-load) are two wheels of the same cart.
Summary
A game you can retry after dying is built from these four beats.
| Beat | What to do | Implementation |
|---|---|---|
| Effect | Communicate the death | fall over, flash, darken the screen |
| Stop | Halt controls | Disable Input |
| Wait | Let it sink in | Delay (0.5 to 1 sec) |
| Revive | Return to the saved spot | reposition ( Set Actor Transform + full HP) |
And the thing you must not forget is the sorting of what to reset (HP) and what to keep (coins) . That's your difficulty dial.
With this, the "move → hit → die → retry" loop is closed. In your game, where does the player die most often? Try planting your first flag right there.
Further Learning
- Health and Damage (Apply Damage) — the source of the death check
- Implementing a Save/Load System — keeping progress across launches
- Carrying Data Over with GameInstance — where to store records that cross levels
- UE5 Official Docs: Game Mode and Game State