You got as far as putting a "Settings" button on the title screen. But you have no idea where the resolution should be saved. Create a SaveGame class, write out resolution and quality, read them back on launch, and apply them. Plenty of people design all of that before writing a line.
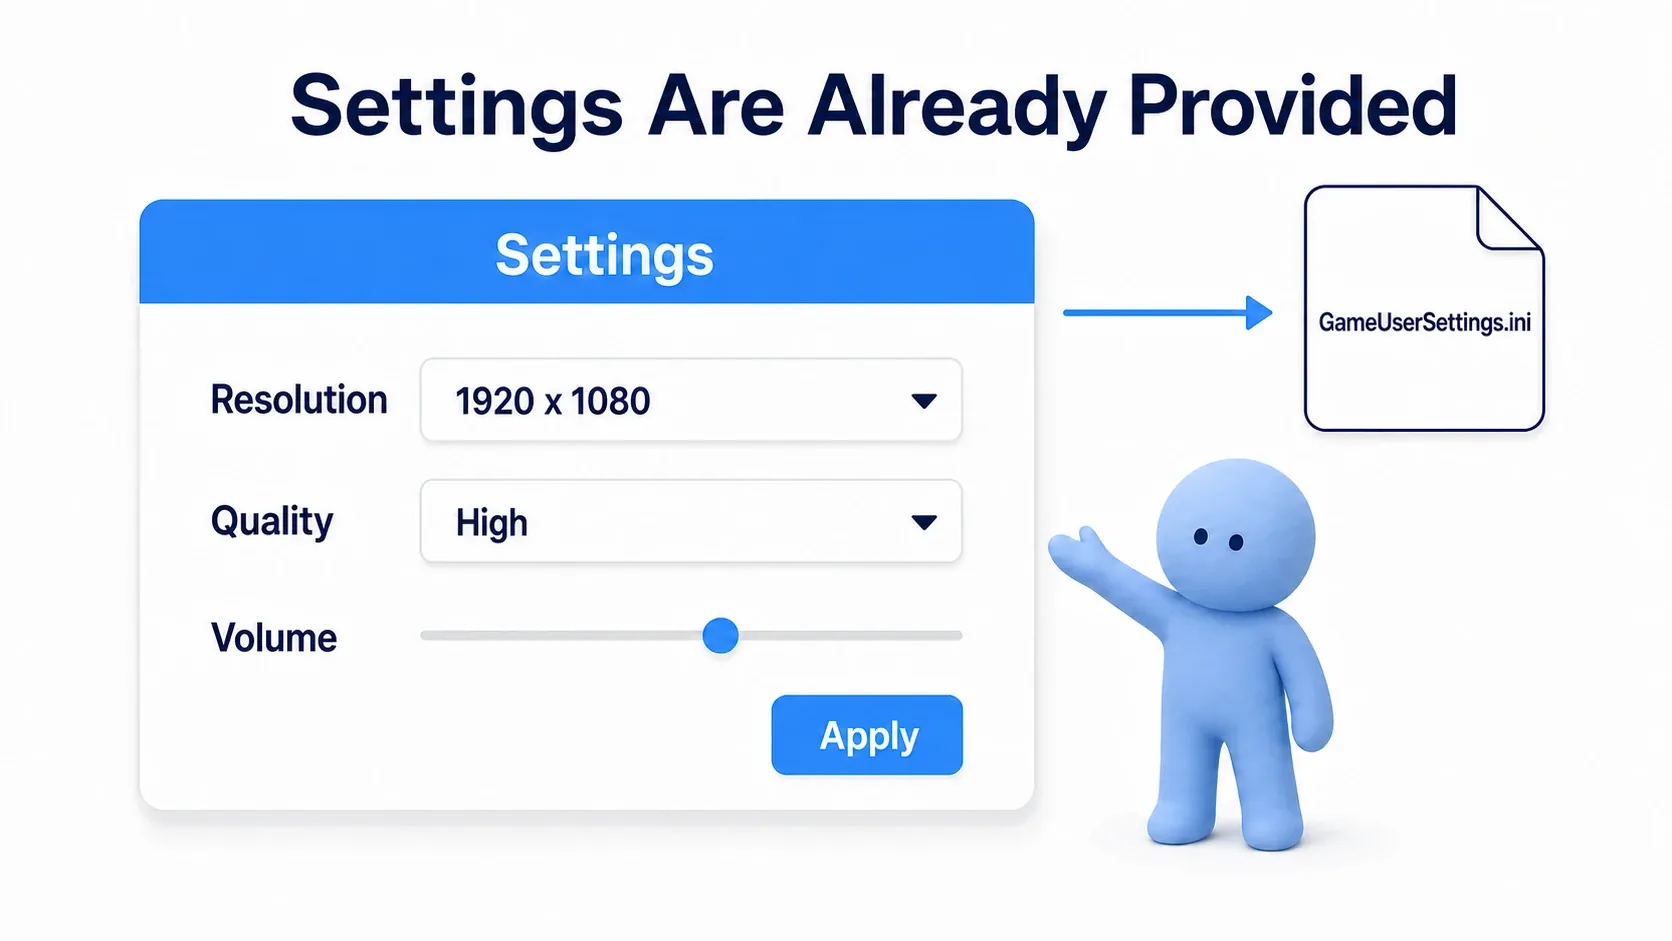
UE ships with a dedicated class for exactly this: Game User Settings . It holds resolution, window mode, quality, VSync, and frame rate limit, and handles writing to a file and loading on startup by itself. This article covers what Game User Settings can handle, the two easy-to-forget nodes Apply Settings and Save Settings, and why volume alone takes a different path.
What You'll Learn
- Game User Settings already holds display-related settings for you
- How to switch resolution and the three window modes
- Quality is specified as a Scalability level
- Nothing applies without
Apply Settings, and nothing persists withoutSave Settings- Volume alone lives outside Game User Settings
- Hands-on: a settings screen that changes resolution, quality, and volume
- The Place for Settings Already Exists
- Resolution and Window Mode
- Quality Is Specified as a Scalability Level
- Apply and Save Are Different Jobs
- Volume Alone Takes a Different Path
- Hands-On: Building a Resolution, Quality, and Volume Screen
- Checks When It Doesn't Work
- Bonus: Good to Know for Later
- Summary
The Place for Settings Already Exists
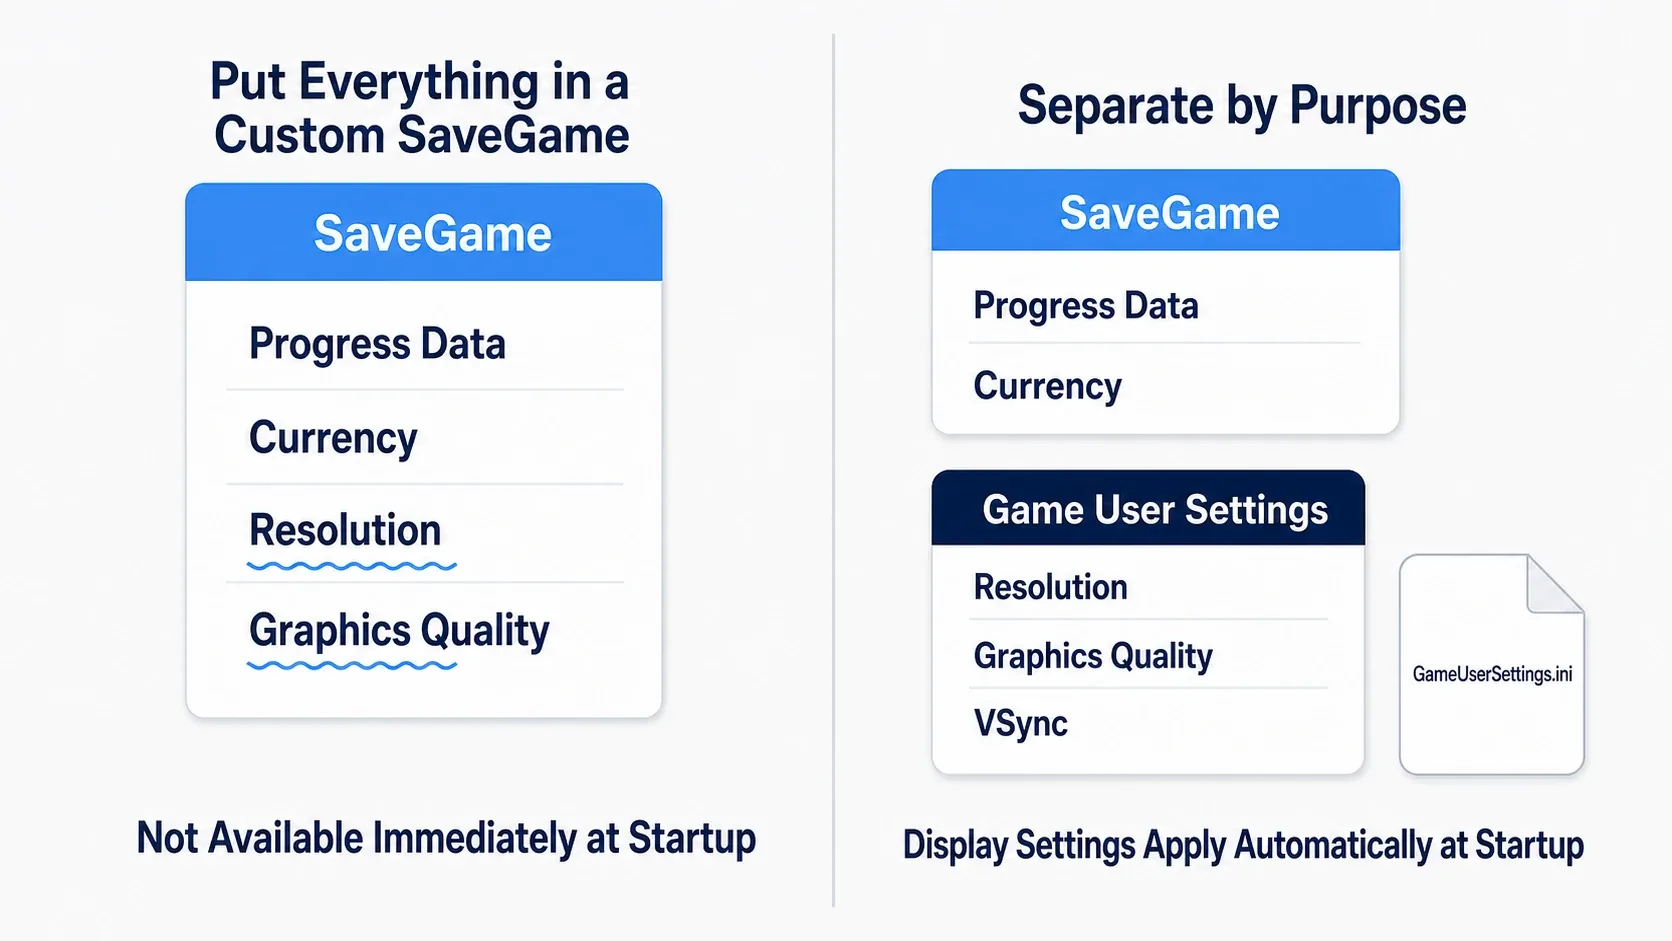
When you design your own save data, it's tempting to put resolution and quality in there. But those two have awkward properties.
- They don't belong to a save slot: "slot 1 is 1920×1080 and slot 2 is 1280×720" is meaningless. Settings belong to the player personally, and their lifetime differs from progression data
- They're needed immediately at launch: these are values you want applied by the time the title screen appears. They can't wait for save data to load
UE separates these. Progression data goes in SaveGame , and display-related settings go in Game User Settings .
To reach it from Blueprint, call the Get Game User Settings node. It takes no arguments, and you connect the other nodes to the returned Game User Settings object. Any Blueprint can call it, and it always refers to the same single instance for the whole game.
The items it handles are roughly these:
| Setting | Node to Write | Node to Read |
|---|---|---|
| Resolution | Set Screen Resolution | Get Screen Resolution |
| Window mode | Set Fullscreen Mode | Get Fullscreen Mode |
| Quality (all at once) | Set Overall Scalability Level | Get Overall Scalability Level |
| Quality (individual) | Set Shadow Quality and friends | Get Shadow Quality and friends |
| Vertical sync | Set VSync Enabled | Is VSync Enabled |
| Frame rate limit | Set Frame Rate Limit | Get Frame Rate Limit |
Notice that volume isn't here . We'll get to that in a later section.
The values are saved outside the project, in a per-user location, in GameUserSettings.ini . For a packaged Windows build that's %LOCALAPPDATA%\<ProjectName>\Saved\Config\Windows\GameUserSettings.ini, while testing in the editor reads the project's Saved/Config/WindowsEditor/GameUserSettings.ini. Since the test file and the packaged file are different, settings you configure in the editor do not carry over to the packaged build.
Resolution and Window Mode
Resolution is specified with Set Screen Resolution . It has a single pin, Resolution, of type Int Point (a pair of integers, X and Y).
How the window is presented is set with Set Fullscreen Mode , passing one of three values to In Fullscreen Mode.
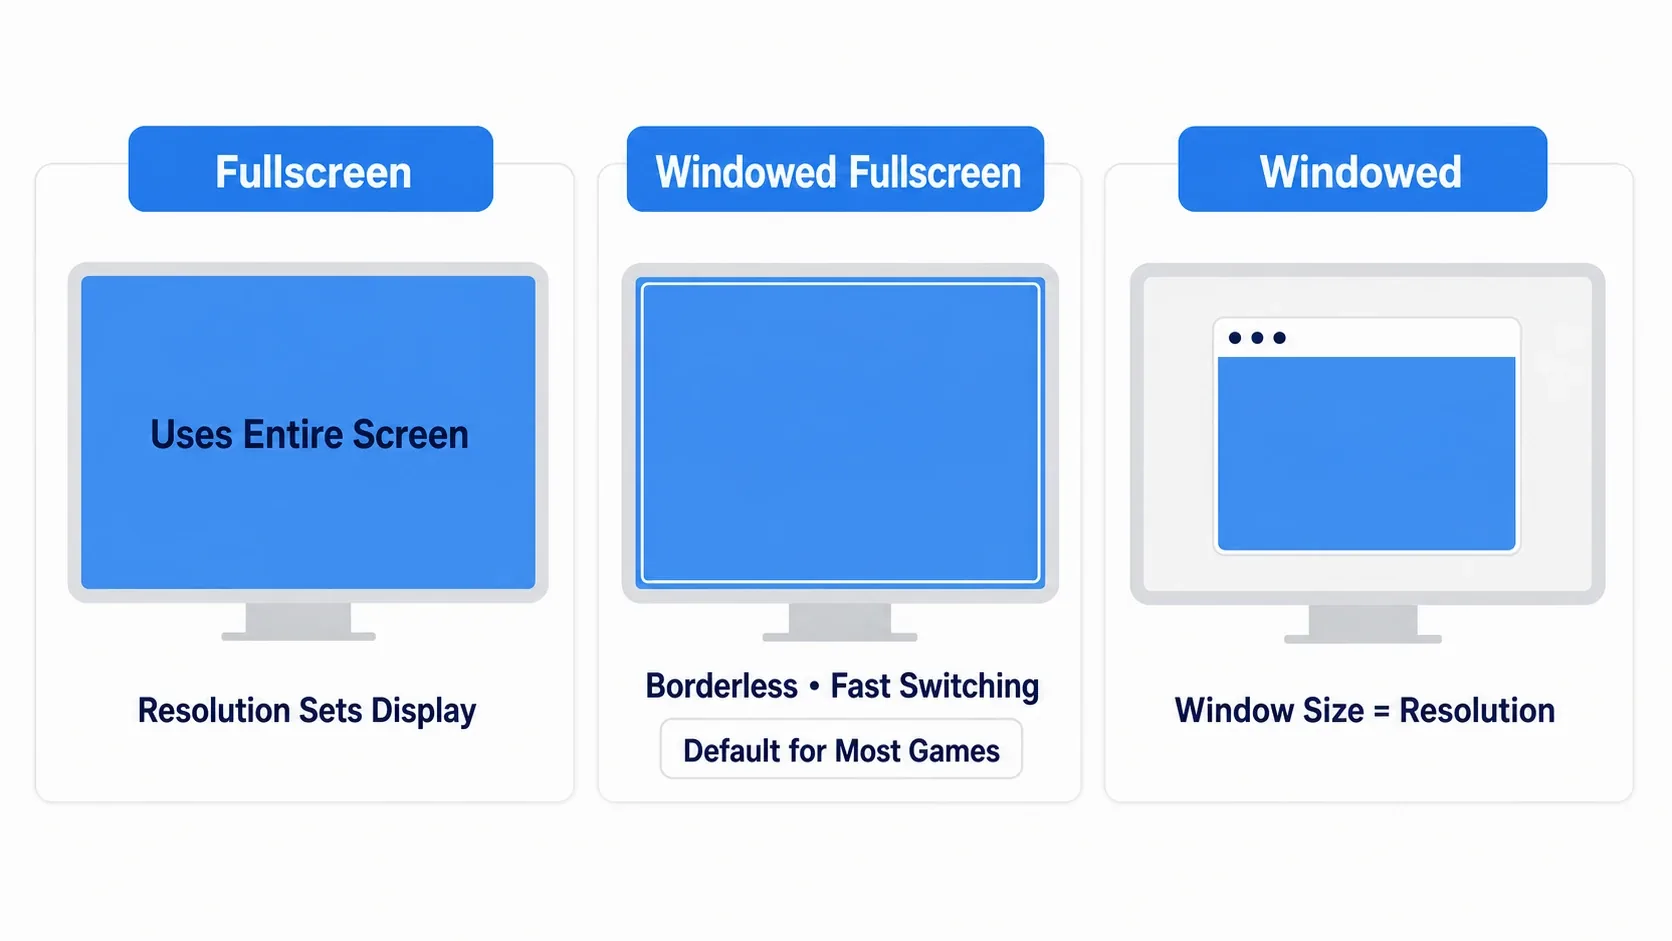
| Mode | Appearance | Characteristics |
|---|---|---|
| Fullscreen | Takes over the entire display | The chosen resolution is applied to the display itself. Switching takes a moment |
| Windowed Fullscreen | Looks fullscreen, but is a borderless window | Fast to alt-tab to other apps. The default for most PC games |
| Windowed | A normal window | The resolution becomes the window size directly |
When in doubt, defaulting to Windowed Fullscreen avoids most problems with flicker on switching or mismatched resolutions.
Build the list of choices to match the environment. The Get Supported Fullscreen Resolutions node returns the resolutions available on that display as an array of Int Point (the returned Boolean tells you whether the query succeeded).
| Node | What It Returns | Good For |
|---|---|---|
| Get Supported Fullscreen Resolutions | Array of resolutions usable in fullscreen | Fullscreen-oriented options |
| Get Convenient Windowed Resolutions | Array of window resolutions that fit the current display | Options for windowed mode |
Writing a fixed list yourself always breaks down eventually: ultrawide and 4K users can't pick their resolution, or you offer resolutions larger than their screen. Build your options from what you queried.
Note: These nodes report what the connected display supports . Some environments return a nearly empty array, so it's safer to fall back to one default entry when the element count is 0.
Quality Is Specified as a Scalability Level
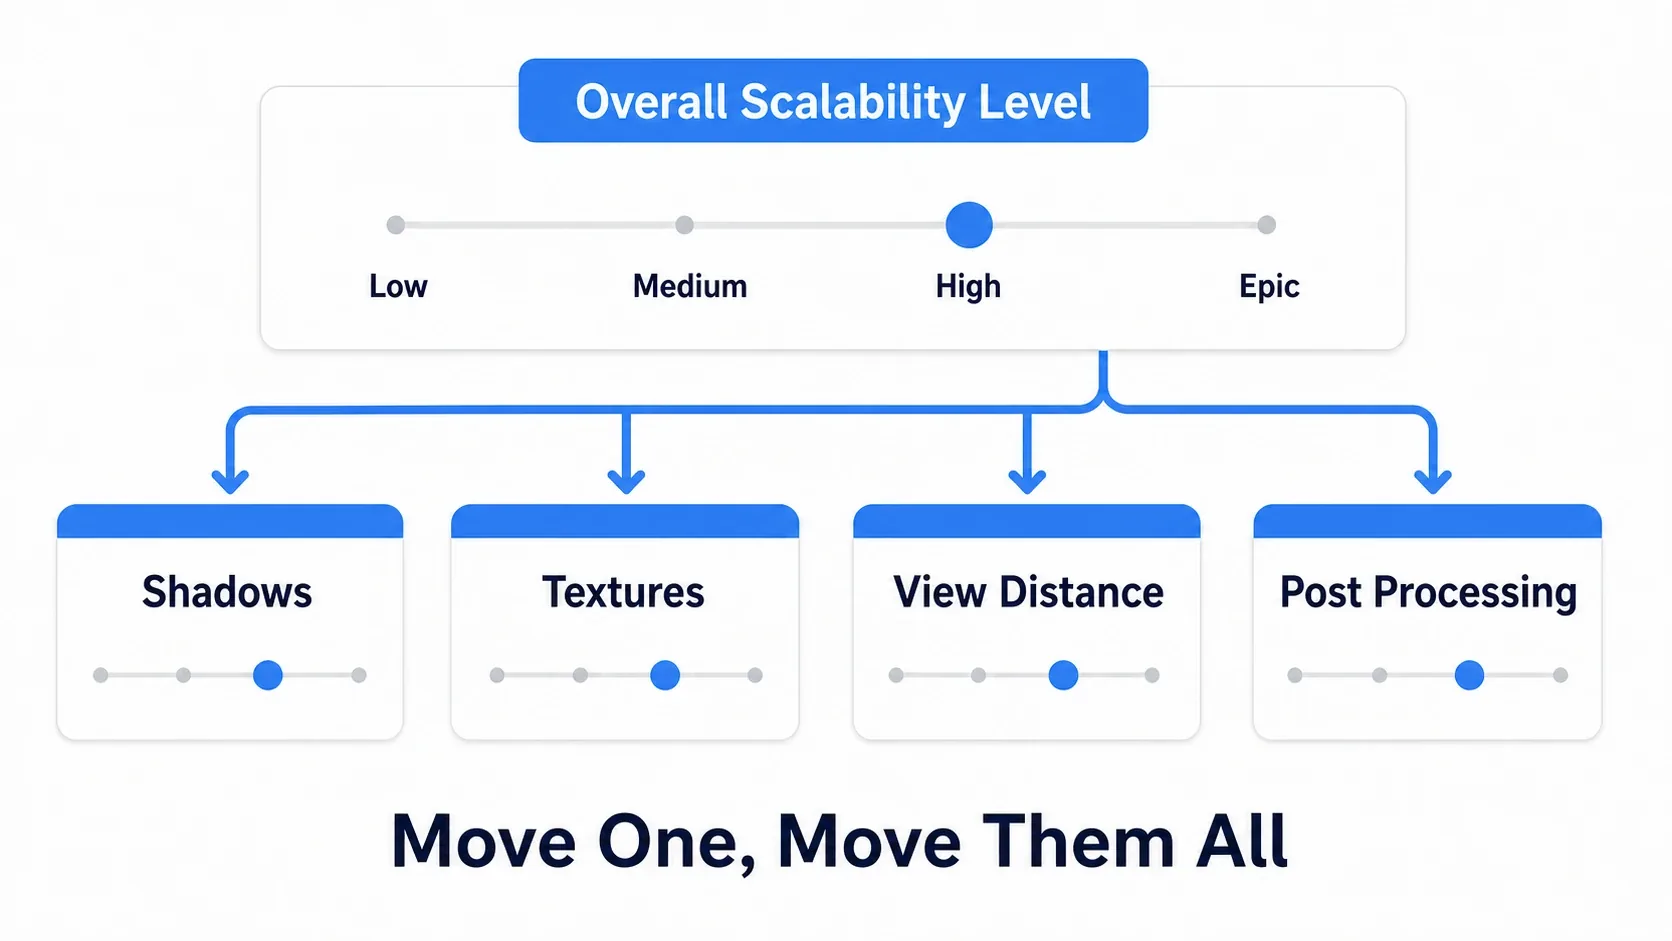
UE's quality settings are grouped under a system called Scalability . Shadows, textures, post-processing, view distance, and more exist individually, and you can switch them all together by level.
The node to change everything at once is Set Overall Scalability Level . Pass an integer to Value.
| Value | Level |
|---|---|
| 0 | Low |
| 1 | Medium |
| 2 | High |
| 3 | Epic |
| 4 | Cinematic (for filmmaking) |
For an in-game settings screen, exposing the four levels 0-3 is enough. Cinematic is a filmmaking tier and is too heavy to play at in real time.
Individual items have their own dedicated nodes.
| Node | Target |
|---|---|
| Set Shadow Quality | Shadows |
| Set Texture Quality | Textures |
| Set View Distance Quality | View distance |
| Set Post Processing Quality | Post-processing |
| Set Anti Aliasing Quality | Anti-aliasing |
| Set Visual Effect Quality | Effects |
There's one behavior here that catches people building UI. Get Overall Scalability Level returns -1 when the individual items are set inconsistently. There's no level that corresponds to "shadows low, everything else high."
So when you reflect the current value into a dropdown on your settings screen, you need to decide how to handle a -1. Adding a "Custom" option, or simply leaving nothing selected, are both reasonable.
Note: If you want to pick a starting level automatically, you can measure with
Run Hardware Benchmarkand then callApply Hardware Benchmark Results. Run it once on first launch and respect the player's choice afterward. Running it every time overwrites their settings on every startup.
Apply and Save Are Different Jobs
This is the part of the article most worth remembering. Nearly every broken settings screen comes down to one of these two.
Both Set Screen Resolution and Set Overall Scalability Level only rewrite a value inside Game User Settings . Nothing happens on screen.
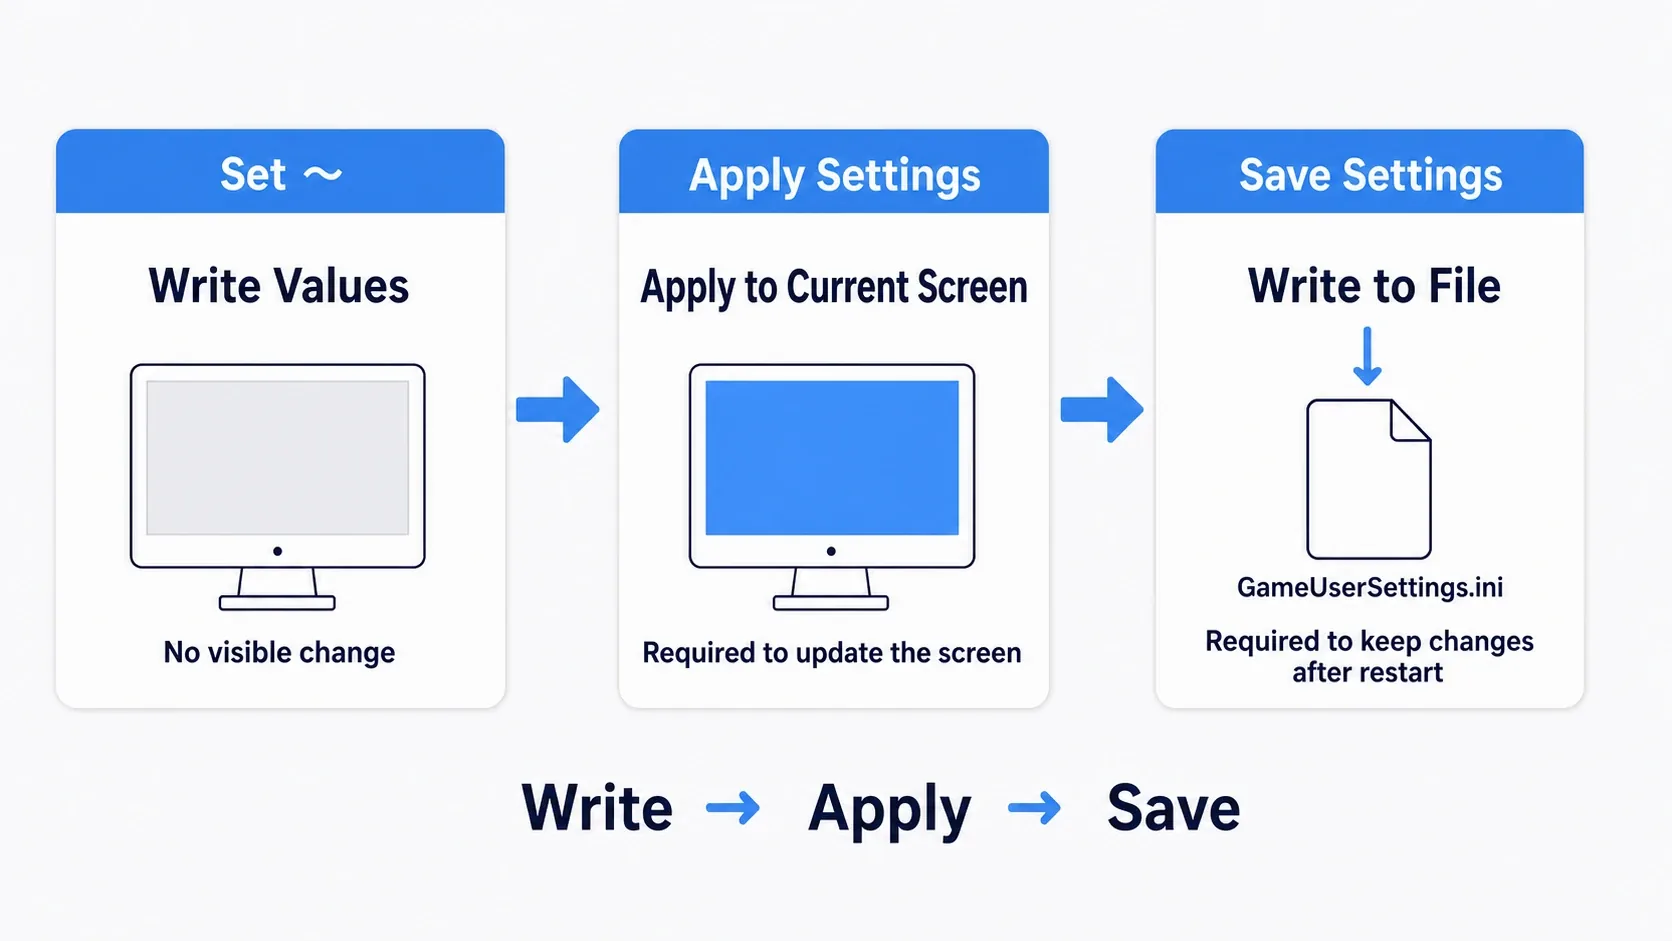
| Node | What It Does | What Happens If You Skip It |
|---|---|---|
The various Set ... | Writes the value | Nothing changes at all |
| Apply Settings | Applies the written values to the current screen | Choosing something doesn't change the display |
| Save Settings | Writes the values to a file | Everything reverts on restart |
Apply Settings has a Boolean pin, b Check for Command Line Overrides . It controls whether command line arguments (such as -ResX=) take precedence when present. When calling from a settings screen you want the player's choice to go through as-is, so pass false .
The apply nodes come in three flavors.
| Node | Scope |
|---|---|
| Apply Settings | Everything |
| Apply Resolution Settings | Resolution, window mode, VSync |
| Apply Non Resolution Settings | Quality and everything else |
Using Apply Non Resolution Settings when only quality changed makes the switch smoother, since the window isn't rebuilt. Early on, though, it's safer to standardize on calling Apply Settings then Save Settings from your "Apply" button so nothing gets missed.
(Apply button On Clicked)
  → Get Game User Settings
  → Apply Settings (b Check for Command Line Overrides: false)
  → Save Settings
Loading is automatic. The engine reads and applies GameUserSettings.ini at launch, so you normally don't need to call Load Settings yourself. All your settings screen has to do is show the current values in the UI .
Volume Alone Takes a Different Path
If you're going to put three things on a settings screen, they're resolution, quality, and volume. But volume isn't part of Game User Settings .
Volume isn't a rendering setting; it's part of audio mixing. In UE you group sounds with a Sound Class and change that group's volume with a Sound Mix .
| What You Want to Decide | What to Use |
|---|---|
| Display-related settings | Game User Settings |
| Which group a sound belongs to | Sound Class |
| How loud that group is right now | Sound Mix + Set Sound Mix Class Override |
So a volume slider on a settings screen has to take care of two things separately:
- Applying: call
Set Sound Mix Class Override - Saving: write to a save location you provide yourself, such as SaveGame
How to assemble Sound Classes and Sound Mixes is covered in the 3D sound and mixing article. That article covers the mechanism; this one covers wiring it to UI. For the save side, the SaveGame class from the save/load article works as-is.
Hands-On: Building a Resolution, Quality, and Volume Screen
An action game's title screen, an exploration game's pause menu, a simulation game's first launch. If you're shipping, a settings screen is required in every genre. Here we build the minimum three-item version, all the way to values that survive a restart.
The Finished Result
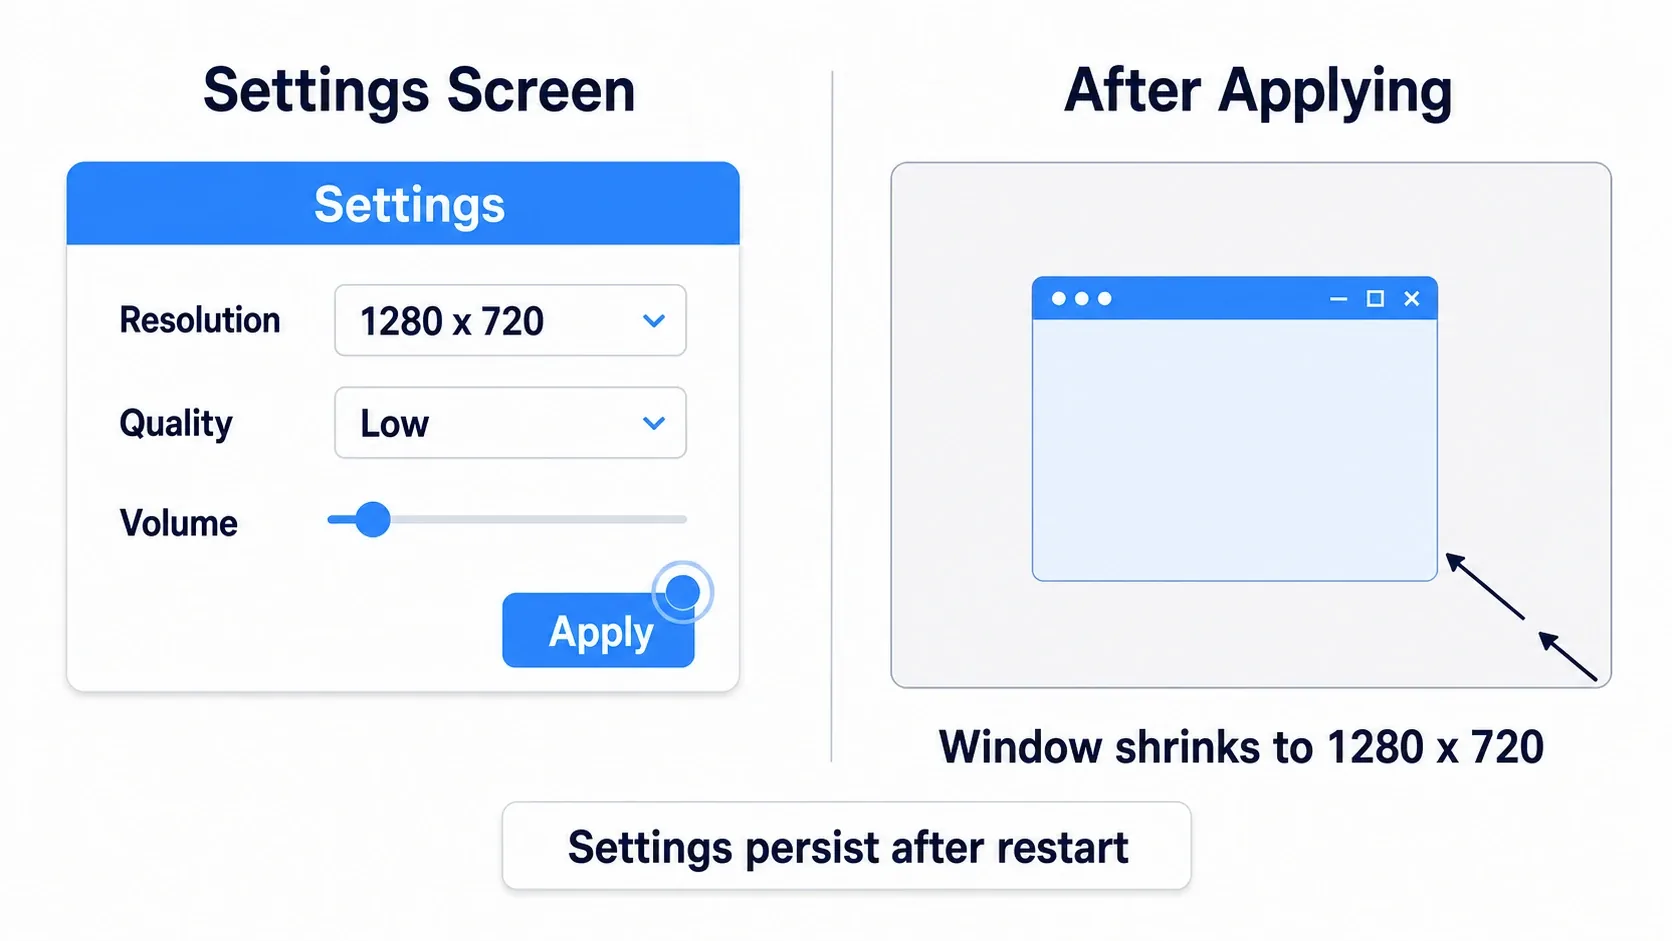
Pick 1280 x 720 from the dropdown, press "Apply," and the window resizes. Set quality to "Low" and shadows get coarser. Quit the app and launch it again, and it comes back up at the resolution and quality you chose.
Setup to Reproduce It
Create a new project from the Third Person template and prepare the following. The volume portion uses the same setup as the 3D sound article.
| Type | Name | Settings |
|---|---|---|
| Widget Blueprint | WBP_Settings | Built with the layout below |
| Sound Class | SC_Master | Just create it |
| Sound Mix | SM_UserAudio | One entry in Sound Class Effects (SC_Master / Volume Adjuster 1.0 / Apply to Children true) |
| Sound Wave | Any BGM | Looping on, Sound Class set to SC_Master |
In WBP_Settings, put a Vertical Box in the center of a Canvas Panel and add these four widgets. Check Is Variable on all four.
| Widget | Name | Initial Settings |
|---|---|---|
| Combo Box (String) | Combo_Resolution | Leave the options empty (filled in at runtime) |
| Combo Box (String) | Combo_Quality | Register Low / Medium / High / Epic in Default Options, in that order |
| Slider | Slider_Volume | Min Value 0.0 / Max Value 1.0 / Value 1.0 |
| Button | Button_Apply | Put a Text inside reading "Apply" |
Variables (create these on WBP_Settings)
| Variable | Type | Default | Purpose |
|---|---|---|---|
ResolutionList | Array of Int Point | Empty | Holds resolutions in the same order as the dropdown |
Since a dropdown can only hold strings, the most reliable approach is to keep the corresponding Int Point values in an array in the same order and look them up by the selected index. That removes any need to parse 1280 x 720 back into numbers.
Note: In Play In Editor (PIE), resolution and window mode changes don't show up on screen. You're running inside the editor's viewport. Always test by choosing
Standalone Gamefrom the dropdown next toPlay. Quality and volume do change in PIE.
Step 1: Build the Options and Show Current Values at Launch
Build this in WBP_Settings's Event Construct. There are two jobs here: building the options and reflecting the current settings into the UI .
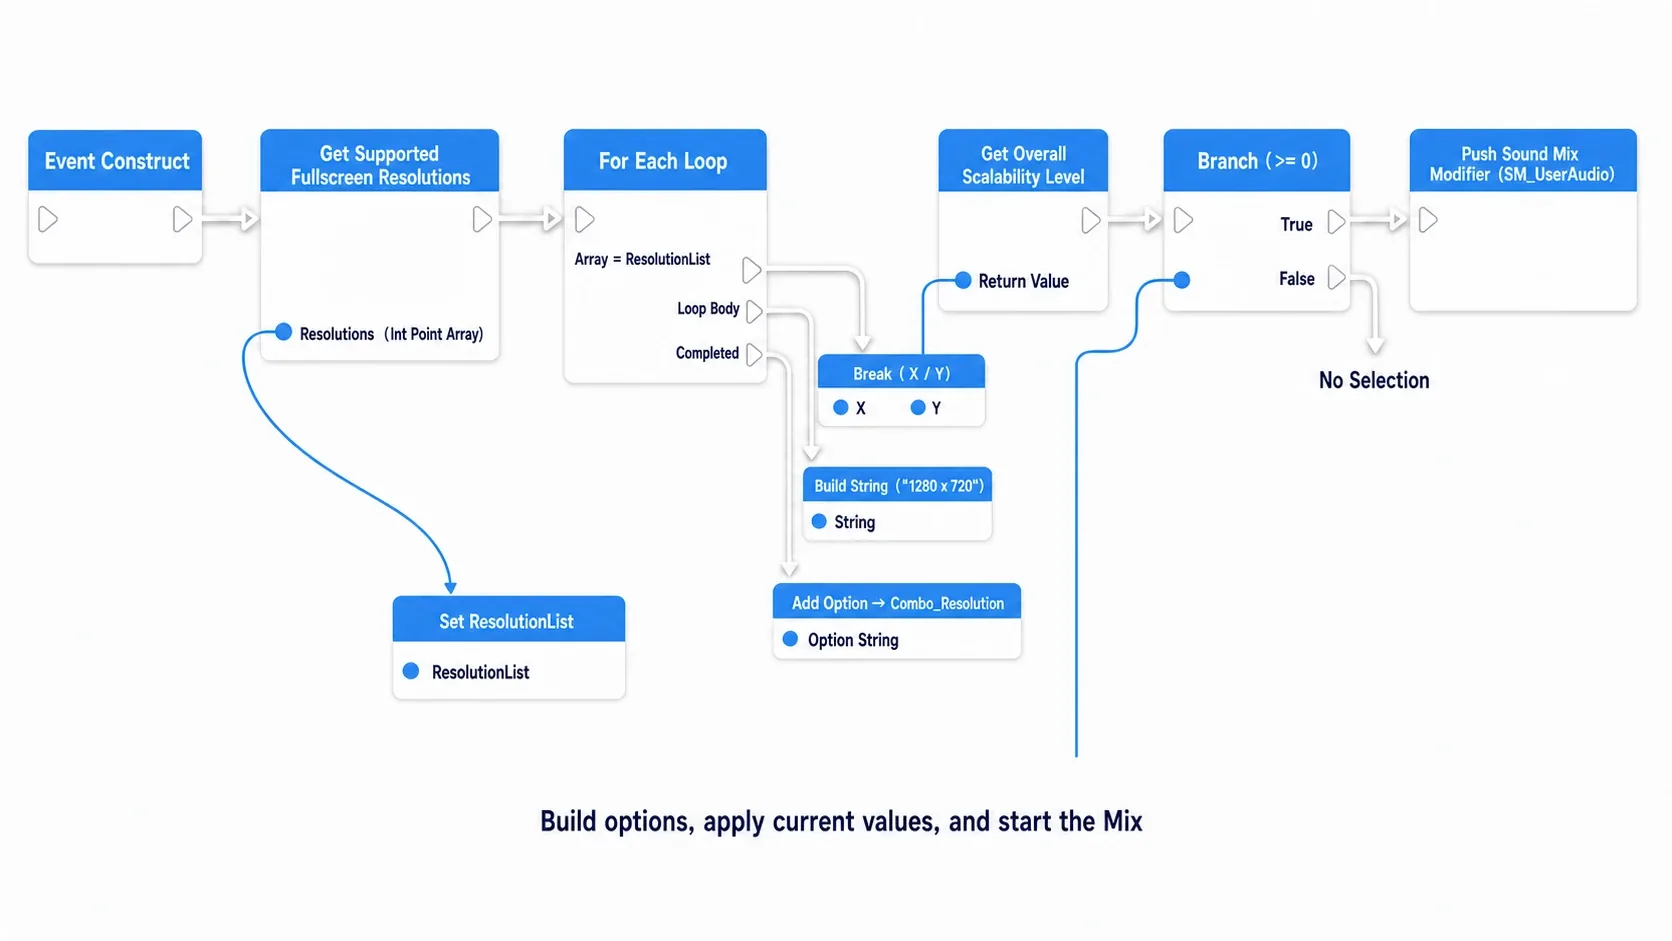
Event Construct
  → Get Supported Fullscreen Resolutions ── Resolutions (array of Int Point) ─┐
  → Set ResolutionList  ←──────────────────────────────────────────────────────┘
  → For Each Loop (Array = ResolutionList)
       Loop Body:
         → Pull out the Int Point's X / Y (right-click the pin → Split Struct Pin)
         → Append (build the form "1280" + " x " + "720")
         → Add Option (Target = Combo_Resolution, Option = the string you built)
       Completed ↓
  → Get Game User Settings
  → Get Overall Scalability Level ── Return Value ─┐
  → Branch (Return Value >= 0)                      │
      True → Set Selected Index (Target = Combo_Quality, Index = ←┘)
      False → (do nothing; individual settings are custom, so leave it unselected)
  → Push Sound Mix Modifier (In Sound Mix Modifier: SM_UserAudio)
Don't forget that final Push Sound Mix Modifier. If the Sound Mix isn't active, the volume override does nothing at all.
The reason Combo_Quality's options are ordered Low / Medium / High / Epic is so the 0 through 3 returned by Get Overall Scalability Level can be passed straight into Set Selected Index.
Step 2: Apply Volume Immediately
The volume slider alone applies the moment you move it, without waiting for "Apply." It's an item you adjust by ear.
Select Slider_Volume in the designer and press the + next to On Value Changed in the event list at the bottom of the Details panel.
Event On Value Changed (Slider_Volume) ── Value ─┐
  → Set Sound Mix Class Override                  │
      In Sound Mix Modifier : SM_UserAudio        │
      In Sound Class        : SC_Master           │
      Volume                : ←──────────────────┘
      Pitch                 : 1.0
      Fade In Time          : 0.1
      Apply to Children     : true
Fade In Time defaults to 1.0 second. On a slider that feels like a one-second delay, so drop it to 0.1.
Step 3: Write, Apply, and Save from the Apply Button
Lay out this article's key points directly in Button_Apply's On Clicked.
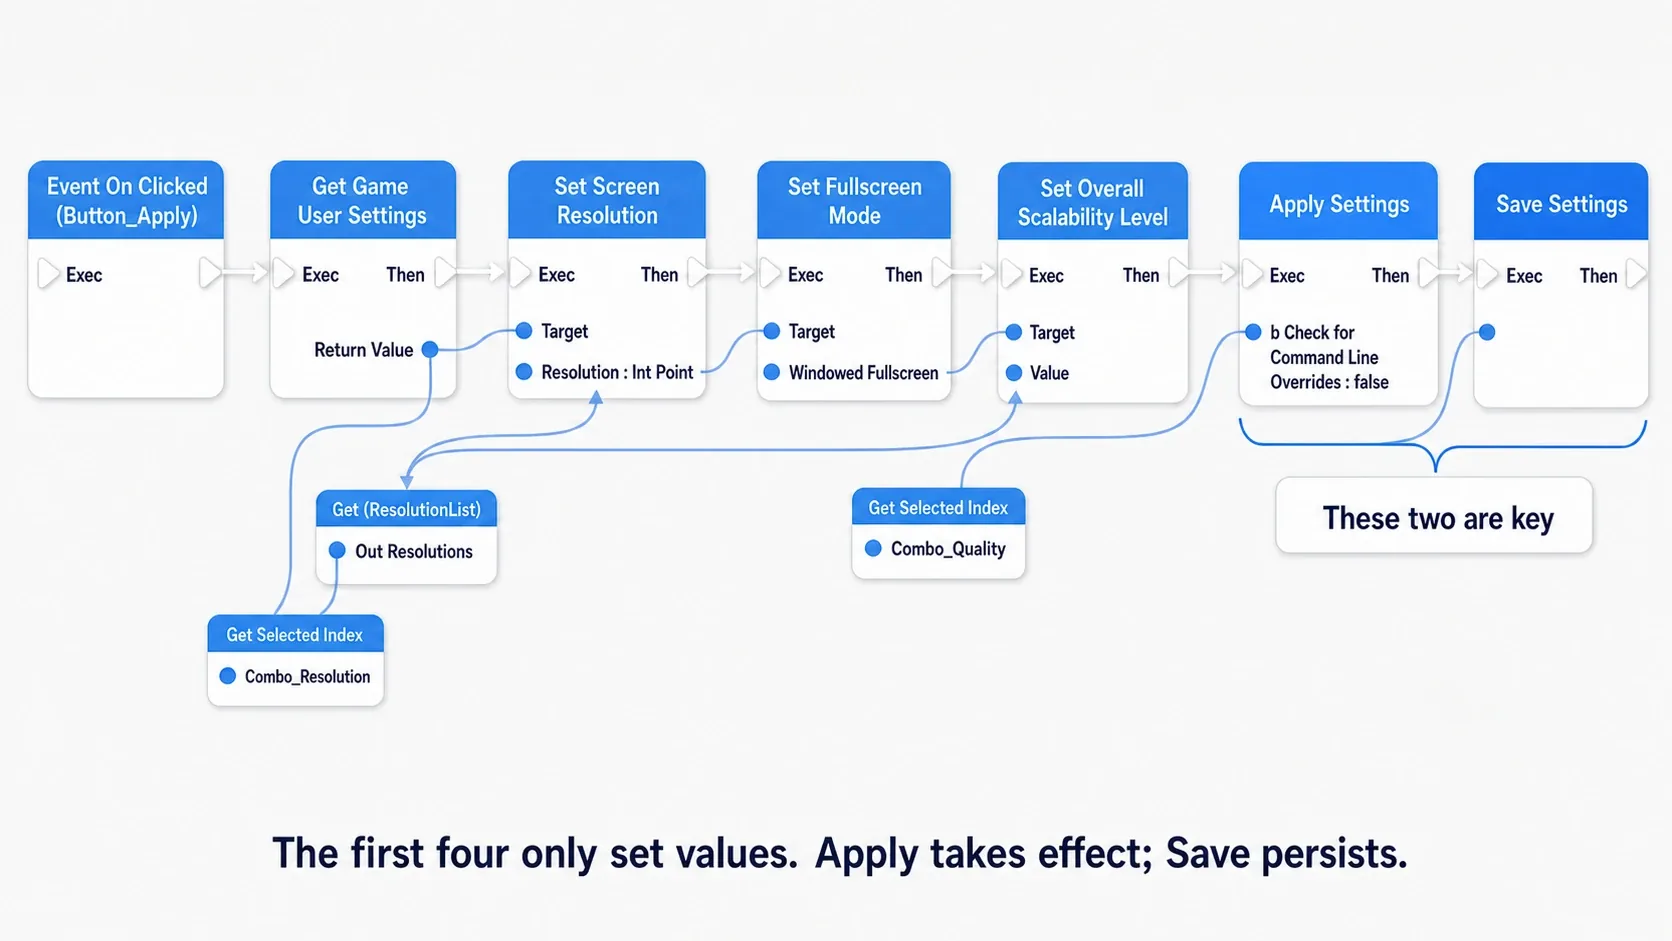
Event On Clicked (Button_Apply)
  → Get Game User Settings ── use the Return Value as the Target below

  → Get Selected Index (Target = Combo_Resolution) ── Return Value ─┐
  → Get (Target = ResolutionList, Index = ←──────────────────────┘)
  → Set Screen Resolution
        Resolution : ← the result of Get (Int Point)

  → Set Fullscreen Mode
        In Fullscreen Mode : Windowed Fullscreen

  → Get Selected Index (Target = Combo_Quality) ── Return Value ─┐
  → Set Overall Scalability Level
        Value : ←────────────────────────────────────────────────┘

  → Apply Settings
        b Check for Command Line Overrides : false

  → Save Settings
Apply Settings and Save Settings are what this entire article is about. The four Set ... nodes above only write values, and nothing happens on screen. Apply Settings applies them, and Save Settings writes them to a file.
Note that this setup doesn't save volume. If you want all three to persist, add a write to SaveGame after Save Settings, then read it back in Event Construct and Set Value on Slider_Volume. The split is: the engine owns display settings, and you own volume.
Step 4: Show It on Screen and Enable the Mouse
Add this to BP_ThirdPersonGameMode's Event BeginPlay.
Event BeginPlay
  → Create Widget (Class = WBP_Settings) → Add to Viewport
  → Get Player Controller → Set Show Mouse Cursor (true)
In a real game you'd open this from a pause menu. How to wire that up is in the pause menu article. When switching to the settings screen, don't Remove from Parent the pause menu; set its Set Visibility to Collapsed and the back button becomes trivial.
Verifying
Choose Standalone Game from the dropdown next to Play, launch, and check the following in order.
- Pick
1280 x 720for resolution and press "Apply." The window immediately shrinks to that size - Set quality to "Low" and press "Apply." Shadow edges get coarser and distant foliage renders more simply
- Drag the volume slider to 0. The BGM cuts out on the spot, without pressing the button
- Close the window and launch
Standalone Gameagain. If it comes up at1280 x 720on low quality, it worked - Disconnect the
Save Settingsnode and repeat steps 1 and 4. This time it reverts to the original resolution
Doing 4 and 5 back to back makes what Save Settings does click in one pass.
Here's how to narrow things down when it doesn't work.
- Pressing the button changes nothing →
Apply Settingsisn't wired up - Nothing happens in the editor but the values do change → That's how PIE works. Test with
Standalone Game - Everything reverts on restart → You aren't calling
Save Settings - The dropdown stays empty →
Get Supported Fullscreen Resolutionsreturned 0 entries. TryGet Convenient Windowed Resolutionstoo, and if that's also empty, insert one default entry - You get a different size than the one you picked → The order of
ResolutionListdoesn't match the dropdown's order. Build both inside the same loop - Nothing is selected in the quality dropdown →
Get Overall Scalability Levelis returning-1. The individual items are in a mixed state - Moving the volume slider does nothing → You aren't calling
Push Sound Mix Modifier, or your BGM has noSound Classassigned
Two points to take away.
- Writing, applying, and saving are separate nodes:
Set ...just puts a value in place.Apply Settingssends it to the current screen, andSave Settingssends it to a file. When a settings screen doesn't work, first figure out which of those three stages it stopped at - Build your options from the environment: hard-coding a resolution list always breaks on ultrawide and 4K setups. Building the dropdown from
Get Supported Fullscreen Resolutionsand keeping the matchingInt Pointvalues in a parallel array is the most durable shape
If you want gamepad support too, the focus management article is the natural next read.
Checks When It Doesn't Work
Settings screens are structured so you can trace causes from symptoms.
| Symptom | Where to Look |
|---|---|
| Nothing you pick changes the screen | Are you calling Apply Settings? |
| It applies but reverts on restart | Are you calling Save Settings? |
| Resolution only fails to change in the editor | That's how PIE works. Test with Standalone Game |
| Only the packaged build launches at the default resolution | The editor and packaged builds use different GameUserSettings.ini files. Configure it once in the packaged build |
| Settings are broken and can't be fixed | Deleting GameUserSettings.ini restores the initial state. Or use Set to Defaults → Apply Settings |
| Raising quality doesn't change the look | Are individual items pinned separately? If Get Overall Scalability Level returns -1, they're mixed |
GameUserSettings.ini is a text file, so opening it shows you exactly what got saved. It separates "it wasn't saved" from "it wasn't loaded" in one look , so check this file first when you get stuck.
Bonus: Good to Know for Later
- A frame rate limit of 0 means "unlimited": passing
0.0toSet Frame Rate Limitremoves the cap. Offering30,60,120, and0as choices is standard. For a quick temporary check while running, typingt.MaxFPSin the console is faster - VSync and frame rate limit are different things:
Set VSync Enabledsyncs to the display's refresh rate to prevent tearing, and isn't a way to specify a cap. Offering both as options is the friendly choice Set to Defaultsdoesn't save: when building a "restore defaults" button, followSet to DefaultswithApply SettingsandSave Settings. The same three stages apply here too- Key bindings use a different system: remapping keys isn't handled by Game User Settings; it lives on the Enhanced Input side. If you split your settings screen into tabs, you'll end up with display, audio, and controls
- Quality isn't always the cause of poor performance: when "Low" doesn't help, the culprit may be Blueprint logic or Tick rather than rendering. Measure first (see the stat commands article and the LOD and culling article)
- Test the first launch of a packaged build: plenty of settings-screen bugs only show up in packaged builds. Anything involving resolution must be packaged and verified at least once (see the packaging article)
Summary
- Display-related settings already have a home in Game User Settings . You don't need to cram them into a SaveGame yourself
- You work with the
Set ...nodes hanging offGet Game User Settings. Resolution is an Int Point , and quality is a level from 0 to 3 Apply Settingsapplies,Save Settingspersists. Forgetting these two accounts for most bugs- Build your options from
Get Supported Fullscreen Resolutions. Fixed lists break in the wild - Volume lives outside Game User Settings. Change it with Sound Class + Sound Mix, and save it yourself
In the game you're building right now, which setting would a player want to touch first? Even a settings screen that only handles that one item changes the impression of how finished your game feels.