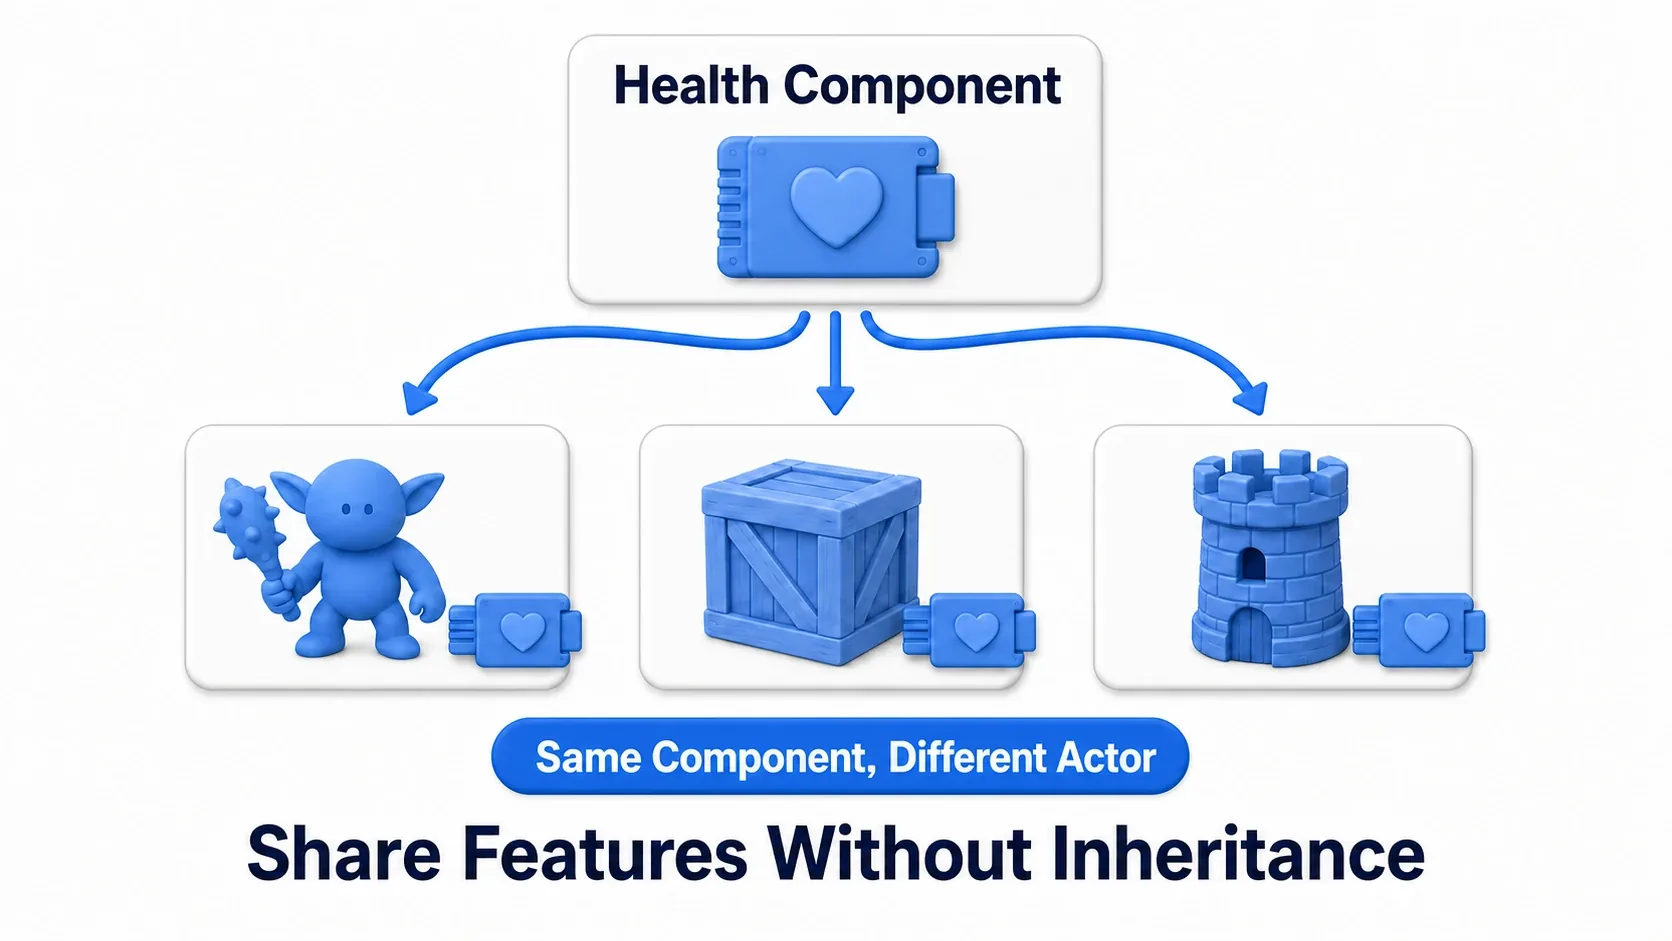
You want enemies, breakable crates, and fortress towers to all have health. Copy-pasting the same health logic into three Blueprints works, at least for now. But every time the spec changes, you have to fix all three places.
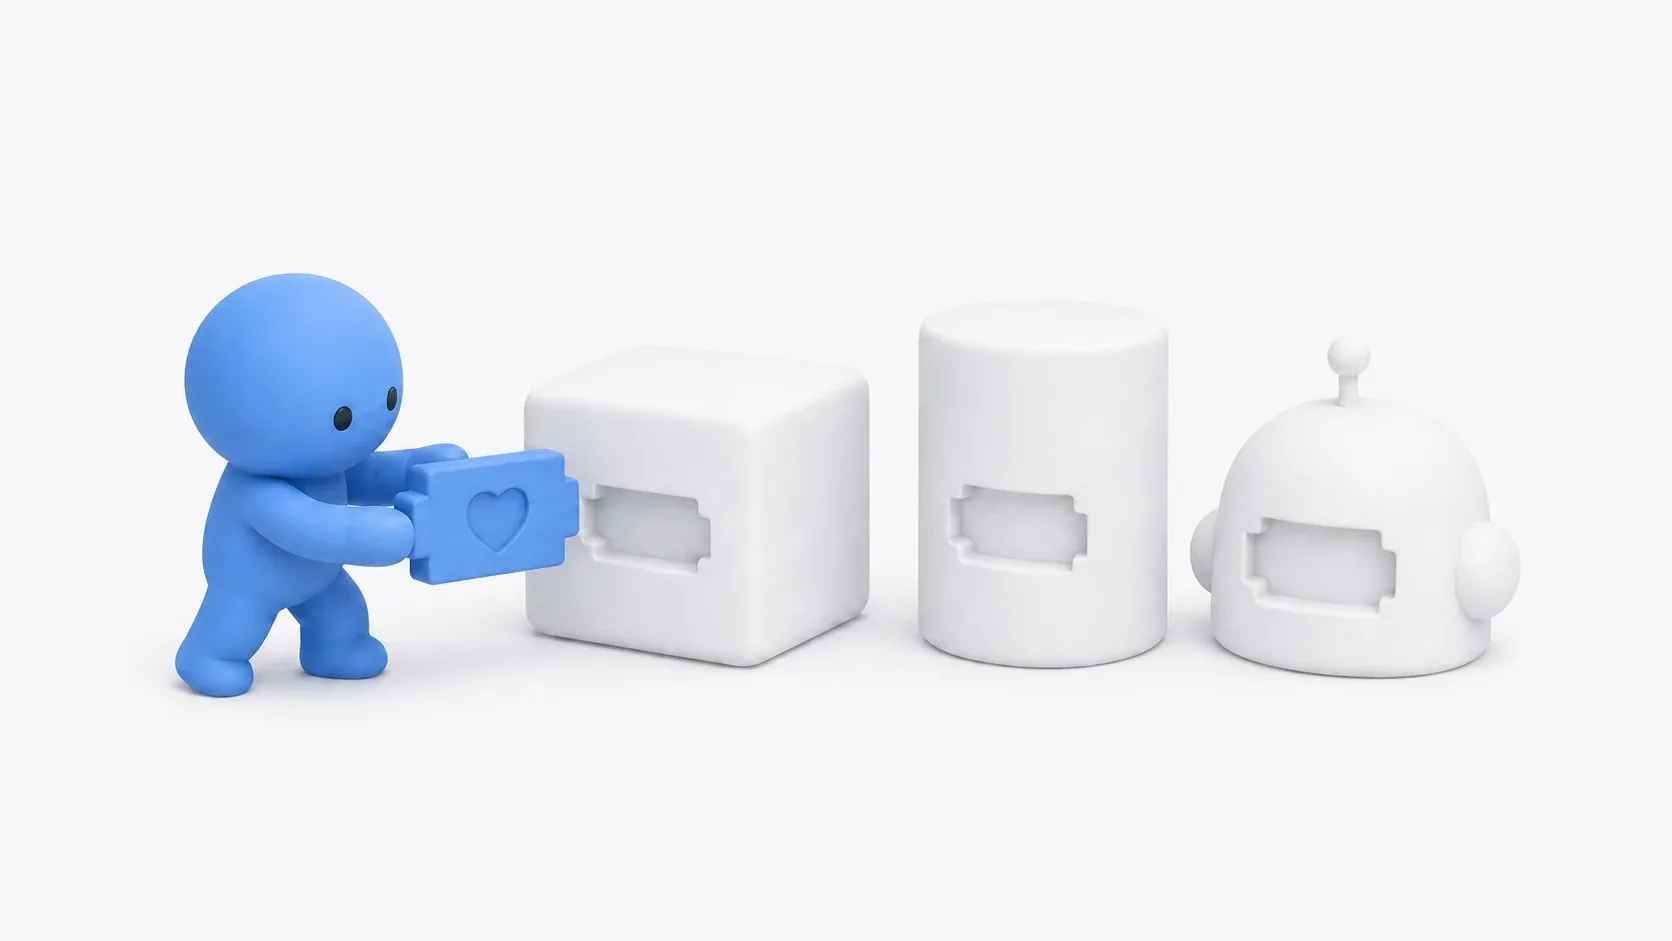
The solution is a custom Blueprint Component. Build the feature once as a plug-in part, a kind of cartridge, and you can slot it into any Actor. No inheritance required. This article covers how Components work, the design principles behind them, and how to build a health Component you can attach to any Actor.
What You'll Learn
- Blueprint Components are feature cartridges that distribute behavior without inheritance
- When to use ActorComponent vs SceneComponent (does it need a position or not?)
- Hands-on: build a health Component that works on both enemies and crates
- The rule that protects reusability: "a Component never picks its host" (no casting, use Event Dispatchers)
What Is a Blueprint Component: A Feature Cartridge
Just as StaticMeshComponent gives an Actor its appearance and MovementComponent gives it motion (see Actor and Component basics), a Component is a part that plugs a feature into an Actor. And in UE, you can build these parts yourself in Blueprint.
| Actor | Component | |
|---|---|---|
| Role | The entity placed in the world | A part that adds a feature to an Actor |
| Can exist alone | Yes | No (always attached to an Actor) |
| How it's reused | Inheritance (requires a parent-child relationship) | Attachment (works between completely unrelated Actors) |
The biggest strength is that you can give the same behavior to entirely different Actors that share no inheritance. An enemy character and a crate can't be parent and child, but a health Component slots into both. Zero copy-paste, and fixes happen in exactly one place.
Choosing the Parent Class: ActorComponent vs SceneComponent
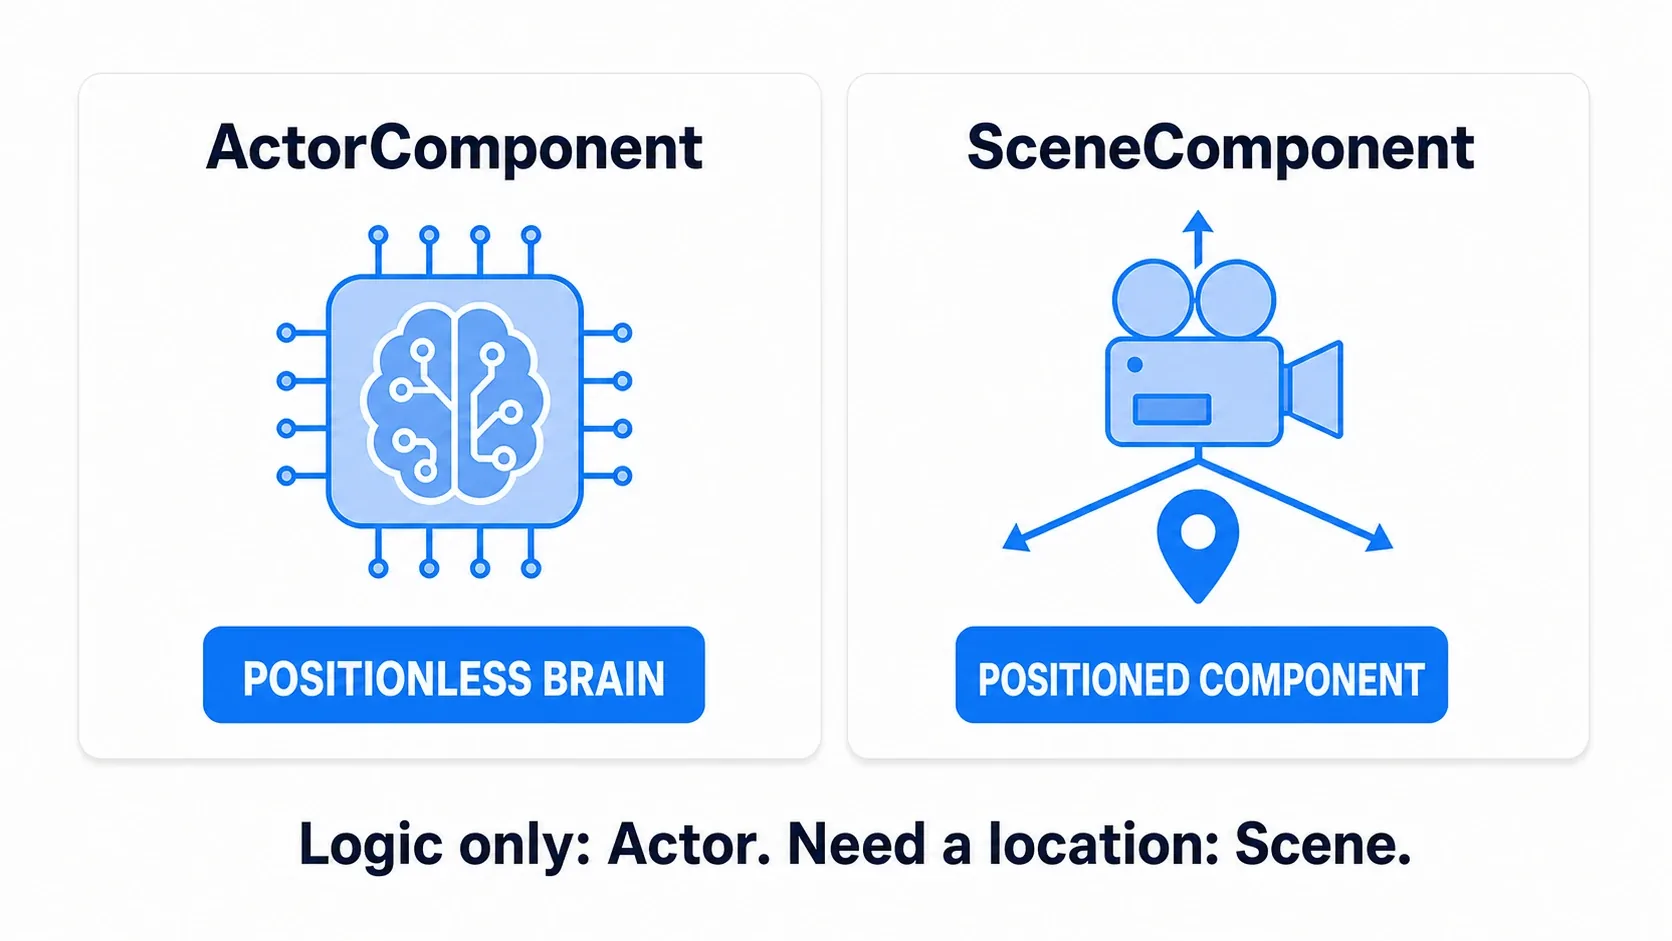
When you create a custom Component, the first thing you pick is the parent class. There's only one question to ask: does it need a Transform (a position)?
| Parent Class | Characteristics | Examples |
|---|---|---|
| ActorComponent | No Transform. A container for pure logic | Health management, inventory, state management |
| SceneComponent | Has a Transform and can sit in the Actor's hierarchy | Camera arms, effect spawn points, collision placement |
Remember it this way: features that are just data and calculation, like health or inventory, go in an ActorComponent. Features where the location itself carries meaning, like a muzzle position, go in a SceneComponent.
Hands-On: Building a Health Component for Any Actor
The fastest way to understand this is to build one. Our subject is a health system. Enemies in an action game, breakable crates in an exploration game, fortresses in a tower defense: "take damage, break when it runs out" is a universal mechanic across every genre.
Step 1: Create the Component
Right-click in the Content Browser, choose Blueprint Class, pick ActorComponent as the parent class, and name it BP_HealthComponent. (Health is pure logic, so ActorComponent is the right choice.)
Step 2: Design the Contents
| Type | Name | Role |
|---|---|---|
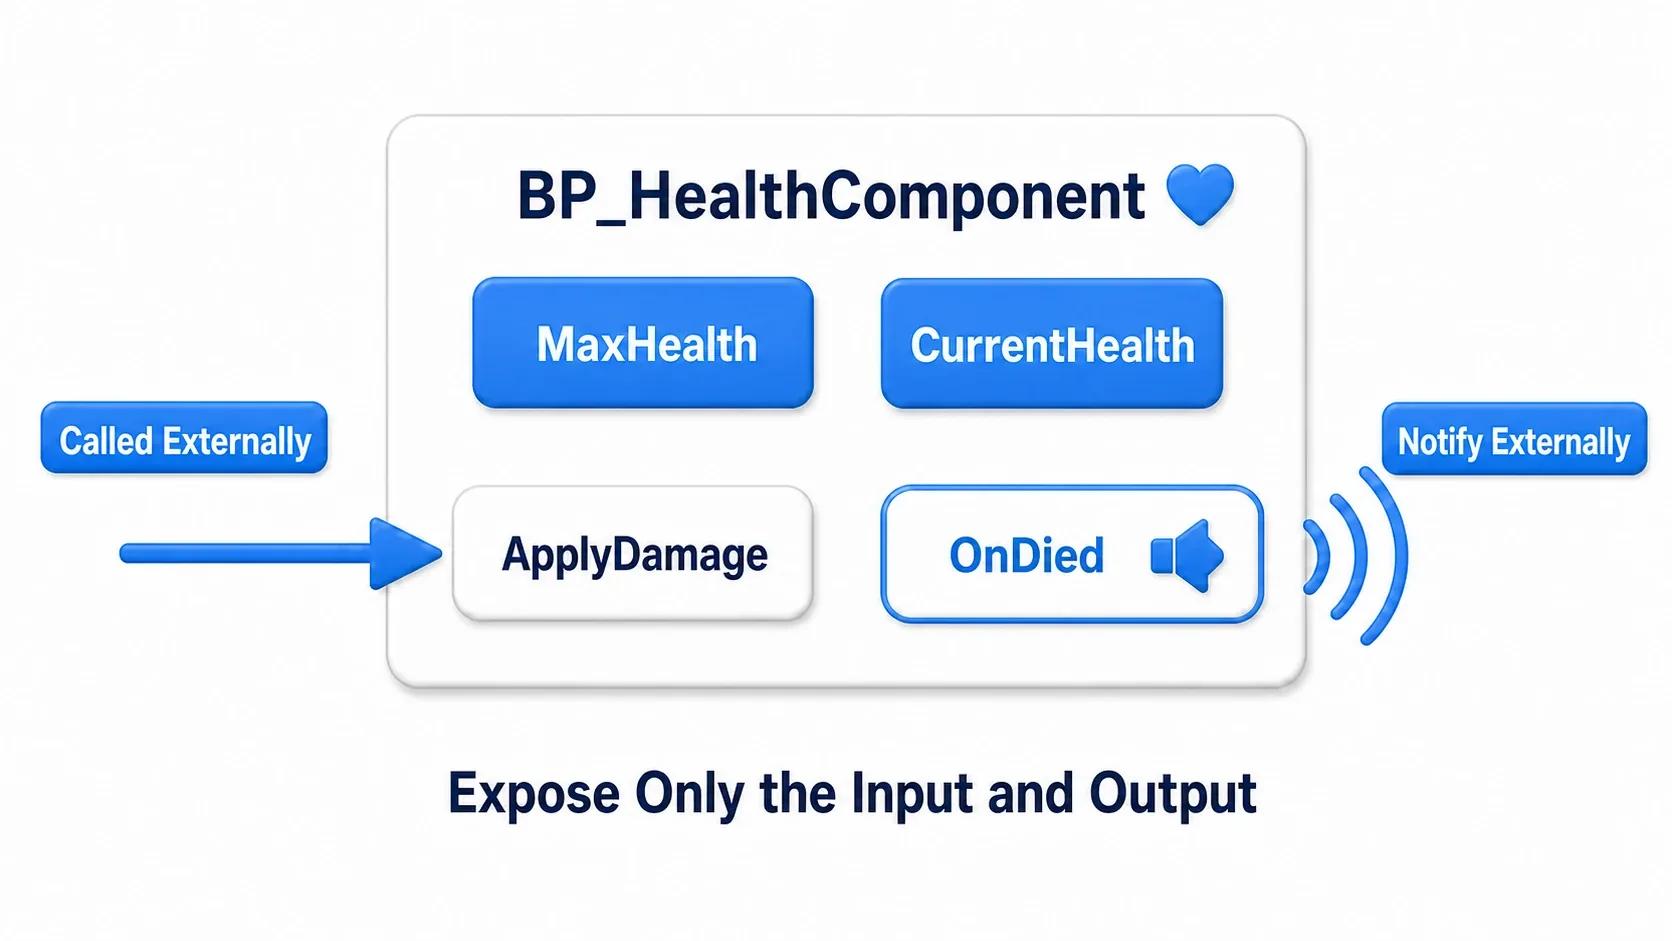
| Variable | MaxHealth (Float, Instance Editable) | Maximum health. Instance Editable so each instance can differ |
| Variable | CurrentHealth (Float) | Current health |
| Function | ApplyDamage (input: DamageAmount) | The inlet: accepts incoming damage |
| Event Dispatcher | OnHealthChanged (output: NewHealth) | A broadcast port: announces health changes |
| Event Dispatcher | OnDied | A broadcast port: announces that health ran out |
Fill health to the maximum on BeginPlay, and reduce it in ApplyDamage. That's the whole thing.
Event BeginPlay (inside BP_HealthComponent)
  → Set CurrentHealth (= MaxHealth)        ← full health on spawn

Function: ApplyDamage (input: DamageAmount / Float)
  → Set CurrentHealth
      = Clamp (Value: Subtract (A: CurrentHealth, B: DamageAmount), Min: 0.0, Max: MaxHealth)
  → Call OnHealthChanged (NewHealth: CurrentHealth)   ← broadcast on every change
  → Branch (Condition: CurrentHealth <= 0.0)
      True → Call OnDied                              ← broadcast only when health runs out
Here's what that looks like as a graph. Subtract and Clamp are pure calculation nodes with no execution pins, so they join in from below with data wires only.
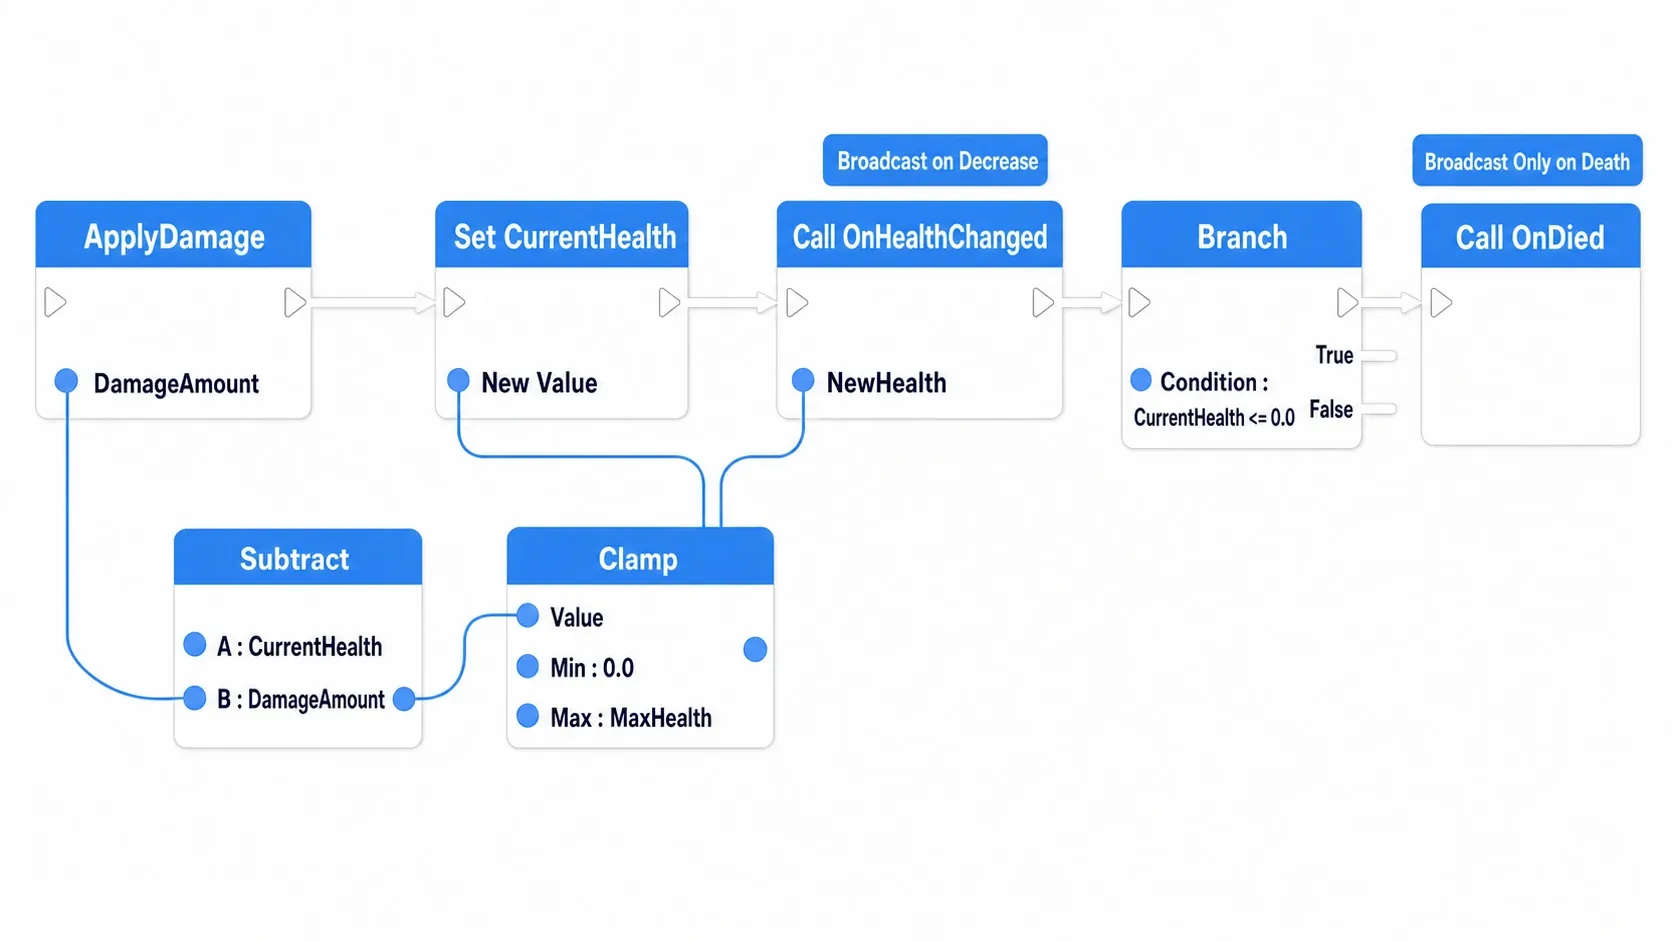
Clamp is there so HP never punches through into negative numbers. A UI health bar computes its fill ratio as CurrentHealth / MaxHealth, so a negative value makes the bar stretch in the wrong direction.
Step 3: Attach, Wire Up, and Play
-
Attach it to the enemy: Open
BP_Enemyand addBP_HealthComponentvia "+ Add" in the Components panel. SetMaxHealthto 100 in the Details panel -
Write the reaction: Select the Component you just added, then click the "+" next to
OnDiedunder Events in the Details panel. UE generates a pre-bound event in the Event GraphBP_Enemy Event Graph Event On Died (from BP_HealthComponent) → Print String ("Enemy defeated") → Destroy Actor (Target: self)The key point is that the host decides what dying actually means
-
Attach it to the crate too: Repeat the same steps in
BP_Crate. This time setMaxHealthto 30 and change only theOnDiedreactionBP_Crate Event Graph Event On Died (from BP_HealthComponent) → Spawn System at Location (a Niagara debris effect) → Destroy Actor (Target: self) -
Call it from the attacker: The bullet or sword collision logic doesn't care who it hit
On Component Begin Overlap (bullet Collision)
  → Get Component by Class (Target: Other Actor, Component Class: BP_HealthComponent)
  → Is Valid ?
      Valid → ApplyDamage (Target: the retrieved Component, DamageAmount: 25.0)
  → Destroy Actor (remove the bullet)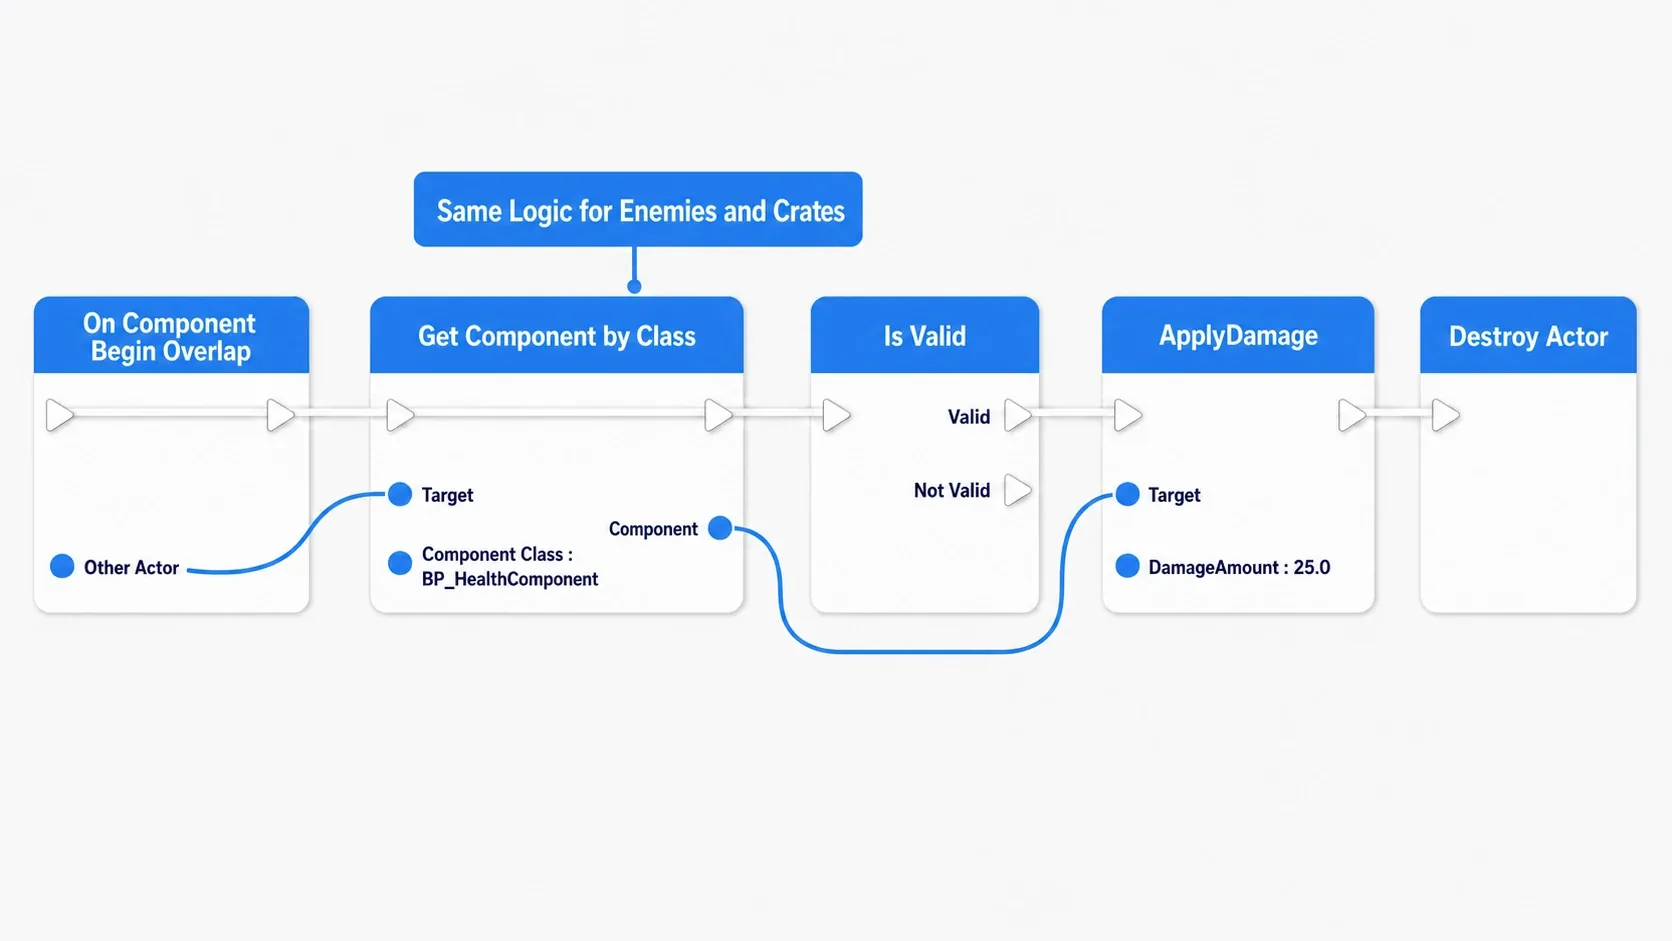
Notice that
Cast To BP_Enemyappears nowhere. The attacker only checks whether the target has a health component.
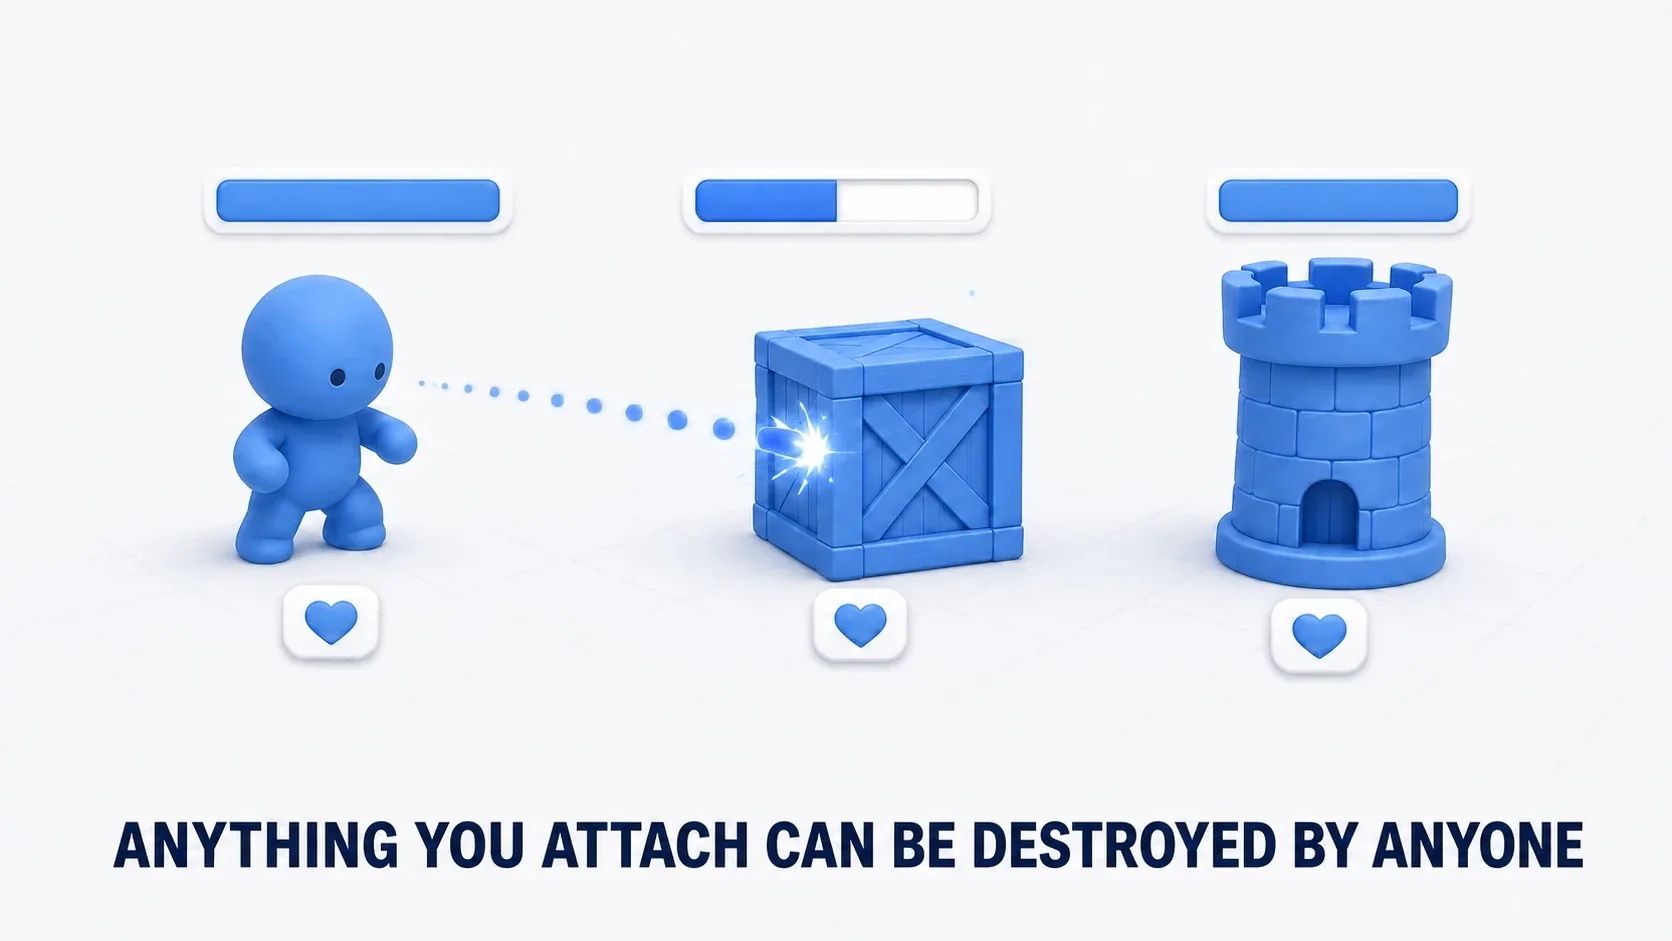
Hit Play and start attacking. The enemy breaks in 4 hits (100 ÷ 25) and the crate in 2 (30 ÷ 25, rounded up), each dying in its own way. Yet there's exactly one copy of the health logic in the entire project. Try adding a single node at the start of ApplyDamage that reduces damage by 10%. Enemies, crates, every Actor picks it up instantly. That's the payoff of Component-based design.
Two things to take away.
- Expose only the inlet (functions) and the broadcast ports (Dispatchers): never let outsiders touch the internal variables directly. That discipline is what keeps the Component reusable
- The host is free to decide what dying means: the Component just announces "I died." Whether that means exploding or dropping loot is up to the receiver. That division of labor is the topic of the next section
Component Communication Patterns: Designing Host-Agnostic Parts
There's one rule that makes a Component genuinely reusable: it must not know who its Owner is.
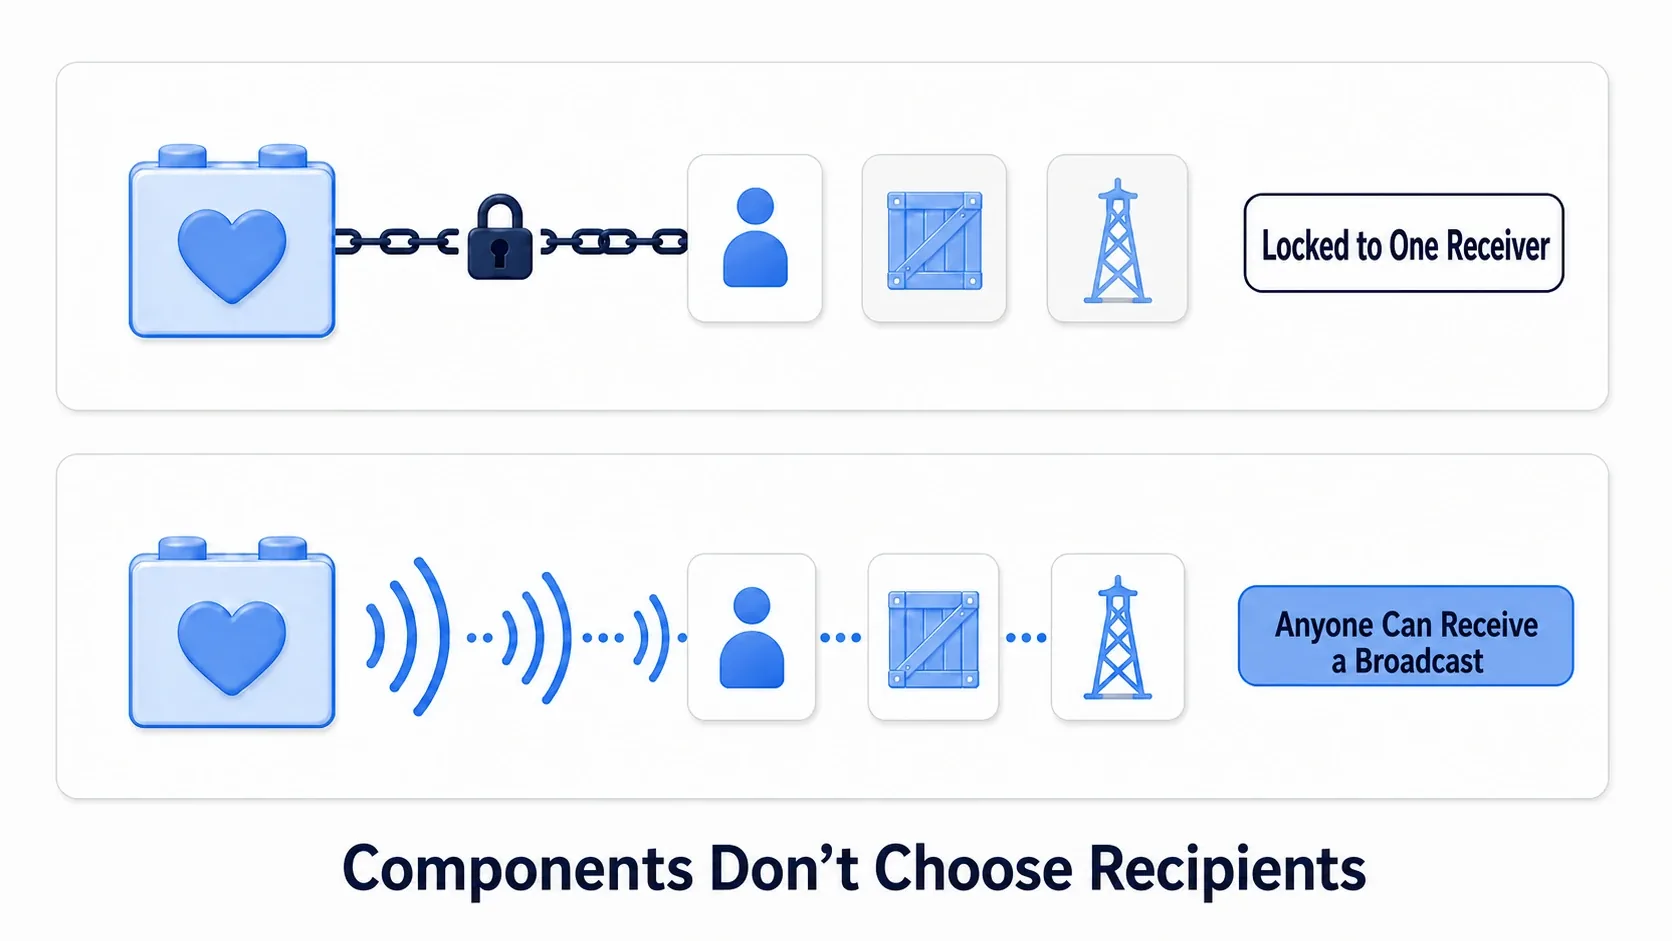
- Component → Owner: broadcast with an Event Dispatcher, like
OnDied. The Owner binds to it and implements whatever reaction suits it (death animation, item drop) - Owner → Component: calling functions directly is fine (
ApplyDamageand friends). Commanding a part is always allowed - Component → external systems: when you don't want to depend on the other side's type, send a generic message via a Blueprint Interface (see the Blueprint Interface article)
What you must never do is Get Owner → Cast to a specific class inside the Component.
Bad example (inside a Component)
Get Owner → Cast To BP_PlayerCharacter → call a player-specific function
The moment you do that, your Component is demoted to a BP_PlayerCharacter-only part. Attach it to a crate and the Cast fails, so nothing works. While designing, keep asking yourself: "would this Component still work if I attached it to a person, a box, or a tower?"
Bonus: Good to Know for Later
- Components have Tick too: custom Components have Tick enabled by default. If you don't need per-frame processing, turn off Start with Tick Enabled in Class Defaults (see designing without Event Tick)
- Built-in Components work the same way: the engine ships plenty of handy parts, like
RotatingMovementComponent(attach it and things rotate) andProjectileMovementComponent(attach it and things fly along a trajectory). Get in the habit of searching for an existing solution before building your own - Unbinding Dispatchers: if an object that outlives the Owner is bound, failing to Unbind on destruction leads to calls into null references. The standard pattern of "the Owner binds to its own Component" is safe because their lifetimes match
Summary
| Key Point | Details |
|---|---|
| What a Component really is | A feature cartridge. It distributes the same behavior to unrelated Actors without inheritance |
| Picking the parent class | Logic only → ActorComponent. Needs a position → SceneComponent |
| The design rule | Never pick your host. Expose only the inlet (functions) and broadcast ports (Event Dispatchers), and never Cast |
| Where it applies | Health, inventory, interaction checks, special movement: any feature shared by multiple Actors |
After health, the next thing you'll want to turn into a Component might be the notification mechanism itself. For serious use of Event Dispatchers, head to event-driven design with Event Dispatchers, and for the full picture of Actor-to-Actor communication, see three ways Actors communicate.
What logic in your project is currently copy-pasted in two or more places? That's the name of the next cartridge you should build.